Working on an Art Deco Dresser

We’ve been working on an Art Deco dresser. Danny has taken it all apart and is rebuilding it. It is going to be beautiful! The detail is so pretty! But the drawer pulls are spectacular! They were so worn and discolored but still all in one piece. The red Bakelite inserts are in perfect shape and by themselves are valuable. I cleaned them, scrubbed them with Bar Keepers Friend, then waxed them and applied gold leaf RubnBuff. They are amazing!

The dresser had been painted in an earlier life. The only thing now is to decide what color to paint it. My thought right now is to paint it a bluish green color with our Missouri Limestone Paint Company chalk paint color we named “Something Blue”. Then highlight the details on the front, the trim on the back of the top, and the feet with gold leaf RubnBuff.

Projects in January – 1st through the 20th, 2023

Still busy creating so I haven’t had time to post how we did some of these projects. Here they are, though, for inspiration for you.

This is a vignette I put together for winter decor. I had a Christmas transfer on one side of this pitcher and a winter one on the other. I turned it around and added some branches from a tree in my yard then added lights. I made the snowman last year and added the Winter sign I’ve had for a long time.

Danny cut this cute gnome out of a scrap piece of plywood, drew the details and painted and sealed him. He added some stakes so we can put him in the pot’s dirt.

I crocheted another bunch of hats to sell to a friend’s daughter. She adds them to the baskets of herbal remedies she sells.

And more crochet… which begat more crochet that I’m still working on. I made a couple of gnome towel rings. I had made some boho type ones for a couple of friends and then decided to find a pattern for making more. I’ve sold 10 so far of them.

And then I saw a post for a group called Random Acts of Crochet Kindness and cute little worry worms to make and spread around town so I had to make some of those. I plan on making more later on. But I figured out a way to make a cute Valentine one for kids and ended up with 86 orders. Still working on those.

Then my cousin sent me a video of someone crocheting a woven heart. I had to find the tutorial and make one. Then I saw a video on making a heart with wine corks so I had to do that, too. And then someone else told me about decoupaging on a candle with wax paper. Yep! I had to do that, too. I’ve used the hot iron method with parchment paper before, but not on a candle. Worked like a charm. And the little tag- I wrote love on it with a s or h marker and burned it and then painted it. That worked, too.

Whew! I’m getting tired just typing all we’ve done so far this month. But wait! There’s more!

And then came a couple of jewelry boxes. I have a huge stash of them but haven’t painted any in awhile. These sold quickly so plan on painting ring more soon.

I saw an idea for a date night jar on Pinterest. This is my version. Jar from Dollar Tree. I painted the glass lid. If you spray glass with a clear sealer first, chalk paint will adhere well.

I don’t have staged pics of this beautiful library table. It is going to one of our booths this week. Danny sanded the top. I stained it with a w at teenaged stain. It has five coats of Varathane Crystal Clear Water based polyurethane in matte finish. The rest is painted with our Missouri Limestone Paint Company “Cupboard Green” and sealed. I love how it turned out.

Danny created this white washed hanging rack from a vintage ladder.

Another project is this gorgeous half table console. This is a long description but hopefully will inspire those who like boho with some ideas. I think this is one of my most favorite projects ever. I had so much fun with it.

We’ve had this table (and matching lamps) since soon after we built our house in 1985. Holy cow! That was 38 years ago!! The other day, I decided we didn’t need them anymore so decided to paint them. Danny suggested painting the top with our Missouri Limestone Paint Company “Bourbon Street”, a dark teal color. I thought Rustoleum metallic gold on the metal legs would look good with the teal. I also painted the metal on the lamps with it. They all turned out gorgeous!

Then, when I showed the table to a friend, she said I should style it as a boho piece. I agreed.

So pretty much all day today, I have been creating items for it to sell from things I have in my supplies:

1) Picture frame: gifted by a neighbor- funny thing, my mom had our pictures in frames almost exactly like this growing up. The back is velvet. It can still stand up, but it makes a great tray, too. This frame is old!
2) This awesome fabric which was once valances with bead trim, was gifted by a friend. I’ve already used it as a curtain, as you can see, to hide Danny’s power tools and to create a little boho hanging. Lol I simply put a piece of the fabric under the glass of the picture frame for an instant boho tray!
3) A bowl of boho goodness. I had all the ingredients including this cute wood bowl I thrifted. I just added the beads around it for a true boho style. It took me a good bit to figure out how to do it to look finished, then decided to rip it out (it was sewn in with nylon thread). But when I got it all out, it was attached to this beautiful piece of fabric tape in this awesome color! I just hot glued it around the bowl!
4) Picture frame: gifted by the same neighbor: I did a line drawing on the glass of similar leaves in the table and put a piece of scrapbook paper behind it in a coordinating color and now have a boho print!
5) Bottle of peacock feathers: the bottle I think came with fragrance oil and bamboo sticks at some point. I did paint the lid that sits around it metallic gold this morning. I’m pretty sure I picked up the peacock feathers at a yard sale.

And then, we came up with a few more boho accessories.

And when we found this mirror shopping, we knew we had to get it! Danny painstakingly covered all the mirrors. I painted it metallic gold and then he removed all the tape. I cleaned it and….it is just stunning!

We also found this cute little kid’s drawing table. We added a couple of stools to it and took it to our booth at Sweet Repeats in Sullivan.

The wood base on this candle holder is a bed riser I turned upside down and painted. the dish for the candle is a vintage ashtray.

Coming up…. Danny is working on a new project. We are busy figuring out a way to make a table top for it. Stay tuned!

You probably wouldn’t want to use both lamps on the table, but maybe in the same room would be perfect!

Saving an Awesome Coffee Table from the Dead

What a makeover! This awesome slate topped huge coffee table was a custom job. We brought it back from the dead as it was in pretty rough shape with a finish that was the old thick rough and nasty varnish. Prepping is definitely the key! Quite the project, right? But once we finish, it will be perfect in the young person’s apartment (once moving day occurs). For now, it will go in mom and dad’s basement family room and still be used by young people. 🙂

The first thing you need to do is spend some time contemplating how to remove the top. Oh, and to find a place to store the slate top until needed again. No problem, it resided under our living room couch until needed. 🙂

It looks like there are screws. I think we will remove the top to make it easier to paint and to see if any repairs are needed. After many minutes of contemplating, the screws were removed. The only repair needed actually was one section on the bottom needed some glue.

The top sanded easily to get it smooth enough to paint. A good cleaning and two coats of our Missouri Limestone Paint Company chalk-style paint “Coal Shovel” and two coats of Varathane Crystal clear water based polyurethane in satin finish later, it was ready for curing.

The top is looking great!

Sanding the bottom piece wasn’t working at all. Danny got a good amount off with stripper, then I did another round of stripping with mineral spirits mixed in. That helped a lot. Then another round of mineral spirits. Cleaned well them sanded again. Used a tack cloth to get rid of any sanding dust. Then cleaned really well again. That finally got it smooth enough for painting.

Whoever says you don’t need to prep if you use chalk-style paint doesn’t know what they are talking about. It was definitely a process on this bottom piece!

Painted with two coats of Missouri Limestone Paint Company chalk-style paint “Coal Shovel” (https://sharsumpaint.com/missouri-limestone-paint-company-colors/) and sealed with two coats of Varathane water based polyurethane in satin finish. This table is now ready to be put back together!

What an amazing difference!

Now came the task of lining the top and bottom holes for screwing it back together.

Bamboo skewers to the rescue! All holes are now lined up perfectly!

The beautiful slate top was rescued from under the couch and got a good drink of Wise Owl Lemon Verbena Salve. What a difference that made! It smells good now, too!

So happy how it turned out. This table is eventually going in a young person’s apartment. I can just see a group of young people gathered around it. Sitting on colorful pillows that could easily be stored underneath.

There will be a lot of fun times gathered around this coffee table! This is one sturdy, beautiful table now!
Love the black rippled slate top!

A Round Pedestal Table Gets an Amazing Makeover

I found this small (20.75” tall and 24” wide) solid wood table at a flea market about a year ago.

https://sharsumpaint.com/2020/07/16/a-round-pedestal-table-gets-an-amazing-makeover/

It was in good shape, but dated. It needed a makeover. We had sanded the top almost all the way, but it still needed a bit more to get it down to bare wood.

However, life got in the way and so it sat in our basement waiting patiently for its makeover.

A few days ago, it happened. I took the heat gun and stripped away the rest of the residue on the top, then sanded it smooth and hand scuffed the base. I cleaned it well.

I couldn’t wait to try out the DIY wood aging stain recipe I found and mixed up. It had been sitting waiting to be used for several weeks. I had tried it right after I mixed it up on a board. I think it reacts differently on different types of wood and it really hadn’t had a chance to darken the wood much. But, it turned out with a beautiful, natural wood look that I loved.

The stain is a mix of used coffee grounds, vinegar and steel wool. It doesn’t look very pretty in the jar, but wait until you see it on this oak table top!

Here’s the link to the DIY tutorial I found and used: https://www.familyhandyman.com/article/how-to-stain-unfinished-wood-with-used-coffee-grounds/?_cmp=stf

The interesting thing is you don’t see how it is working until it dries. At first it looks like it is just darkening the wood (and it darkens more as it dries) but when it dries, ahhhh….there is that beautiful grayish cast….just like old barn wood that has been left out in the weather for years. And this photo doesn’t even do it justice.

Hmmm…..At this point I happened to notice a strange formation in the grain going across the top. In my eye, I saw a llama head and neck. There are actually 4 of them, seeming to march in a line across the table, but this one stands out more than others. Still not seeing it? Let me help you. Lol

So now I had the stain on, but I wanted to really enhance the old wood look so I sealed it with a mix of liming wax and clear wax.

I wanted to open up the grain for the liming wax to get into it and stay so I used a wire brush and carefully ran it across the table top, going with the grain.

The liming wax I used is by Briwax. I mixed some of it with Howard’s Chalk-tique light wax. You can use any brand of clear wax, though. Mixing them together gives you a little more control over the liming wax and provides a nice finish. I think you can purchase both of these products from several places like Amazon online.

The next photo shows half the table top with the liming wax combo and half without. What a difference the liming wax makes!!

Can you see my 4 marching llamas? I know…. they are hard to see. Lol

Let me help. 🙂

Here is the top all waxed and buffed. Again, pics don’t really show just how beautiful this table top is. The sheen of the wax is gorgeous!

By the way, did you know wax helps repel dust? So using wax on furniture that isn’t going to get a lot of heavy use will save you dusting time, too!

The little metal feet needed a makeover, too, so I took them off and spray painted them a metallic gold. So pretty now!

Now it was time to paint the base. Sometimes I use primer, sometimes I don’t. I didn’t on this one. I had just cleaned and scuffed it up really well. In retrospect, I wish I had primed this and I wouldn’t have had to use as many coats of chalk-style paint, especially since I wasn’t going to distress this piece. I used 4 coats of Missouri Limestone Paint Company “January”, a pure white. You tend to need more coats when using white or very light colors.

But all is well as chalk-style paint dries so quickly. Once the paint coats had all dried well I sealed the base with several thin coats of Varathane Crystal Clear water based polyurethane. I never have had a problem with yellowing in the 6 years I’ve been using it.

The secret is thin coats and no drips or pooling. I use a round damp car wax sponge to put on a thin coat and follow it with a sponge brush if needed to clear up any drips or pooling. For long areas I go in one direction only and work quickly. You can’t go back and forth or overwork the sealer or you will have a mess as it dries so quickly.

And now…. drum roll ….. My finished “llama table!” 😉 What a difference, right?

Gray Weathered Wood Nesting Tables

https://sharsumpaint.com/2019/06/30/gray-weathered-wood-nesting-tables/

I have been searching for a good way to create a gray weathered wood look for a table top ever since I saw my cousin’s new dining room table. I was sure I could paint something similar.

These nesting tables had been waiting patiently for me to work the gray weathered wood magic on them. The time was now.

I came across a tutorial from Angela Marie Made which showed the look I was going for so I pinned it and waited for the right time to try it. Thank you so much for sharing this technique!

First up, the legs – the tables are well made – solid wood with metal inserts for the legs to screw into. I’m sure there is a furniture term for that but I do not know what that is. Just know the legs easily screw on and off with no worries. We cleaned, hand sanded, then cleaned again and they were ready for paint.

My original idea was to paint the legs a light gray, but once I painted one with a new custom color “MO Graystone” we created in our Missouri Limestone Paint Company chalk-style paint line, I knew it would be too light. So I started dry brushing “Sunday Silver” over the lighter gray, lightly in the detail areas and heavier on the rest! I used just a small amount of paint, dabbing most paint on the brush on paper towel first. This is a great way to distress without sanding and it was fun to watch it happen.

Two down, 10 to go!

Love this distressing technique

Table tops: My husband cleaned, sanded, and cleaned again (top and bottom) and I used Varathane Premium Fast dry stain in Kona. I stained the bottoms for a finished look but did not do the weathered wood finish on them. I thought that Kona would darken them a lot, but actually didn’t. The wood is a very hard wood so I probably could have given them another couple of coats, but I lack patience in waiting for oil stain to dry so I chose to do just one coat.

I watered down the “January” color 50/50 and painted it on, then wiped off excess and rubbed in what was left. I could tell it was going to be lighter so I also used a little “Sunday Silver” here and there and rubbed it in. Yes, it turned out lighter than my inspiration, but I love how it turned out.

Love when the furniture decides how a technique is going to look.

I put five coats of Varathane water based Crystal Clear polyurethane Satin on each table, sanding lightly between coats. I love the satin finish!

Now that I’ve experienced how nice this technique is, my plans are to use this finish on this farm table set I have to paint and sell. But that’s a project for another day.

Bringing a Garden Bench Back to Life!

This garden bench had good bones. It just needed some paint and the boards refreshed and I knew just the way to do it.

First of all – the paint. Our Missouri Limestone Paint Company chalk-style paint is perfect for the cast iron metal on this bench. It actually only took one coat of our gorgeous dark green color called “Evening Shade”. It also needed no sealer. Our chalk-style paint, when used on metals like this, cure naturally with the heat and the sun baking it in.

Yes, we ship!!! You can purchase all of our 45 colors in 16 oz. jars through our online distributor, Connie Mathews of Winston Home Designs.

The whole project took less than two hours, even when you have a cute little helper. 🙂

Next – the wood. The wood was in really good shape, just bleached out and dry. Wise Owl Salve in White Tea scent to the rescue! We don’t sell this product ourselves, but I love it and have used it to rehydrate wood and as a sealer on several projects. It comes in several wonderful scents! I purchase mine through a fellow painter in Massachusetts. I was fortunate to meet Sarah, of the Princess and the Peacock, while on a trip to visit my cousin, who lives about 30 minutes from her shop! I’ve linked her name to the Wise Owl Salve section of her online shop.

I tried to show in the photo below the difference the Salve makes in bringing the wood back to life!

The Salve is so easy to apply, then let it soak it, and buff. And Yes, you can use it on furniture left out in the weather, and we do have some weather here in Missouri. The bench may need a reapplication of wax down the road, but it only takes a few minutes so that isn’t a problem.

And that is all there was to it. This bench now looks almost brand new and holds a prominent spot in my front yard under the trees.

Upcycle a Stone Coaster with a Decoupaged Napkin

I ran across a set of four stone coasters in a thrift store one day. Someone had tried to stencil and had a fail with bleed through. Their loss was my gain so I bought them with the idea I could do something with them some day.

Update: these coasters were already made but a friend told me she gets the stone tile at Lowes and then adds felt pads to the bottom for coasters. 🙂

Today is that day. We are going to deliver this beautiful bistro set to its new owner this weekend (hopefully the snow stops soon), but we wrapped and loaded it before the snow started in case we can’t go until Sunday.

This is a repeat client and I wanted to have a little gift for her. As I am such a hoarder….I mean a person who is always prepared …… with supplies, I just happened to also have a package of napkins I purchased in a shop somewhere that I knew would look great with the color of paint I used, Missouri Limestone Paint Company Chalk-style paint “Clothesline”, one of my favorite colors.

Here are the steps I took to create two coasters for her that will look great on the stained table top. Sorry, I forgot to take pics of this part.

1. I cleaned the coasters thoroughly.

2. I painted the tops and sides (to cover the black stencil) white “January” color. The white paint will really help the print stand out.

3. While the paint dried, I cut out the flower area a little bigger than the coaster. I peeled off the two white layers of the napkin so that I was left with only the printed part.

4. For the decoupage medium, I did not use Modpodge. I used Varathane water-based Polyurethane. I find it works great for decoupage. I applied a layer over the white paint and while still wet I applied the napkin. I used a sponge dipped in the poly to press the napkin into the stone, making sure I had no bubbles.

5. Once dry, I used 220 sandpaper to sand the edges.

6. I then used 2 coats of Rustoleum spray lacquer on the tops and sides to seal the napkin. Using lacquer will not reactivate the poly, so no bubbles formed.

The coasters look beautiful! I think my client will be very happy with her gift.

TIP OF THE WEEK: THANKSGIVING HOLIDAYS – Creating a Barn Wood Look With Paint on a Farm Table Top

You can create a barn wood like look on a table top using Missouri Limestone Company chalk-based paint and a stain_sealer. I have a step-by-step tutorial here to show you how!

For previous TIP OF THE WEEK click here.

The tip of the week is a little late thanks to Thanksgiving holidays. One of my sons and his two sons ages 4 and 17 months came to visit the week before Thanksgiving so need I say more.

My tip of the week for the Thanksgiving holidays shows you how I created a barn wood look on a table top. Plus I get to share the final results of the farm table set.  This is one of those projects I sure wished I had #1 – a garage to work in and #2 – that my dining room was big enough for me to keep it.  I posted pics of the progress and that generated so much interest, I sold it the day I finished it, so others liked it, too.


I did manage to get some time in to finish the huge farm table set I started (hoping to finish before Thanksgiving) the day after so that wasn’t too bad.  It took a couple of mornings getting up at 4:30 am to work on it before the little ones were up.  I really needed to get it out of the basement before everyone got here so we could get to the bed.  I was thinking we might have to sleep on it.  It sure was big enough. LOL

TIP OF THE WEEK

How to create a barn wood look with paint and Varathane’swater-based stain and sealer (I call this my magic stain).  I love it!  I debated about keeping this as my secret weapon, but I can’t do that.  I’m an educator and I just have to share what I have learned myself.  Hence the name of our paint company….SharSum Paint, a play of words based on my name Sharon Sumner (Share Some – get it?)

But first, some before pics of the table and chairs.

original-top originalbase originalchairs

farmtablebenchchairsbefore

The table and chairs were basically in pretty good shape.  We had to do some repair on some of the veneer under the table top and on the leaves and had to put the sliding mechanism back together, but this was a good sturdy set.

TIP #1:  Creating a barnwood type look on a table top.  I really didn’t know how this was going to turn out, so I did a practice piece and then decided to just go with it.  I really do love how it turned out and it is all due to my magic stain/sealer technique.

First, I gathered my supplies.  I used Missouri Limestone Paint Company’s chalk-based paint.  I needed Grannie’s Lace (an off white) Sunday Silver (a medium gray), French Roast (a dark brown) and Varathane water-based stain and sealer in Dark Walnut.

I painted the leaves and table first with the French Roast.  The pic shows a finished sample.

barnwoodlooksupplies

Next, I used Grannie’s Lace and dry-brushed over the French Roast.  Then, just a little of the Sunday Silver dry-brushed, and even less of French Roast again.  I then did a light wash of Grannie’s Lace.  I took dry paper towel and just started rubbing that wash in.  Sometimes I rubbed down to the French Roast and sometimes even harder down to the original finish.  The picture below shows the dry brushing.  UPDATE:  I did another table top after this (see pics at bottom of post).  I didn’t bother using the paper towel and rubbing it in.  Instead, I did a dry brush technique on the other colors (adding just a bit of water – not much) and tried to keep the brushing as straight as possible.)  It turned out as nice, if not better, with much less work.

2016-11-14_225107555_480a1_ios-1

The magic comes when I add the Varathane water-based stain and sealer.  I used Dark Walnut.  It somehow just blends everything all together and seals it at the same time.  You can see the white wash on the picture below.

2016-11-20_170958642_3595a_ios

The more coats you put on, the darker it becomes.  I used 3 coats on this table and leaves.  I very lightly sanded in between coats.  The result was a very smooth finish.  The sealer has a little shinier finish than I like, though, plus I always want to have a really durable surface on a table, so I added two coats of Varathane water-based satin polyurethane, which toned down the shine.  Every single time I would walk past the table top, I just had to admire it and feel the smoothness.  : )

So, there’s your tip of the week.  And now for the finished farm set.  By the way, we made a bench for this table out of 3 complimentary chairs.  Check it out on a previous tip of the week.The lady buying the set loved the bench.  She has two little ones and one on the way and she said she was worried about the benches with no backs and afraid the kids would turn them over too easily.  She loved how heavy and sturdy the chair bench was.

finishedbench finished-table farmtableset10 farmtableset9 farmtableset8 farmtableset7 farmtableset6 farmtableset5 farmtableset4 farmtableset3 farmtableset1

The 2nd table top I did is pictured below.


Electrical Spool Redefined as a Coffee Table/Bookcase

We’ve all seen these…..those spools in the hardware store that hold electrical wiring, etc.  You may not realize that at stores like Lowe’s (at least in my town) you can put your name on a list to get one of these for next to nothing.

Then, once you have one…..what to do with it?  I recently, thanks to my son’s father-in-law, received one.  It was a smaller one, the perfect size!  I forgot to take a picture of mine before the redefine, but it looked similar to this one…especially the top.  The bottom had 4 holes around the perimeter that matched the 4 top holes.

electrical-spool2

A quick search on the internet “electrical spool DIY” produce quite a few results.  One of the ideas I ran across was to make a coffee table/bookcase.  I loved that idea.  I also knew I wanted to keep all the imperfections in the spool so I chose not to sand mine.  My project was going to be to redefine my spool into a shabby/chic coffeetable/bookcase perfect for a lake house.  Why not beach house?  We live closer to a lake rather than an ocean and I think one that says lake house would sell much better….more market for a lake house table.  LOL

It’s a little difficult to see from the photo above but there are 4 washers and screws on the top.  I also decided to leave them as is and not paint them.  I did clean them good as they were kind of oily.  Now, onto creating my table.  Here’s the inspiration piece I found.

spoolbookcase_inspiration

Off to Lowe’s we went to purchase dowel rods….oops…stumbling block.  They had the perfect size dowel rod, but at over $6 a rod and we need 4 of them, that meant over $24 just for the rods to create the bookcase part.  Nope….that wasn’t going to happen.  So, we put on our thinking caps and decided pvc pipe was the way to go and off to the plumbing department we went.  They had a long piece that would make 4 the size we needed for a little over $3 for the piece.  Yes…..pvc pipe it is.  However, there was printing in black up one side.  We knew from experience that wouldn’t wash off.  So, off to the paint department we went.  We found a can of spray paint for plastic for about $6.  I knew I would use this again, so we purchased it and were on our way home.

The first thing Danny (my handyman husband) did was cut the pvc into 4 pieces just about the right length and then sanded out the existing 4 holes around the edge so the pvc pipe would fit.  It was just a bit too snug.  It didn’t take long and soon our bookcase supports were in place.  He then sawed them off even with the top of the spool.  We took them out again and gave them one coat of the spray paint for plastic.  (I wanted to have that base coat so that the chalk-based paint I would be applying later would have a good bond).

While that paint was drying, Danny turned the table over and added some wood on the bottom to create a stable base.  There were washers and nuts on the bottom, too, so without that (or casters – which were more expensive than I wanted) this worked out fine.  He made kind of an X pattern with the wood that fit around the nuts and washers.  He made one long piece and then two shorter pieces that formed the X and screwed them in place.  He also added on each edge, those little things you put on the bottom of furniture to keep it from scratching floors.  The ones he used were round and had what looks like carpet pieces on them that you tap into place.

I was now ready to paint the spool and bookcase supports with Missouri LImestone Paint Company’s (MLPC) chalk-based paint – “Front Porch”.  We put the supports back in and for good measure, Danny added a small screw on the inside of each one to make sure they stayed in place.  But they were a good type fit as he pounded them in with a rubber hammer so I don’t think they were going to go anywhere. I gave the whole thing one coat, allowing a little of the wood to peek through if it wanted to.  On the supports I also only used one coat.  A lot of the white showed through, but I liked that.  It looked like the front page color was just a wash over them and it created a nice effect.

Note:  All the other hole in the top of the table we left open, including the pvc pipe holes.  In interesting thing to note is at the bottom of the spool column there is a little hoe shaped like an upside down U.  I saw one idea that someone draped white Christmas lights down the big middle hole.  The plug would easily come through that little upside down U hole and you could plug them in.  That would make a nice effect at night.

After the paint dried, I cut a stencil from my Silhouette machine and stenciled “Lake House” on the top using MLPC “Sunday Silver” color.

The final step was mixing up some liming wax by adding some MLPC “January” to some Briwax and giving the whole thing a coat of wax….let it dry for a bit and buffed it.  I loved the effect of the liming wax.  The redefine was complete.  We are taking it to our storage unit “PopUp Shop” this morning.  Fingers crossed that it sells!  If not, I’ve posted it on Facebook’s marketplace and several local facebook swap shops, so hopefully it will sell on one of those if not today.

spooltable

TIP OF THE WEEK: April 15, 2016 – October 7, 2016

See our TIP OF THE WEEK page for newer tips.

The TIP OF THE WEEK came about through a facebook site my friend and I started, but I wanted to have them all in one spot.  I’m re-posting the ones I’ve written before here on my blog, then will post new weekly ones in separate posts.  I hope some of these help you as you paint with chalk-based paint.  Follow my blog to get notified when I post new Tips of the Week.


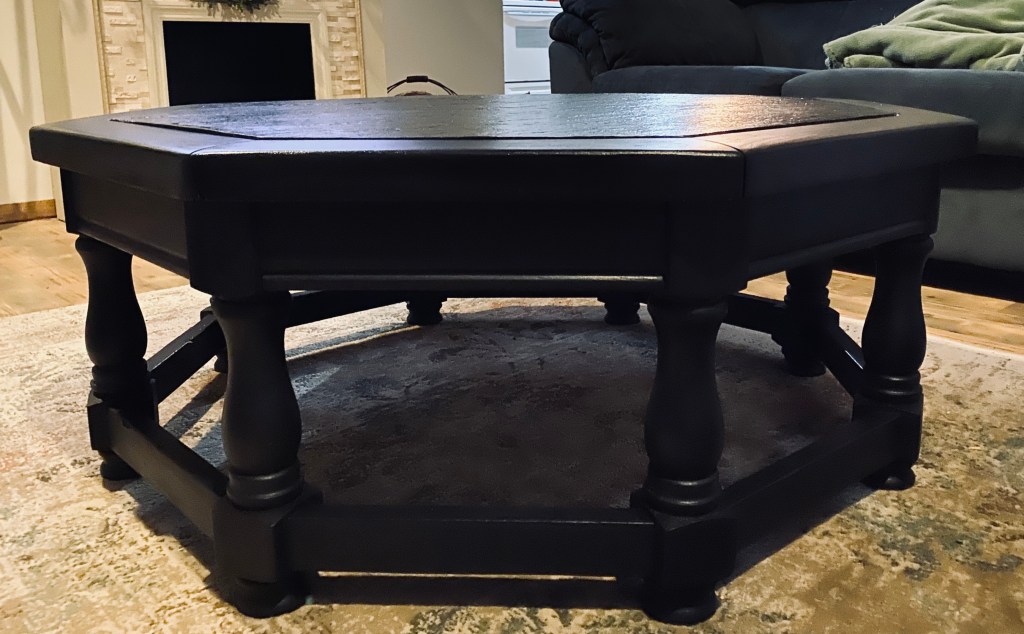
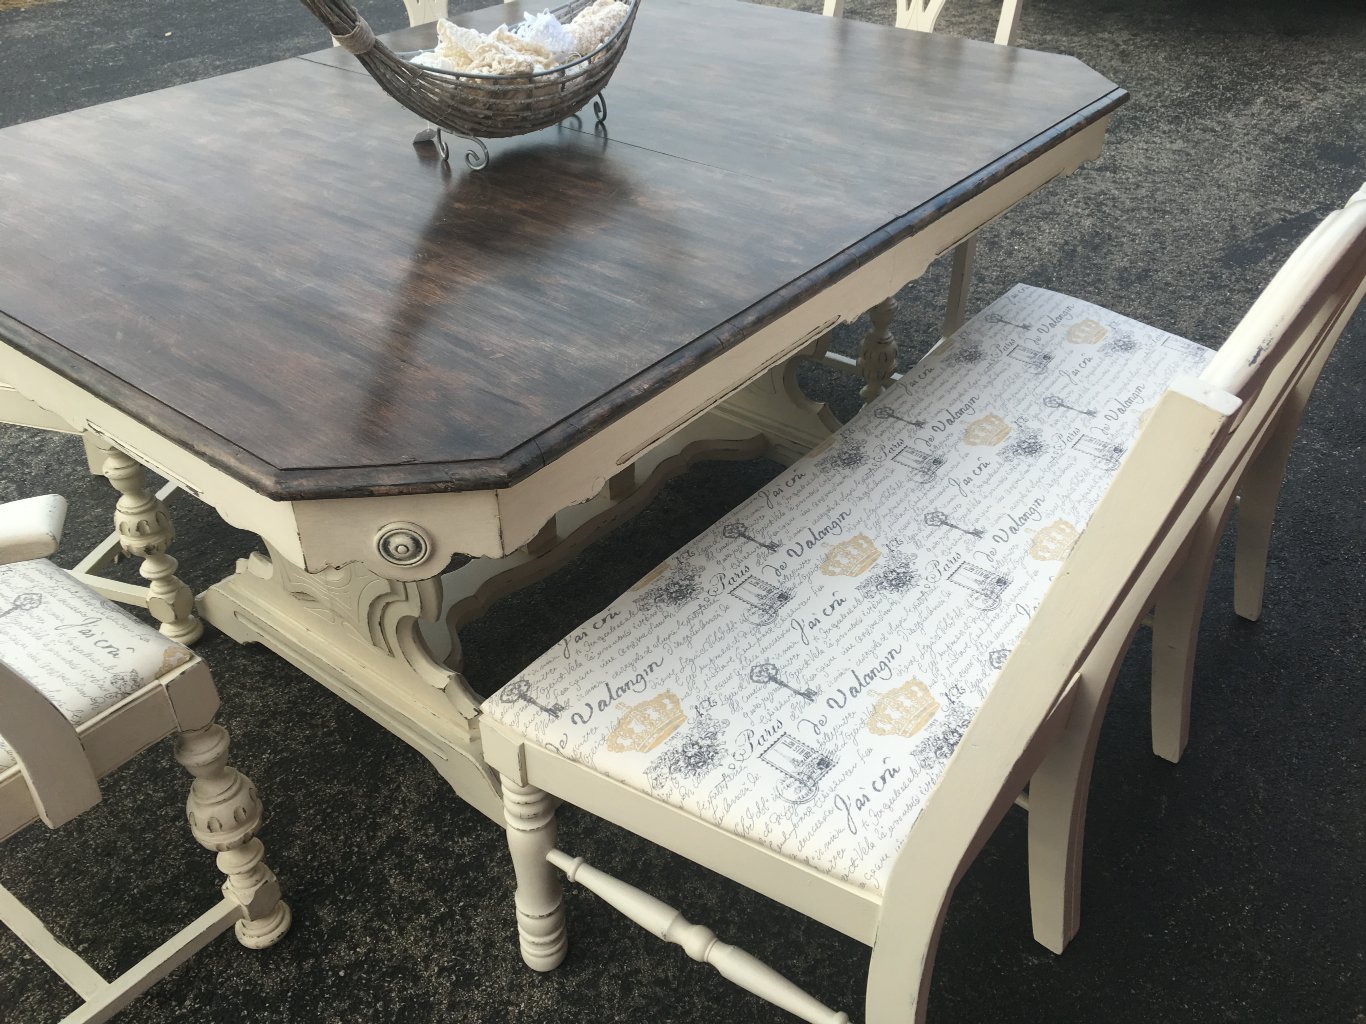
TIP OF THE WEEK:  October 7, 2016 (posted by Michelle)  😊 custom pieces are a unique way to transform traditional pieces into One of A Kind furniture. you can free hand or simply stencil a piece and completely change the style. I love seeing new ideas in furniture. These pieces were inspired by my friend, Leigh Ann. Thank you for the inspiration, to recreate a “New Look”

Posted Pics Before & After   Note:  Facebook photos
Pic 1: inspired by photo
Pic 2 – 4 Redefined pieces

Michelle Sohn Conrad's photo.

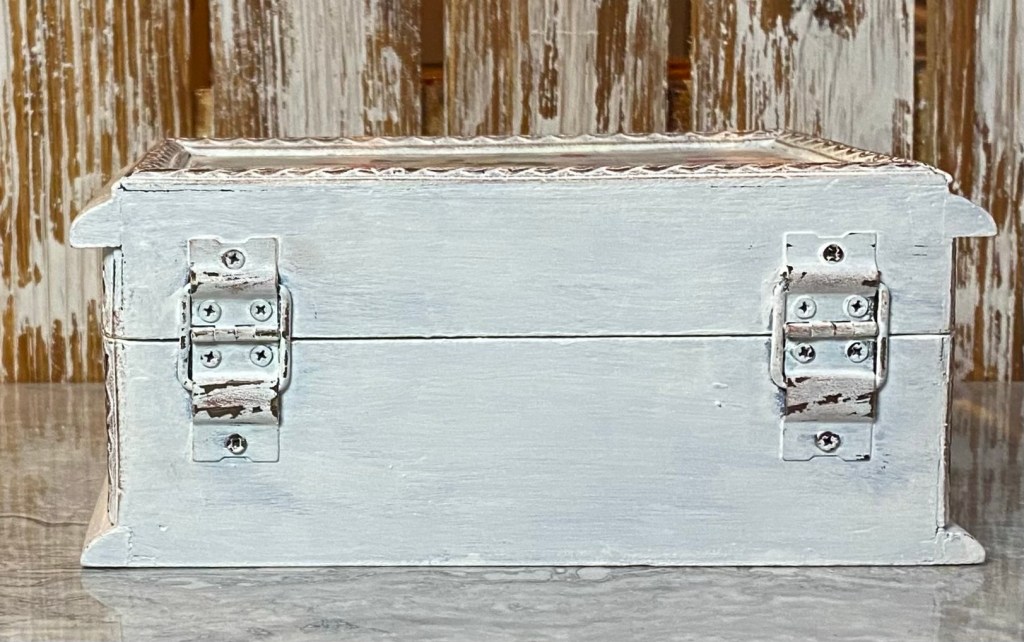
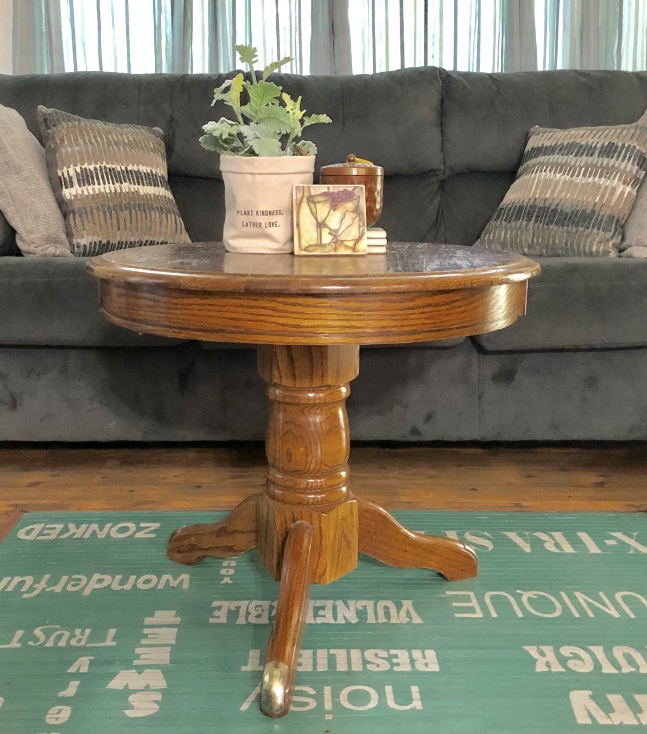
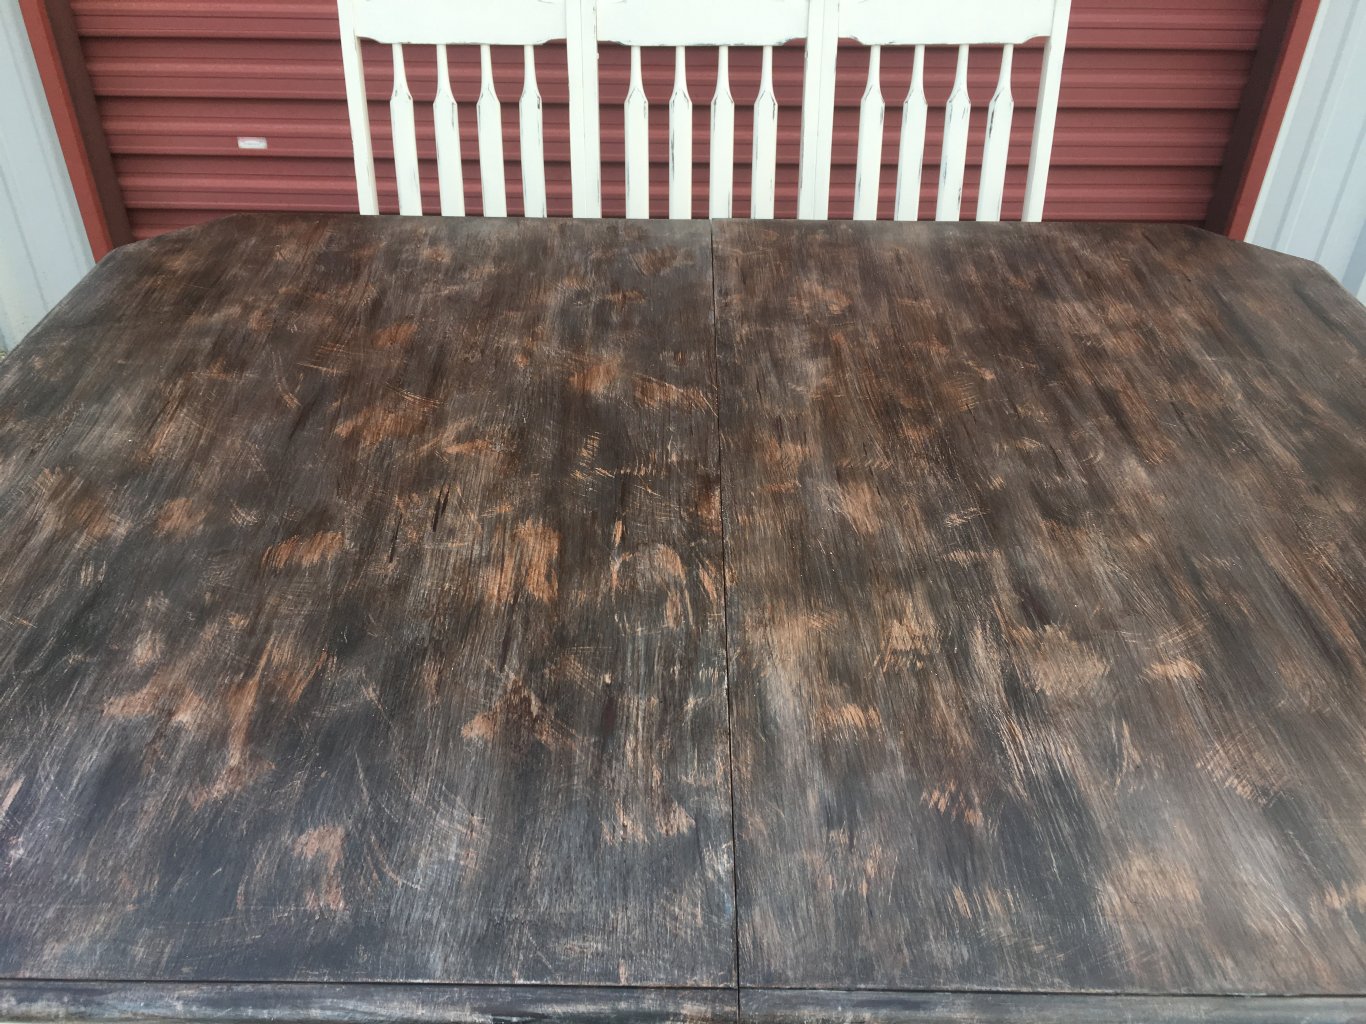
TIP OF THE WEEK:  September 28, 2016 – Stripping furniture – I have recently, with my new-found love of the restoration hardware look, realized that there were some pieces of furniture I want to strip down to the raw wood even though with chalk-based paint that is not necessary. I remember, though, the old gel stripper I used to use. It was messy, nasty smelling, and if you got some on your skin, you could actually feel it burn. I didn’t want to relive those days. However, I did want to get down to the raw wood so the paint could get into the grain even more for that barn wood/driftwood effect. I did some research and found Citristrip. It is non-toxic, has a citris smell, and is water clean-up. It is available at Lowe’s for $11.98. I found it extremely easy to apply because Danny did it, not me. LOL Note: The table I wanted to strip was an old oak table with just a light coat of varnish. I’m sure if you had many layers of paint or heavy, dark varnish, it would take much longer and probably more applications. For this table, Danny brushed on a coat and let it set up for about 30 minutes. You could see it bubbling up. Then he scraped it off with a paint scraper. He cleaned it up with a wet paper towel and let it dry and it was ready for me to do the barn wood/driftwood technique on it. I won’t always be stripping furniture down to the raw wood, but when I do…I’ll have Danny use Citristrip again. : ) 

Update:  A new tip of the week – using Saran Wrap with Citristrip!  Check it out!

Sharon Strothcamp Sumner's photo.

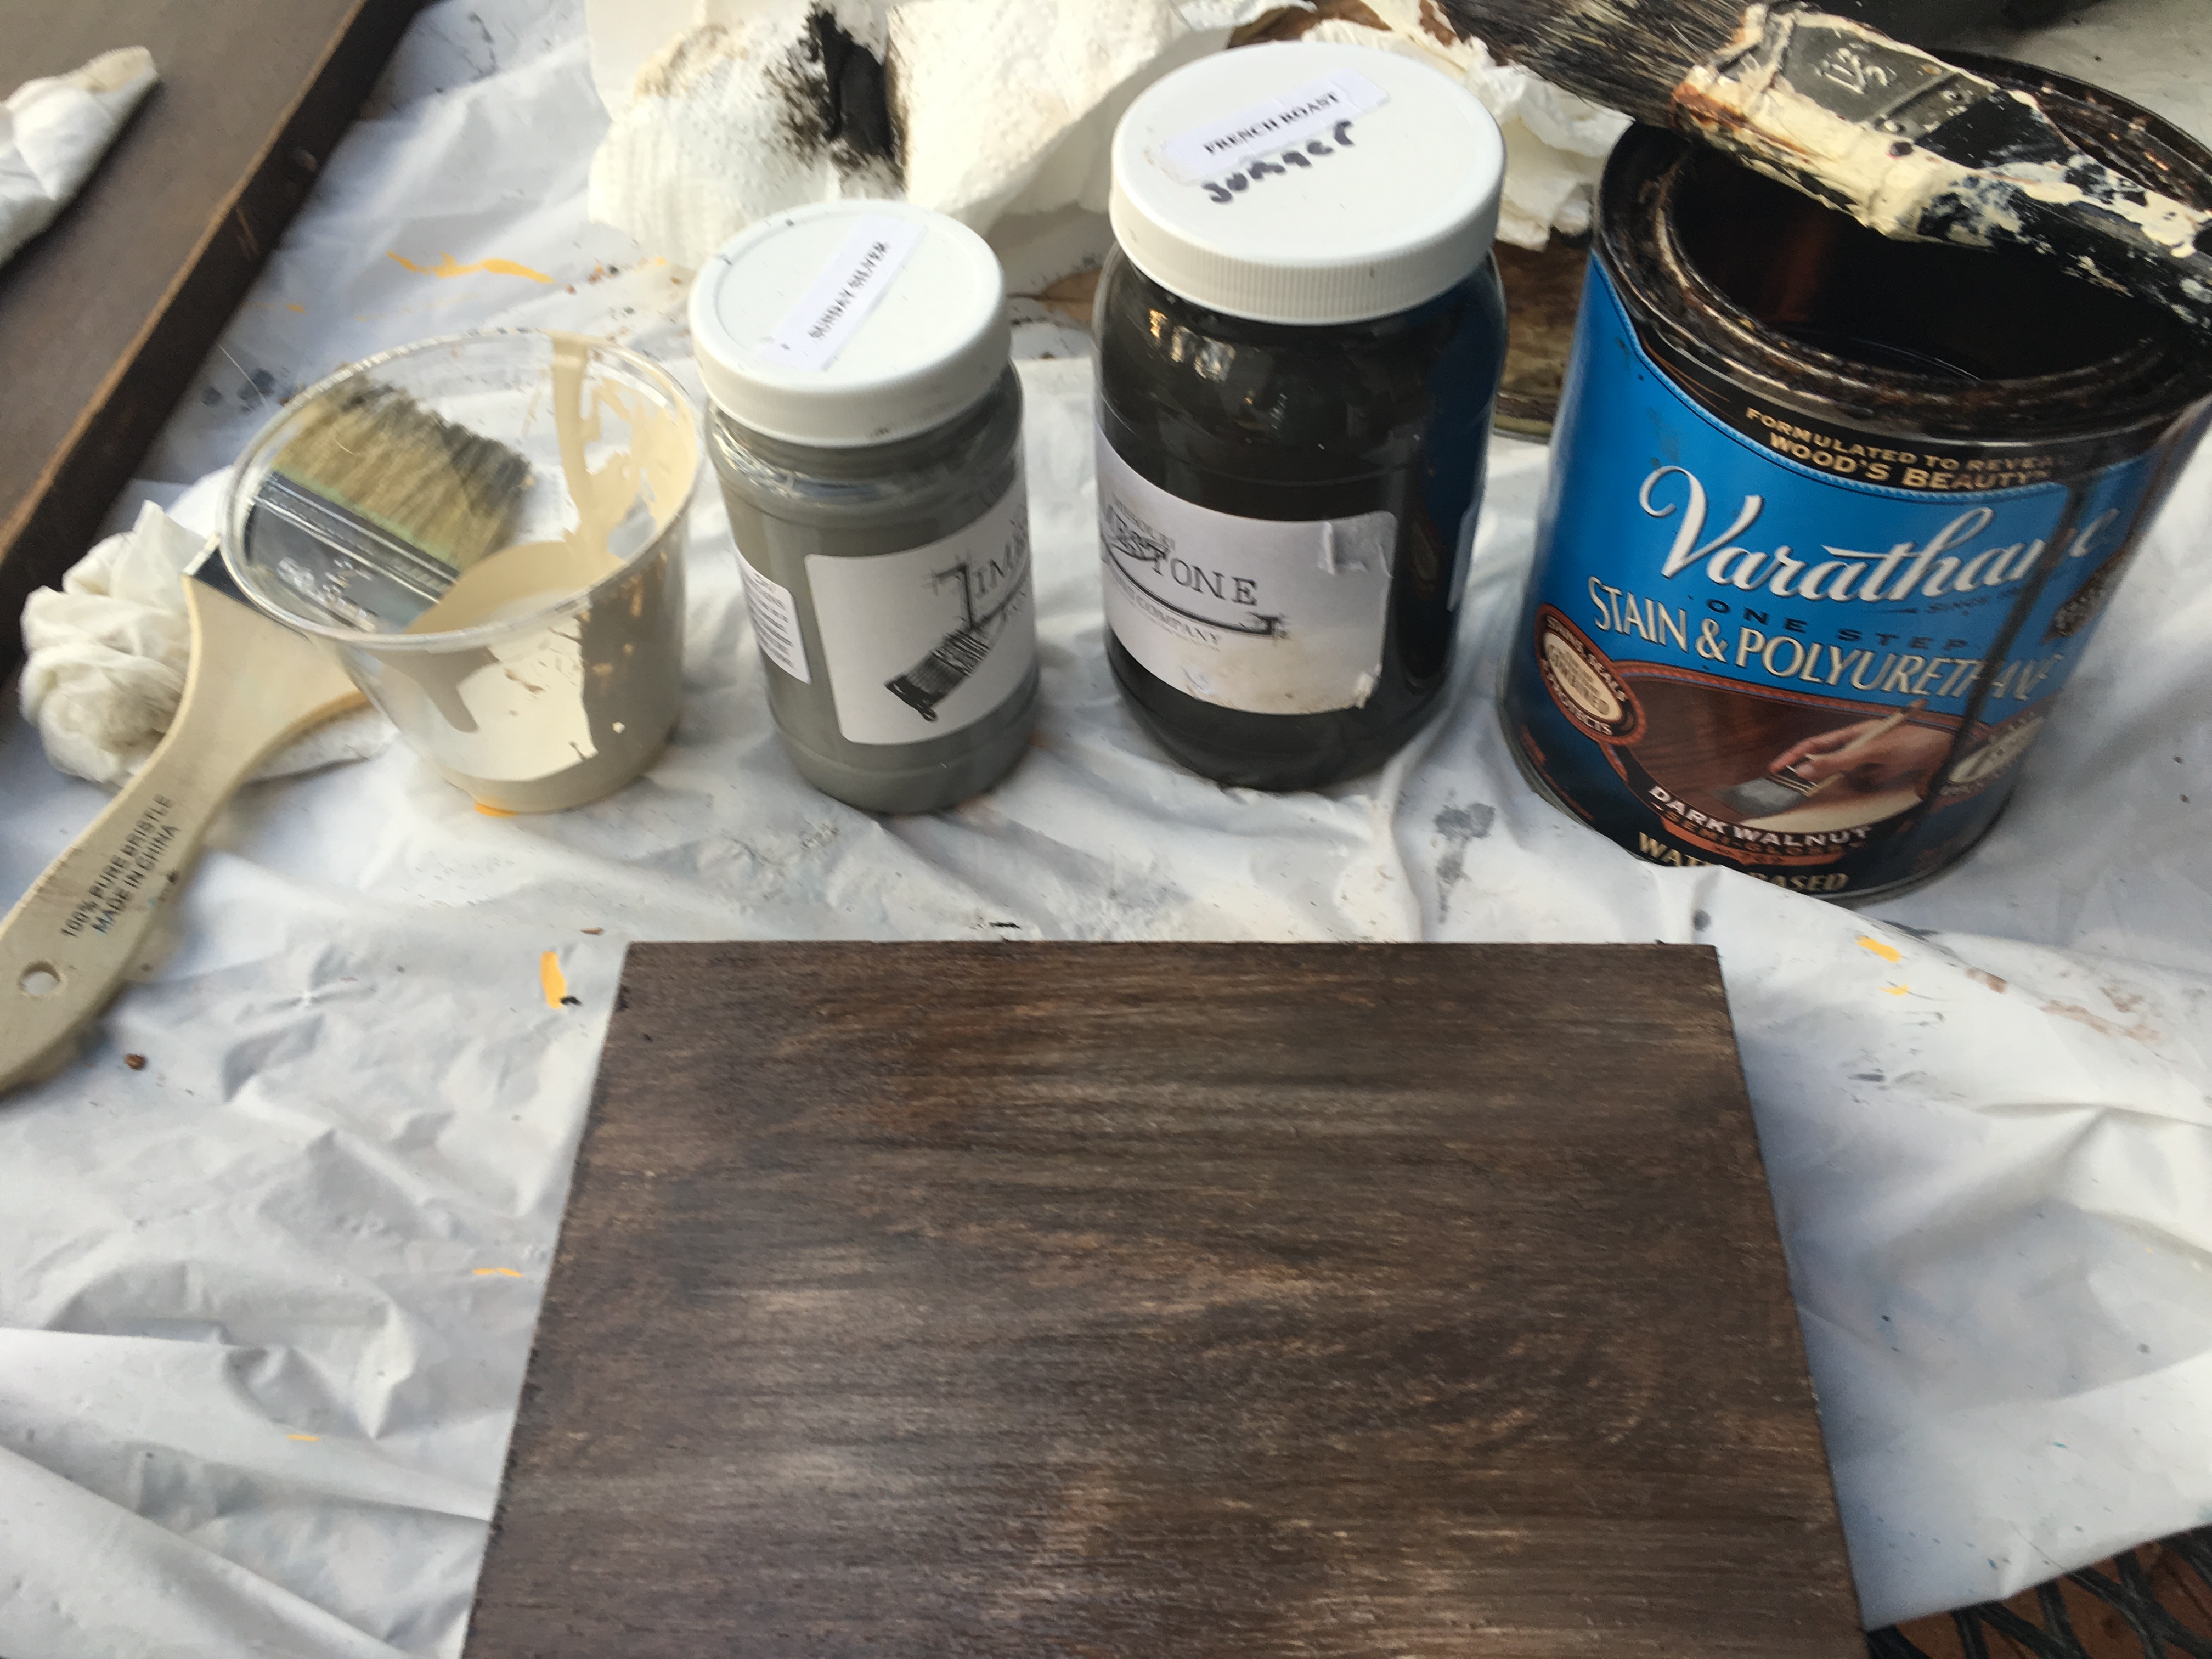
TIP OF THE WEEK:  Old barn wood is all the rage right now. You can use this technique with our Missouri Limestone Paint Company chalk-based paint and a water-based stain and sealer to create this look of old barn wood. Here’s the tutorial: http://cececaldwells.com/barnwood/

Update: I couldn’t wait to try this so this morning bright and early, I got started. Of course, I didn’t take a before pic of my piece of wood, but it was a new piece of oak, I believe….light in col…

Continue Reading

This week’s guest blogger is our Retailer, Erin Gunckle Debri from Grand Ledge, Michigan. Many of you may recognize her as Lucky Star Lane. However, she…
CECECALDWELLS.COM

TIP OF THE WEEK:  Designer Knobs!  I can’t wait to try this! This tip even includes all these designs! And it mentions If you use Martha Stewart modpodge, you could even wash in the dishwasher after 28 days. It’s that durable.

Anthropologie worthy DIY cabinet or door knobs that look like hand painted designer ceramic knobs! Download beautiful designs to make your own set easily!
PIN.IT

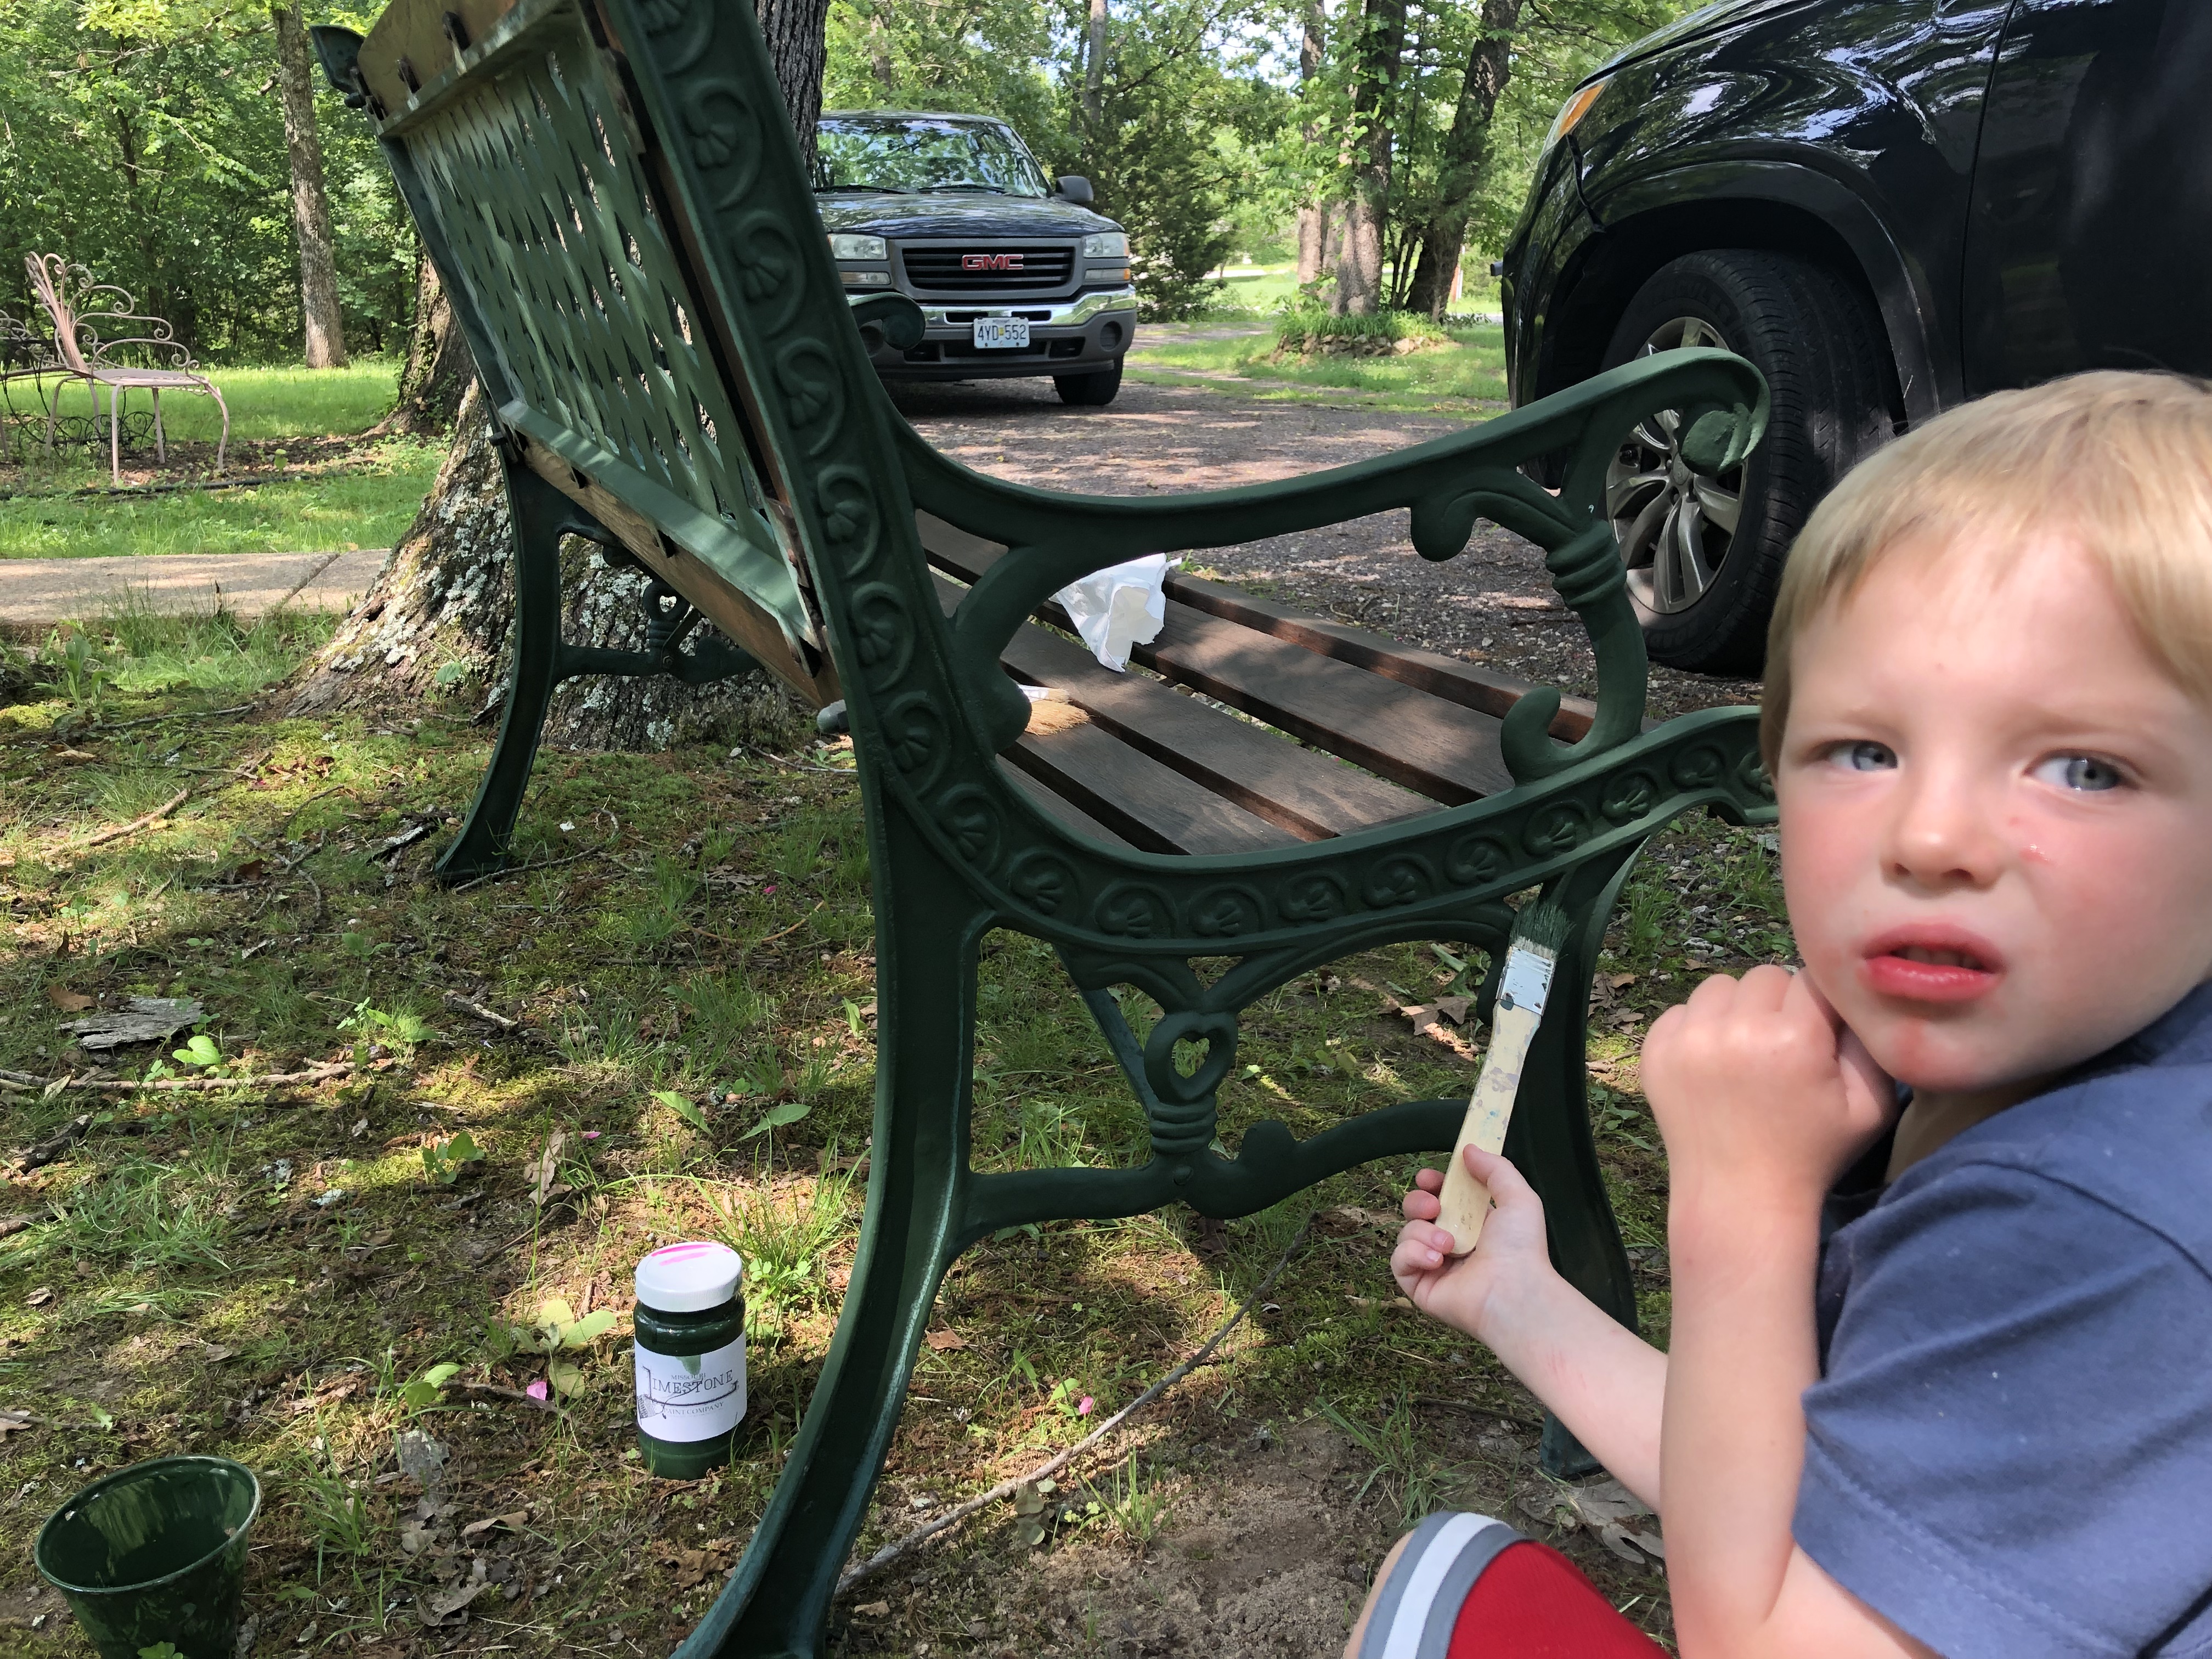
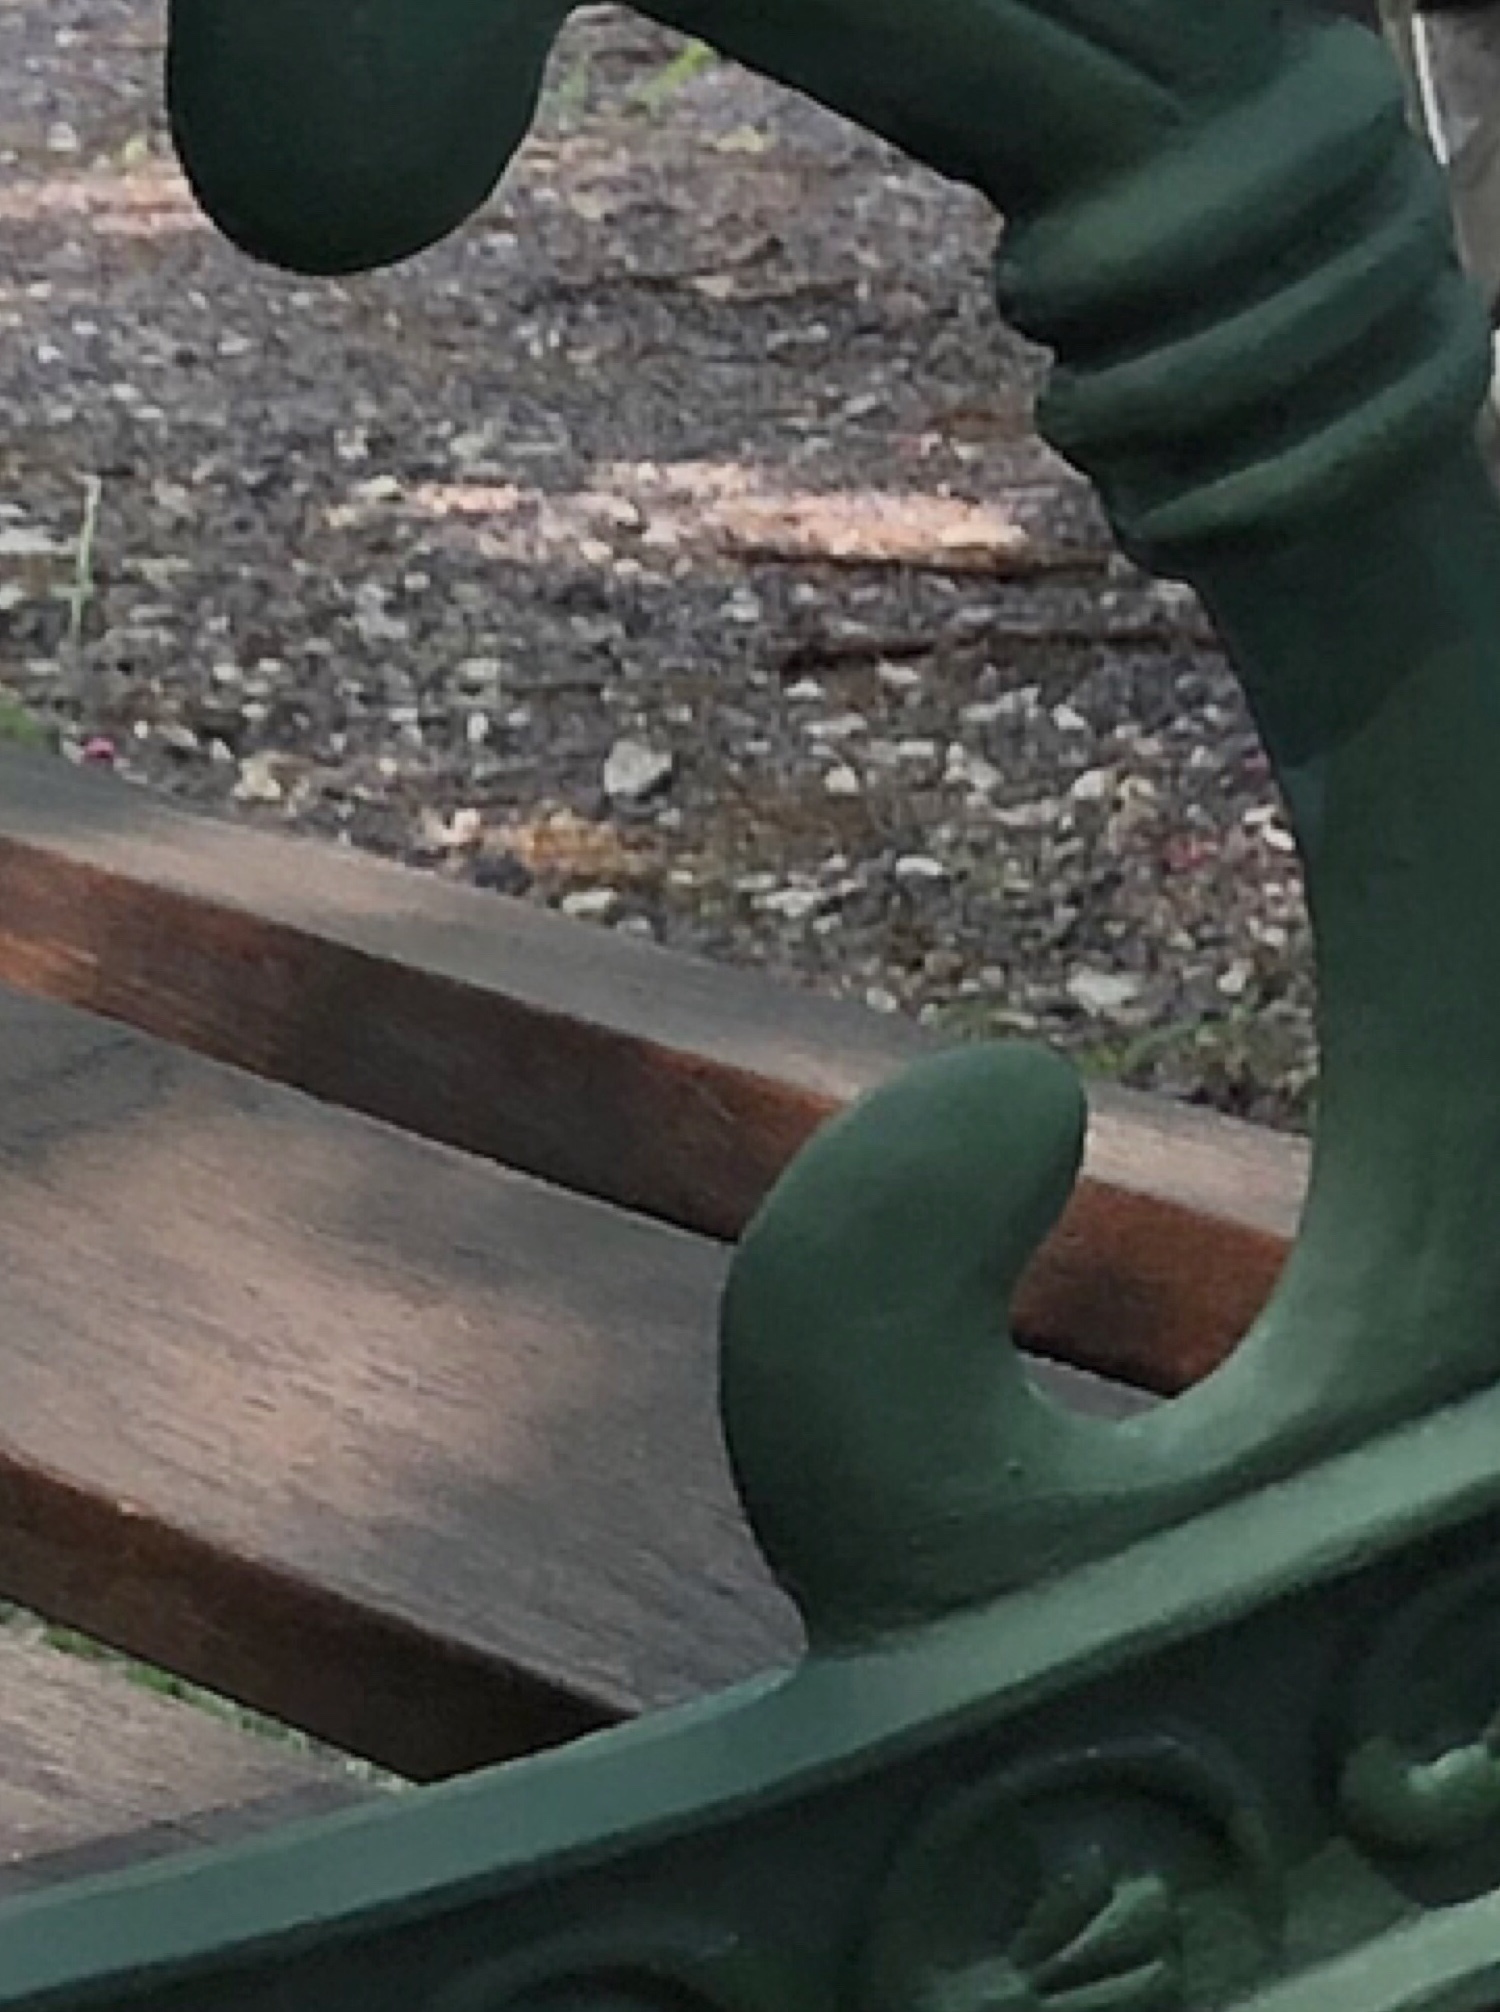
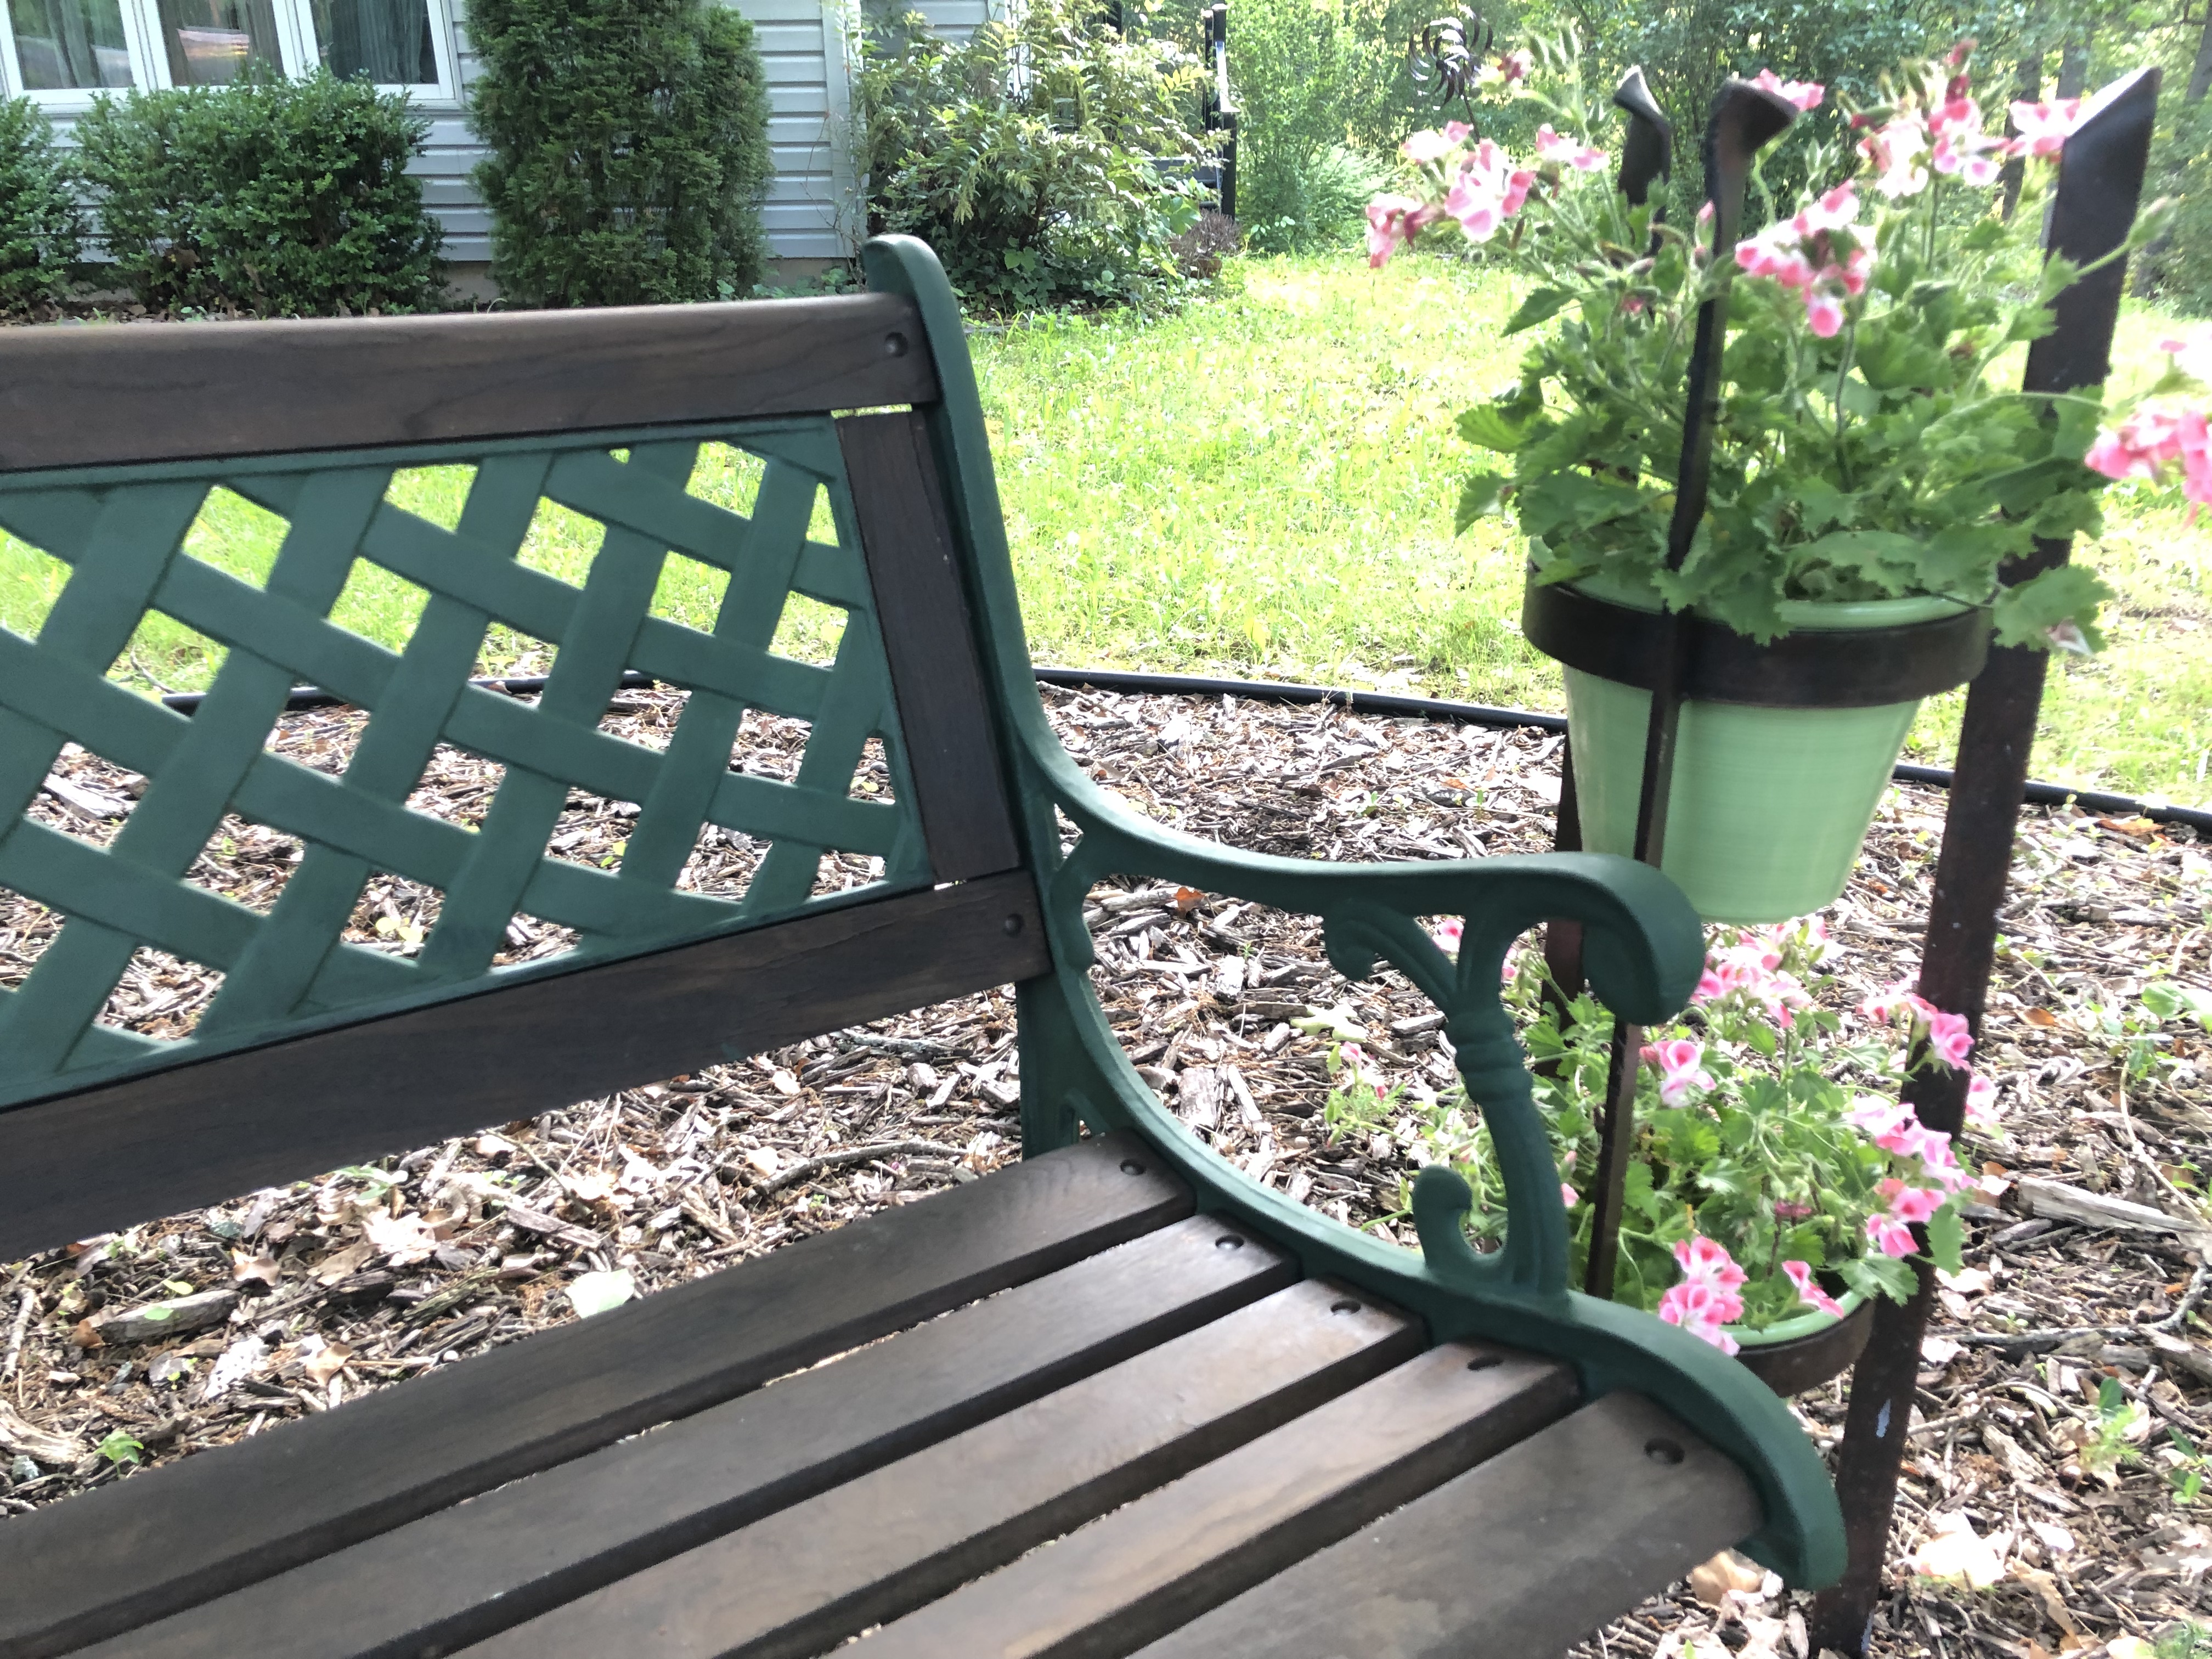
TIP OF THE WEEK:  The Garden Rocker – It’s a seat normally used in the garden but has been “redefined” to use with painting furniture. “This ergonomically designed seat subtly rocks with you as you bend and stretch. The patented curved base reduces strain on knees & lower back while providing a full range of motion.”

I read about this seat on a blog called “Refunk my Junk” and knew I needed to find this as soon as possible. My knees and back really take a beating when I paint. The blog mentions you can find them at Tuesday morning. I didn’t have any luck in Cape Girardeau but I did find one at Lowe’s for $24.99. Can’t wait to try it out!

Here’s the blog link for the seat:http://refunkmyjunk.com/your-bottom-will-thank-me-4/

And here’s the link on how this blogger paints furniture:http://refunkmyjunk.com/painting-furniture-tips-tricks-turn/

Image may contain: 1 person , outdoor

TIP OF THE WEEK:  Save space and leave drawers in while painting – I love the space saving while painting idea behind this tip. I never thought about this. I will definitely be trying this on the next drawer project!http://pin.it/uxply5Y

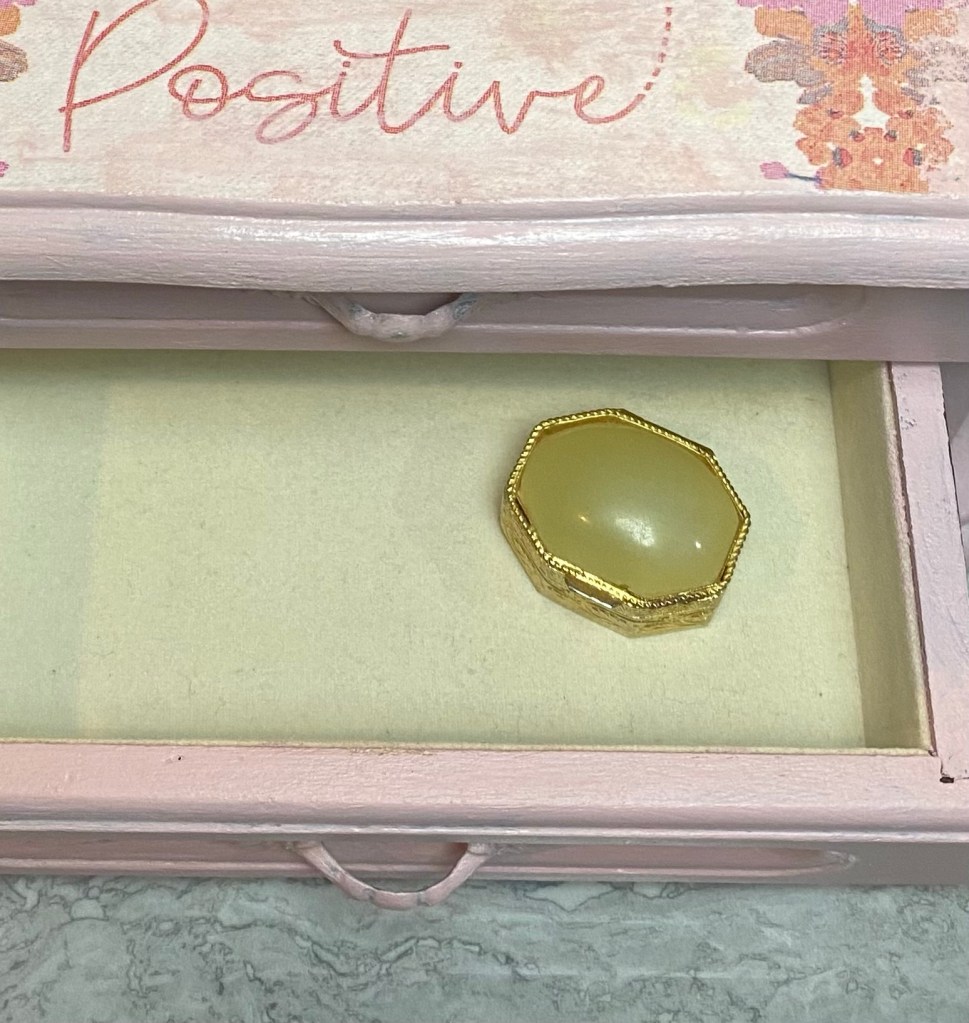
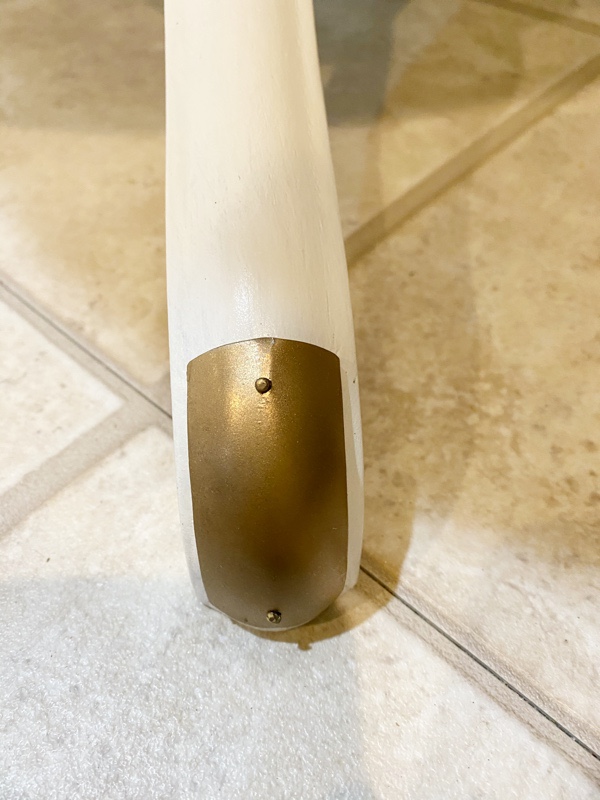
TIP OF THE WEEK:  Restoring Hardware – While searching for something else last night, naturally I found yet another thing. This little jewel will make you jump for joy when it comes to working with the hardware on a piece of furniture. It is a product called “Rub n Buff”. Sometimes you just want to keep the cool hardware but it just doesn’t go with the piece anymore or it is discolored and unsightly. Never fear…..you can restore it, too! You don’t have to buy expensive new hardware. I can’t wait to try Rub n Buff!

1. You can paint and distress it with your Missouri Limestone chalk-based paint. : )

2. You can spray paint it…..I have found Amy Howard at Home’s white spray lacquer to work very well – makes it look like a piece of porcelain. Also, I’ve tried a metallic silver spray paint.

3. But last night I ran across a video of someone using Rub n Buff. This looks like a great way to finish hardware. I can’t wait to try this. I found you can purchase Rub n Buff online at Walmart and Amazon. But, I think places like Michael’s or Hobby Lobby may have it in their stores. You would have to check that out. It comes in a variety of colors.

Here’s a link to the video I saw last night and a link to a question and answer on Rub n Buff.

Video: https://www.youtube.com/watch?v=YEuU_hZNMqE

Q & A: http://renewredo.blogspot.com/2012/10/rub-n-buff-q-a.html

TIP OF THE WEEK:  Video Tutorial – dry brush distressing technique over original finish. Enjoy!  Note:  This is a facebook video.


TIP OF THE WEEK:  I came across this site of a report about trending paint colors. It is interesting to note how many colors for 2016 trends are found in Missouri Limestone Paint Company’s Chalk-based paint. They work hard at staying on top of what colors are in fashion.

We’re taking a close look at the 2016 paint color trends and forecast reports highlighting paint colors are predicted to be popular in 2016.
WWW.THECREATIVITYEXCHANGE.COM|BY THE CREATIVITY EXCHANGE

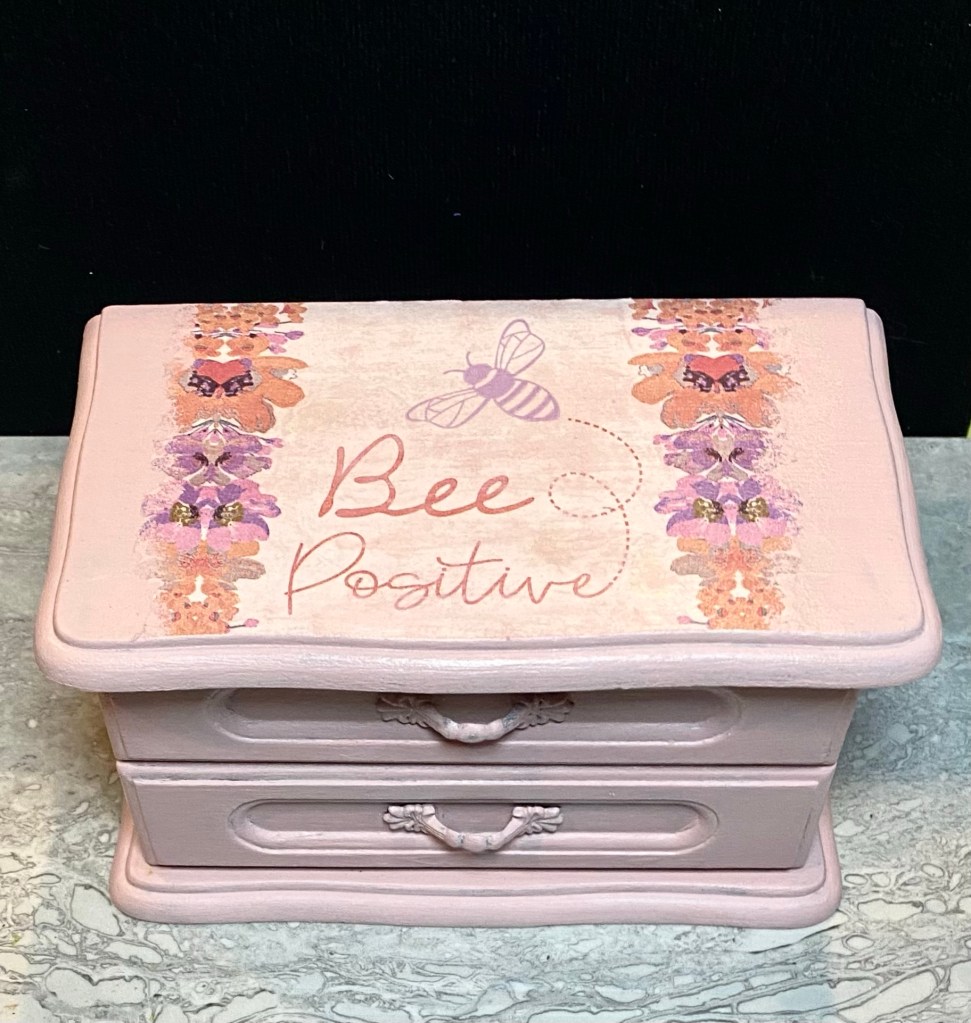
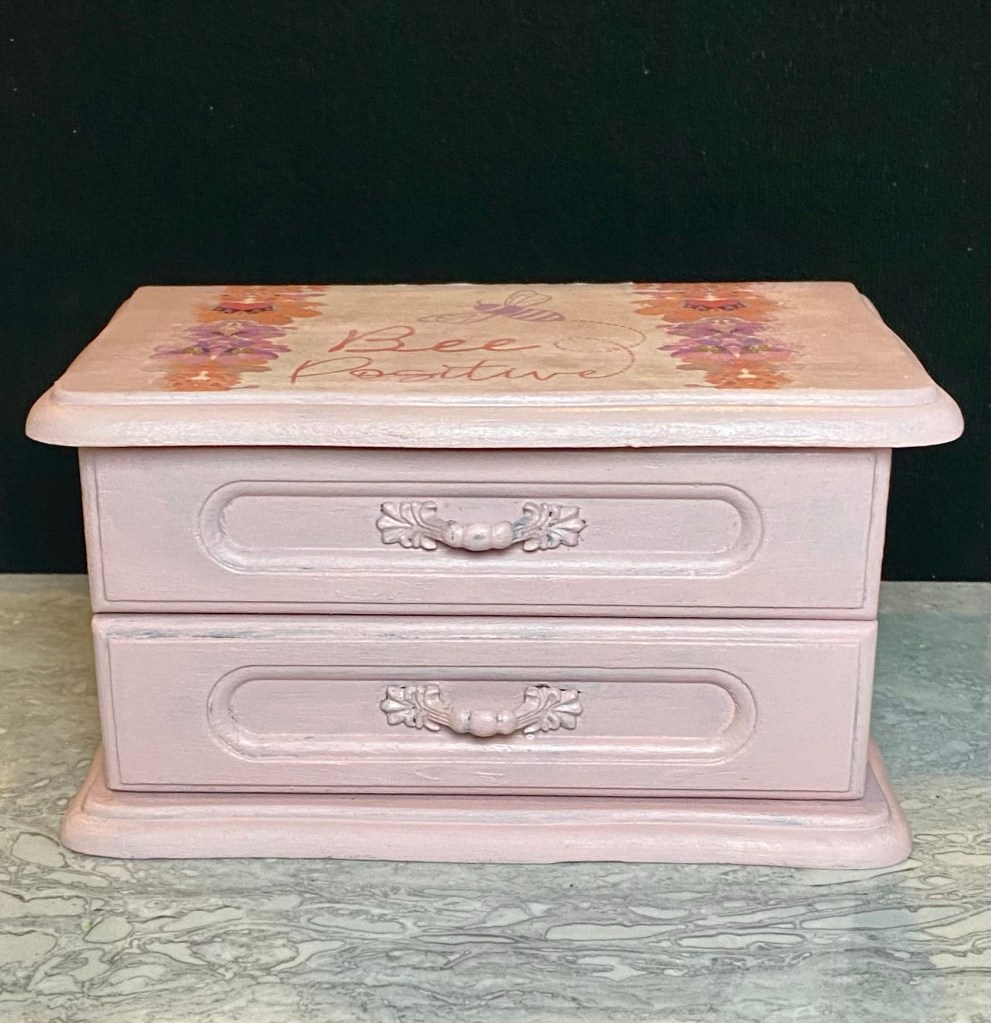
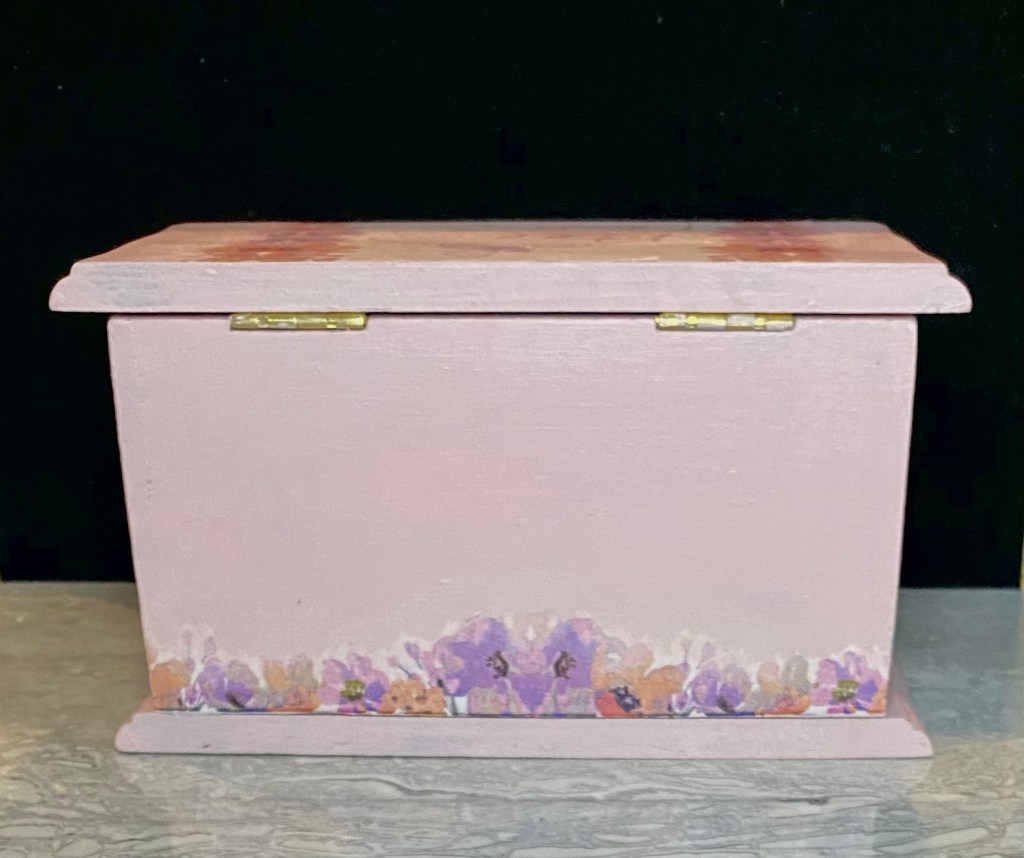
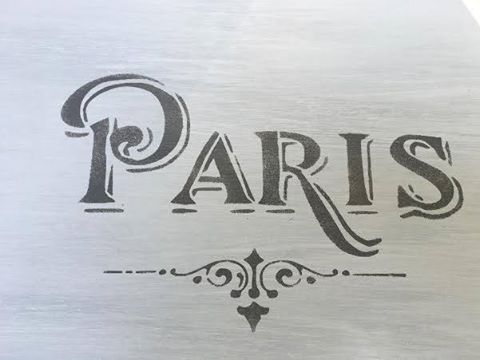
TIP OF THE WEEK:  Adding a graphic image….I’ve tried many different ways of adding an image to a piece of furniture, wood, or fabric – some with success, some were complete failures. When I came across this technique, I thought I might be able to do this. I haven’t tried it yet myself, but it does look doable. I think at the very least it would give you a good enough image to enhance with paint (for the artists out there) or to touch up with a paint pen or Sharpie. I think I might be able to do that. So, if anyone tries it before me, be sure to let me know how it worked, and post your result pics here! Enjoy!

I want to show you How To Add A Graphic To Furniture The EASY Way. I decided to start with a little cupboard that was a gift. [media_id:3489893] When I first…
HOMETALK.COM

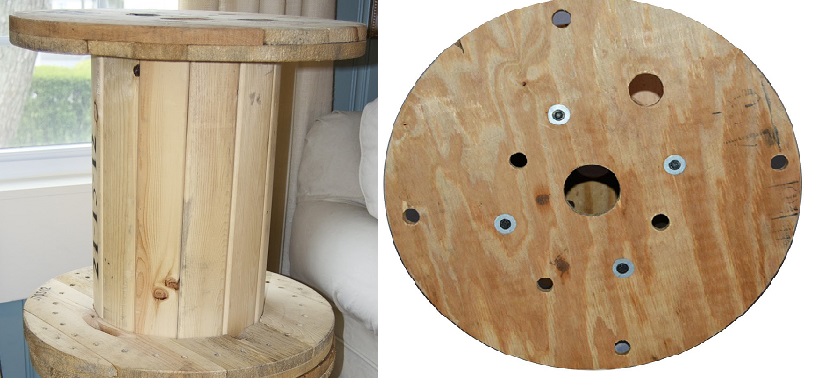
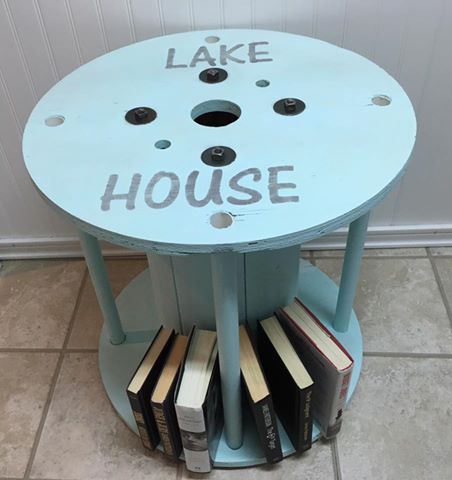
TIP OF THE WEEK:  Great ideas for Upcycled Furniture.

Over 20 of the BEST Upcycled Furniture Ideas – ways to turn Trash into Treasure! These ideas are a great way to repurpose old furniture & very easy to make!
KITCHENFUNWITHMY3SONS.COM|BY KITCHENFUN3SONS@GMAIL.COM

TIP OF THE WEEK:  Vaseline  distressing …. I love to try out news ways to distress and dshare what I learn. The last two pieces I’ve done, I wanted to get a chippy, shabby chic look so I thought I’d try vaseline as the distressing agent. I want to say this works perfectly and is very, very easy. I was lucky, too, that the two pieces I wanted to distress were already dark wood, so I only needed one color of chalk-based paint. Normally, you’d want two colors, one a base coat, then the vaseline where you want it to go and then the top coat. I found this tutorial very helpful when distressing with vaseline. I used my finger on my first piece and a cotton swab on the second. I think a small artist paintbrush is what I’d use the next time to help give me control of the vaseline.

Before I reveal a few tips I learned and show you how EASY it is to distress with this Vaseline technique, here’s the before and after and a few close ups. CHARMING!
SALVAGEDINSPIRATIONS.COM|BY DENISE

TIP OF THE WEEK:  Baby wipes for distressing chalk-based paint….who knew? Of course, my chalk-based paint of choice is Missouri Limestone Paint, available at Gift Emporium & Cafe’ in Sullivan. : ) Watch for sales, use coupons, buy in bulk…..Dollar Tree also carries a 90-count package.

I happened upon a new brand of Chalk Paint recently (not to be confused with chalkboard paint). Have you heard of CeCe Caldwell? Great all natural chalk paint…
TWENTYONEFIFTYNINEBLOG.COM

TIP OF THE WEEK:  Did you know you can paint those cheap white canvas shoes? They turn out great and are very quick to do. My grand daughter Lucy demonstrates how in this video. I also painted a pair for her brother Liam. I painted in the morning and he wore them by afternoon. Tip: Make sure the canvas shoes are plenty big. By the time we sprayed them with water and painted them, I think they might have shrunk a little, so get them plenty big enough.

Lucy demonstrates painting canvas shoes: https://drive.google.com/file/d/0B4jO-IG4PCRmcXd1ZUNJUEhNVm8/view?usp=sharing

Liam’s shoes:liamshoes

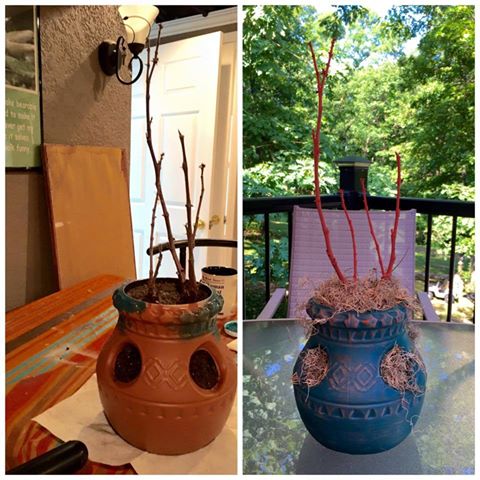
TIP OF THE WEEK: The Ultimate Redefined Tip: Taking Redefined to the next level….redefining a dead plant. I thought I’d share the painted pot/stick idea inspired by the botanical garden ones we saw in Germany. I just happened to have a plastic hen and chick pot (yes, you can paint plastic) left over from last year, complete with dirt and dead plant sticks already in place. How handy is that? I left the dirt to give it some weight. I painted the pot with one coat of Missouri Limestone Paint’s “Bourbon Street” then used the dry brush technique with a little bit of “Coral” on the pot and the sticks.

paintedstick

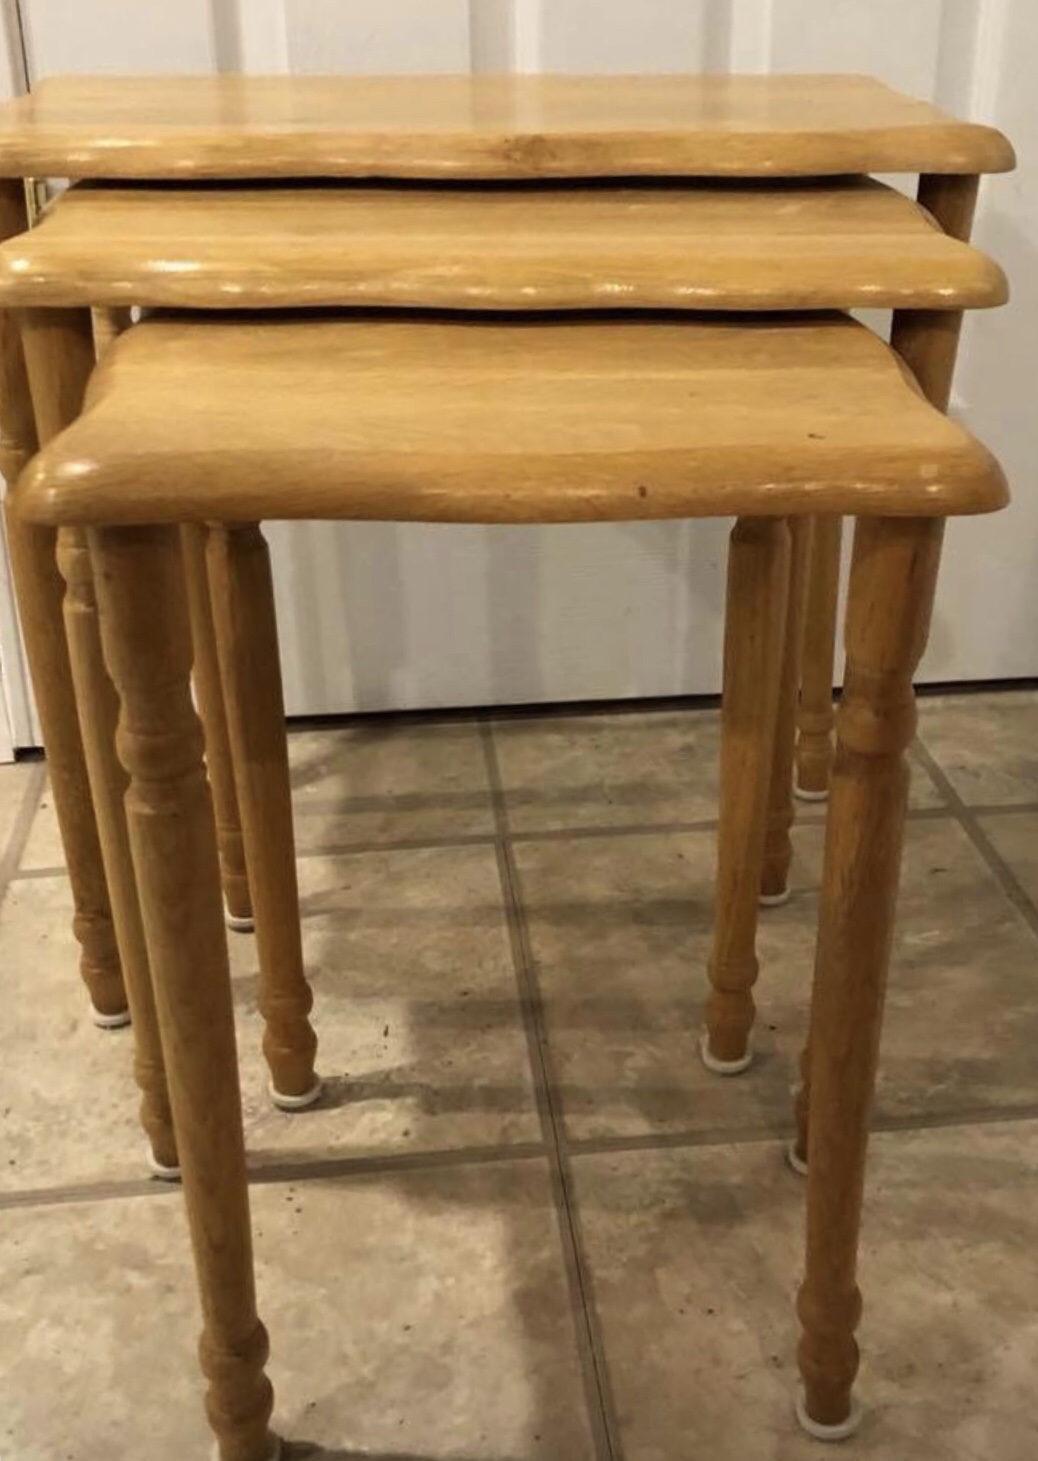
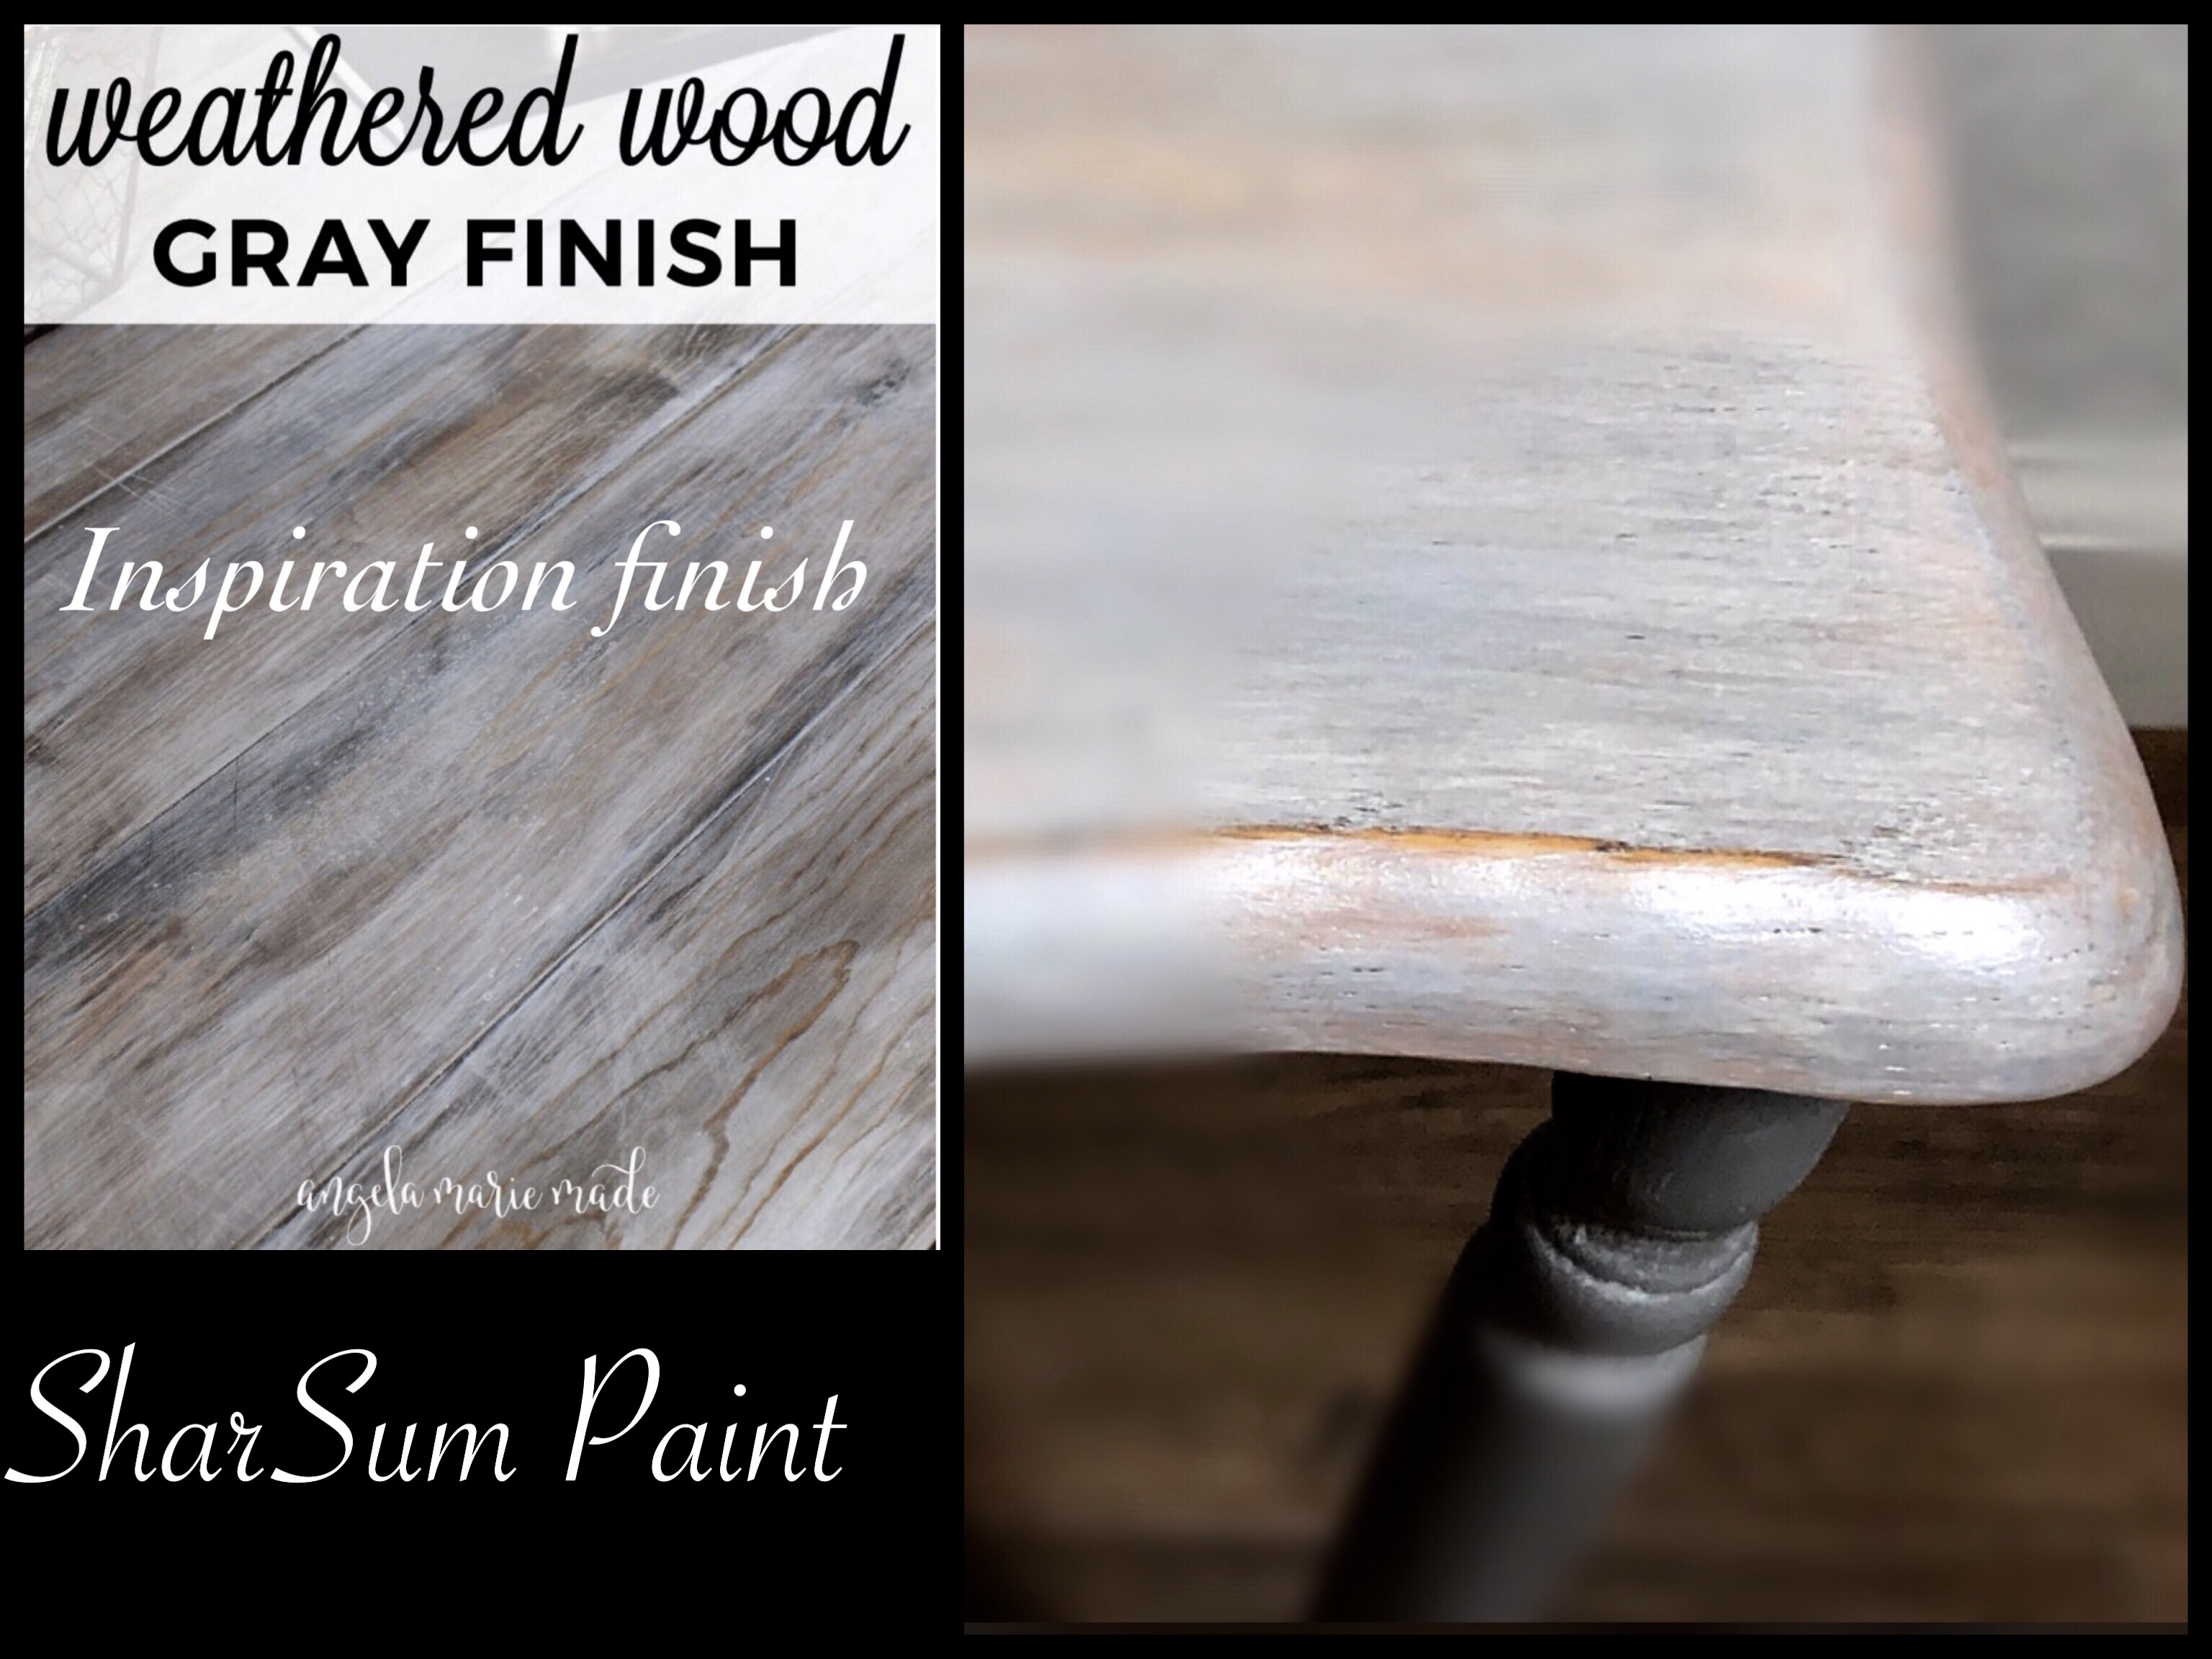
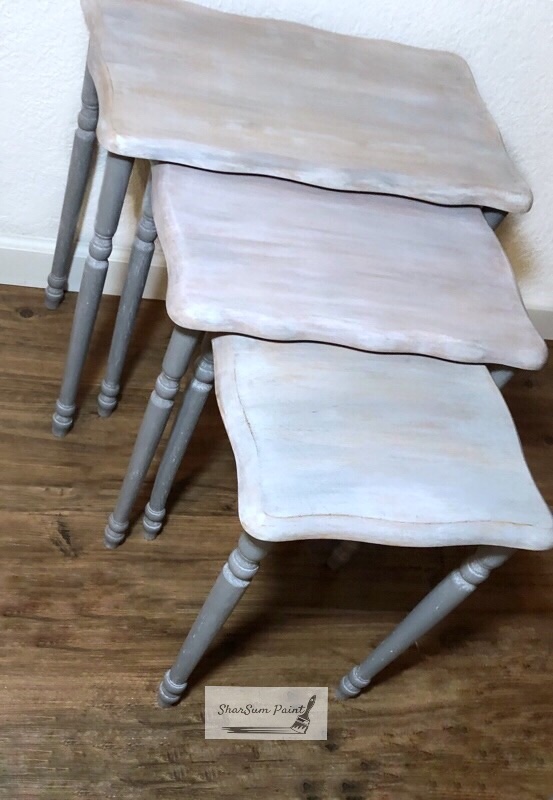
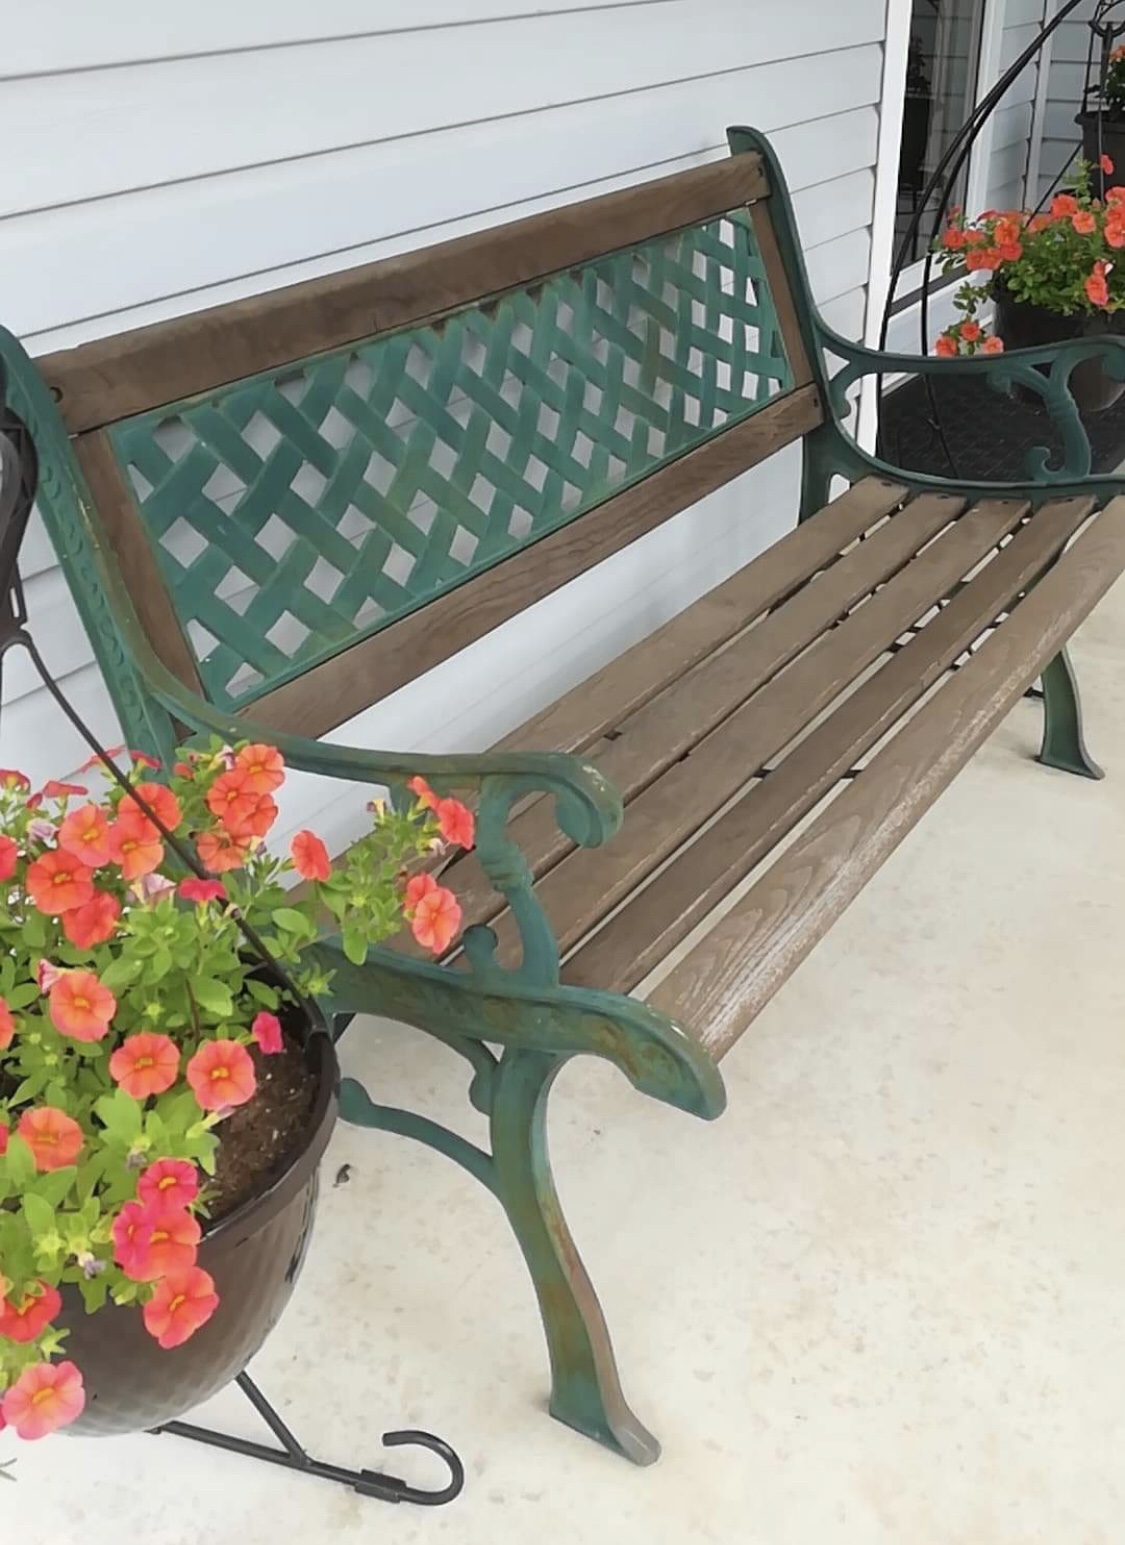
TIP OF THE WEEK:  (Posted by Michelle)  Bleach is not my friend, but Sharsumpaint is.
Well today started out with loads of laundry on my agenda. Several loads of white with Bleach. All went well until…I did a load of colors. Black, blue and grey. Simply loaded the washer, then.. added Bleach. To late…!! They were all a new style of polka dotted white & dark.
Okay this got me thinking. First: I’am a idiot for doing this. 2nd tye dye clothing would be a little too much 70’s for all my pants. 3rd what can I do to fix this? Then…like a light above the head (I do see the light on this one) I remembered Sharon Strothcamp Sumner paints. I has re- painted a cushion, so maybe I could salvage some of my clothes. ( Not wanting to buy a new wardrobe do to being, Bleach happy) it worked! My tip is, if you splatter bleach or as I, Added it to all your clothes in the wash. Paint them. The result was fantastic. Simply spray the area you are painting then water down paint slightly, let dry completely and it is a set in color.
I won’t share the picture of the clothing catastrophe. I will share the cushion. Before was a Ivory worn cover into a Coal Shovel (black) Sharsumpaint creation.

paintedchaircushion

paintedchaircushion1

TIP OF THE WEEK:  Canary Street Crafts Blog is one of my favorite reads. This post is spot on explaining when to prep when painting with chalk-based paints. Enjoy and be sure to check out other areas of this site!

Learn how and when to prep furniture before painting with chalk paint.
CANARYSTREETCRAFTS.COM

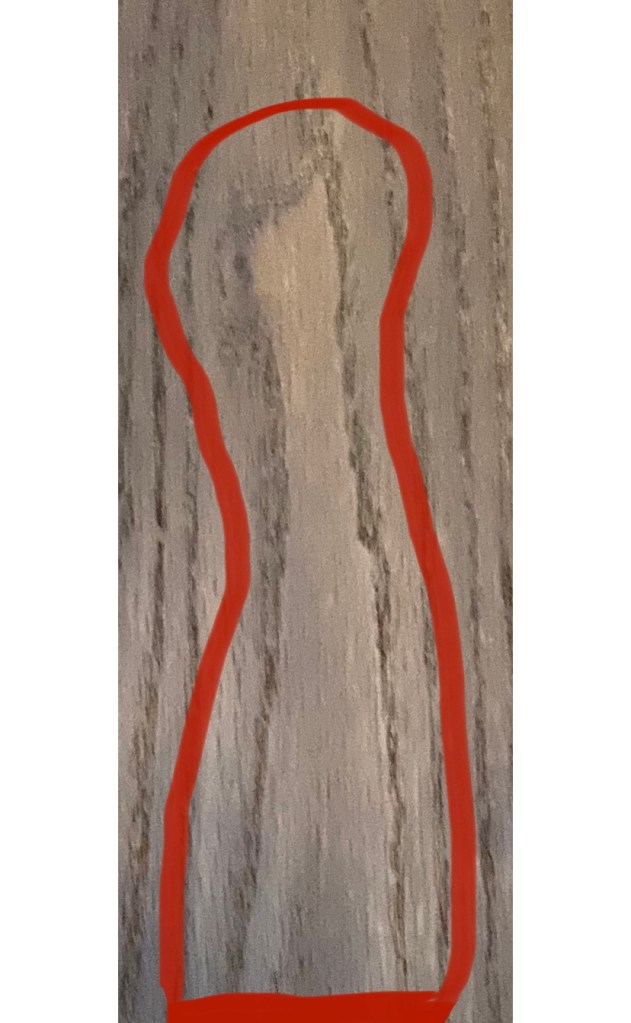
TIP OF THE WEEK:  Stenciling with Chalk-based Paint

I love my Silhouette machine for making stencils to use on the furniture I paint with Missouri Limestone Chalk-based paint. I can create just about any kind of stencil you can imagine…well within reason….as long as it is a pretty simple design. I will also sometimes, buy the design on Etsy, usually for a very reasonable price and cut it out on my machine. Another great source for plastic type stencils can be found at Gift Emporium & Cafe’ hanging on the door of the cabinet where our paint is on display. How handy is that!

It is very easy to stencil a design on your project using chalk-based paint. Why? It is easy to work with and dries so fast! If you have never stenciled before, you’ll need just a few basic supplies….a stencil, a stencil brush (just a cheapy from walmart is fine) your project, and…..of course….some Missouri Limestone Chalk-based paint. : )

You can use a foam brush or one with bristles but they should be the flat across type. I use contact paper when creating my Silhouette stencils. Contact paper of today is not that sticky stuff from the past. Sometimes it is called adhesive shelf liner. It doesn’t matter the color or print. I can sometimes find it at Dollar Tree and keep it handy for making stencils.

1. Whichever type of stencil you use, attach it to your project….if a plastic one from Gift Emporium, use painters’ tape to hold it in place. It is important that your project has had time to cure, about 24 hours is best, to ensure the tape won’t pull up the paint.

2. Dip your stencil brush in the paint, and then dob it on paper towel. This makes sure you don’t have a lot of paint on your brush. Start on the edges and work your way toward the center, dobbing up and down, quickly. When you feel you have covered all you want inside the stencil, allow the paint to thoroughly dry before removing the stencil. This usually only takes about 5-10 minutes, depending on the thickness of the paint you applied. I sometimes hurry that process by using a hair dryer.

Note: If you are using a plastic stencil over and over, be sure to wash it often so you don’t get a build up of paint that would allow new paint to seep under since it might not be laying flat anymore.

3. Carefully remove the stencil and…..your beautiful design will be revealed. I then use whatever topcoat I had planned for the piece, either wax or a poly seal.

I’ve included several examples of projects I’ve completed, using a stencil.

So, if you want to start doing some stenciling on your projects, head over to Gift Emporium to see what she has in stock, or PM me about creating a stencil for you on my Silhouette machine. Prices would vary, but not be expensive at all – you’d basically be paying for my time to make it….after all, the material is just Dollar Tree contact paper. : )

parisstencilfairestofthemallstencilgrandehotelstencil

TIP OF THE WEEK:  SharSum Paint’s Missouri LImestone Company’s chalk-based paint, carried by Gift Emporium in Sullivan, uses plastic lids on their jars of paint. Just sayin’….: )

5 Ways to open a plastic stuck on jar lid:

Have you ever struggled trying to open a plastic paint container? If any product lands on the containers rim, the paint ends up drying and fusing the lid shut. The next…
SALVAGEDINSPIRATIONS.COM|BY DENISE

TIP OF THE WEEK:  (Posted by Michelle)
I want to begin by saying. Do not feel challenged by painting and re creating your own finds. I was totally intimidated by all this chalk paint chatter. The paint looked so beautiful on furniture, it had to be difficult, I thought. This is the wrong mind set. After Sharon literally placed the first sample purchase in my hand and directed me to go home and try it. I loved it. I believe my first thoughts were, this is so easy a monkey could do this. Not to down play monkeys. I do love them.


The one thing I am trying to express is that you simply put one thin coat on let it dry, fifteen to thirty minutes, then re apply a second coat. Mission complete with a brand new style to a older worn out treasure. Anyone who can use a paint brush can easily do this. My tip is go create with this one of a kind limestone Sharsumpaint. Beautiful results with a rewarding feeling of self gratification that all is well in the world of creation. Thank you Sharon for the insisted introduction to your paints. I love them, and the future of furniture looks bright.

TIP OF THE WEEK:   I’m finishing up the “Ombre Desk” set. The desk is finished and I’m working on the chair. Won’t be long now. The desk is in really good shape and the drawers are in great shape, too. They smell just fine. However, I’m into essential oils and I have an oil from Young Living called Cedarwood. I decided I would wipe down the drawers with a mixture of water and about 10 drops of Cedarwood. I thought that might be a perfect scent for a wooden drawer, right? It smelled so good, I put a little oil on qtips and put one in each drawer for awhile. I love opening the drawers and getting a faint whiff of Cedarwood. You might try a favorite scent in the drawers of something you are working on or purchased.

ombredeskdrawerwithcedarwood

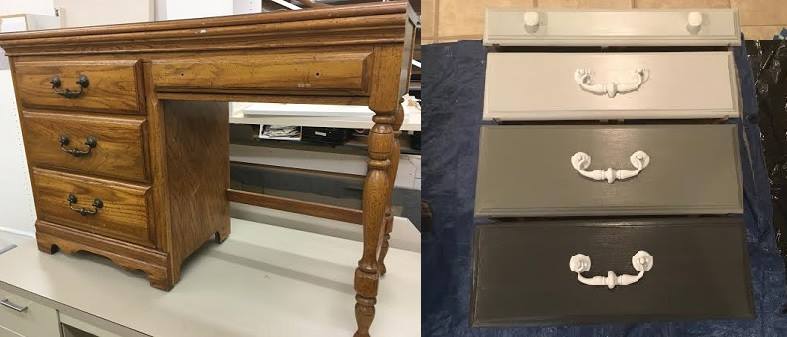
TIP OF THE WEEK: I’ve been working on a desk today that will be for sale soon. I am so pumped on how the drawers are looking, I just had to share. They are finished with 3 coats of poly and they are gorgeous. I’m calling this desk “Gray Ombre” as the drawers are varying shades of gray using Missouri Limestone chalk-based paint. Take a look at the drawer pulls in the original photo and then again in the finished drawer photo.

I love, love, love the Missouri Limestone Chalk-based paint we have for sale at Gift Emporium and Cafe’ in Sullivan, but I also love to use other products when I find something I like. In this case, it is Amy Howard’s Home spray lacquer “White Perfection”. You can buy it at Ace Hardware Stores. It is expensive but it makes old hardware look like porcelain. The knobs on the drawers are porcelain, but metal knobs can be painted, too. Now that you have this awesome tip, just be sure to use our Missouri Limestone chalk-based paint and move on past Amy Howard’s. : )   Gift Emporium and Cafe’s facebook page: https://www.facebook.com/Gift-Emporium-CAFE-194319340843

drawerpulls