Creating a Color Portfolio of Work on Pinterest

Note:  To make it easy for you to follow the directions below in print, I created an eBook for you.  Just click on this link to download.  Be sure to follow my blog if this is something you  can use.  I would appreciate it.

Free eBook: Pinterest Colors Board Tutorial

I found Pinterest to be an excellent way to showcase my painted projects.  If you enjoy this tutorial or just enjoy looking at painted furniture and home decor, please consider following me on Pinterest.  https://pinterest.com/sharsumpaint  And if you like seeing tutorials like this, please follow this blog.  I have many tutorials listed here.  Just click on the category Tutorials to see them all.  I add new ones periodically.  Thank you.

I’ve been working on creating portfolios of my work through various platforms:  Pinterest, Facebook, and eventually here on my blog.  This is something I’ve attempted in the past and it is a lot of work. I realize now I have created quite a few projects and have the images saved in several different places and finding them all, saving in one place, adding descriptions, etc is all going to take time.

However, I am highly motivated right now to get this done.  Why?  I am doing more custom work with my business and I want an easy way to share examples of my work along with colors and techniques to hopefully, future clients.  So, I am creating color albums.  I started with Facebook and have quite a few ready to go with it, but last night I got distracted (lol happens often) with checking out how to go about it in Pinterest and Wow!  I love what I discovered.  The only drawback is that the client will need to have a Pinterest account, but these days, most people do.

Note:  These directions are for the Pinterest app.  But if working on a computer, they are basically the same.

Steps for Creating a Color Portfolio in Pinterest:

1.  I logged into my business account in Pinterest.  Click on the Plus Sign at the top of the page.pinterestlogin2.  Type in Colors for the Board name and click Create. After it is created, you can click Edit and add a description of your Colors Board.  Here’s mine:  “Portfolio of SharSum Paint’s Work”

createboard_colors

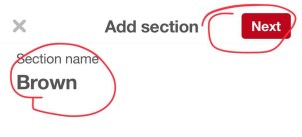
3.  I then clicked on Add Section, gave it a Color name and clicked Next.
Add a Section


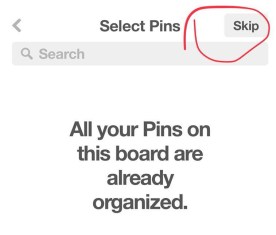
4.  You may or may not get this message.  If you do, just click Skip at the top right.  I think I got it as I already had boards on my account.

Skip This

5.  You are now ready to add pins to your Brown Section.  Click on the left arrow until you get back to your main page and click on the + sign there.

pinterestlogin

6.  You will now add a pin.  This can be from a photo on your phone, a copied link, or a website.  I think it is best to use a photo from your phone.  You will see the photos from your phone.  Click on the brown photo you want to add.  (note:  my brown is not in this screenshot as there was a selfie of me beside it and I didn’t want it on here, but you get the idea.  LOL)Photos from Phone

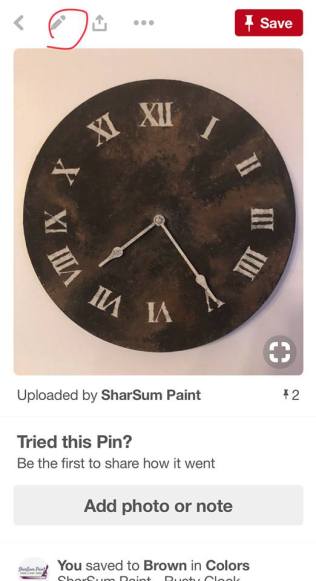
7.  Your brown photo will show up.  You will want to add a description of your photo at this point.  You will then Click on Choose Board.  You will Choose the Colors and then it will ask you to choose a Section.  You will choose Brown Board.  Then click Done.  Or you may be at the point where you have a photo pin to add that doesn’t have a color section.  At this point, you can choose that photo and choose Create a new Section and add your pin to it.  Bonus:  When you click on a Pin to view it, if you scroll to the bottom, Pinterest adds additional pins that relate to the pin you added.  Pretty cool!


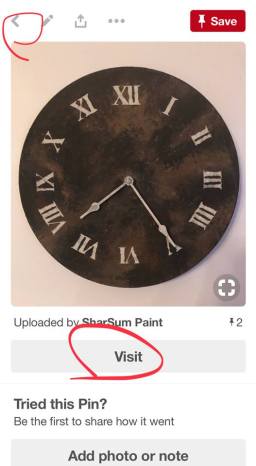
8.  You can add a link now.  But to do that you have to edit your pin.  The spot for a link doesn’t show up when you are creating the pin.  So click edit and add the link you’d like visitors to go to.  Be sure to click Save.

26856972_10210630977799655_97368452_n

I have found a very cool link that I use with Instagram and other places that only allows you one link.  It is called linktr.ee  It is free and you can sign up through Instagram.  I add all my business links to it.  I found you can even copy a link of the Colors Board in Pinterest, so I added that, too.  Kind of a one stop shop of all my business links and a way to contact me.  It is perfect for Instagram.  Here’s mine:  https://linktr.ee/sharsumpaint 

26793476_10210630978039661_710133468_n

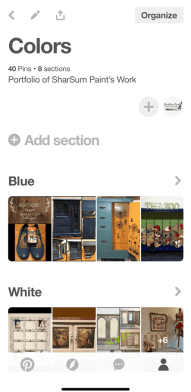
9.  You are now ready to add a new pin or see your color board.  Just go back to the main screen again and click on Colors to see all your Color Boards or click on the + sign to add a new pin.

26855450_10210631753899057_441388994_n

10.  Click on Colors and you will see all your Color Boards

ColorsBoard

That’s it!  I hope you enjoy creating a Color Portfolio in Pinterest to showcase your work as much as I did.  If you create one, please share below!  I love looking at other artists’ painted projects.


A Wax Resist Tutorial – Using Chalk-Based Paint and Furniture Wax

I have probably said it before, but I’m saying it again.  I LOVE playing with techniques and color on the 1970’s style plastic furniture.  I have been buying up wall vase sconces and wall candle holder sconces and trying out different techniques.  This is going to help me decide how to paint some solid wood furniture I have with the plastic fronts. These pieces are gorgeous when painted.

The technique I used on this set of wall sconces is a wax resist using the paint we sell, Missouri Limestone Paint Company’s chalk-based paint.  Any chalk-based paint should work just as well.  Any furniture wax should work fine also. I used Annie Sloan clear wax mixed with gray paint just because I had it on hand.  Otherwise, I would have used just clear.  You can wait until it is fully dry (about 24 hours) and give it a light coat of wax and polish.  Just don’t rub too hard.

The wax resist, on these sconces, produces an old world layered effect that is just beautiful.  I used 4 colors. over the original gold of the plastic piece, “January” (a pure white), “Sunday Silver” (a medium gray), “Arlington Blue” (a medium blue), and “English Bluebells” (a light blue).

View the Tutorial Here:  https://youtu.be/pcmhZ5Ydb64 

Photos from the tutorial: 


Chalk-based Paint Q and A – A Recorded Live Video

Last Friday evening, I sat down to do my first Live Video on Facebook.  After stressing pretty much all day about it and primping like I was getting ready for a first date, I was ready.  It seemed almost too easy to set up so I was a little worried.  I got in about 5 minutes early just to make sure I knew what I was doing and 30 seconds later, I got the message that I had a poor connection and the little hamster wheel just started spinning.  Great!  I’ve had enough experience with technology, though, I just canceled it and started over.  That time I connected and it was smooth sailing (kind of) the rest of the evening.

Another lesson I learned was that there is evidently a rule that says you can only do an hour. Oops…didn’t know that.  One hour in and people weren’t wanting to leave, so I did 45 more minutes.  I also learned you can stop after an hour.  Wait 5 minutes, then reconnect.  I’m glad I didn’t do that and I’m glad Facebook didn’t cut me off, recorded the whole thing, and didn’t put me in Facebook jail for not following rules.  Whew!  Live and learn.

The biggest thing I would do differently would be to actually use the laptop sitting in front of me.  I was so stressed about it failing the first time, that when I saw the comments start coming up on my phone, I was so relieved, I didn’t think to start it on my computer.  In fact, I remember wondering why I wasn’t seeing it on my computer.  So, I spent the whole time leaning forward peering into the phone to see that tiny little print.  LOL

But once into it, I really enjoyed it.  There were a lot of questions and I was able to share a lot (although it was hard to share when questions kept scrolling through).  I tried to go back to see them but there were some I missed.  I did go back after and answered them on the recorded video.  It was also a little bit fun to “have the floor” so to speak with no one interrupting and me not talking over anyone else.  LOL

It was a great experience, all in all, and I will do it again.  In fact, one viewer suggested doing a live video during a painting class we have coming up on September 30, so we will be working that into the class.  Stay tuned for an update on that.

It is also important that you create an Event for a live video, usually about a week ahead of time.  Then people can join it and will be reminded when it is time for the live video.  I did this quickly, so I only had the event for the day.  I had so many viewers and reached so many people by sharing it with the online course I’m taking and the instructor shared it with one of the other groups she admins.  That was extremely helpful.  I also shared it in the groups I’m in that allows that, on my personal page, and on Instagram.

So…..are you ready to view my very first Live Video.  It really was like having friends come over on a Friday evening.  Too bad I didn’t think to serve wine. LOL .  I do want to warn you that sometime after the first hour, someone asked me to show something I had painted, so I grabbed my phone and tripod and took them on a tour of my living room.  LOL.  I was afraid I might have made them seasick.

And remember.  Be kind.  I am a newbie at this.


Nightstands & Storage Bench

The problem (not really a problem) with selling chalk-based paint is that with everything you paint, you really want to keep it all. Take my bedroom….we bought nightstands about a year ago. We’d never had nightstands before much less matching ones and I was going to paint them. We bought themnightstands_somethingblue 
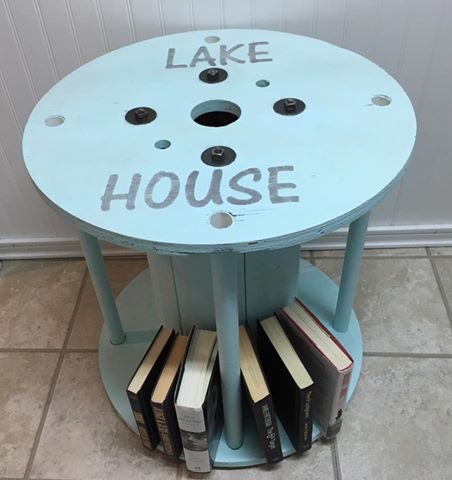
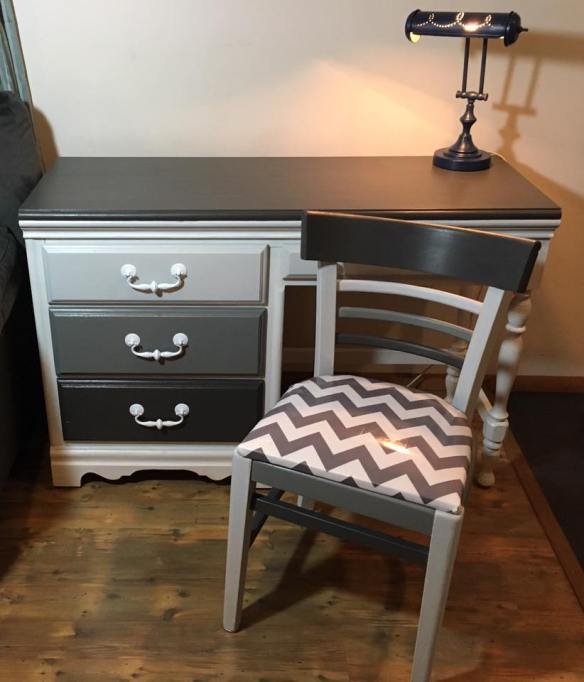
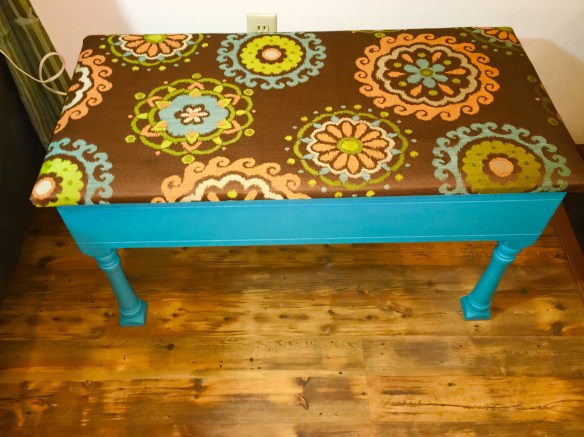
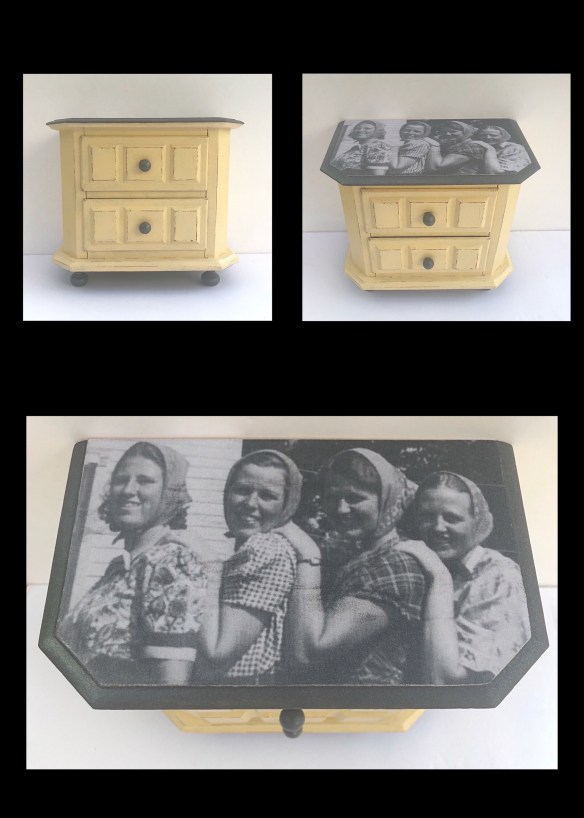
at Mary Ann’s Home Decor and Consignment in Rolla, Missouri, about a year ago and they were in such good shape I really didn’t want to paint them. So, I compromised and painted just the drawer fronts, then gave them a coat of wax. I’ve really enjoyed the size and the drawers and the drawer fronts I painted with Missouri Limestone Chalk-based paint in the color “Something Blue”, which is similar to a light teal color.

Then about a storagebench_pier1
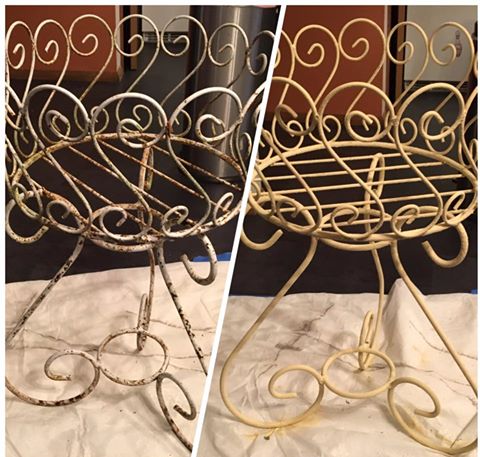
month ago, our son Trevor found at an estate sale in Cape Girardeau,  a really neat rattan storage bench for me to paint and sell. It was from Pier 1 Imports originally.

Hmmmm…that would look so nice painted with the same color as my drawer fronts and sitting at the foot of my bed storing clean sheet sets. I gave this a couple of coats  of polyurethane for protection.bedroom_somethingblue1


Sold! To me!  See, I told you it was a problem. I had to keep this one.

bedroom_somethingblue

TIP OF THE WEEK: November 3, 2016 – Steampunk Decor – Who Knew?

For previous TIP OF THE WEEK click here.

I have to admit, before I started painting furniture I had never heard of Steampunk or Steampunk Decor.

steam·punk
ˈstēmˌpəNGk/
noun
a genre of science fiction that typically features steam-powered machinery rather than advanced technology.

Steampunk incorporates technology and aesthetic designs inspired by 19th-century industrial steam-powered machinery. Steampunk decor will then have elements of machinery and the elegance of 19th century design.

I found this article does a great job of explaining Steampunk and Steampunk Decor.

http://www.impressiveinteriordesign.com/steampunk-interior-design-style-decorating-ideas/

Here’s what came up with a Google Search on Steampunk Decor.  Browse through some of these links to get an idea of the look.

https://www.google.com/webhp?sourceid=chrome-instant&ion=1&espv=2&ie=UTF-8#q=steampunk%20decor 

For previous TIP OF THE WEEK, click here.

Why am I so interested in learning more about this unusual interior design? I have a customer who really likes this and looks for pieces that will fit. So, I made it my business to find out…and you know what? It’s pretty fascinating stuff.

I’ve done a couple of pieces now for him. I call it a Steampunk type look. Not exactly the real deal, but reminiscent of true Steampunk.

The first piece was a marble top coffee table. The middle piece of marble was missing and had been replaced with glass. I painted the table black and bought a piece of fabric from Jo-Ann’s which featured some of the colors of Steampunk and included images of a map, post office stamps, etc. I covered a thin board and stapled it on the back. I put it under the glass (it fit fine as with the board and the glass, the width was just about the same as the original marble and ended up with a cool, Steampunk look coffee table.

steampunktablesteampunktable11

Then, this cool clock came to me through a friend and I thought it would really be a statement piece. I painted it black and an out of date nautical clock has now been elevated to a Steampunk look. My customer loved it and purchased it on the spot.
nautical-clock

I’m kind of liking this Steampunk Decor.

Restoration Hardware Look? Yes, Please! A Driftwood/Old Barn Wood Technique for Wood

My husband and I (SharSum Paint) are distributors of a brand of chalk-based paint out of Ozark, Missouri, called Missouri Limestone Paint Company.  Even better, we personally use the paint we sell and, through our business, teach classes to others on how to use it.  As a result, I’m always on the lookout for different techniques to try out and share with others.

Yesterday, I was on Pinterest, naturally.  I came across a tutorial on creating a driftwood/barn wood effect.  What was really interesting was how the author referenced the final result being reminiscent of “Restoration Hardware” furniture.  I had to learn more!

Old barn wood is all the rage right now. Here’s the excellent tutorial showing the method they used and was what gave me the inspiration to try my own version: http://cececaldwells.com/barnwood/

Of course, I took a little liberty with the tutorial and substituted our paint brand ( we all have our favorite brands, right?) and changed it from using a stain/sealer to using liming wax mainly because I wanted to try out liming wax. varathanewaterbasedstainsealer 
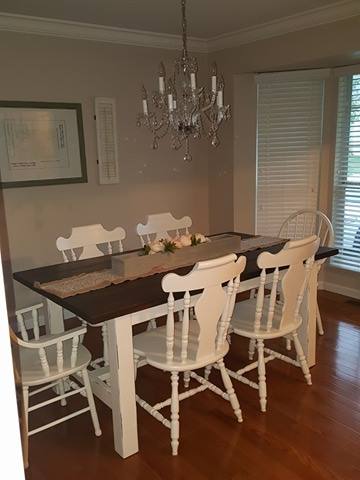
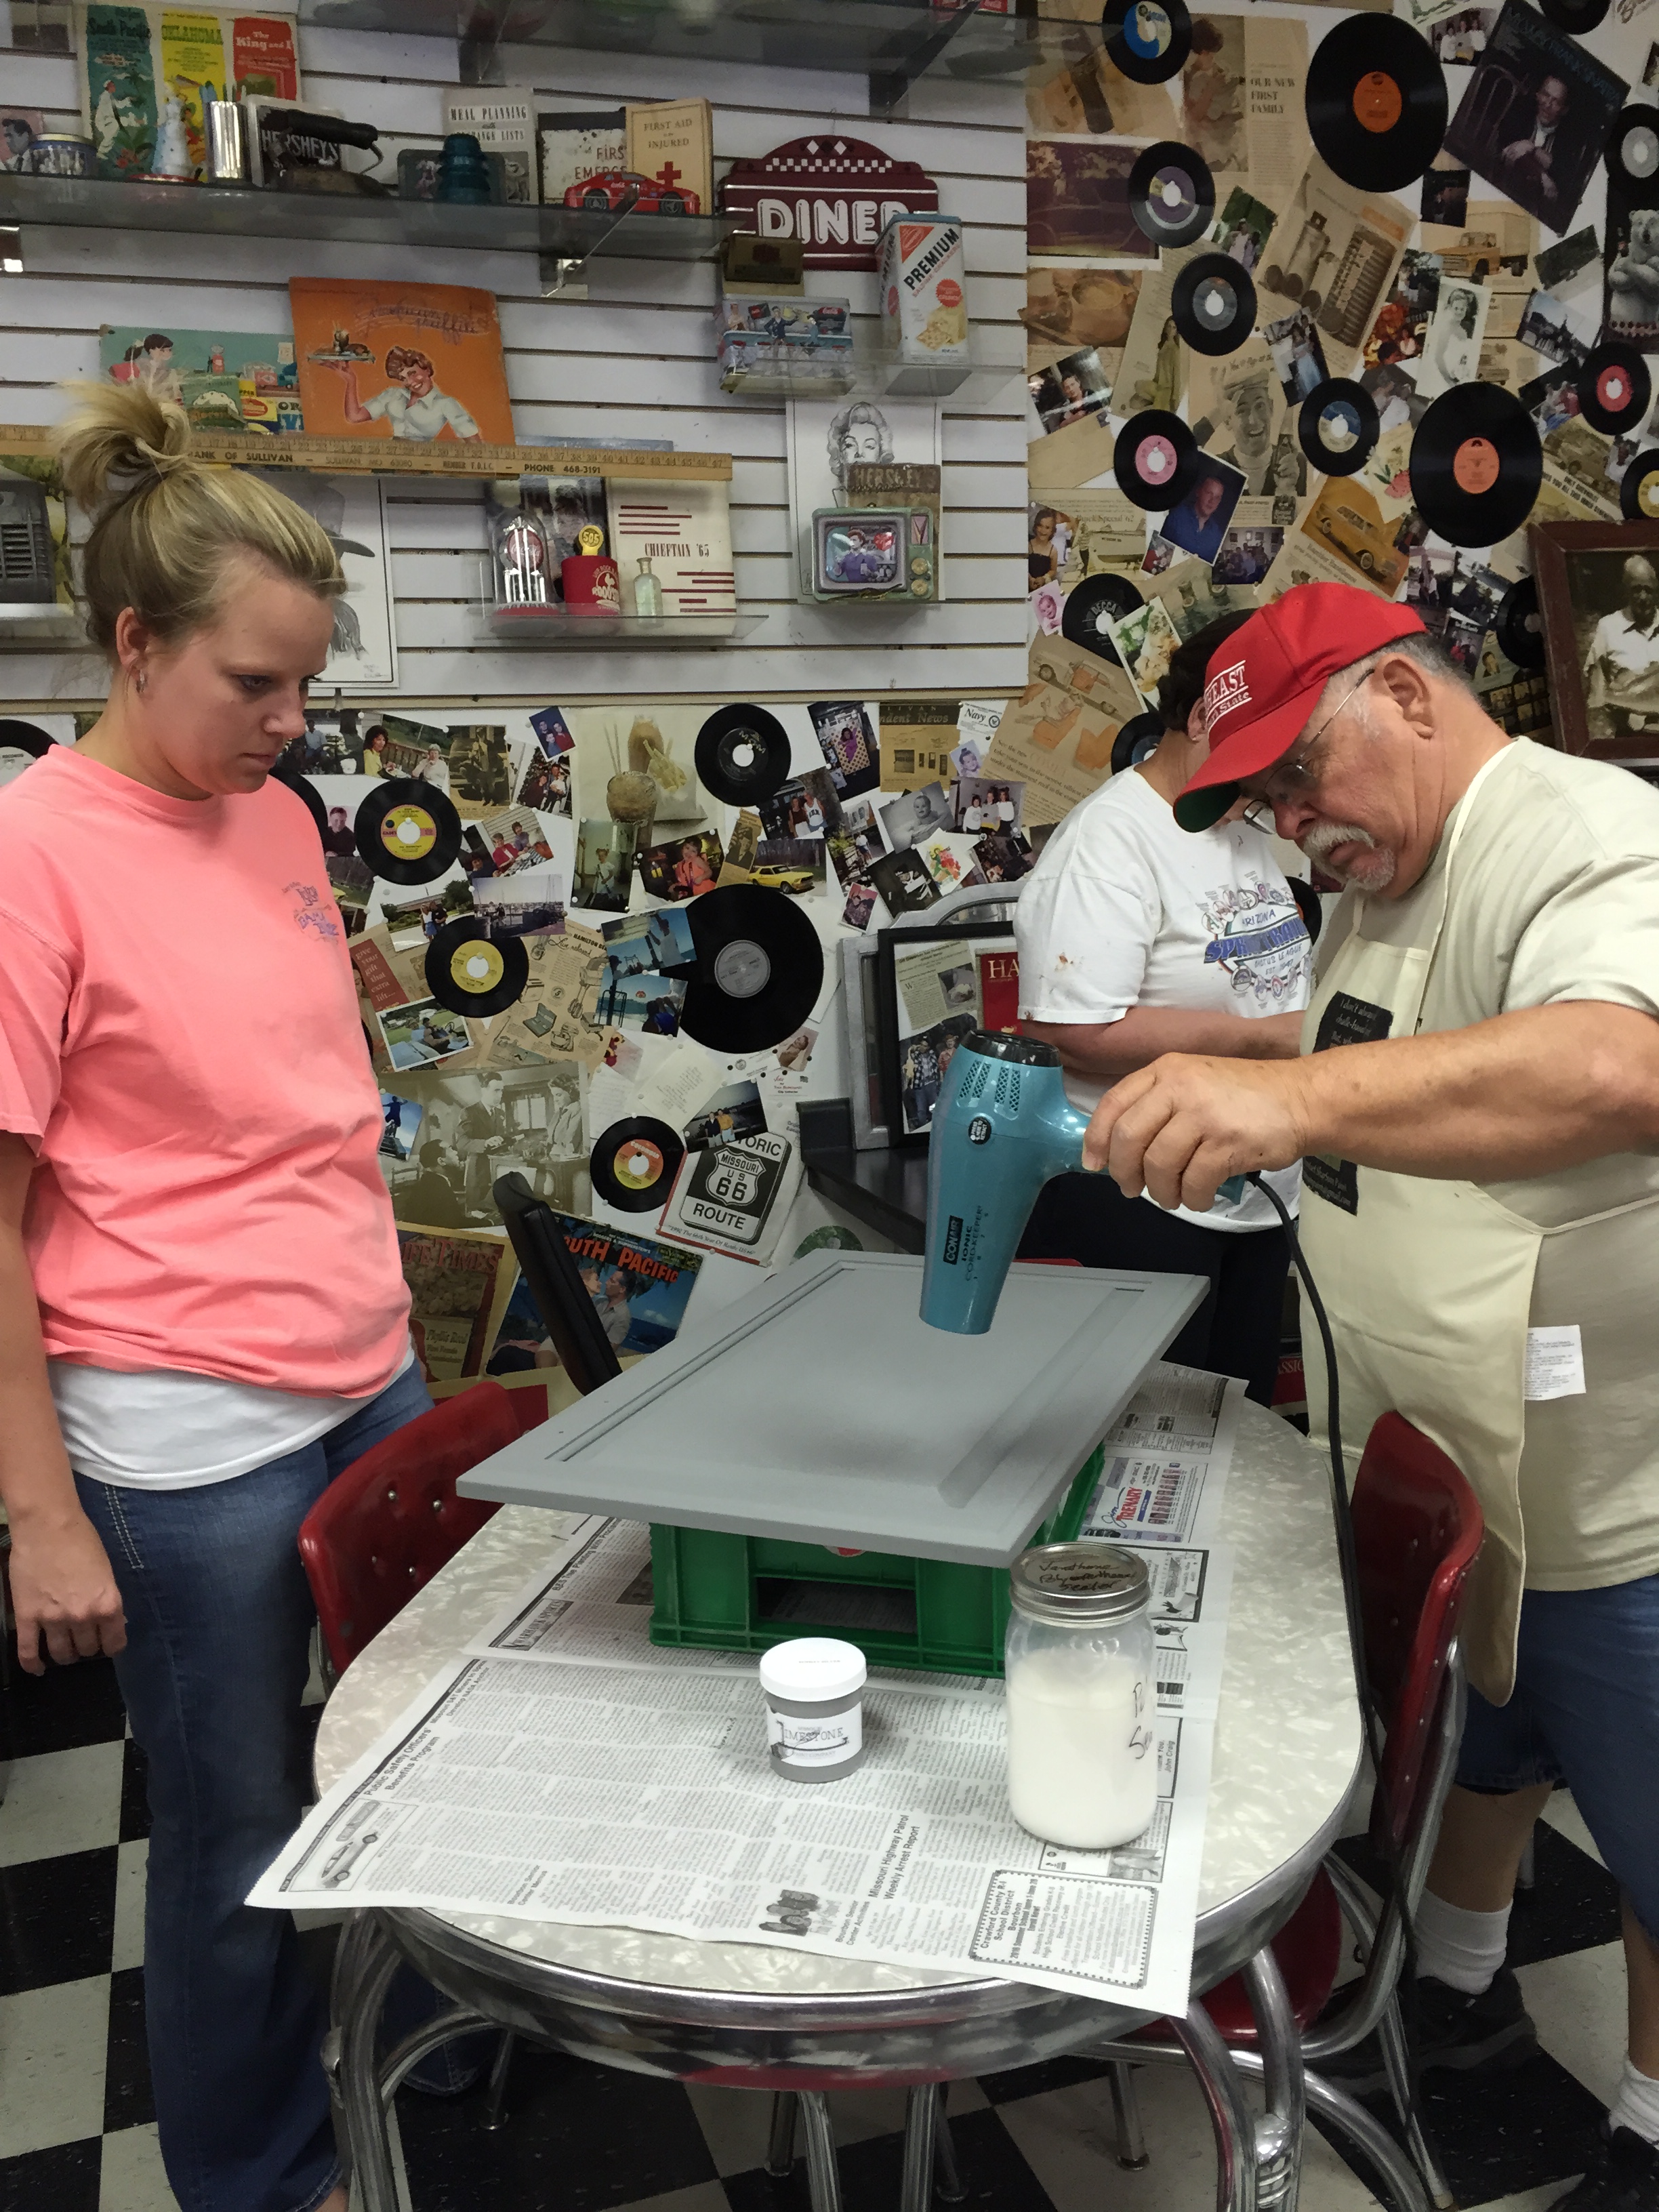
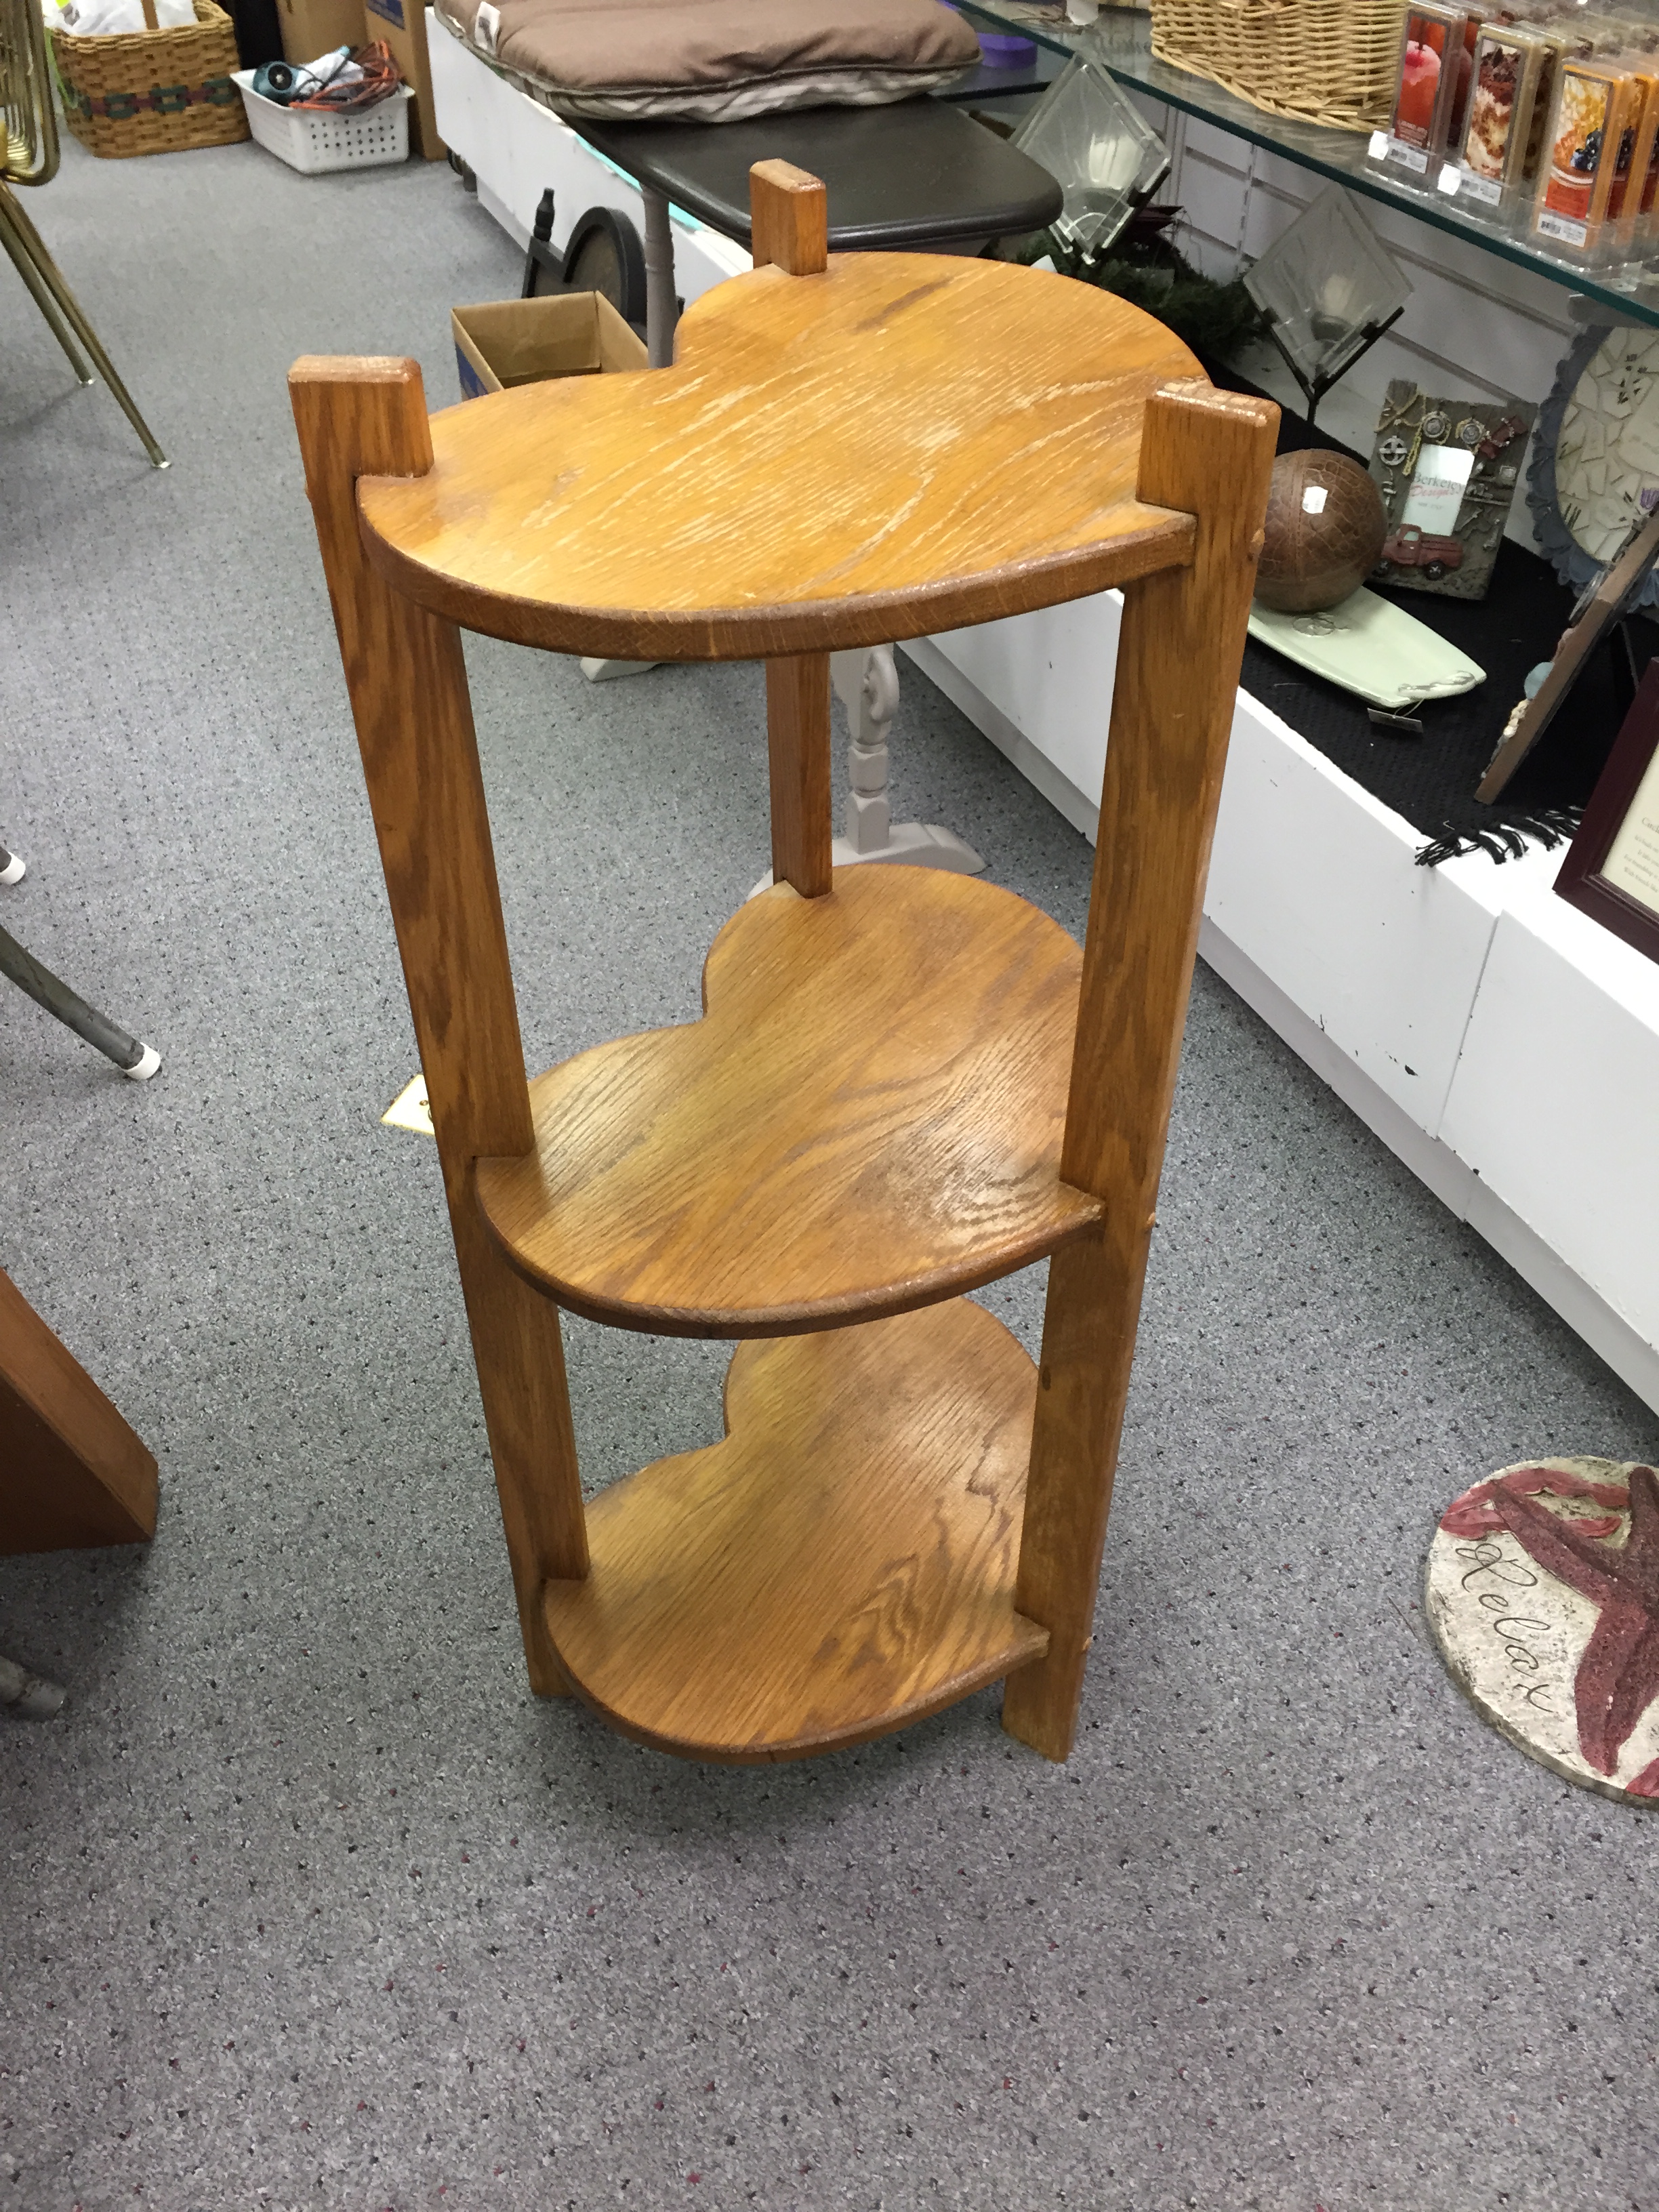
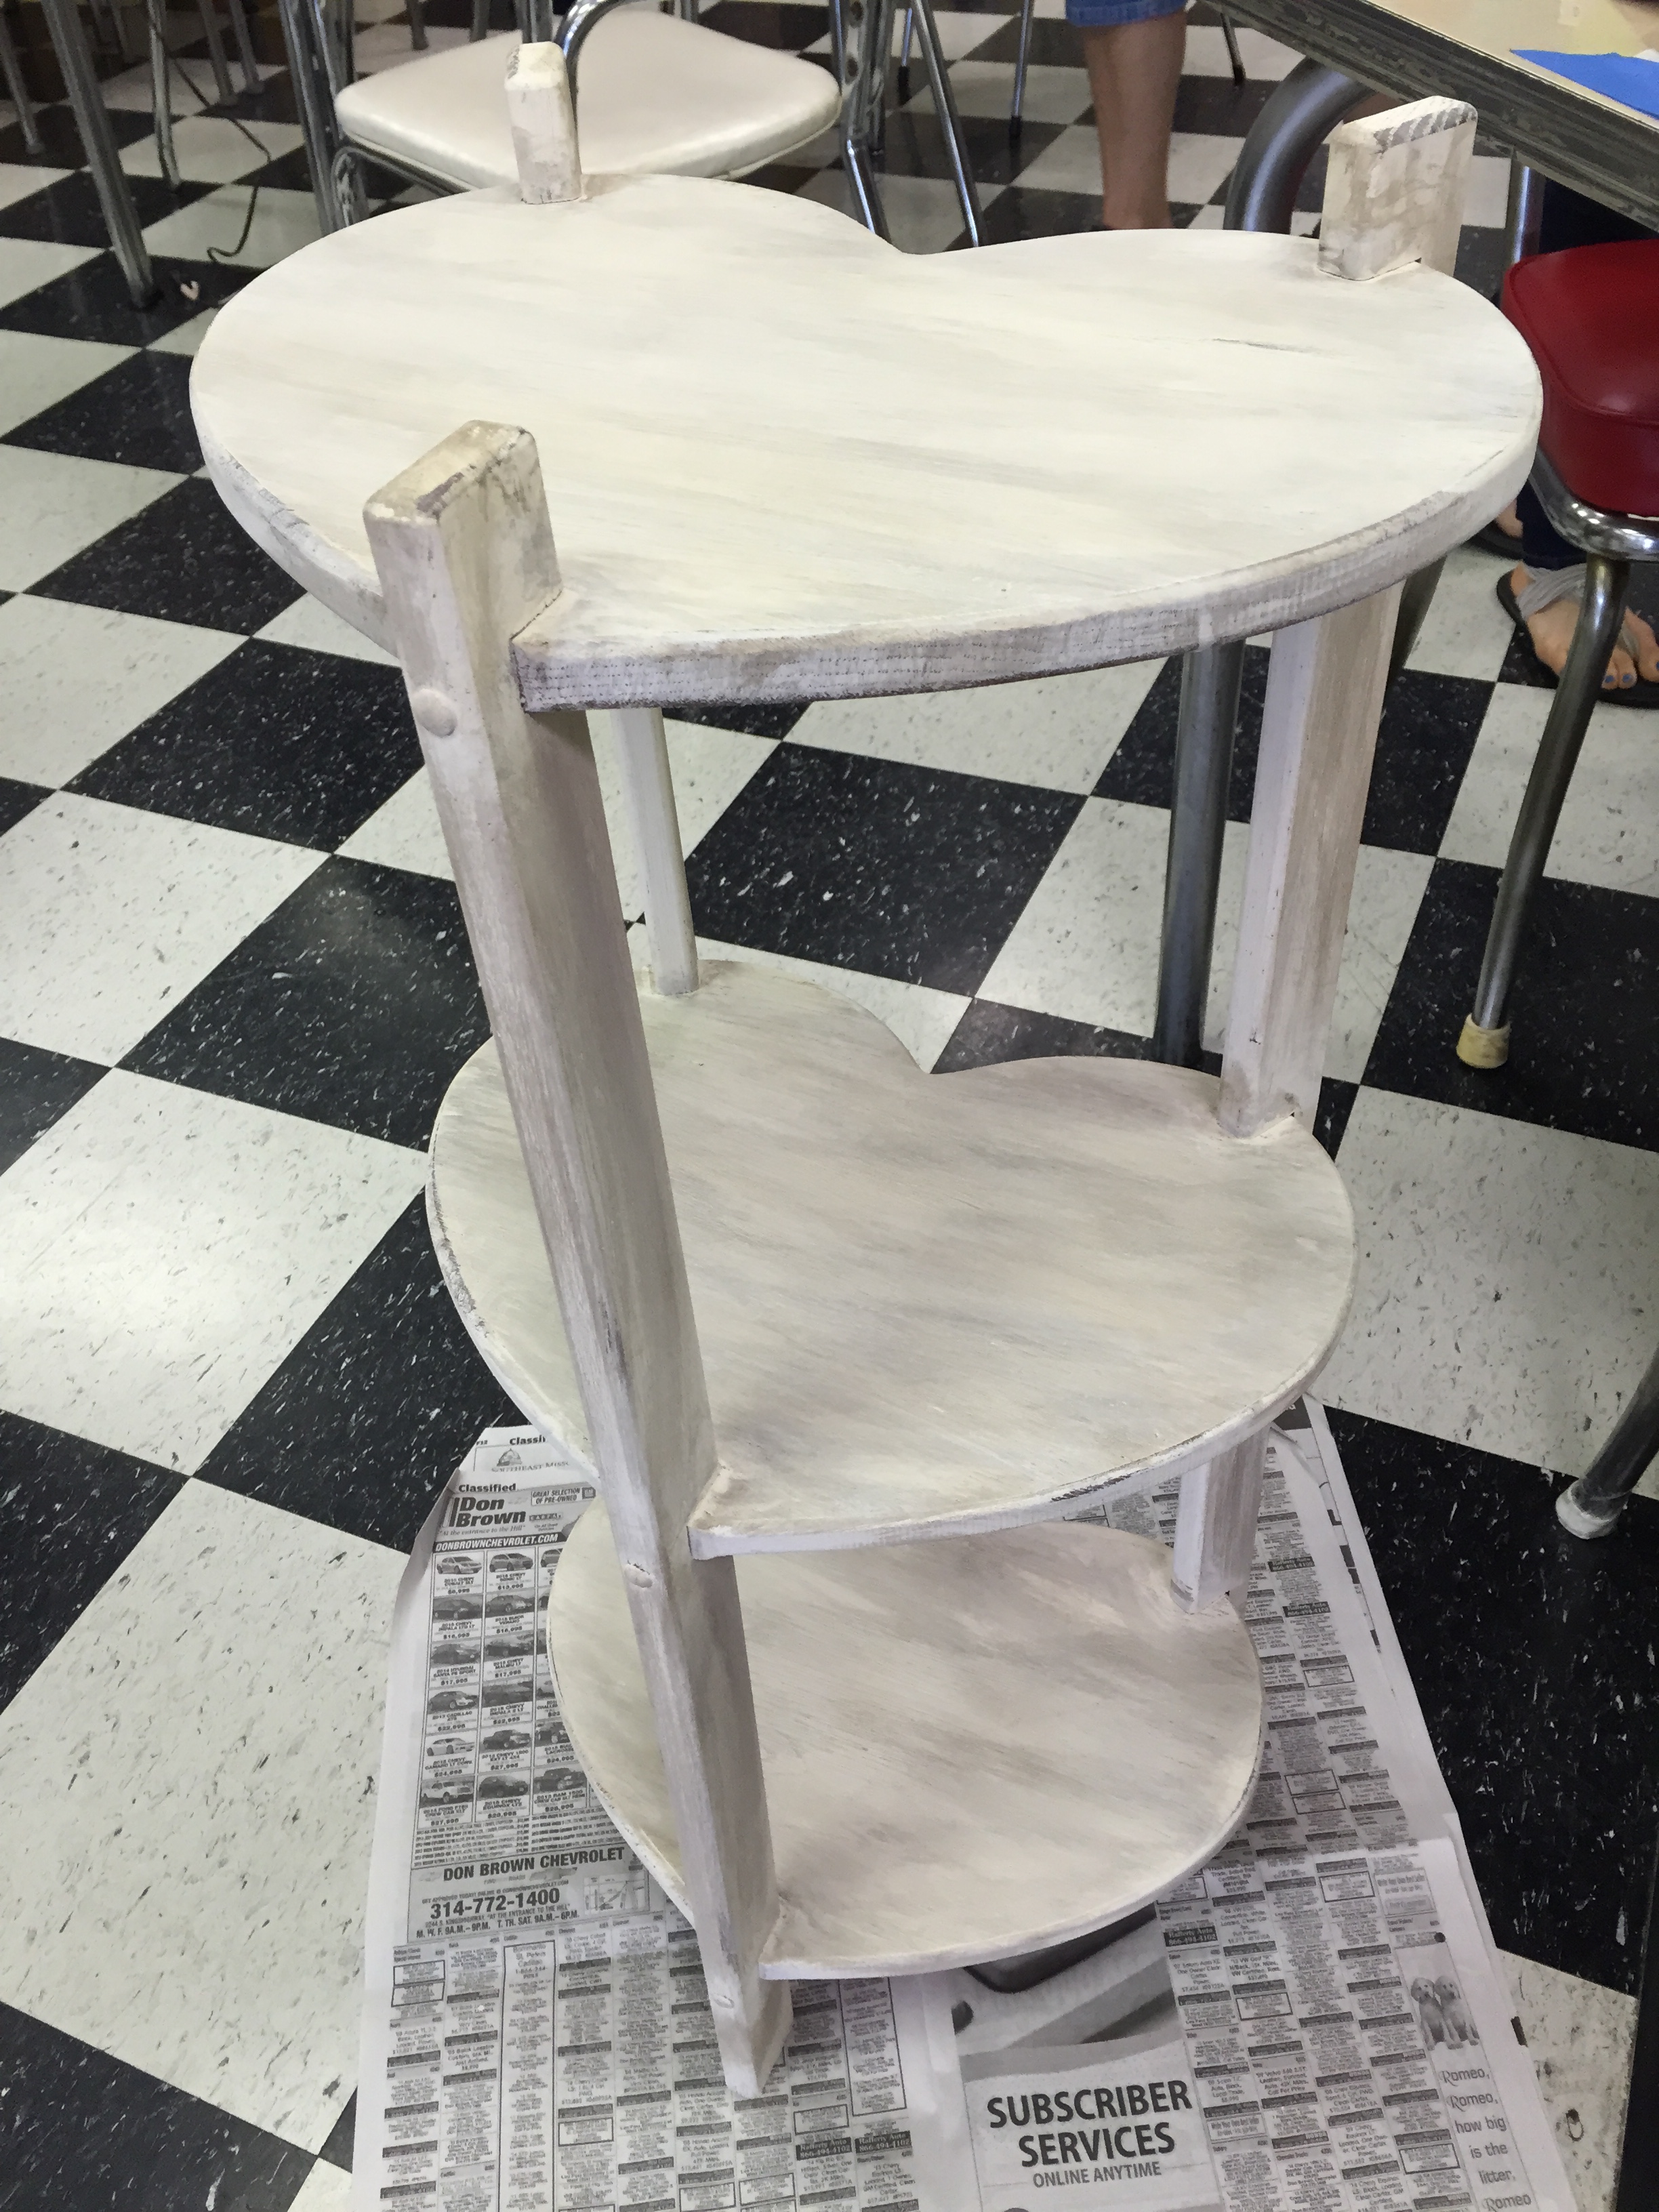
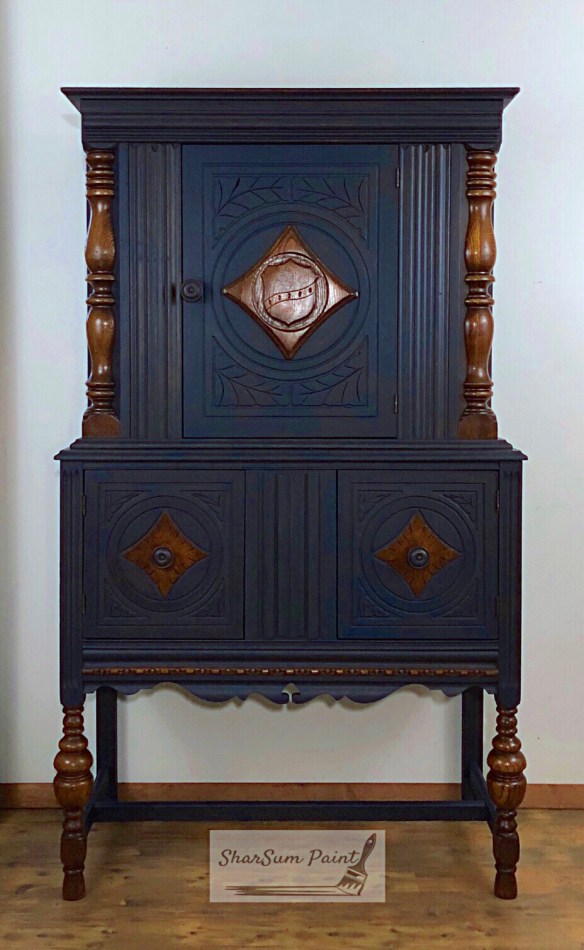
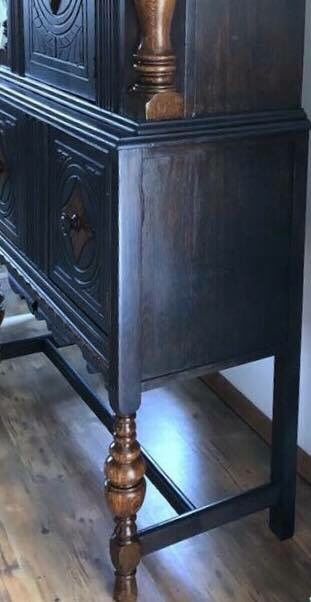
If I were going to do this on something like a kitchen table, I might use the method in the tutorial, or possible do the wash, then the drybrush, making sure to blend it in, then seal it with stain/sealer as the final step. I will try to get a sample using stain/sealer later.

I couldn’t wait to try this so this morning bright and early, I got started. Of course, I didn’t take a before pic of my piece of wood, but it was a new piece of pine, I believe….light in color. Anyway, it had some good grain in it. I also looked at the tutorial again and noticed there were quite a few steps listed to get the result of driftwood/barn wood…..the restoration hardware look. 1. gray paint wash 2. stain/sealer 3. dry brush white and 4. seal again. I decided I could create that look in 2 steps…(The older generation reading this might find this statement reminiscent of “I can name that tune in 2 notes”!)  : )

I remembered that liming wax will give the whitewash effect the dry brushing does. I also wanted to use wax rather than a sealer.  What is liming wax? It is basically a white wax – a clear wax with an added white pigment that gives a white grained finish, a white washed faded effect to your bare or stained wood or painted furniture. Liming works best on either open grained wood such as oak, pine or ash but is also beautiful on ornately carved furniture where the white wax will settle in the crevices and give a soft worn look (like antiquing with dark wax but cleaner and more gentle). Originally, lime was used for this technique, which is pretty caustic. Using a white wax will give you a similar look but it is safe to use  and at the same time will also protect your furniture and make it smooth to touch. What is even better is you don’t have to buy liming wax. You can make your own. I used the Briwax toulene-free clear wax we carry at a local store in Sullivan, Missouri as well as at our other locations in Bourbon, Cuba, and Rolla. I added a little Missouri Limestone Paint Company “January’, just eye-balling the amount…..I would say maybe 3 parts wax to 1 part January to start, and then stirred it up. It looked nice and white after stirring. Briwax is so easy to apply and buff. Not much elbow grease is needed at all. It does have a chemical smell, however, so I would make sure to work in a well ventilated area.

Here are the steps I used.  The finished result is below although the picture doesn’t show how truly beautiful the board is after this technique.

1. I poured a small amount of Missouri Limestone paint Company “Gray Goose”
into a small cup. I had another small cup of water. I dipped the brush into the Gray Goose paint, then dipped it in the water. I applied this thinned down paint to the whole board, adding more paint and dipped water as needed to cover. I let that sit for a few minutes, then wiped it off lightly with a wet cloth (I use baby wipes – they work great). I let that dry and then reapplied. The two coats is what darkened the wood more and then I didn’t need a stain.  I also didn’t need a poly sealer as I wanted to use wax to seal.

2. Then came the liming wax I made (see above). I did apply it with a round brush, really working it into the grain of the wood. I let it sit about 30 minutes or so and then buffed it out. I did two applications of this as well.

That’s it! Only two steps!   On a piece of furniture, I would go ahead and do one or two more coats of clear Briwax  for more durability.  Watch this site soon for a “Restoration Hardware” type piece of furniture I will be painting using this technique.

Here’s a photo of my finished board.  The photo, though, does reflect how truly beautiful this technique is.

driftwoodtechnique

Here are some picture frames.  They were raw oak.

But wait!  There’s more!  Here is my first finished piece – The Restoration Hardware Look – already sold!  I am 100% in love with this look.

Stay tuned for a post on my version of this technique using a stain/sealer.

Projects are Endless, Using Chalk-based Paint

My chalk-based paint of choice is Missouri Limestone Company because, as you know by now if you’ve been reading my blog, I love it so much I’m now selling it locally!  So, when I see an idea using chalk-based paint, I just substitute with my MLP!

As I’ve said before, the projects are endless when using chalk-based paint! I was just checking facebook before leaving to get my plant at Lowe’s for my newly painted plant stand and saw this idea. Well, yes! Missouri Limestone chalk-based paint would be perfect on concrete pavers.http://www.countryliving.com/…/g10…/decorative-paint-ideas/…

My project for last night was to paint my wrought iron plant stand. There was no rust flaking off, so I cleaned this old thing up then gave it one coat of Missouri Limestone Paint’s “Homemade Ice Cream”. It now matches my newly painted front door. I know exactly what plant I’m going to buy for it in the morning at Lowe’s. 😍 I have plans now for my wrought iron set.

Update:  Here’s a photo of my new look for the front of my house.  The wrought iron furniture is painted and the set turned out great!

doorandfurniture

For even more projects using chalk-based paint, be sure to follow my board Chalk Paint Projects for inspiration as I’m always adding new project ideas there. https://www.pinterest.com/sharsum/chalk-paint-project-ideas/

Projects Painted and Sold Using Missouri Limestone Chalk-based Paint

It’s been awhile since I added sold projects, so thought I’d update and add a few.

This has to be my favorite piece I’ve sold. It was shipped all the way to Virginia. This was a watercolor technique I came up with, staining the wood with a paint wash. Read all about the Rags to Riches story of Sir Albert on my blog!

The unassembled parts of a hutch we recently finished for a client. Too big to put back together in my house. Don’t you just love the decoupaged knobs and drawer sides?

This dining room set is one of my favorite ones we’ve painted and sold.

Another favorite set.

We even paint and sell jewelry boxes.

Yes, this pink one is really a jewelry box.

This one was actually a gift. It is a memory box I made for my sister with a vintage photo of my mom and her sisters decoupaged on the top. Have a photo of your own? We have more jewelry boxes. We can copy your photo and make one for you!

This client owned set was just what she was envisioning. We even painted books to go in the basket we painted for one of the nightstands.

We paint and sell smalls, too. Like these vintage sewing machine drawers.

We have turned several Queen Ann captain chairs into colorful, whimsical works of art. This one we donated to my grandson’s kindergarten classroom.

Love how this one turned out!

We had fun with this set. Client purchased it to donate to a heart charity auction.

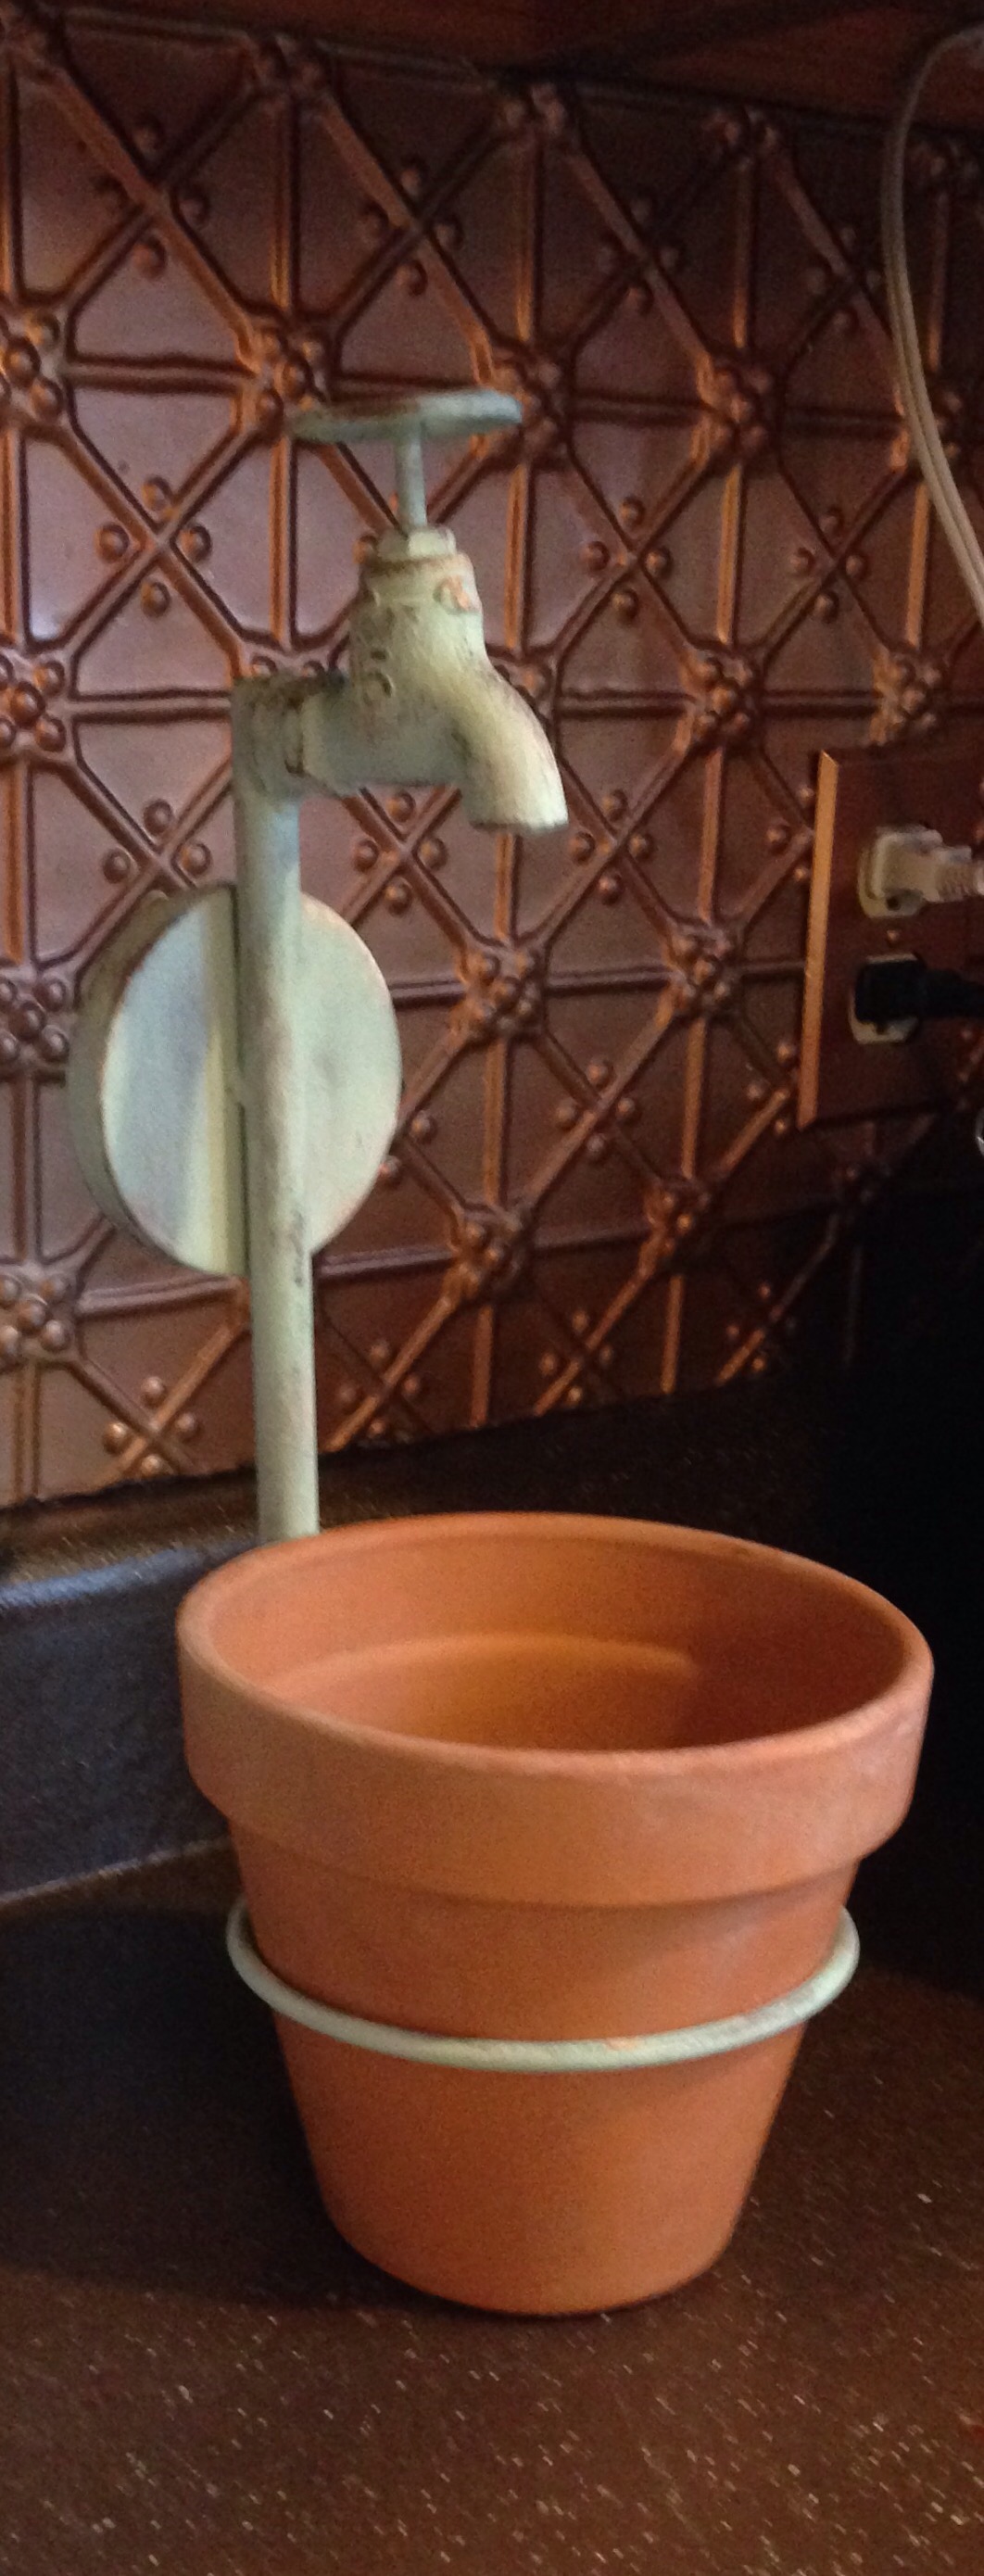
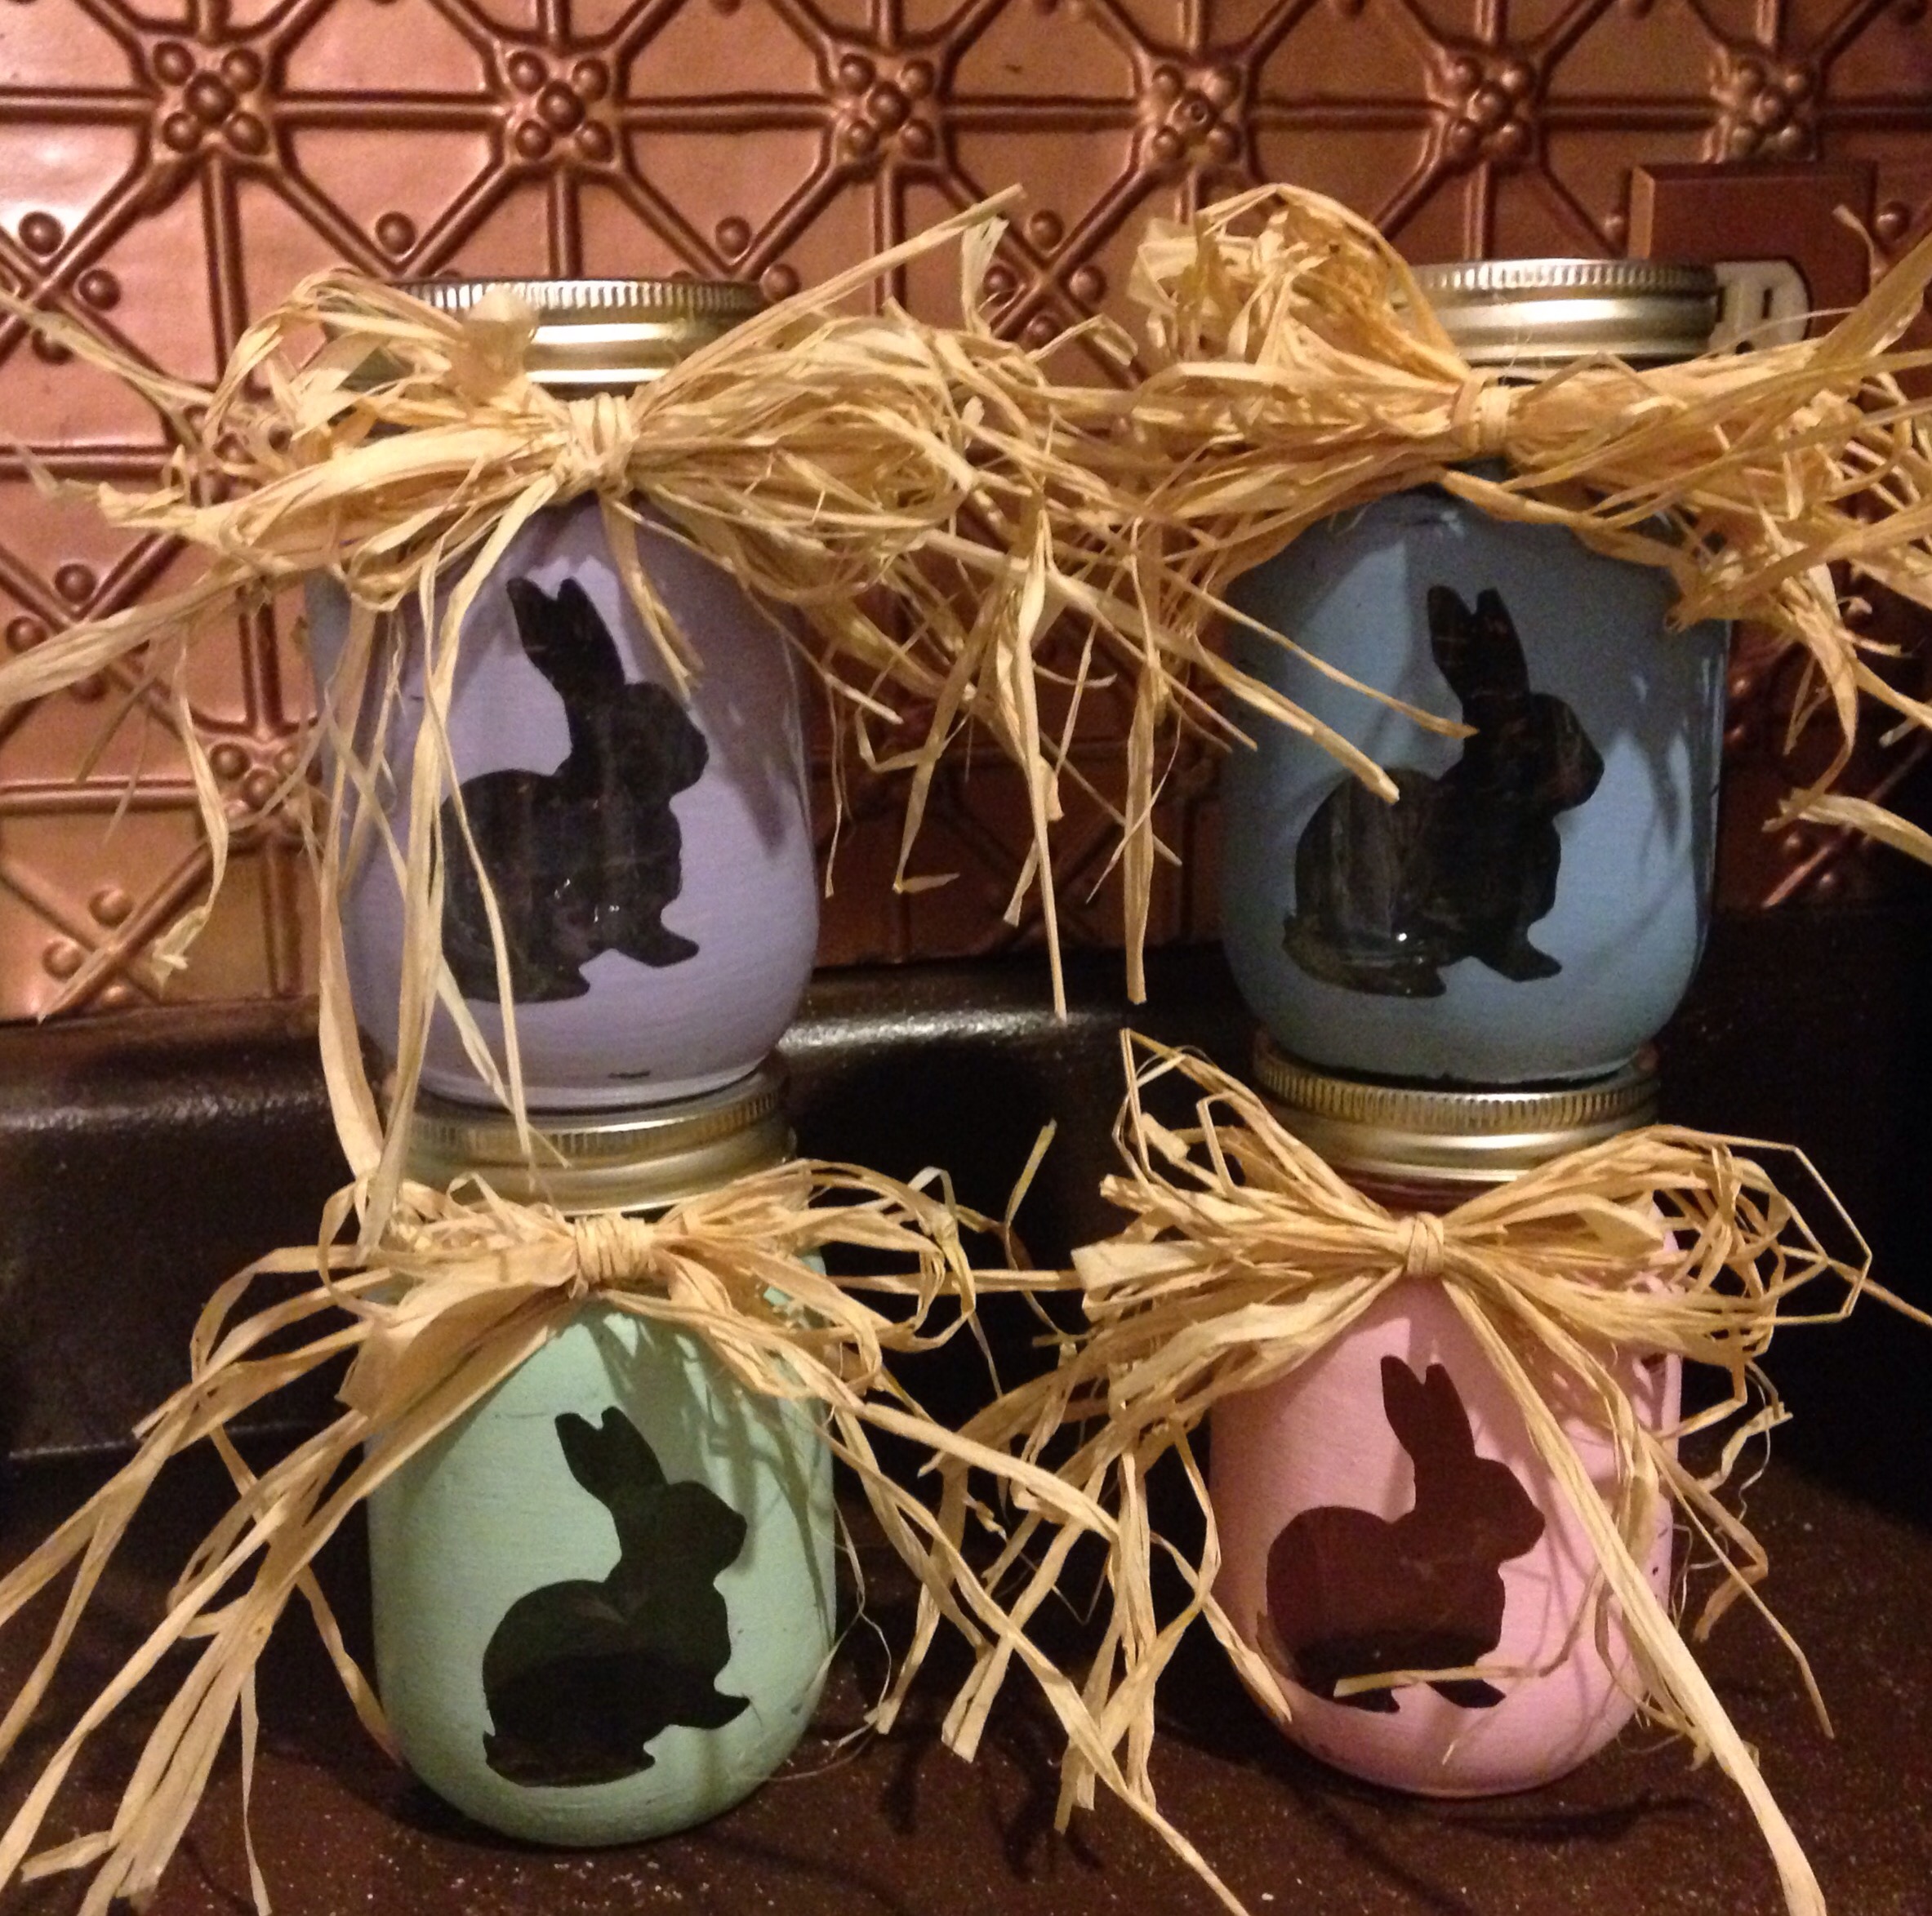
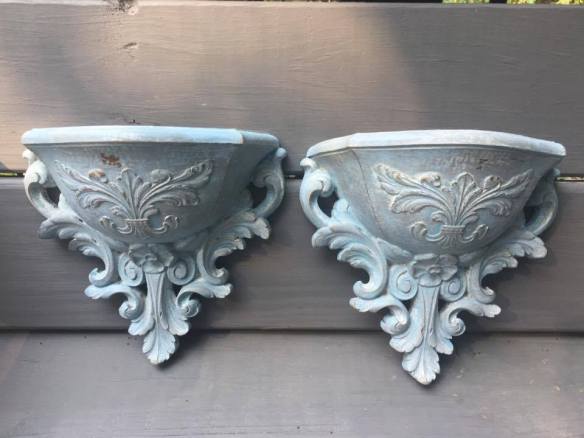
We painted a bunch of these cute little vases. Can paint these with your color choices. I love filling mine with fresh blooms from my yard.

This is a cute little cabinet we reinvented with a farmhouse look, custom painted with client color choice. We can do that. Just ask!!

This was a little bench I painted with Missouri Limestone Psint Company’s January and Crepe Myrtle. Stencils were cut using my Silhouette Portrait machine and contact paper.

This is another piece I really hated selling.  I was so wishing I had a 4 season room.  I would have kept this little table set in a heartbeat.

a4tablechairs

This 1880’s sofa table is very long.  It really needed a paint job so we gave it one.  I distressed this piece with vaseline.  : )

1880sofatable

The original use for this spool was for electrical wiring a Lowe’s.  We transformed this into a little table, just perfect for a beach house.  I called a friend who had just purchased a beach house as a second home.  She thought so, too.  It is now happily content in its new home.  : )

spooltable

I had this waterfall set and custom painted it for a customer.  She wanted the dresser to be gray with some of the wood still showing.  The wardrobe’s inspiration was from a piece she saw on Pinterest.  We even found the same exact vinyl design on Amazon.

dresserfinishedwardrobefinishedwardrobefinished1

Another Steam Punk look for a customer that loves the look.  The middle piece of marble was broken on this coffee table and had been replace by a piece of glass.  We covered a thin board with this map fabric from Jo-Ann’s and it fit perfectly under the glass.  Gave it a black paint job and sealed it with poly.

steampunktable

This was such a fun project!  This dated wooden nautical clock was blah, until I turned it into a Steam Punk look with a little black paint and wax.

nautical-clock

Love Pinterest.  That’s where we got the idea to take chairs and turn them into a bench.  The bench is 3 chairs put together.  We used the back legs of the 4th chair to create the sides.  This bench sold with a table and chair set my friend was selling. Love how it all turned out.

bench-12

bench-1

This is one of my first “restoration hardware” looks I did.  I really enjoy trying out different painting techniques.

restorationhardwaretablerestorationhardwaretable1

I loved painting the gray ombre desk so much, I painted the dresser that matched it the same way. The lady that bought the desk snatched up the dresser right away.ombredresser

I didn’t sell this one.  This is my front door, and my wrought iron furniture I have in my front yard.  The door is metal.  I did this about 3 months ago and still haven’t sealed it.  I’m not sure I will.  It is holding up well.

frontdoorplantstanddoorandfurniture

This hutch and desk was a drab, yellowish color and had seen better days.  Painting it with varying shades of pink made all the difference in the world.

pinkblushdeskhutch

This is one of my all time favorite pieces.  I would have kept this one if I had the room in my house.  finalpicfinalpicatnightdeskhutch3

We had another client who had 6 chairs that needed painting.  We took that project on and delivered them back home this past week.  They look gorgeous with the dining room table that was handcrafted by the husband.  A beautiful set at the fraction of what a new one would cost.

chairspaintedforclient

Painted chairs – Missouri Limestone Paint – January


This little vanity table was a family heirloom.  It had been “antiqued” by the client’s grandmother back in the 1960’s.  Read more about that here.  The client had admired the Ombre desk I had completed and so the vanity has the same type of look, with the addition of a stencil to give it a french-style look.


desk set

Ombre Desk Set – painted in varying shades of gray – Missouri Limestone’s Chalk-based Paint – Winter Gloves, Sunday Silver and Gray Goose. Lamp is painted with Indigo.

desklamp_indigo

Desk Lamp – Painted with Indigo


ombredesk_finalhome

Ombre Desk in it’s new home – 9 year old owner is said to be very excited. : )

bench

Piano/Storage Bench – painted with Trading Post

pet bed

Pet Bed – upcycled from a drawer – Painted with Coal Shovel

Lamp painted with Vintage Coral.

Lamp painted with Vintage Coral.

Spigot Planter

Spigot Planter – painted with “Clothesline”

Easter Candy Jars

Easter Candy Jars

fliptoptable

Small Tilt Table – Painted with Grannie’s Lace

cupboard green_memories

Memories Photo holder – painted with Coal Shovelv

sharsum_spigot1

Spigot towel rack painted with “Clothesline”

sharsum_smtable

Small Detailed Cabinet – painted with Dark Roast on top (with poly sealer)  and Zinc on bottom (with clear wax and dark wax in detail area)

smalltable_finalhome

The small table is sitting happily in its new home. Looks like the colors go perfectly with the decor in the home.

April 16, 2016 “Make & Take It Class

SharSum Paint’s April 16 class was so much fun!  It was held at Gift Emporium and Cafe‘ in Sullivan. The projects everyone brought in to paint were just perfect.  Participants were able to paint and wax/seal their projects in the 4 hour class.  In between drying times, they learned painting, distressing, waxing, and sealing tips, talked, ate, laughed, and enjoyed seeing each other’s projects and all the colors of paint being used.

Interested in learning more about chalk-based paint and tips on applying it and the best way to seal it?  These people and others who have taken the class will tell you it really isn’t hard to do and the transformation is amazing!  To learn more about our classes, which are usually kept to 6-8 participants, visit SharSum Paint’s Painting Class page.

Update:  Our May 16, 2016 class is now full.  See our Painting Class page link above for more details on our classes.

IMG_0228

Let the painting begin!

plant stand

Donna’s plant stand and…..hard to see…..but a concrete bird partially (hidden by the drink tumblers), painted in “Something Blue”.

bird

Here’s a better view of Donna’s concrete bird – he will get no wax or seal. Outside items do not need it. The sun and heat will cure the paint.

waxing

Christina brought in this beautiful claw foot bench. Painted, distressed just a bit, and waxed, she is thrilled with it and it is now going from basement storage to a prime spot in her entry way.

inspecting

Inspecting her wax application.

bench

This bench is just gorgeous!

lampshade

Megan is painting a fabric lampshade. Yep! Works great!

lamp

Paint a metal lamp to go with that shade? Why not? This color “Chicory” (first coat) is just beautiful. It was named for the little periwinkle color flower that grows along Missouri roads. You will see them usually sticking out of the asphalt. It looks like Danny is taking 5. : )

finished lamp

Beautiful final project – went from a yard sale reject to a prominent place in a little girl’s bedroom.

chair

Megan also painted this cute child chair “Something Blue”. Her kids use in their bathroom for reaching the sink. She used a poly seal on it for durability. Next up for her – painting kitchen and bathroom cabinets!

cabinet door

Danny is drying Mallory’s practice cabinet door so she can see how the Varathane polyurethane works and will look. She’s now going to paint her kitchen cabinets.

bathroom vanity door

Watching paint dry on Roxanne’s bathroom vanity door, which doesn’t take long at all. This picture shows it looking gray, but it is really a dark brown “French Roast”. With a light distressing showing the golden oak door underneath, this truly has that Pottery Barn look to it. She is now going to paint the rest of her vanity. Sure glad she liked the look or her vanity might have ended up with one dark brown door. : )

shelf

Wendy brought in this small shelf to transform.

Final look - After painting this shelf with "January, she did a light wash with "French Roast".  This gave it a little bit of a vintage look and broke up the pure white look of the shelf.

Final look – After painting this shelf with “January, she did a light wash with “French Roast”. This gave it a little bit of a vintage look and broke up the pure white look of the shelf.

A great time was had by everyone.  All the projects turned out great.  It was so much fun to see them coming to life.

Paint a Patio Chair Cushion with Chalk-type Paint? Yes, Please!

I was with a friend at dinner the other night and she was mentioning how faded and blah her patio chair cushions were.  She wondered if she could paint them with Missouri Limestone Chalk-type paint.  I said, “Sure you can!”  But then we both wondered if you would need to seal them and if so, what you should use.  I told her I’d check it all out and let her know.  I’m so glad I did, and you will be, too.

paintedcushion1

First, I did some research and here are my findings:

Painting Tips:

  1.  Give your cushions a good cleaning before you begin. My practice cushion, sad to say, had some of that green gunk on it.  I took a Mr. Clean sponge and wiped that stuff off and was good to go.
  2. The best tip I read when getting started: Before painting, take a spritzer bottle of water to dampen the cushion.  The paint goes on better and gets into the fabric better when the cushion is slightly damp.  I didn’t need to do that.  I just went outside and found an old cushion that had been left out and it had rained some earlier.  Perfect dampness!  Sometimes it pays to be lazy!
  3. Some people took their cushion covers off (if able to remove) and used cardboard between the covers so paint wouldn’t bleed through.  My thought on this:  If your cushions were so bad you were thinking of throwing them out before you decided to paint them, then just leave those covers on.  Who cares if the pillow underneath gets paint on it?  Save yourself some time and energy.
  4. I noticed when I painted my striped cushion, you were able to see the faint stripe underneath.  I also needed to spread it out a little while painting to get into the nooks and crannies. I also noticed my brush bristles went right up to the cording on the sides.  On this pillow, the cording seemed to be a plastic type material and looked ok, so I just left it like it was.  I painted a second coat in one area, but still saw the faint stripe.  So, my conclusion on that was:  That stripe was kind of cool.  It gave the pillow a look I liked.  Why waste paint and time and cover it all up.  Patterns are good under a coat of paint.  In fact, they are very, very good.
  5. I saw some people added stencil designs to their pillows and some used painters tape and painted their own stripes in coordinating colors.

Finishing Tips:

  1. You don’t want to wax….my friend’s cushions are on a screened-in porch, but it does get hot out there.  We wouldn’t want to sit on those cushions on a hot summer day and have wax come off on our clothes….so no waxing outside….on any project.  The sun and the heat will cure your chalk-type paint projects.
  2. Some suggested sealing with a poly of some kind, some did not.  I would guess it would all depend how much they are left out in the elements.
  3. My finishing tip?  Don’t bother.  I’ll explain why below.

What a difference a little chalk-type paint makes, right?  It literally took me just seconds to paint the area I painted as the paint covered so well.  But then came the question of sealing.

I let the cushion dry for several hours and then tried an experiment.  I put a poly sealer on half of the cushion and let the other half stay as it was. My thought was the poly would not only give it more protection, it would make the cushion easy to wipe off.

After the poly dried well, I took a wet cloth and scrubbed it really hard.  No paint came off on the rag, and it was easy to scrub, so I thought that was very nice.  Then, I took a wet rag and scrubbed the area that just had paint. I scrubbed and scrubbed.  Guess what?  No paint came off that area, either.  It was easy to scrub and actually, except for the slight sheen of the poly area, you really couldn’t tell any difference.

Bottom line…..don’t bother sealing.  Bring your cushions in to protect them like you did when they were new (as you can tell from the beginning of this post – I tend to leave mine out in the elements at times) and your newly painted cushions should last the summer, at least.  I personally believe the heat of the summer will make the paint cure even more and they will last a good long while.  If they don’t, just paint them again next year.

I’m so glad I did my research and experiments.  I, too, have a set of patio chair cushions that I’m going to paint……now my biggest problem is choosing a color!