This all started with a Chalk Couture transfers. I have fallen in love with these! To describe Chalk Couture it’s kind of like screen printing with a washable chalk paste or permanent ink. With proper care, you can use them over and over. And… I have!
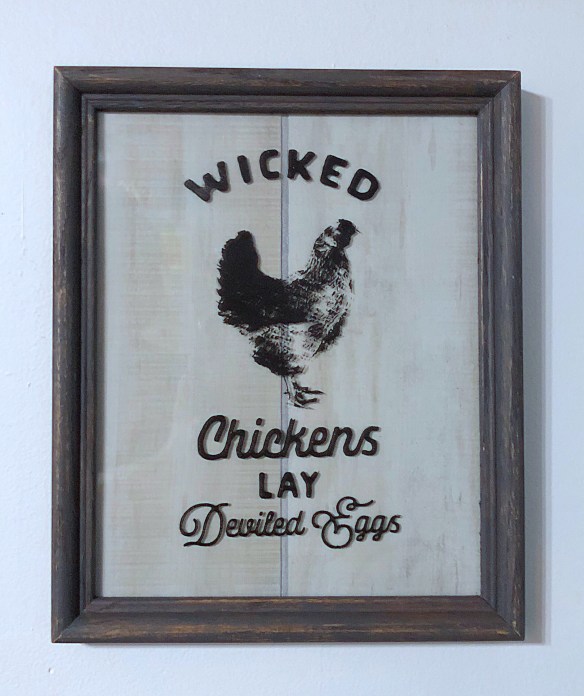
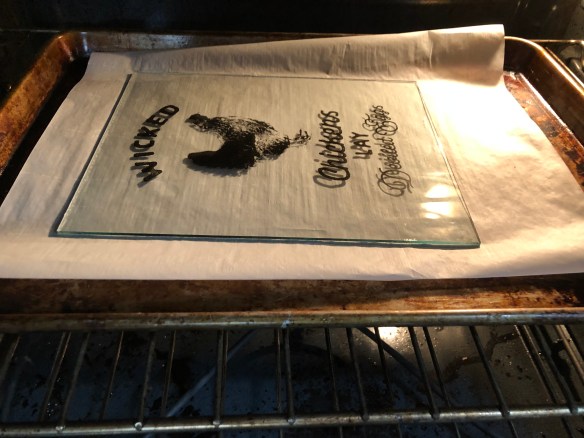
I have especially had fun with the “Wicked Chicken” transfer. I have used both the paste and ink.
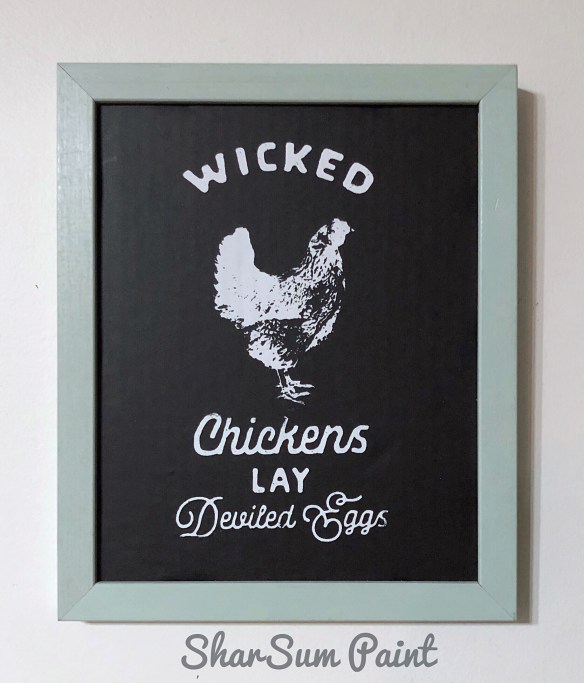
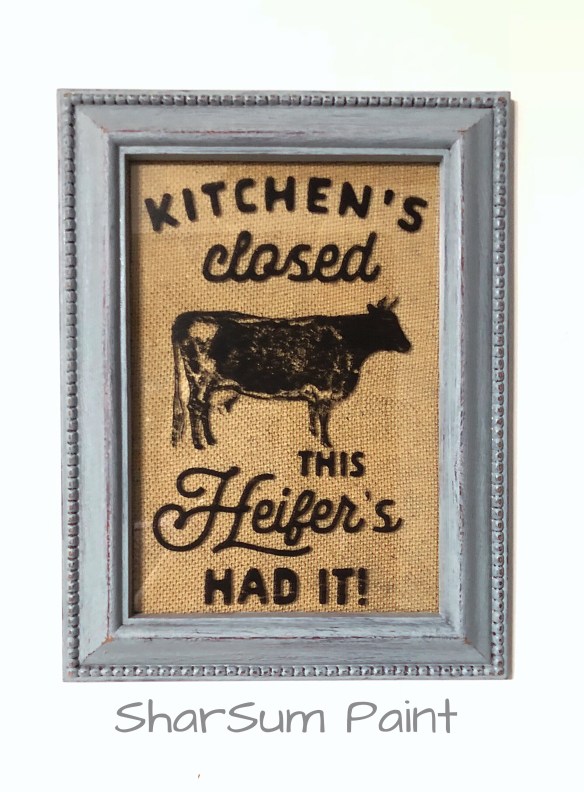
I used the chalk paste on this one

This one was ink on glass. See my post on baking picture frame glass. I put this glass in a cold oven set for 170 degrees. I timed it for 45 ovens once tempwas reached, then left in oven until completely cooled.

This was ink on painters canvas. I heat set this with parchment paper and ironed on medium heat for 3 minutes.
So then, I was ready to try coffee mugs. I tried just one first. After allowing it to air dry for 24 hours (an important step) I put it in a cold over and preheat to 275 degrees. I then timed it, baking for 45 min. I turned off the oven and left it in there until it cooled completely. The next day, I put it through the dishwasher. It came out perfect! Yay!
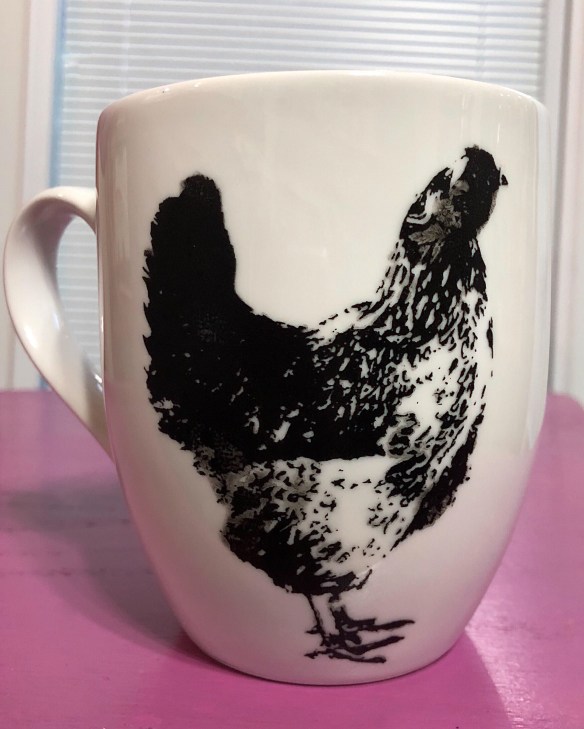
I used ink on this mug
I was now ready to make some mugs to sell in one of my booths. I purchased dishwasher and oven proof mugs and got to work. First, I thoroughly washed them with soap and water and then cleaned with alcohol. Note: if you mess up, you have time to wash it off and start over. 😉
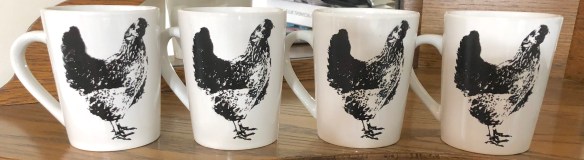
So cute!!!
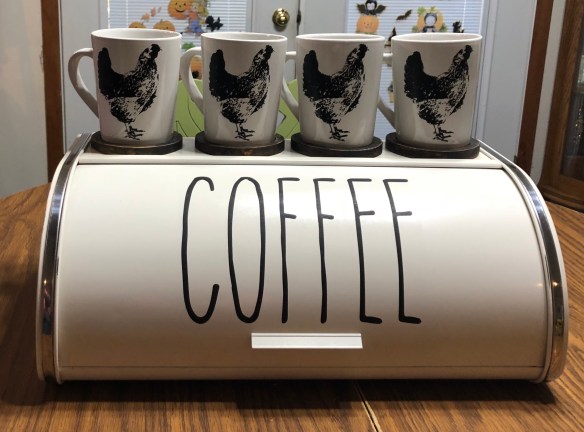
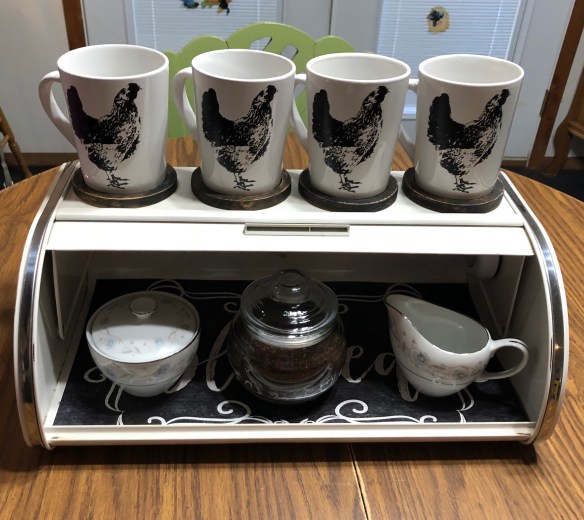
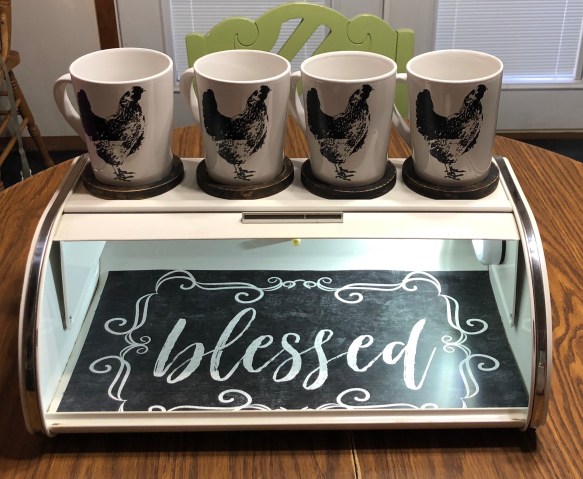
But, they seemed kind of lonely so I decided they needed a coffee bar to go with them, but not just any coffee bar. I decided they needed a portable coffee bar that could be used anywhere!
I love repurposing and I just happened to have purchased a vintage metal bread box some time ago. It was the perfect thing! All it needed was some cleaning up and it was ready to be transformed.
The top was the perfect size to hold the four mugs. I also just happened to have four round wooden coasters. I painted them (including the cork) with one coat of the chalk-style paint we sell. Missouri Limestone Paint Company I then distressed them with some sandpaper. I did not seal them. They ended up with a great farmhouse look. I forgot to take a picture, though. You can see them under the mugs in the photos.
I then decided the inside needed a liner. Dollar Tree to the rescue! I happened to see a very cool vinyl placemat that would be perfect! I cut it to size and voila!
But, what’s a coffee bar without the fixings? I included an apothecary jar of ground coffee and a 46 year old vintage sugar and creamer set. How do I know it is 46 years old, you ask? I know because it is what is left from my wedding china and today, October 28, is our 46th anniversary! I sold the rest several years ago. Some people register for their china. In my family, I shopped at Kroger for weeks for my mother so I could collect this china during one of their promotions. 🤷🏼♀️
Then, imagine waking up early in the morning, making coffee ☕️ at your new coffee bar and then waiting for that first cup in the early dawn light and looking over and seeing the inside your coffee bar glowing in light that you turned on when making coffee. Yep! I found a small round light at Dollar Tree. The kind with an adhesive back and you press the center to turn it on and off.
The final perfect touch was adding the word “coffee” to the roll top. The Rae Dunn look has become very popular in creating farmhouse decor so I found a font called The Skinny and typed “coffee” in landscape font using Microsoft Word. I enlarged it to fit most of the paper. I printed it with a laser printer on water slide decal paper and cut around the word as close as possible, but leave a small bit of margin. If you’ve never used this as a transfer medium you have to try it. Wow! The transfer comes out perfectly and adheres well. It is amazing! You can clean when needed by wiping with a damp cloth. Here’s a YouTube video I watched when trying this for the first time.
Here is my finished vintage portable coffee bar! It is available for purchase at: Midwest Trading Post in Hermann, Missouri.
 They are dishwasher safe as I was able to bake them to make the ink permanent. I know this for a fact as I made one for myself first and put it through the dishwasher. Came out perfect!