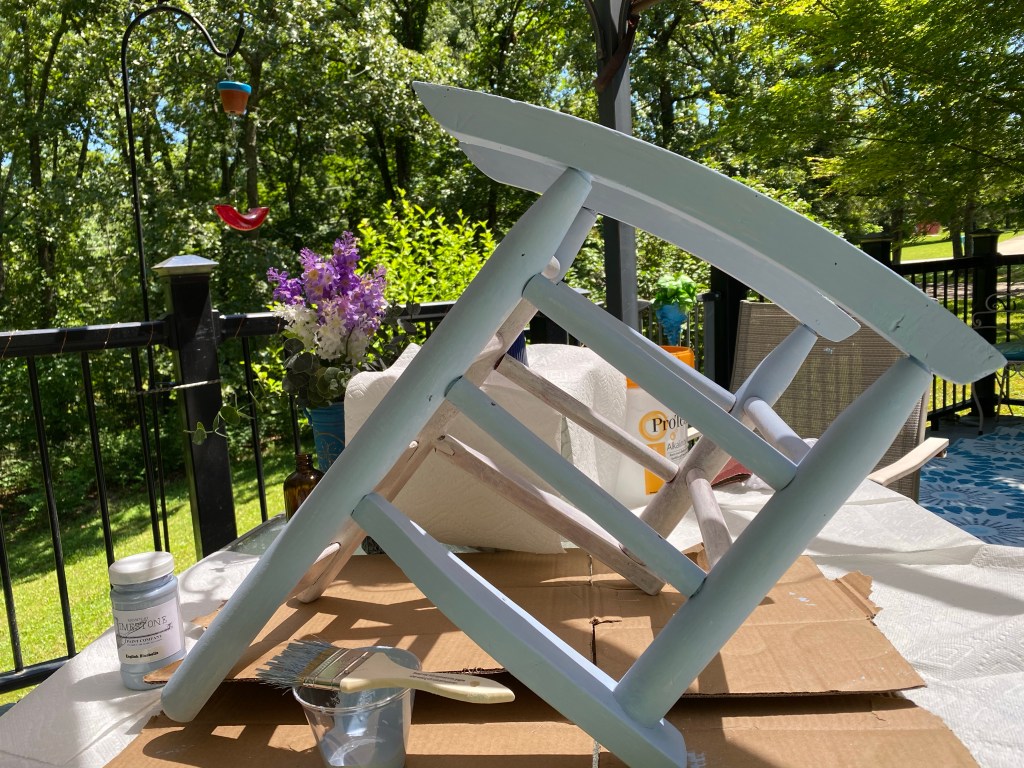
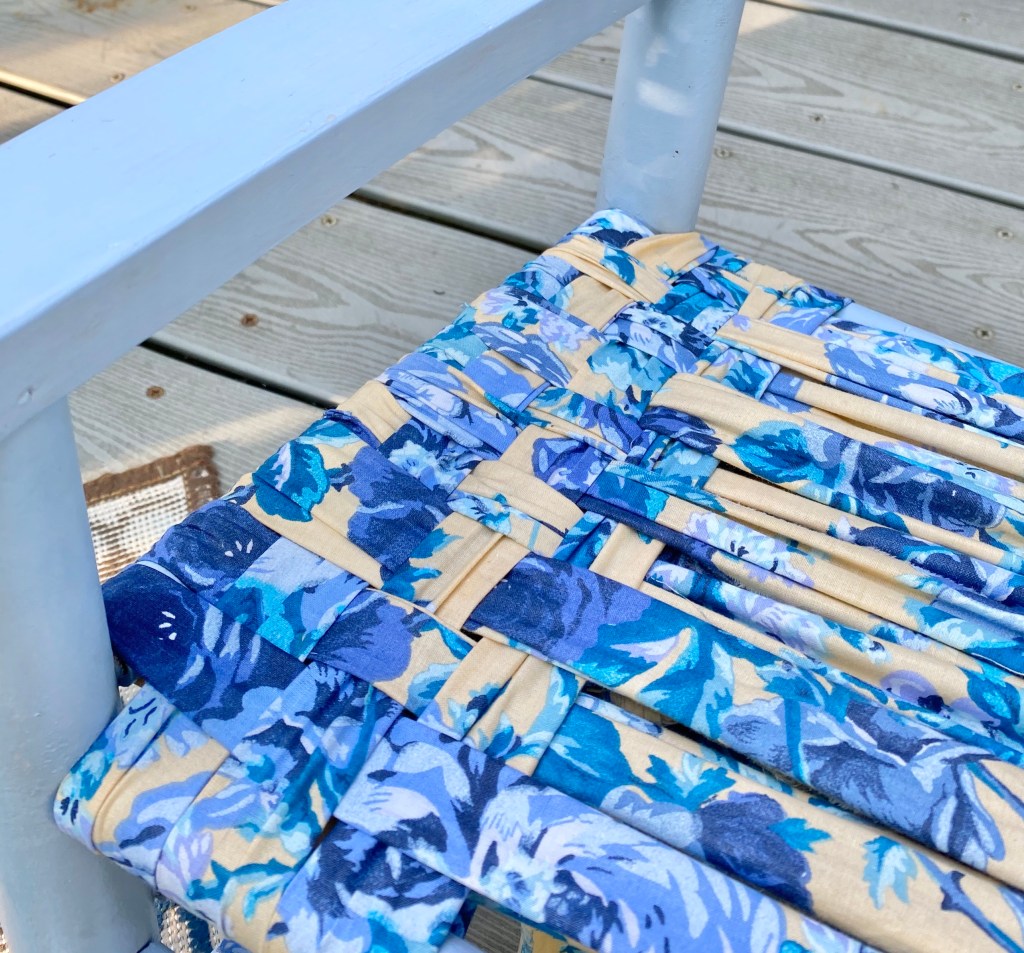
A friend had this family heirloom and asked me to update it for a gift for her great niece. The seat was no longer there. At one point this temporary red seat was added. The rocker was also a little wobbly and in need of some TLC.
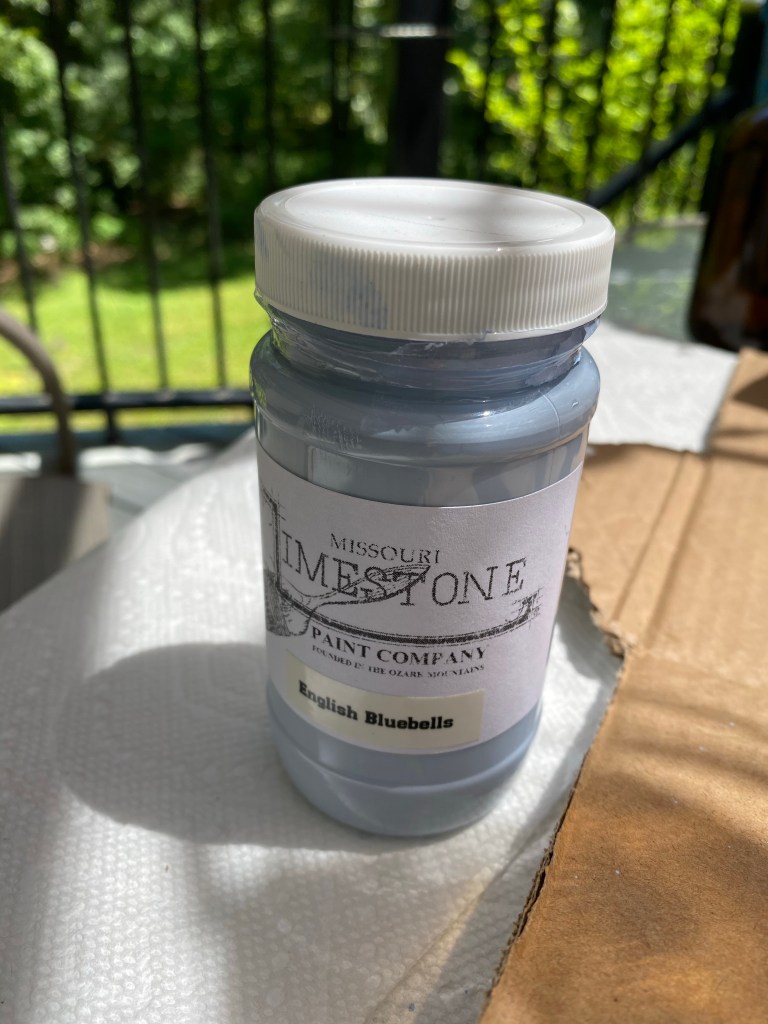
I told her we could make it sturdy again, apply primer to block the red paint and keep it from bleeding through, paint it with the Missouri Limestone Paint Company chalk-style paint “English Bluebells” (color she picked out), and would weave a new seat using strips of fabric that would coordinate with the paint color. She was ready for the transformation and left it for us to give it a new life.
With repairs made, we cleaned, sanded, and cleaned again, then applied two coats of primer. It was then time to chalk paint. Since we primed, we only needed two coats of the chalk-style paint.
It was a beautiful summer day yesterday, so I painted outside. Chalk-style paint sure dries fast on a nice summer day.
Once paint has dried, I sealed it with Varathane water-based Crystal clear polyurethane in satin finish. I applied 3 thin coats.
It was now time to start weaving. I have woven chair seats before with fabric, This is my go to tutorial I follow each time. I hide the knots on the underneath side and at the end I apply hot glue to help the knots stay secure. I also like to spray the fabric with Scotchguard. http://firstadream.blogspot.com/2011/03/chair-weaving-tutorial.html?m=1
I chose a printed fabric that once scrunched together would all blend together for a pretty pattern.
Final reveal: I think there is going to be one happy little girl in my friend’s family as soon as she is old enough to start using her family chair.
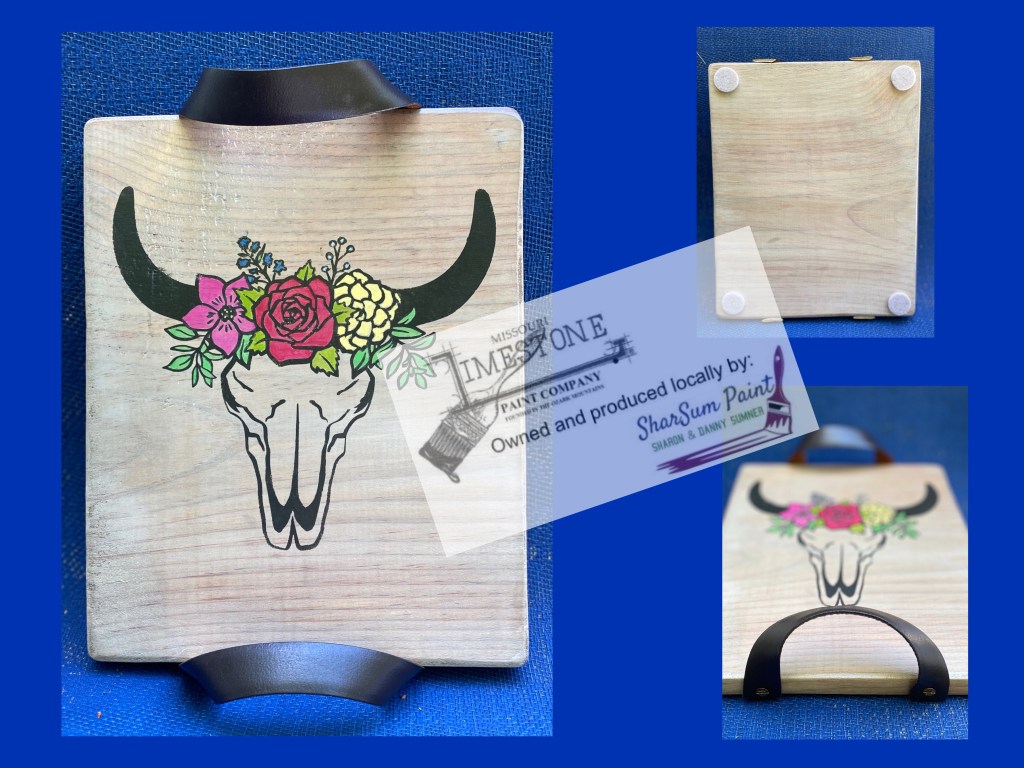
I’ve been on a kick creating stencils lately of farm animals on my Silhouette machine. My latest project has become my favorite! 🙂 I also tried a new staining technique on this one. I will definitely be using this technique again.
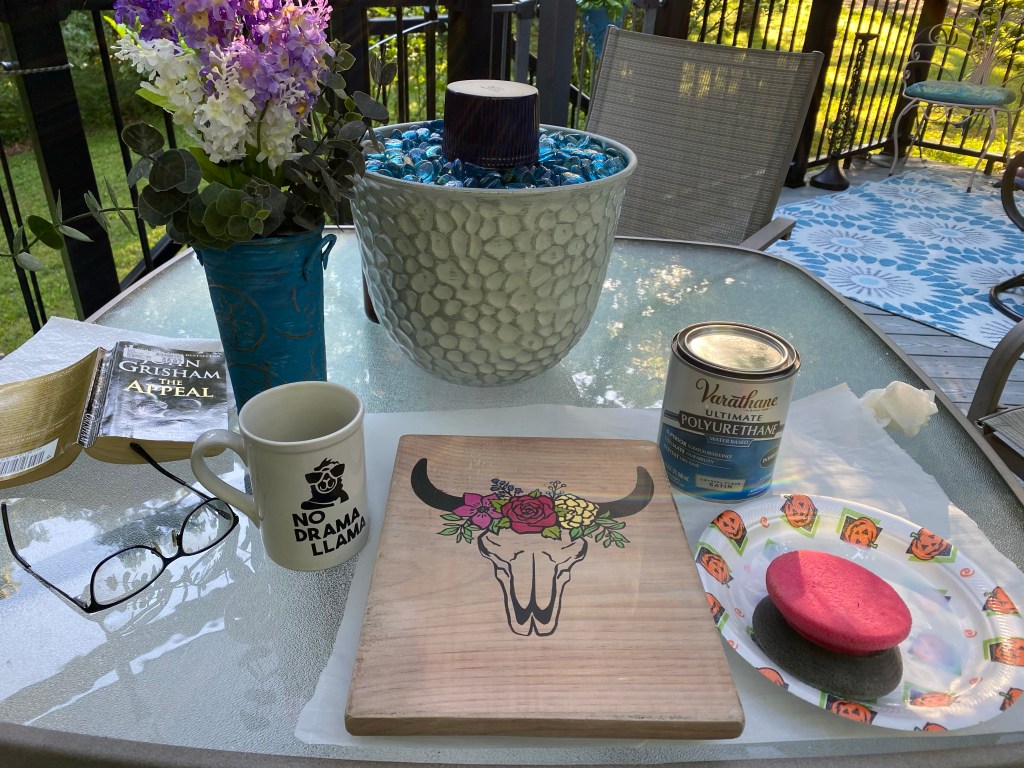
I started with a plain new pine board. Danny, my husband and partner in our world of painting and creating, had previously cut a long pine board into 9 x 11 1/2” boards, sanding and rounding the edges. Some we will make into cutting boards, but this one I wanted to make a tray that could also hang up and be used as a wall decoration.
This worked well to darken the wood and bring out the grain. I would have liked for the wood to have been a little darker. When this dried, and after 3 coats, I still thought it would be a little darker but it was fine. I let the solution sit for 24 hours after I mixed it. The next time, I think I would let it sit several days.
After drying, the board was ready for the white wash, I mixed our brand of chalk-style paint Missouri Limestone Paint Company (MLPC) “January” with a little water, painted it on, then used a damp rag to rub it in and wipe it off. I let that dry well and it was ready to stencil.
I really liked the look of the end result – I will be using this technique on a small table top next.
I uploaded the SVG file to my Silhouette machine, traced it and cut it out, using Contact paper. I find this is a cheap and easy way to cut stencils. The Contact paper adheres nicely and is easy to remove. I also use clear Contact paper to transfer the stencil to my project. Press n Seal will also work as a transfer.
Then I did all the “weeding” (picking out the areas of vinyl) for the dark area of the skull. I stenciled those areas with MLPC “French Roast”, a dark brown.
For the flower area, I decided the best way to finish that would be to hand paint it, so that’s what I did. I am no artist, but I did learn to pretty much stay in the lines when coloring in elementary school. ☺️
The MLPC colors used: Crepe Myrtle, Farmhouse Green, Cornflower, Radio Flyer, Sour Green Apples, English Bluebells, and MO Buttercup.
Once all the flower area was dry I sealed front, back, and sides with Varathane water-based Crystal Clear Polyurethane in Satin Finish. I used 5 thin coats for durability. This piece may be used as a tray so I wanted it to stand up to hard use. (It was so pretty out I did the sealing on my deck. I had my book and coffee handy and read while my sealer dries. It only took about 10 minutes for each on this day.)
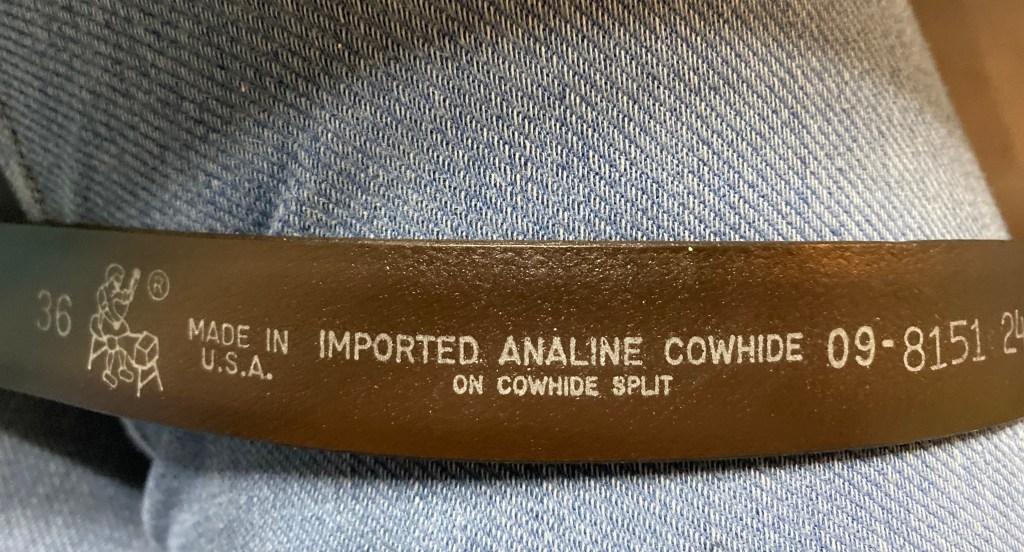
Now it was time for the handles. I remembered seeing a DIY on Pinterest for creating handles out of strips of leather. I happened to have the perfect belt made of genuine cowhide that I thought would be perfect! I had purchased it at Goodwill some time ago to create handles for a suitcase dresser, so used it for this project instead. I cut two strip of 8” each and we attached them to the edges of the top and bottom of the board using vintage wood screws.
This beautiful, floral cow skull tray/ wall hanging decoration is now complete! I absolutely love how it turned out!
Here are the other projects I have recently completed.
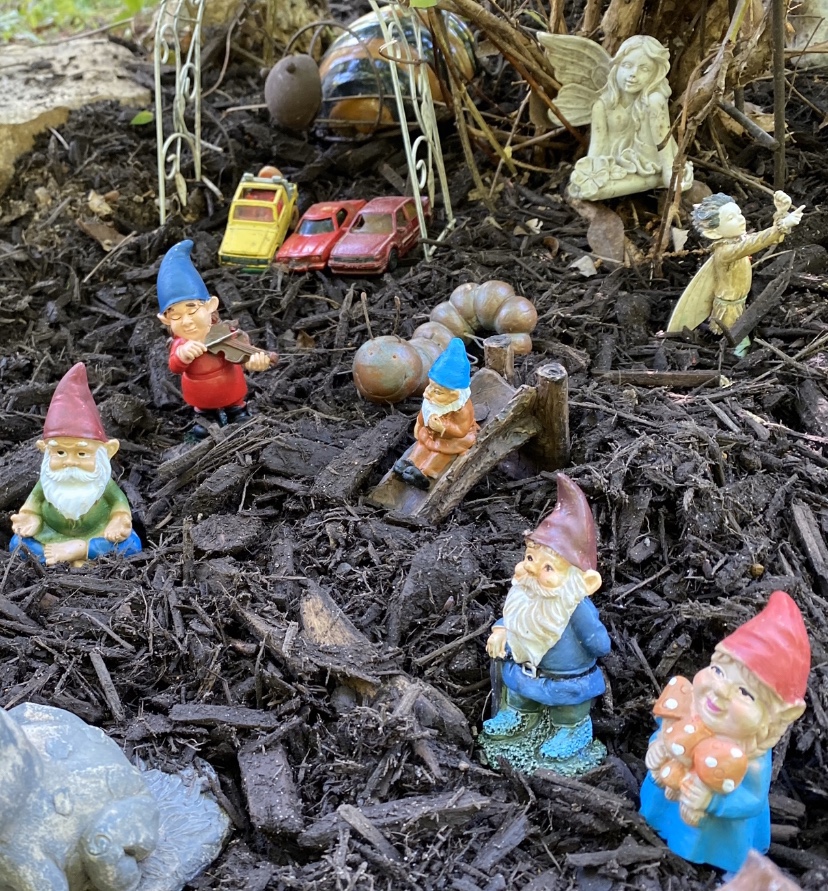
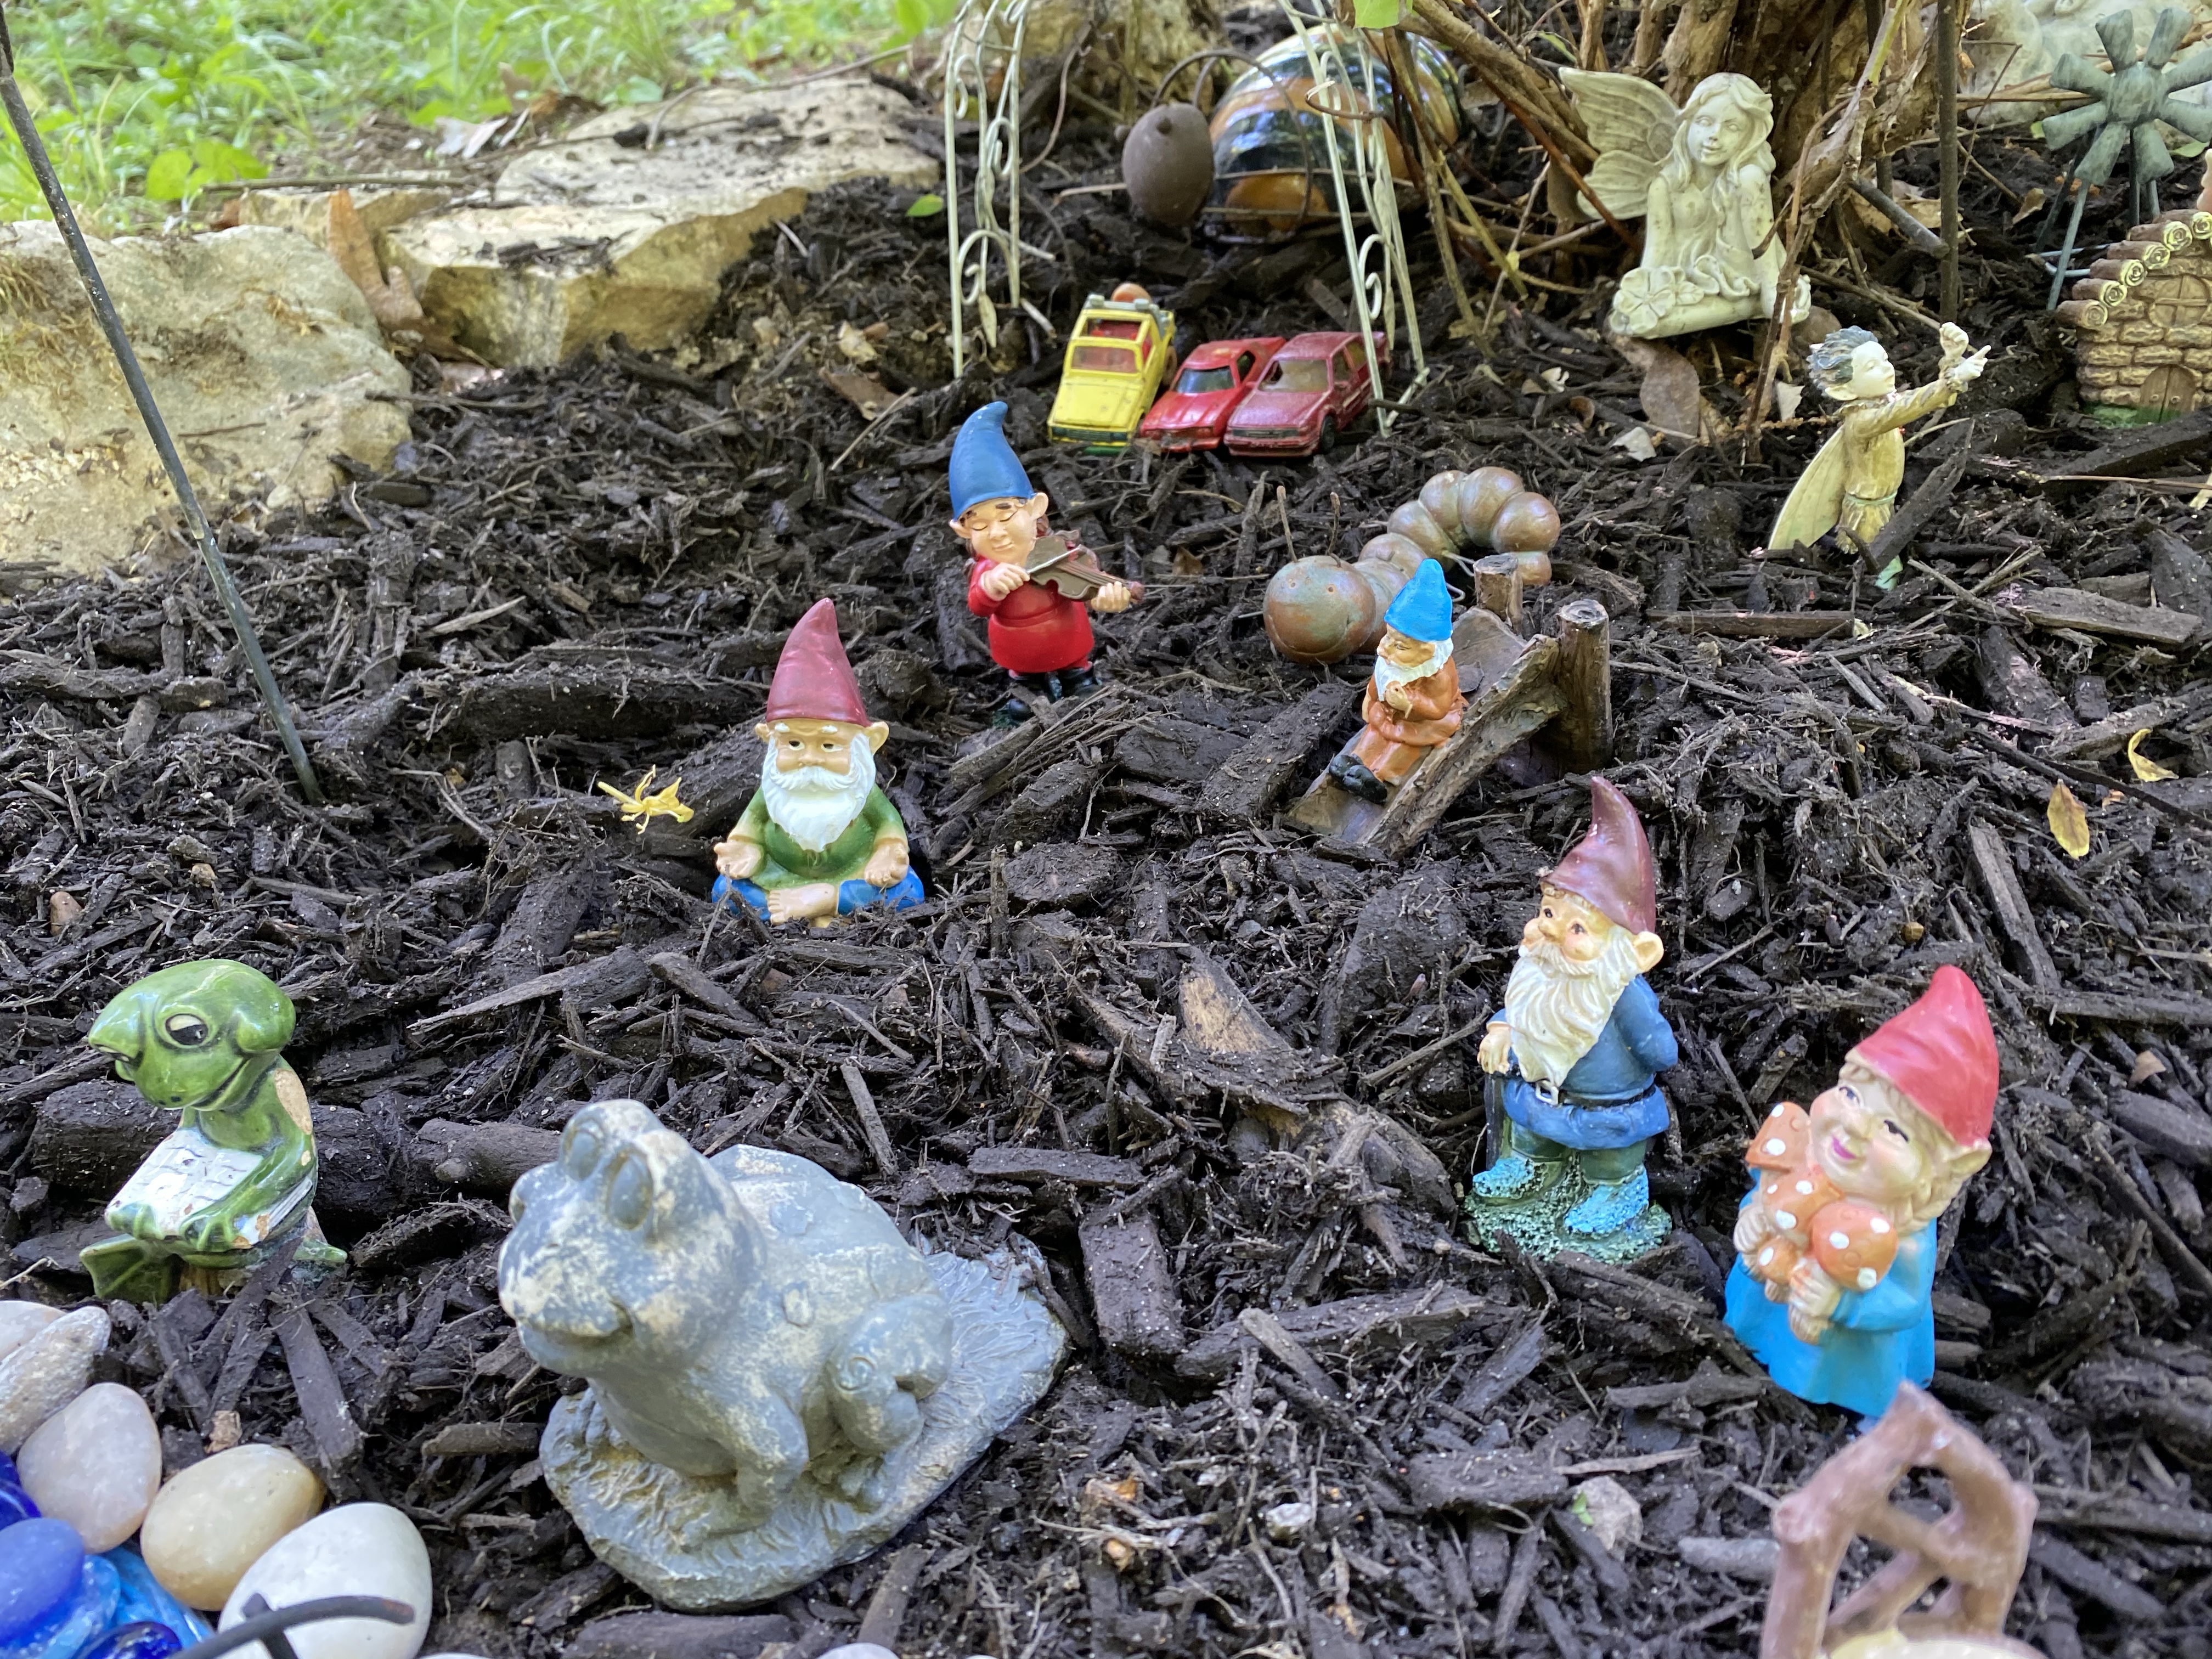
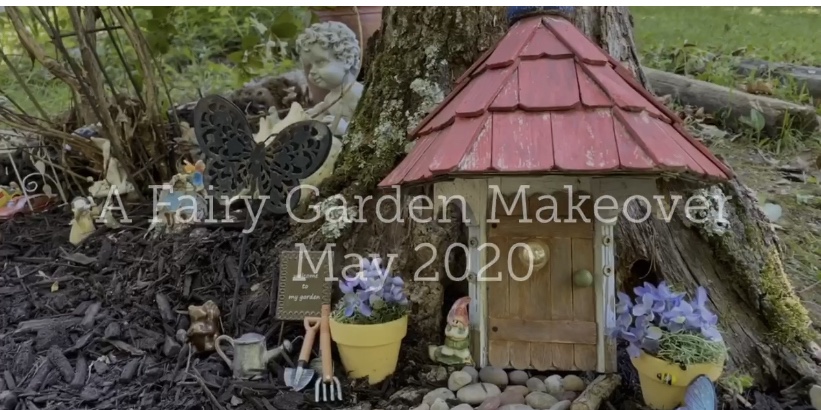
We started a fairy garden for our granddaughter about eight years ago. We’ve enjoyed adding items to it through the years. When we added grandsons it seemed only fitting the fairy garden had a carport and cars. It was time for a major makeover!
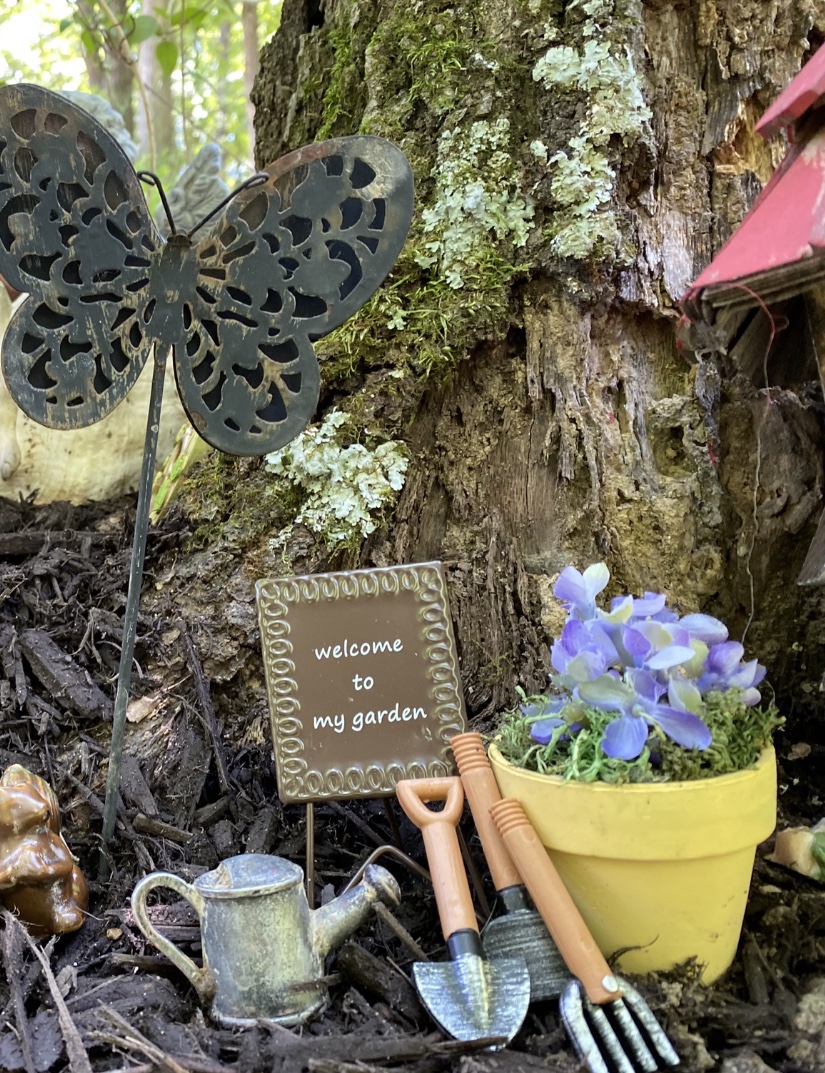
And did I mention our fairy garden is right under a trellis of honeysuckle vines I trained to grow there. It is blooming right now and smelled heavenly as I toiled in my garden. ☺️
My before photo does not clearly show how bad of shape our fairy garden was in, but will give you an idea.
Here’s a video I made and below I will add individual photos and some hints on how I made my pond this year so you can get a better look and maybe some ideas to create a fairy garden of your own. Whether you have kids, grandkids, or none of the above, if you have never had a fairy garden, you should. They are a lot of fun to create.
I have painted two rocks to look like gnomes and will paint two more for each grand and have them add to the garden. I painted them with Our Missouri Limestone Paint Company colors and then sealed them with spray lacquer.
I also plan on adding a miniature toy train as a couple of the boys love trains.
Through the years, some things broke beyond repair and some were just getting old. Last year seemed to be the roughest winter on the garden yet, so in 2020 with plenty of time on our hands, we made over the fairy garden.
It was kind of a treasure hunt digging down into the dirt to retrieve buried fairy items. And then the scrubbing of those items had to take place. But some, even with their rusty and worn look, are still treasures to keep.
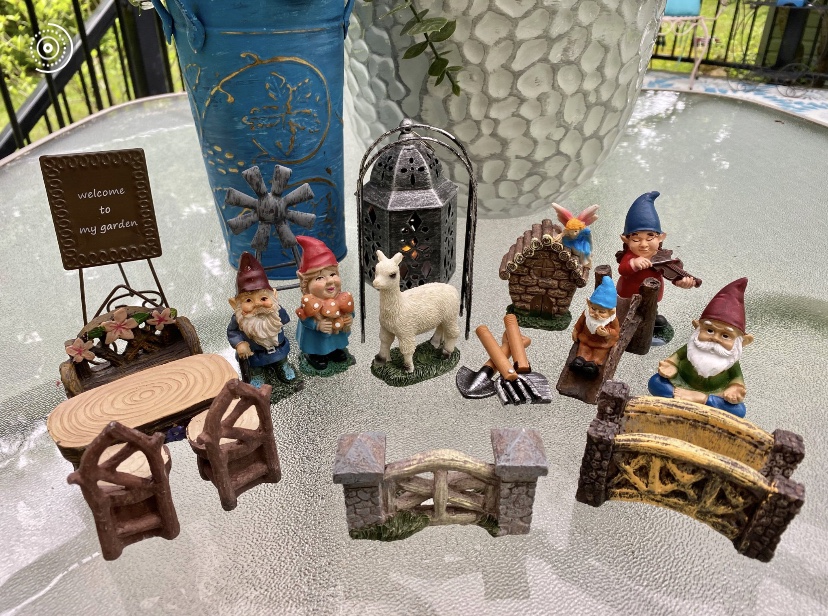
We did find a few new ones for $1.00 each at our local Dollar Tree. They had little gnomes so we added gnomes to our garden this year. But forget the llama… I already gave it to my granddaughter who loves llamas. I crocheted a few, painted a couple and even made some coffee cup quotes this winter using llamas, so I will have to find another to add to my fairy garden.
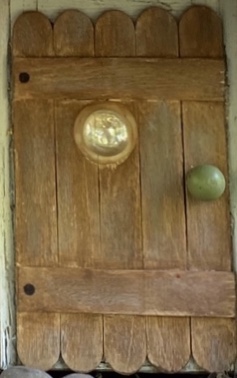
I made the door with jumbo craft sticks from Dollar Tree (another Pinterest idea). I used a bit of hot glue (to hold in place) along with E6000 for durability outside to glue the sticks to the braces which were 4 glue sticks cut to size (2 for the front and 2 for the back). The window is a glob of hot glue with a clear half gem from Dollar Tree presses into it.
The roof was what was left from the bird feeder we had sitting on top of the stump the last several years. Danny reworked it and we were amazed the door fit perfectly inside the part it did. He attached the door and then screwed the whole unit to the stump. I gave it just a little paint so it still looked weathered.
The mushroom top on the stump was a resin base of some kind we had sitting around for years I painted it and added white polka dots with a foam stencil dauber. It is very heavy so it is just sitting on top of the stump.
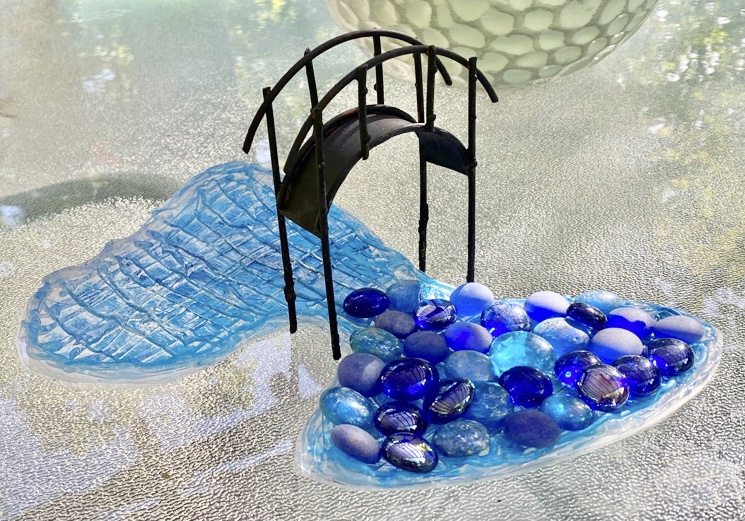
I also dug out all the gems from Dollar Tree we had used earlier for a pond so I wanted something to contain them.
Now for the pond I created this year:
I saw an idea on Pinterest and thought it would work, and it did. I used a plastic sheet like a report cover and then drew out an outline and then just made a thick border of hot glue and then just created a grid like inside so my gems wouldn’t fall out and get buried again. I painted it with some colors of water with our MLPC paint and even added a little glitter paint I had. You were supposed to be able to peel the glue formation off the plastic when dry and you can, but I chose to cut around my form and keep it so I would have another layer for my gems.
We will continue to add more items, I’m sure. And the grands will rearrange what we have many different times. 🥰
But what fun memories we will continue to make in our magical fairy garden.


 We started a fairy garden for our granddaughter about eight years ago. We’ve enjoyed adding items to it through the years. When we added grandsons it seemed only fitting the fairy garden had a carport and cars. It was time for a major makeover!