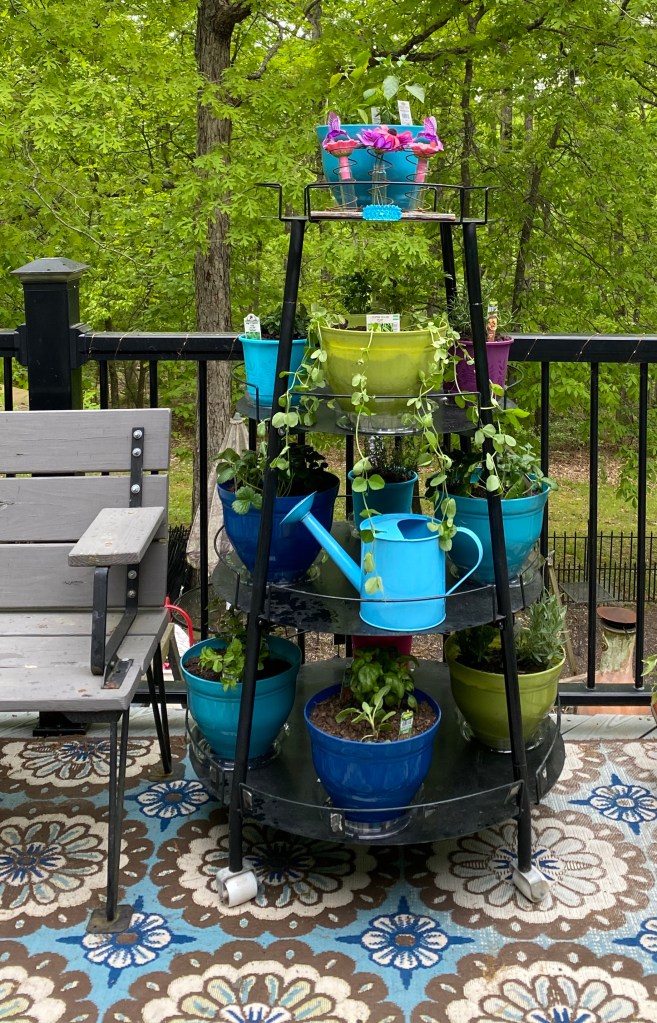
Today is September 30th and it is a beautiful Fall day in Missouri ….. the perfect day to make a Halloween decoration for my Halloween Deck Display “Tree”. See my summer garden and fall displays below.
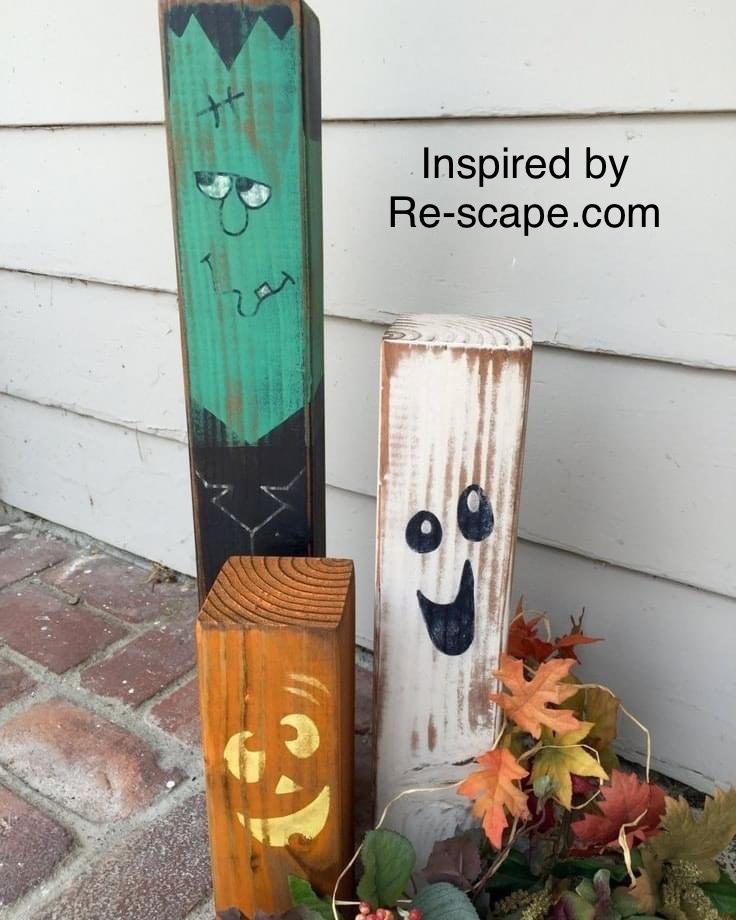
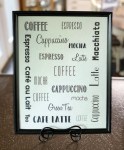
I used our Missouri Limestone Paint Company chalk-style paint (colors: Crisp Kale, Coal Shovel, January, and Harvest Pumpkin) and Sharpie oil paint pens. I had to have an inspiration piece to look at or I wouldn’t have been able to draw the faces. This is the inspiration photo I saw that was posted by https://www.facebook.com/ReScapedotcom/ I found the artist and they are for sale on Etsy for $74.95. https://pin.it/7DjaZfV
I used the photo above to help guide me when drawing the faces on mine below. FYI – if I can do this anyone can. We sell our paint in 2 oz ($3.99) containers that are perfect for projects like this as well as other sizes. Message me if interested in a porch pickup of paint. We can also ship.
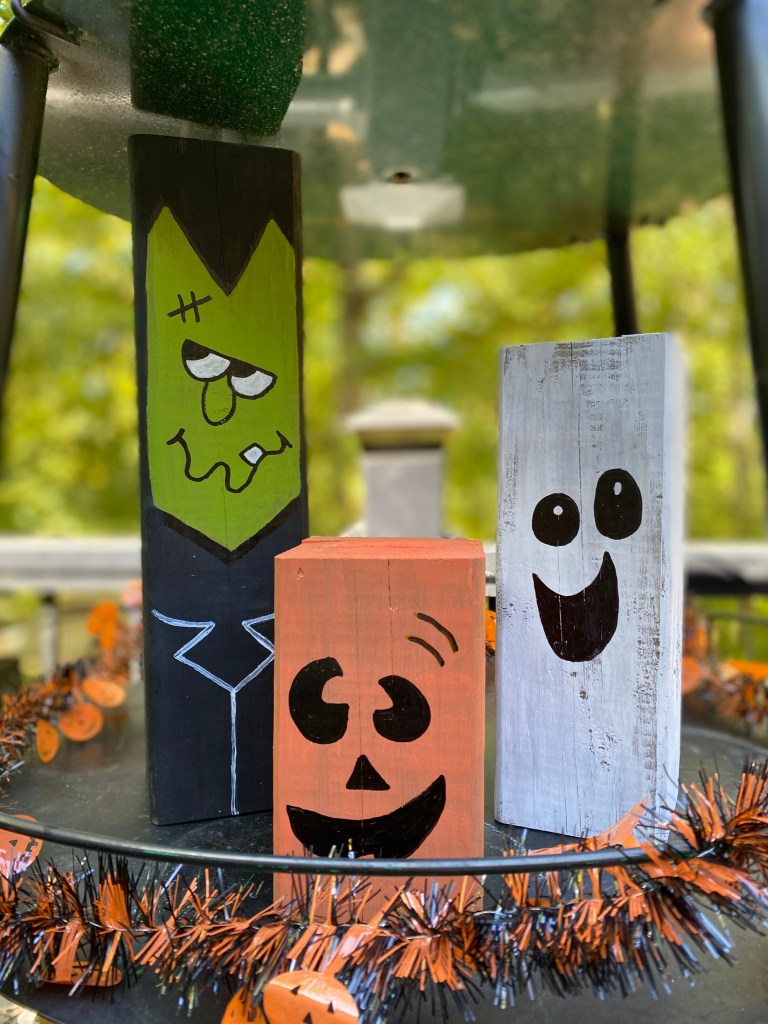
Here’s my version of these cute and easy to make blocks.
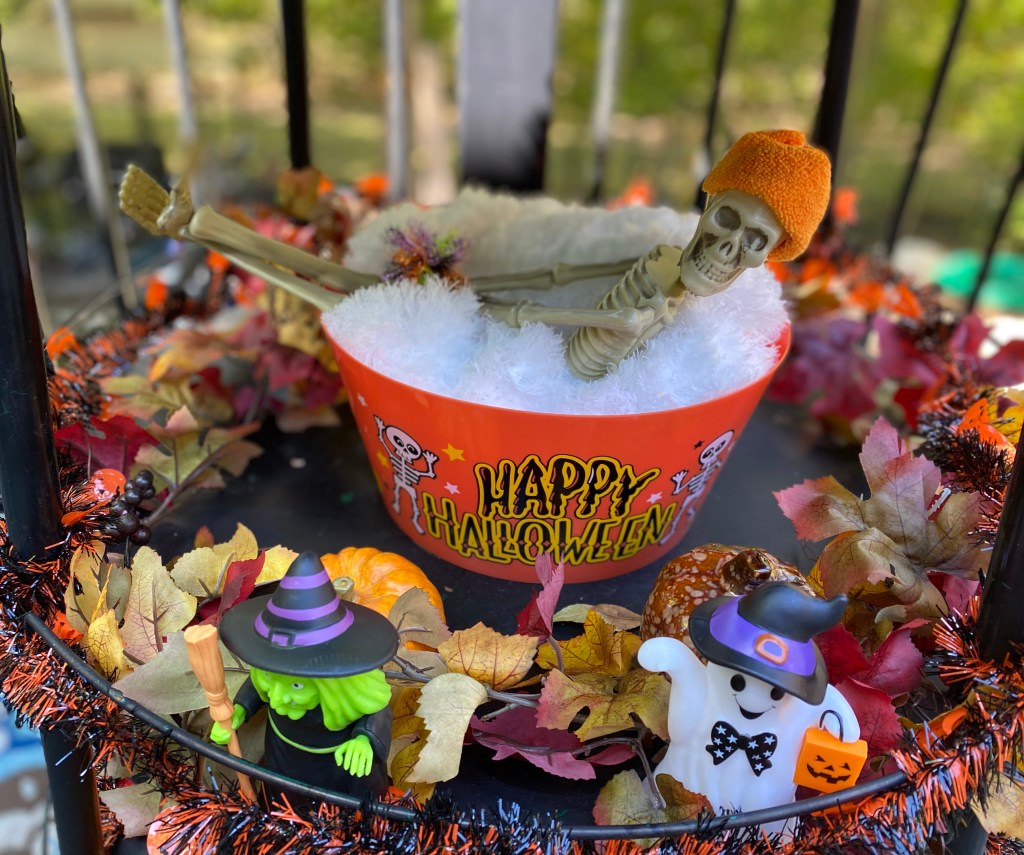
And now here is my Halloween Deck Display “Tree”.
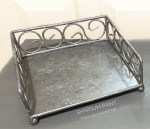
I used a silver tray and glued to a base. The painted and distressed it and the candelabra. The skeleton head are from Dollar Tree.4×4 blocks are 15”, 10”x and 6” tall.Dollar Tree idea I saw.This pumpkin’s face is a vinyl cut out.It didn’t take long to turn off the motion detector sounds on these Dollar Tree finds.Fall DisplaySummer Deck Garden
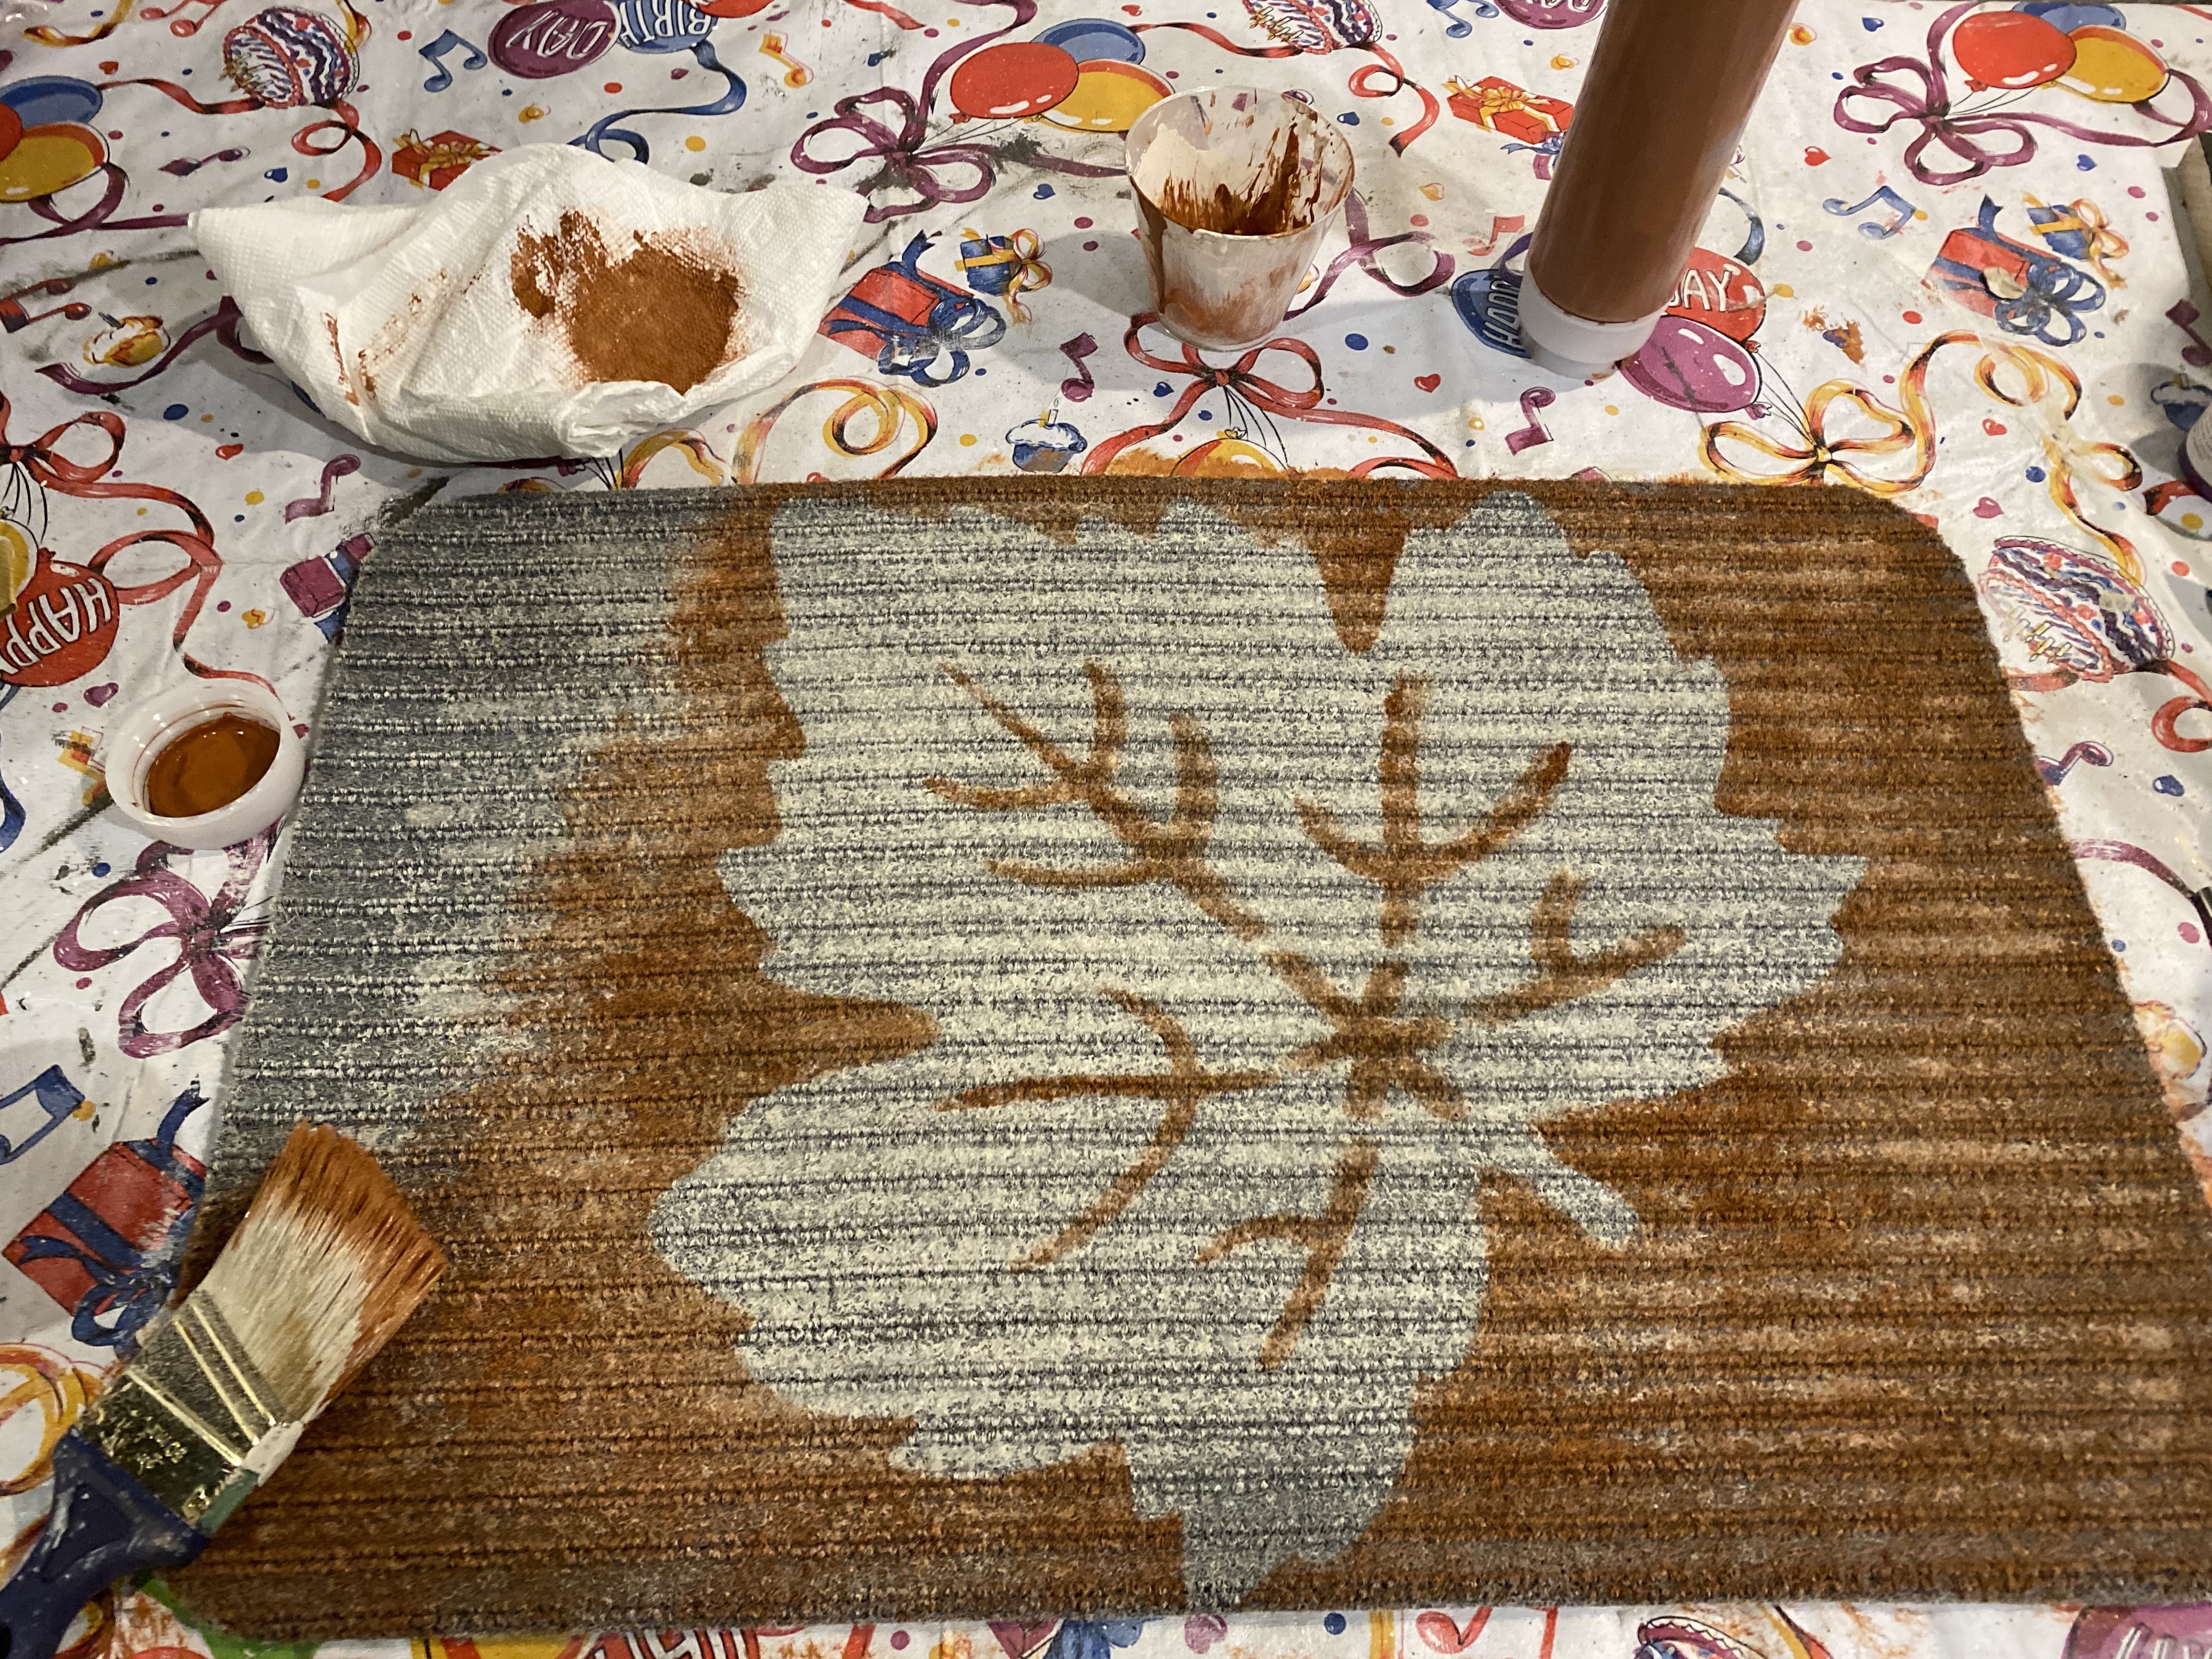
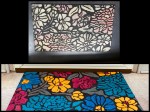
I’ve been seeing the Dollar Tree Felt Pumpkins, Leaves, and Acorns used as stencils on the Dollar Tree gray door mats. This morning, I used the leaf one to create this beautiful door mat. You can do it, too!
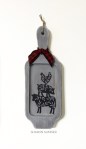
Yes, I made that cute little fall gnome door hanger, too.
These are the materials I used. I used our paint brand we own and produce, Missouri Limestone Paint Company chalk-style paint: Grannies Lace, Old Tin Barn, Bordeaux, English Ivy, and Possum Grape Jam. However, any brand and type of paint should do fine.
I used the side that was more ribbed. On my next one I will use the flatter side. This mat really soaks up the paint. This is the first coat. I eventually did two coats and then a little more to cover well the area that will be under the leaf stencil. The rest can have a more dry brush look.
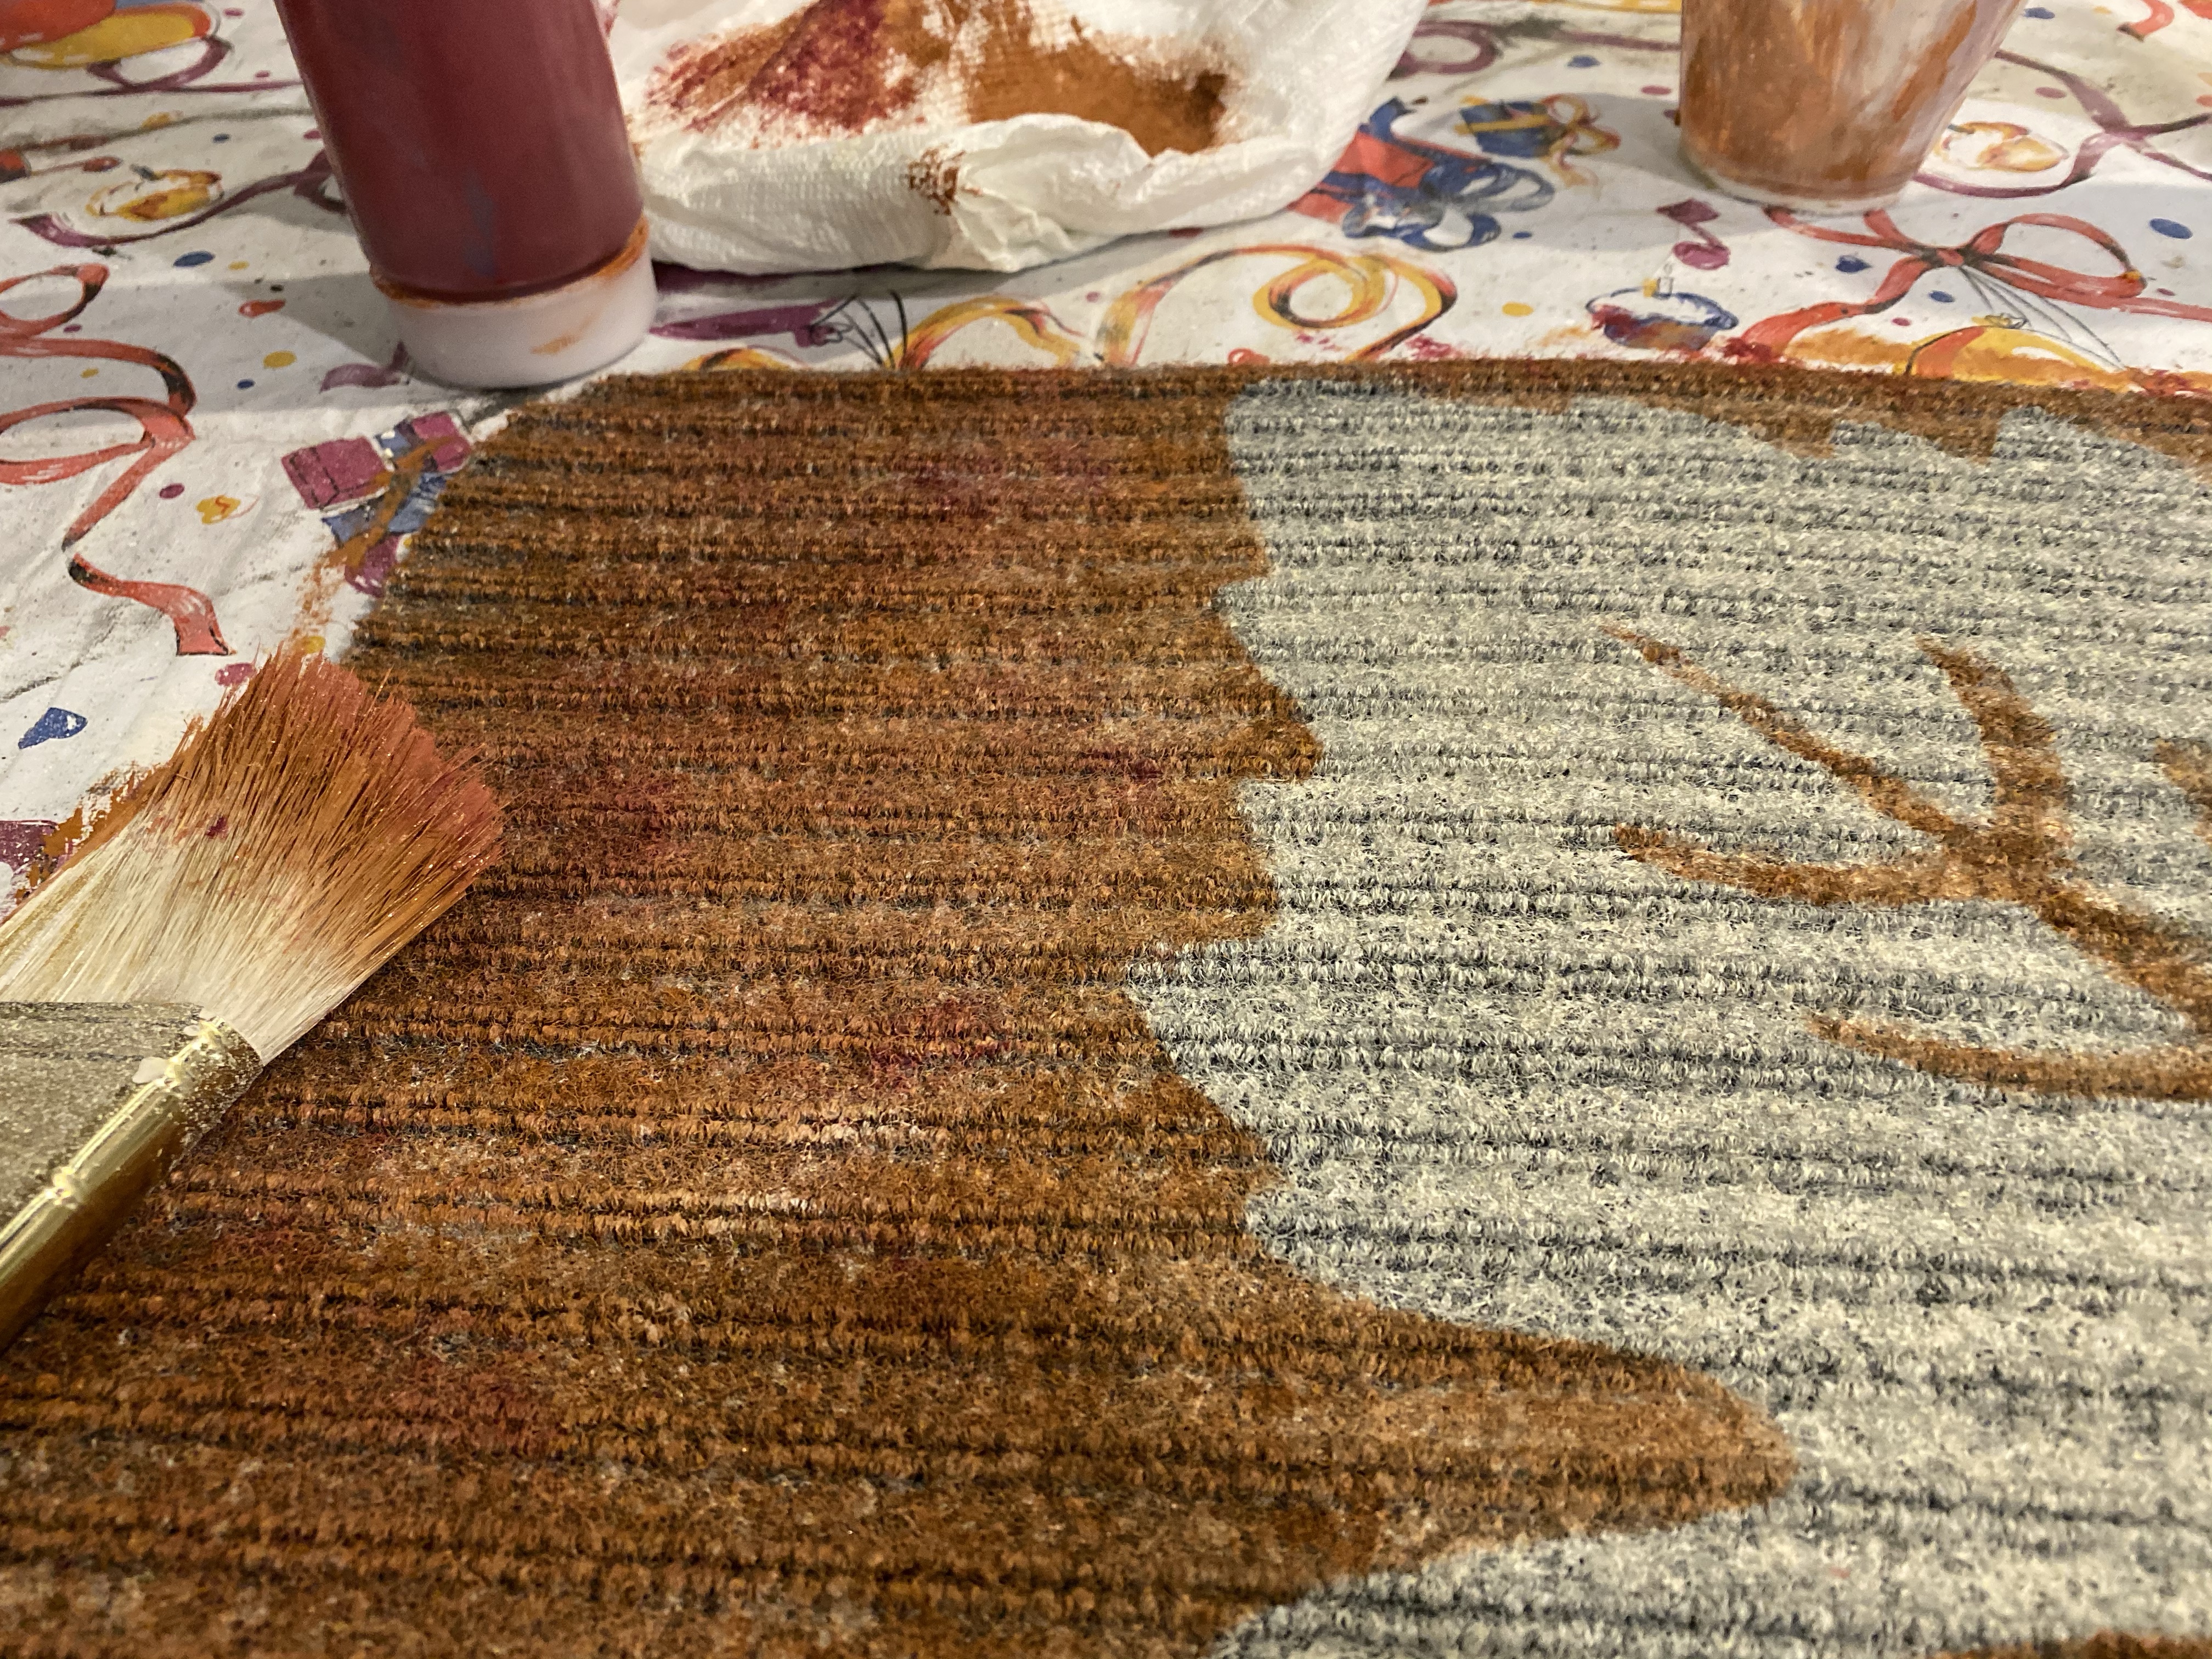
I then placed the stencil on the mat and just started pounding the Old Tin Barn color on the spines and all around the leaf. You don’t have to do the whole thing at this point. I just did around the leaf area then removed the leaf stencil.
I then continued pouncing the Old Tin Barn color all around.
Using the same brush, without washing it out, I pounced the Bordeaux color on randomly over the Old Tin Barn, trying to blend it a bit.
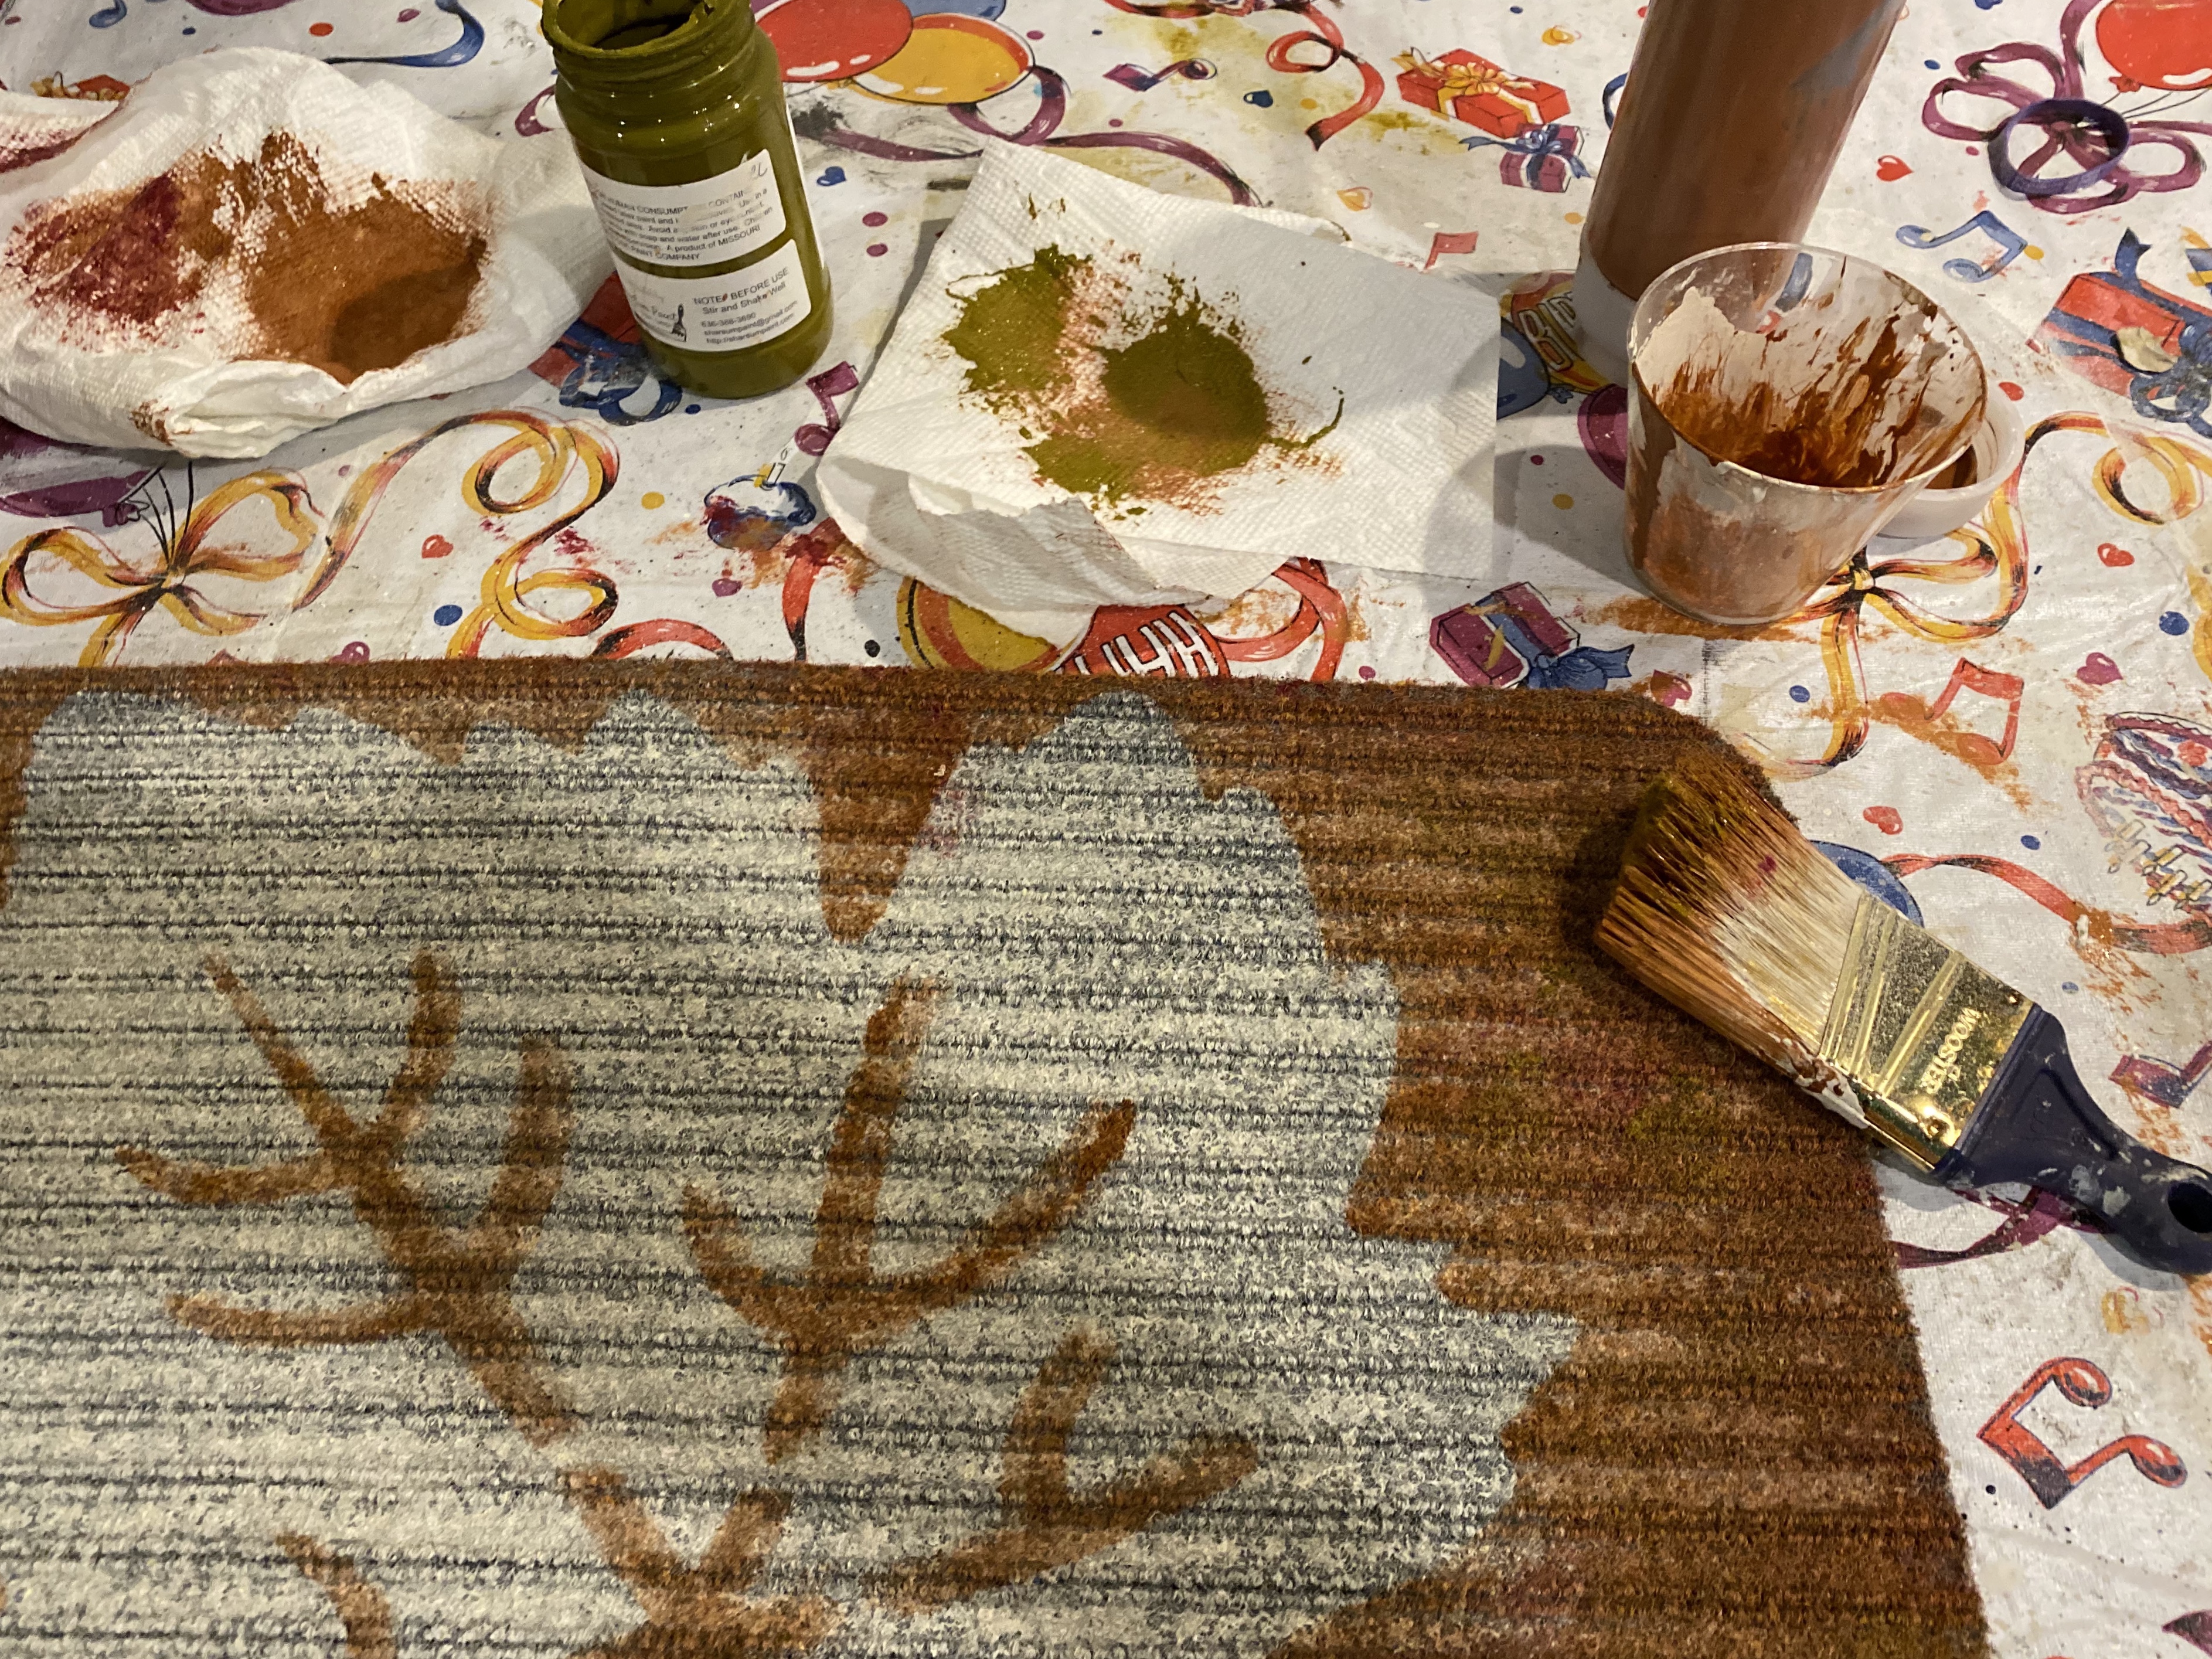
Using the same brush again, I pounced on randomly the English Ivy color.
Using the same process, I added a bit of Possum Grape Jam color.
This photo shows all the different colors, much like you would see in nature in the fall.
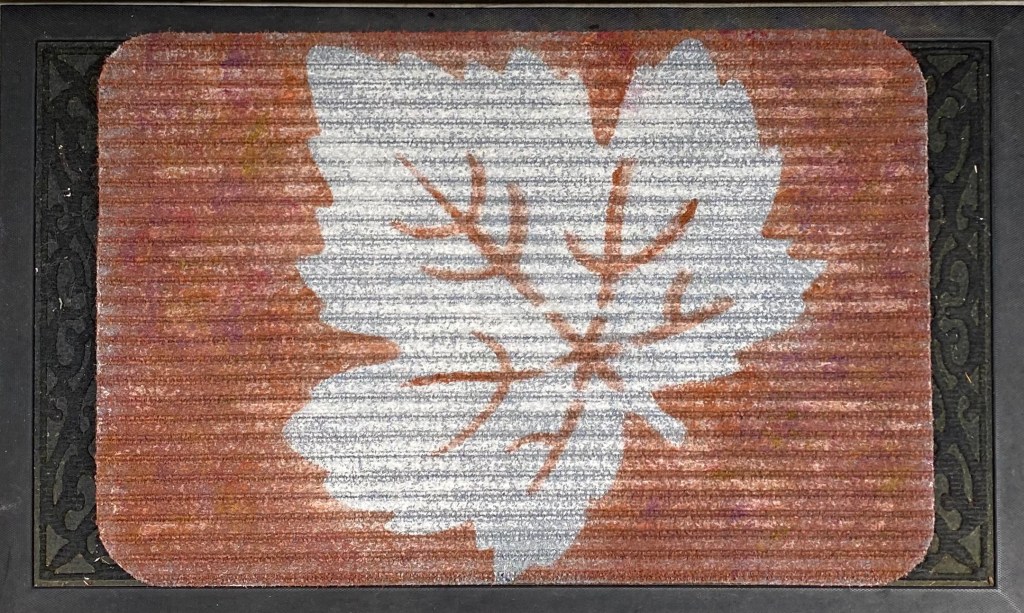
The last step is to take the mat outside and give it a couple coats of the SPAR Urethane waterbased exterior sealer. It says it is gloss, but doesn’t show up gloss on the mat. I don’t think, once chalk-style paint cures for 30 days, a sealer is really needed, but in the meantime I think it just helps protect it a little.
And there it is! A beautiful Fall door mat. The pumpkin and acorn would also look nice.
And here’s my acorn one. I’m keeping this one. It’s pretty appropriate since we have a ton of oak trees (not to mention leaves) in our yard.
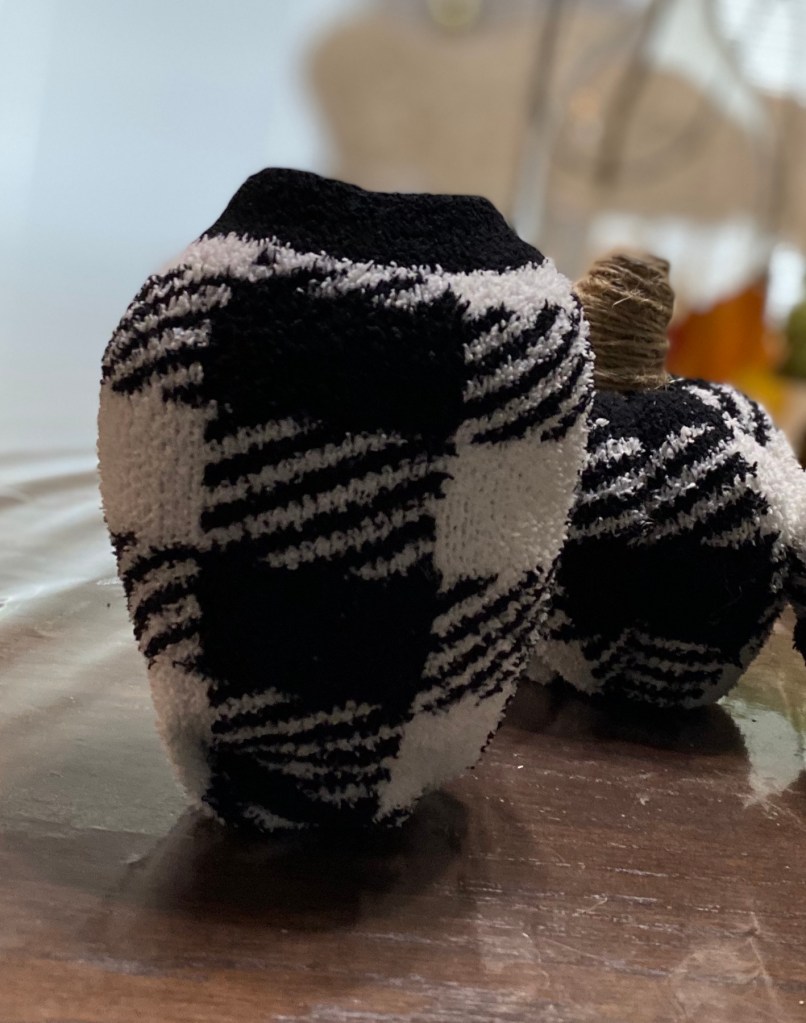
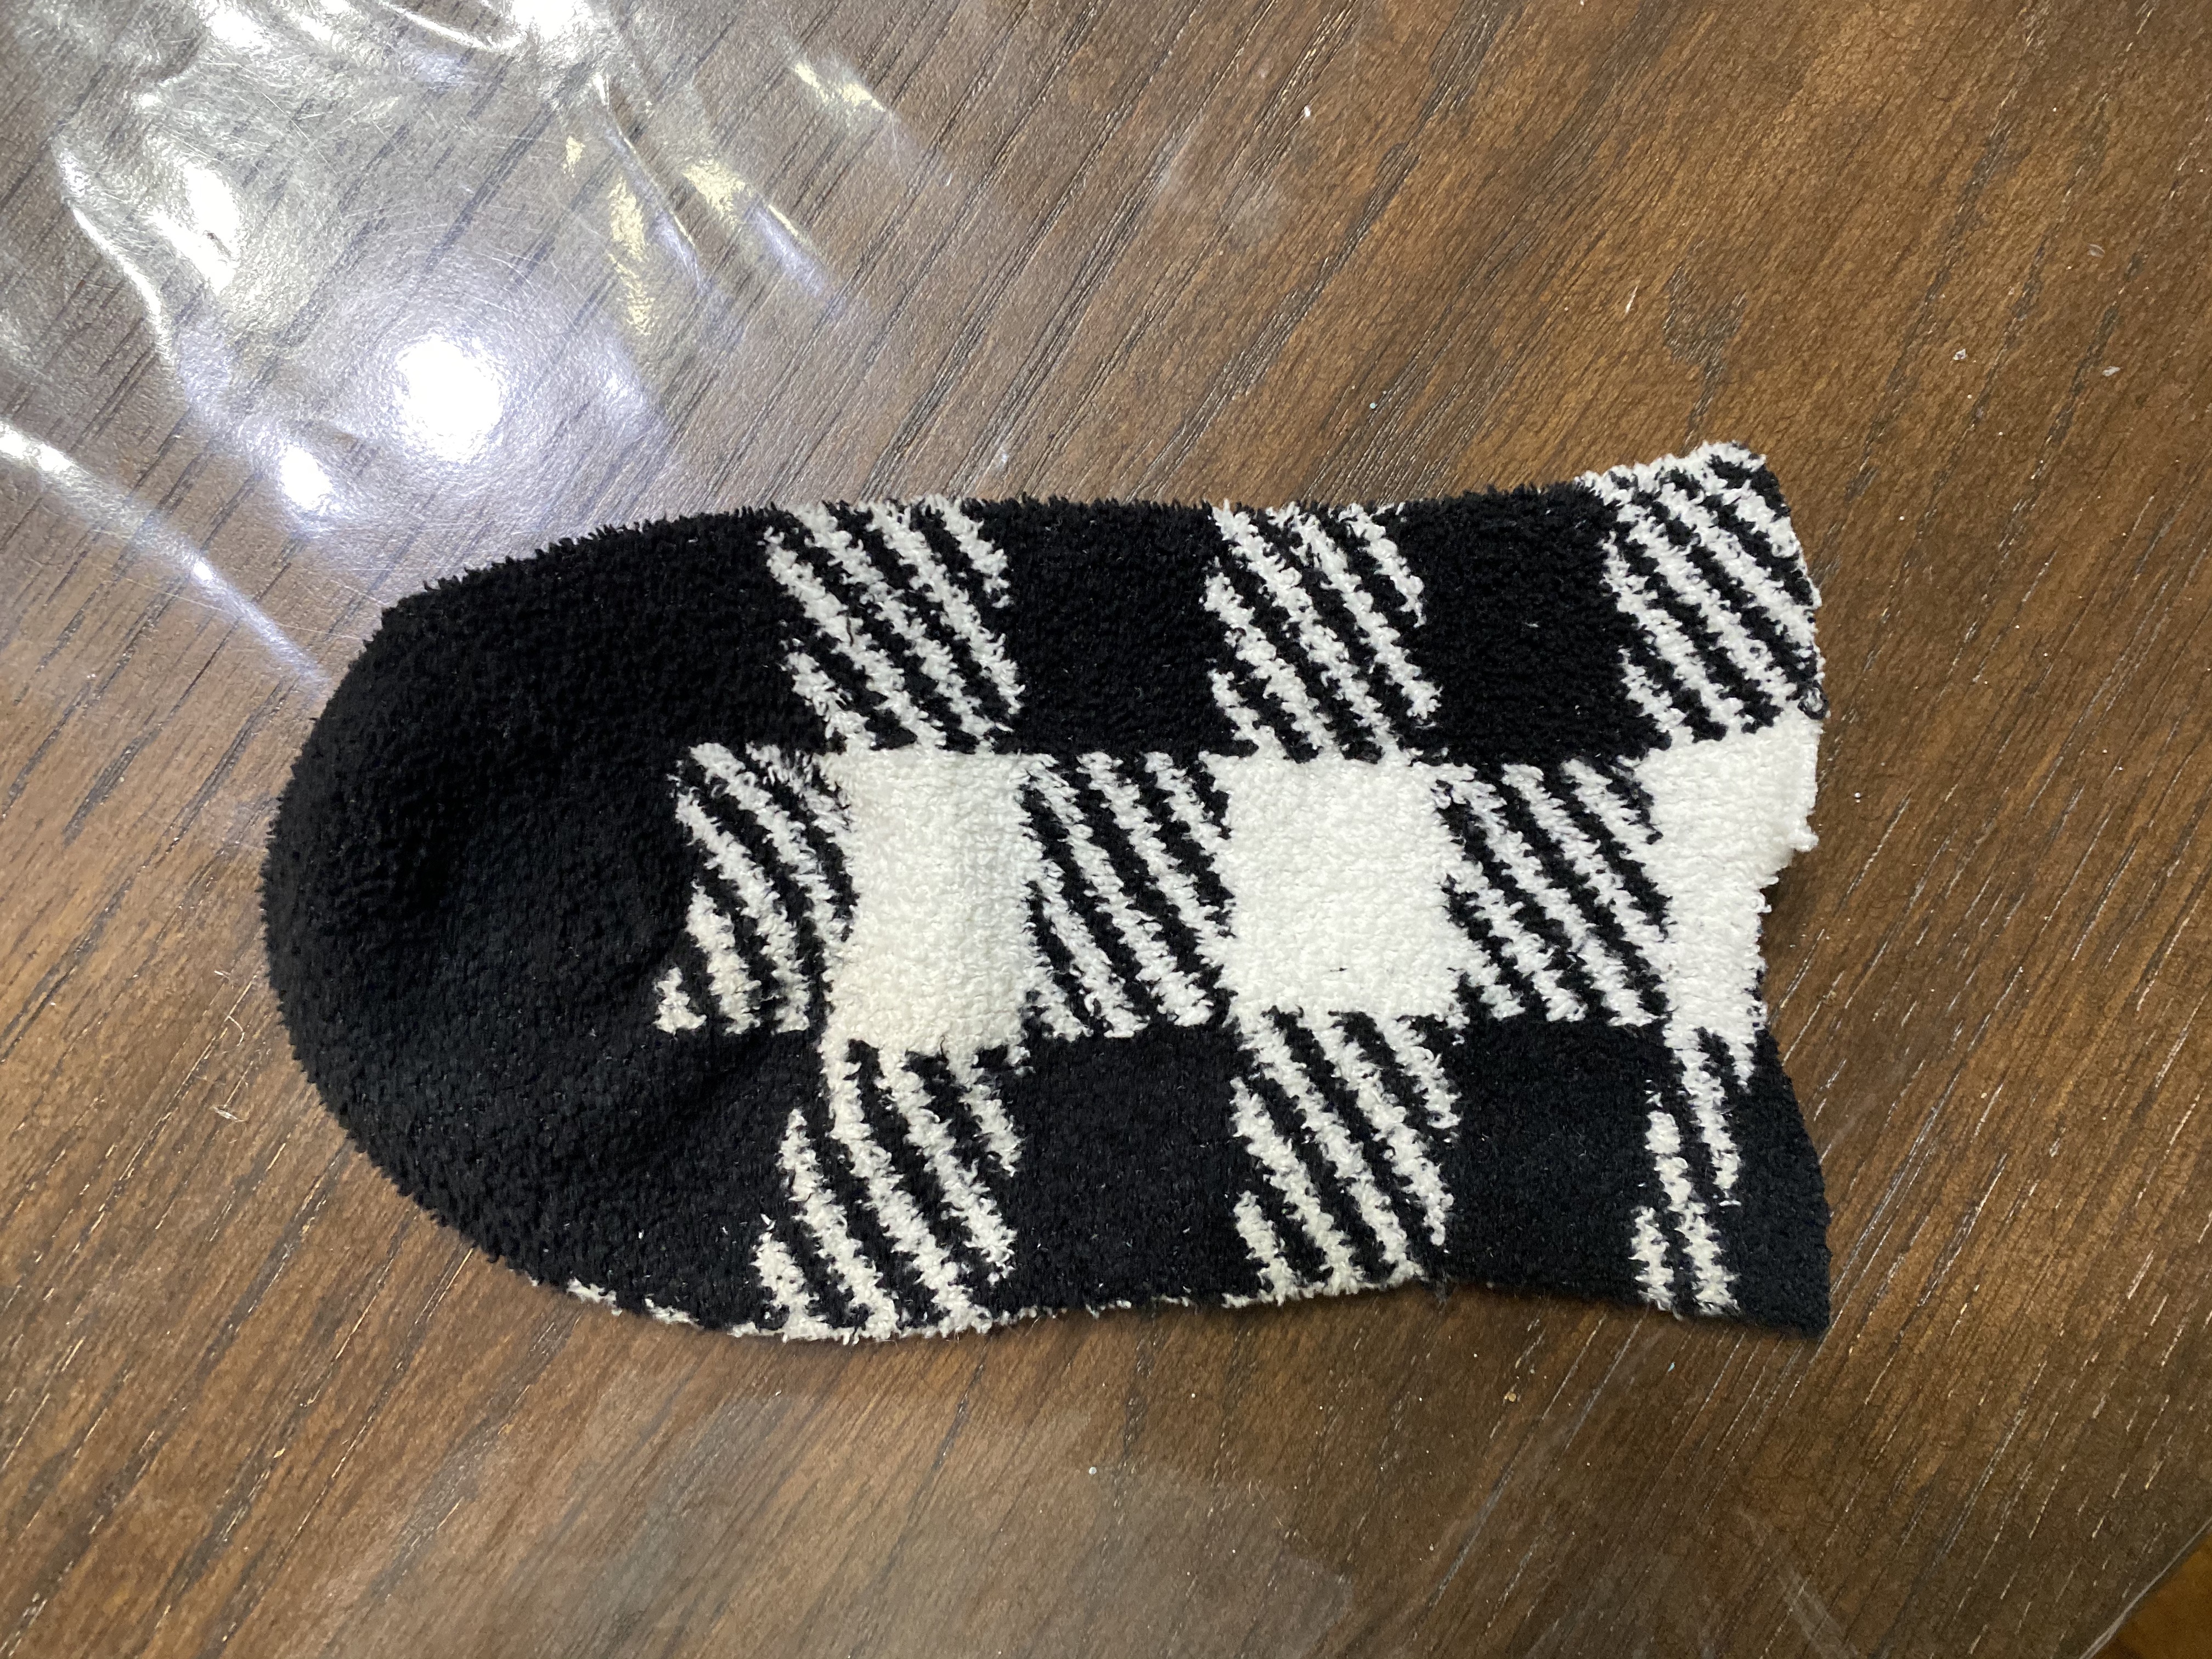
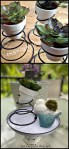
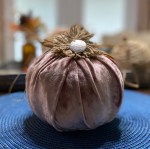
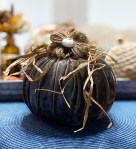
I am always up for quick and easy projects especially when they involve Dollar Tree materials. I saw a great idea for making a pumpkin using a sock so just had to go with it and put my own spin on it. I quickly realized I could get two pumpkins out of one sock.
One sock = 2 pumpkins
And now I get to show you how easy it is. No sewing is involved in the making of these pumpkins. Just some glue gun and a bit of wire. That’s it!
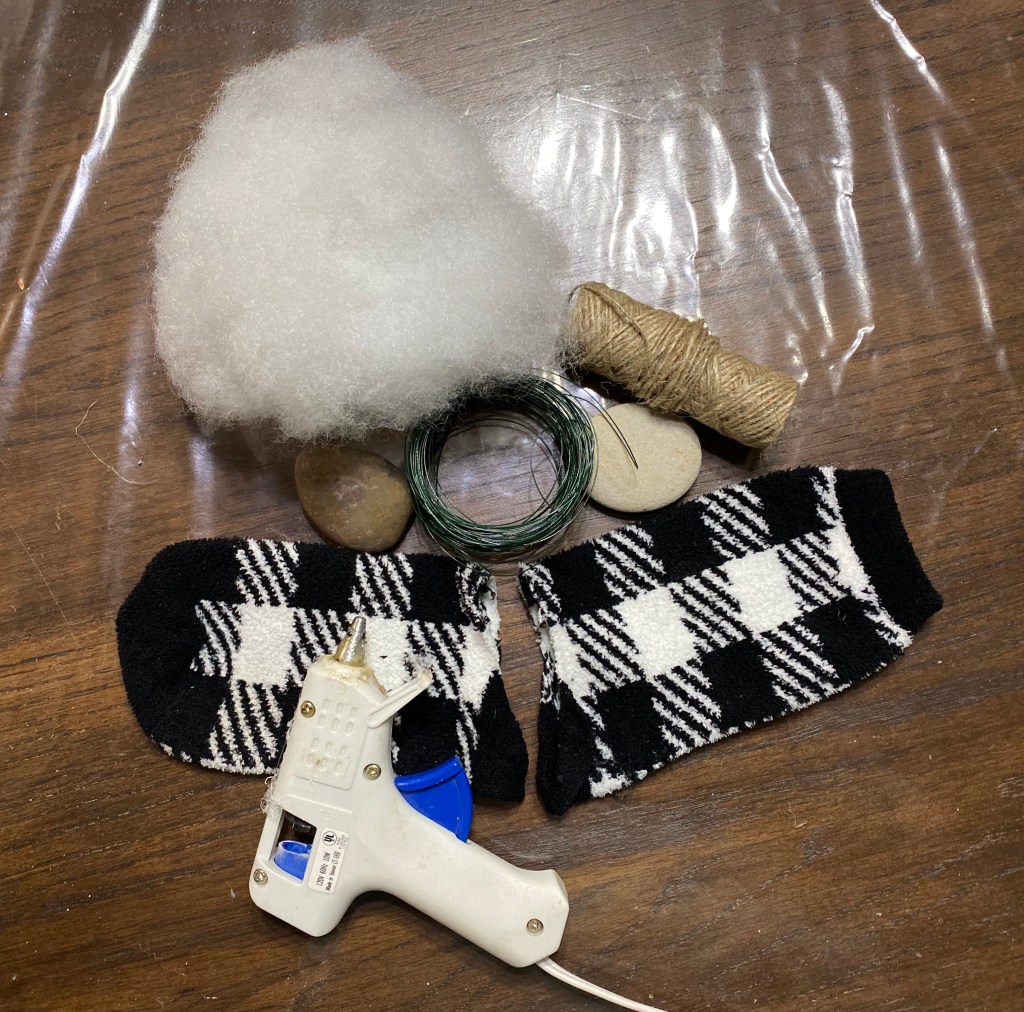
You will need:
• A Dollar Tree sock – cut in half at the heel
• Two flat rocks
• Fiber fill
• Dollar Tree Thin Wire
• Dollar Tree Twine
• Glue gun
First, we will make a pumpkin with the top half of the sock.
I turned the sock inside out and as close to the edge as possible, I hot glued the bottom part shut.
Then I gathered that part up and hot glued the edges in place, again as close as possible to the edge.
Next I added the rock and glued the flattest part to edge of the gathers. This is to help keep it in place.
I then turned the sock right side out again and stuffed it with fiber fill.
I gathered up the top, twisted it and wired it closed.
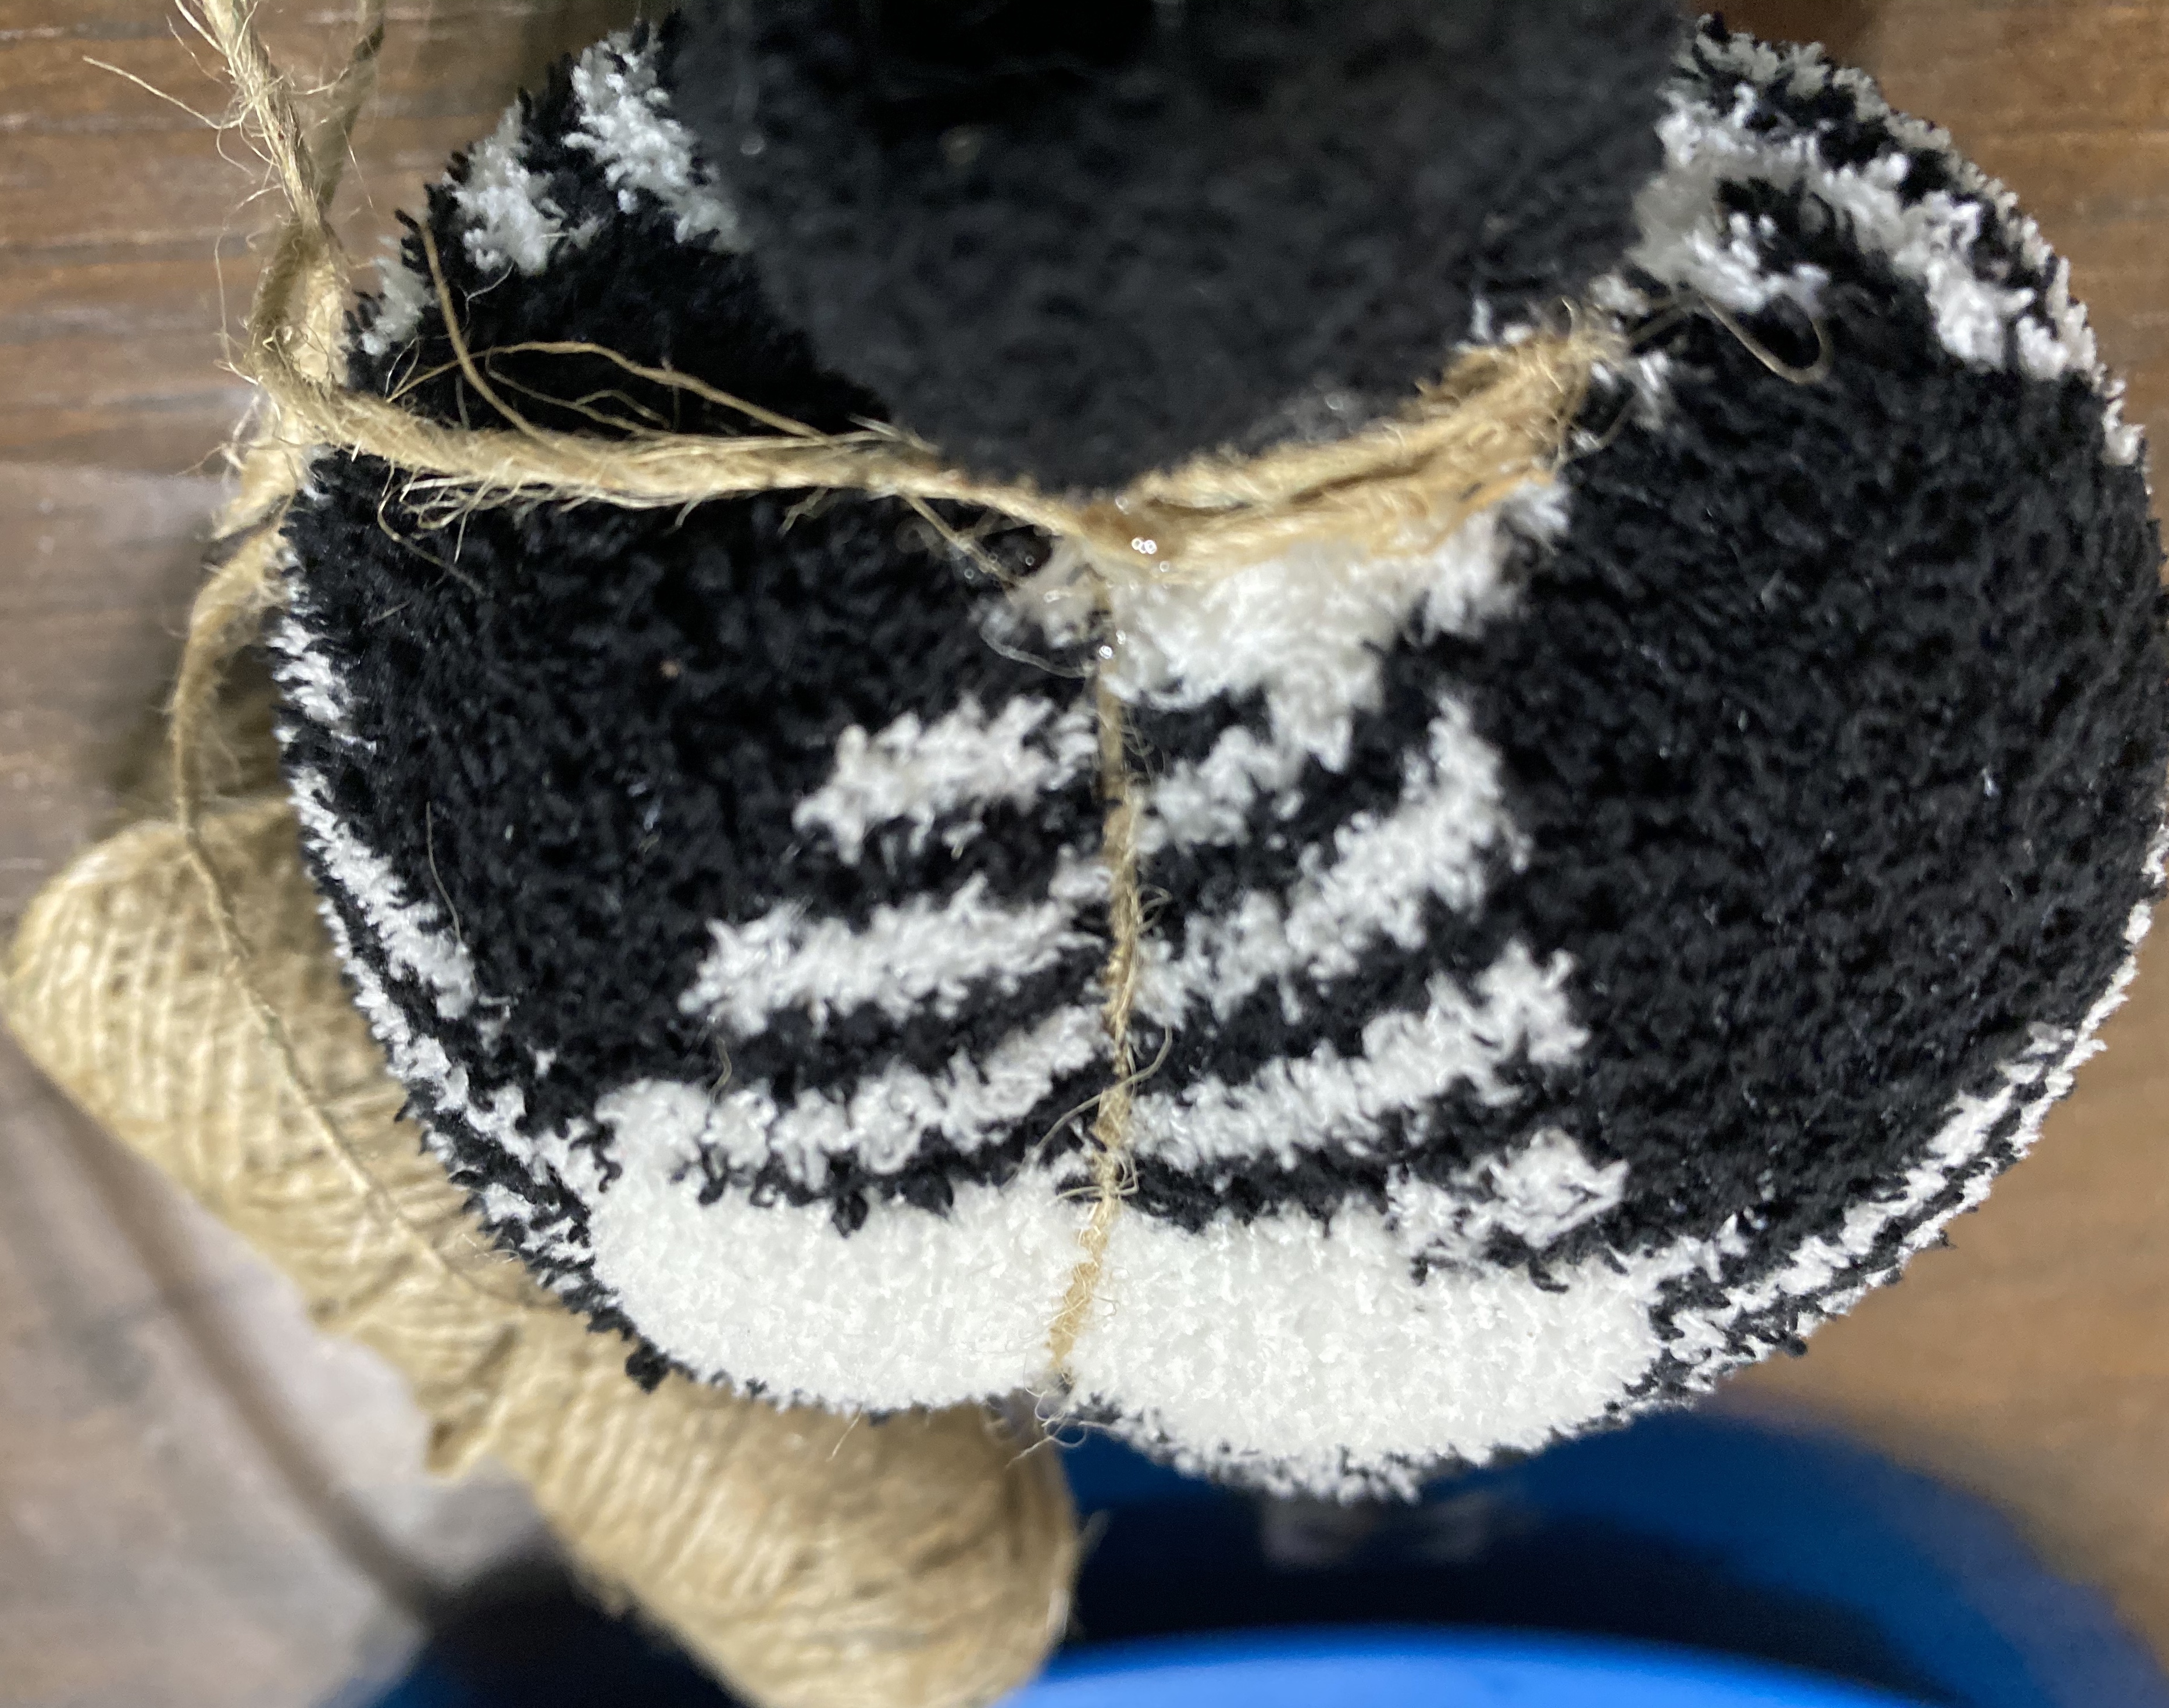
It was now ready for the stem and the sections. I tied the end of the twine around the wire and added a drop of hot glue to secure it. Then wrapped the twine around a couple of times. I secured it in place with glue.
I then pulled the twine around the bottom of the pumpkin and up the other side, pulling it very tight. I secured it with glue to the other twine and wrapped around and did another section the same way. I ended up with 6 sections.
I wrapped the twine all the way up the top of the twisted top and and end, securing with a bit of glue every so often, then wrapped it back down again. Cut the twine and glued the end down.
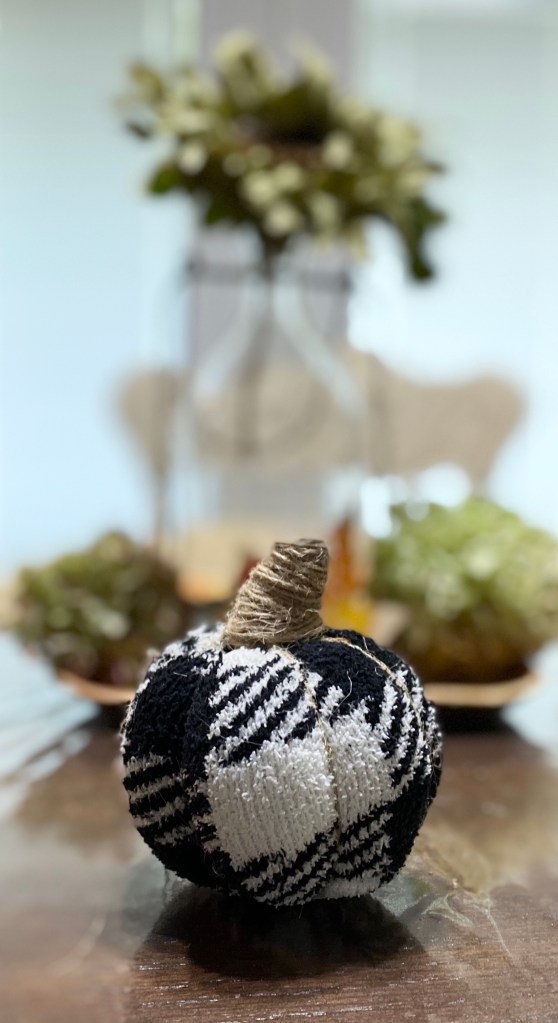
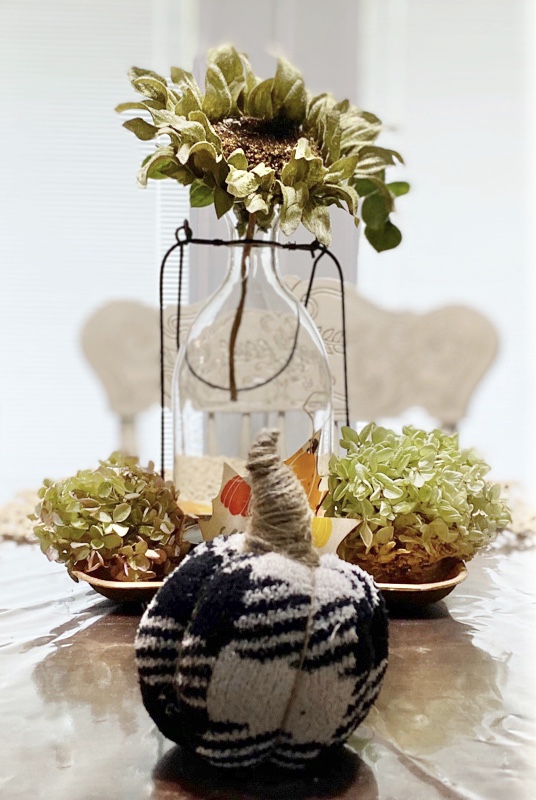
And there it is… a perfect little pumpkin.
Then for the second pumpkin, I didn’t need to glue the bottom of the tube because I would be using the toe as the bottom of the pumpkin.
It was worked the same as the first one until I got to the stem. I trimmed the twisted part of the sock at an angle and when I glued it at the top I was able to use the glue to help mold it into a point.
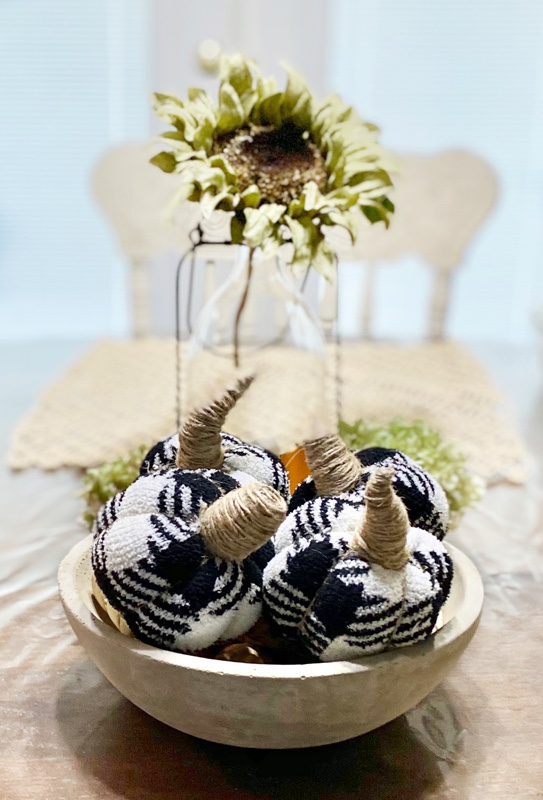
And since I had a pair of socks, I made 4 pumpkins!
I hope you try this with socks or maybe make them with fabric tubes or maybe sweater sleeves. Please share your creations with us if you do. We’d love to see them!
This project was so much fun to do. I often write tutorials for my projects, so be sure to follow my blog and you can be notified when I post a new project! Thanks!
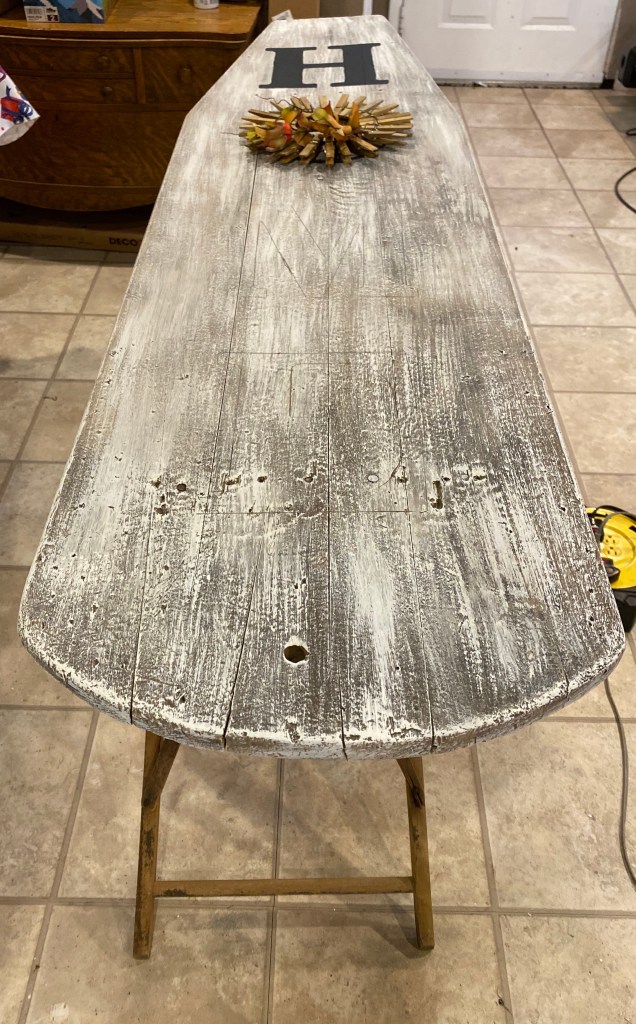
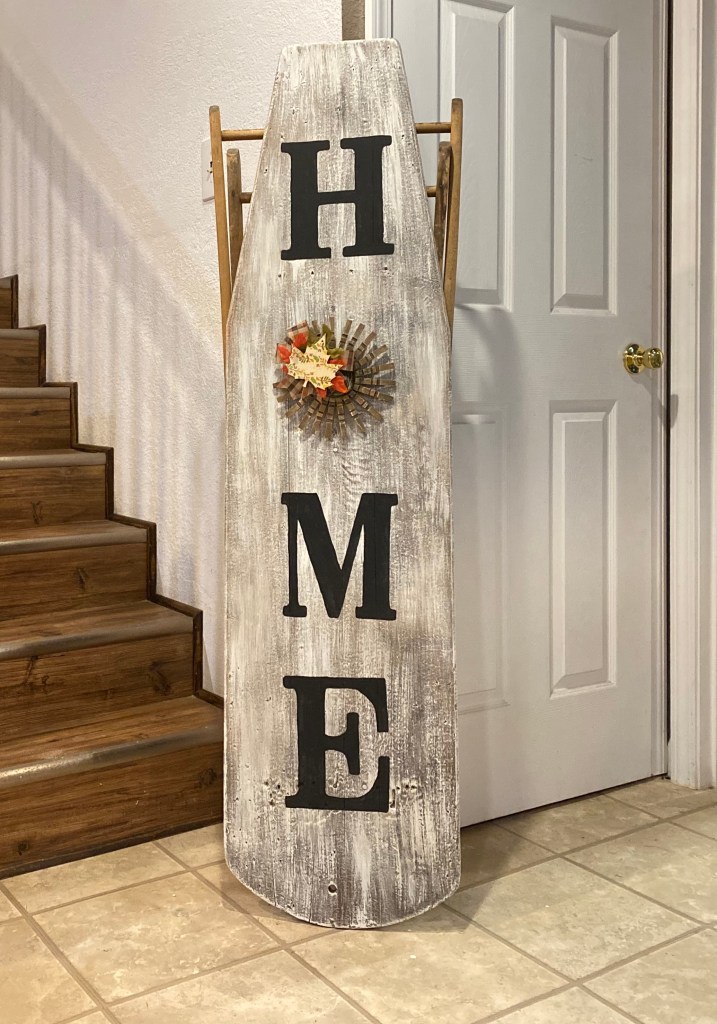
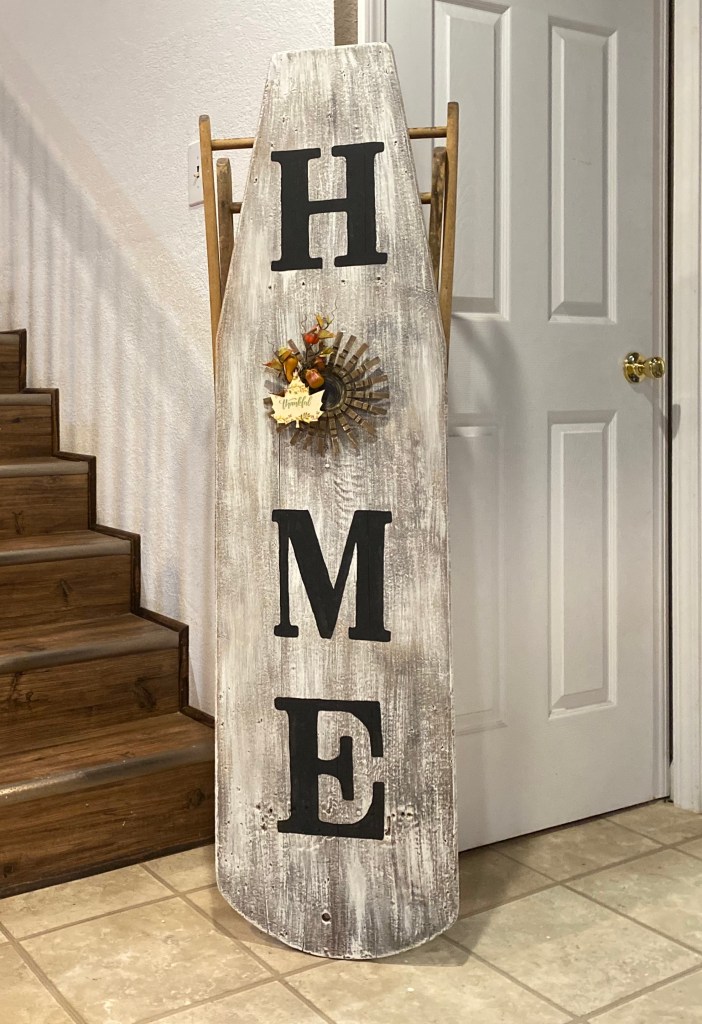
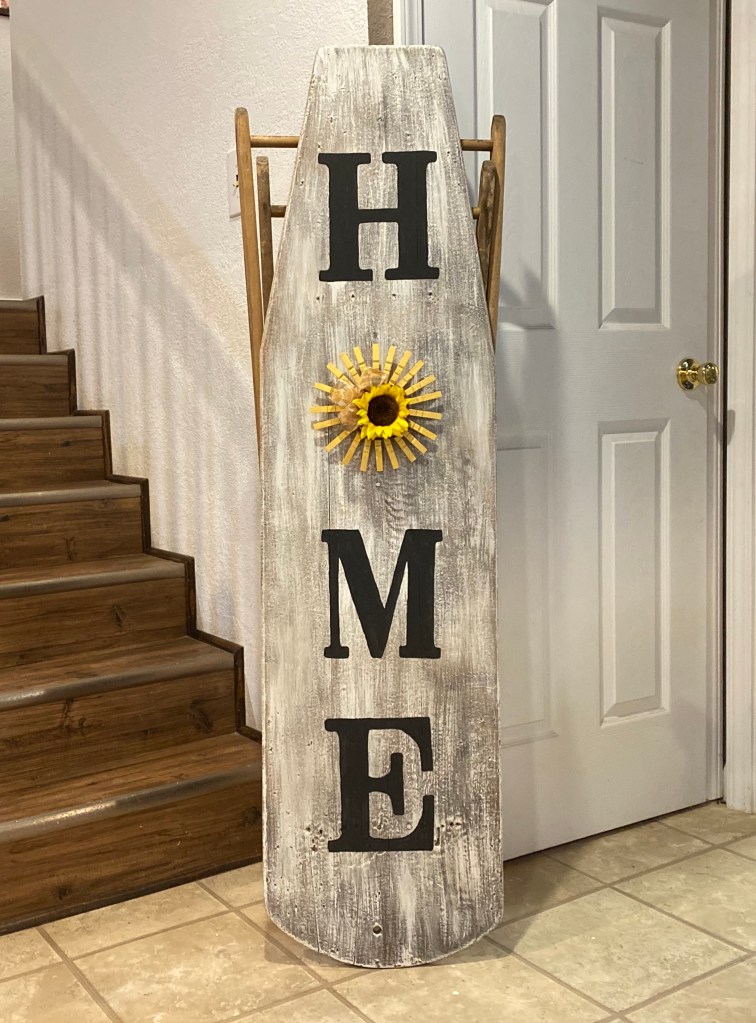
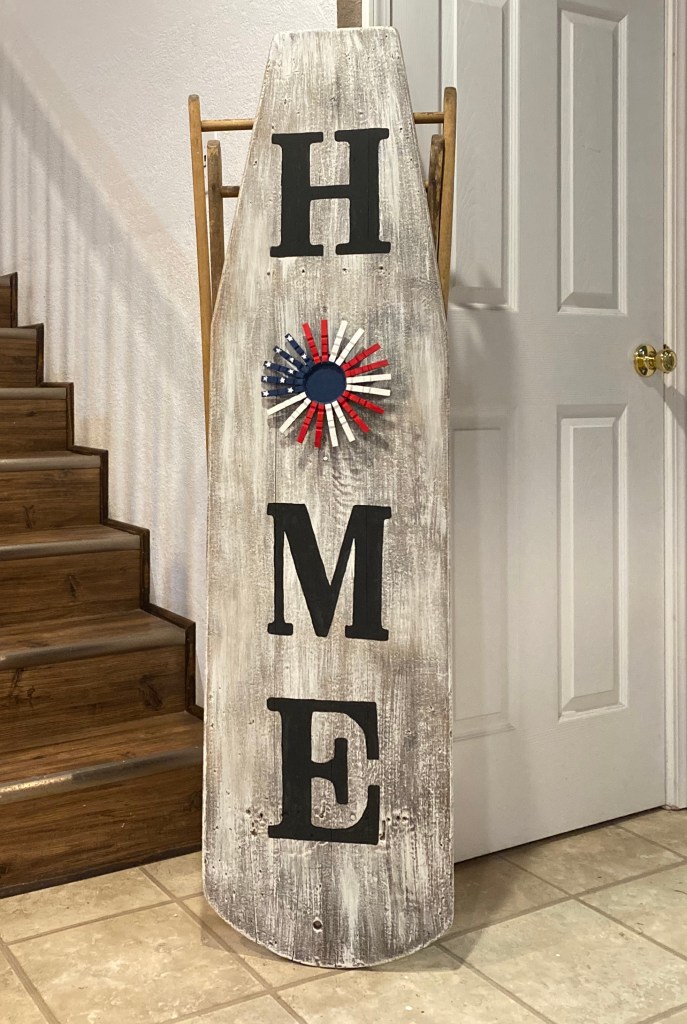
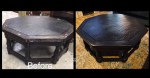
One day Danny mentioned we should paint the vintage ironing board we had. I researched some painted boards and was inspired to paint it like a HOME sign. And that was just the beginning.
I had a brainstorm…. and now I’ve been obsessed with it. I decided I would make 7 different “O” wreaths. The buyer of this awesome creation would only have to change out the decoration and wreath I created for them every season or holiday.
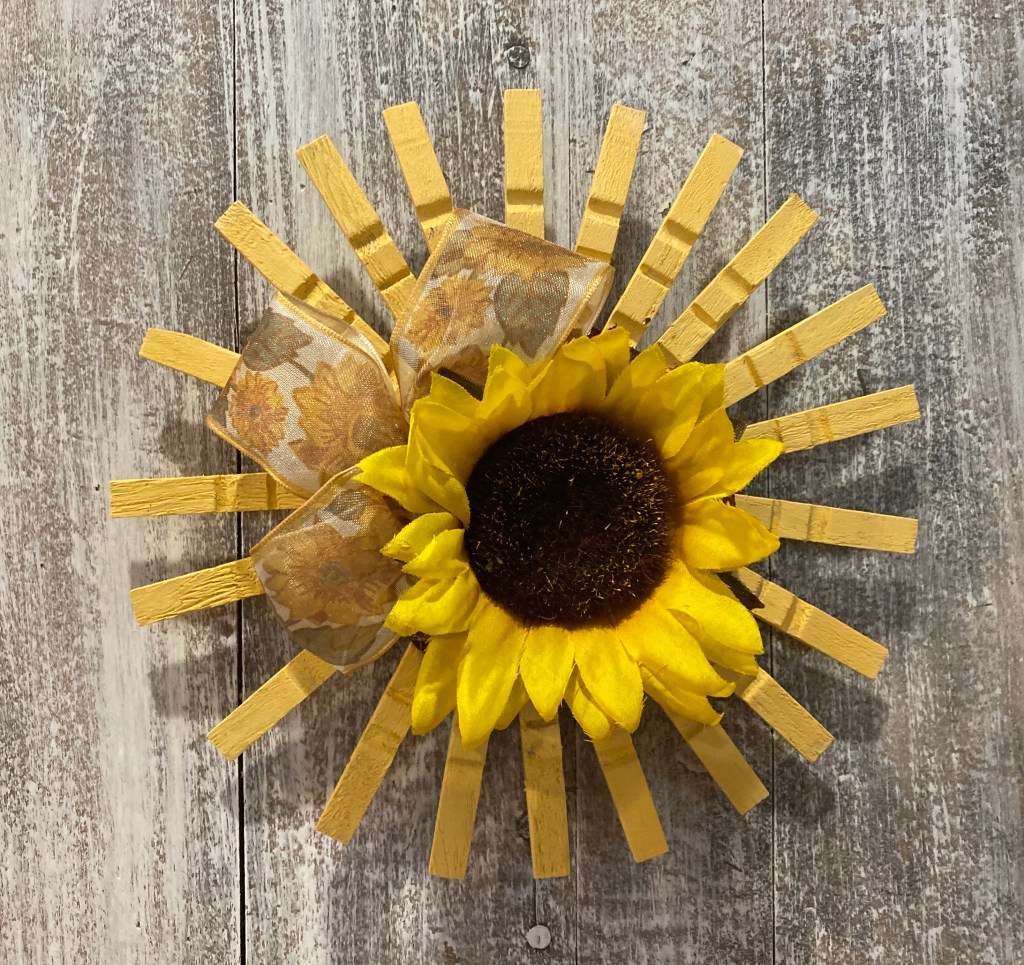
Fall/Thanksgiving
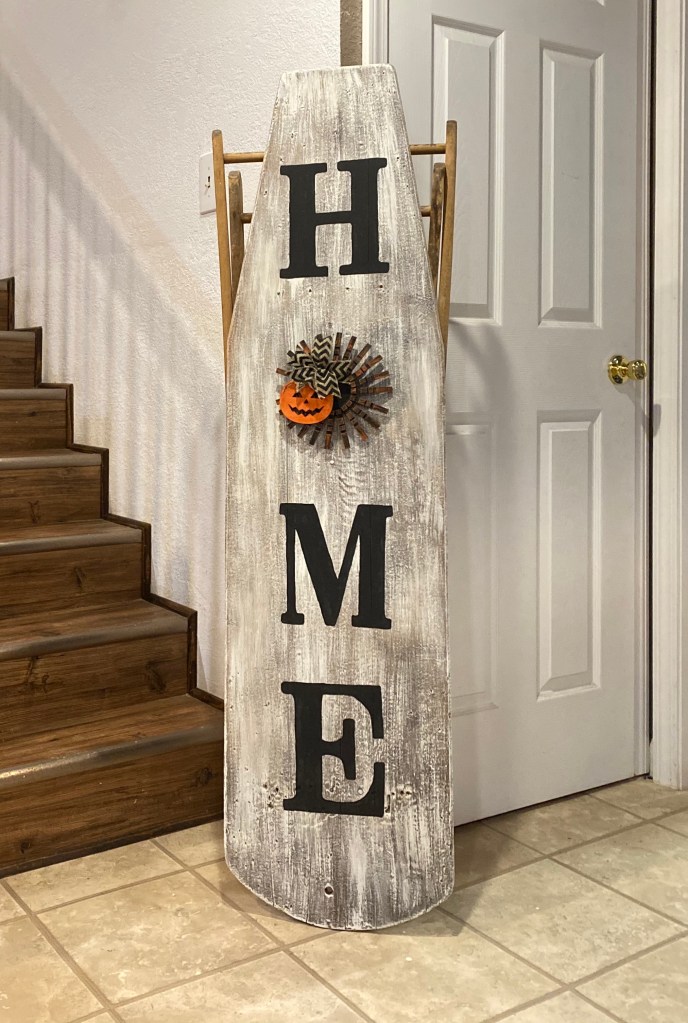
Halloween
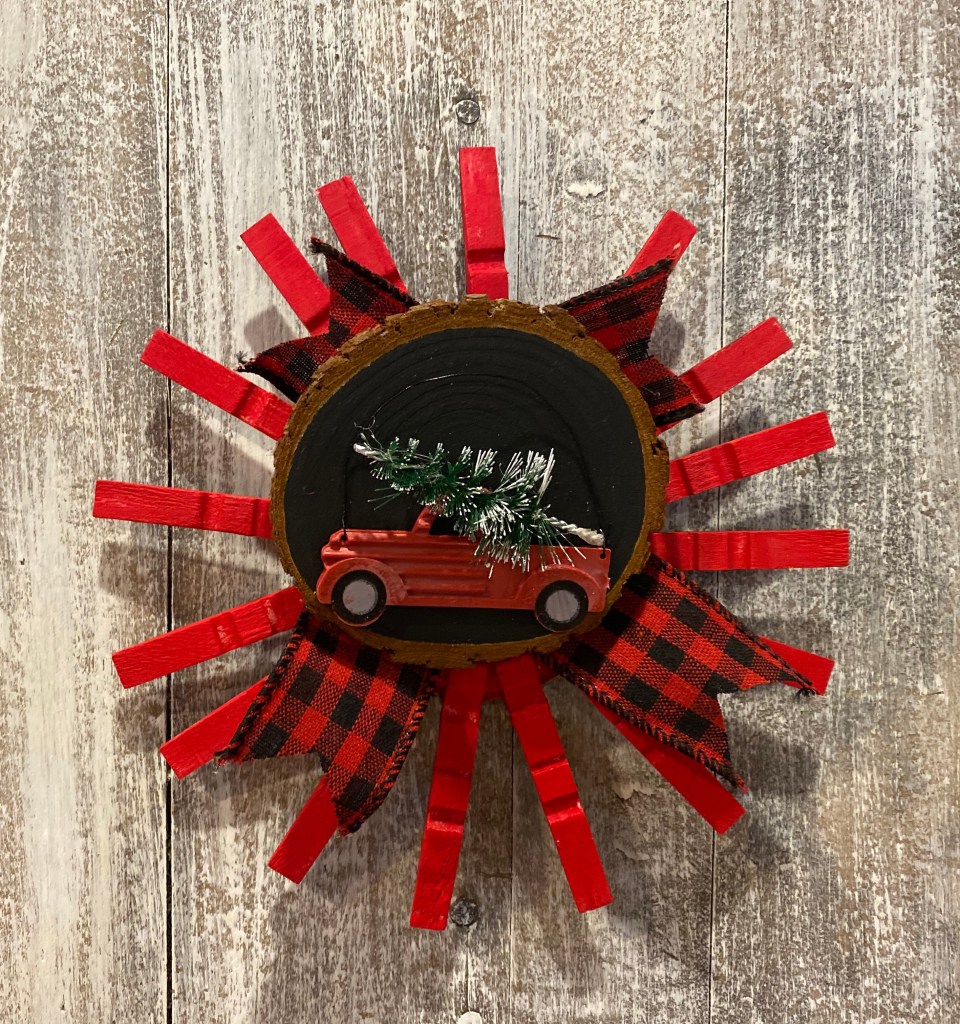
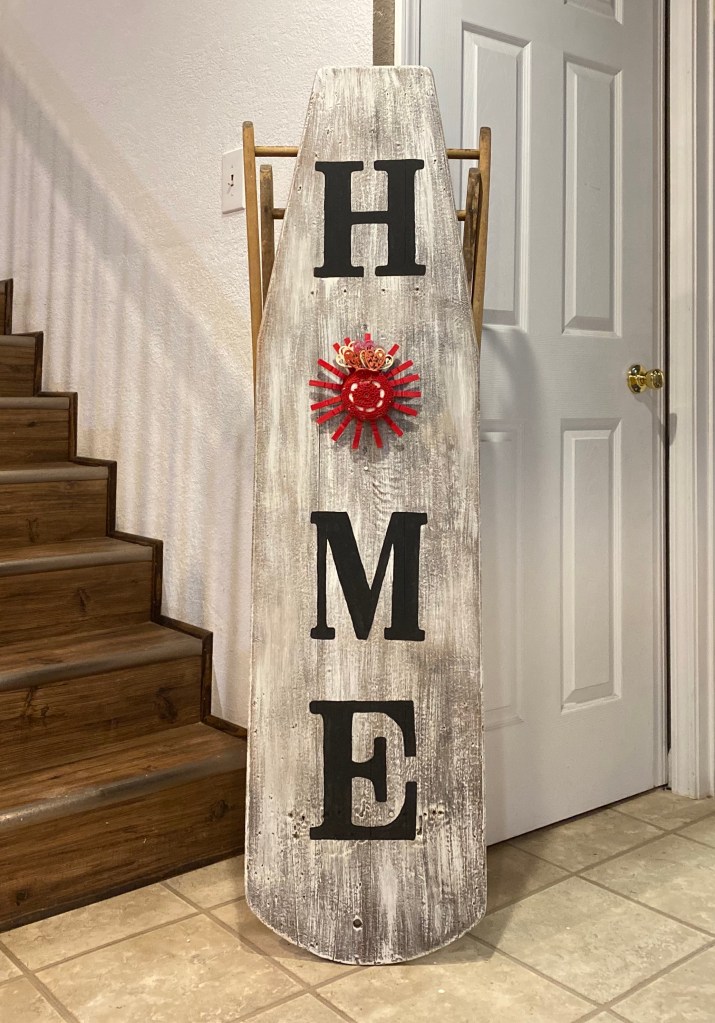
Christmas/Valentine’s Day
Winter
St. Patrick’s Day
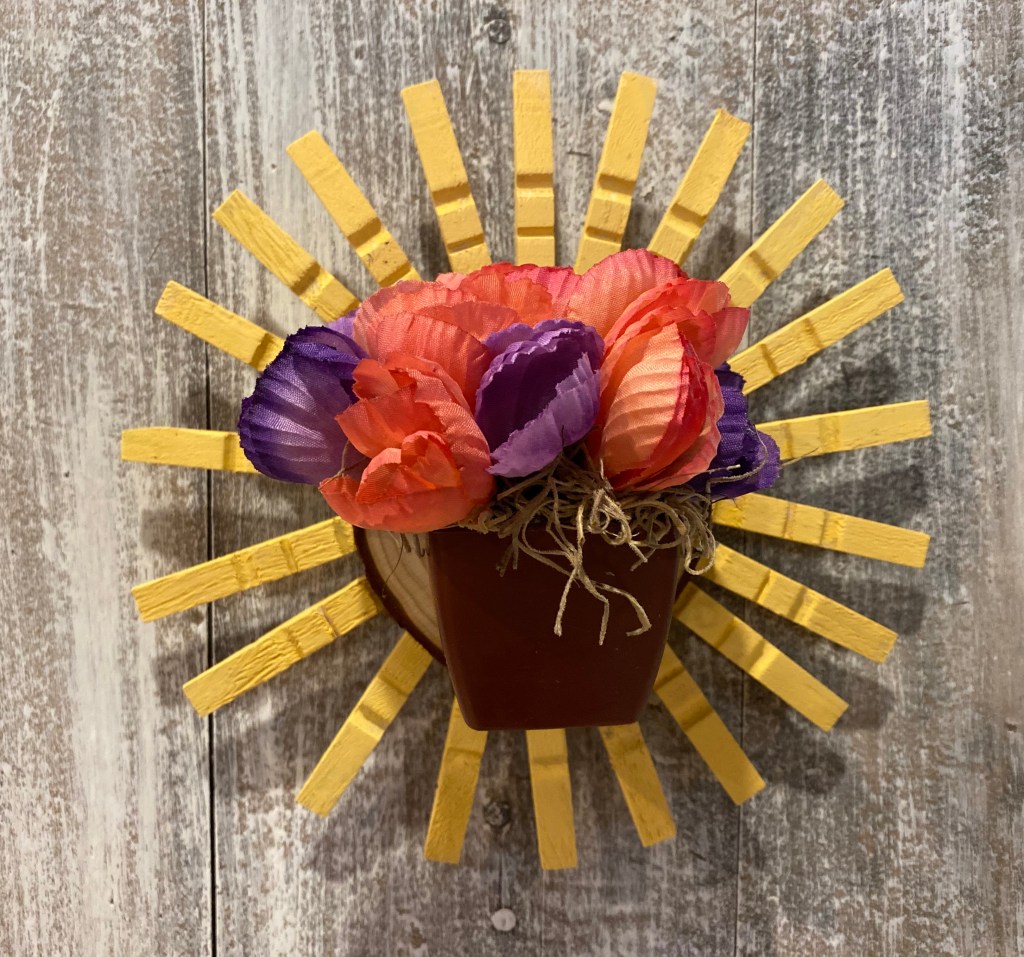
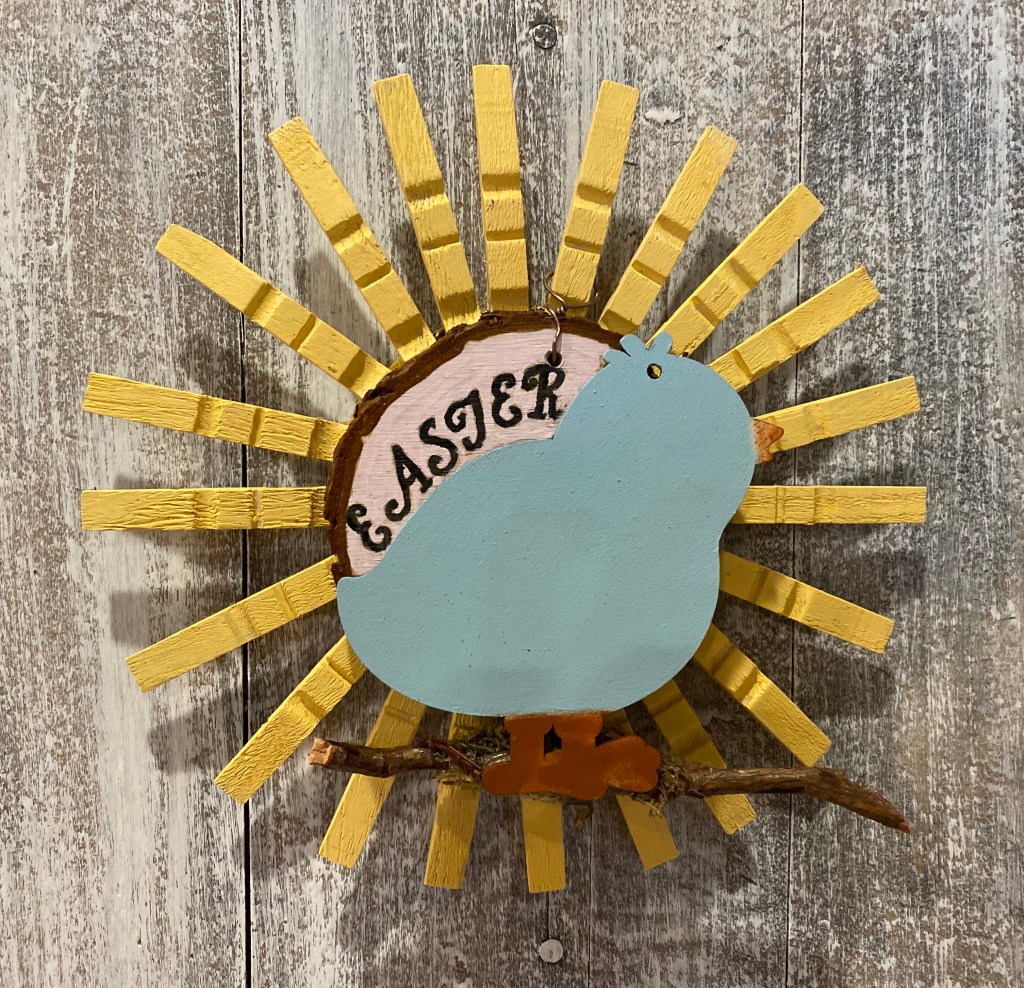
Spring/Easter/Summer
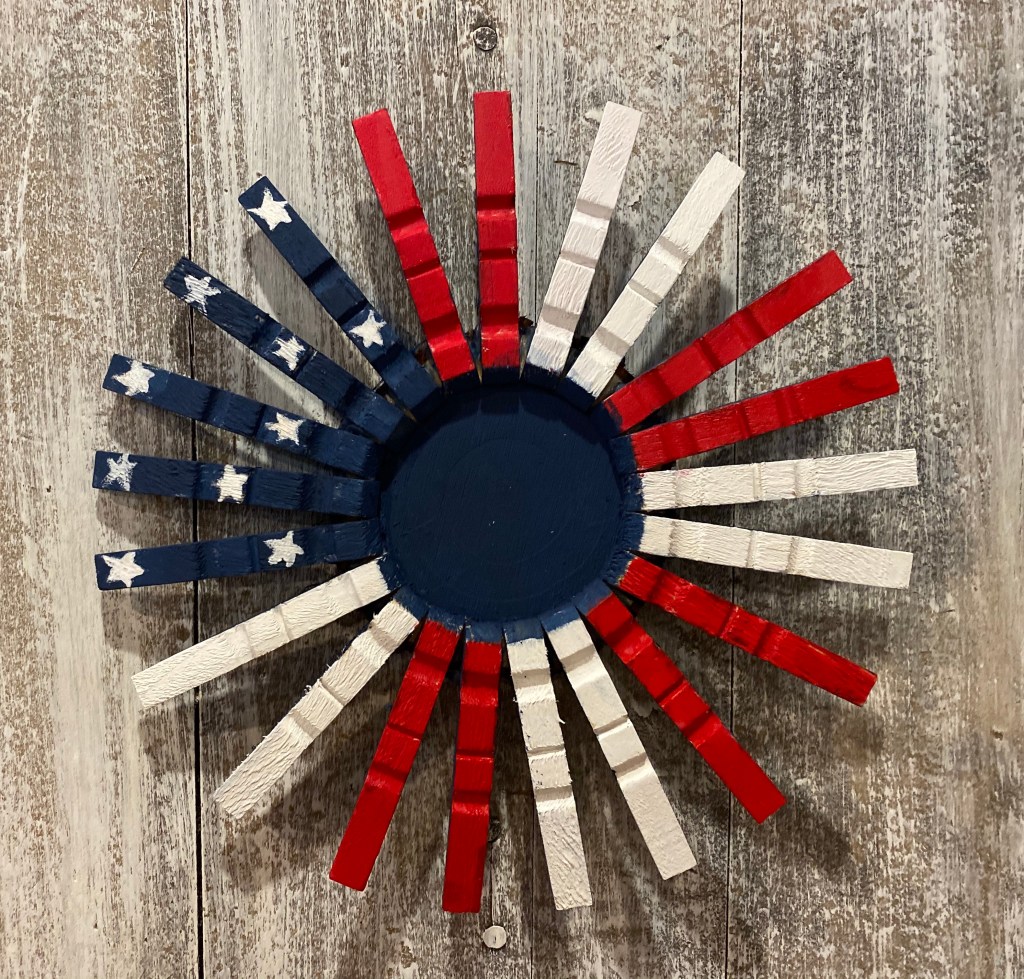
4th of July/All Flag Holidays
I have gone a bit overboard, I know, especially since I want to sell my creation and will never be able to charge for all the hours I will have into it, but I am enjoying the challenge, so there is that.
After cleaning the board thoroughly, I did a heavy dry brush of our Missouri Limestone Paint Company “January” to give it a nice distressed looking base for the words “HOME”.
I found 8 inch letters (H, M, and E) at Walmart and traced them on the board with a pencil. I left a space for a wreath to represent the “O”.
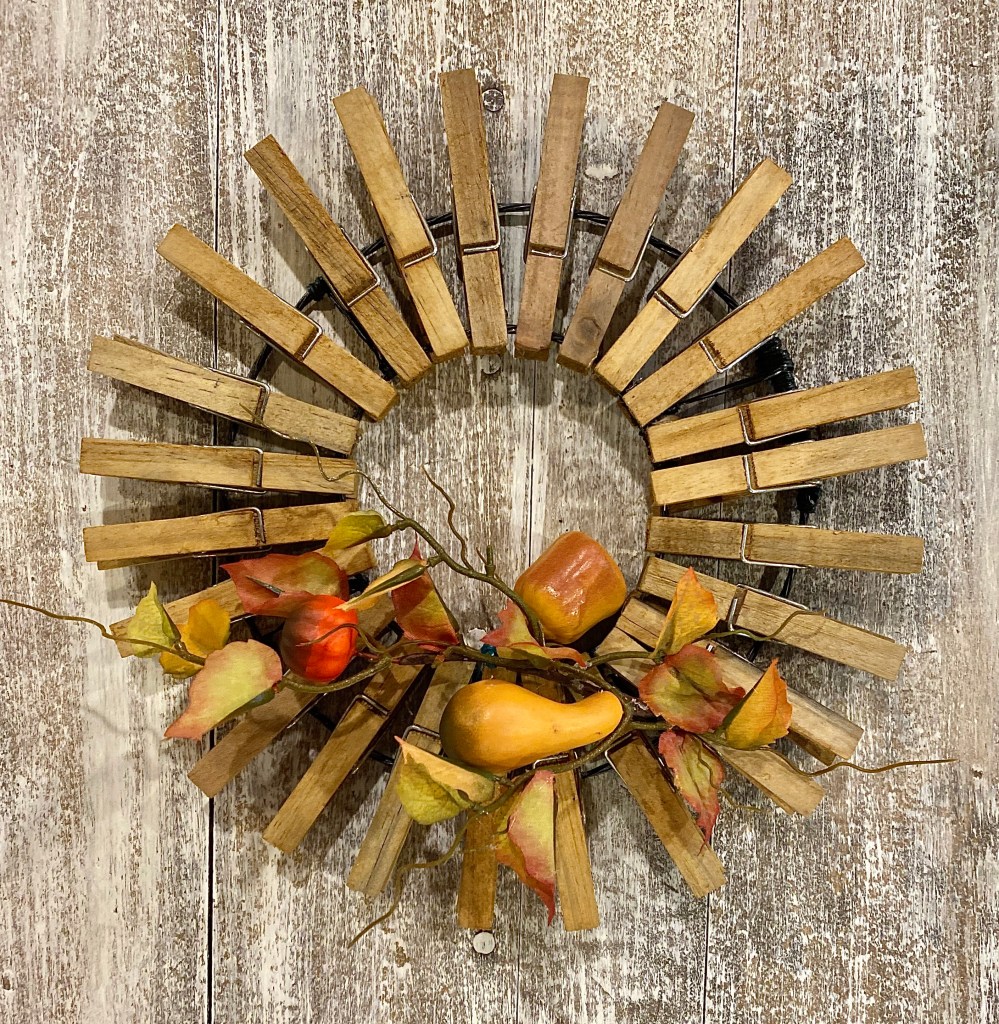
The beginning of the sign showing the H letter I painted black and my first idea for an “O” wreath using clothespins.
Looking good, but realized right away it would be too time consuming to make 8 of these wreaths.
To get the 8” size I needed, I had to make my own form with wire. With this one I stained the clothespins with a solution of vinegar, used coffee grounds, and steel wool, then glued the clothespins to it with hot glue and E6000. So….scratch that idea.
All is not lost, though. I added a different decoration and sold this one in my booth. But now, I had to think of an easier wreath to make.
My next idea was to use a big mouth canning jar lid. It was the perfect size! So, this time I took the clothespins apart and glued them with hot glue and E6000 as a sample. That made the perfect size. But…..I only had 2 wide mouth lids. Would you believe this whole town must be canning food for the next 10 years? There were no canning jar lids in the 4 different stores I tried.
Turns out, that didn’t matter. The clothespins weren’t adhering well to the canning jar lid anyway. So, scratch that idea.
Building the wreath
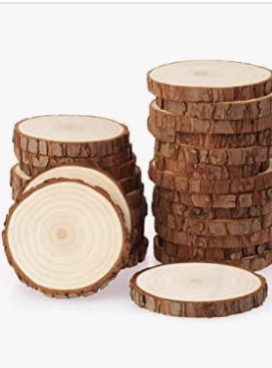
And then I remembered the small wood slices I bought on Amazon. They were perfect. The clothespins would adhere well to wood, I thought, and they did! So, I am now immersed in “O” wreath making. I am painting these according to the season/holiday.
All the wreaths have a recessed area drilled into the back. We put a screw in the board, but left a bit out so the wreaths could pop on and off. They are a tight fit and take a little work getting them on and off, but they are secure.
This huge project was completed in time and sold the day of the big sale event at Half-Crocked Antiques in Bourbon, MO on Saturday, September 18, 2020. Our booth #25 is inside and downstairs.
It was a lot of work but a lot of fun coming up with decoration ideas for the wreaths.
As a bonus, I decided on the color of paint I’m going to use on my next project, a custom desk.
So….. are you ready! Drum roll. Introducing the one of a kind Vintage Ironing Board Sign with 11 (yes, eleven) interchangeable decorations on wreaths for various seasons and holidays:
FallThanksgivingHalloween ChristmasWinterValentine’s DaySt. Patrick’s DaySpringSummerMemorial Day4th of July/Flag DaysHere it is in its new home!
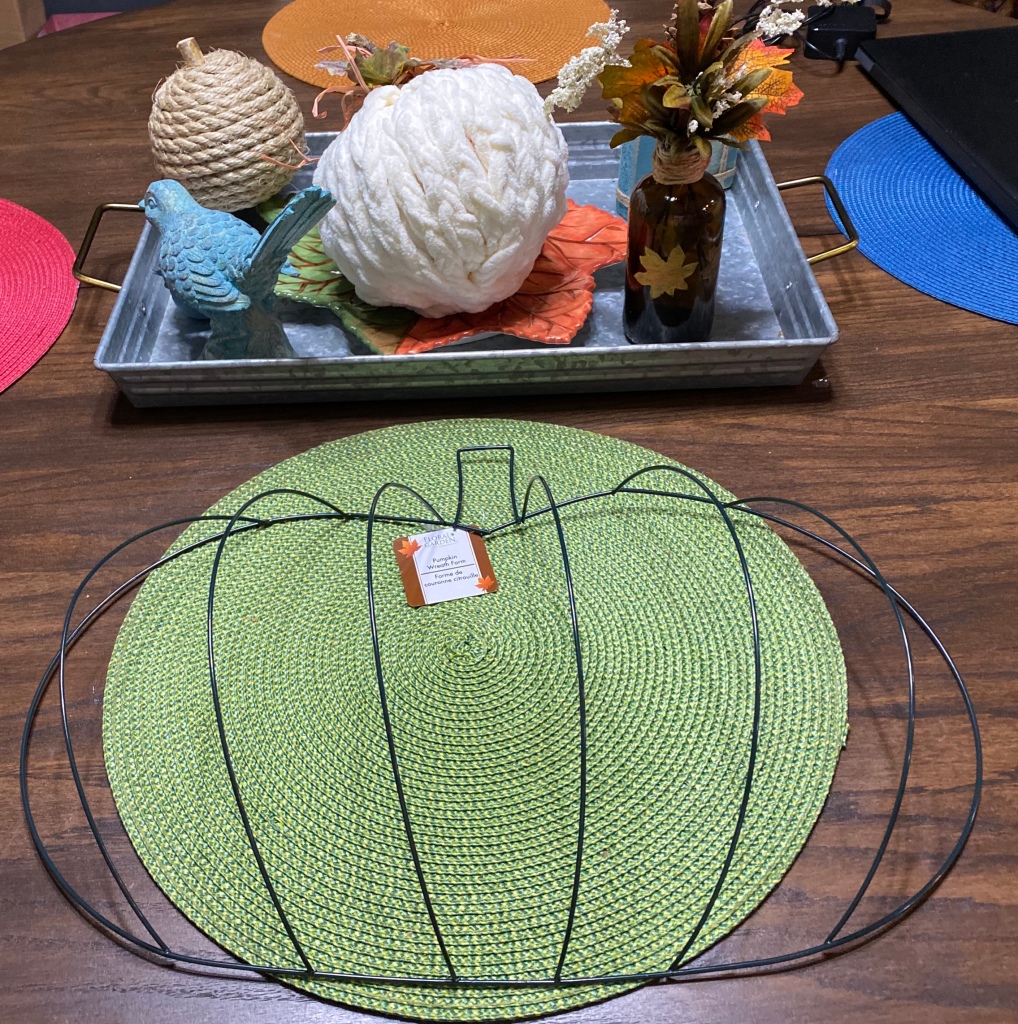
I ordered 24 of the pumpkin wire forms from Dollar Tree. They were shipped free within a couple of weeks to my store and the notification and pick up were very easy. Just go to https://dollartree.com
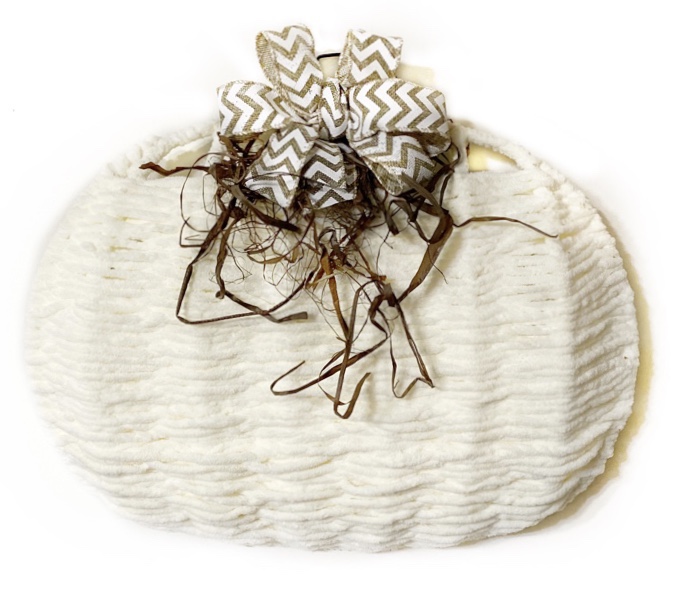
In addition, the manager of my local store told me if I didn’t want them all, they would buy any back for store credit as they were so popular. My plan is to make up some and decide what might be easiest to do. I want to then try a Zoom craft meet with about 8 friends. I will make up a kit for them, let them know the date and time, and they can porch pickup the kit. This should prove to be pretty hilarious. I did decide on weaving yarn through one, similar to the cream colored one pictured. Hopefully they will remember their elementary school lantern weaving projects. 🤪
Right now, I have completed 8 wreaths. Several take two of the forms. I have a few more to make, including a snowman made from one. Most of my ideas came from or were inspired by those I saw on Pinterest or in my crafting groups. Most of these wreaths can hang on a door, but should be kept out of the weather.
I hope these will inspire someone else. So keep coming back to this post as I add more. 😁
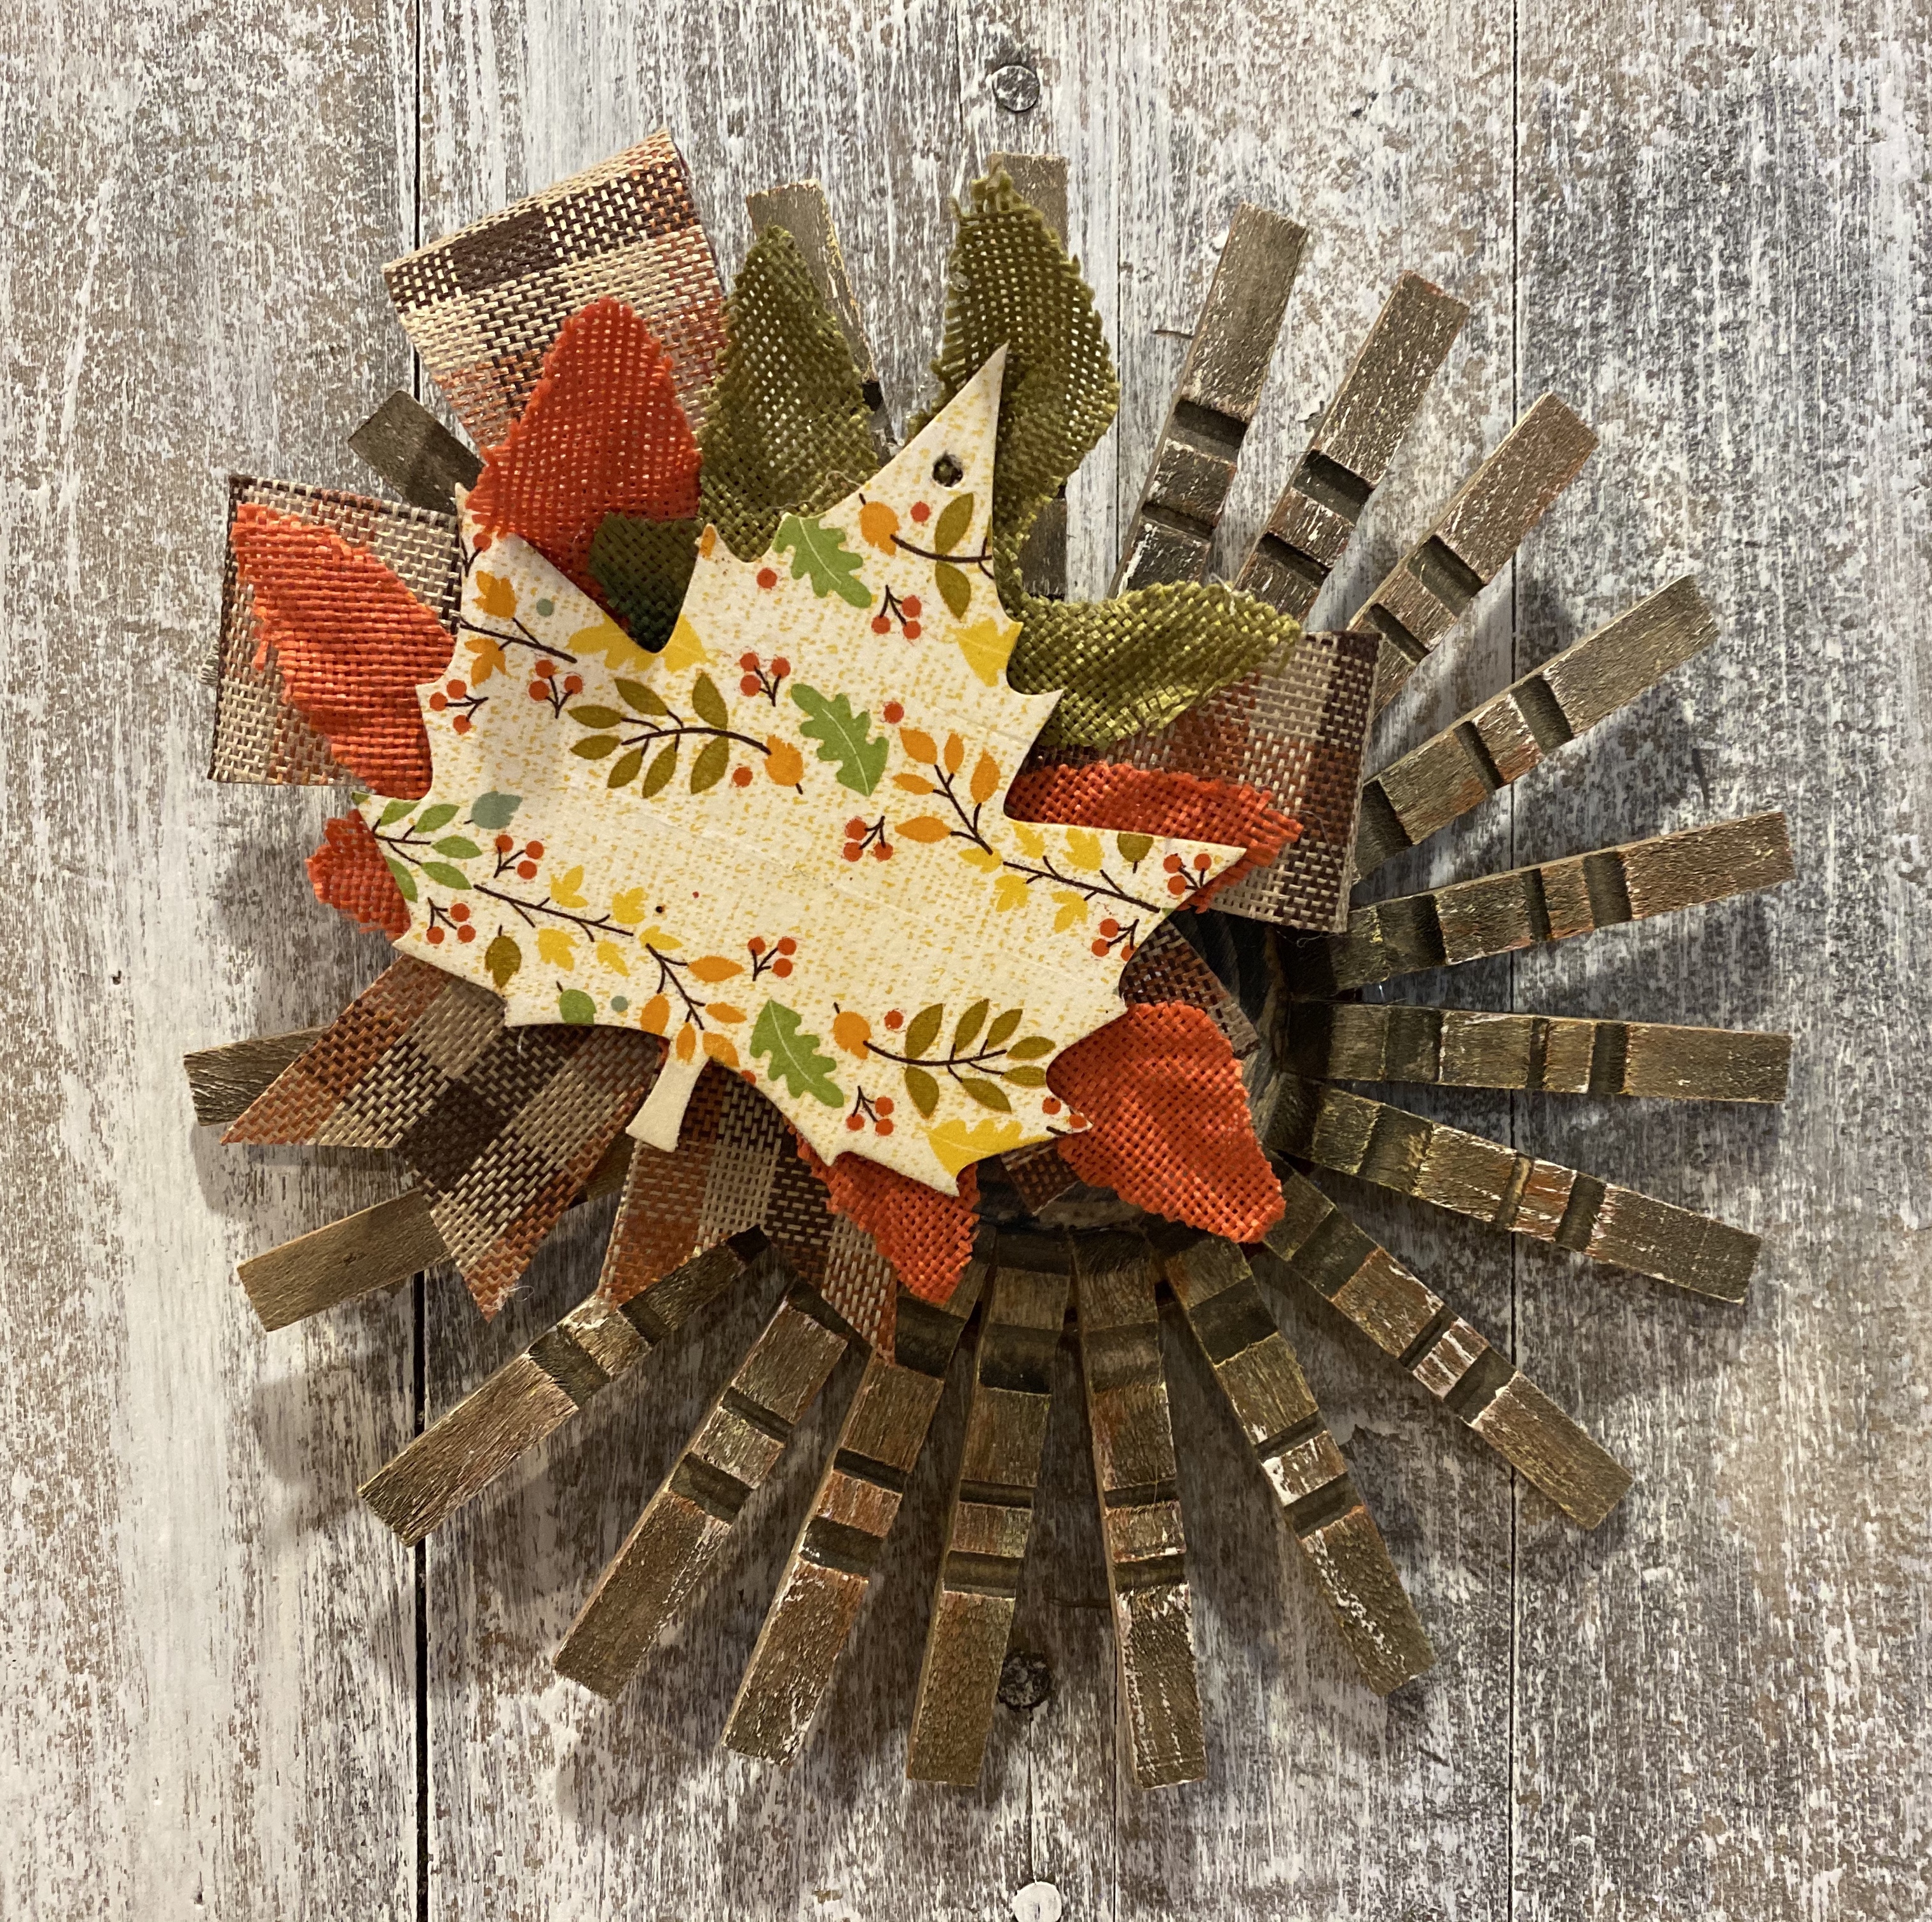
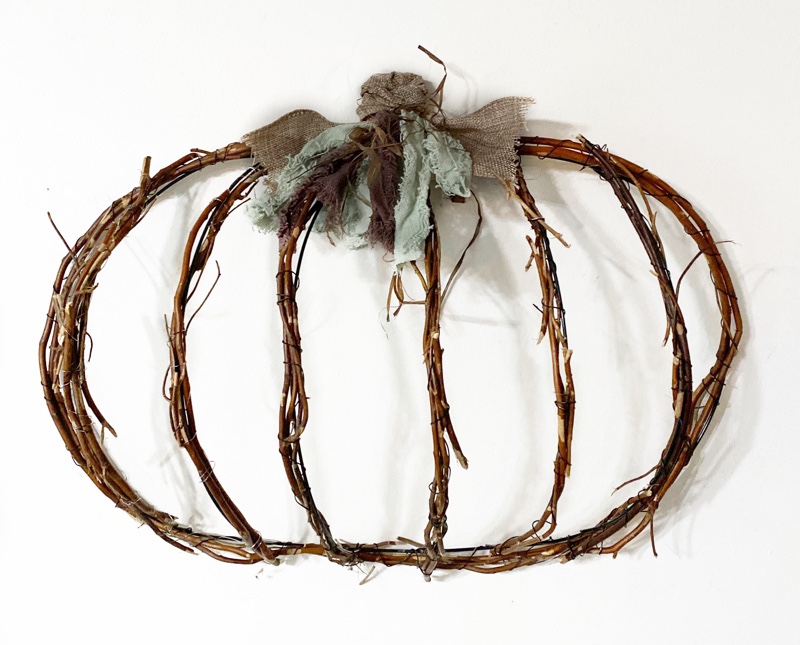
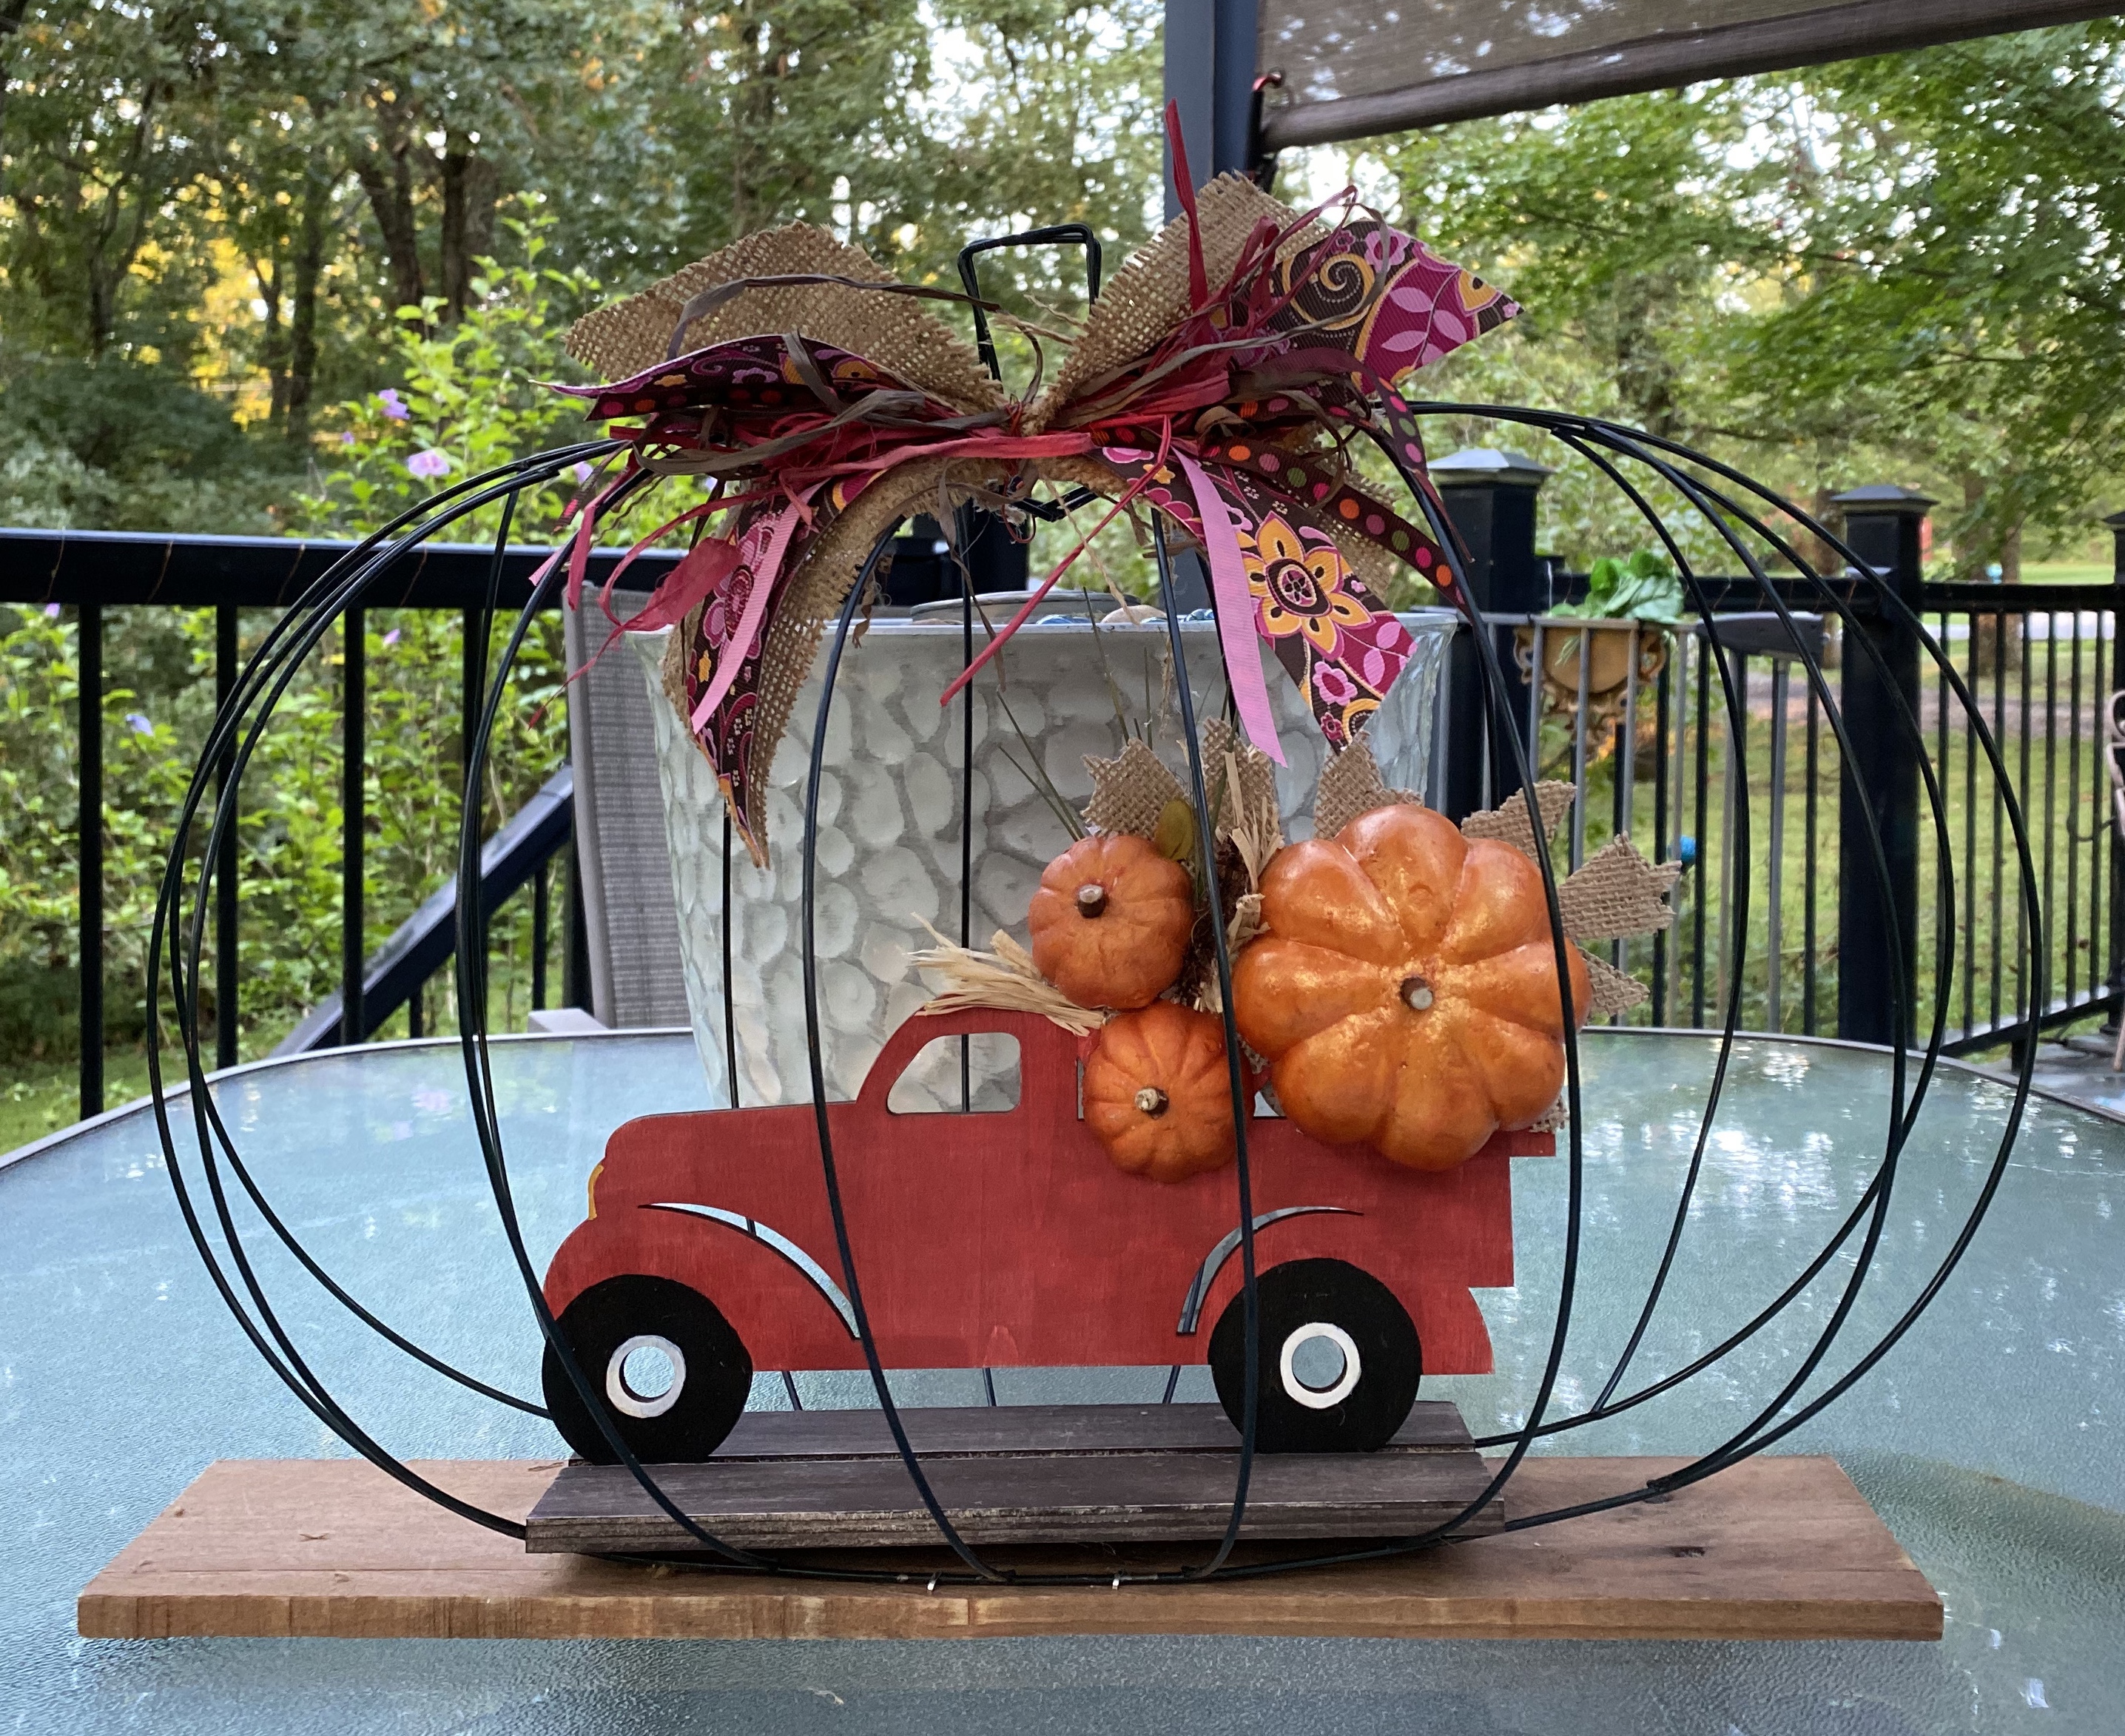
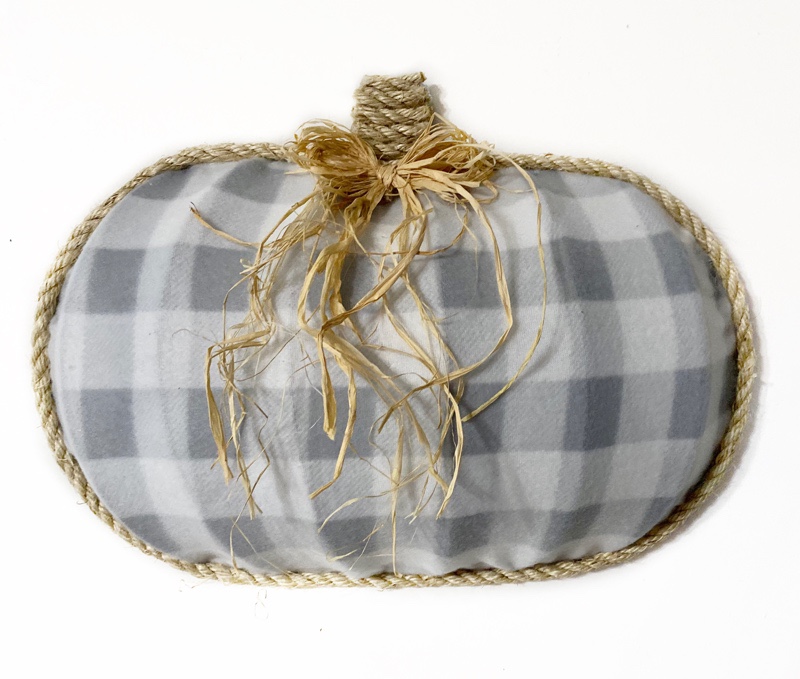
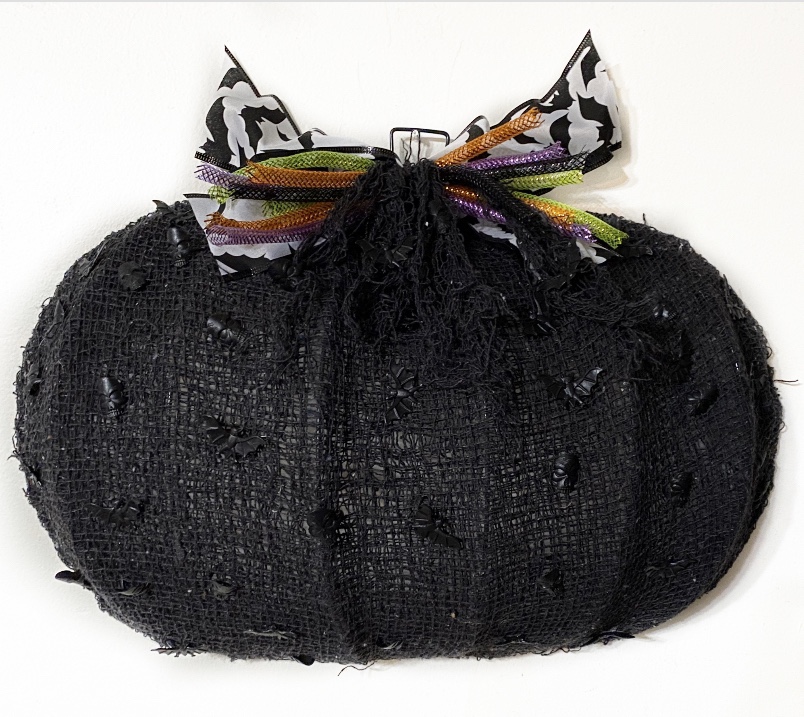
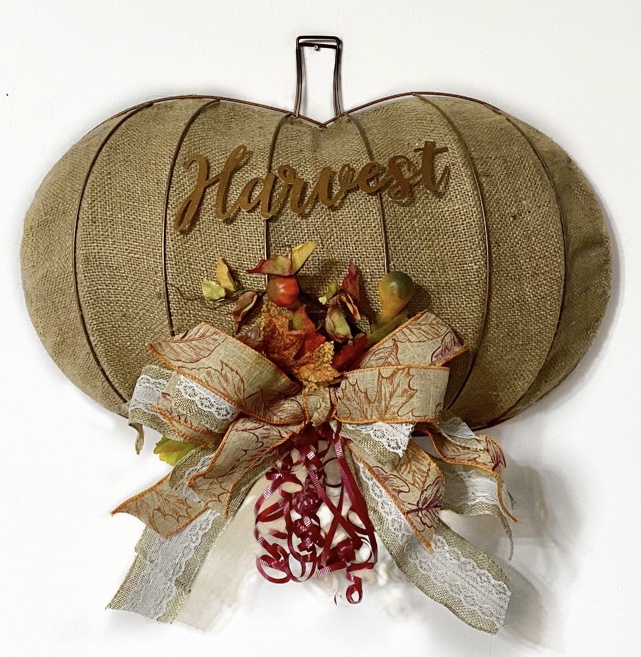
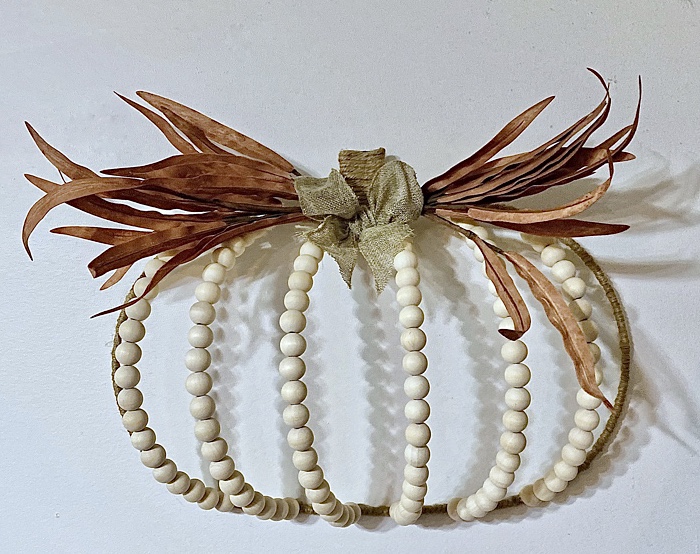
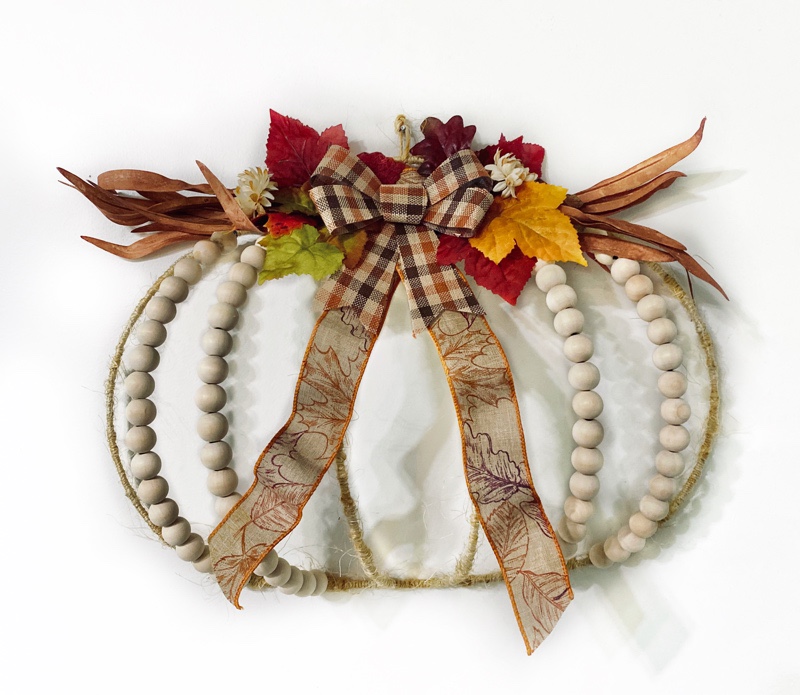
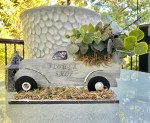
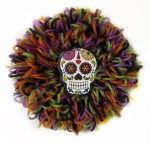
I used a grapevine wreath from Dollar Tree and took it apart. I wired it to the form, wrapping the wire as I went.Woven with chenille blanket yarn. I first wrapped the whole pumpkin. The bow is removable and I left an opening at the top in case someone wanted to add decoration there, plus, I liked the look of that.This one took two. The bottoms were stapled to a board and tied across the top with jute. I pulled the wire apart just a bit to get the big pumpkin in the truck to fit. The wires went right back in place. The truck is decorated on both sides and a bow added to that side so this makes an awesome centerpiece.This one has two forms. The first one, I wove with chunky chenille yarn. Then placed the second over it. I tied them together with pieces of the yarn on the top, sides, and bottom.This gray buffalo check wreath started out as a flannel baby receiving blanket. I added jute all around and on the stem for a finished look. Bow is just long strands of raffia tied in a bow.I had to do a Halloween one. All materials for this one came from Dollar Tree, including the gauze like fabric. The tiny black bats and skulls are actually plastic rings for your fingers. I tried to make the ribbon look like bat wings.This one took two. I sprayed them with metallic copper paint first. It is made with a burlap feed bag glued over the first form, then the second one place over that. I use mall wire to secure them together in places. The Harvest word was sprayed copper also. The curly ribbon is old school curled with the edge of a scissors blade.I wrapped jute around the outside wire and the stem. Then cut the spine wires at the top leaving a bit of wire to glue the first natural wooden bead to. Then added beads to each spine wire and glued the first bead to the last one on each. Foliage from JoAnn’s and a small wired ribbon bow seemed perfect for this neutral wreath.
That’s all for now. Remember to check back. I still have a few more forms left and will add photos here. 😁
I’m not sure why but I suspect that besides finding all kinds of cute ideas I have to try, and the fact I recently ordered 24 pumpkin wreath forms from Dollar Tree and have been searching for ideas on how to use them and get side tracked with more cute ideas to try, I find it takes my mind off the news for awhile.
So today, I’m just going to share pics of some of the things I’ve been crafting and painting lately, since July. Trust me, almost everything I have done here is not original. I saw it somewhere and thought, “I (meaning me and sometimes Danny, my other half) can do that!”
There are over 50 here and I probably even missed a few, so I made them into a gallery. But I am sure I have them on my Instagram page and my Facebook page, so if you are curious to see a larger version, and sometimes how I created projects , you can go to: