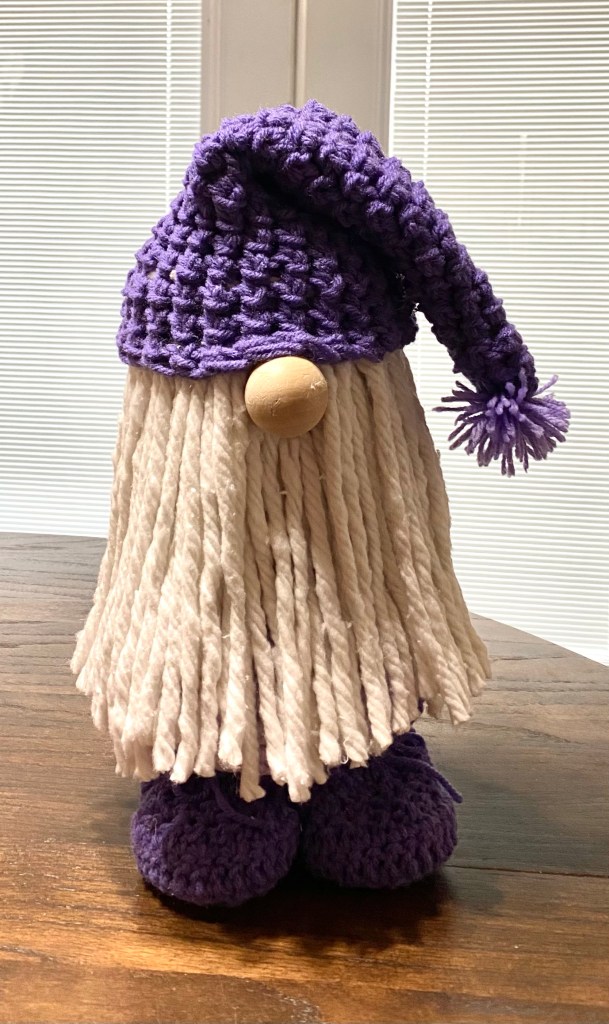
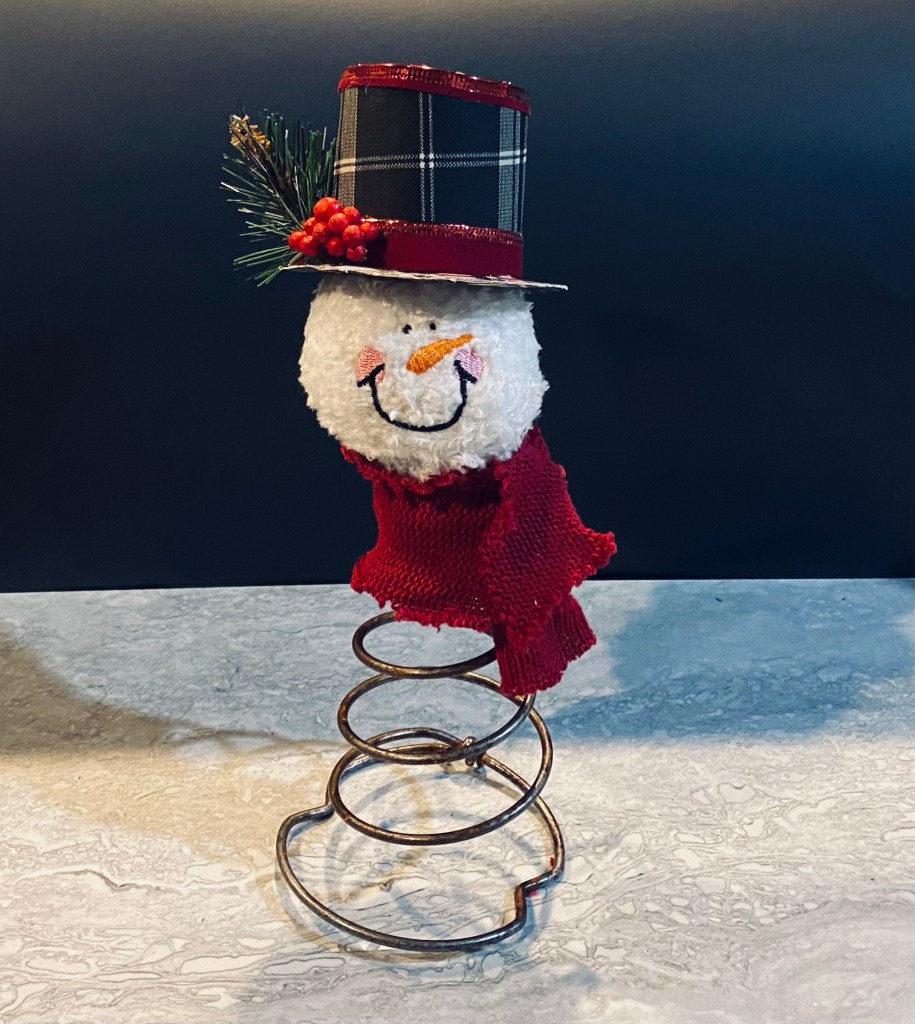
A friend saw the picture I posted of a gnome I made a couple of years ago and wanted one, do I crocheted a hat, body covering, and boots for it in her favorite color – purple. A Dollar Tree mop head became his beard.
I hot glued the body covering over a large water glass with lid from Dollar Tree. I made wood forms for his feet and stuck them in the crocheted boots I made and glued them to the lid of the glass, using hot glue and super glue. Then added more hot glue all around the wood.
I cut the strands off the mop head and applied two layers of them all around the edge of the glass bottom. Then hot glued the hat on and added a wood nose. He stands about 12” high.
Gnomes are still popular. Anytime I make one, it sells quickly. So the other day, a friend sent me a link for making one around a wooden ring with the hat being created with yarn around a piece of toilet paper holder. So, of course I had to make one. My ring was a little bigger so I improvised and added purple yarn around it and glued the hat to the ring. I added a little pink heart. I also glued the whole thing to a Dollar Tree stand up frame to display him.
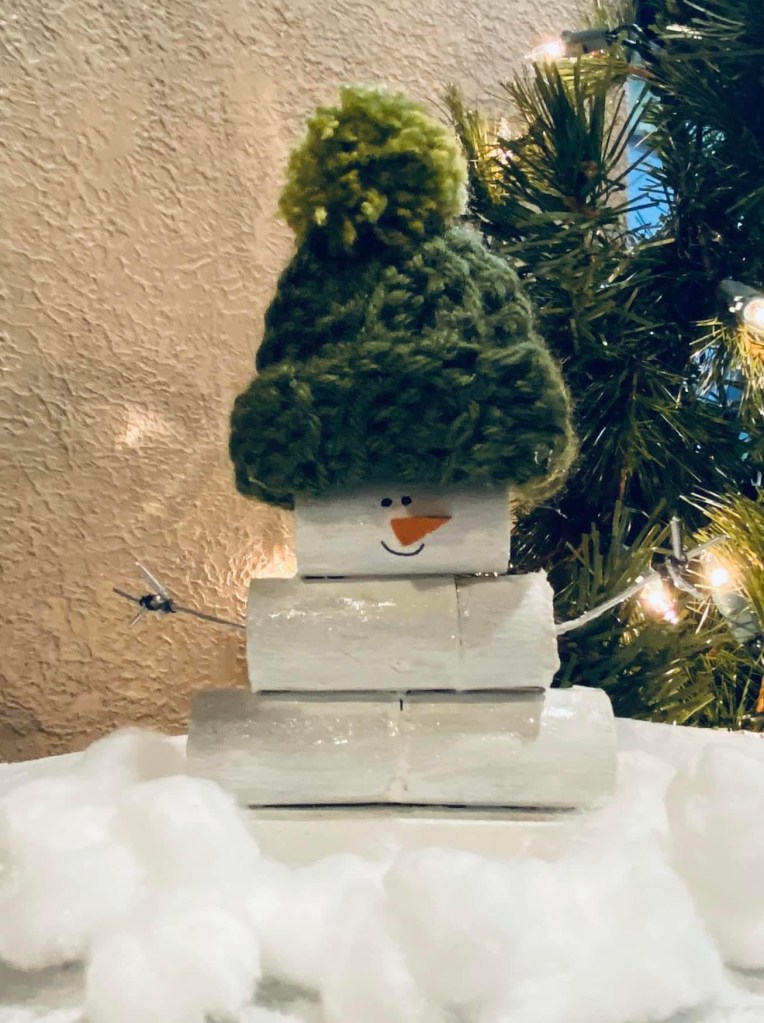
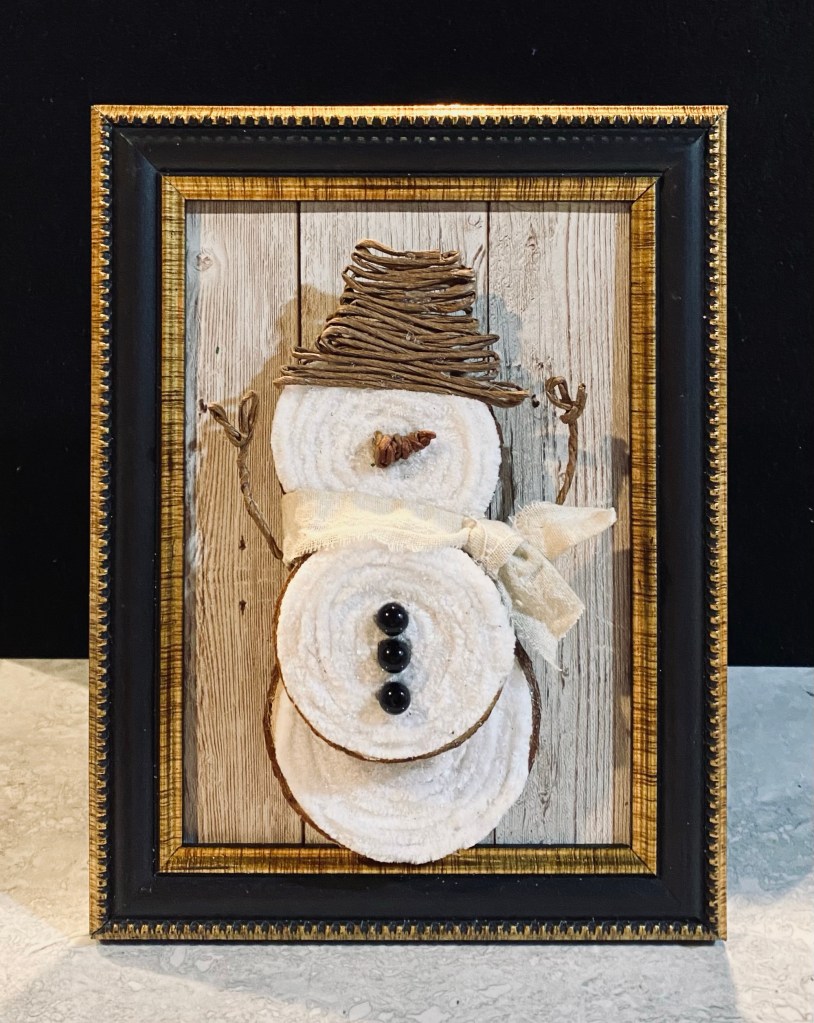
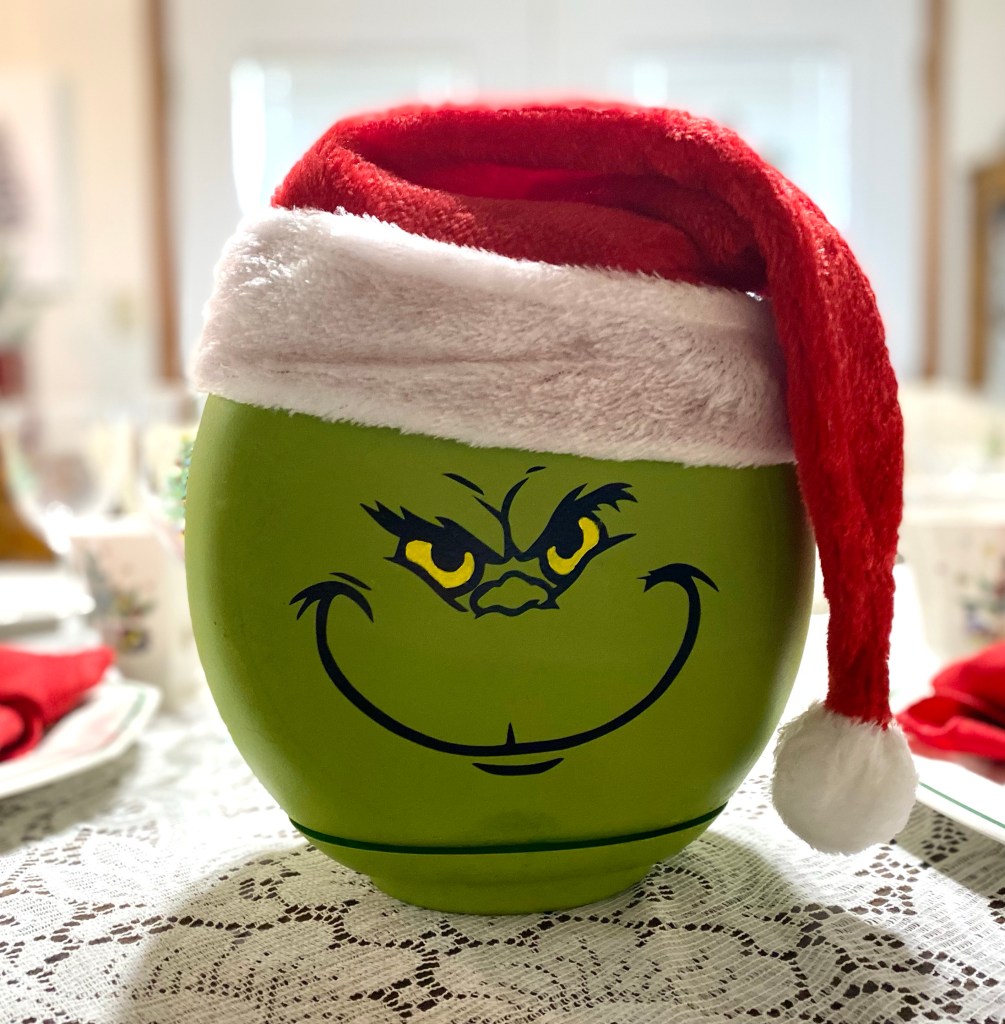
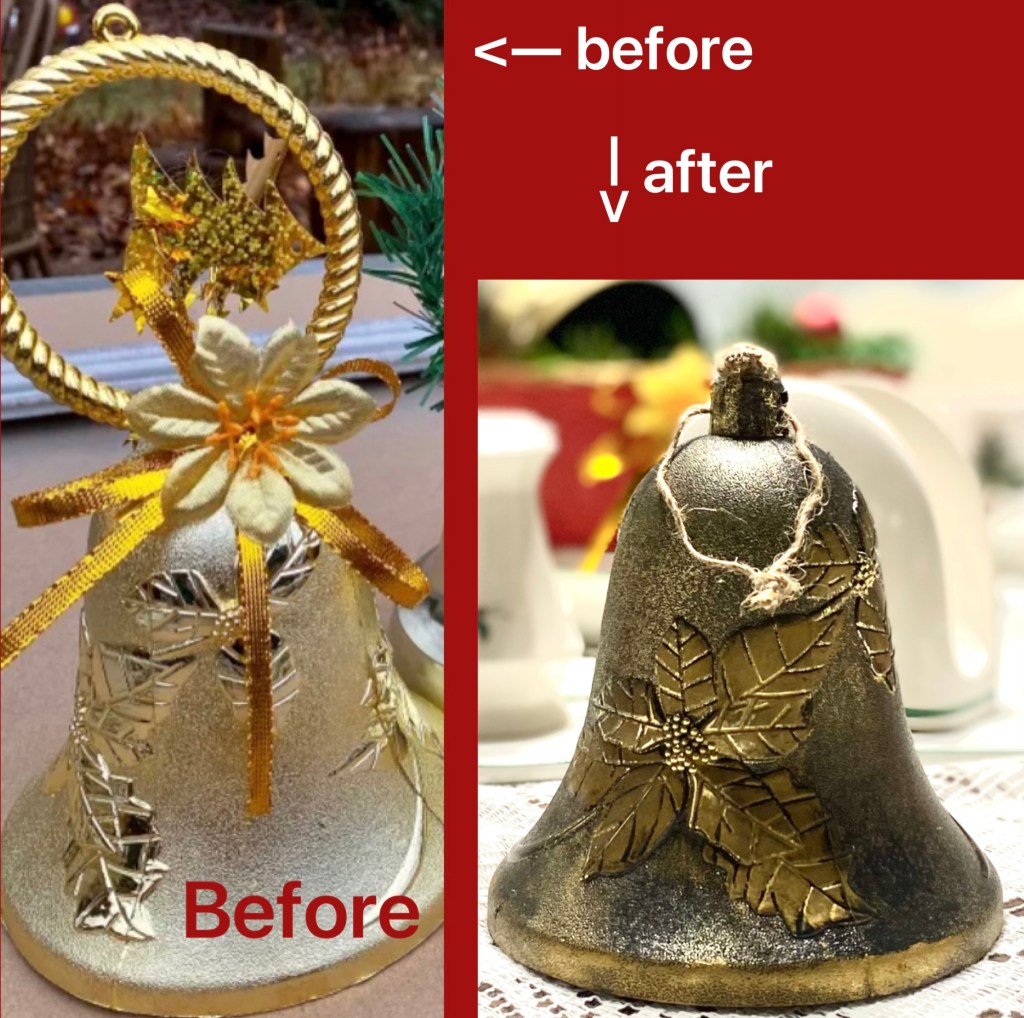
I’ve been so busy crafting, I haven’t been posting lately. So doing a photo dump here of many of the projects I, or my husband and I, have been working on lately.
You will find details on some of these projects by following my Instagram page. I try to explain there on how some of them were created. https://instagram.com/sharsumpaint
For now, I have to go clean and reorganize my craft area before Christmas. Wish me luck!
Update: Jan. 12, 2023
It seems Christmas got in the way and every time I sat down to try to add photos, I couldn’t. But, I did get my craft area cleaned and organized! I finally figured out that I was missing permissions for WordPress to access my photos. Most of the projects are on Instagram, but here’s few of my favorites. Maybe you can save some ideas for next year.
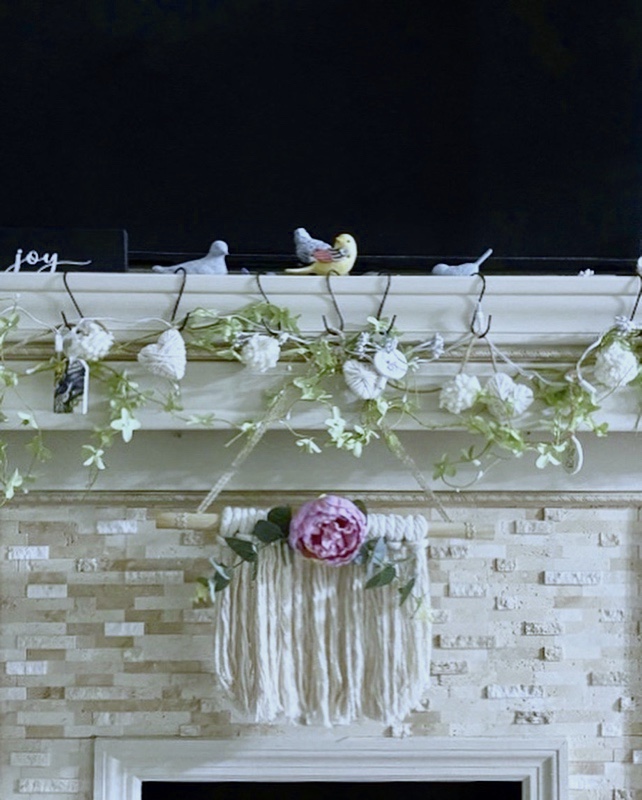
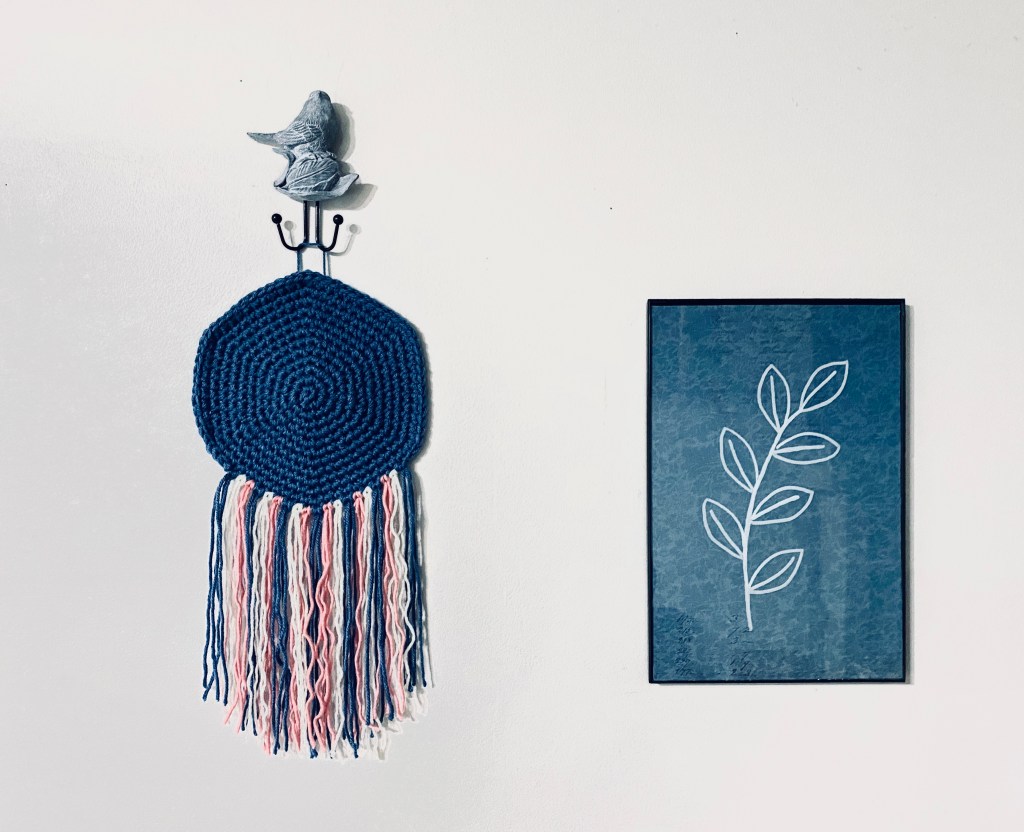
Last night I made a simple macrame boho wall hanging….while I watched TV. It was fairly time consuming so I recommend TV watching while you do this. 🙂
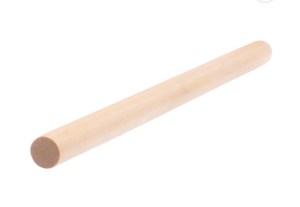
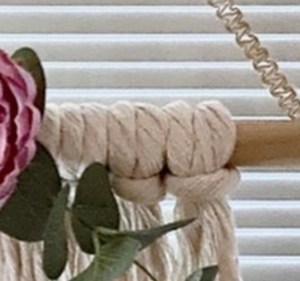
I had a dowel 16” long by 3/4” diameter. A slightly smaller one would work as well. A cut down plunger handle from Dollar Tree would be perfect.
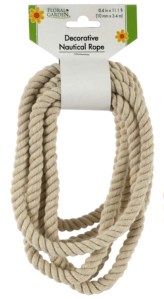
I unraveled the whole nautical rope from Dollar Tree. It made 3 strands. Then I cut those strands in half and I had 6. Then I cut those in half and I had 12.
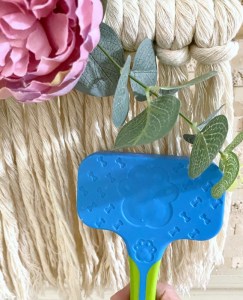
I know had 24 strands to unravel. The time consuming part was unraveling all the strands until I got the look you see in the photos. Take your time and do just a few strands at a time or you will get it all knotted at the end. Trust me… I know. I did use a dog brush I bought at Dollar Tree for macrame projects and brushed the strands out as much as possible after I separated them. Then I trimmed the bottom a little trying to go at angles toward the center.
I attached a flower and foliage with hot glue. I bought four flower pots with a variety of high end flowers and foliage through an online auction for just $8.50 for all four after fees. They were originally priced at $10 each! What a bargain! If you haven’t tried online auctions, you should!
I then used some of the burlap trim from Dollar Tree to make the hanger. I wrapped some around a small metal book ring from Dollar Tree, hot gluing it as I went around. I took the length of one of the pieces in the package and cut it in half. I wrapped one end of the piece completely around the dowel rod, securing it with hot glue. I did the same for the other side. Then I brought the ends together, put them through the covered ring and hot glued them to the ring on the back side. I did that twice to make them very secure.
I took photos hanging from my fireplace and French Door. I especially love how it looks hanging from a fireplace for summer!!
This is line art I created on glass – by tracing a print out with a metallic paint pen . 🙂 This YouTube channel video has many great ideas that think fit right in with this modern boho style. This project I saw on the video, by Katie Bookser, in particular caught my eye.
I printed an image from the site of free images she shared and placed it under the glass of the photo frame I was using. Then with a white metallic paint pen from Dollar Tree, I simple traced the image.
Once the paint was dry, I turned it face down on a unique piece of blue scrapbook paper I placed in the frame. In the close ups, you can see a bit of writing on the paper. With the painting face down, you can easily clean the glass.
This 8”x 12” frameless photo frame is very unique. The glass and contents pop in and out from the front. You press on the edges to release them. There is also a fun surprise under the scrapbook paper. I used a snowflake picture I made this winter. Repurposing are its finest. 🙂
Photos were a little challenging due to glass reflection.
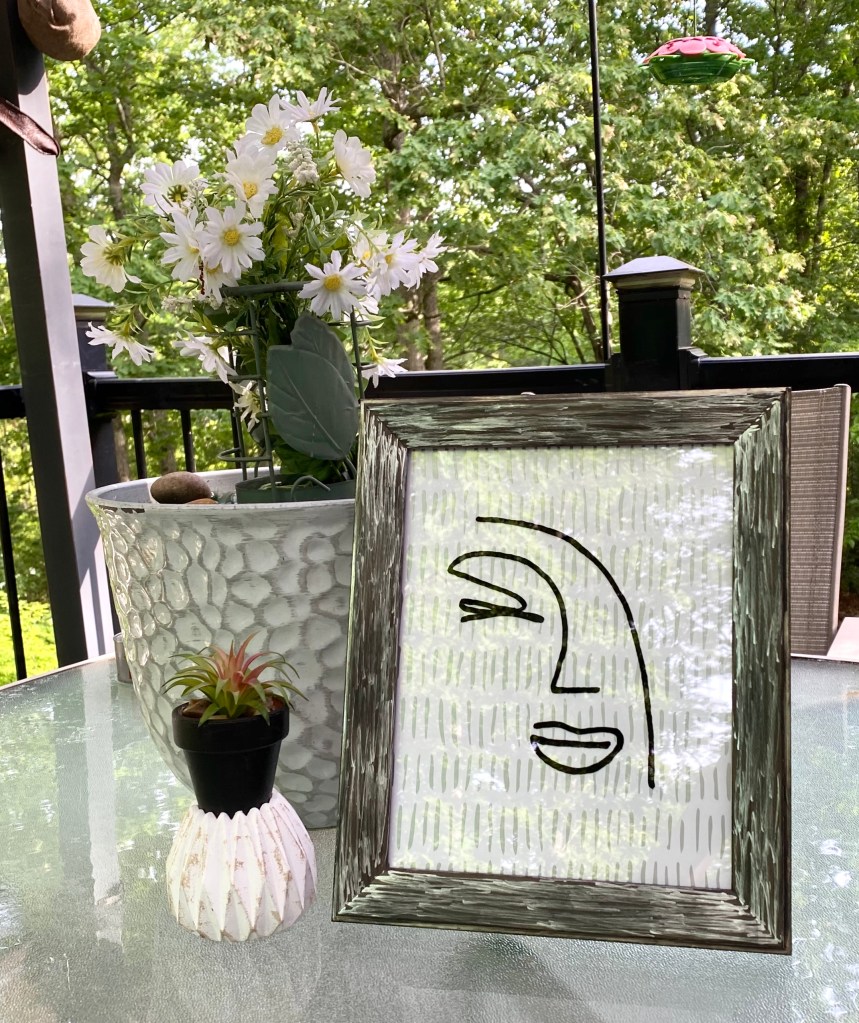
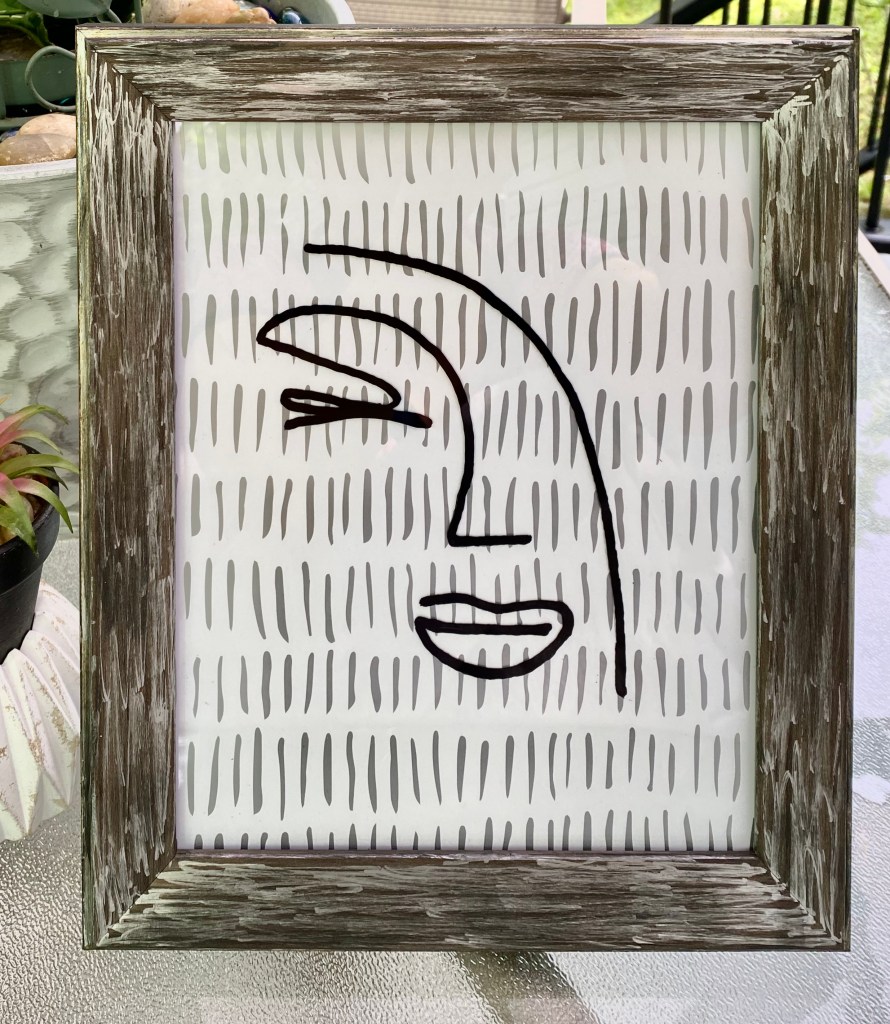
I had so much fun with tracing line art on glass yesterday, I just had to play around with another one this morning. I’ve discovered I love to do this!
The graphic is from a free vector site called vecteezy. I did a search for face line art. I traced this graphic on glass with a black permanent ink Sharpie.
The tribal peel and stick wallpaper came from Dollar Tree. The nice solid frame is a Hobby Lobby one I thrifted from somewhere.
I painted the lines on the front with a silver metallic pen and the sides with black chalk paint.
This one is true bohemian style. So cool!
I was fighting reflections on the glass, but I actually love the reflection of the leaves in the first photo. And it’s a beautiful morning on the deck for taking photos. Honeysuckle must be blooming because I can catch a whiff of it every now and then.☺️
It was a rainy day yesterday and since rainy days are made for crafting, I had a couple more projects in me.
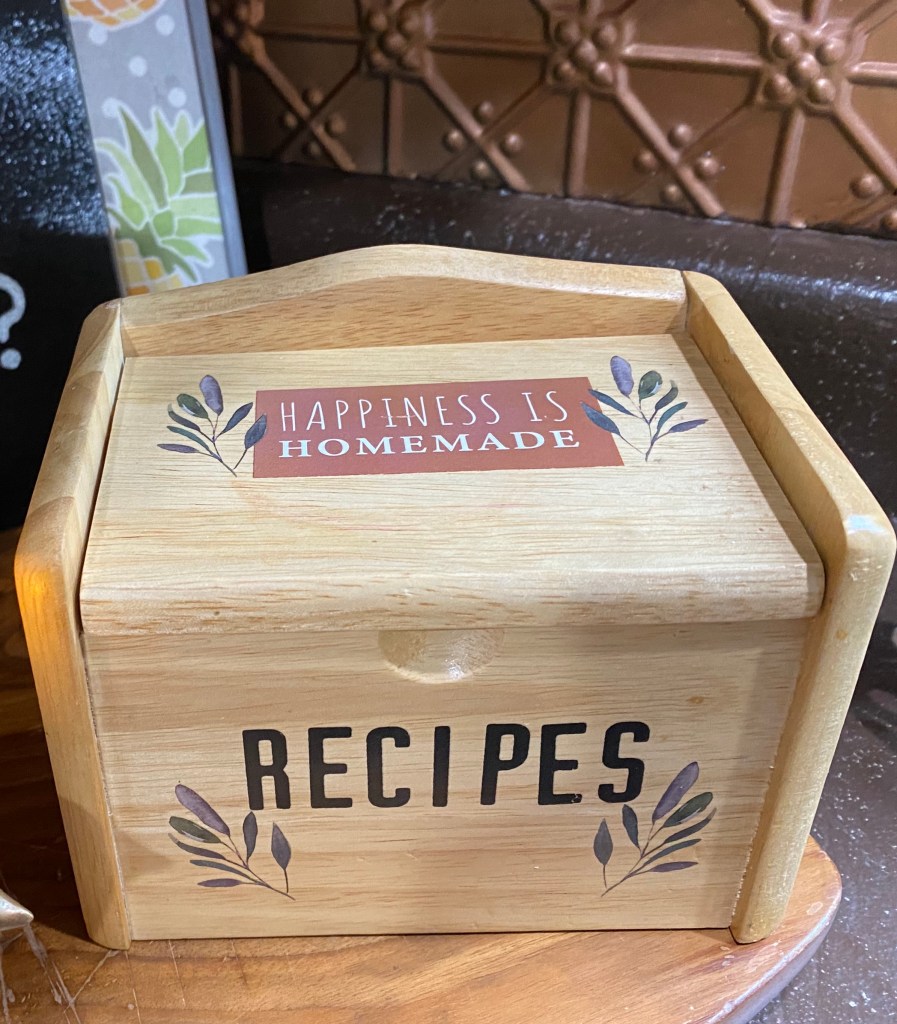
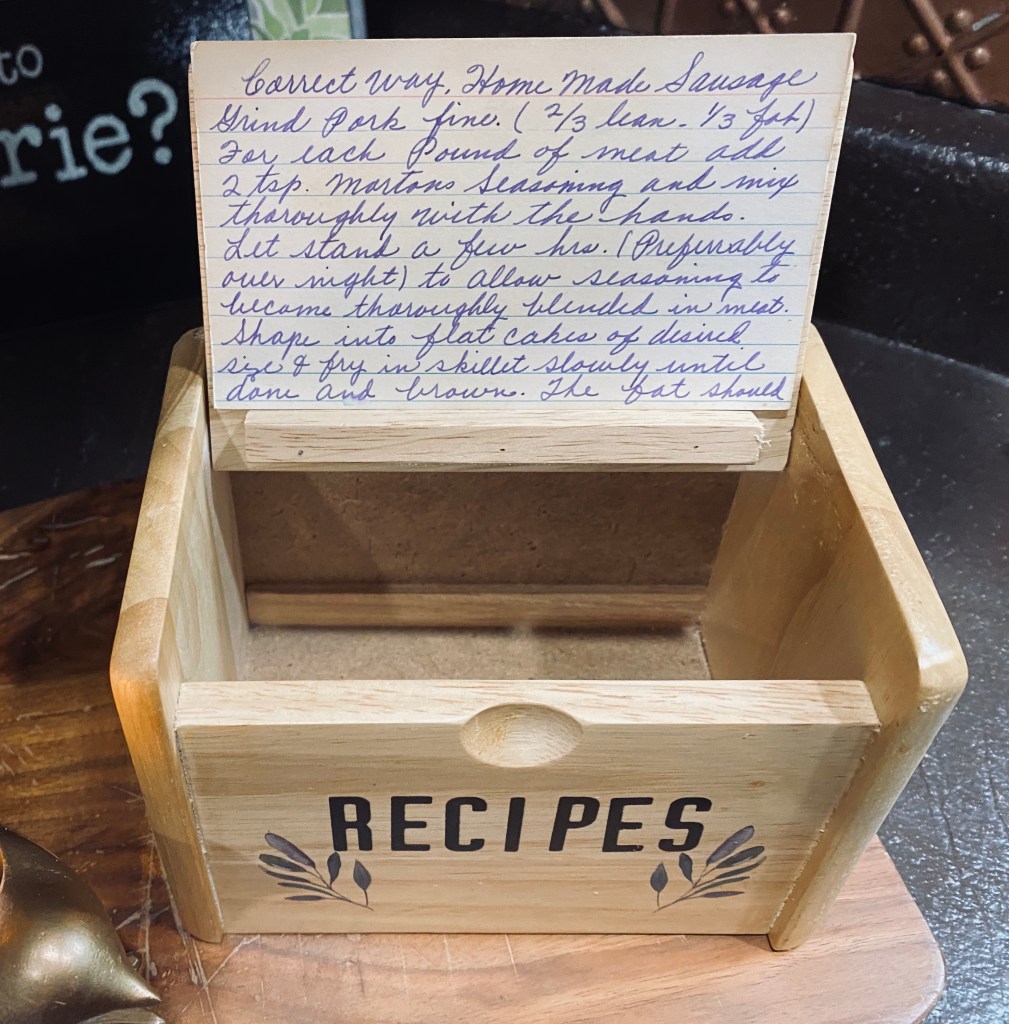
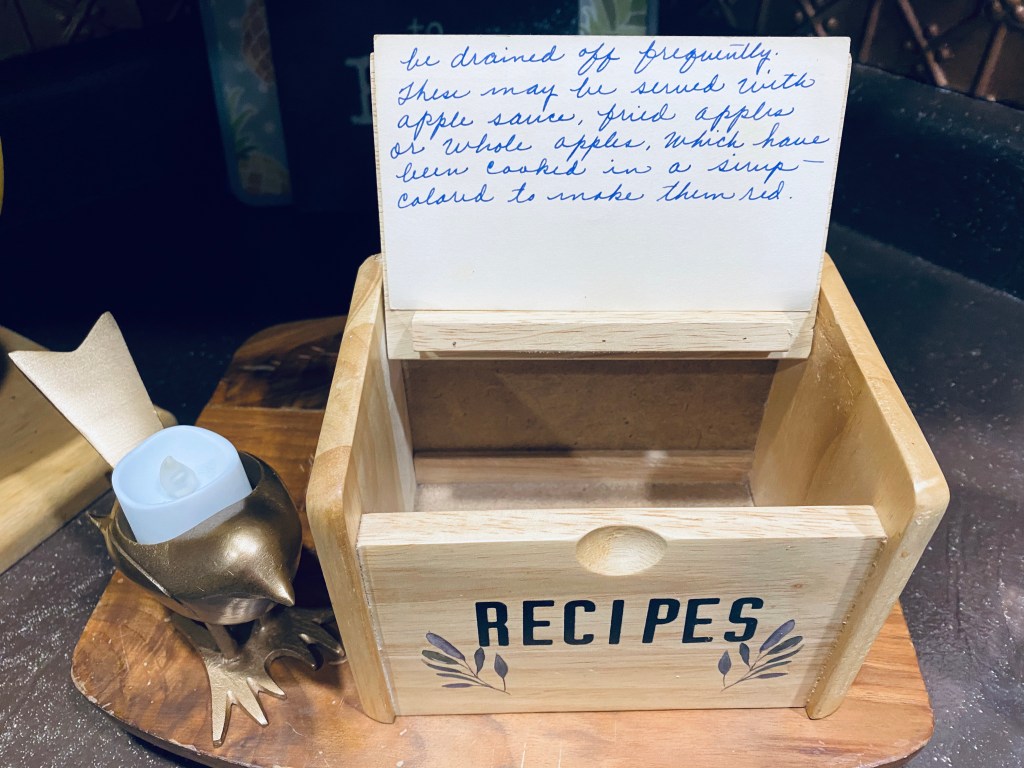
I was in Danny’s workshop area and happened to see this cute recipe box I thrifted so long ago I didn’t even remember it. Who knows why it was in there. 🤷🏼♀️
I opened it up and the lid has a little shelf inside to hold a recipe card. How cool is that! The wood was natural and I decided it was the perfect thing for a modern boho decor as well as many other styles.
I immediately knew I was adding some transfers to it and knew just which ones to use from some small ones I got at Dollar Tree.
Aunt Ada’s recipe card for homemade sausage seemed like the perfect recipe to display. I love how she titled it “Correct Way” and how beautiful her handwriting was. 🥰
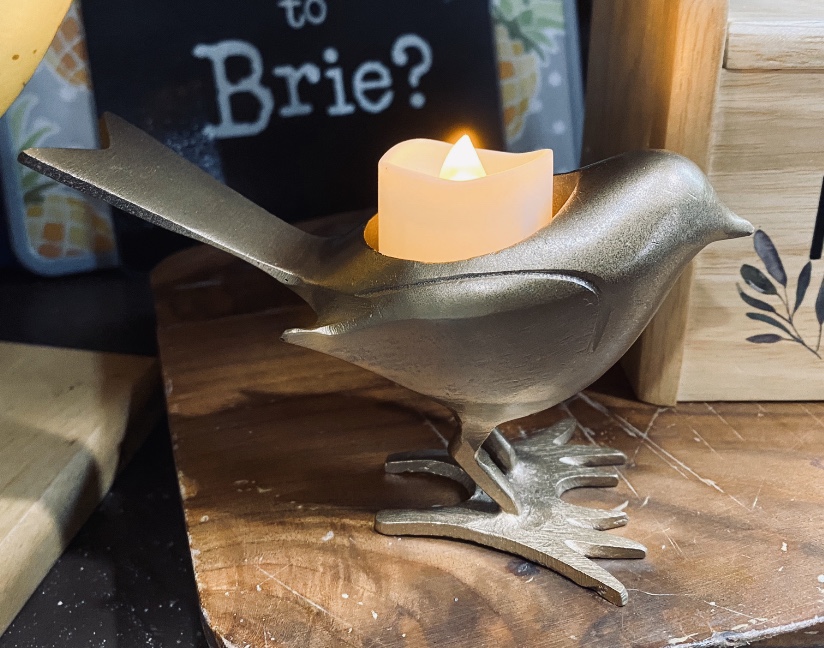
I also recently thrifted this solid metal bird tea light candle holder. After immersing myself in modern boho decor, I knew I had to spray paint him metallic gold. 🙂
Yesterday was definitely “A good day to have a good day!” And it quit raining, and the sun is shining, so today looks like it’s going to be a good day, too!
I’ve been seeing a lot of the “boho” (bohemian) style lately! As I looked into it more, I have come to the conclusion that I really like the contemporary boho style, also known as modern boho or boho chic. I love the eclectic feel of using many different styles together. Although my Beatles themed guest room has that vintage bohemian look that I love.
I think I have been leaning toward the contemporary (modern, chic) bohemian style for awhile now with my love of natural colors, wood, elements of nature, and color. I just didn’t know it had a name.
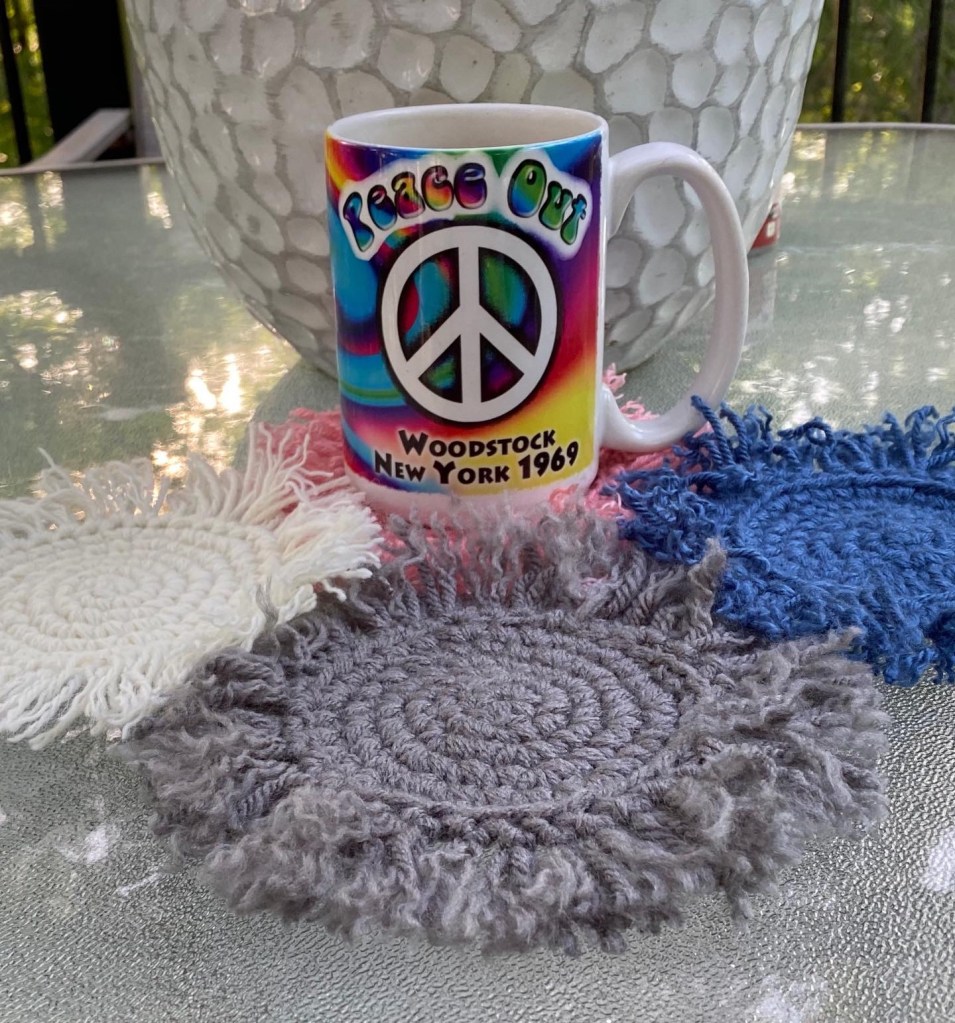
As a result of my research, I’m beginning to create some modern boho style projects in the coming days. I love that macrame and crochet is trending so I’m definitely going to making some coasters for sure.
This lady also explains boho really well. I think it is becoming very popular.
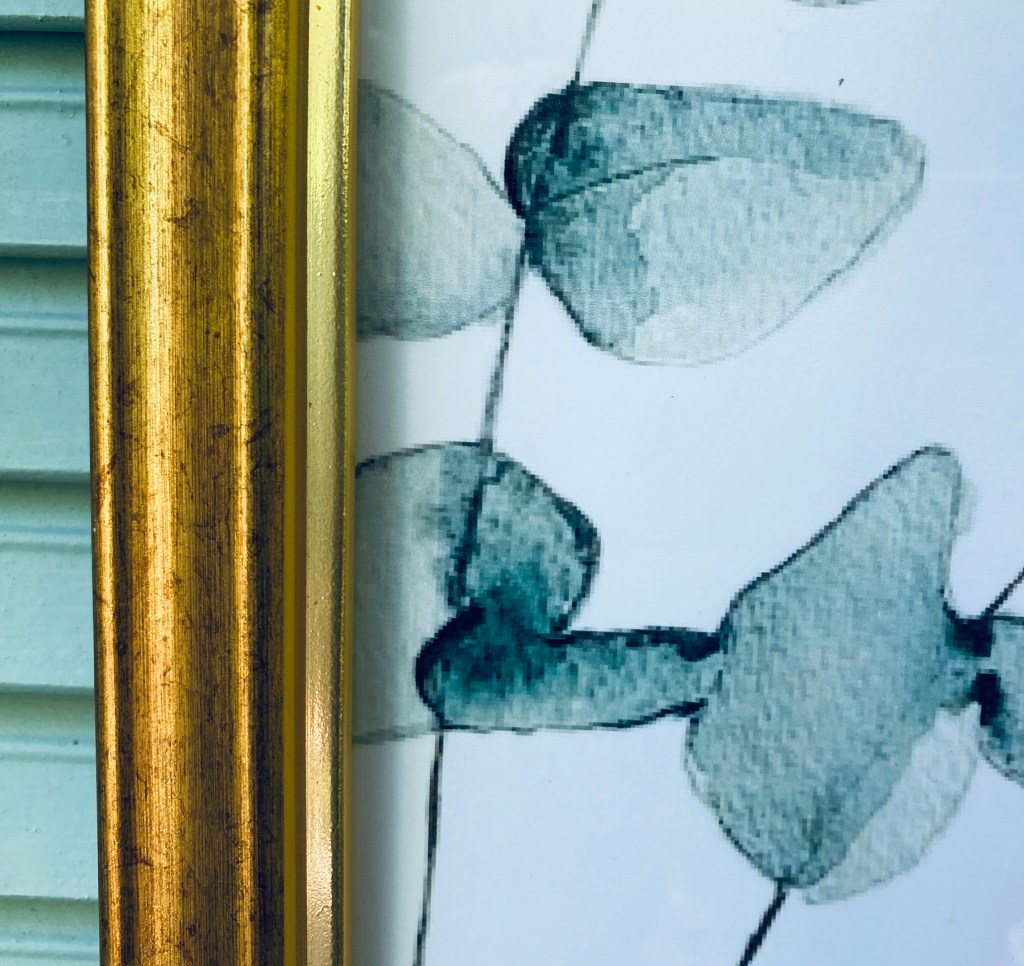
She gives away a free 8×10 print so I printed it out this morning and put it in a gold frame. Simple to do.
I printed her 8×10 botanical watercolor image and put it in a gold metallic frame. A simple project that will look great with any style, but especially with the modern boho (bohemian) Look I’m going for.
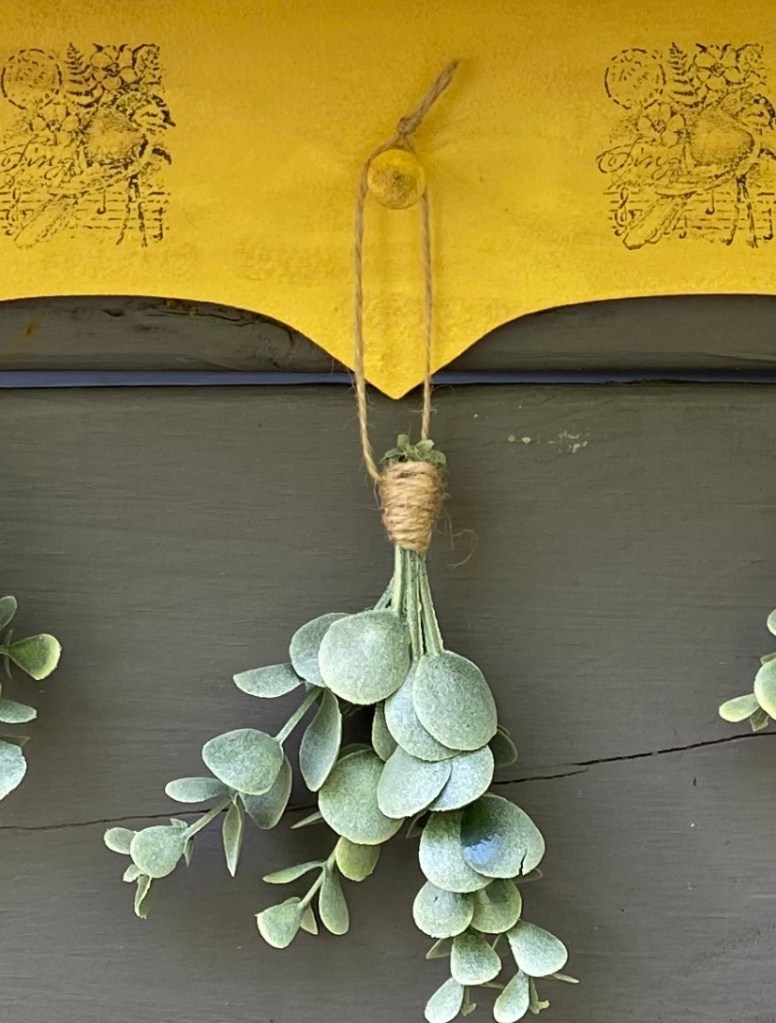
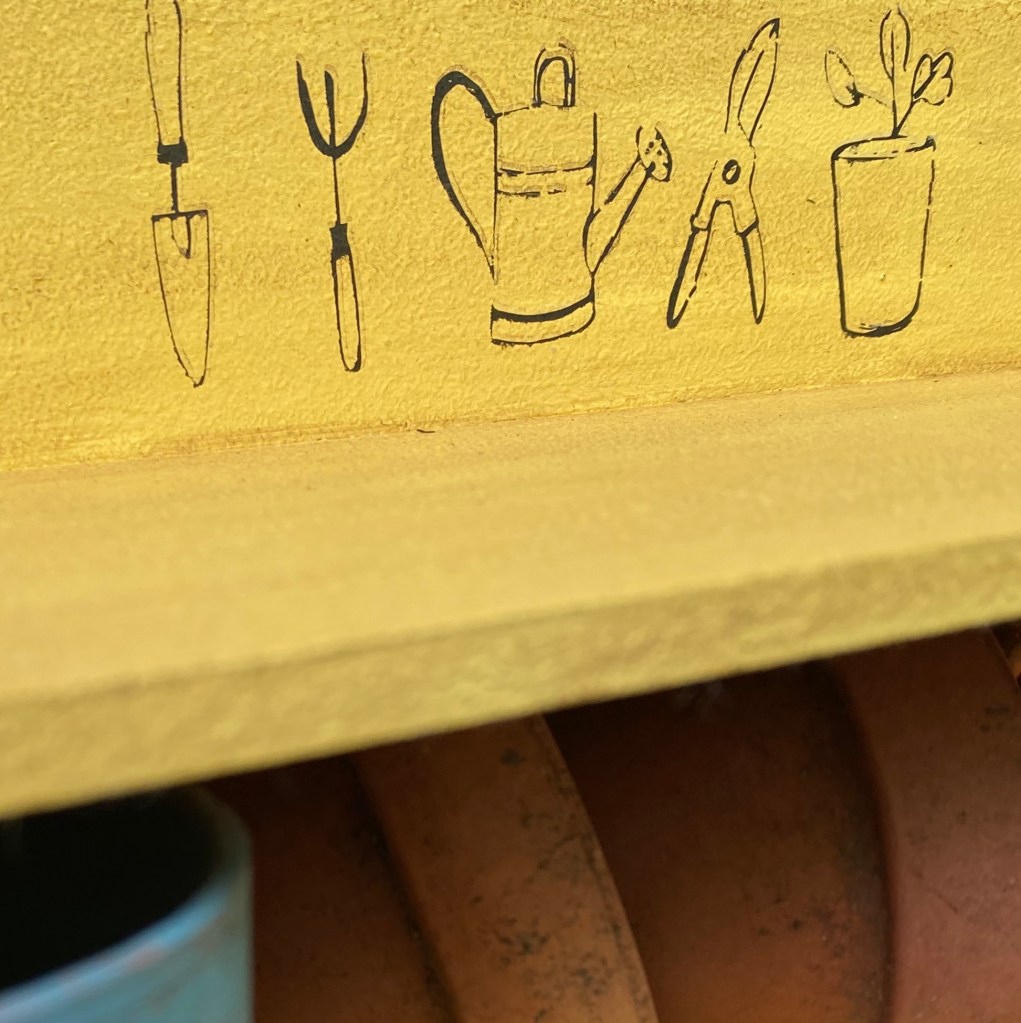
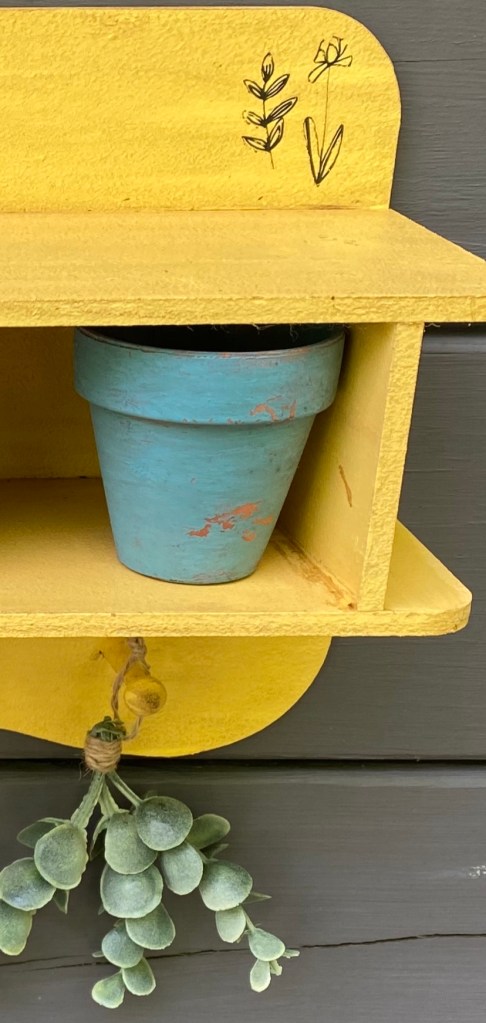
A garden shelf display that shouts “SUMMER”! This could easily fit in boho decor or any style.
Dimensions: 15” wide x 15” high (with greenery) x 5” deep
Transfers and bird stamps were applied to this cute yellow shelf. Stain was applied for a distressed vintage look. Small, well worn clay pots fit inside the 12” wide 3” high and 4” deep inside shelf. Faux greenery hangs from the pegs.
I had started painting these 3 storage cases with metal trim some time ago but was not sure how I wanted to finish them. When I realized they would make the perfect Boho display, I knew what to do.
I painted them lightly with black and distressed them. The top I opened and filled with greenery, a beautiful green silk sunflower and a cloche I made earlier from a light fixture. I added some boho looking transfers and put a coral rose inside. I also added a crocheted coaster for color.
As I was crocheting boho coasters, I thought making a bigger one would look pretty cool as a wall hanging. So, that’s what I did.
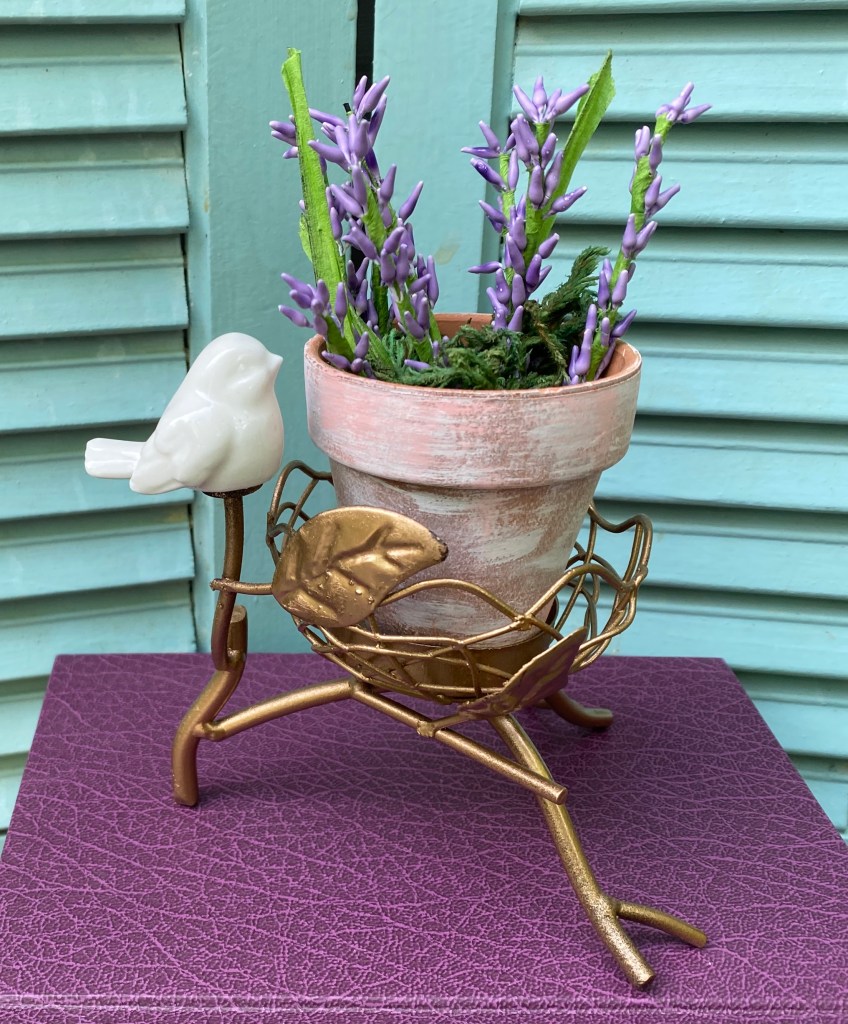
I had also thrifted a little votive holder with a tiny ceramic bird. Keeping in mind the boho look likes metallics, I spray painted the base a metallic gold and added a little clay pot with faux lavender.
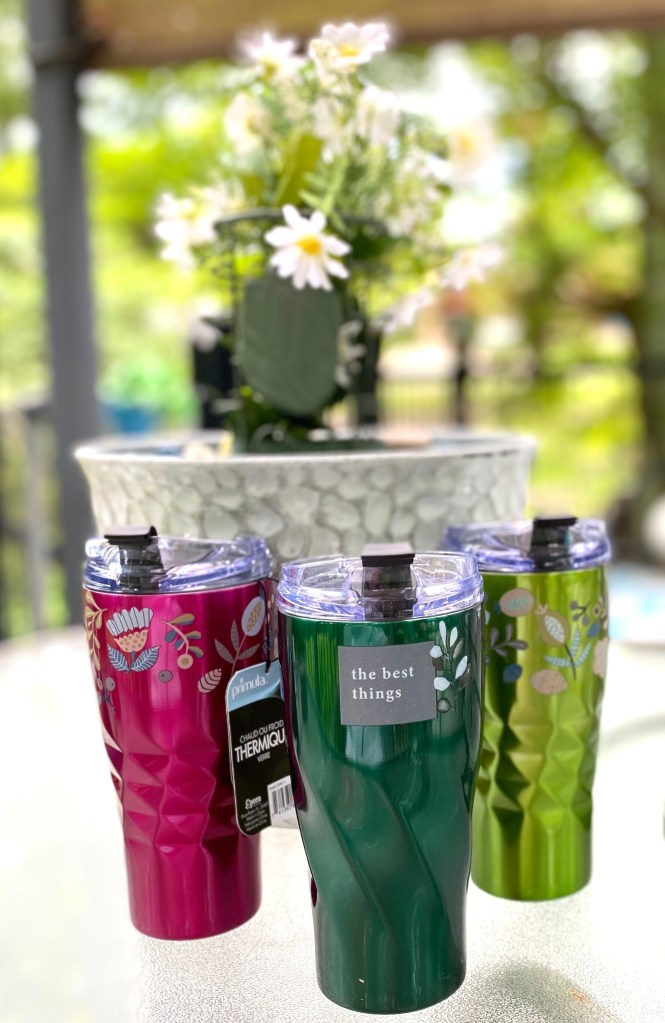
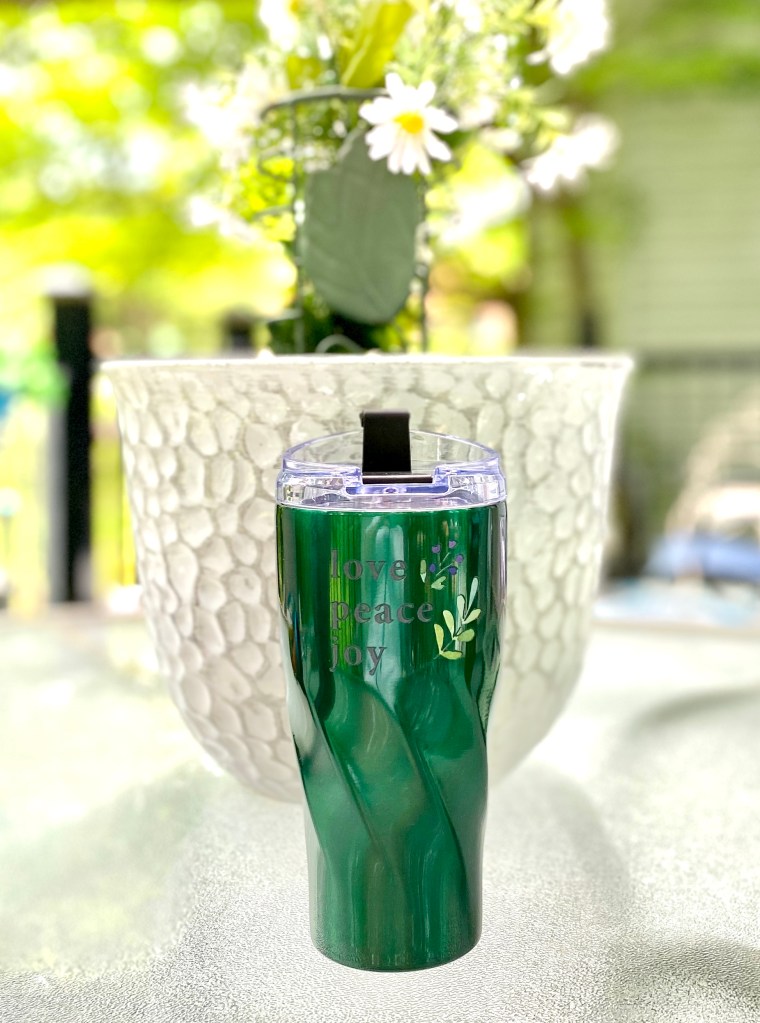
Yep, I’m obsessed with boho. I have 3 new Primula hot/cold tumblers. I had to boho them up a little with some transfers from Dollar Tree (sealed for protection). After all they are metallic and colorful!
That’s all for now. I’m sure I will have more coming up.
I had a mid-morning project this morning. First of all, I slept in. I never do that. We have had a new rule the past Several months that the last one up has to make the bed. So, I did. The first thing Danny said to me when I came into the living room was not Good Morning. It was, “Did you make the bed?” 😂
It’s a thrill a minute when you are retired.
I love when plans change on a dime. I was going to be knee deep in cleaning today but…..we had gotten an offer we couldn’t refuse from our credit union to move the financing of our car over to them. So, they set it all up this week and now we are on our way to lunch in the city and closing. Lol
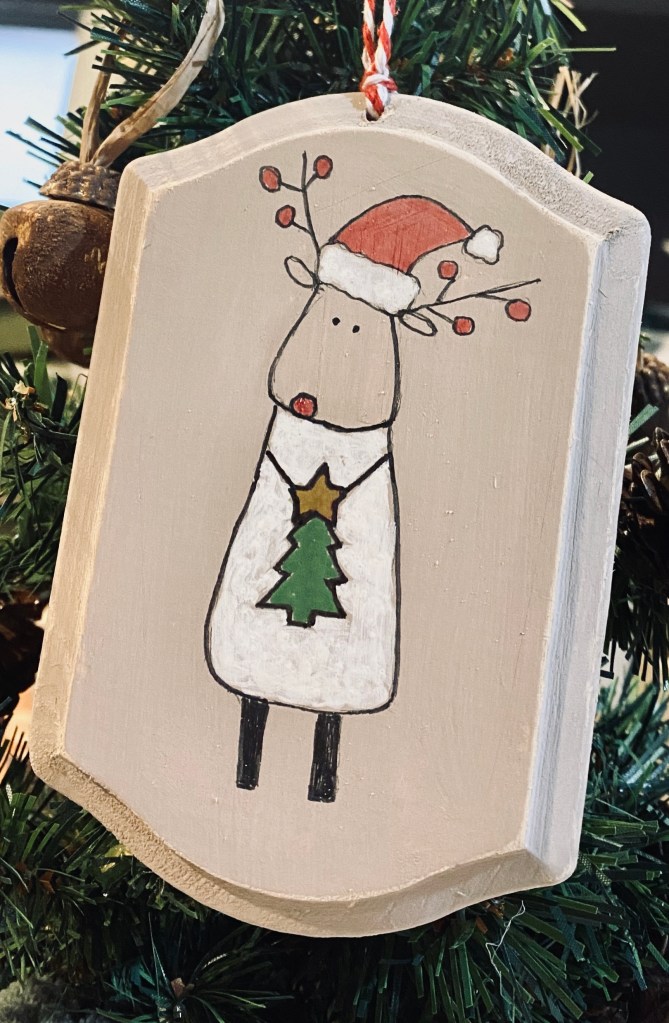
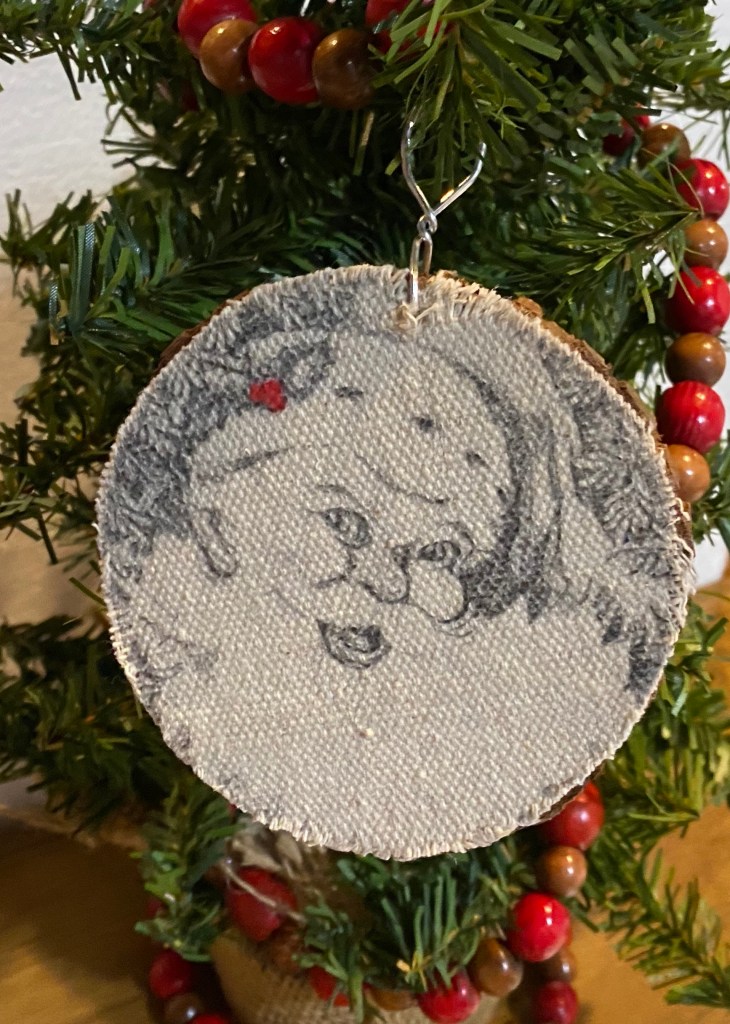
I had already stolen a little cleaning time with my framed Santa I made earlier this morning. For this project I adhered the printed drop cloth to the cardboard that came with this frame I had distressed some time ago and gave the berries on his hat a bit of red. I kept looking at that frame thinking he would look so good in it. I kind of think he does. See how I created the image on my cheese box post.
So, while Danny was getting ready, I just had to make the Santa wood slice ornament. I really love this Santa! 🙂
Plans change, but hey…. we are saving money and I get lunch in the city. So, retirement is pretty good….most days. And I can always clean later. 😌
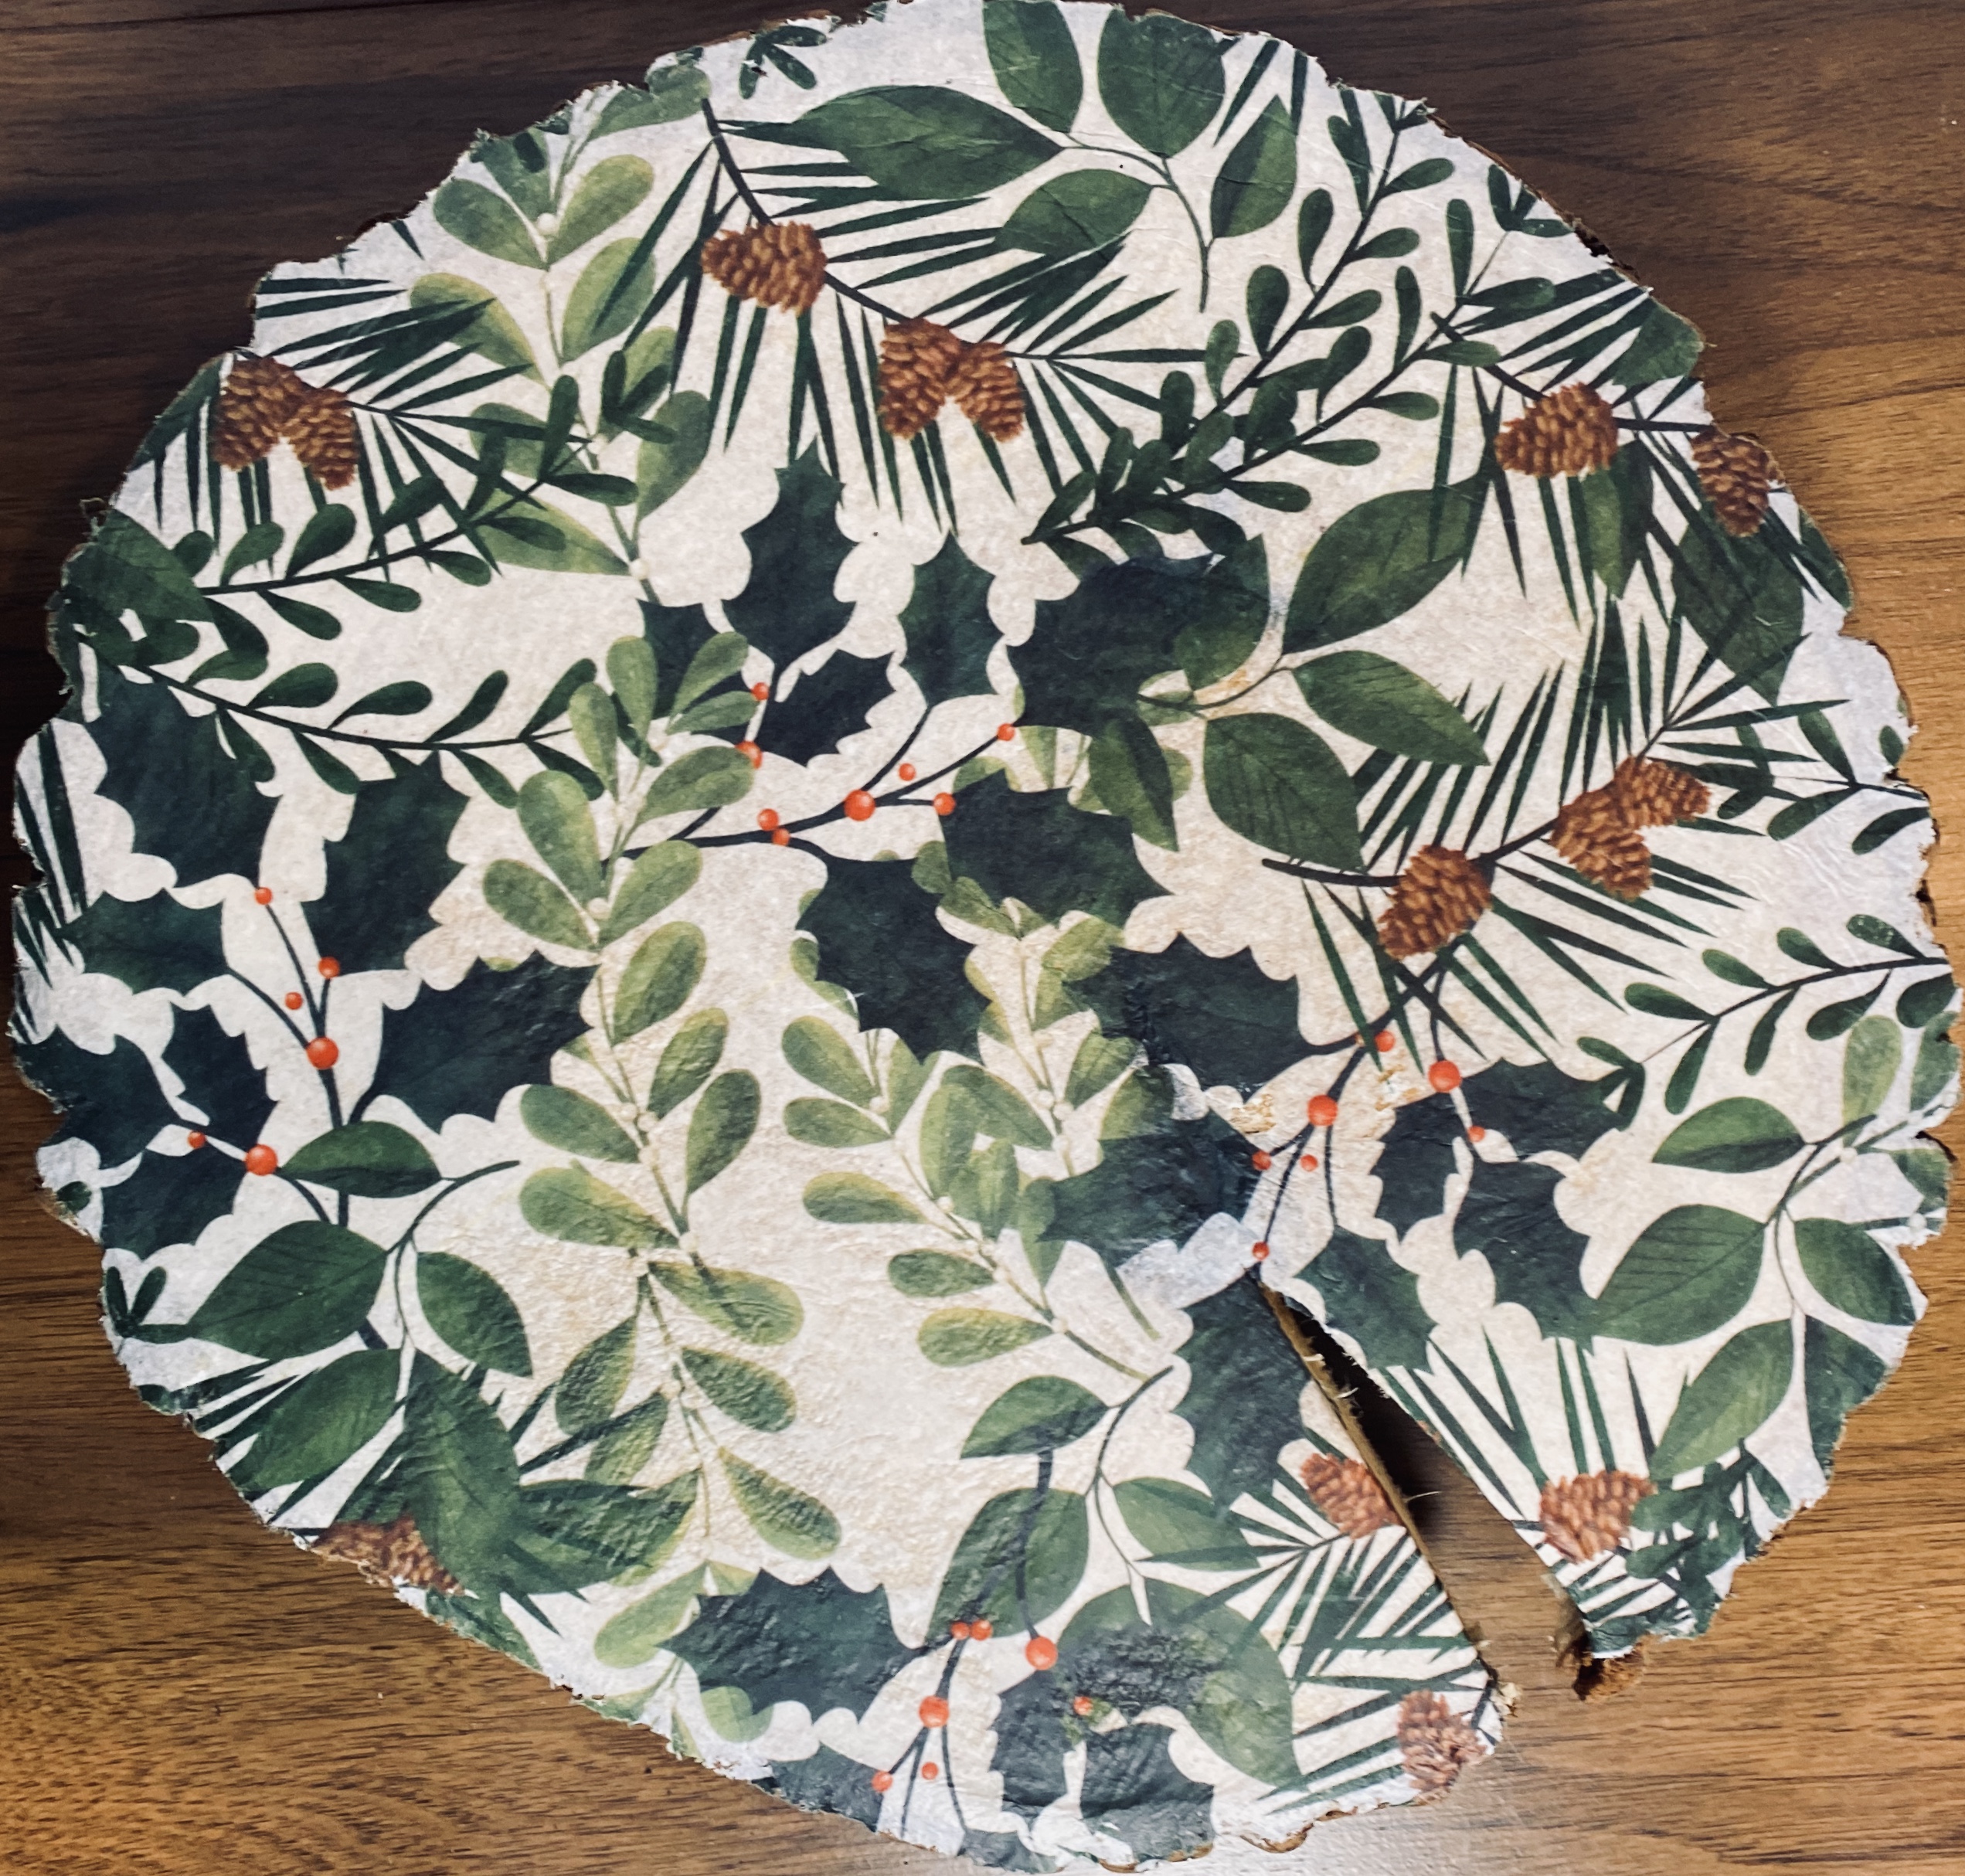
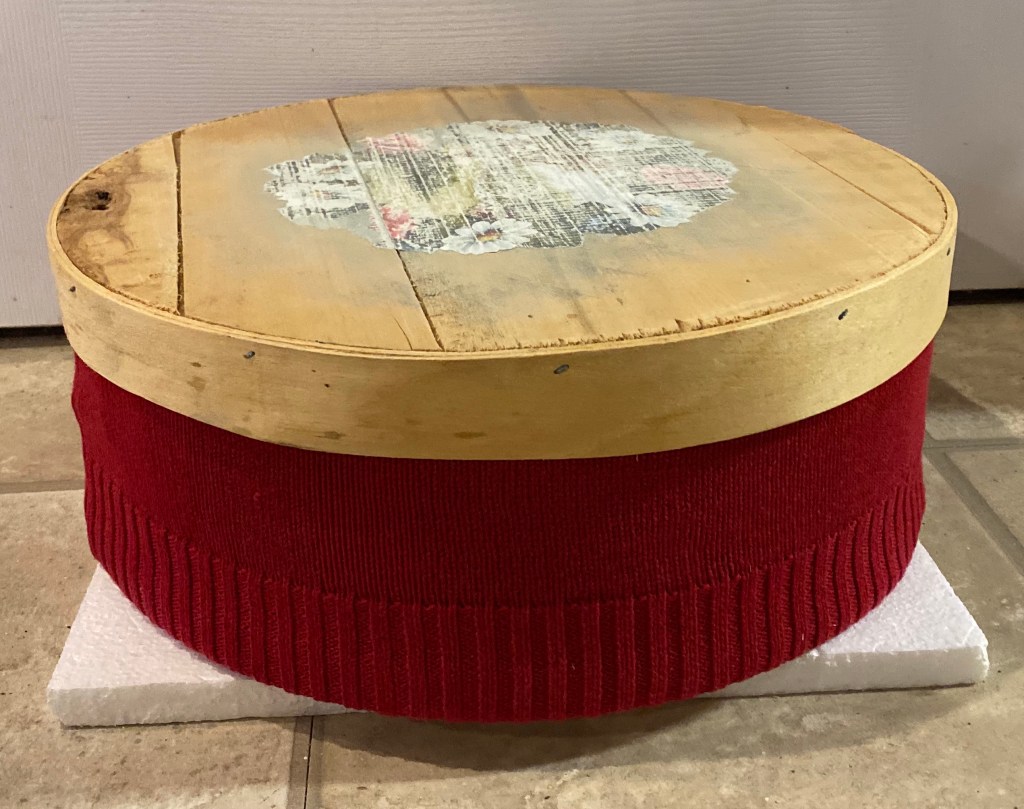
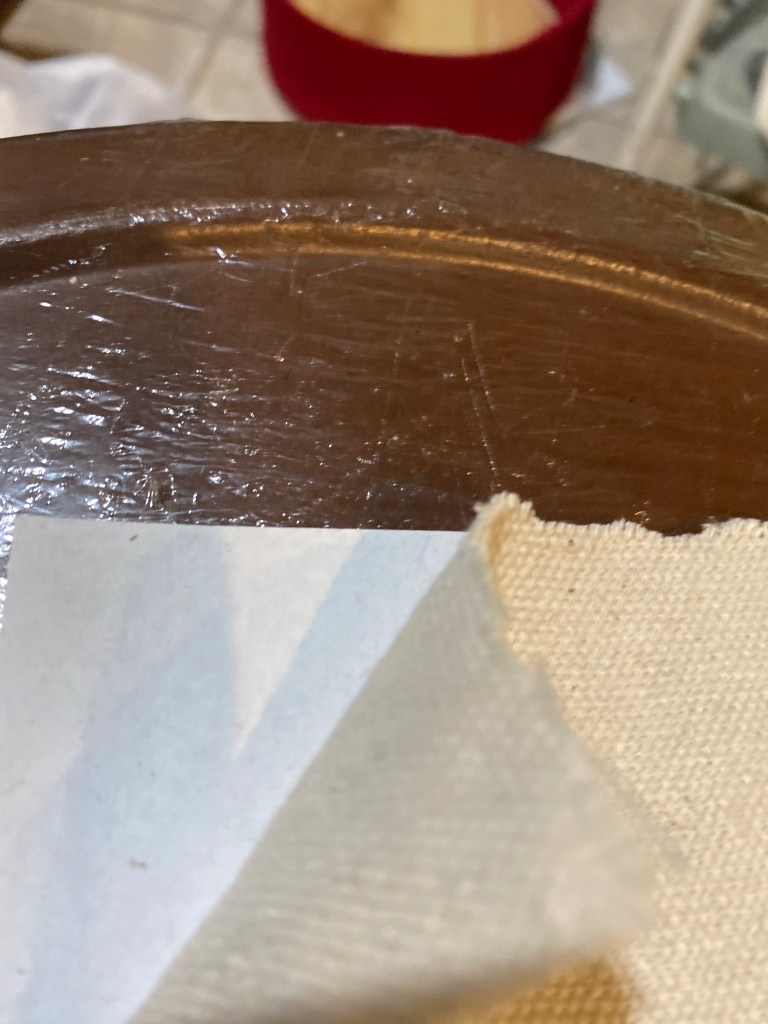
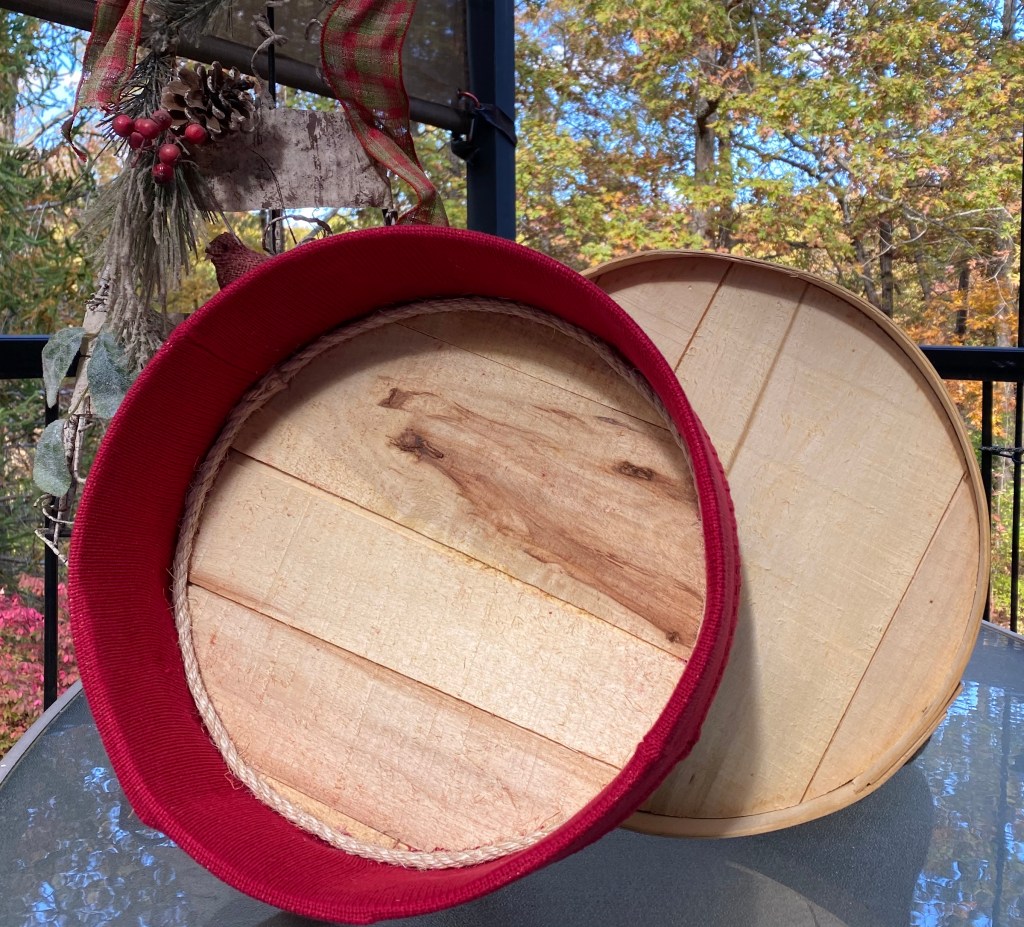
I found this cheese box (15” round x 5 1/2” tall) when thrifting this summer while on vacation. I knew the glued on flowers had to go, but hadn’t decided how I was going to upcycle it….until today.
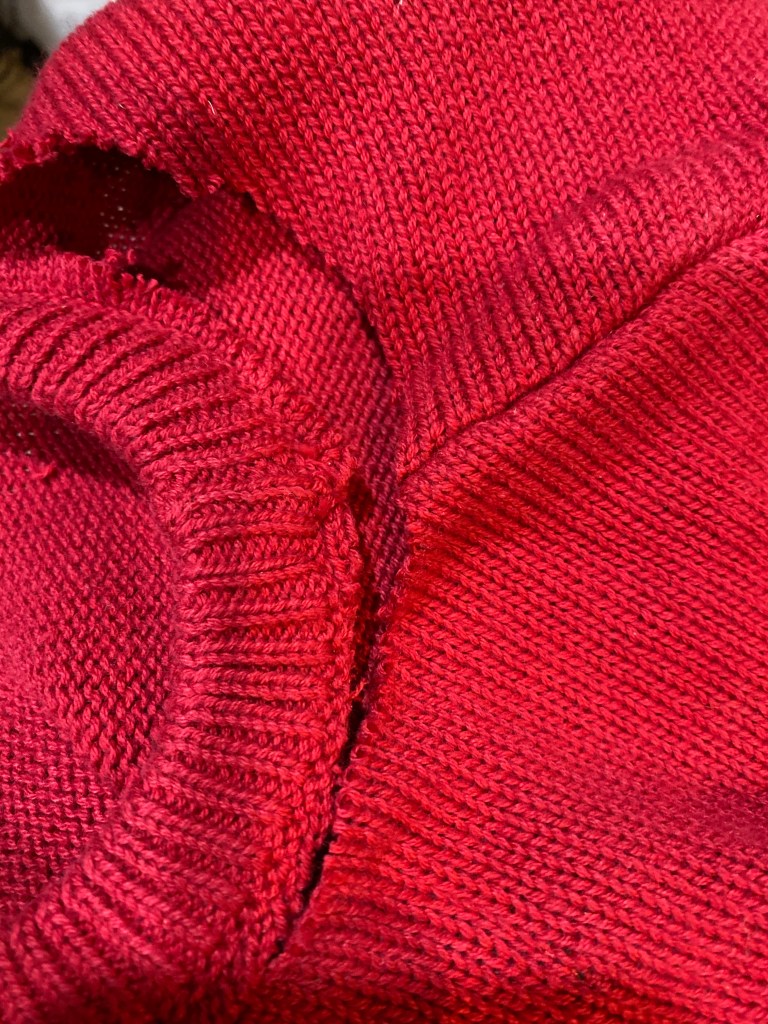
It’s getting cold out and that cheese box needed a sweater. I just happened to have a new red sweater that came in an Ugly Sweater kit I thrifted last year.
The first thing I did was sand off those flowers as much as I could and then I cut the sweater in half about 4” below the armpits. Then I covered the outside of the box and down the inside. The lid still fits fine around the sweater.
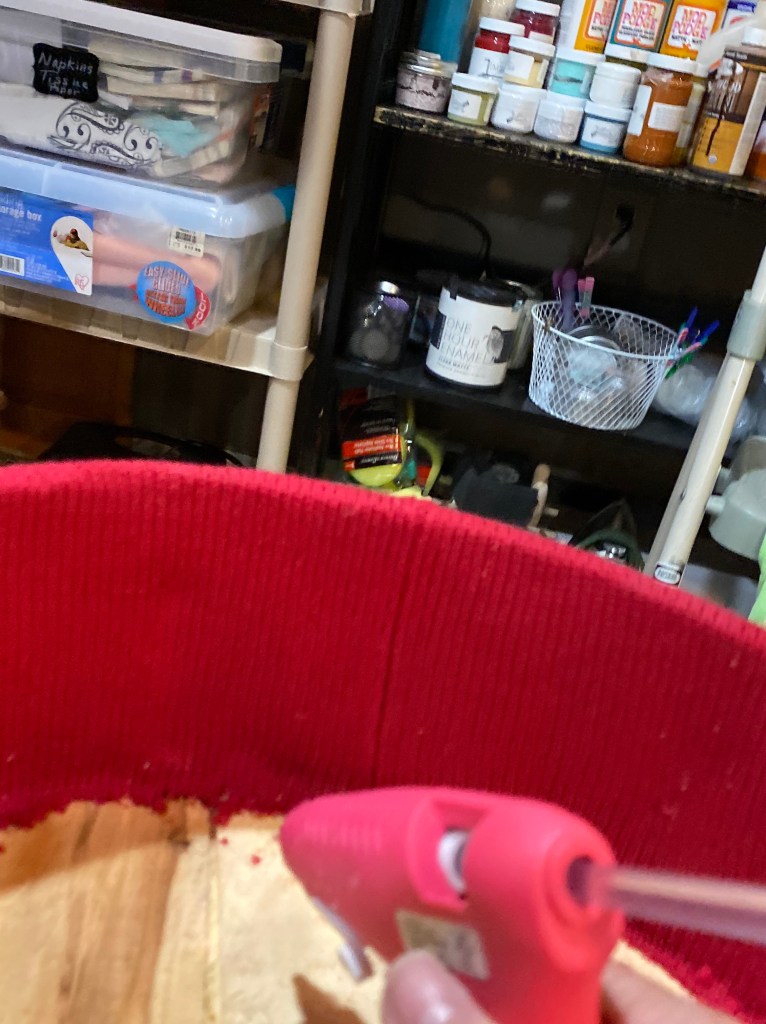
I glued the seams first, inside, outside, and underneath. Then I glued all around, securing the sweater to the box.
I was left with a lot of fuzz, which was hard to remove on that rough wood. I didn’t want to get out a vacuum, so I used rolled up masking tape to pick it up. It worked like a charm.
Next, I finished the rough edges by gluing sisal rope around the sides and bottom.
And then came the image I downloaded and adapted to cover up the old flowers I had mostly sanded away. This is a technique I’ve used several times now. I found this image, free on The Graphics Fairy Site. I had to do several things to get it the way I wanted, though. First, I had to make the image transparent and I cut it into a round shape using the free app Pro Knockout. But I wanted it to have a more vintage look so I uploaded it to the free website Lunapic and saved it as a pen drawing.
All of this is free, so I’m sharing my image I created here. Please credit The Graphics Fairy and this blog post if you do use it. Thanks.
Pen drawing created in Lunapic.com from a free image found on The Graphics Fairy.
I then inserted the image into a Google Document, enlarged it to fit the paper, and saved it as a pdf file. Next, I used a product called Pixi Spray to temporary adhere a piece of drop cloth to a sheet of printer paper. I trimmed the drop cloth to the size of the paper, then printed it on my personal black and white laser printer.
I am always blown away how cool this look is on drop cloth. I cut around the circle and adhered the image to the box using Elmer’s Craft Bond.
I cut the neck off and used what I learned from the wise words of all mothers, “Don’t pull on the neck of your sweater, you will stretch it out!” They are right! I pulled and pulled and stretched it enough so that it would fit around my image and then hot glued it in place. It is on there forever. 🙂 And while I was at it, I used a red paint pen and colored in the berries on his hat for just a bit of color.
This finished my cheese box. I posted it for sale on my Facebook page and it sold almost immediately!
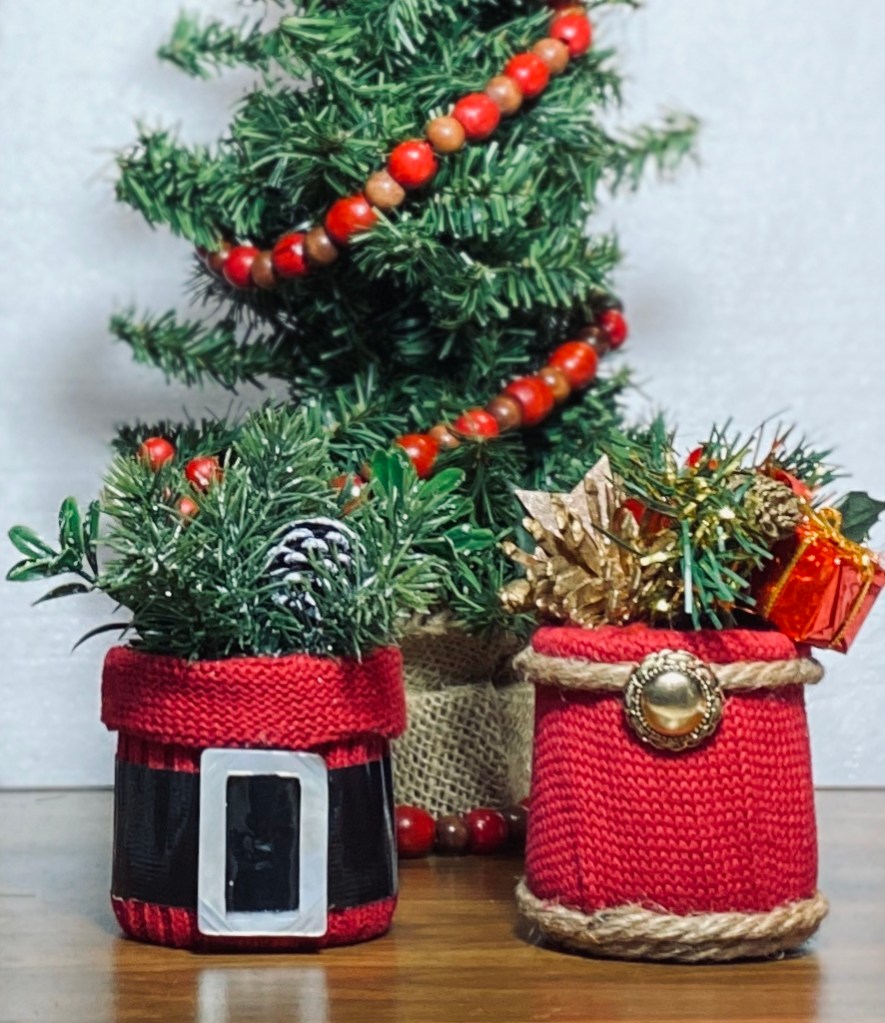
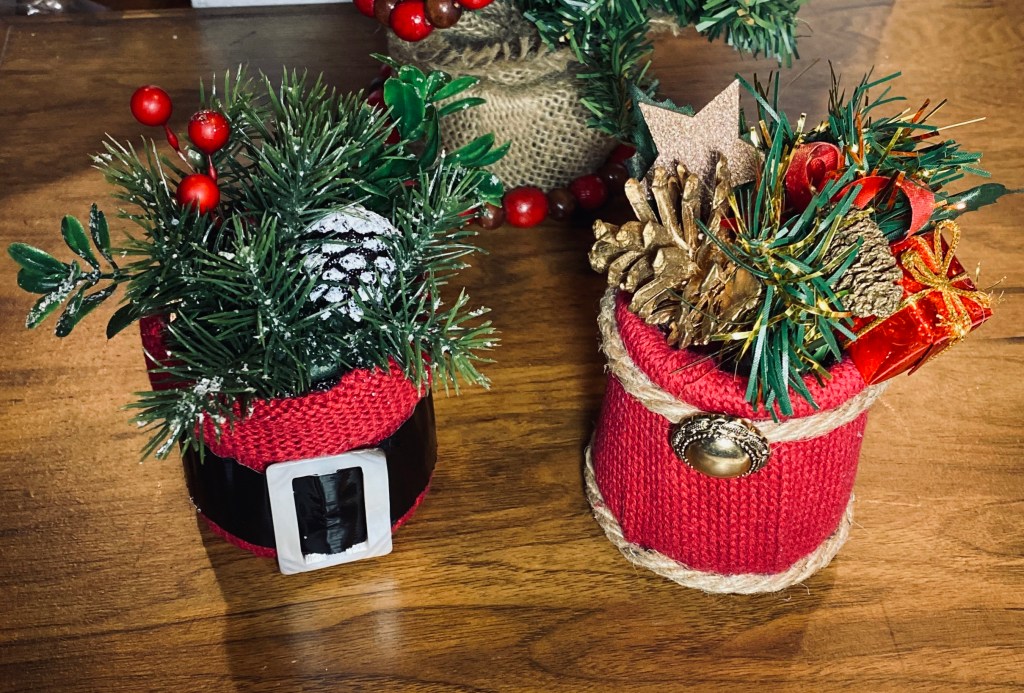
Now, what to do with the sweater arms?? I’m thinking my early morning project will be dressing a few Oui yogurt jars. 🙂
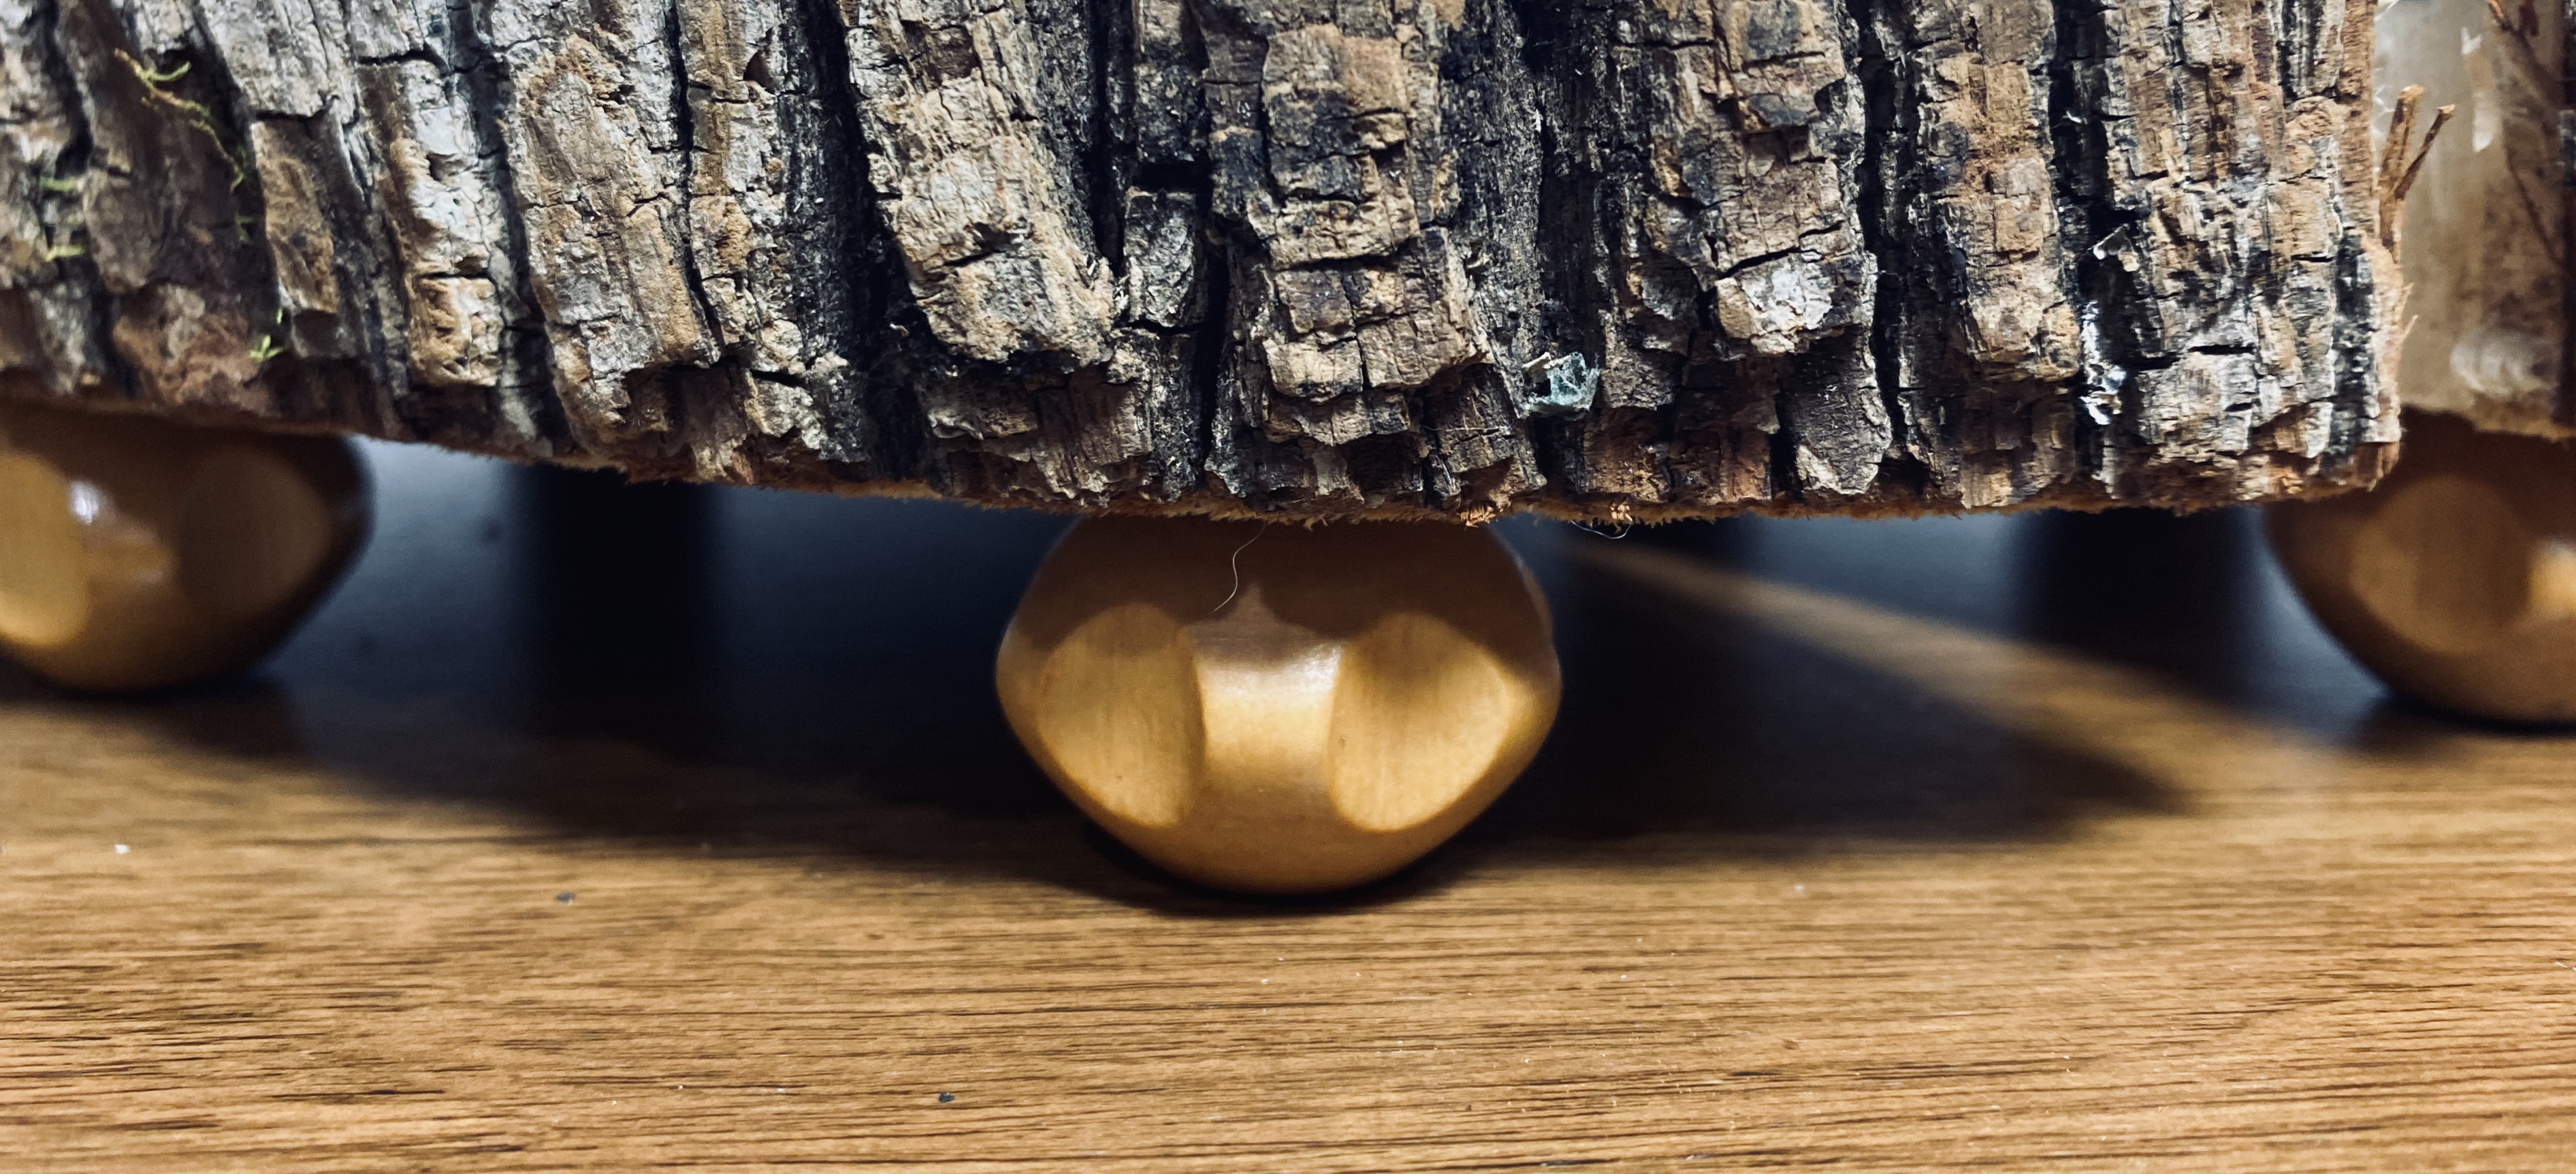
We’ve been making birch tree risers. Leonard Butts, Robin Holmes Butts, and Kathy Strothcamp thanks for the contribution from your fallen trees and limbs. Leonard, your big branch we saved from your tree became the risers, and Kathy, your branches and Leonard and Robin’s smaller branches became the birch log bundle.
Danny cut them into the sizes I wanted and made me hold the saw down while he got the right measurements. Personally, I think he could have done that himself, but the couple that works together, stays together, right? 😂 Plus, I could make sure he was doing it correctly if I helped. 🤪
The resulting projects are all natural and beautiful just as they are. Some have peeling bark, some have bark that peeled off. Some bark may still peel, but that’s what birch trees do.
We made several sets of (1/2”, 1” and 1 1/2”) risers and several sets of (1”, 1/2”, and 2”) risers.
We also made a bundle of 10 birch logs. They fit perfectly on the MCM magazine rack we turned into a log holder.
I researched how bundles of logs are tied for carrying so gave Danny that task after I told him how they did it.
The look on Danny’s face in the first pic says, “Hurry up and take the picture, Pierre. These are freaking heavy.” 😂😂 The second one was a little better after I let him rest his arm. 🤪
The name Pierre is brought up every time there is a photo being taken around here. Ed Pierre was our local photographer for many, many years. He was meticulous with his photography and posing positions and it took forever it seemed until he was satisfied it was the perfect shot. And they always were.