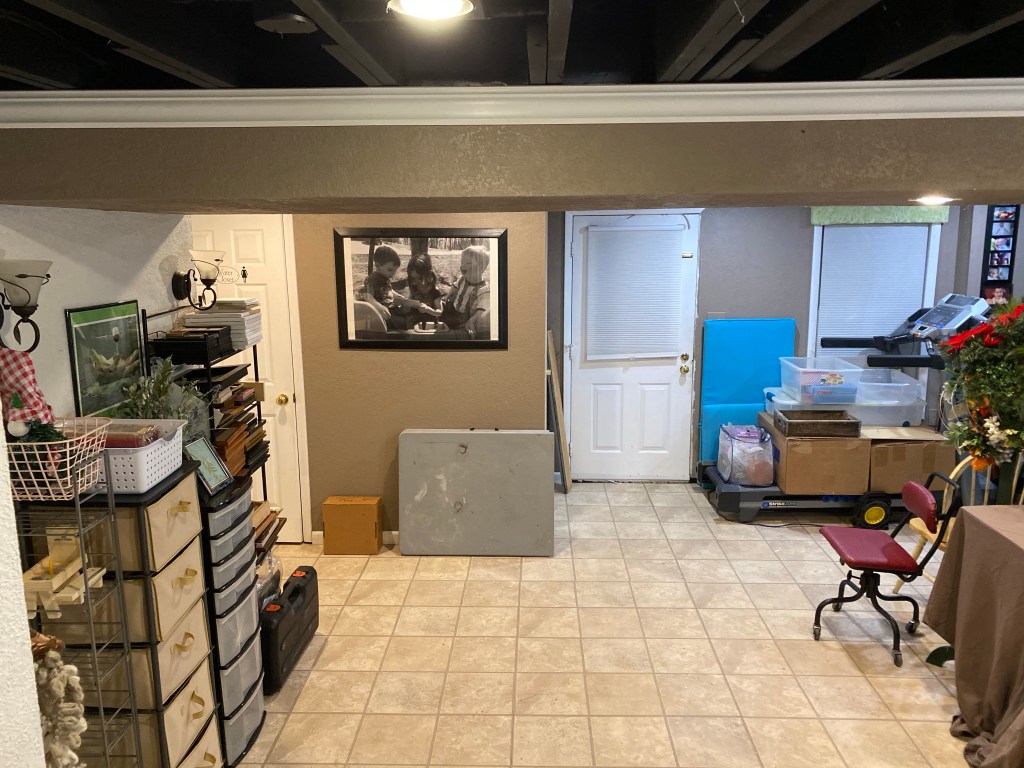
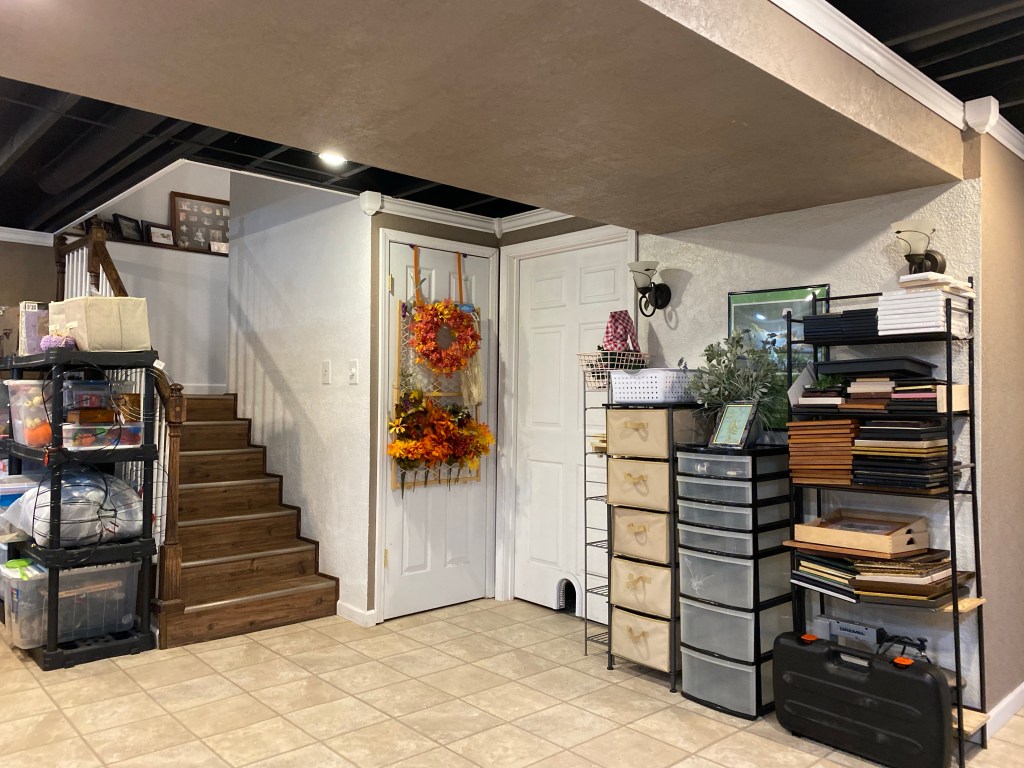
We started this process the end of September. We have finally, for all intents and purposes, finished. There is still more to do and it’s a never ending process, but we are very happy with the results. Follow this link to see the beginning of this huge transformation.
And now, for more pics of my new and improved basement. We can now also enjoy the living space there once again.
Do you struggle with faux flower storage in your craft area? I do!
I’ve tried several things, but nothing was working well. I’ve searched Hoogke and Pinterest. I’ve watched organizational videos and even tried some of them, but nothing worked for me.
Until today. As we were decluttering the basement we came across several baby gates. Since the grands are no longer babies, Danny wanted to know if I wanted to sell them. I’ve really had the flower problem on my mind and all of a sudden, I saw not a baby gate, but a rack with holes that could hang on a wall or door and I could stuff stems through the holes!
We had an over the door hanging rack. I had to leave then so Danny tried it out and it works perfectly with room to spare for more. I can see at a glance what I have (I may reorganize by color 🤪) and it is space saving, too! I even have room for more on this one, plus I have two more gates if I need more room. 🤪
I have been doing a lot of crafting lately. I have an area in my basement for crafting and when I first put it together it was good. But, it was closed in on 3 sides and I had nowhere to really organize.
So I have basically taken over my dining room table.
What a mess!
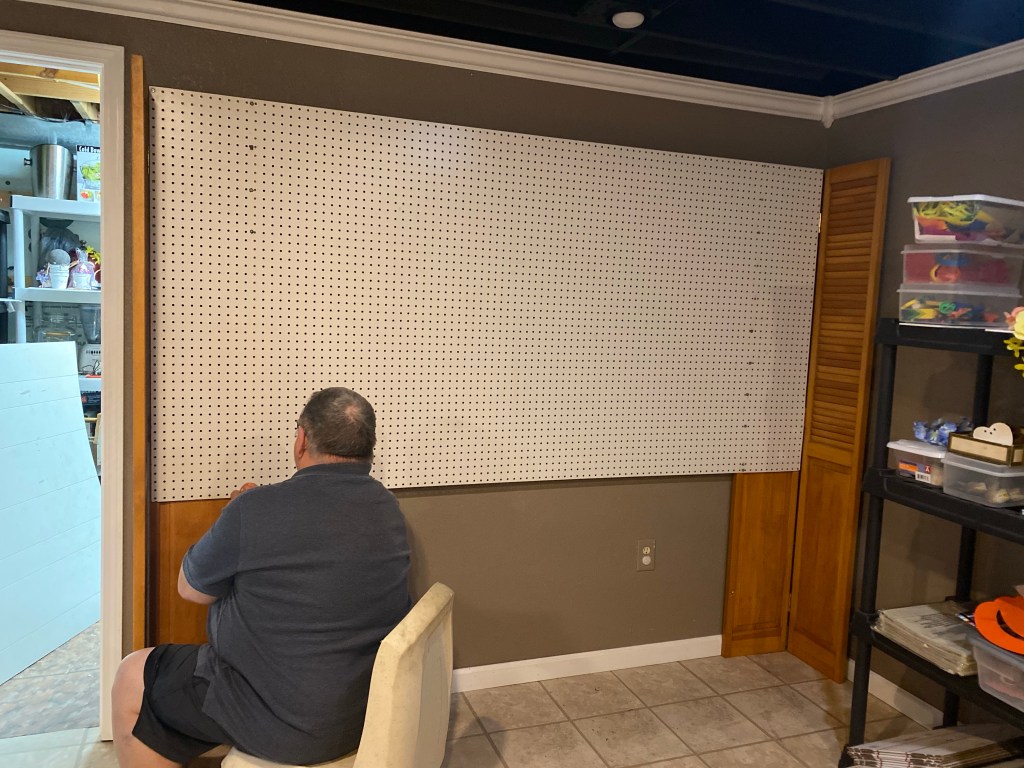
I needed to reclaim my dining room table and stop with the constant mess all around. So I started researching craft room ideas. I noticed many had peg boards.
I mentioned it to Danny about how overwhelmed I was with the clutter and mess. We talked about how to attach one and that several made frames to attach and then framed around them to dress them up.
We first rearranged the area for my crafting area by switching where we had a daybed. It is amazing how much that opened up the area.
He came up with an idea he was sure would work. He wanted to attach the peg board to two bifold doors and make it free standing. So last night we went to Lowe’s and purchased a peg board for around $20. I also bought a box of hardware for $13 and we have more here. We had two nice bifold doors with hinges someone gave us and got to work.
This literally took just about an hour to put together. We started with it on the floor. Danny was afraid he wouldn’t be able to get up once he got on the floor, so with my back that has been giving me trouble with sciatica, I put all of the screws in on one side and enough on the other until we could stand it up and he finished it up. As I was starting to get up off the floor, he provided some sage advice. “Take your time getting up,” he said. I gave him one of those long suffering wife looks and replied. “I don’t think that will be a problem.” 😂
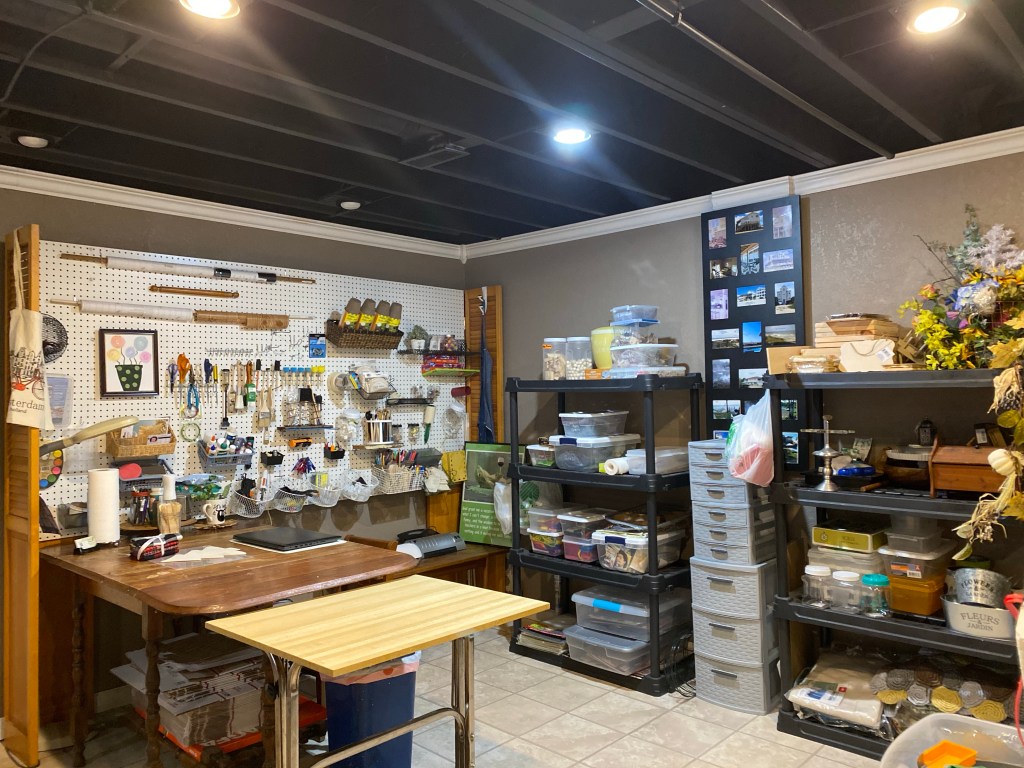
I was a little leery thinking it might fall over but he assured me it won’t. I did make sure my table was up against it but I think he’s right. It probably would be good to add another door in the middle just for stability, but honestly, it is fine the way it is. It just has some movement in the peg board. I can’t wait to start organizing. Right now I am just adding things. I am finding Dollar Tree wire baskets work well.
I can see the TV fine when sitting at the table. I have one of those bright lights next to it. I have a refrigerator in my laundry room and I have a bathroom nearby. Danny may not see me for Hoya on end now.
Hmmmm.
Now I’m thinking there was a reason he was so eager to make this happen. Lol
I will add final pics here. I have several shelving units to go through, too.