Spooky, Gothic Halloween Tray

It’s a little early for Halloween but I’ve been having some fun upcycling stainless steel trays. Here’s a couple I had previously done by gluing legs on them and painting them to look somewhat like pewter.

https://sharsumpaint.com/2019/09/20/diy-halloween-tray/

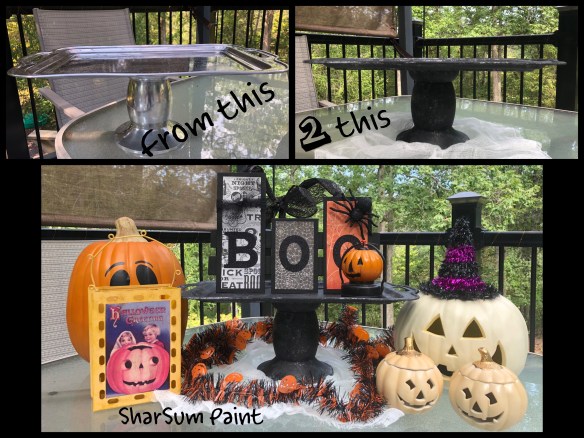
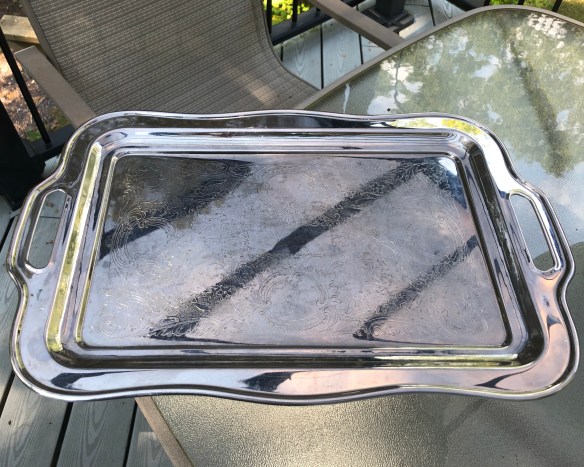
So then I was on the hunt for another tray. I wanted to make a Gothic looking, spooky tray for Halloween.

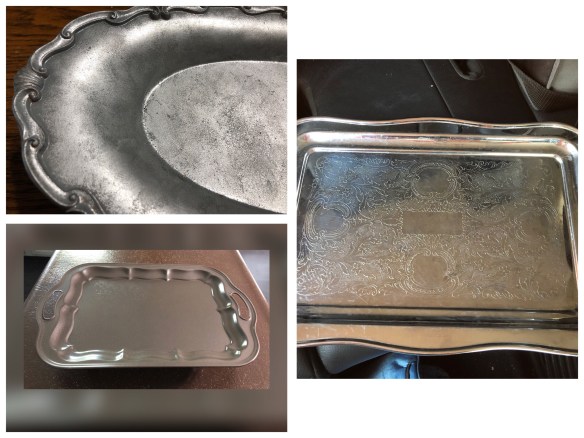
This time I wanted to find a big heavy base to glue the tray to. I found exactly what I was looking for! I don’t know what the base was originally, but it was nice and heavy and a kind of man-made pewter material. I glued the tray to the base with E6000, let it dry overnight, then cleaned it well and it was ready for paint.

I spray painted it with Krylon Fusion in the only gray I could find in a satin finish, but it was fine. It dries extremely fast and I love that! Next time, I would scuff it up a little bit after it dried just to make it a really good base for my chalk-style paint, but I didn’t do that on this one.

I then daubed Missouri Limestone Paint Company chalk-style paint using “Coal Shovel” all over like I was stenciling, leaving a bit of the gray to show through in places. I like the rough matte finish so I didn’t seal. I will let it just cure naturally for about 30 days and it should be perfect by Halloween.

I couldn’t resist. I had to drag some Halloween decorations out and stage my new tray.

Can’t you just imagine this spooky, Gothic style tray with some of your decorations?

I Can Change the Color of My Transparent Logo?

This is a real game changer! Sorry. Pun intended. ☺️ But if you are like me, I have been searching forever to learn how to do this. I had purchased a transparent logo, and it is fine, but sometimes you just want something different. I wanted a more neutral one, too. Or maybe one with a different brush color.

Well, kids, today is your lucky day! The teacher in me is sharing a quick and easy way to do this with a free photo editor called lunapic. It’s a FREE online tool! You can’t beat that price, can you?

You can play around on this site for many more features like changing more colors than just the one quick basic color change I’m showing you here. But now, you have the ability to color coordinate your logo many different ways.

In addition, but it is a little trickier, you can make a solid color background transparent, too. Just do a search on how to do that in lunapic and you should find a tutorial on that.

But onto today’s tutorial. You will need:

1. A cell phone (I have iPhone but Android would work, too. Any device should work.)

2. Your transparent logo saved to your photo album.

3. The lunapic website: https://www199.lunapic.com/editor/

That’s it!!!

Now, all you have to do is follow along with this video tutorial! Any questions, just ask!

Ideas to Share at Jewelry Box University 2019

A Jewelry Box University??? Why not?

I belong to a group of talented artists that paint jewelry boxes. There are many talented people in this group I’ve had the privilege of getting to know online. I now get the chance to meet some of them when another painting friend (I met online) and I travel to North Carolina from Missouri later this month to learn from some of the best! How crazy is that? 🤪

Not so crazy! Painting jewelry boxes is very rewarding and so much fun and so worth the trip! Sometimes painting jewelry boxes can even be more time consuming than painting furniture. The techniques and skills we will learn at Jewelry Box University will easily transfer for use when painting furniture. And when I say we paint jewelry boxes, we don’t just mean the kind that holds jewelry and plays music. We create something new out of any kind of jewelry case or any kind of box.

I will be sharing some of these techniques with my fellow artists, so thought I’d do this post so they would all be in one place:

Change the color(s) of your transparent background (or solid, too) logo!

Video tutorial

Decoupage:

Using Varathane Polyurethane

Coasters

Drawers:

Essential Oils

Hardware:

From another site:

Mirror Reflections:

PicMonkey YouTube tutorial from Brushed by Brandy

Painting Techniques:

Color Wash

Buffalo Plaid

Wax resist

See video: https://www.facebook.com/sharsumpaint/videos/2056536231244976?sfns=mo

Chippy and Crackle look

Prepping:

An excellent article by The Copper Elm

The non-toxic cleaner she uses called Whip It

Transfers:

Waterslide Decals

Coloring a waterslide decals with Sharpies

*******

I am no where close to being able to paint boxes like some of my painting friends, but here are a few of my favorites I have done:

When turning this box into a memory box by painting a decoupaging a vintage photo of my mom and her sisters, I learned the Lane Company gave these boxes to graduating seniors across the country as a marketing technique. The earliest I heard from was 1924 and I think it continued into the early 90s.

Color Wash – A Beautiful Effect on Wood!

Have you ever tried a color wash on wood? Our Missouri Limestone Paint Company chalk-style paint (https://sharsumpaint.com/paint-color-chart/) works perfectly for a beautiful color wash effect. This coffee table in the photo using “Indigo Blue” is an example of color wash. You can see a hint of navy blue but still see the beautiful grain of wood underneath.

It’s a fun technique to try. It’s kind of like staining, but using paint and water. Dries quickly, too!

Here’s a quick tutorial I just came across the does a great job of explaining color wash.

https://dukesandduchesses.com/create-color-washed-effect-wood/