My favorite No Sew Face Mask I Have Tried

This is the best face mask tutorial I have found so far. No sewing involved. It takes just minutes to make. All you really need is a t-shirt (or t-shirt fabric) with some stretch in it, such as spandex or polyester, a piece of paper, and a pair of scissors.

The only things I tweeked about this pattern:

* I twist the ear pieces to make it tighter on me (Which actually makes it look more like the pleated ones.)

* I use stamps and an ink pad to embellish them (Why not? And I have small alphabet stamps. Oh, the messages I could write on them!)

* I like that you can easily add a nose piece and filter, but if you don’t use a filter (this is two pieces of cotton blend) I show how you can just take a pipe cleaner to it for a nose piece.

I truly think we will be using masks for awhile and I hope everyone does. Yes, they are hot (this one is actually very comfortable even though it is hot) but hopefully, with wearing masks, staying 6 feet apart, and continuing the hand washing and sanitizing, we can get back to being out and about until we have this virus contained.

Here’s the tutorial: https://youtu.be/A43g4KBAEa4

A Faux Succulent on a Can of Vegetables Decoupaged With a Napkin

How pretty, right? You would never know that’s a can of garbanzo beans under there. 😁

I woke up this morning thinking I wanted to napkin decoupage a tin can and add a succulent to it. I had all the supplies except for the tin can. I did have a can of garbanzo beans, though. I didn’t want to waste food, so I decided to just decoupage the full can. I could always just open up the can later. I did realize, too late, that I shouldn’t paint the lid in case I do want to eat the beans. So I would not paint the lid the next time.

I gathered my supplies and got started.

I didn’t use the refried beans. That is there just to show you what a can of vegetables looks like with its clothes on compared to when it is naked. ☺️

Step 1:

I then painted the can, but next time I won’t, just in case I want to open the can later. I used two light coats of “Grannie’s Lace” from our brand of chalk-style paint Missouri Limestone Paint Company. It really doesn’t matter what paint you use. The can also doesn’t need full coverage. The napkin details will show better just by it being white.

Step 2:

The expiration date was already on the bottom of this can. I just added the name in case I forgot what was in there.

Step 3:

I trimmed the napkin to fit the can, leaving a little overlap on the top and sides. Also with napkins you need to pull apart and remove extra layers as you can see in the above photo.

Step 4:

I was now ready to decoupage. I spread a thick layer of Mod Podge onto the can. I cut down a small baggie and tape it small enough to slip my fingers into it like a mitten. I use the plastic to press the napkin into the Mod Podge. This keeps the napkin from tearing as it will stick to your fingers otherwise. Any little bit of plastic will work. You still must press carefully.

Step 5:

After decoupage dried, I sanded the rim of the top. The part sticking up will sand right off, leaving a clean edge. I then added another coat of Mod Podge all over to seal it.

Step 6: Final Step. I just added a little Spanish Moss and a Faux Succulent to the top. You could use a spot of hot glue to hold it in place, but I didn’t. After all, I may just want to open up that can of garbanzo beans. The moss and succulent will be easy to remove. ☺️

Turning a Funky Yellow Tray into a Rustic Faux Succulent Garden

I bought this tray about a year ago and never really did anything with it.

It’s not really wood and it was a funky yellow color. But yesterday, I decided. I would create a rustic, driftwood finish on it ….

…. and plant a faux succulent garden. Those seem really popular right now.

I already had the two pinkish succulents and I found a few more at Dollar Tree at some point in time. I removed the clips attached to those and saved the clips. You never know when they could be used. 🙂

Using our Missouri Limestone Paint Company chalk-style paint, I paint washed the tray with “French Roast”, wiping it down before it dried. When dry, I dry brushed with “Sunday Silver”, let that dry, then dry brushed with “Winter Gloves”. When that dried, I sanded the whole thing with 320 sandpaper, applied a wax salve, and buffed it. I love the color now! It now has a rustic, driftwood look.

This morning, I added some mosses from Dollar Tree and now have a beautiful succulent garden. I just need to figure out where I will display it.

Creating a Lamp with a Globe Lampshade

Covid 19 Creations:

What do you do when you’ve got to do something? You go shopping in your own storage unit, create a project, then make a movie! All in one afternoon!

And it’s not raining so you work outside! Another silver lining and a great day!

Now get your popcorn ready. The feature film is about to begin.

A Stool Cover Update – Confessions of a Hoarder Part 1

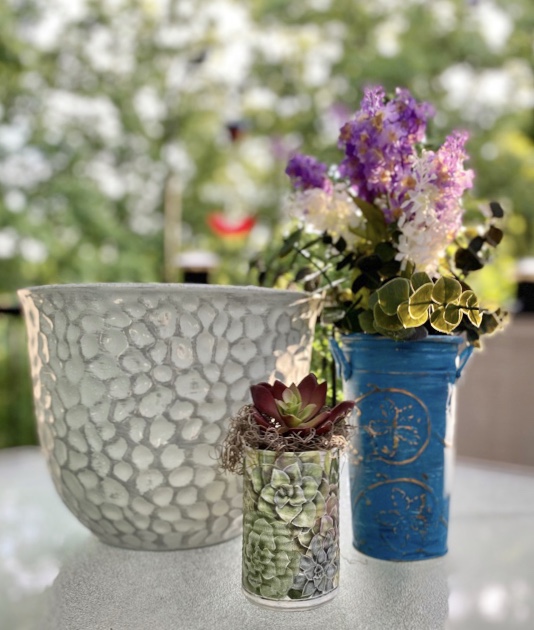
People wonder why Furniture Artists and Crafters hoard. There is a reason. The perfect scenario would be that the hoard was organized. But that is for another day and another post. But the reason is the unbelievable beauty that can come from not selling, giving, or throwing everything away is priceless.

This post came about through hoarding. Lol. This is the first in a series of posts that chronicles a complete deck makeover that all started with a deck rug. Yep! My son didn’t want it, although all it needed was a good cleaning so we said, “Sure, we’ll take it!” Just like Mikey in the old commercial who would eat anything, we will take anything, especially when it is free. After all, we have a basement, a shed, and two storage units. 🤪 But, this post is all about a stool cover makeover, Part 1 of the series.

Follow my blog and you will be notified when I post Part 2 (The Free Deck Rug) where you will learn more about the big picture of our whole deck makeover.

One corner of our deck gets a good amount of shade. It’s a nice place to sit and read a book and watch the world go by. We had bought a couple of cool chairs last year and painted them a neutral blush color, thinking they would sell in a heartbeat. They didn’t. So….we kept them…stored in one of our units. We then decided why not use them ourselves? After all, I really liked them. Lol And that’s why we have a beautiful little reading nook on our deck. We moved the deck rug we’ve had a couple of years there because we were given another one to use (stay tuned for Part 2 of this series of hoarding confessions).

As I was reading there one day, I thought it would be nice if I had a stool to prop my feet on while I read. I just happened to have one in my basement I’ve had for years but wasn’t using. But it needed a new cover. No problem!

One day, when staging a piece of furniture I was painting, I needed a throw pillow. I took a piece of painters drop cloth (washed and dried it to make it a soft fabric) then used a French postcard stamper and Missouri Limestone Paint Company chalk-style Paint (the brand we own and produce) and stamped all over the piece. I then used a stencil and stenciled a bird on a branch on it. I wrapped it around a pillow and pinned it in place, took my photo, then took the cover off and stored it with my other fabric. (Hoarders do organize sometimes.)

I retrieved that piece and my stool and quickly made a new cover. The back is not pretty but won’t show and I will probably cover it with a piece of contact paper because it will be somewhat waterproof.

And then … I just used more of our chalk-style paint and free hand painted over the stencil. Soooo easy! I just followed the lines of the stencil and filled it in.

I plan on leaving this stool outside. It is old and way too much trouble to carry it in every day, so I ordered this waterproofing spray I found on Amazon. Not sure if it works, but it is worth a try!

And now, my reading nook has a foot stool for one of the chairs. 🙂 And I just noticed, with the tea cart and the mini fire pit ball (looking like a coach and pumpkin) the blue bird and the chair, it almost looks like a nod to Cinderella! It’s a magical space now for sure! 💕

Remember, follow my blog to be notified when I post Part 2 of the series “Confessions of a Hoarder.”