I’m always trying to find ways to use the Oui yogurt jars. This idea was inspired after seeing someone do something similar with a mason jar using string. Any type of jar will work with beautiful results.
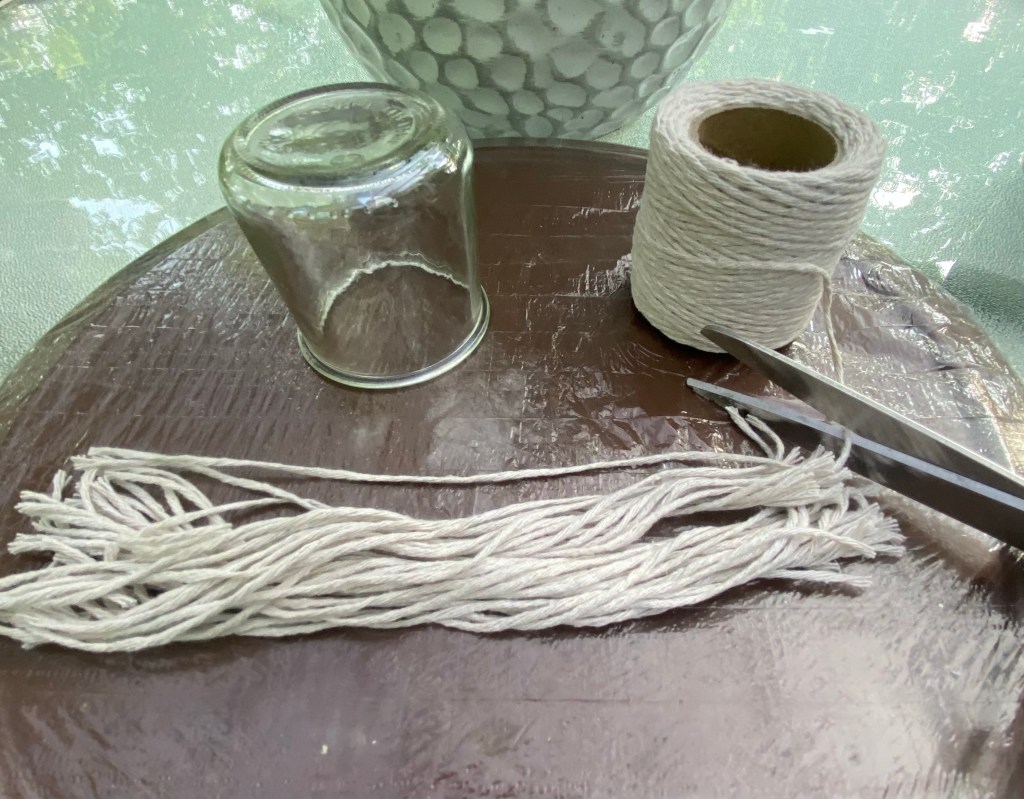
So I gathered up my supplies and went to work on this quick and easy project.
I took the ball of string I bought at Walmart and cut maybe 50 12” lengths of string. I might have used more or less, so you could cut less and then cut more as you go.
I then folded the pieces of string in half and hot glued them around the bottom edge of the Oui jar, side by side.
The results look like the photo below.
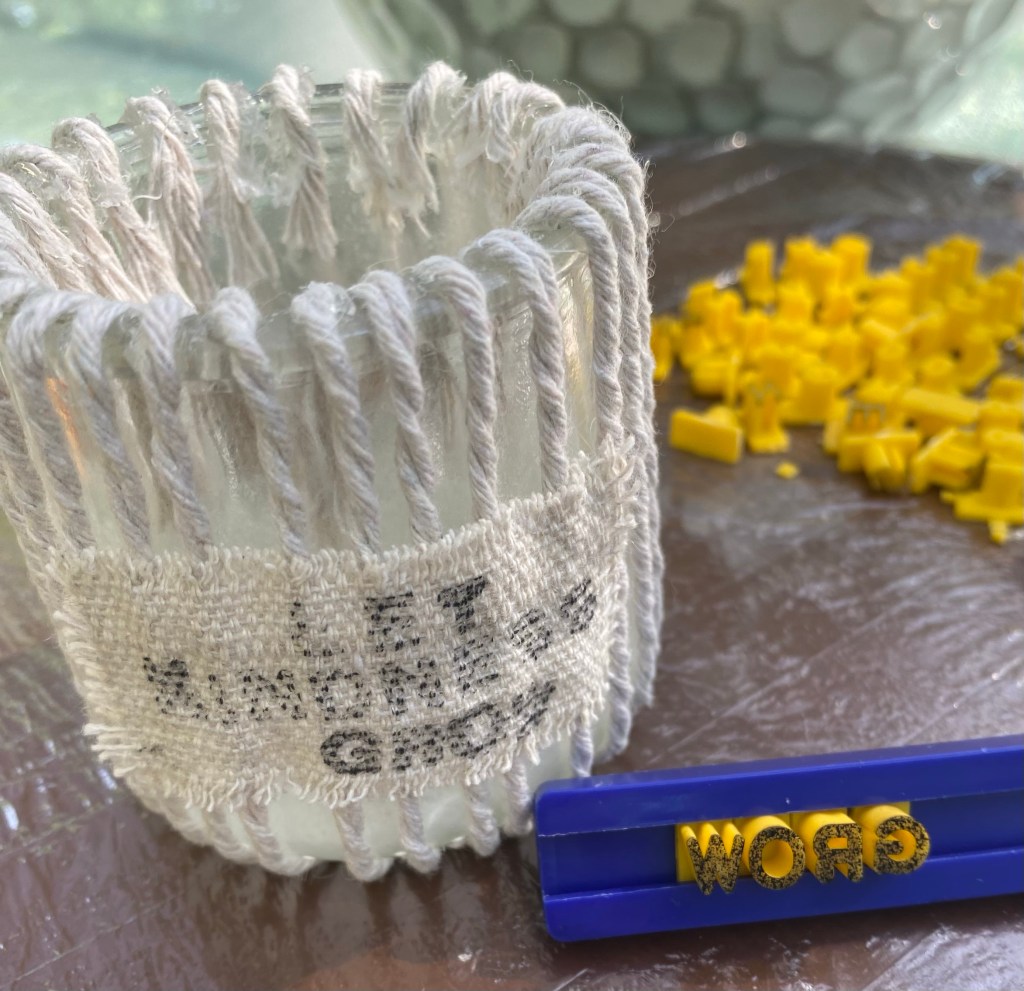
I then turned the jar over and fanned the strings out. I then twisted each set of 2 strings and brought them straight up and over the top edge and glued them to the inside.
I was now ready to make a label. I cut a piece of dropcloth and frayed the edges then used a number/letter alphabet stamper I bought on Temu and inked the words I made. I then stamped them onto the label. I really like the small stamper as you can do an entire word or words and keep them straight to stamp.
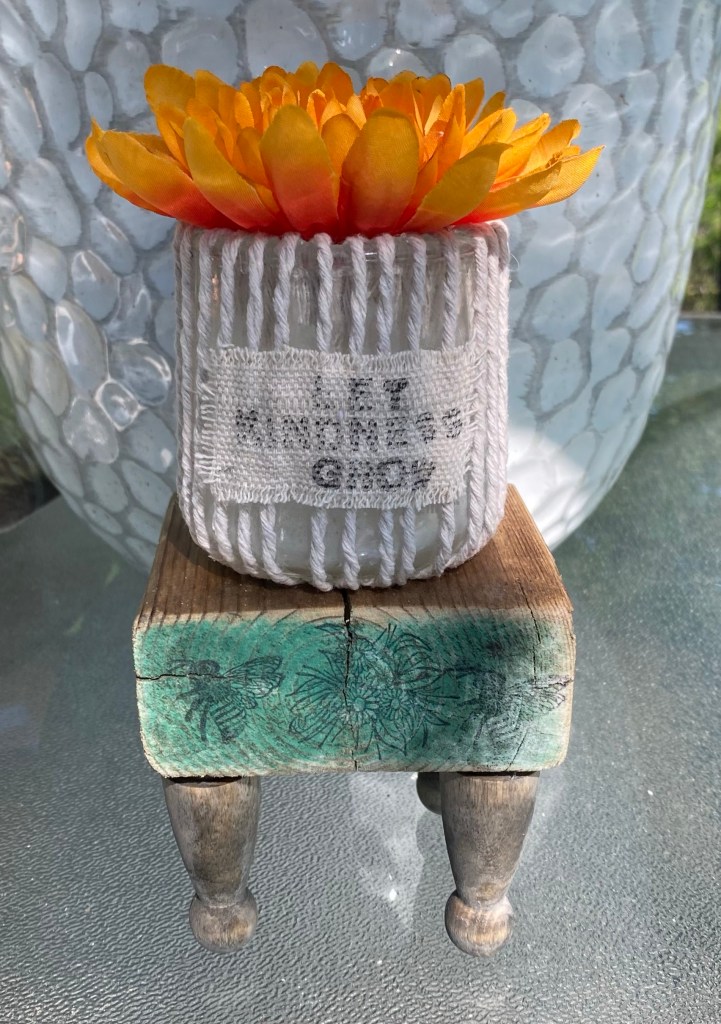
I also made a little riser using an end piece of an old 2×4. I loved the original green end so just distressed it a bit with sandpaper and added legs (Woodpecker peg dolls) I stained. I stamped a couple of designs across the front.
In no time at all I had a beautiful little decorated jar I can use in so many different ways. I just added a faux flower bloom for this one.
Everyone is always using high end stores as inspiration and creating projects that sometimes turn out better than the original. I did that this evening, and even I was blown away by the results.
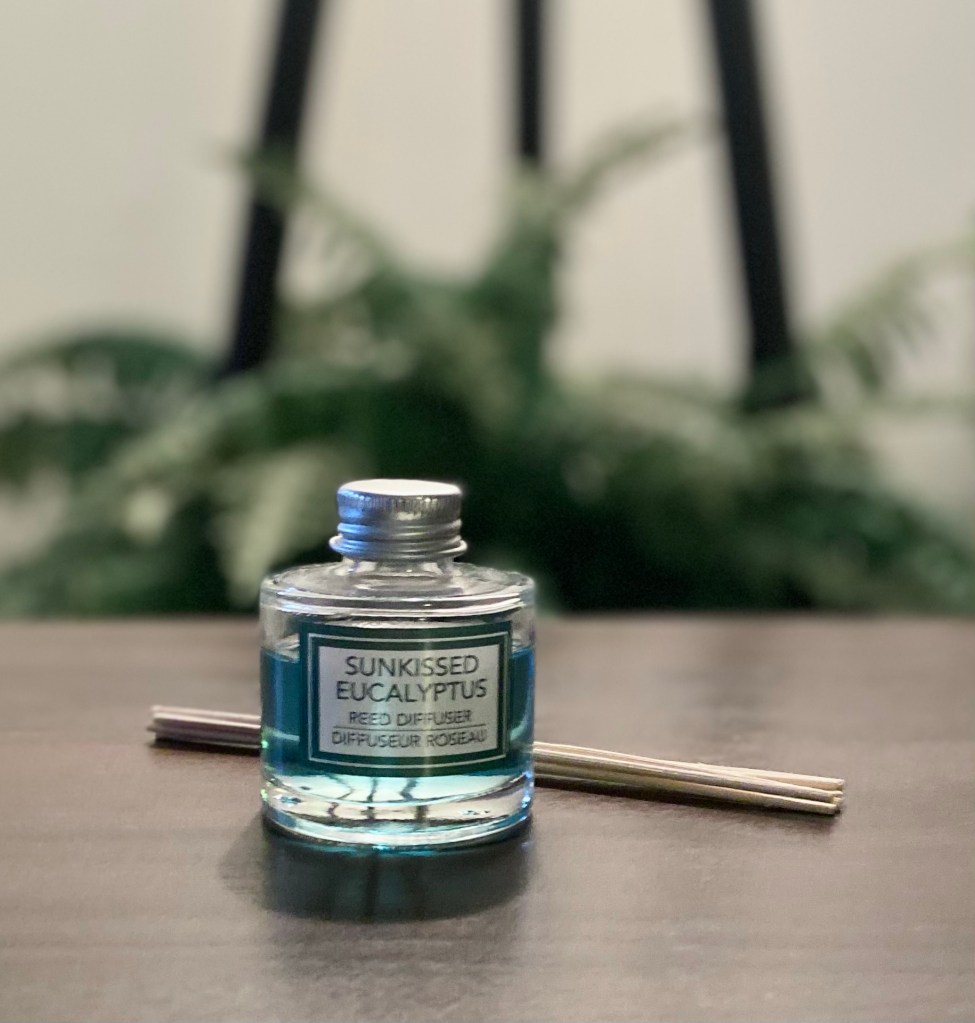
It all started with this little Reed diffuser from Dollar Tree.
I was putting away some bags with Dollar Tree purchases and got distracted. Lol
First of all, I’ve had a little gold metal riser for a year or two. I never knew what I would do with it. Today, I used it to put my hot melted candle wax jars on, so it was handy (I hadn’t put it away yet, either. 🙄)
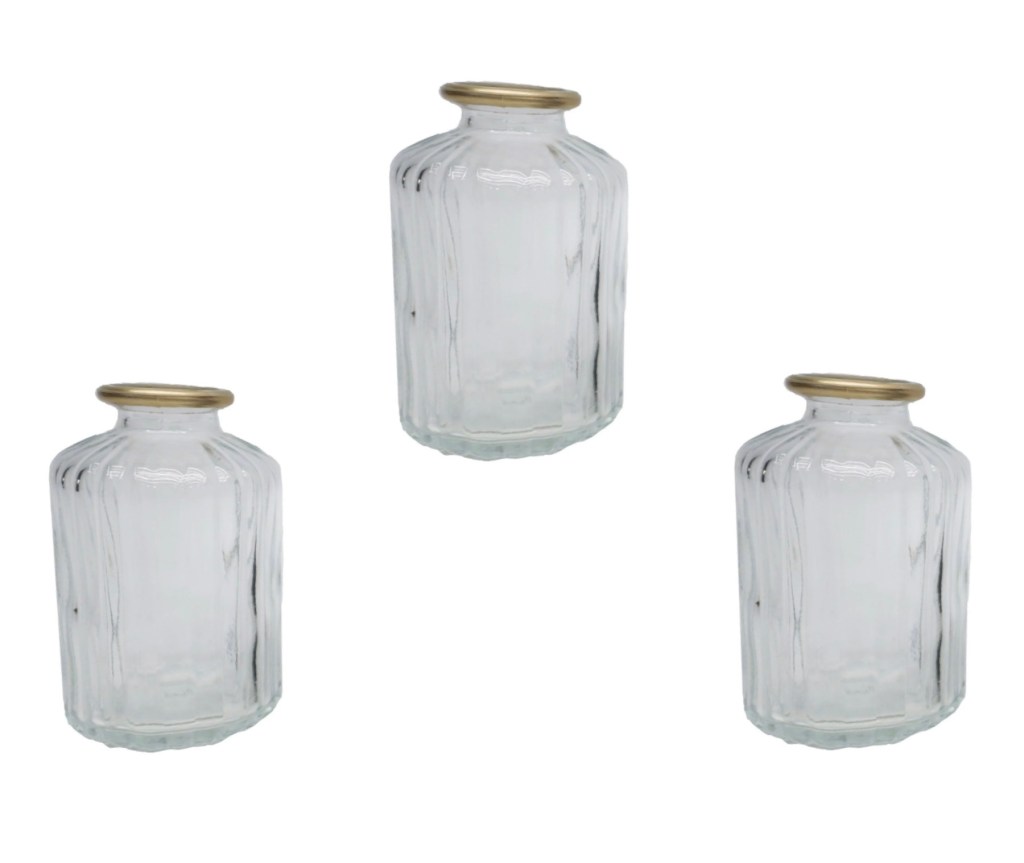
I took three little glass vases out of one of the bags. They were the only three I saw at Dollar Tree one day so I got them, not knowing what I’d use them for, either. I really liked the bit of gold around the top of them.
I also found two packages of reed decor. I have found these before and have them in my upstairs bathroom in a vase. I really like the neutral look of them.
Then I remembered I bought a Reed Diffuser at Dollar Tree awhile ago and hadn’t used it yet. It had the Eucalyptus scent.
So, of course, I had to act on an idea that came to me.
I added some RubnBuff on the rims of the vases to enhance the gold a little more and also added it to the edges and feet of the riser.
I poured the liquid from the diffuser evenly into the three jars and divided up all the reeds into the jars, making sure I saturated the ends well. Then I arranged the jars on the riser. They fit perfectly!
I’m so glad I stopped what I was doing and put all these things together. I really like how this turned out! It’s so much prettier than just the little Reed Diffuser all by itself. It looks and smells perfect in my downstairs bathroom.
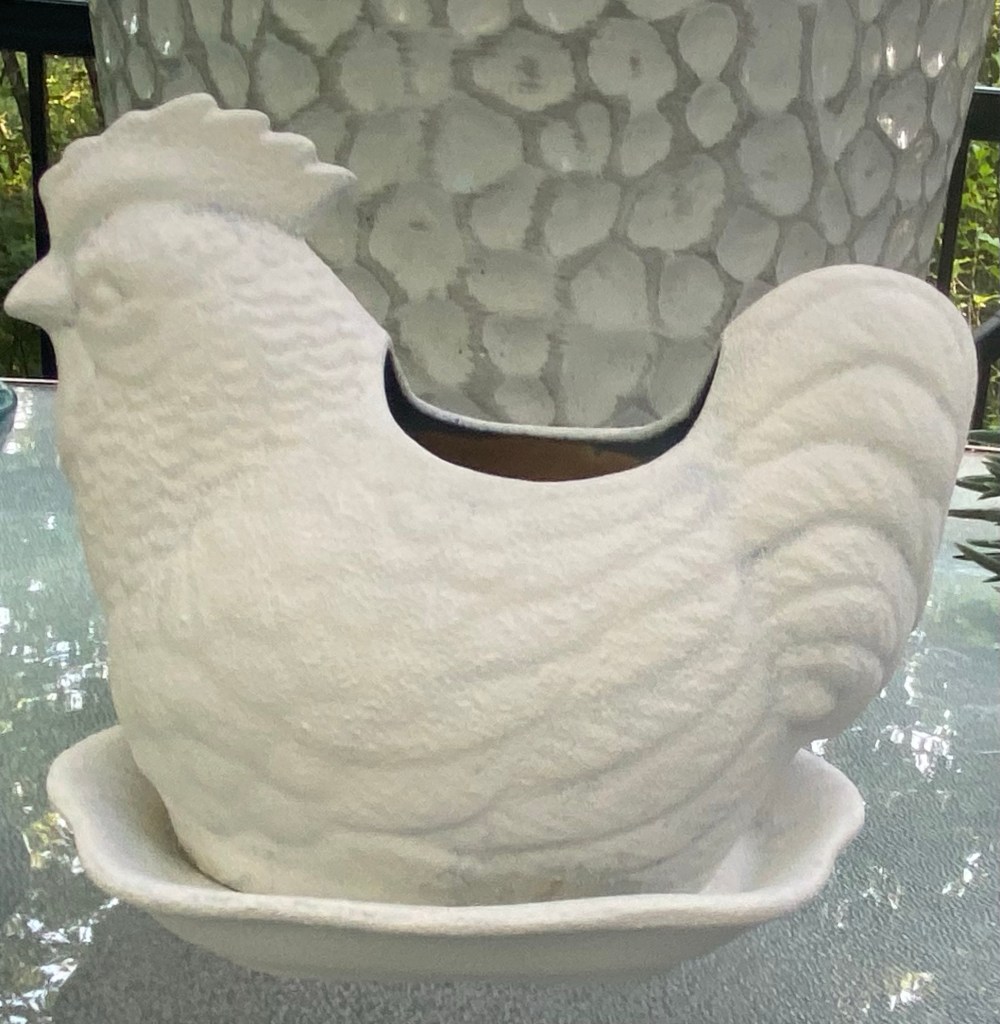
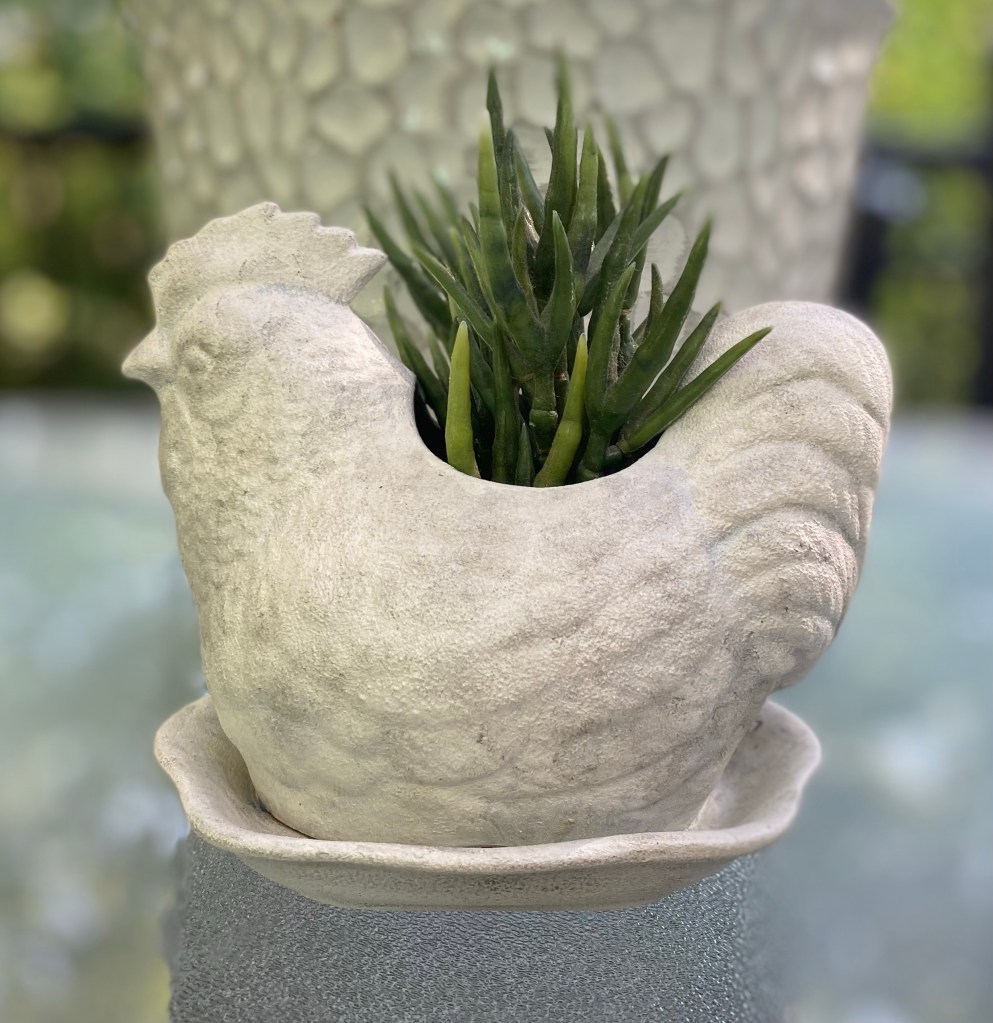
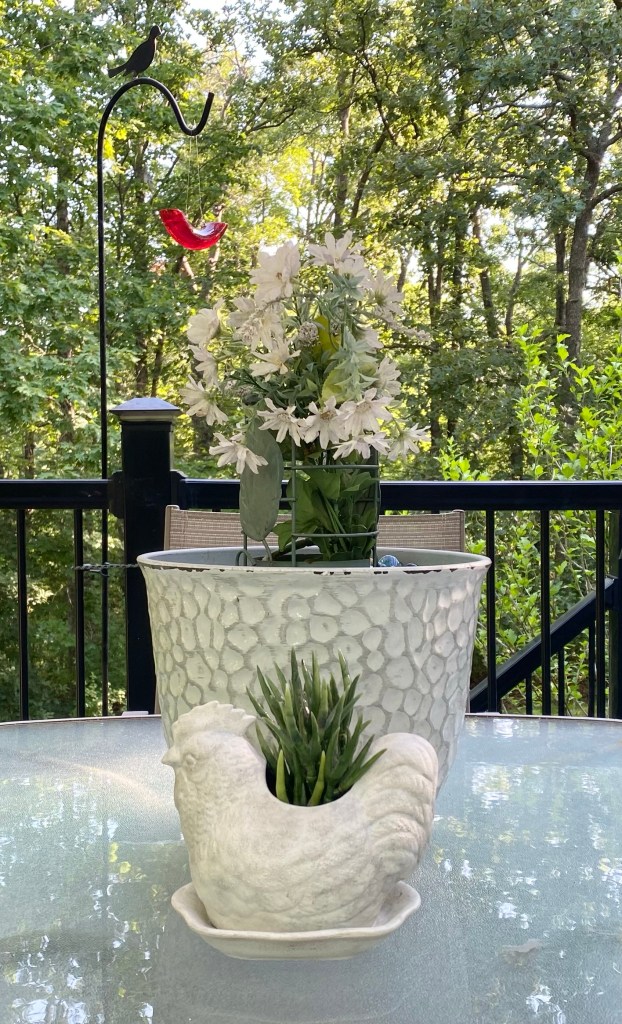
I found a chicken planter and a rooster that would hold a vase at two different thrift stores in the last few weeks. I decided they both needed updating using a concrete look technique.
The first thing I did with the chicken was spray him with Mod Podge pearlized glaze. Any sealer would work or even spray paint. I sprayed it to help the paint adhere well since the pottery was a bit shiny.
Next, I mixed chalk-style paint with baking soda and began daubing it on all over. This gives it a nice texture and no brush strokes. I gave it two coats, letting it dry in between.
After two coats of the baking soda and chalk paint mixture. I don’t have a photo, but I sprayed it with a coat of Mod Podge. This will help keep the antique look I’m giving it from soaking in which would make it hard to remove if needed.
Next, I did a little dry brushing with the gray paint. I would daub it on and use a baby wipe to blend where needed.
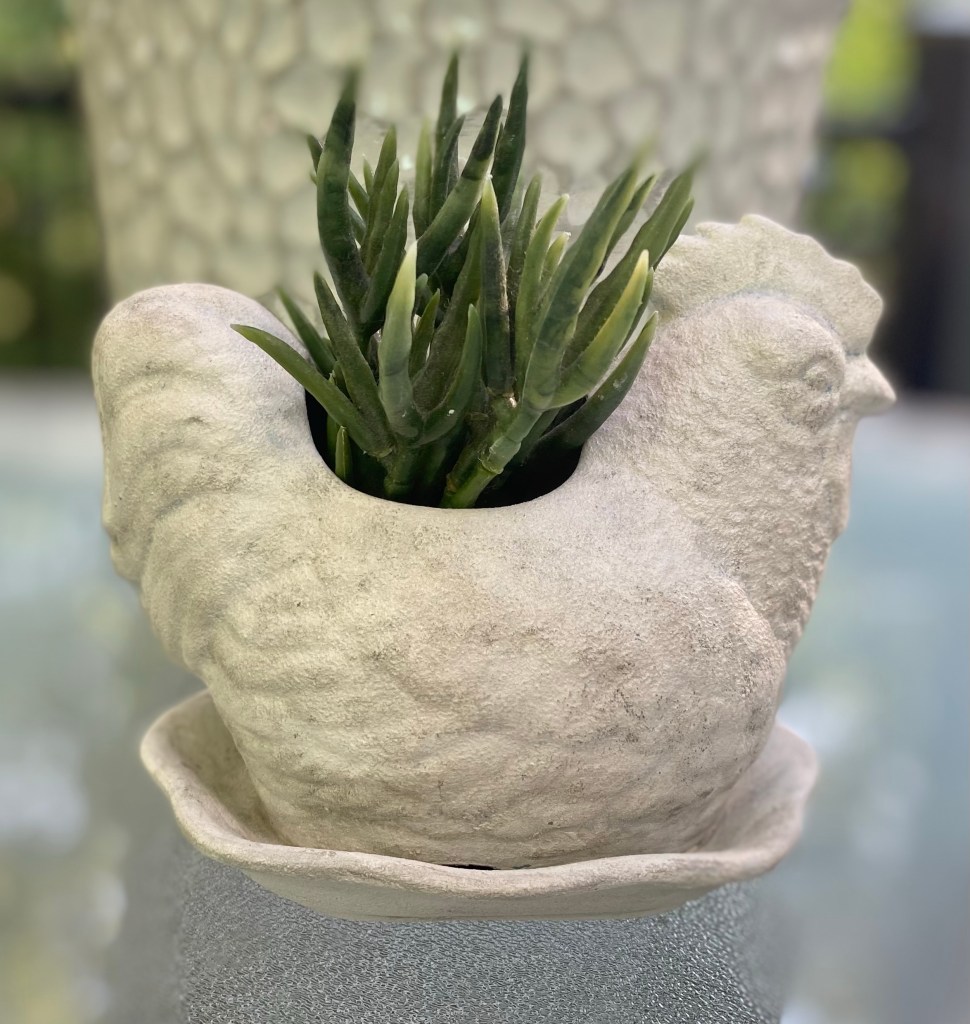
That’s it. I now have a chicken planter with a concrete look.
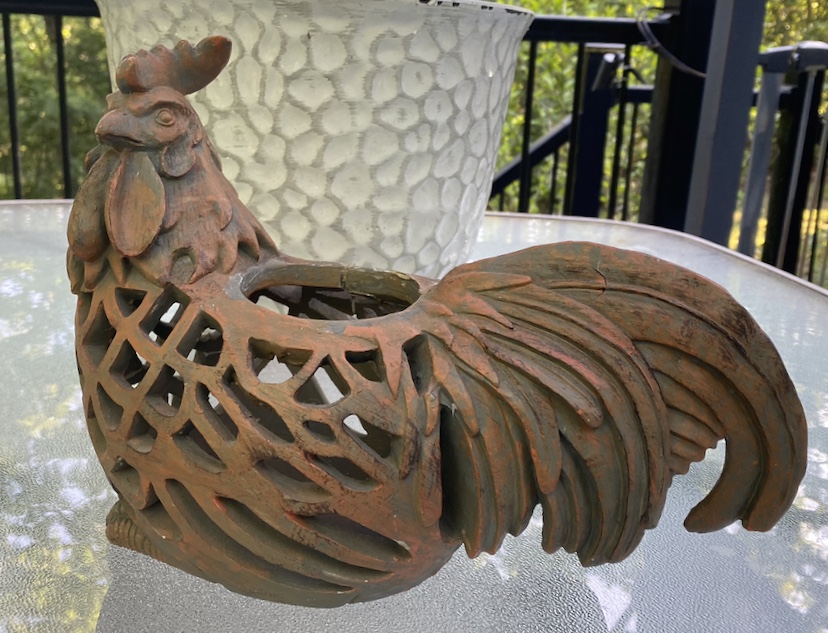
Now, for the rooster – I finished him much in the same way using the baking soda and white chalk- style paint mixture with a little different type of antiquing.
I learned the rooster was made of resin. I knew it wasn’t metal or wood. I had someone tell me to scratch off a bit of the bottom and if it was white underneath, it was resin…it was white!
I daubed the white chalk paint all over him. I only used one coat and wasn’t worried about full coverage because I liked the colors underneath and didn’t mind them coming through a bit.
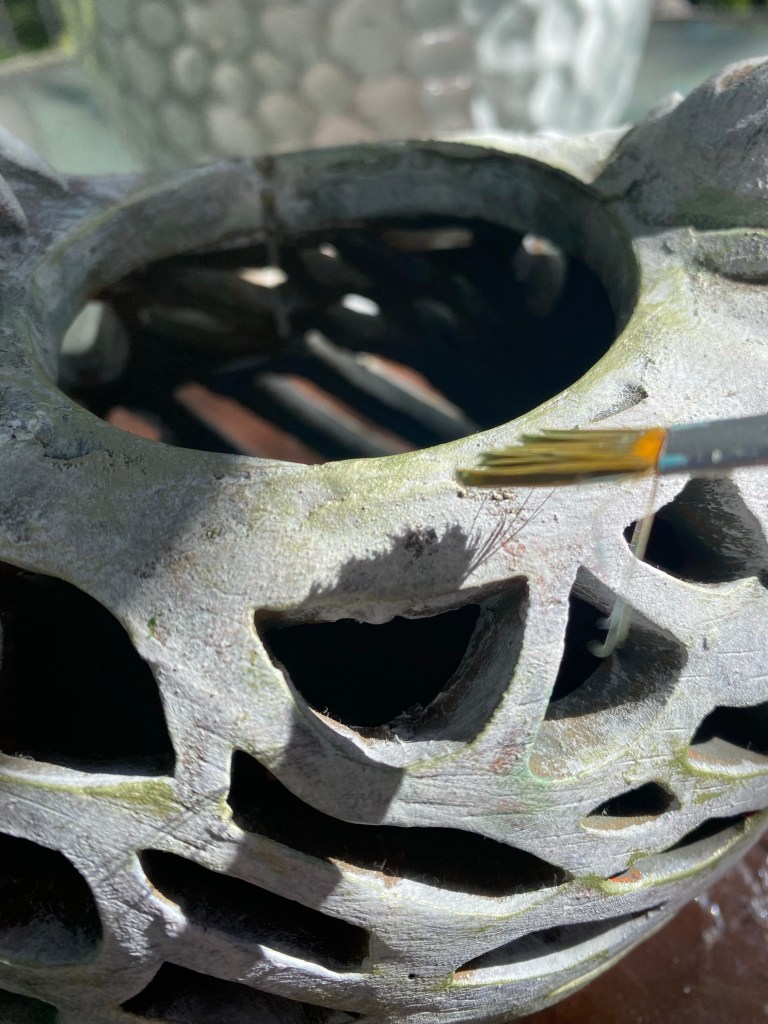
Once dry, I used sprayed the rooster with this clear chalky spray. This will help me when I apply the glaze and will let me remove excess.
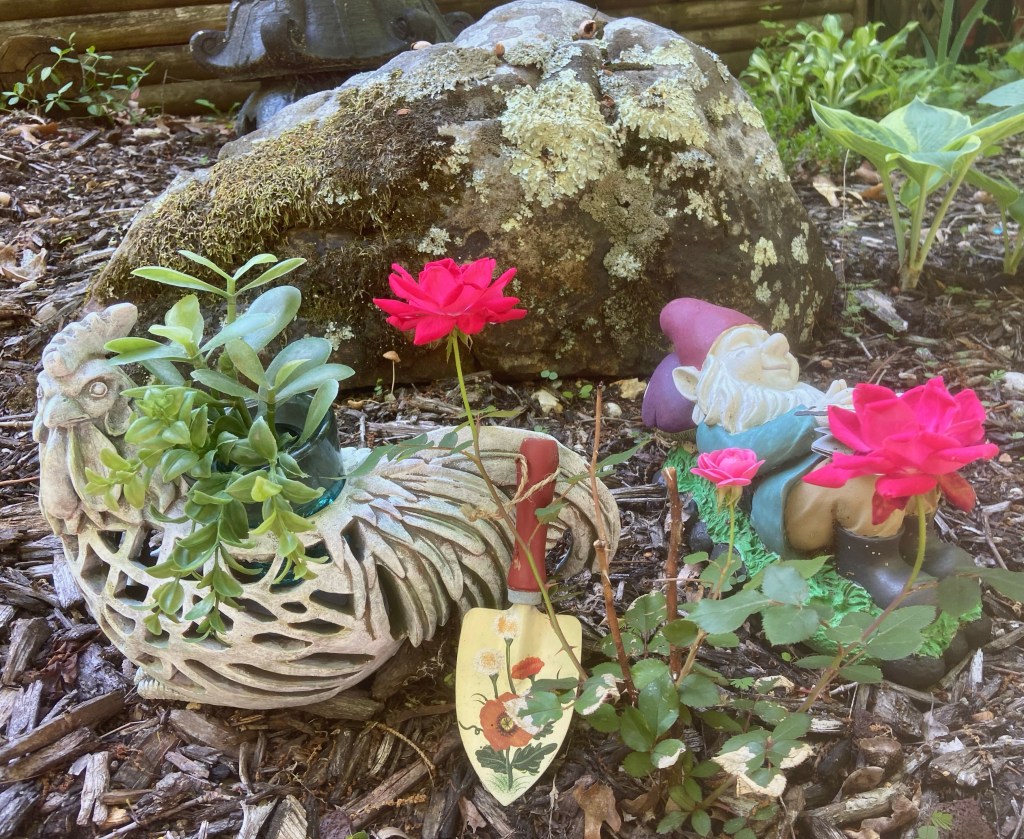
I applied the metallic green glaze to make it look like the rooster had been outside in the weather for years and had moss growing on it at one point.
I also applied a bit of turquoise paint for some patina.
The rooster was now ready to be added to a garden display.
I’ve been seeing crafters use the tall Dollar Tree candles and melt them to create new candles in pretty containers. I had everything I needed to try this out. I am thrilled with the results. In fact, I shared the one I made for myself on my Facebook page and already have a request to make another.
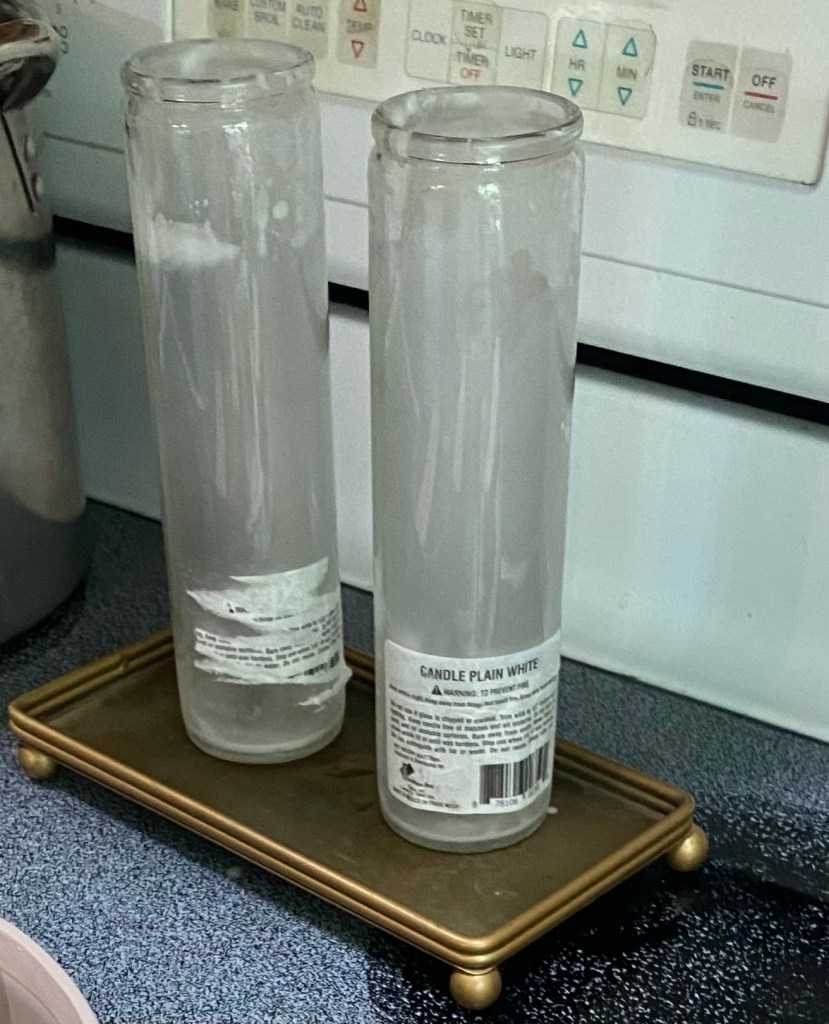
The candle in the glass holder is from Dollar Tree. I ordered wicks from Temu and I had this wooden bowl. I love thrifting wooden bowls so I had several to choose from. The fragrance oil is “Egyptian Musk”. I love the fresh clean smell. I found it on Amazon.
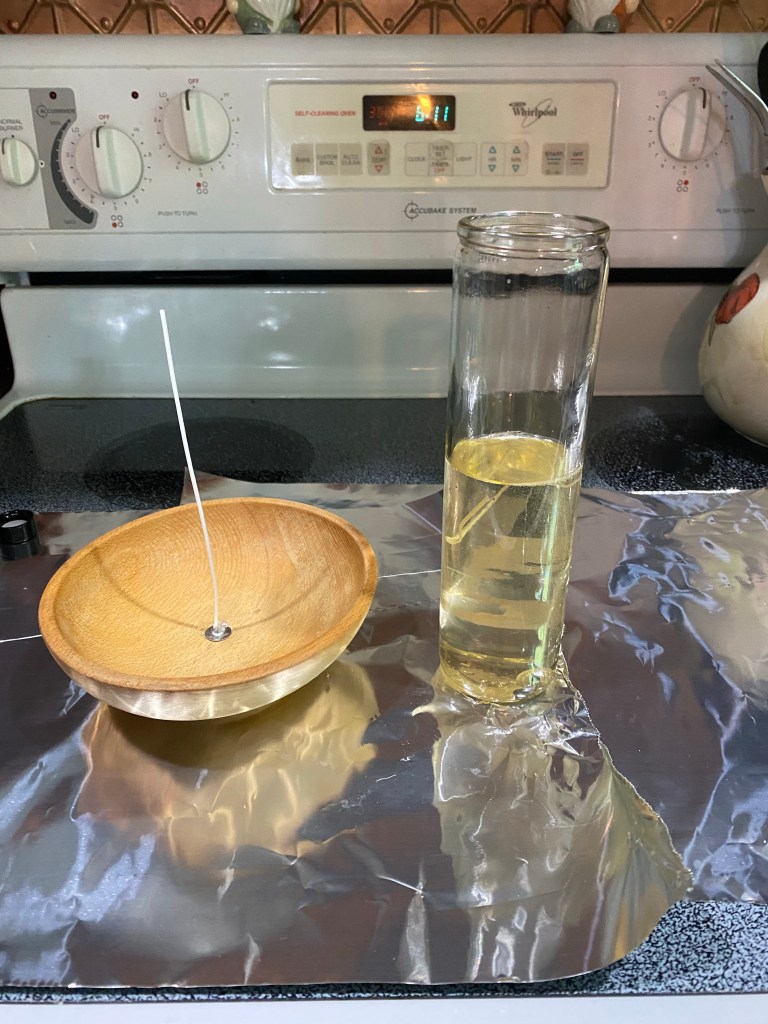
I had seen many crafters stand the candle in a pan of water and put it on the stove on low until it melted. Today, though, I saw a technique of placing the candle on a cookie tray in the oven at 300°. It took about 18 minutes to melt mine.
I hot glued the wick to the bottom of the bowl while the candle was melting and got it ready for the wax.
It is ready to pour.
After I poured the wax into the bowl, I added two capfuls of my fragrance oil and stirred it around a bit with another skewer.
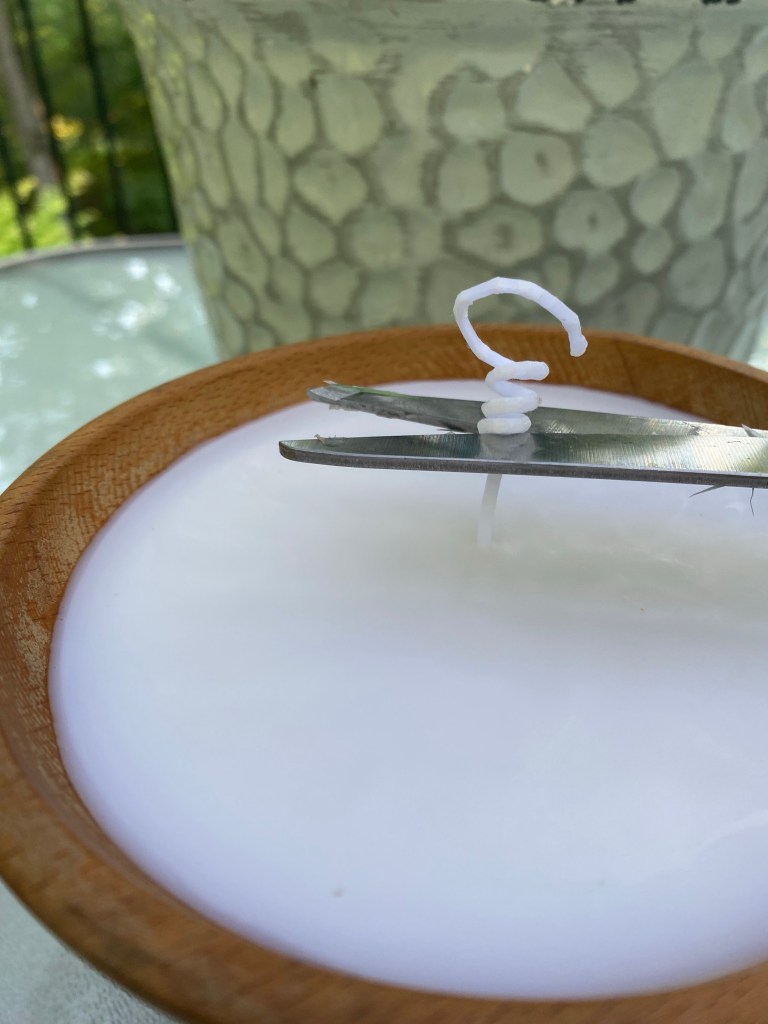
I should have curled the extra wick around a skewer and laid it on top of the bowl to keep the wick upright, but didn’t remember to do that until after I poured the wax. Next time I will do that before pouring.
I then let it cool and trimmed the wick.
I love how my candle turned out! I can’t wait to make more!
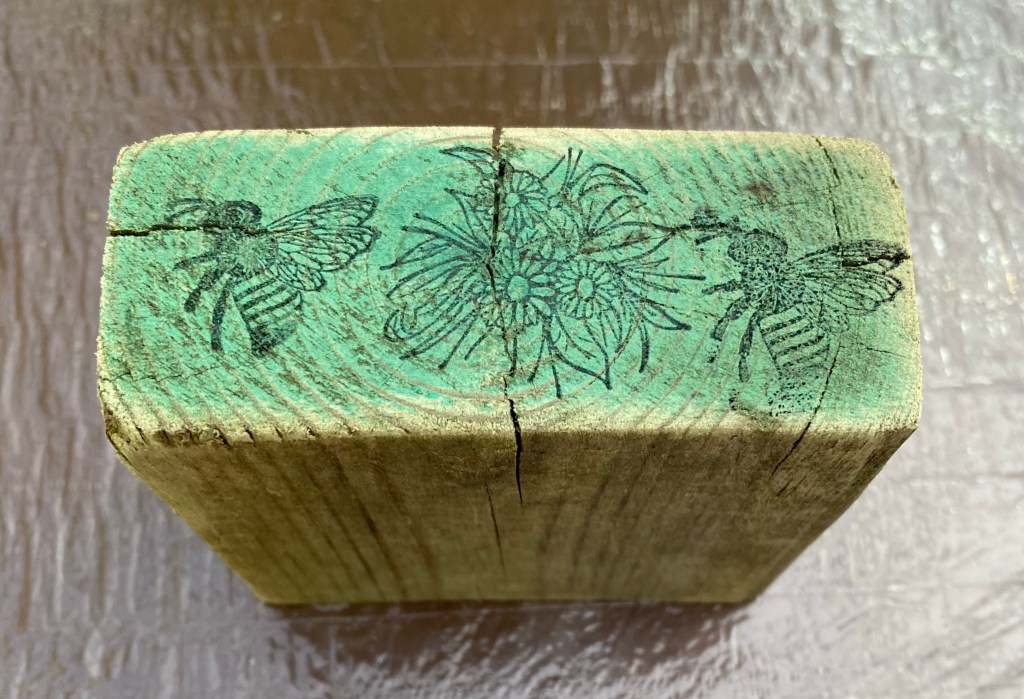
I’ve been seeing risers made from blocks of scrap wood so thought I’d make one, too. My 3.5” x 1.5” square block of scrap wood had one end that was painted green. I didn’t want to cut it off so I just made it the front of my project.
I did sand the block well, including the green part and that lightened it up a bit.
I like to work on this lazy susan. I bought 100 disposable shower caps on Amazon and stretched one over the lazy susan to protect it. These work great and I just throw them away when finished.
I gathered up my supplies and got started.
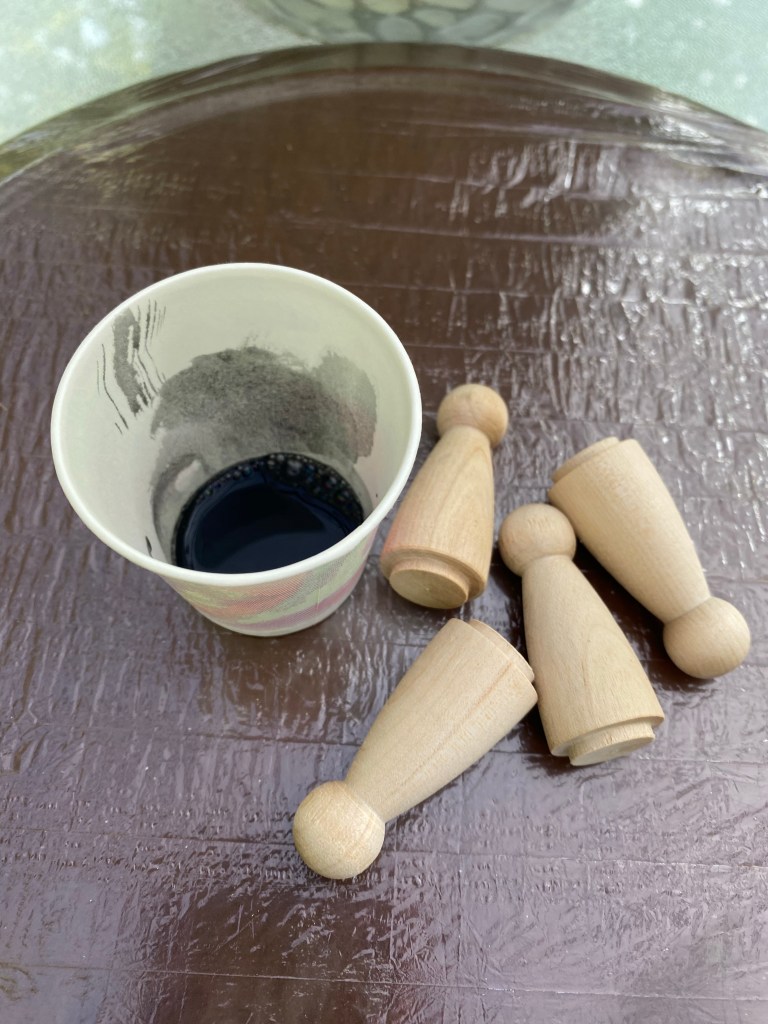
Step 1: I used black ink and stamped flowers and bees on the green side of my block. I put it aside to dry.
Step 2: I purchased wood peg dolls from Amazon to use as feet. I watered down a bit of our Missouri Limestone Paint Company chalk-style paint (Coal Shovel) and covered the feet I would be attaching to the block. This will give them a rustic look similar to the block. I wiped the excess away and put them aside to dry.
Step 3: I wrapped the block with a paper towel only leaving the green inked part exposed. I sprayed that part with the Krylon spray matte sealer. I believe I got it at Lowes. This sealed the ink to make sure it wouldn’t smear when I applied wax to it later.
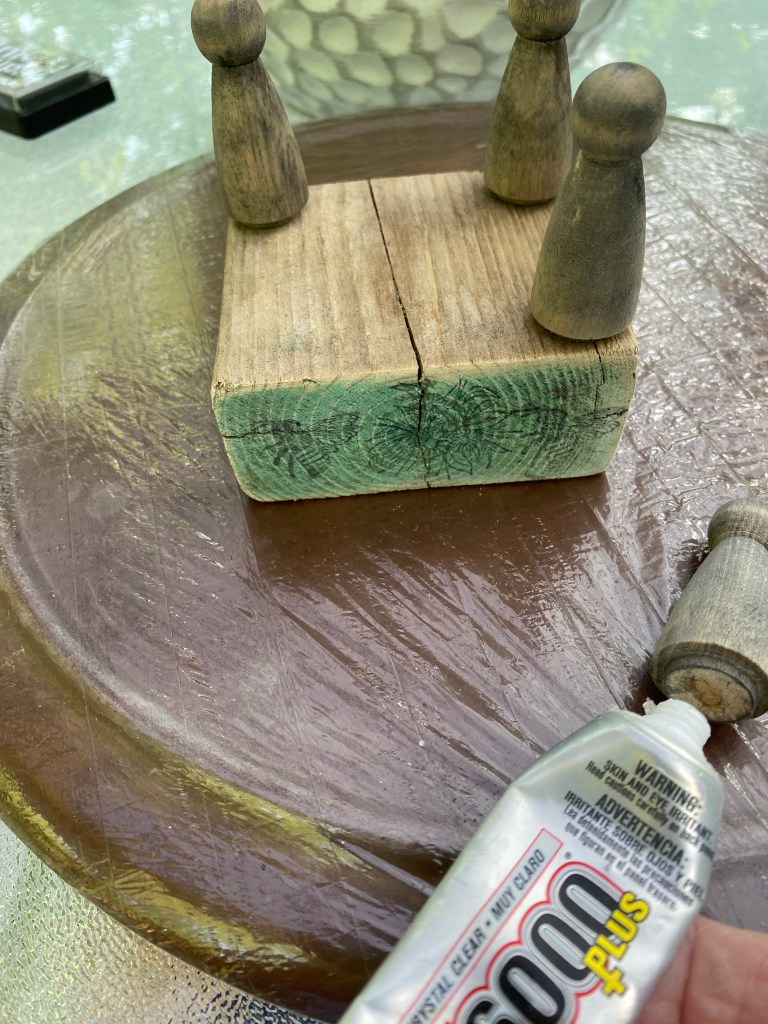
Step 4: It was time to glue on the legs. I used a combination of E6000 for permanent hold and hot glue for immediate hold.
Step 5: Once the hot glue set up, I applied Wise Owl Salve (ordered from a retailer) to the whole piece.
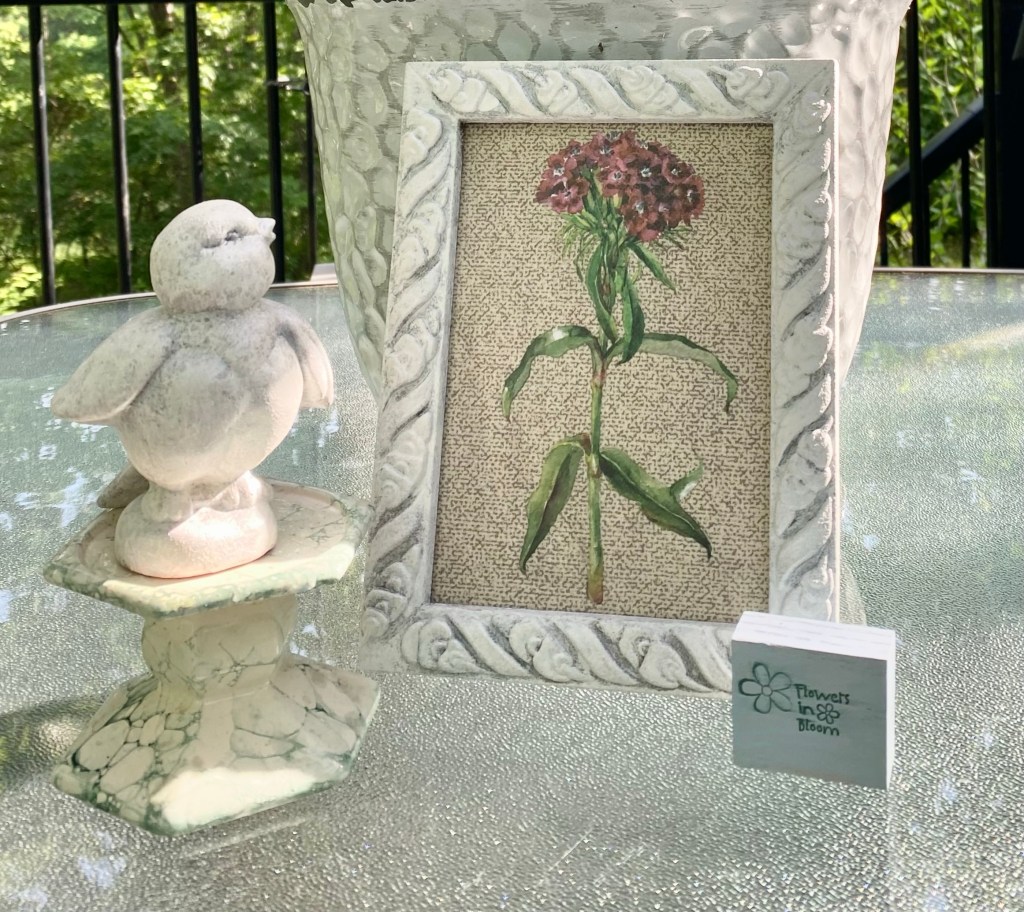
My rustic riser was now complete. I added a small painted terra cotta pot I had applied Dollar Tree rub on transfers to, added faux flowers, and displayed it on my rustic wood block riser.
I love how it now looks like the whole riser has been outside in the weather for years!
For today’s project I am up-cycling an old gold frame and adding a Redesign with Prima transfer from the Floral Collection. The transfer is applied to a unique background – a piece of one of Dollar Tree’s storage bins.
Cutting apart a Dollar Tree storage bin
The material is kind of a paper/fabric with cardboard in between layers. I cut off a piece to use as background for the transfer.
I cut the cardboard to fit the frame.
I used a glue stick to glue the material onto the cardboard.
I then trimmed the material to the size of the cardboard.
It was time to paint the frame. I mixed a little baking soda with a littler chalk paint to achieve the texture of stone.
It took two coats. On the first coat I used a brush to pounce the paint/baking soda mixture on so I didn’t get brush strokes. For the second coat I used a foam dauber. I love the distressed shading this technique produced. I set it aside to dry well.
Once dry, I gave it two coats of Mod Podge Pearlized Glaze Spray to seal it.
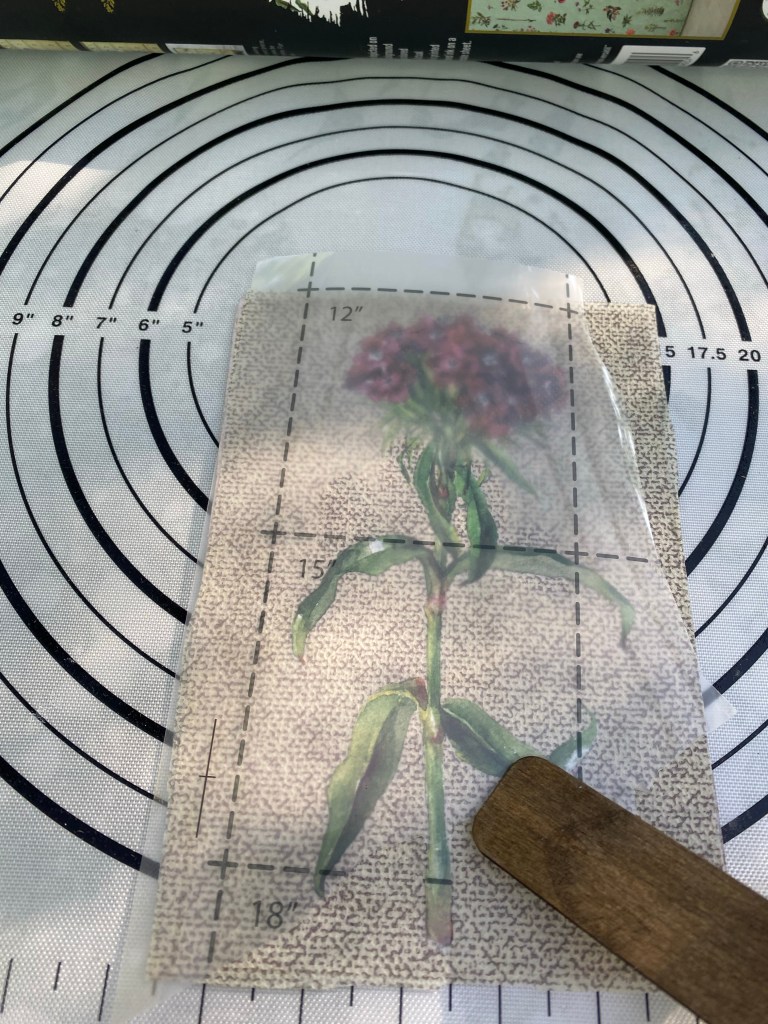
It was then time to apply the transfer to the material I had adhered to the piece of cardboard. I didn’t seal it as it is a decor piece and will not be handled much.
The sheet underneath is a silicone baking sheet I use to work on. Paint does not adhere well to silicone, so it is easy to clean after I finish a project.
I added the transfer to the frame. You could add the glass back in but I did not use the glass.
The final reveal – The material under the transfer looks almost like a piece of linen. It makes a very nice background.
I can’t believe it’s been so long since I’ve posted anything. I have been busy creating, though, so I will share my Instagram page at the end so you can see what I’ve been up to. Many of the posts explain the process I used when creating my projects.
But today, I actually have pics of the steps I took to make these awesome slippers. So, sit back and enjoy. This was so much fun to do!
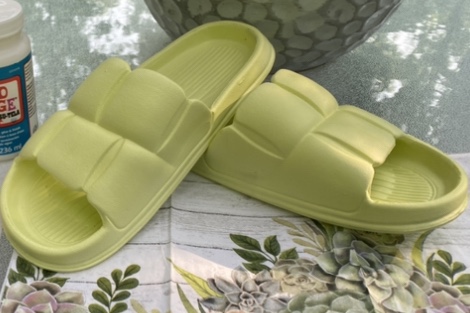
Early this morning I happened on a Pinterest post that showed a pair of slippers similar to ones I just purchased from Temu and how the crafter decoupaged them with napkins. Of course, I had to try it and am so glad I did!
Bathroom slippers from Temu
I apologize to the Pinterest crafter. I was in such a hurry to do this, I forgot to save the post and now I can’t find it again. Sorry, original crafter. She actually cut the napkins into small pieces and decoupaged all areas of the napkin. I decided just to use one large piece across the top and sides.
I had purchased this pair of slippers from Temu. There were a very bright greenish yellow color and I wasn’t sure I liked the color until ….. I added the napkin to them. Wow!
One piece of the napkin covered the top and sides
Step 1. You must remove all the extra layers of the napkin. This one happened to have 2 extra layers. You only use the layer with the image. I cut around the image part of the napkin: I cut around all the succulents and greenery of the napkin and then took the other end of the napkin and cut it into small pieces.
The napkin laying across the top of the slipper.
Step 2: Once I laid the large part of the napkin over the slipper, I knew I wanted to only use it so I didn’t use the small pieces except to fill in on the sides where needed. I used a bit of water to wet down around the areas I didn’t want and tore that away, leaving only what I was going to decoupage.
Adding Mod Podge to the slipper
Step 3: The original crafter used Mod Podge for fabric. I’m not sure you’d have to use that, but I happened to have the fabric one so that’s what I used. Mine has been around awhile and was pretty thick, so I had a bowl of water to dip my brush in first and that thinned it out just enough. I applied the Mod Podge to the whole top and sides of the slipper. (I did the second slipper with another identical napkin cut out and placed it in the same position so they would match.)
Step 3: I laid the napkin where I wanted it, added more Mod Podge to my brush, and started smoothing the napkins down, getting into all the grooves and around the edges.
Step 4: Once the Mod Podge was dry, I gave it two more coats to seal the napkin well. When the final coat was dry, I applied a coat of water based polyurethane just for a bit more protection.
UPDATE: Just to make sure I would give it 2 coats of the sealer and even spray it with an outdoor spray sealer.
Close up
This close up shows how the raised puffiness of the slipper almost gives the napkin a 3D look.
I love how they turned out! It is amazing how the napkin color took on the color of the slippers. They truly are beautiful! The original crafter said hers were holding up well. These slippers are really not meant for shopping trips, etc. but I think you could even if you get caught in a rainstorm. They are perfect for pool shoes or wearing around the house, inside or out.
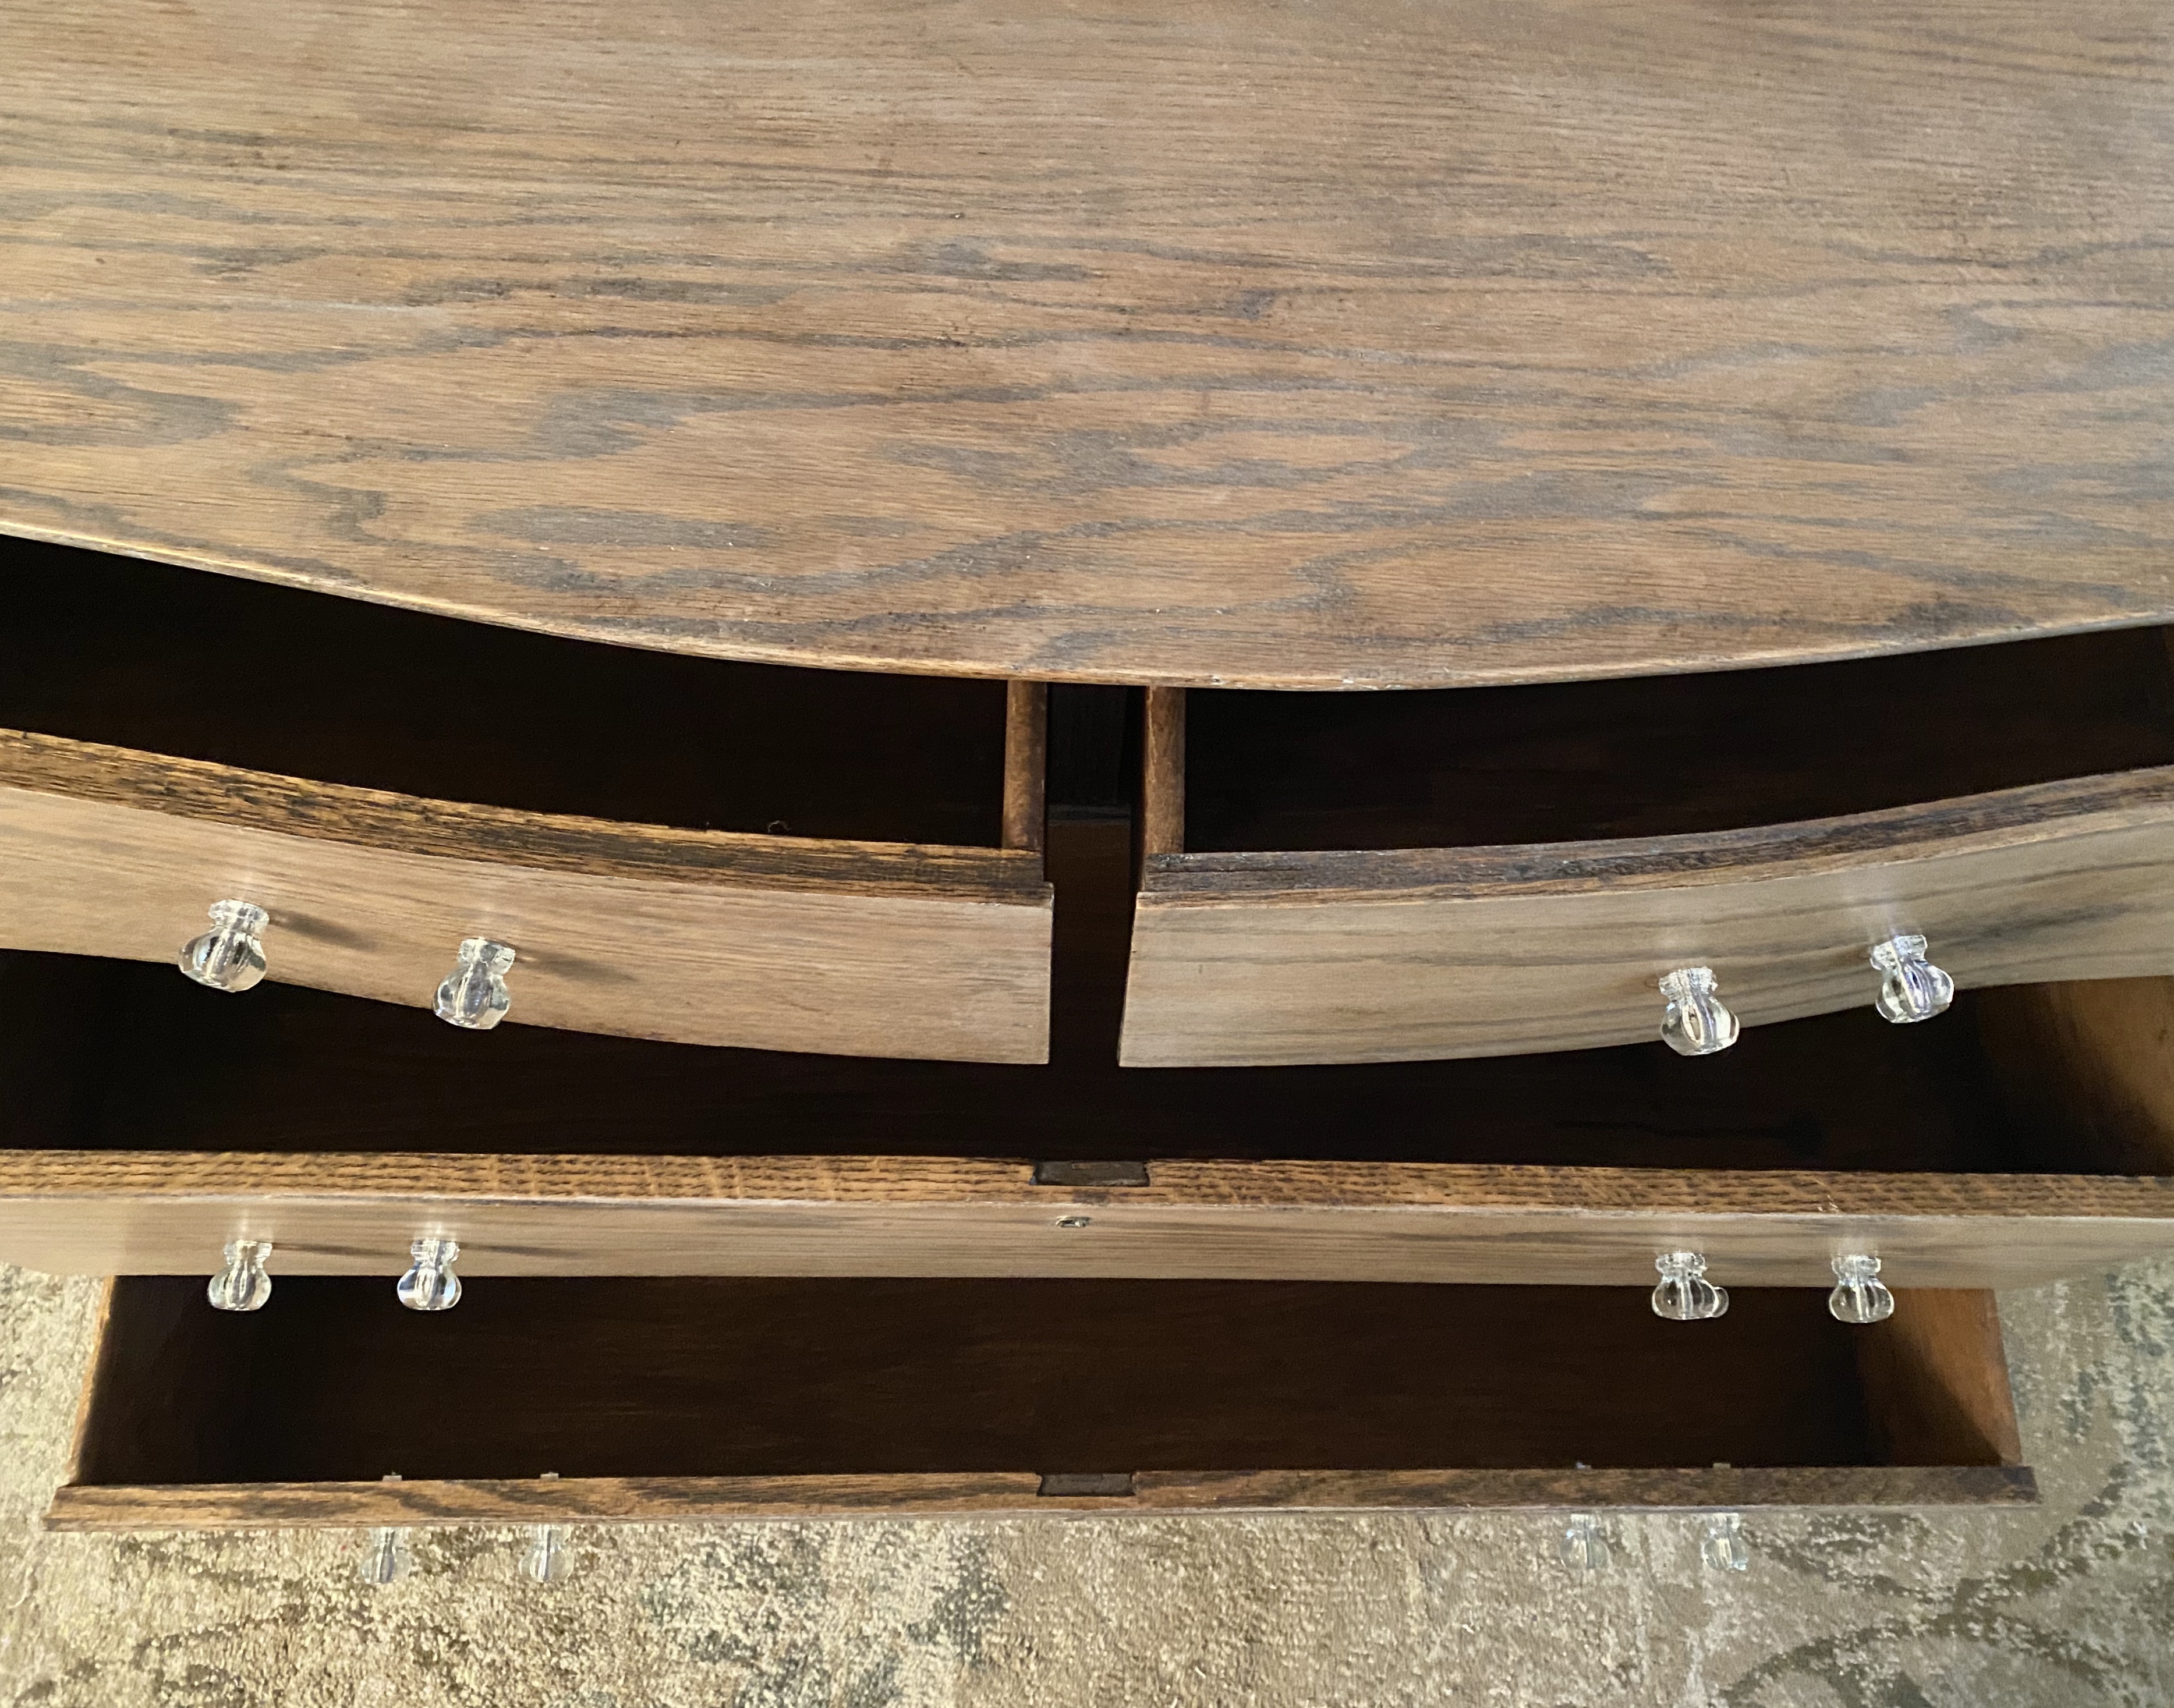
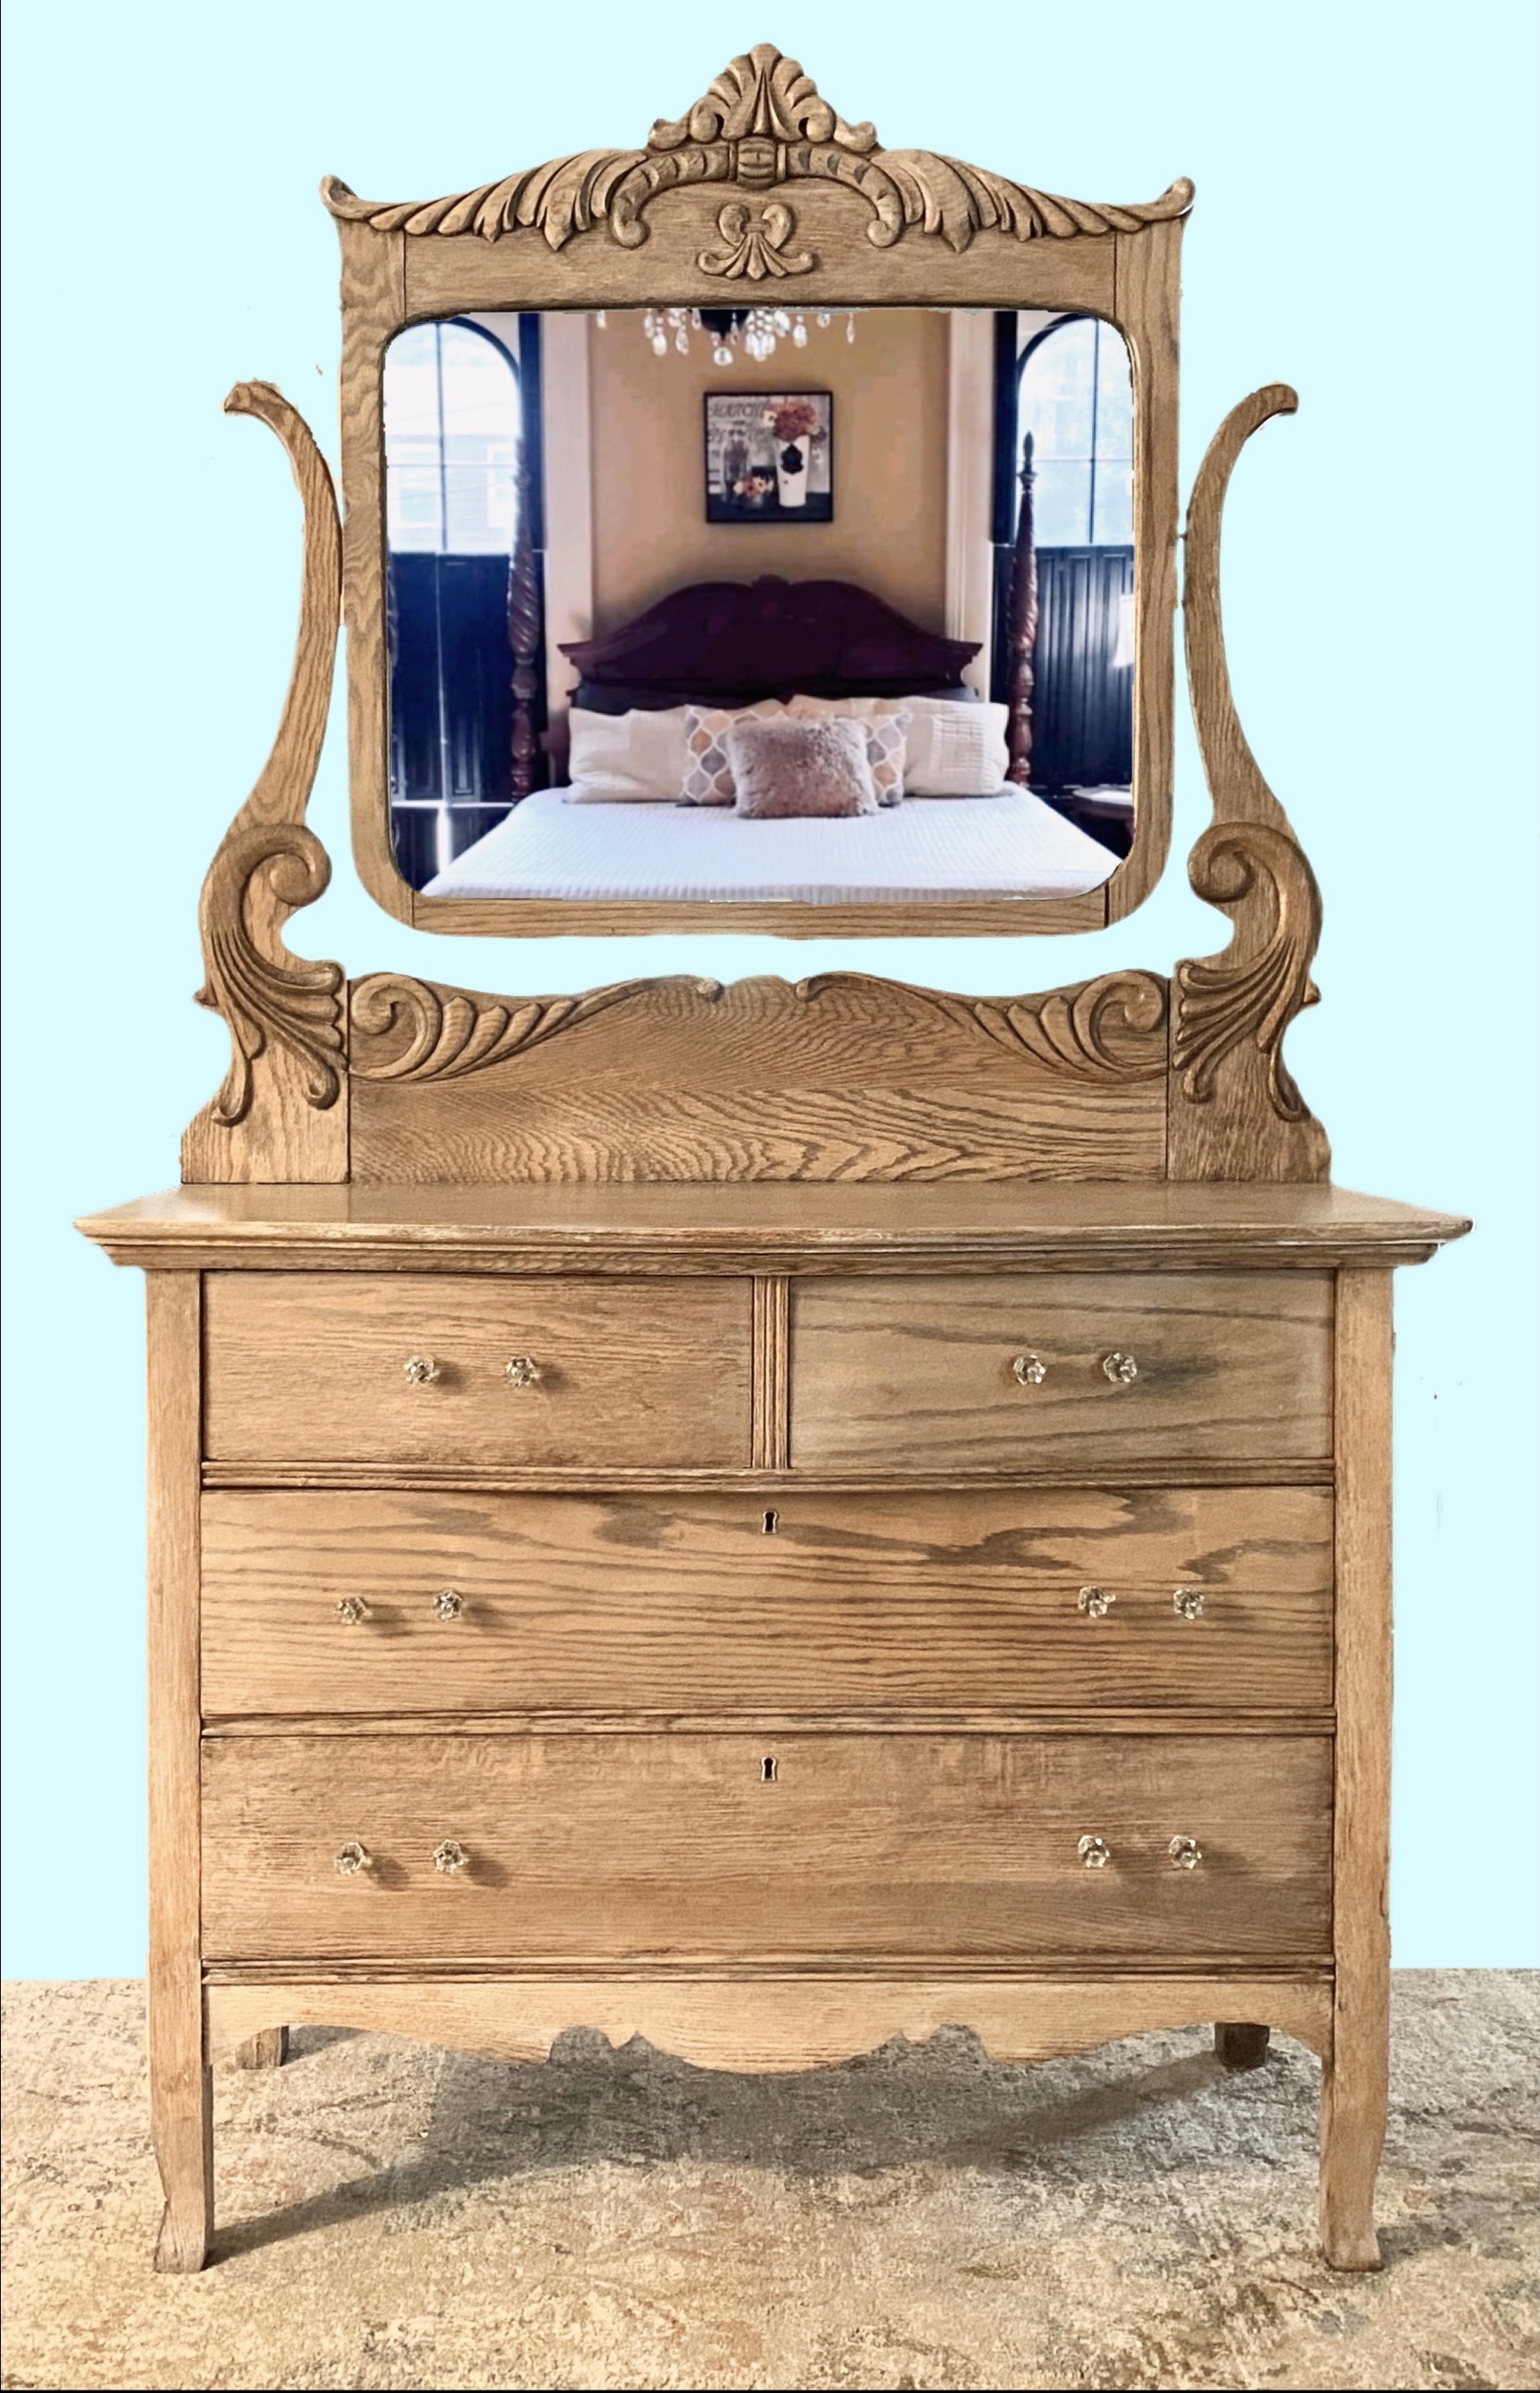
The oak dresser we’ve had for several years in storage is now refurbished. When we bought it, the base literally fell apart as we were loading it, but that mirror was so worth all the work it was going to take to bring it back to life. The mirror is beveled and has just a bit of aged patina.
Researching it, we found the company Estey Furniture produced it in the late 1800s or early 1900s. The original handles were a bail type handle, but were replaced at some point by these Depression knobs from the 1930s.
Danny took the dresser completely apart. He loaded the base into our SUV and took it to a grands babysitting gig and stripped it. A few weeks ago, he loaded it again and when we were babysitting another grand in another city, sanded it, and put it back together.
We had completely forgotten what the mirror looked like. Wow! It changed my whole idea of how I wanted to refinish it. I decided a whitewash look would bring out the grain detail and take away the orangeish look oak raw oak sometimes has. The drawers were not pretty on the inside and sides so I stained the insides and stenciled a pattern on the outside.
This is the difference between the whitewashed look and raw wood after stripping and sanding. After whitewashing everything, I gave the base and mirror 3 coats of water-based Crystal clear Varathane Polyurethane in satin finish and 5 coats on the top of the dresser.
I couldn’t wait to take pics. I used an app called ProKnockOut to remove the mirror reflection and change it out to a new image of a bedroom I found on pixels.com and to cut out the dresser itself and to apply a plain background.
It already has a new home. This piece ranks right up there as one of my favorite pieces we have ever refurbished.
I changed it up a little. This one is 5” tall. I used a small 2 1/4” wood slice for the base and cut down the size of the skewer some. It still has a point on it for piercing each strand of jute. I just cut it off at the end.
The jute pieces I used:
12 – 4” 12 – 3” 12 – 2” 2 – 1” And a half inch piece. For this one I used more glue and pressed and molded it to round off the top.
I cut off the skewer and left enough to glue the greenery and the star to the skewer and glued some jute to the back of it to cover.
This one got caught in a snow storm so has a bit of snow (paint) on the branches.
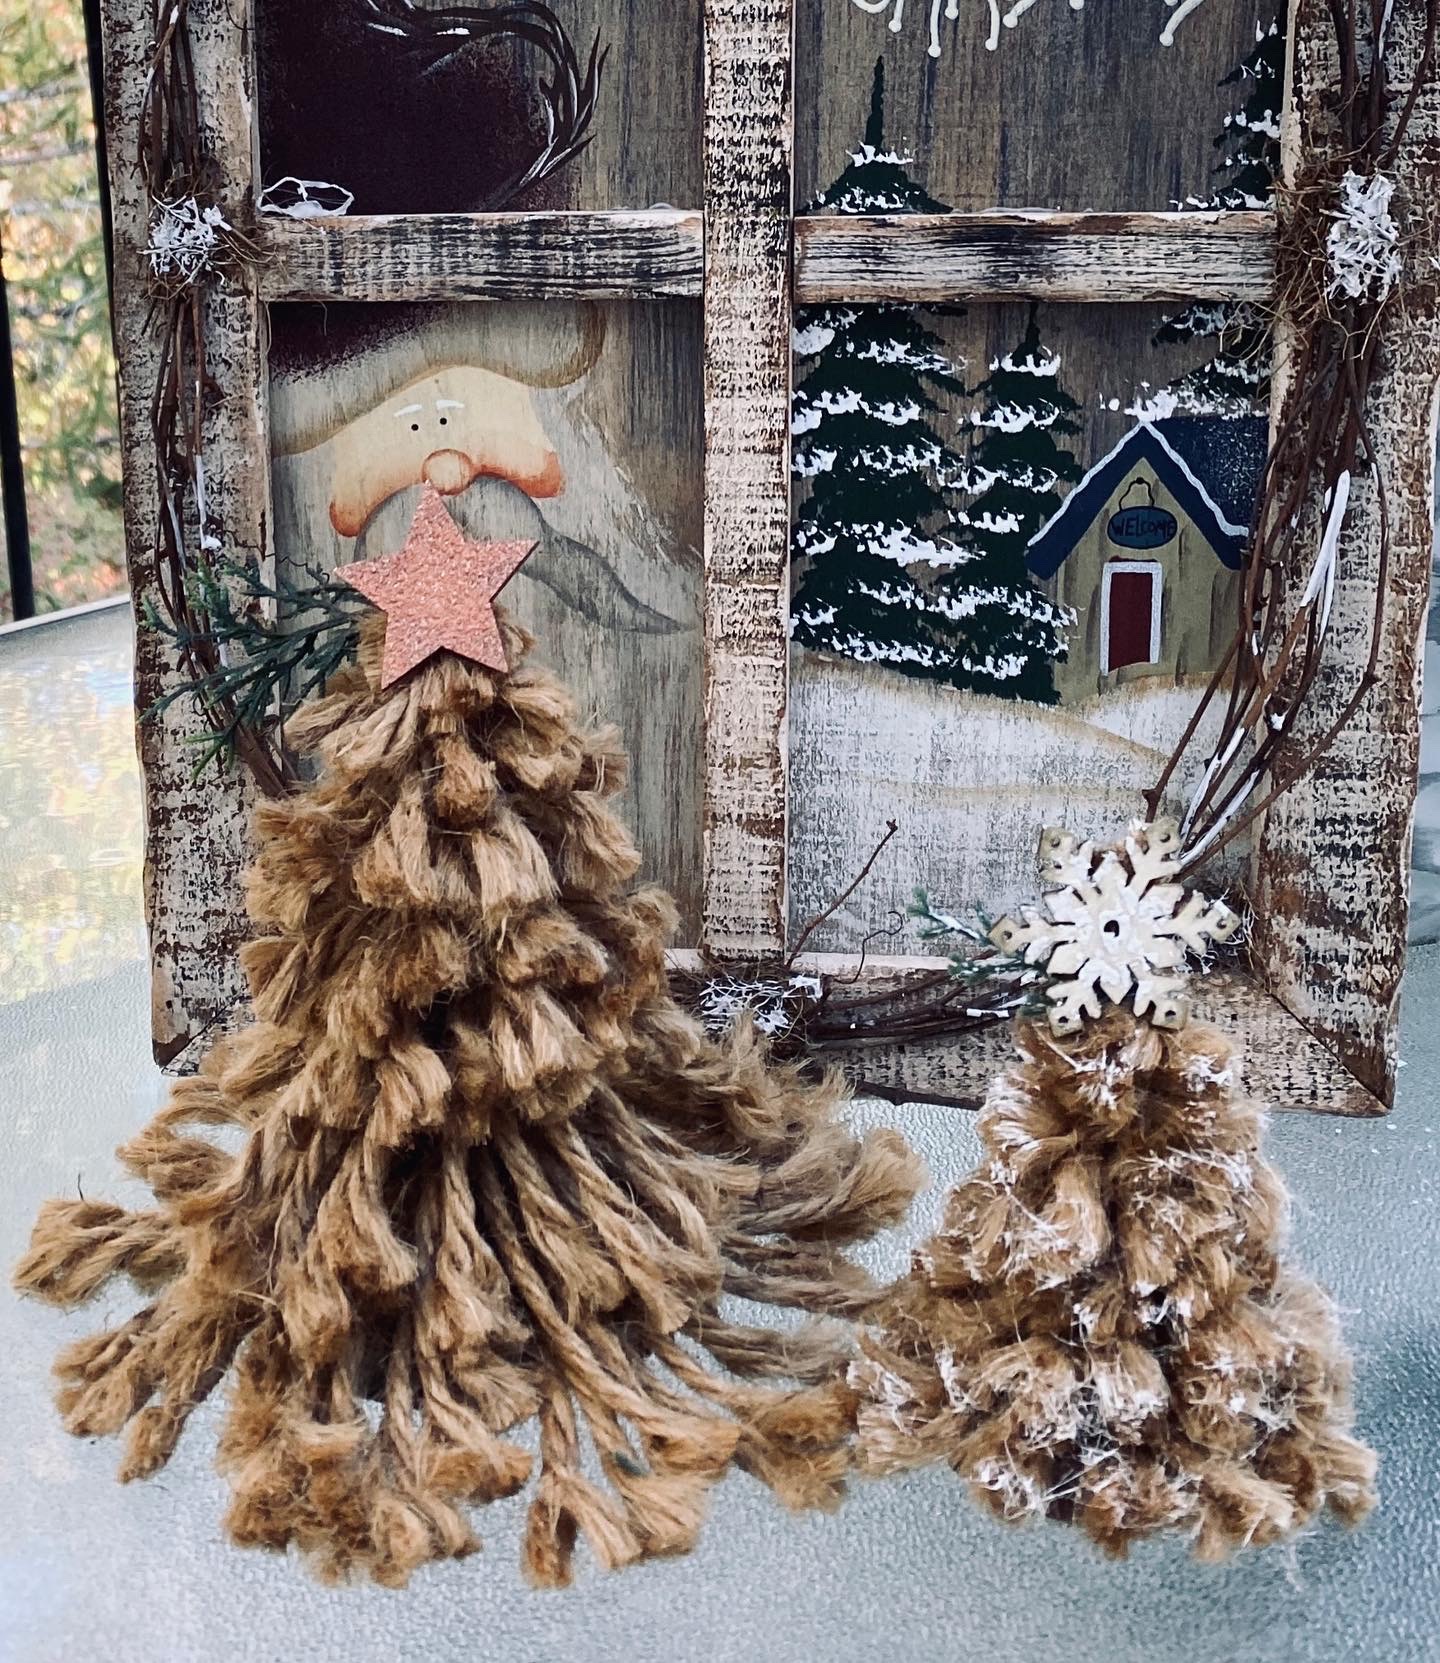
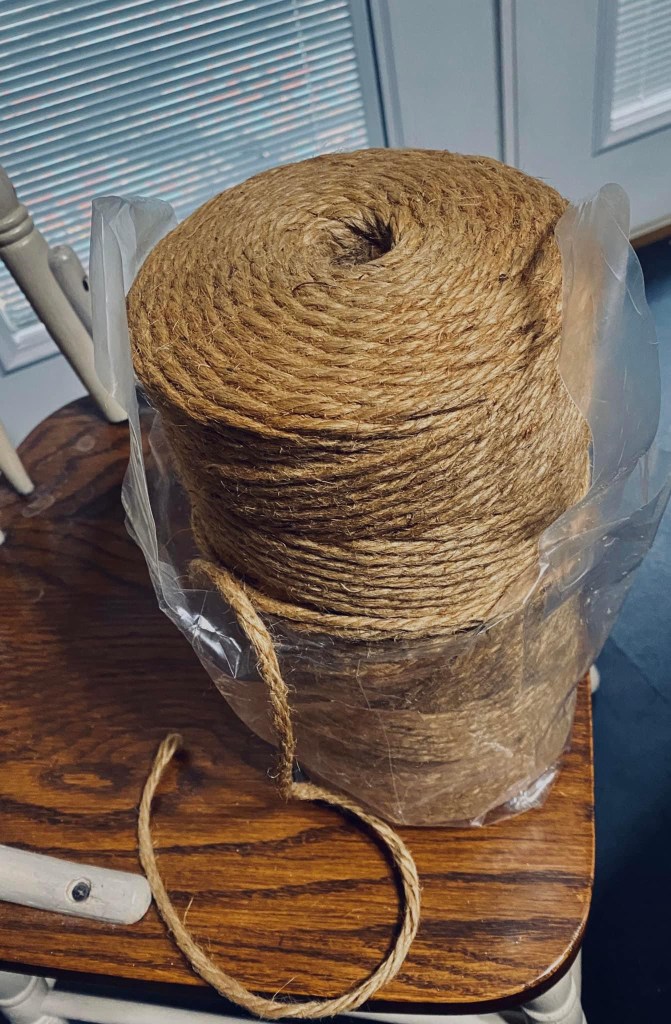
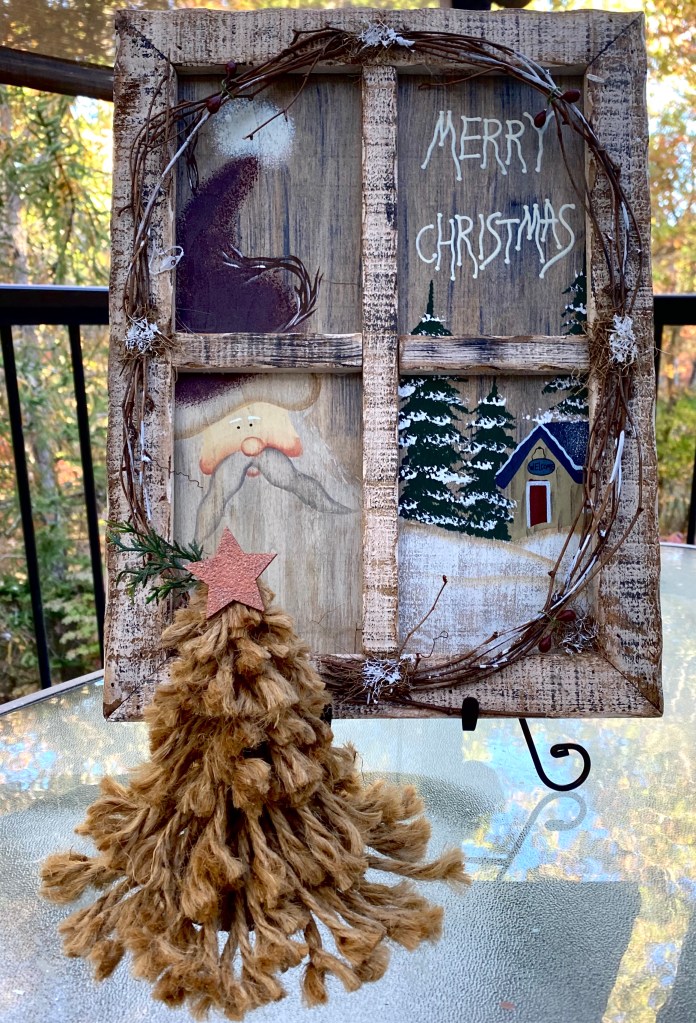
I found one thing this morning to make with the big roll of jute I found at an estate sale… a shabby jute Christmas tree. It took me about 1 1/2 hours to make.
My little tree stands about 7 1/2” h x 7 1/2” w.
I was inspired by a tutorial I saw come up on Pinterest. My jute was a little thinner than the tutorial so I adapted it some.
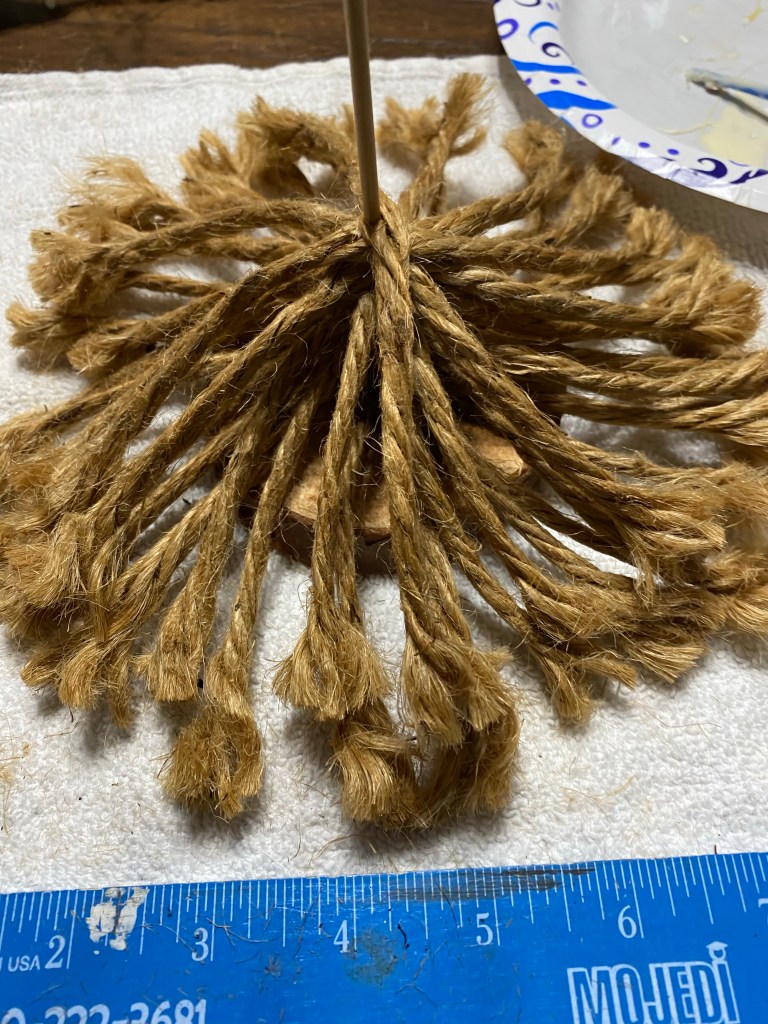
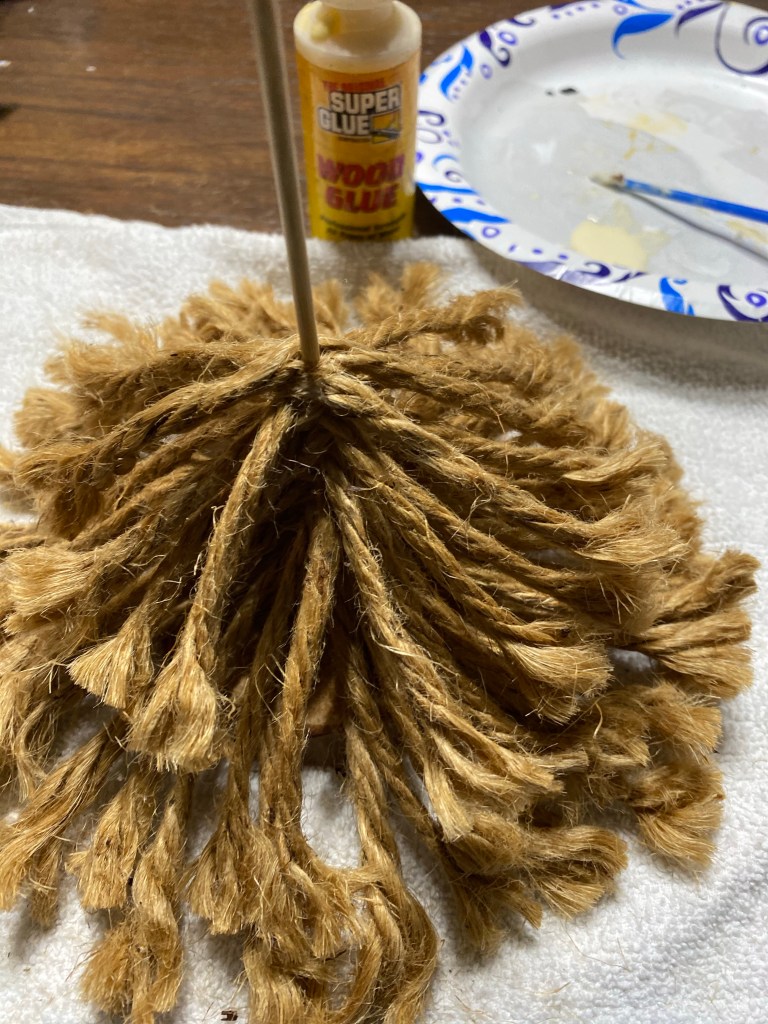
I used a 10” skewer from Dollar Tree but ended up cutting several inches off when finished. I also used 5 – 3” pieces 3 -2” pieces and 3 – 1” pieces of jute instead of what they did. I also used Dollar Tree Super GluecWood Glue on the wood round stand and on each stand of jute as I built it.
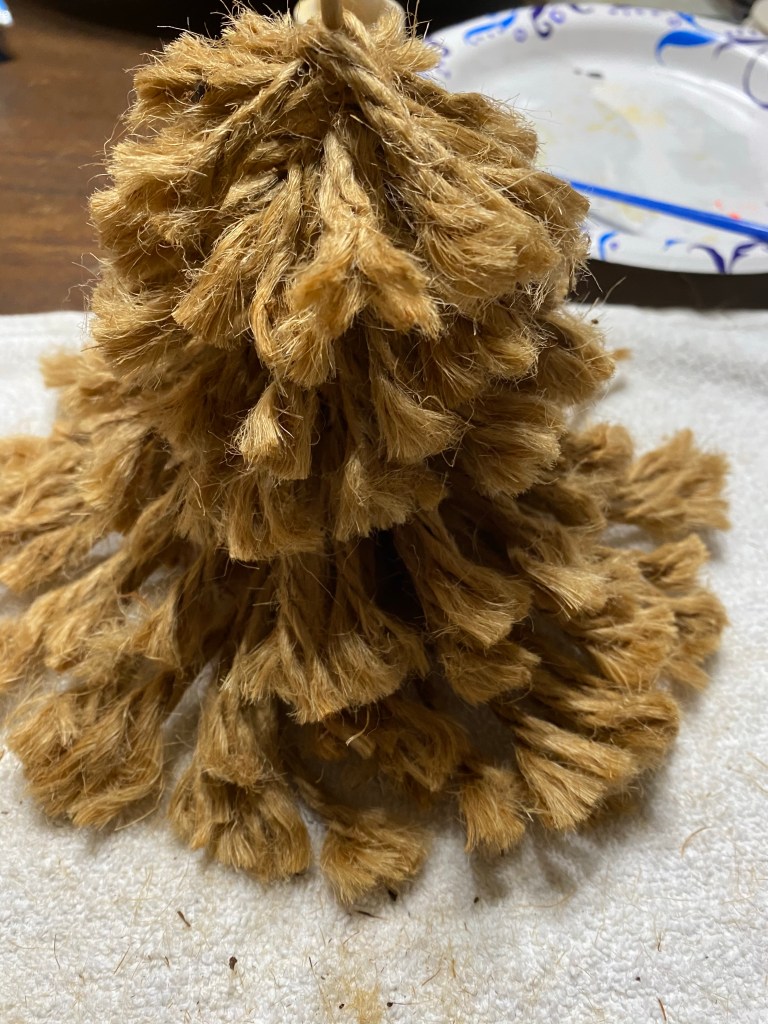
Then I just kept building.
Here it is pictured next to this cool sign I also thrifted. Sure wish I had could have created that, but sadly, no.