Previous TIP OF THE WEEK
Note: This is a long post, but hopefully it will save someone else hours of research to learn how you can get a beautiful, smooth finish on a piece of chalk-based painted furniture using a water-based polyurethane. This is something that has worked for me. It may not be an industry approved tip or what others think is the best product to use, so keep that in mind. I had one person tell me that it was pointless to use sanding sealer with paint. It was only to be used on raw wood. However, I’m a person who tried the idea of making Glitter Glue Slime with contact solution and it worked, so who knows what will work unless they try. Right?
Disclaimer: I do not guarantee this will work for every piece or for every person. You just need to try it to see. You may want to practice on an old piece first.
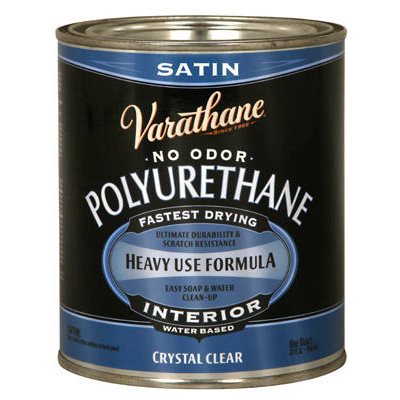
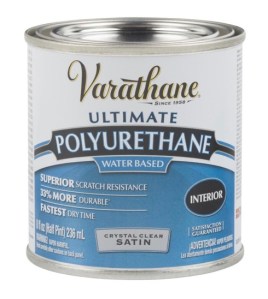
You’ve painted a piece of furniture with your chalk-based paint and now you want a durable, smooth finish….which polyurethane do you use and how do you apply it? When I first started painting, these were my concerns…so I started researching. I knew I wanted to use a water-based polyurethane. This is the one I found to be the best: Varathane Heavy Use Formula.
 Why this brand? There are several reasons:
- No odor
- Easy Cleanup
- Fast Drying – although sometimes a little too fast so you have to work small areas at a time
- Satin finish
- And this is the most important – Crystal Clear – it does not turn yellow on light paint
As I started painting and sealing more and more furniture I started noticing that I was having difficulties in getting a smooth finish….not all the time, but more often when sealing over dark colors and after painting very old furniture. It was very frustrating.
So, back to the Internet for more research. I found others having the same problem. I searched and searched and finally drew some conclusions from all the research. Here’s what I found:
- Water-based paint raises the grain of the wood, creating an uneven surface
- The poly doesn’t go on smoothly when the surface is uneven
- Very old furniture is sometimes very dry and really soaks up the paint, creating an even more uneven surface. This is especially noticeable with dark colors.
I found there was a solution to that problem. It is called “sanding sealer”. Who knew? I had never heard of that before. I do use shellac sometimes, especially on older furniture to seal in musty or smoke odors, on red woods such as mahogany, oak pieces to seal in the tannins, and wood with knot holes when I don’t want them showing through. I still use shellac for that purpose even though it is not water-based, as it dries in about 15 minutes. It even comes in a spray can. I use it to spray the inside of the pieces.
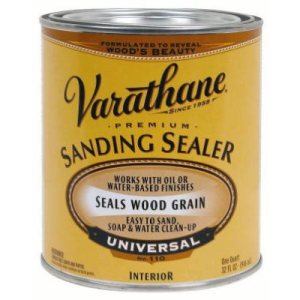
Varathane has a sanding sealer also. Yay! It cannot be found in my hometown, however. I love the Varathane products. It can be ordered online from variious places. But, when unavailable, I also use Minwax water-based sanding sealer and have had good results.
So what does sanding sealer do? It basically fills in the spaces around the raised grain and creates a smooth surface. It also works as a sealer on odors like the shellac.
It is important to note that I use sanding sealer when painting with dark colors. I don’t seem to have streaking issues with lighter colors, so I don’t use it on the lighter colors, unless it is very old dried out wood. It is my belief that with the darker colors, the light picks up the wood not being even, creating the streaky look.
A word of caution when using sanding sealer. Please use a thin coat and make sure you sand it afterwards. If you put it on too thickly, it will turn yellow and you don’t want that. So….thin coats and sand afterwards. Always! Use a very, very fine sandpaper. 320-400 would be good.
I now use sanding sealer on all my older pieces before I paint. I also always use it now after painting dark colors especially just because I want the smoothest possible surface before using the polyurethane.
How do I apply the sanding sealer?
- With a good synthetic brush (Purdy is a good brand) apply a thin coat of sanding sealer to your piece of furniture.
- I let this dry about an hour and then with a very fine 320-400 grit sandpaper, I lightly sand (with the grain). You will see it creates a powdery dust. That is what you want to see.
- Do I apply sanding sealer once or twice? That depends….sometimes I work with very, very old wood that no longer has a good finish. Then I would apply the sanding sealer more than once. If still in good shape with a good finish, I apply and sand only once.
- After sanding, I wipe all the dust away with a wet paper towel and then wipe down with a dry paper towel.
The finish on my older, dried out piece is now very smooth. If it doesn’t feel very smooth, then I would apply the second coat and sand again.
Now my paint goes on smoothly and doesn’t soak in, so I’m saving paint here, too.
In the past, after I’ve painted my piece of furniture and allowed it to dry, I would start applying the polyurethane. Sometimes, it would go on perfectly and sometimes I would become frustrated because no matter what I did, it would start “gunking” up or leave a very uneven finish. I would apply it very thinly, going only in one direction and not go back and forth and only work in small sections, but still would not be happy with the results. This wouldn’t happen all the time, though, so that’s why I couldn’t figure out what I was doing wrong until I did my research.
The next application of the sanding sealer is where the magic comes in. I now use the sanding sealer with ALL my pieces of furniture I have painted with dark colors after applyng the paint, even it I don’t use it before.
Steps for applying sanding sealer after using chalk-based paint:
- Apply the final coat of chalk-based paint and allow to dry.
- With a good synthetic brush (Purdy is a good brand) apply a thin coat of sanding sealer to your painted piece of furniture.
- I let this dry about an hour and then with a very fine 320 grit sandpaper, I lightly sand (with the grain). You will see it creates a powdery dust. That is what you want to see.
- Do I apply sanding sealer once or twice? On painted pieces, I usually just do the one coat.
- After sanding, I wipe all the dust away with a wet paper towel and then wipe down with a dry paper towel. If it feels nice and smooth you are ready for the poly. If not, you may want to do another application of sanding sealer and sanding.
Why all these extra steps using the sanding sealer when it takes so much longer than just painting a piece and putting a sealer on it. Because I want a quality piece of furniture when I’m finished. I hand paint my furniture and I want it to look the best it can. If that takes a little more time and care and less frustration, then I don’t mind it. That is a much better solution that sanding down a “gunky” mess and starting over.
The first time I applied the poly (I use Varathane water-based polyurethane crystal clear satin finish) to a piece after using the sanding sealer, I was ecstatic! The poly literally glided off my brush (and again….I used a quality synthetic brush to apply the poly). I didn’t have to worry about it going on too thick. It went on thinly all by itself, just like magic. I was able to go back and forth a little and then when I was satisfied with that, I ended the small sections I worked with going in one direction. I lightly sand in between coats of poly with a very very fine sandpaper.
I usually use 3-5 coats of poly on the top of my pieces for durability and two coats on the rest of the piece.
You will be amazed at the difference the sanding sealer makes. I now recommend using the water-based sanding sealer and polyurethane when sealing furniture painted with our Missouri Limestone Company’s chalk-based paint. It is well worth the extra time.
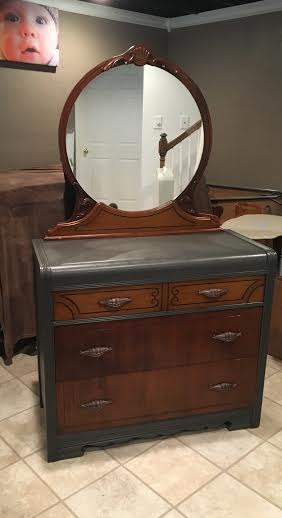
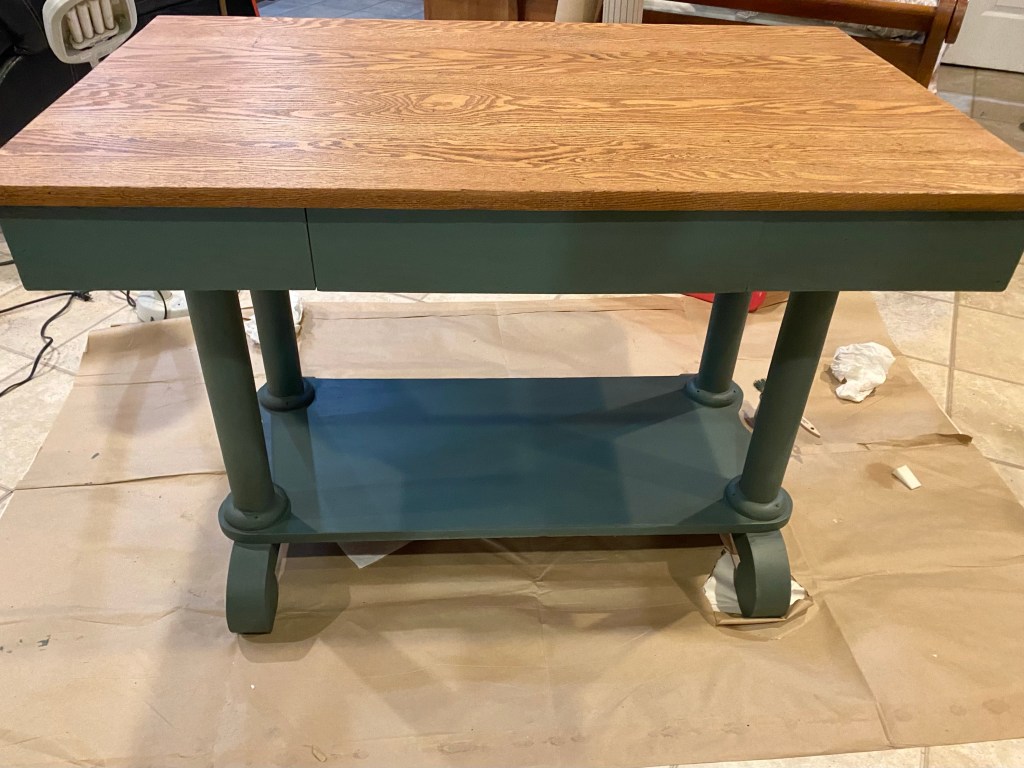
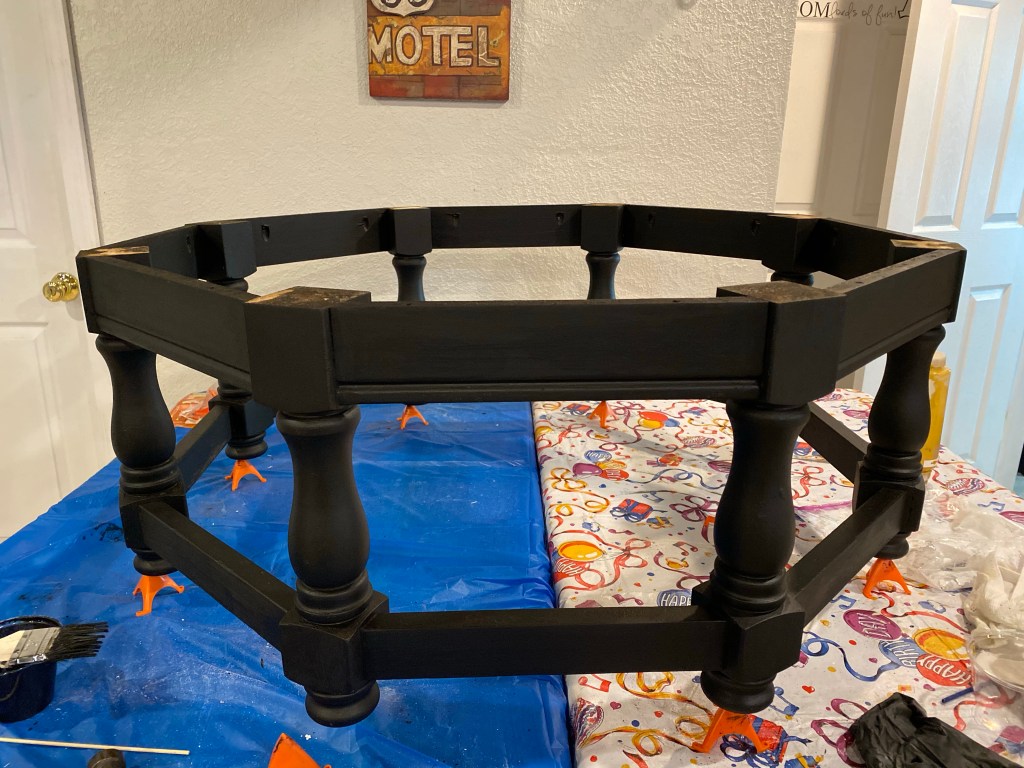
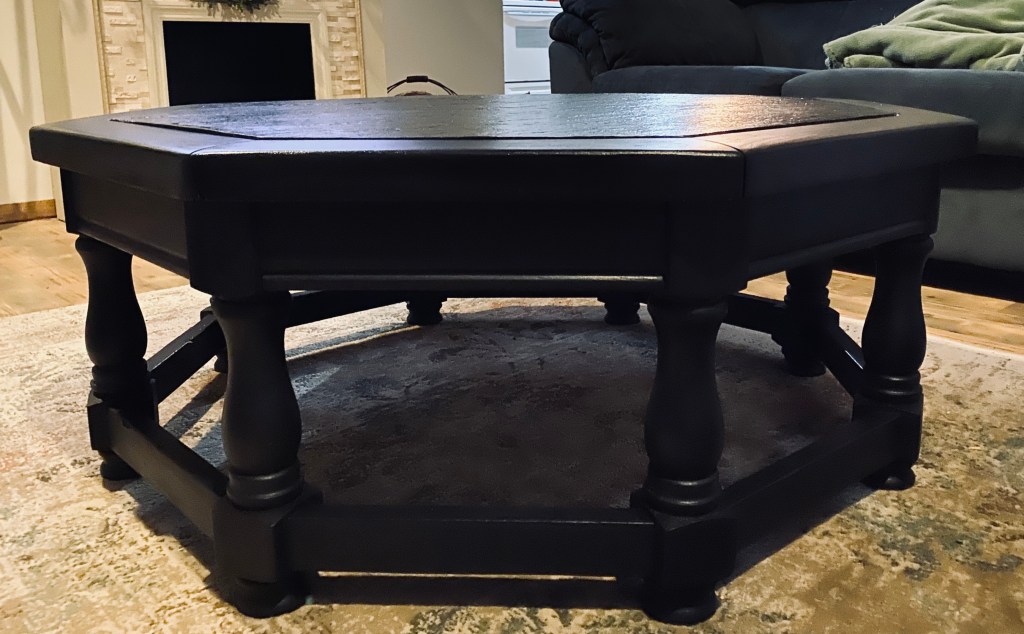
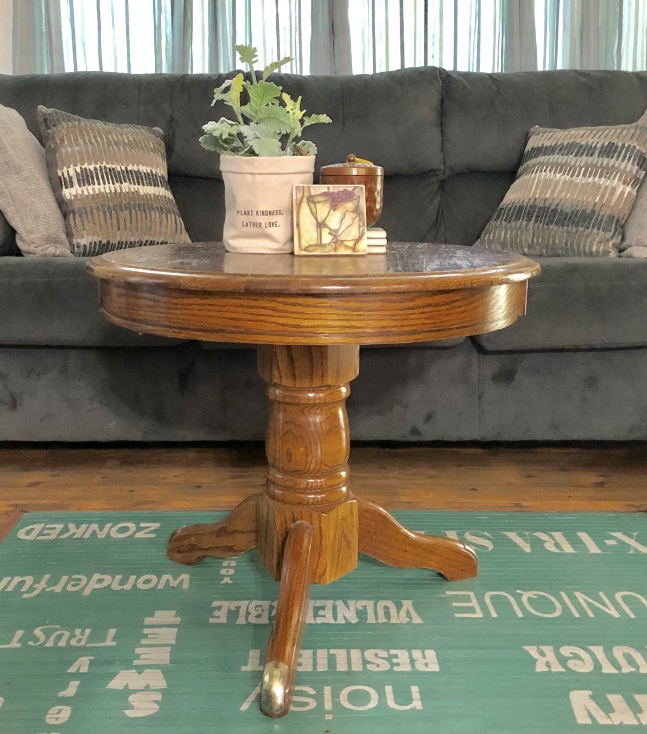
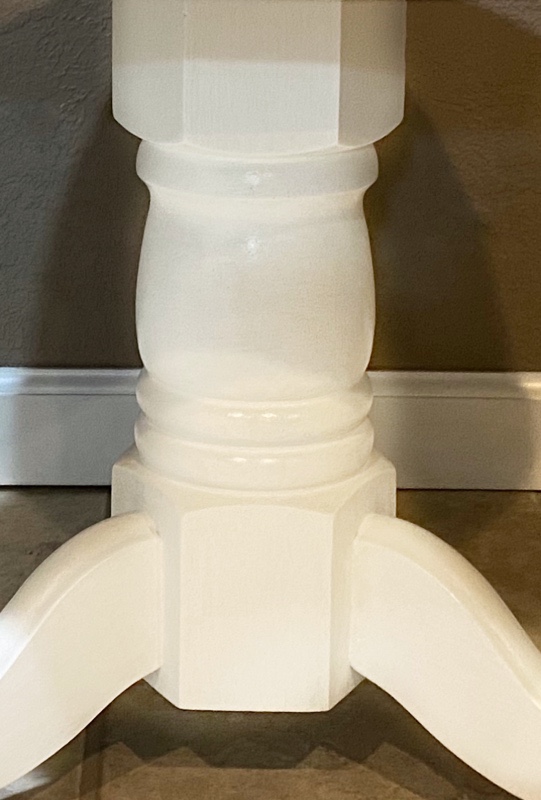
Here’s my piece I painted with Missouri Limestone Paint Company’s “Gray Goose”. You can see the reflection of the mirror on this piece, but no streaking! The finish is also as smooth as silk!


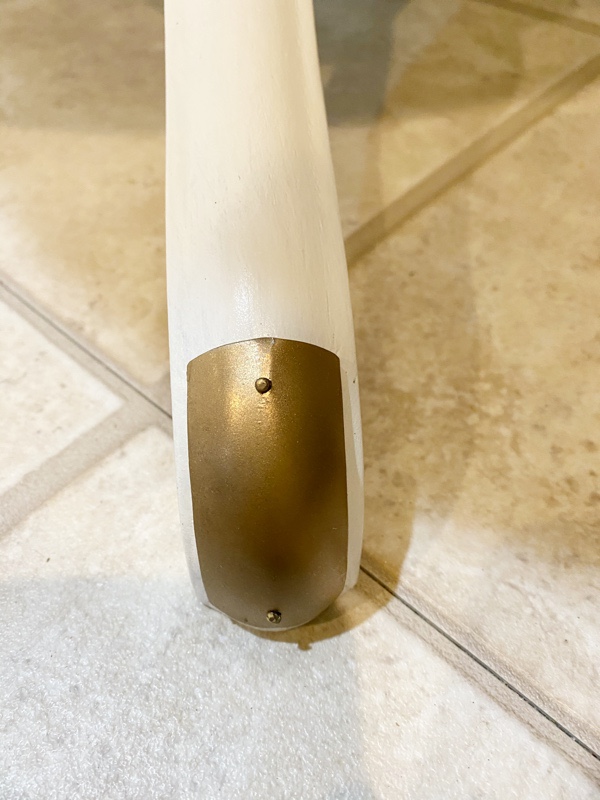


 I first sealed the new rush seat with a 50/50 mix of shellac and denatured alcohol. Then I stained it with another favorite Varathane product. (I just love the Varathane products but are not affiliated with them in any way) I used Varathane water-based stain and polyurethane in Dark Walnut.