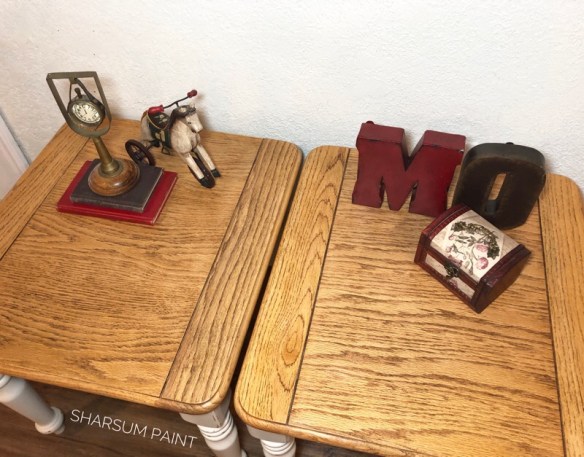
I painted a desk for my granddaughter when she started school.

I knew then I’d be painting three more at some point.
One grandson hadn’t expressed an interest in one until this past weekend. He lives several hours away so he and his grandpa found one at an estate sale near his house. They took it apart and rebuilt it. It is now in place in his room, waiting to be painted at some point.
His brother is just 4 years old, so I have awhile to go before he will need one.
My other grandson, brother to my granddaughter, is in first grade now. They have moved and his room is big enough for a desk. We had promised him some time ago I would paint my late brother’s desk for him, so we are in the process of that right now.
This is a different desk, a child’s desk…. but it seems my brother and I always had a thing for desks. Lol. And seeing the toy phone on his, he must have been my secretary. Notice I had the nicer desk. 😁
My brother’s desk is a vintage 60’s style small desk. I imagine my parents ordered it from Sears or Montgomery Ward. My mom ordered stuff all the time back then from the catalog store we had in our small town. Originally it would have looked something like the one pictured below (photo found on Internet.)

My dad refinished the desk that had been my late brother’s sometime in the 70s or 80s maybe. He was doing a lot of refinishing furniture for relaxation back then. I remember well that he would use some kind of concoction he made and warmed up that included linseed oil. I can kick myself for not getting a picture of his work on the desk before we got started. But, I often get so into starting a project, I forget to take before photos.
Now that I refinish furniture I often wonder exactly what that recipe was he used for sealing. I even try to remember if he mixed it with the stain, but too many years have passed to remember much more about it. Who knew I’d be doing this same thing years later. Of course, he mostly removed paint and stained. I usually remove stain and paint. Lol
He refinished an antique bedroom set for me right after I got married in 1972 that I still use today. The finish is still beautiful on it.
Keep in mind this sealer he used was an important thing to remember and I should have thought more about it before painting.
My brother was given a pocket knife by my uncle back in the day. Yep, no one thought anything about that. You know boys loved to keep pocket knives handy for carving or whittling or whatever. Well, my brother’s whatever happened to be carving his initials. It seemed he carved his initials in my sister’s convertible top! That was the last of him carrying his knife around in his pocket.
However, I guess at some point he carved his first and middle initials in his desk. When my dad refinished the desk, he must have decided to leave them (my brother passed away at age 18) as you could still faintly see them. When my husband sanded the top, there they were. 😏

I thought about various ways to try to keep them visible. A friend suggested having my grandson add his initials, which would have been a great idea. But the more I thought about it, I decided the memories were mine and my sister’s and not the new generation’s, so I decided I will paint over them as they are now sanded smooth. I do think I will put this photo in a frame for my grandson, tell him the history and write on the back of the photo. He can then tell the story to future generations.
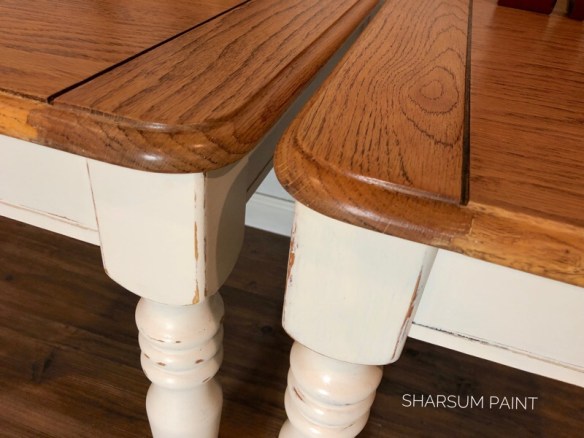
So, my husband had sanded the top because there were some other scratches we wanted to smooth out. He scuffed sanded the rest to prep for painting.

I cleaned it well, as I always do, thinking all the time, that the finish was so nice and smooth on the desk my dad must have used poly on it to seal it. I did notice that after I cleaned well and it had dried, there seemed to be a haze. So I cleaned again. The haze came back. I thought then I wondered if he could have used his linseed oil sealer. But it had been 30+ years. I figured too much time had passed to matter, so I applied the first coat of paint. The second coat started pulling up the first coat and I stopped right there. I knew I couldn’t go any further.
In hindsight, I knew my dad probably did use his linseed oil recipe. But more importantly, my mom spent 30+ years after polishing it with Pledge. It dawned on me that haze was probably built up wax from the Pledge. So my husband then sanded the whole thing down to bare wood and I’m starting over.
Moral of the story: when in doubt of a previous finish, don’t assume scuff sanding and a good cleaning is all that is needed. When you see a funny looking haze after scuff sanding, assume it could be a build up of product of some kind. Then, strip or sand completely.
I will be using shellac all over to help seal in anything missed before starting to paint again.
In the meantime, here’s a sneak peek of what’s to come. I will be updating with pics of the process.
I’ve included a pic of the spray shellac I will be using. As an FYI, shellac will also stop bleed through and seal in odors such as cigarette smoke and old furniture smell if you have a piece that still has odors after thorough cleaning.


Update:
The complete sanding and spraying all over with shellac worked.
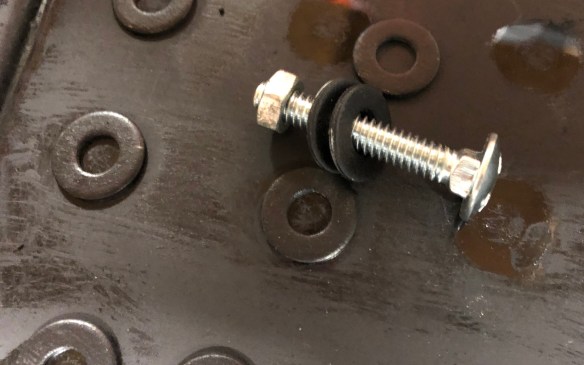
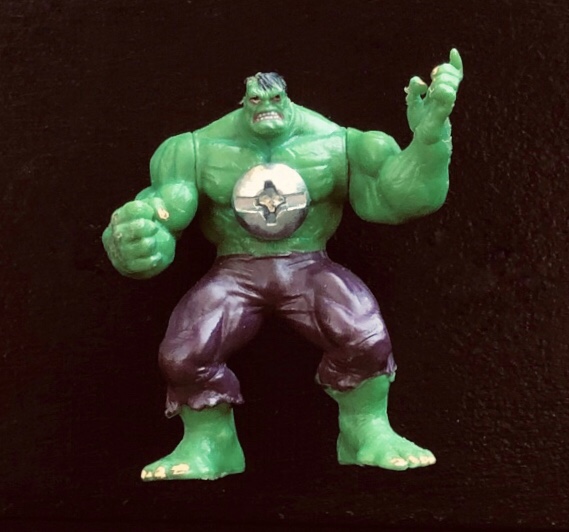
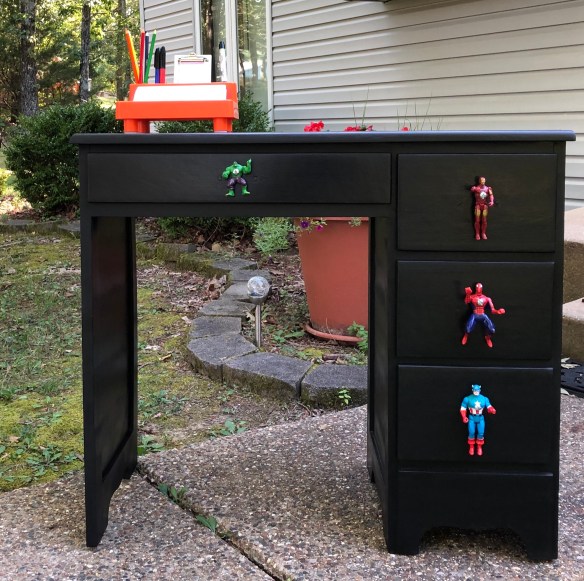
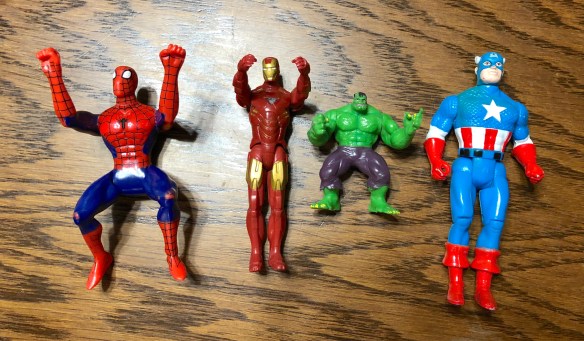
We used action figures to make the drawer pulls. Here’s a link to the post specifically about the drawer pulls. We removed the old handles and filled in the two holes. We drilled a new hole for each drawer and centered it for the action figures. We drilled holes in each action figure and placed a couple of washers we painted black behind each figure to make them far enough away from the drawer to grab hold of. We ran a screw through all and secured it with a nut inside the drawer.


When he tires of super heroes, it will be easy to change it up. He’s pretty fond of Pokémon right now so I will be on the lookout for those.
So here is my grandson’s Avengers desk.
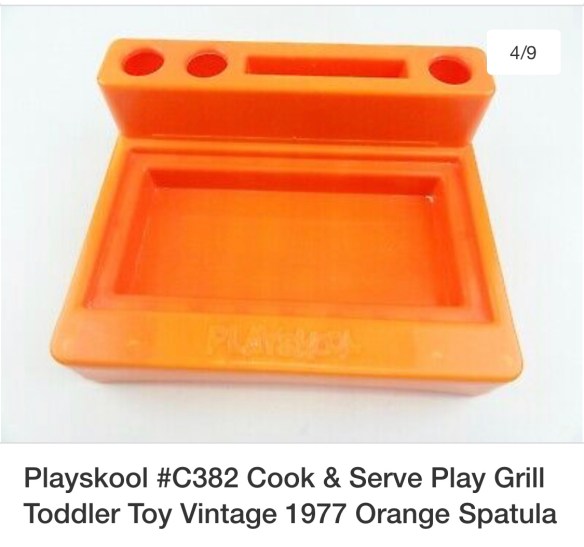
 The colorful desk organizer is vintage, too. It was once a Playskool grill and now perfect for holding pencils, paper, scissors, etc. 😆


 You can read all about the history of this desk and the lesson learned on it along with seeing the other grandkid desks on our blog post Vintage Desk Makeovers – A Labor of Love.