How to Paint on Glass with Chalk-Style Paint

  • So beautiful, right? Have you been frustrated trying to paint Mason Jars with chalk-style paint only to have it distress all by itself (meaning the paint chipping off at the slightest touch)?
  • I have learned the secret! All it takes is a water-based sealer and an oven. Keep reading!

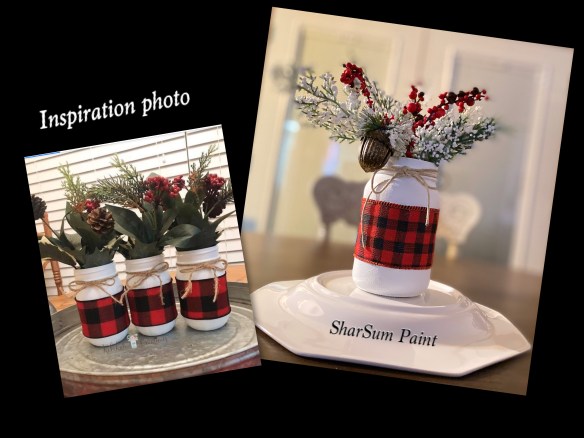
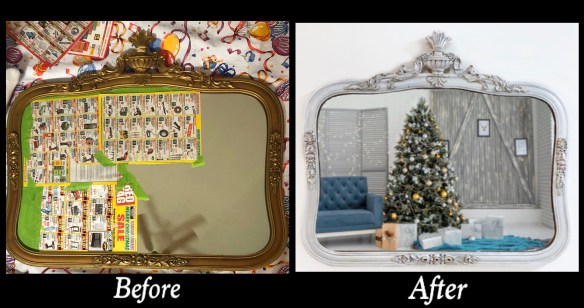
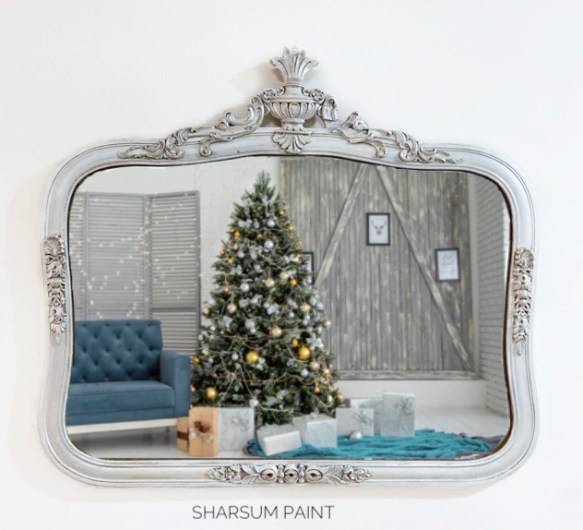
    First of all, my inspiration for this project. I seldom have a thought of my own so kudos to those who are so creative and talented. Plus, I’m a teacher so it is just a part of me to share what I learn and acknowledge how I learned it.

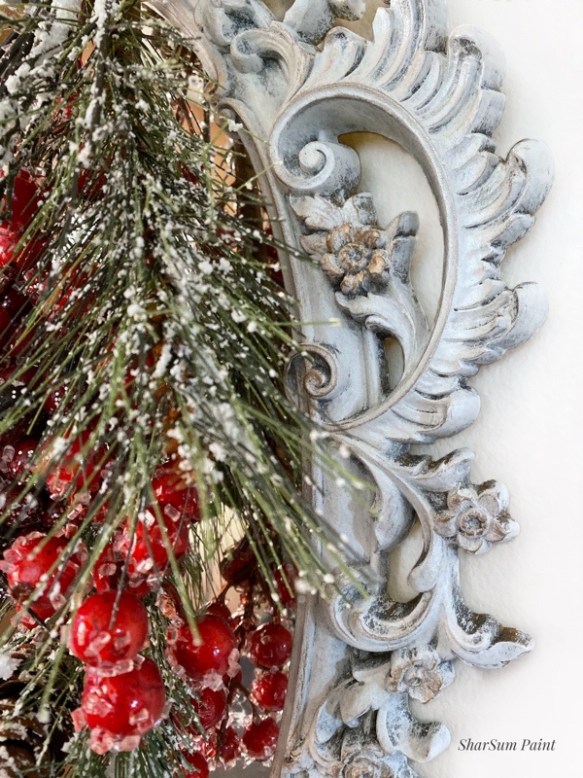
    Love the greenery used on the Inspiration jars!

    Inspiration: Rescape.com is a site on Facebook. If you aren’t following them you should. Their morning post is usually the first thing I see and there are always great ideas. Here is the post for my inspiration.

    Painting on Glass: I’ve tried several different techniques, but this idea works great.

    Now, onto the supplies I used and the directions on how I created mine.

    Supplies:

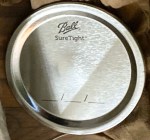
    The jar: My jar came from Dollar Tree! Price check please…yep $1.00. Who knew they had pint mason jar type jars with no raised lettering or images. I spotted these one day and thought…yes! I didn’t think to see if they had quart size so maybe they do. The lids are even the canning jar type with removable insert. Hello, popular tissue holder idea. See painting on glass link above👆🏻. The lady shows how to make those. 🙂

    The paint: Why the paint brand we own and produce, of course. Missouri Limestone Paint Company chalk-style Paint “January”. But seriously, any brand should work, but I only guarantee mine because I tried it and it does. ☺️

    The greenery: I had the white frosted branches and don’t remember where they came from originally, but I’m sure something like them are available in most craft stores. The red berries are from Michael’s and the cute little pine cone is an ornament from Walmart. It came on a card of four.

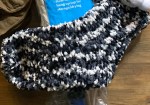
    The ribbon and string: String I just had and the ribbon I used came from Dollar General.

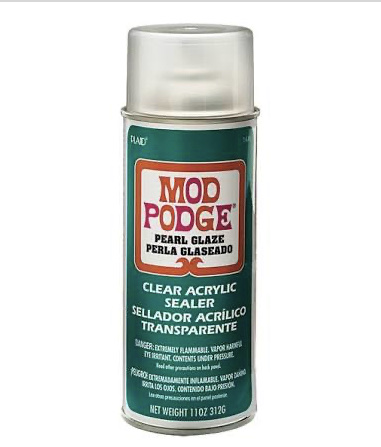
    The sealers: Varathane Water-based crystal clear polyurethane Satin Finish as a base for the paint and Rustoleum Spray Lacquer for shine after baking.

    Directions:

    1. I cleaned the jar well. I then wiped it down with alcohol to remove any remaining oils. I then painted the sealer on (one coat) and let it dry. I used my go to: Varathane water-based crystal clear polyurethane, but any water-based sealer will work. Warning: It has to be water-based. You will be putting this in the oven. Water-based is non-flammable. DO NOT use oil-based sealer.

    2. I really love the technique shared in the link above for applying the paint. I used a foam stencil dauber to pounce the paint on. That way you don’t get brush marks and I love the look! I painted two coats and let dry. I did paint the bottom.

    3. Preheat oven to 170 degrees. Place jar in oven and bake for 20 minutes. Then carefully remove. It will be hot! Let cool. Then go ahead. Test it out. I had to. So I tried scratching the paint off with my fingernail on the bottom. Nothing!!! It was as hard as concrete. Yay!!!

    4. I then sprayed it with Rustoleum Spray Lacquer just to give it a bit of shine.

    5. I hot glued just a bit, in places, a length of string to the jar and tied a bow. I also used a bit of hot glue under the knot so it wouldn’t come untied.

    6. I measured and cut enough ribbon to overlap in the back, then spot hot glued it in place. I turned under the cut edge of the overlap and glued it down.

    7. I then artfully 😉 arranged my greenery.

    That’s it! I just knew this project would work with Missouri Limestone Paint Company chalk-style paint. It worked perfectly. Oh, the projects that can be created now, with confidence, are endless!

    If you try this, please share your beautiful creations in the comments. Tell us the brand of sealer and chalk-style paint you used. Remember, all MUST be non-flammable water-based products.

    Happy Creating!

    The “Scarborough Fair” Hamburger Soup

    It’s so hard to find time to cook when you are busy creating. Lol But, since we got an Instant Pot (ours is Faberware, but essentially the same) we have been doing more. And soup weather is here….and cooking is even easier.

    I’m sharing this recipe I found on Pinterest because it is so good, and even I could make it. It is not an IP recipe, it is a stovetop one. I just used the IP and made a few fun and good for you modifications.

    I call it “The Scarborough Fair” hamburger soup. 😂 You will see why.

    This recipe already called for Sage, Rosemary, and Thyme, (Did you just sing that?) so I added a tsp. of Parsley, too. 😂😂 I also added canned corn and green beans. I did drain most of the liquid only because I was running out of room in my Instant Pot. I cooked on the soup setting for 20 min. This is a on the stove recipe, though, so you don’t need an IP. I also used those little yellow potatoes. Didn’t peel. Just cleaned and cut up. Also used already shredded carrots and already cut up onions. Who has time to DIY those boring tasks. Lol

    Freeze the leftovers in solo cups covered with Saran Wrap. When ready to eat, cut away the solo cup, dump in a bowl and microwave.

    I think the Simon and Garfunkel spices make this soup different with a great flavor. Enjoy and have fun creating!

    The site of the original recipe no longer seems to work although I will still show the link at the bottom, but I didn’t want to lose this great recipe that I have modified above so I took screen shots. I do want to give credit to the original. I cannot find them on Pinterest, either.

    http://skinnypoints.com/2016/01/09/hamburger-soup-smartpoints-2/

    Gnomes in Winter

    Gnomes are so popular this year I thought I would make a winter one (that can be displayed all season) in honor of Danny’s Scandinavian heritage.

    First, a little history lesson. A Scandinavian gnome is a mythical creature of folklore that likes to live near homes and protects them and the children living there from misfortune. It is known as a Tomte or Nisse. We associate them with the winter solstice or the Christmas season.

    The ones we are seeing everywhere we look are just too cute. I forgot to take pics as I worked on this little guy, but it isn’t too hard to visualize how I made him.

    This gnome stands about 12″ high.

    Supplies:

    * 1 plastic glass – this glass is 2/$1 at Dollar Tree

    * Wide mouth pint canning jar lid and insert

    * A scrap of knee high or pantyhose and a bit of fiberfill or wooden ball or anything that would make a nose. I used pantyhose (Dollar Tree) and fiberfill for this one.

    * 2 socks from Dollar Tree – update: these are adult socks!

    * Cotton mop head – I found this one attached to the mop for around $4 at Dollar General. Will be enough to make several gnomes and the handle unscrews and can be used for something else.

    * Pair of booties – these are Christmas Ornament found at Walmart. Too cute!

    Steps for putting the gnome together. Sorry I forgot pics.

    1. Hot glued the canning lid insert to the lid. Then hot glued the top of the glass to the lid. It was a perfect fit! The reason I did this was to give it more surface area when gluing to booties.

    2. The glass becomes the body. Turn the glass upside down and hot glue the canning lid and insert to the top of the booties.

    3. Cover the glass and boot tops with one of the socks and arrange to your liking. I spot glued on the top and on the sides a little just to keep the sock from slipping.

    4. I cute a piece of pantyhose and stuffed it with a bit of fiberfill. I shaped it into a round nose.

    5. I tried the other sock (the hat) on to see where I wanted to place the nose, then glued the nose onto the sock covered glass right below the edge of the hat. I removed the hat for the next step.

    6. I cut the mop head strands from the mop and glued them very close together all around the edge of the top part of the upside down glass making sure I glued strands above and below the nose so close the ends don’t show. I then gave the strands a haircut.

    7. I put the hat back on and shaped it the way I wanted, spot gluing it to stay in place.

    8. I made a little Pom Pom for the end of the hat.

    And there is my little gnome. I think I will call him “Tommy the Tomte”. ❄️💙

    I also helped my granddaughter and one of my grandsons (the other two weren’t interested lol) with making one for their families during our First Annual Thanksgiving Craft Day. We used a different Dollar Tree cup for theirs. These came with lids and straws. The straws I saved to use for drinking straws for my house and used E6000 to glue the lid onto the shoe tops. That worked very well.

    And then I made this one that sold!

    This next gnome is a custom order.

    This gnome is a bit different than the earlier ones. He is created from hand knitted sweater sleeves. Parts of the sweaters were made into pillows, so this gnome will fit right in with his owner’s decor. Look at his booties! They are the same as the other ones I have been doing. I just covered them with some of the brown sweater. There is a close up of the booties and the body. The body is covered with the second knitted sweater. The hat is created from the brown sweater. I’m going to be making about a 4” traveling gnome to match. This gnome will get to stay in the car of the owner and do some traveling. 🙂 You aren’t going to believe what his booties and body will be made of. Stayed tuned to find out.

    And since I had a few that haven’t gone to their new homes yet, I created a band. Meet GG Top! 🤣

    I saw this tag idea on Pinterest so I made tags for each of the gnomes going to a new home.

    More gnomes going to homes. 🙂

    Bed Spring Magic

    I can’t tell you how much fun I’ve had the last couple of days making bed spring decor to put in my booth. This one is, by far, my favorite.

    The springs I used for this one were pretty rusty so I sealed all that yummy rust in with Varathane Polyurethane Satin Finish.

    The jingle bells started out gold. But I used my magic rust paint formula. I used equal parts Missouri Limestone Paint Company chalk-style Paint “River Bottom Dirt” and “Old Tin Barn” and added some cinnamon. That’s it! That’s my secret formula. Pretty cool, right? I then painted the bells with two coats and then sprinkled cinnamon on them.

    To display, we cut a 4×4 post into 3 blocks – 1″, 3″, and 5″ and painted them with Missouri Limestone Paint Company chalk-style Paint “Coal Shovel”.

    We do ship, so contact me if you’d like to purchase our paint.

    And feel free to browse through our website. We have a lot of tutorials. And please follow me if you like what I post.

    Here’s some more pics. Enjoy!

    And here are more bed spring projects.

    Painting a Vintage Collectible Syroco, Inc. Mirror

    If you’ve never painted one of these mirrors or any of this type of molded plastic, you really should. It is amazing how they turn out. It is like they take on a life of their own and they decide how they will turn out.

    This one decided to be absolutely spectacular. By the way, it is available and we will ship.

    I thought I would share how I got this look.

    *******

    This is a vintage Syroco, Inc. mirror, made in the USA. This one started out gold and is made of the molded plastic type material so popular back in the 70s and 80s. You would see these mirrors and other items a lot at Home Interior parties.

    Before:

    The final result is white with some liquid gold leaf highlighting. But the magic came when I sprayed it with my secret shimmer. The steps I took are below:

    1) Remove mirror, prep

    2) Paint dark gray. I used our Missouri Limestone Paint Company chalk-style paint “Gray Goose”.

    3) Lightly distress – I distressed because I was going to have gold highlights on top and wanted to see a little gold showing down inside also.

    4) Heavy dry brush of white I used our Missouri Limestone Paint Company chalk-style “January” – allow some of the dark gray to continue showing

    5) Lightly dry brush liquid gold leaf (I used the Plaid brand I found on Amazon) on flower areas and very light across much of the top. Be sure to seal gold leaf or it will tarnish.

    6) Spray with can spray – Varathane Polyurethane

    7) Spray with Modge Podge spray – Pearl Glaze (My Secret Shimmer)

    And, that’s where the magic happened! (Enlarge the pic for a closer look.)

    This beautiful mirror now has a new life and should be good for at least another 50 years! 🙂

    Update: I have now painted three pieces with this technique. I have decided it was time to give it a name. It is my “Shimmery Sheen” Technique. If you try it, please add pics in the comments. This technique also works well on metal and antique wood.