Patio Chairs Prettily Painted

Click here for previous Tips of the Week

TIP OF THE WEEK:  March 28, 2017 – Patio Chairs Prettily Painted

I was on a swap site close to my home and noticed a set of patio chairs for sale. I knew these had potential to look great again. They looked to be an expensive set at one time and I had looked for some of these comfortable swivel rockers last year so I knew how expensive they were. I just happened to comment on the post that whoever bought them could PM me and I’d tell them how they could paint them. A funny thing happened. The lady selling them PM’d me. Long story short….she removed her post….hired me to paint them for her….and is planning an in-home painting class this summer. She was thrilled with the final result and was hoping to get at least two more years out of them as they were going to be selling and moving closer to a daughter in another state. So, this was a win-win for both of us.

As you can see, even though the metal was in great shape and only needing painting, the fabric on some of the chairs was pretty threadbare in areas. It would be good to note that if you are planning on painting patio furniture fabric, you’ll have even more success than we did with these. They turned out very nice, but some were pretty threadbare and that still shows.


What I did next is not what you want to do next. On the first chair I painted the metal black first. That was a mistake. Why? Because when you paint fabric, you’ll want to wet the chair down first and then add some water to your paint – in this case we used the Missouri Limestone Paint Company chalk-based paint that we sell in the color “Crisp Kale”. So…..when painting with watered down paint, you’re going to to get that watered down mess all over your freshly painted black metal! What was I thinking? That one had to have metal repainted in many areas. So….moral of that story is paint the fabric first.

I also taped off the first one. I didn’t need to do that at all. My chippy brush allowed me to paint the black and not touch the green fabric, so no tape was used on the other chairs.

There were a couple of chairs that were really pretty threadbare. I had read that you could repair those with Bondo. I did that and those areas turned out ok and the paint covered them well, but I would recommend only using it if you had a small hole to fix. I wouldn’t do larger areas again.

I never use a roller when I paint with chalk-based paint but for the first coat on these chairs I did since the paint was watered down. That really helped the paint get into the threads of the fabric and adhere. I did two more coats, using a brush for them and that worked out great!


There is no need to seal chalk-based paint for outside furniture. The sun and heat cures the paint and makes it very durable.

Were they perfect after painting? No, not by any means. Will they hold up for my client for a few years? Yes, they should work out just fine for her. Are people going to be going up and getting eye to eye with the chairs and searching for flaws? I hope not. : ) Or, will they see the overall picture of the bright and cheerful patio chair set on her patio and wish they had one just like it. That’s what I’m hoping for! In the natural light and with the grass peeking through and trees starting to bud out in Missouri, the set looks beautiful on her deck, don’t you think?


A private painting class and one at Gift Emporium

After some nice weather teasing us with spring, we’ve had interest picking up for painting classes once again in February and March.  Our latest was a private one March 24, 2017 and we traveled all the way to Boss, Missouri.  We had a lot of fun with 8 people (including a 3rd grader who is used to following directions and did great!  What a sweet little girl!  She couldn’t wait to try out the dry brush technique.)  It was held in a gym at a church so we had plenty of room to spread out.

Scroll past the March class photos to see all the projects from the February 25, 2017 class.  It is always fun to see all the old come to life new again.  Loved these pieces that were brought in.

Boss, Missouri Private Class:  March 24, 2017

Before photos:

During:

After:  Their projects turned out great!  I missed getting a pic of the finished plant stand, but it turned out having a great rustic look with using “Old Tin Barn”!

Gift Emporium Class on February 25, 2017

Some Before and During:

A few After Photos:


Nightstands & Storage Bench

The problem (not really a problem) with selling chalk-based paint is that with everything you paint, you really want to keep it all. Take my bedroom….we bought nightstands about a year ago. We’d never had nightstands before much less matching ones and I was going to paint them. We bought themnightstands_somethingblue 
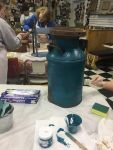
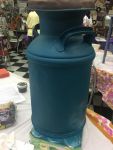
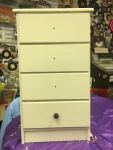
at Mary Ann’s Home Decor and Consignment in Rolla, Missouri, about a year ago and they were in such good shape I really didn’t want to paint them. So, I compromised and painted just the drawer fronts, then gave them a coat of wax. I’ve really enjoyed the size and the drawers and the drawer fronts I painted with Missouri Limestone Chalk-based paint in the color “Something Blue”, which is similar to a light teal color.

Then about a storagebench_pier1
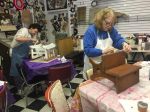
month ago, our son Trevor found at an estate sale in Cape Girardeau,  a really neat rattan storage bench for me to paint and sell. It was from Pier 1 Imports originally.

Hmmmm…that would look so nice painted with the same color as my drawer fronts and sitting at the foot of my bed storing clean sheet sets. I gave this a couple of coats  of polyurethane for protection.bedroom_somethingblue1


Sold! To me!  See, I told you it was a problem. I had to keep this one.

bedroom_somethingblue

Update: Painted Kitchen Cabinets and Countertops

We’ve had so many people lately wondering about painting their kitchen cabinets and what to do about outdated counter tops.

https://sharsumpaint.com/2017/03/18/update-painted-kitchen-cabinets-and-countertops/

I thought I would share the post documenting what we did with ours around 2014.  Both the cabinets and counter top are holding up well and I still love them.  Click here to see the blog on our kitchen makeover. The information about our kitchen is toward the bottom of that post. Sorry you will have to scroll.

I used Annie Sloan chalk paint on my cabinets….Annie Sloan was my introduction to chalk-based paint and I was in love.  I still like the Annie Sloan line. At the time, I didn’t even mind the price as it does go a long way.  It was hard to find in my area, though, and there weren’t a lot of color choices. Then, we stumbled across Missouri Limestone Paint Company’s chalk-based paint, founded in the Missouri Ozarks, and the rest is history.  We are now established distributors of this line, selling paint and painting to sell, and I am more in love with chalk-style paint than ever!

Update on the paint line: As of March 2019 we became the owners of Missouri Limestone Paint Company and continue using and selling this quality paint!

The counter top product we used is truly amazing:  Daich Coatings Spreadstone Countertop Finishing Kit.  It was a long process but well worth it in the end.  To this day, it looks pretty much the same as the day we finished it.  It is wearing very well and I am very happy with it.  Our counter top was the 1980’s white “leather-look” laminate.  I thought we would be able to sand it down, but that was wishful thinking. That laminate is tough stuff.  So, underneath my lovely counter tops with flecks of colored stone, is an interesting “leather-look”, but it really doesn’t detract from the looks of the counter top at all.  Read more about our counter tops on my Pinterest Board.

The Daich Company advertises they give you a generous supply.  That is true.  We had a lot left over in our kit.  I ended up a couple of years later doing the top of a laminated kitchen table to match the counter tops.  This company now has a new finish called Mineral Select, that looks amazingly like (from the photos on their website) a granite or quartz counter top!

Update: I had great luck using chalk paint on my cabinets as they are holding up very well, but I do have to say using wax was probably not the best choice. It was a lot of buffing! Also, these days, there are so many new products available especially made for cabinets, I would use if doing it again.

For countertops I recommend the Daich Coatings products. I have no affiliation with this company.  I just know I used it, loved it in 2014 and still love it now.  I just checked out their prices and the Spreadstone product we used is even cheaper than when we purchased it.

If you have any questions, I’d be happy to answer them.  Just fill out the form below and I will get back to you within 24 hours.

Chalk-based Painted Bunny Decor w/ Clear Glaze Technique

Chalk-based paint and clear glaze – who knew?  And just in time for Easter!  My inspiration piece came from Pinterest, naturally.  As soon as I saw the cute bunny decoration on this site, I thought……I can do this!  So, I did.  http://divaofdiy.com/easter-decorations-rustic-bunny-sign/

First off, my husband and I are distributors for an awesome (we think) chalk-based paint manufactured in the Missouri Ozarks by a company called Missouri Limestone Paint Company.  As of this writing, they have over 30 beautiful colors and we stock most of them in several stores in our area.  Of course, we practice what we preach, so we paint with it, too.  Be sure to visit our website to learn more about us and the paint.  http://sharsumpaint.com  You can follow us on facebook, too.  https://www.facebook.com/sharsumpaint

This is what we did….did I take step by step pics?  No…..so you’ll just have to read carefully on this one.

  1.  We already had the paint and clear glaze.  You know where we get our paint now and the clear glaze we use is Dutch Boy, purchased at Menards a few months ago.
  2. The boards we used to make the sign came from Lowes.  They are 1/4″  x by 2 1/2″ poplar boards.  The ones we used came 24″ long.  We bought 6 of them to make 2 signs.  We just cut them in half.  Then we bought 2 – 1/4″ x 1 1/2″ boards that came 48″ long.  We cut four of them ( about 14 1/2″ long) to use as braces for stapling to the back of the sign.  The finished sign is approximately 12″ wide by 15″ long.
  3. Before we stapled the boards together we painted them (front, back, and sides) with the paint/glaze combination.  I love, love, love how the glaze transformed the paint into soft pastel colors.  I just experimented with the combinations.  I didn’t need much of any of the colors as I only had 2 12″ boards to paint with each color. I’m guessing I used maybe 2 Tablespoons of glaze and about a 1/2 teaspoon of paint….but you just have to figure out your own color preference on that.  I love how the paint/glaze combination produces almost a color stain….so that the wood grain of the boards shows through.
    1. Possum Grape Jam – this is usually a deep purple but just a bit added to the glaze made the darker pink color.
    2. English Bluebells – this, mixed with the glaze, created the lighter blue color.
    3. Trading Post – this color and the glaze produced the light turquoise.
    4. Dandelion and Field Corn – I used a little combination of both of these colors to produce the light yellow when mixed with the glaze.
    5. Effie’s Lilac – Usually a light blush pinkish/lilac – I love the light pink produced with the glaze.
    6. Evening Shade – this is a new color I hadn’t even tried yet.  It is usually a beautiful dark green but the glaze lightened it up and reminded me of Spring grass.  I’m now trying to think of something else to paint with this mixture.
  4.  It was now time to staple the boards together.  We just decided on which side we wanted for the face of the sign and turned them over.  
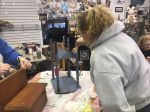
I used the light blue to represent sky and the the green to represent grass and the other colors were just random, trying not to have the pinks together.  Then we made sure they fit tight next to each other and stapled the smaller boards to each one.  We probably could have used glue, too, but we didn’t.
  5. Time to make the bunny.  I’m not an artist, so I usually use a stencil. I have a Silhouette machine and usually use contact paper as stencils.  It usually works great.  Sticks down nice and even and I seldom ever get bleed through.  However, contact paper wasn’t liking the slightly rough, raw boards and wasn’t sticking well enough to stencil.  So, I just used the bunny outline and traced around it with white chalk.  Then filled it in with our white paint called January.  That worked like a charm as I found I can paint with the lines.  This is the template I used to make my bunny.  But I just saw this one.  It looks more like the one used on Pinterest.  It has the little feet on it.
  6. The final touch is the cute little bunny tail.  I used white Bernat blanket yarn to make a pom pom and just kept trimming it until I got the size I wanted and hot glued it on.  This tutorial using a piece of cardboard is basically what I did when I made mine.

That’s it!  If you make one, it is fun to experiment with the different colors you get when mixing them with glaze.  Of course, we love our Missouri Limestone Paint, but any chalk-based paint should work.

If you do make one, be sure to mention it in the comments and send me a pic of yours.  I’ll be sure to post it.