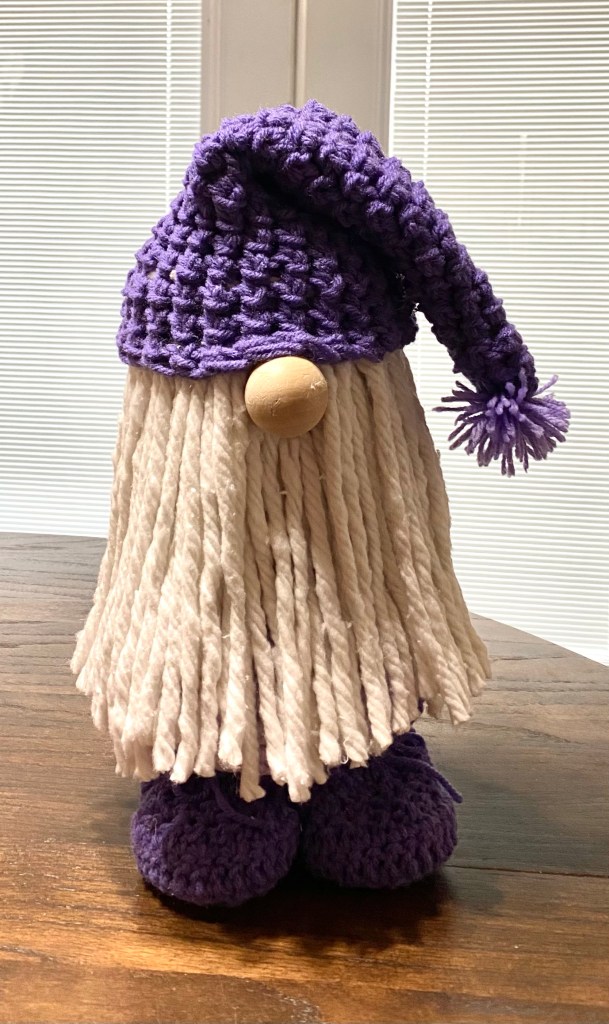
A friend saw the picture I posted of a gnome I made a couple of years ago and wanted one, do I crocheted a hat, body covering, and boots for it in her favorite color – purple. A Dollar Tree mop head became his beard.
I hot glued the body covering over a large water glass with lid from Dollar Tree. I made wood forms for his feet and stuck them in the crocheted boots I made and glued them to the lid of the glass, using hot glue and super glue. Then added more hot glue all around the wood.
I cut the strands off the mop head and applied two layers of them all around the edge of the glass bottom. Then hot glued the hat on and added a wood nose. He stands about 12” high.
Gnomes are still popular. Anytime I make one, it sells quickly. So the other day, a friend sent me a link for making one around a wooden ring with the hat being created with yarn around a piece of toilet paper holder. So, of course I had to make one. My ring was a little bigger so I improvised and added purple yarn around it and glued the hat to the ring. I added a little pink heart. I also glued the whole thing to a Dollar Tree stand up frame to display him.
Still busy creating so I haven’t had time to post how we did some of these projects. Here they are, though, for inspiration for you.
This is a vignette I put together for winter decor. I had a Christmas transfer on one side of this pitcher and a winter one on the other. I turned it around and added some branches from a tree in my yard then added lights. I made the snowman last year and added the Winter sign I’ve had for a long time.
Danny cut this cute gnome out of a scrap piece of plywood, drew the details and painted and sealed him. He added some stakes so we can put him in the pot’s dirt.
I crocheted another bunch of hats to sell to a friend’s daughter. She adds them to the baskets of herbal remedies she sells.
And more crochet… which begat more crochet that I’m still working on. I made a couple of gnome towel rings. I had made some boho type ones for a couple of friends and then decided to find a pattern for making more. I’ve sold 10 so far of them.
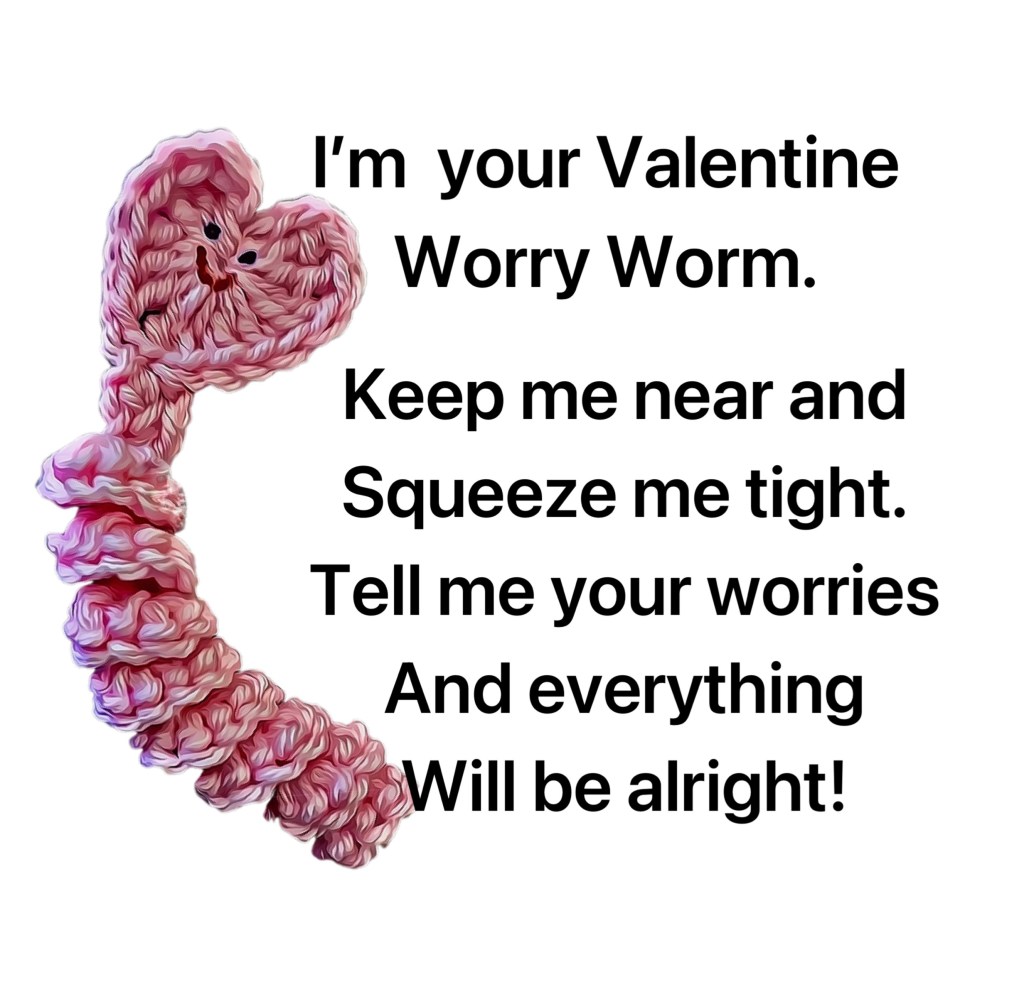
And then I saw a post for a group called Random Acts of Crochet Kindness and cute little worry worms to make and spread around town so I had to make some of those. I plan on making more later on. But I figured out a way to make a cute Valentine one for kids and ended up with 86 orders. Still working on those.
Then my cousin sent me a video of someone crocheting a woven heart. I had to find the tutorial and make one. Then I saw a video on making a heart with wine corks so I had to do that, too. And then someone else told me about decoupaging on a candle with wax paper. Yep! I had to do that, too. I’ve used the hot iron method with parchment paper before, but not on a candle. Worked like a charm. And the little tag- I wrote love on it with a s or h marker and burned it and then painted it. That worked, too.
Whew! I’m getting tired just typing all we’ve done so far this month. But wait! There’s more!
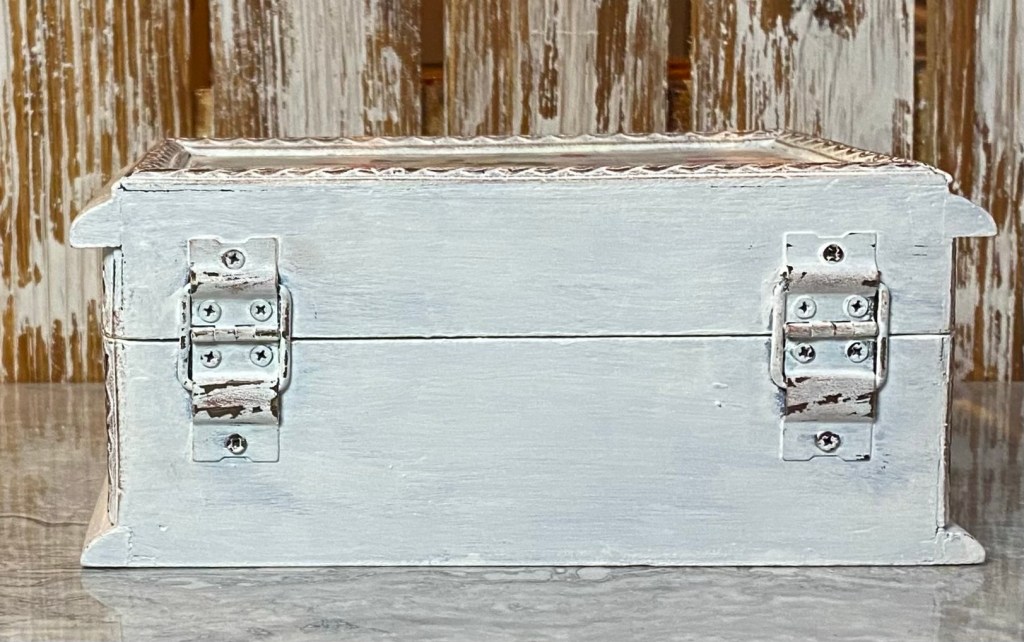
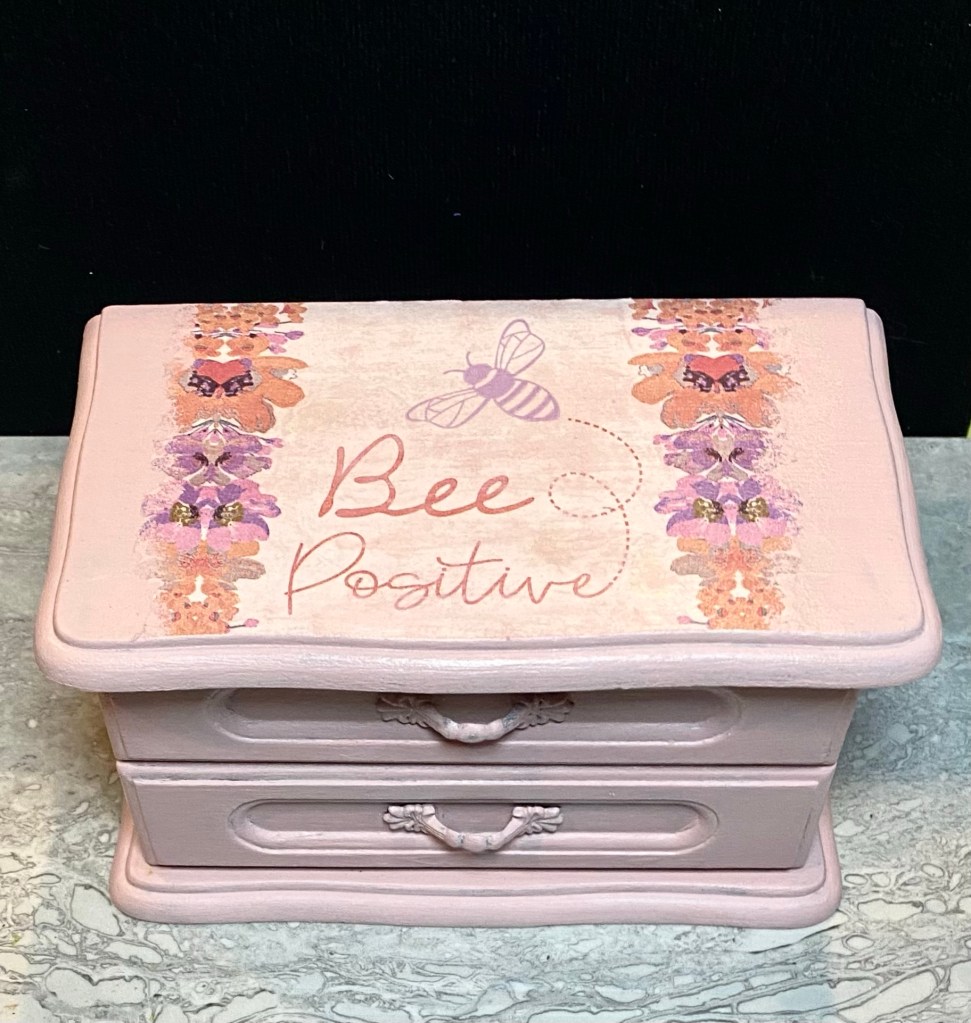
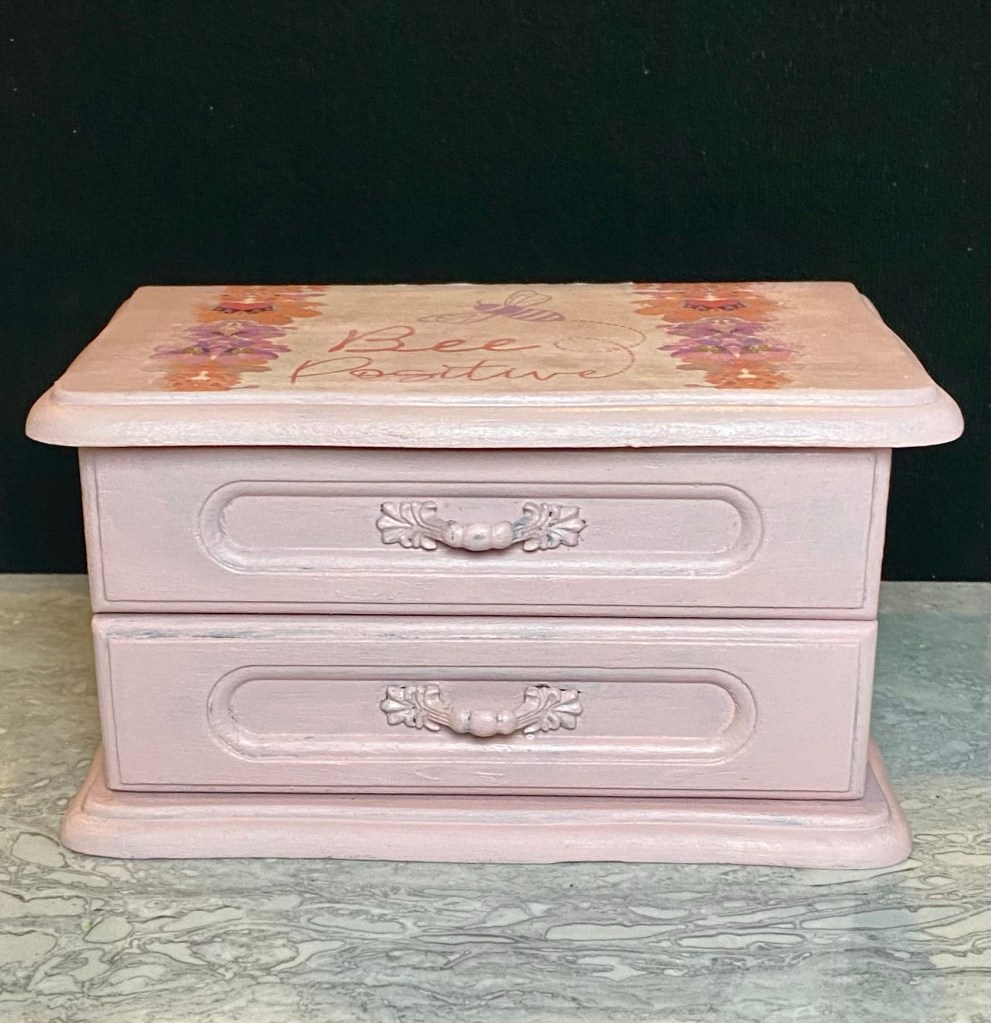
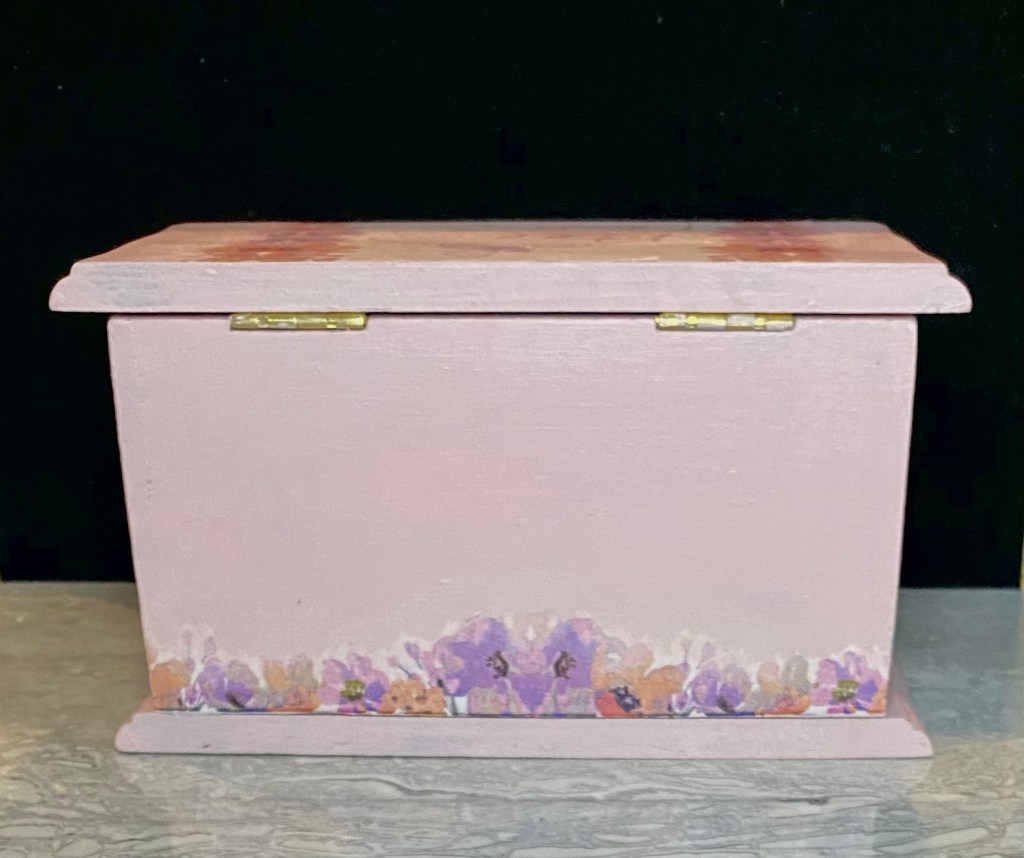
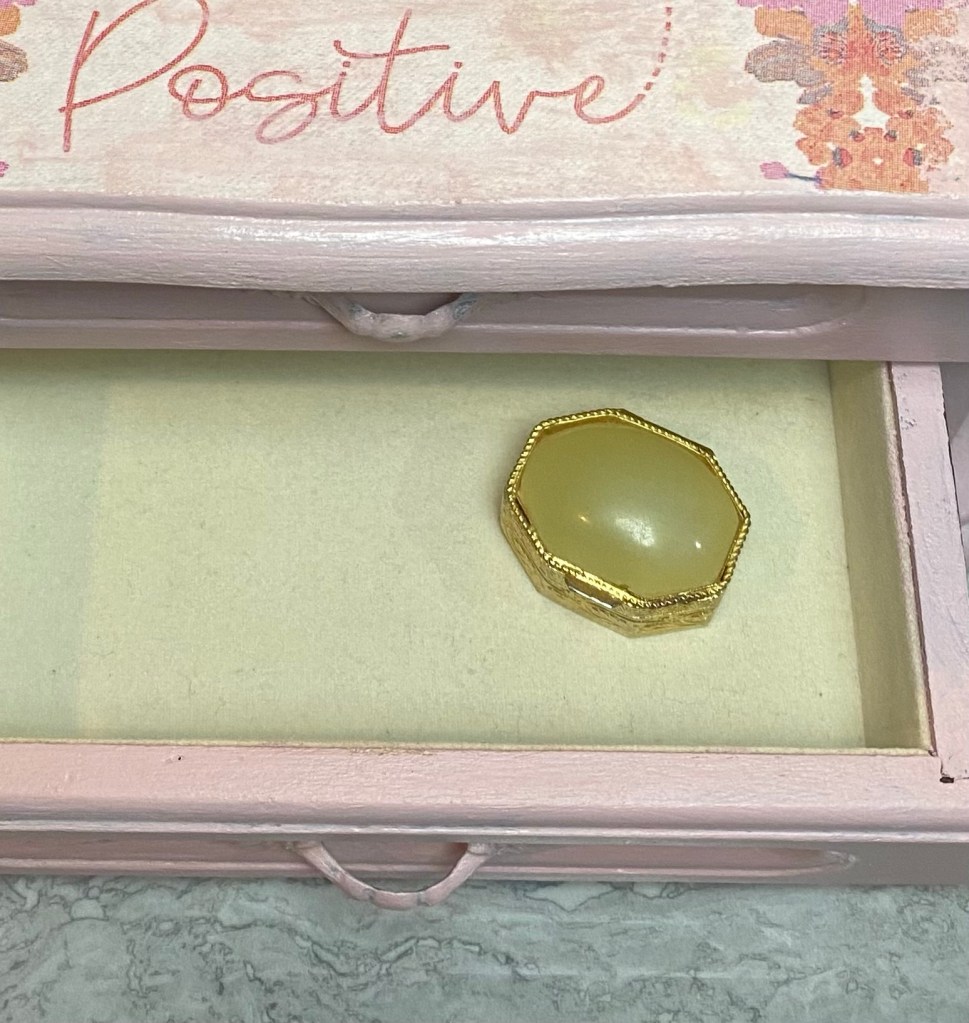
And then came a couple of jewelry boxes. I have a huge stash of them but haven’t painted any in awhile. These sold quickly so plan on painting ring more soon.
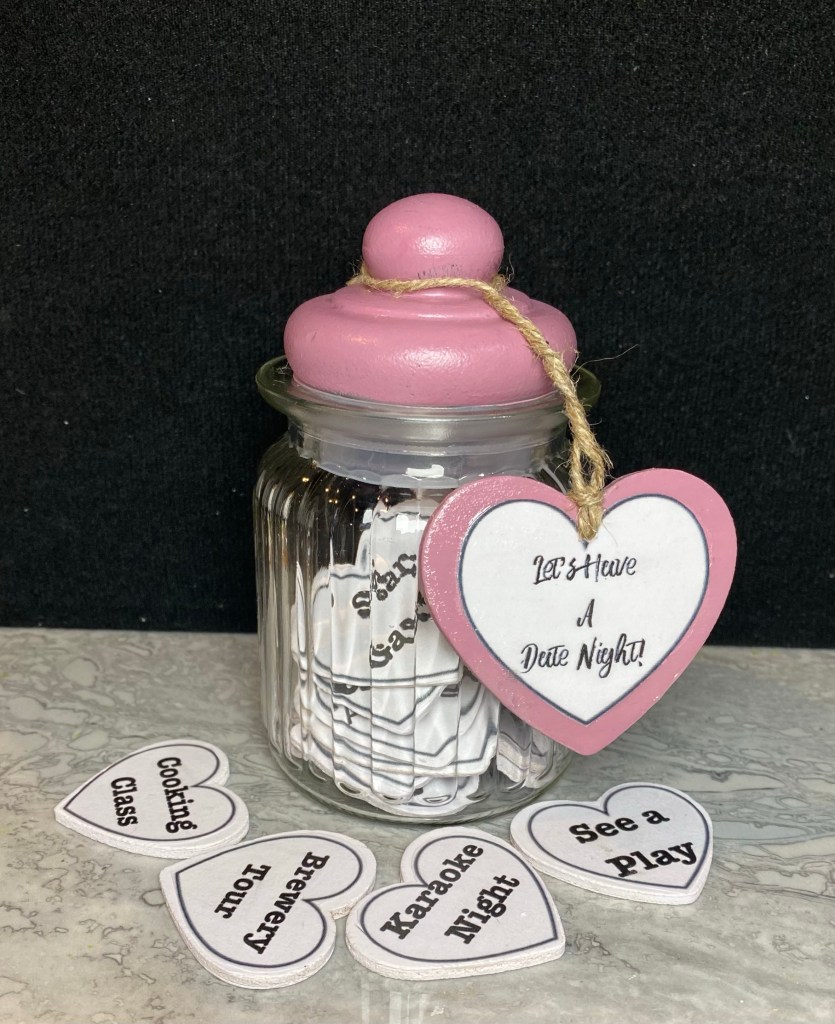
I saw an idea for a date night jar on Pinterest. This is my version. Jar from Dollar Tree. I painted the glass lid. If you spray glass with a clear sealer first, chalk paint will adhere well.
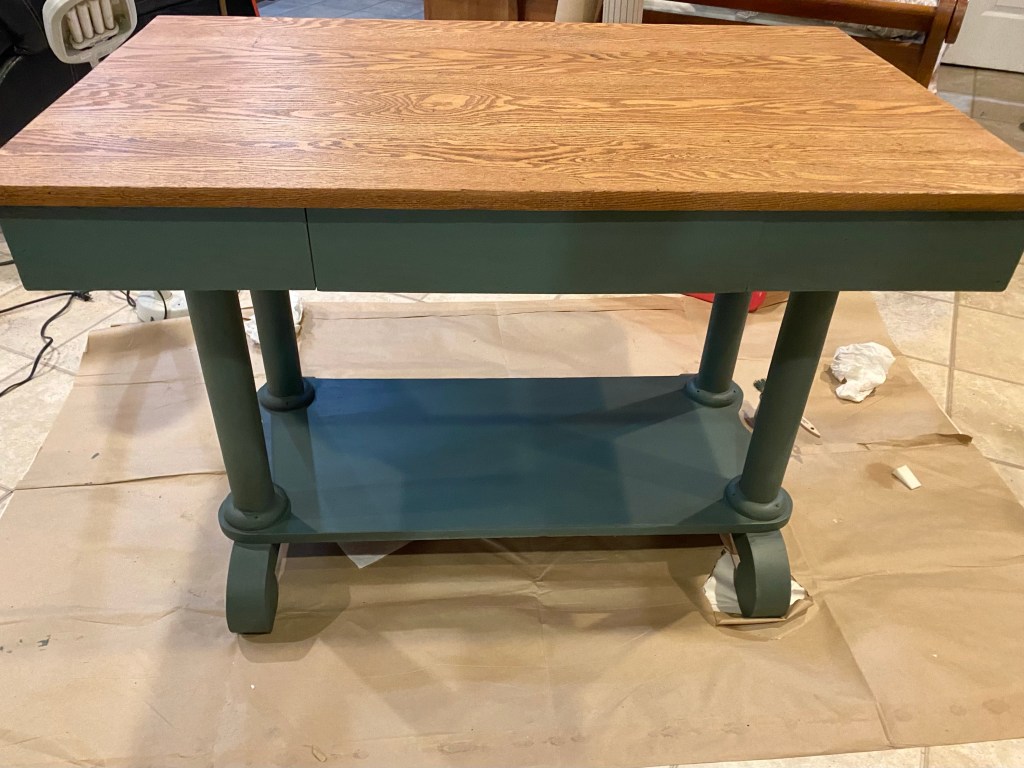
I don’t have staged pics of this beautiful library table. It is going to one of our booths this week. Danny sanded the top. I stained it with a w at teenaged stain. It has five coats of Varathane Crystal Clear Water based polyurethane in matte finish. The rest is painted with our Missouri Limestone Paint Company “Cupboard Green” and sealed. I love how it turned out.
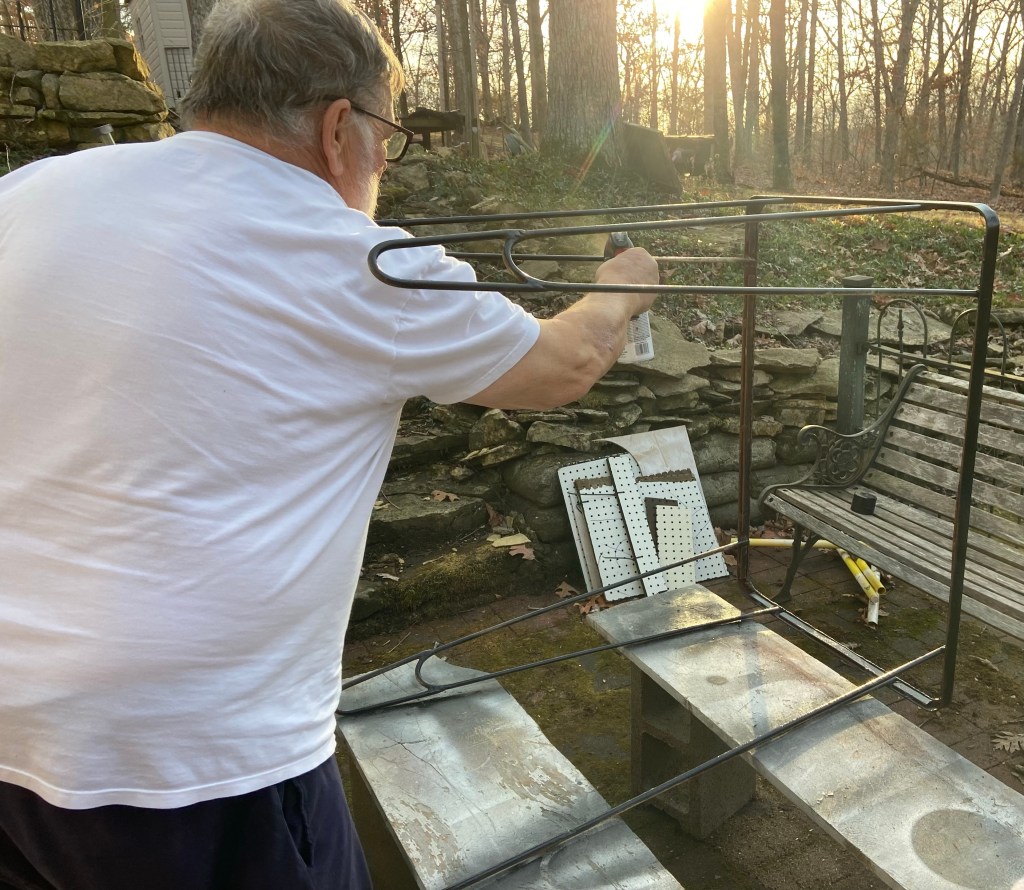
Danny created this white washed hanging rack from a vintage ladder.
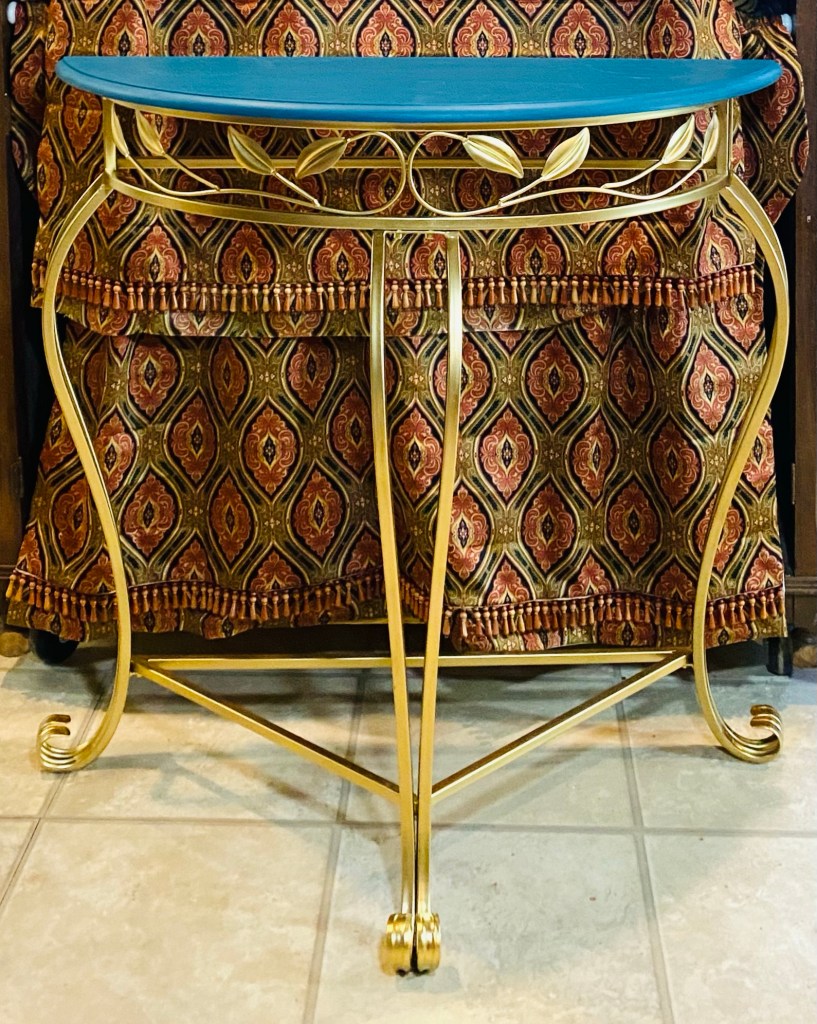
Another project is this gorgeous half table console. This is a long description but hopefully will inspire those who like boho with some ideas. I think this is one of my most favorite projects ever. I had so much fun with it.
We’ve had this table (and matching lamps) since soon after we built our house in 1985. Holy cow! That was 38 years ago!! The other day, I decided we didn’t need them anymore so decided to paint them. Danny suggested painting the top with our Missouri Limestone Paint Company “Bourbon Street”, a dark teal color. I thought Rustoleum metallic gold on the metal legs would look good with the teal. I also painted the metal on the lamps with it. They all turned out gorgeous!
Then, when I showed the table to a friend, she said I should style it as a boho piece. I agreed.
So pretty much all day today, I have been creating items for it to sell from things I have in my supplies:
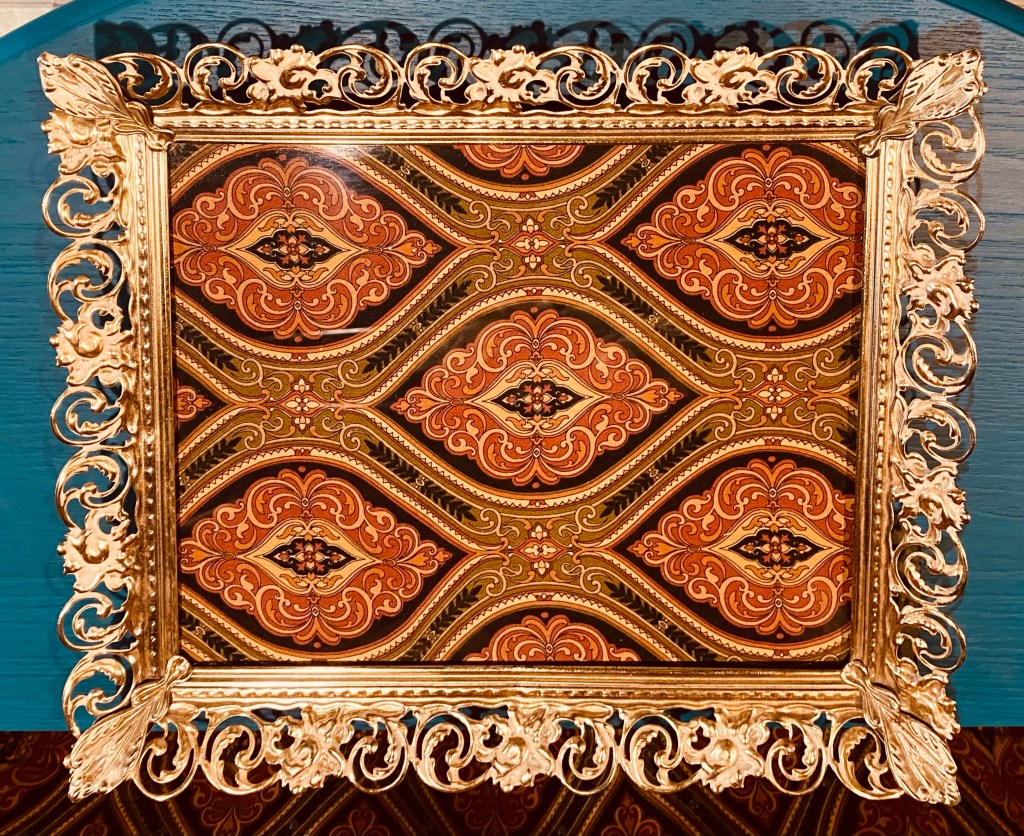
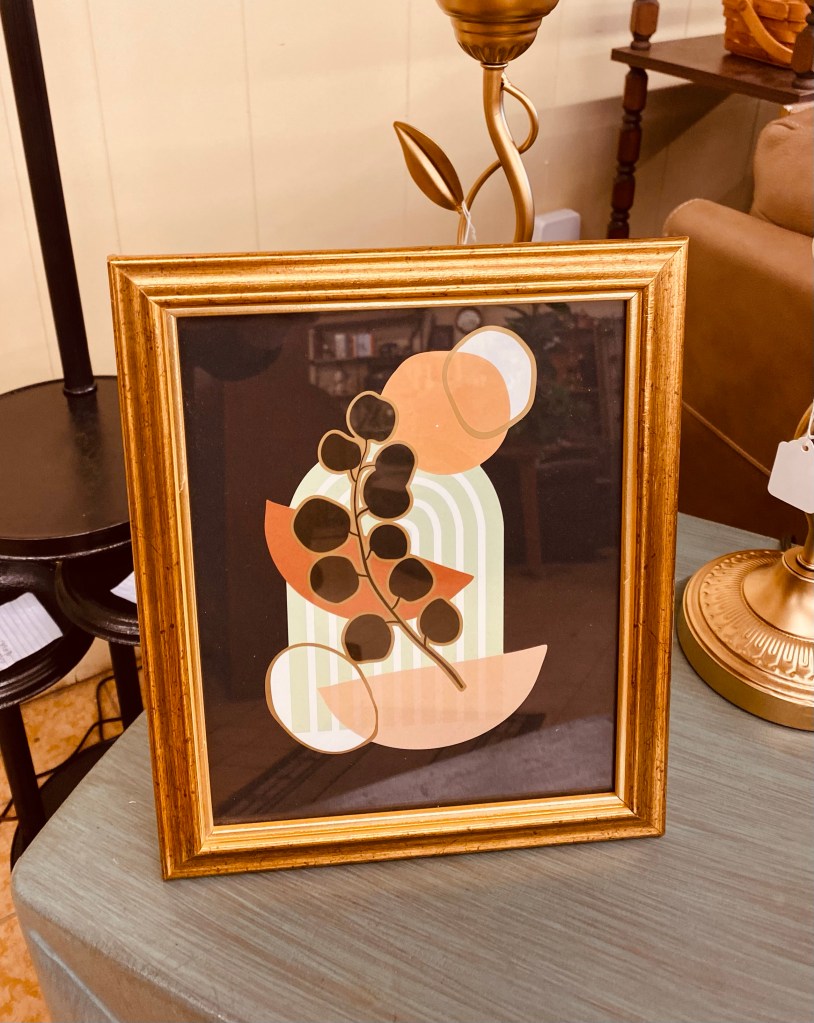
1) Picture frame: gifted by a neighbor- funny thing, my mom had our pictures in frames almost exactly like this growing up. The back is velvet. It can still stand up, but it makes a great tray, too. This frame is old! 2) This awesome fabric which was once valances with bead trim, was gifted by a friend. I’ve already used it as a curtain, as you can see, to hide Danny’s power tools and to create a little boho hanging. Lol I simply put a piece of the fabric under the glass of the picture frame for an instant boho tray! 3) A bowl of boho goodness. I had all the ingredients including this cute wood bowl I thrifted. I just added the beads around it for a true boho style. It took me a good bit to figure out how to do it to look finished, then decided to rip it out (it was sewn in with nylon thread). But when I got it all out, it was attached to this beautiful piece of fabric tape in this awesome color! I just hot glued it around the bowl! 4) Picture frame: gifted by the same neighbor: I did a line drawing on the glass of similar leaves in the table and put a piece of scrapbook paper behind it in a coordinating color and now have a boho print! 5) Bottle of peacock feathers: the bottle I think came with fragrance oil and bamboo sticks at some point. I did paint the lid that sits around it metallic gold this morning. I’m pretty sure I picked up the peacock feathers at a yard sale.
And then, we came up with a few more boho accessories.
And when we found this mirror shopping, we knew we had to get it! Danny painstakingly covered all the mirrors. I painted it metallic gold and then he removed all the tape. I cleaned it and….it is just stunning!
We also found this cute little kid’s drawing table. We added a couple of stools to it and took it to our booth at Sweet Repeats in Sullivan.
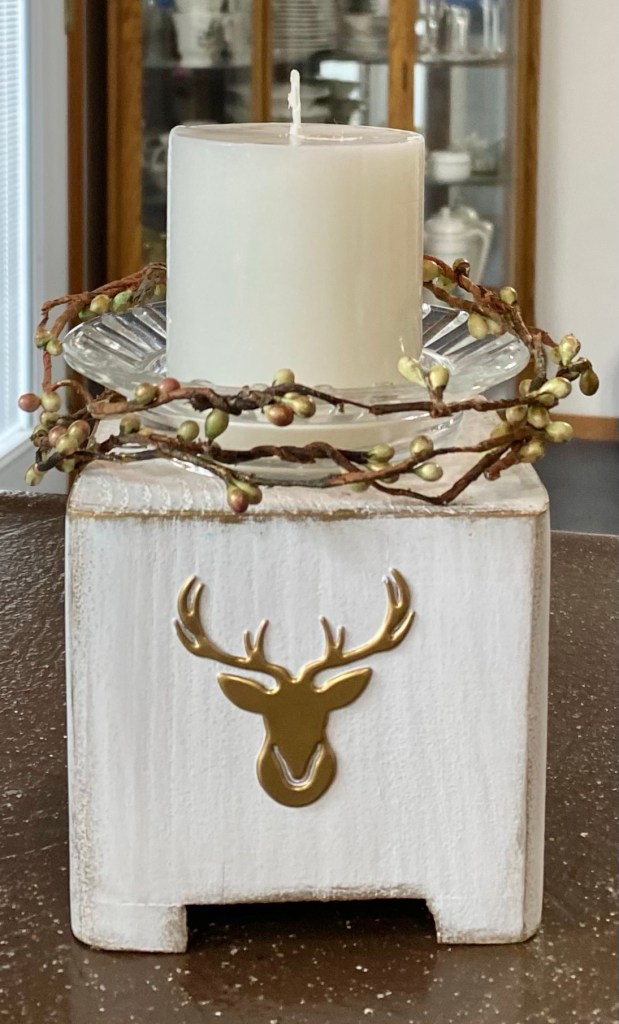
The wood base on this candle holder is a bed riser I turned upside down and painted. the dish for the candle is a vintage ashtray.
Coming up…. Danny is working on a new project. We are busy figuring out a way to make a table top for it. Stay tuned!
You probably wouldn’t want to use both lamps on the table, but maybe in the same room would be perfect!
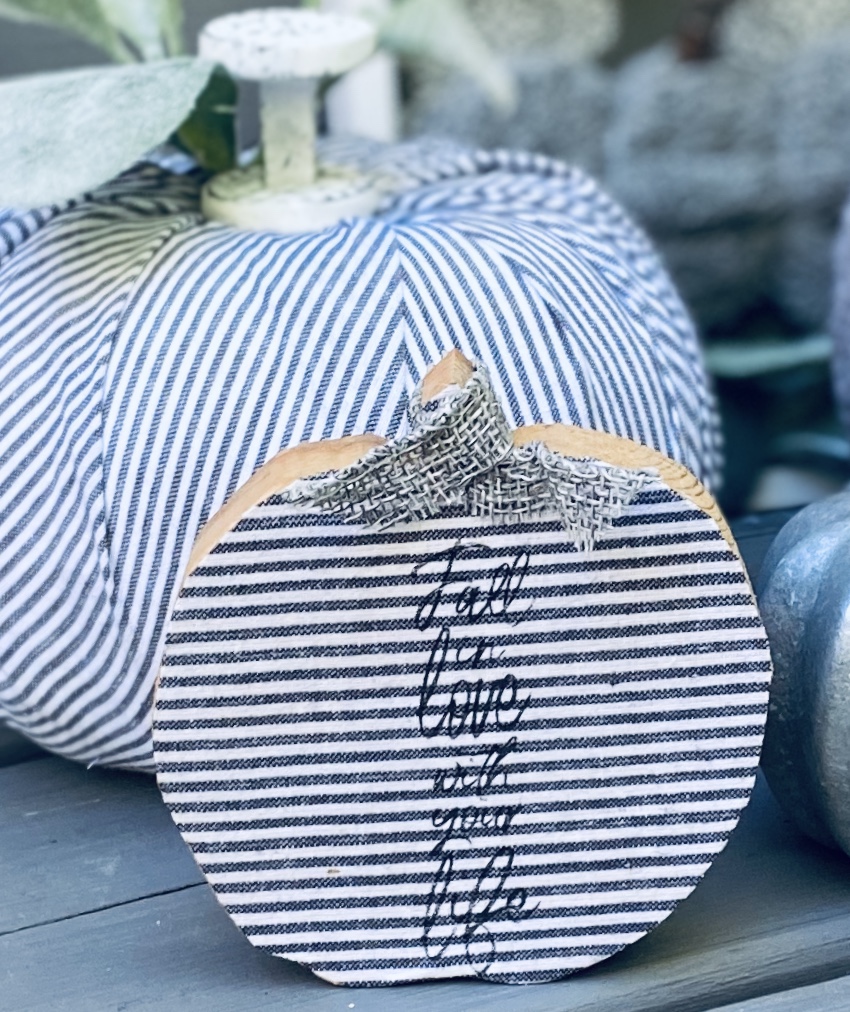
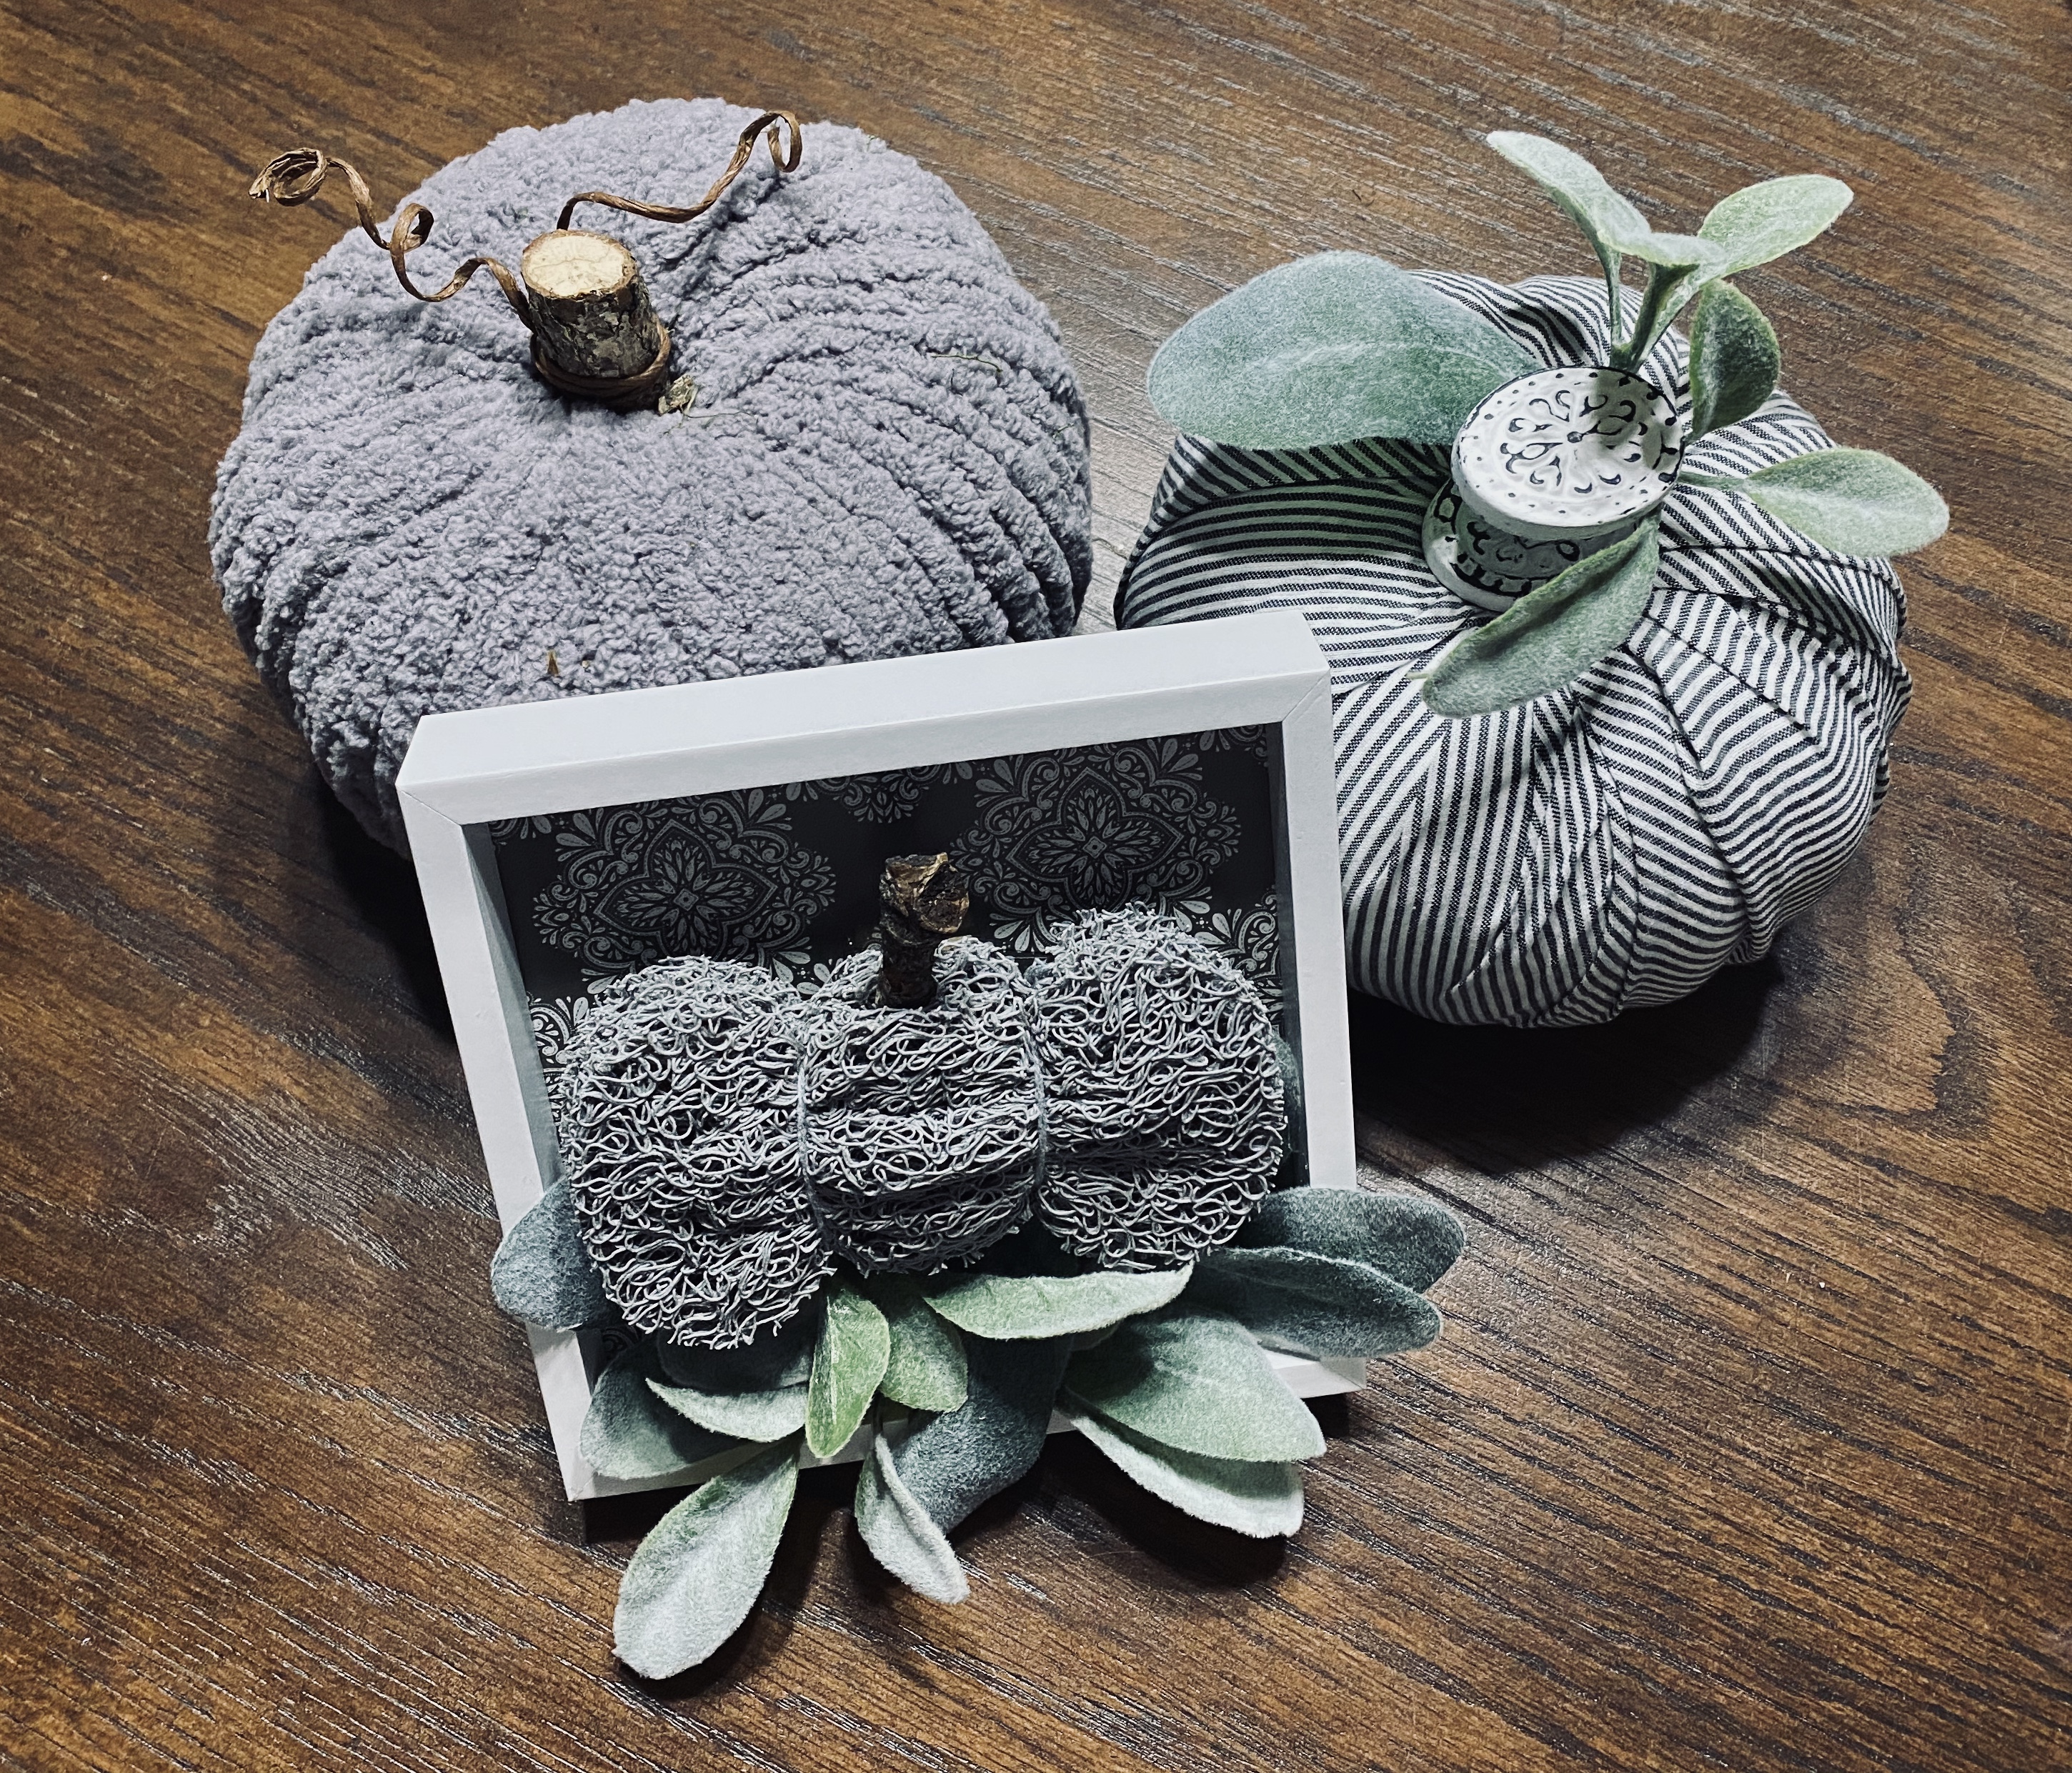
I may have gotten a little carried away on the gray pumpkin decor. 🤪 And yes. I decoupaged fabric (from Dollar Tree) onto a small wood pumpkin cut out and used one of the Dollar Tree brown parchment paper rub on transfers on it. 🤷🏼♀️
I have been a bit busy the last few days creating fall decor. Some days are just like that. You can’t stop. We’ve had some beautiful fall days in Missouri this week so I took advantage of the weather. It felt good to be outside working on my projects.
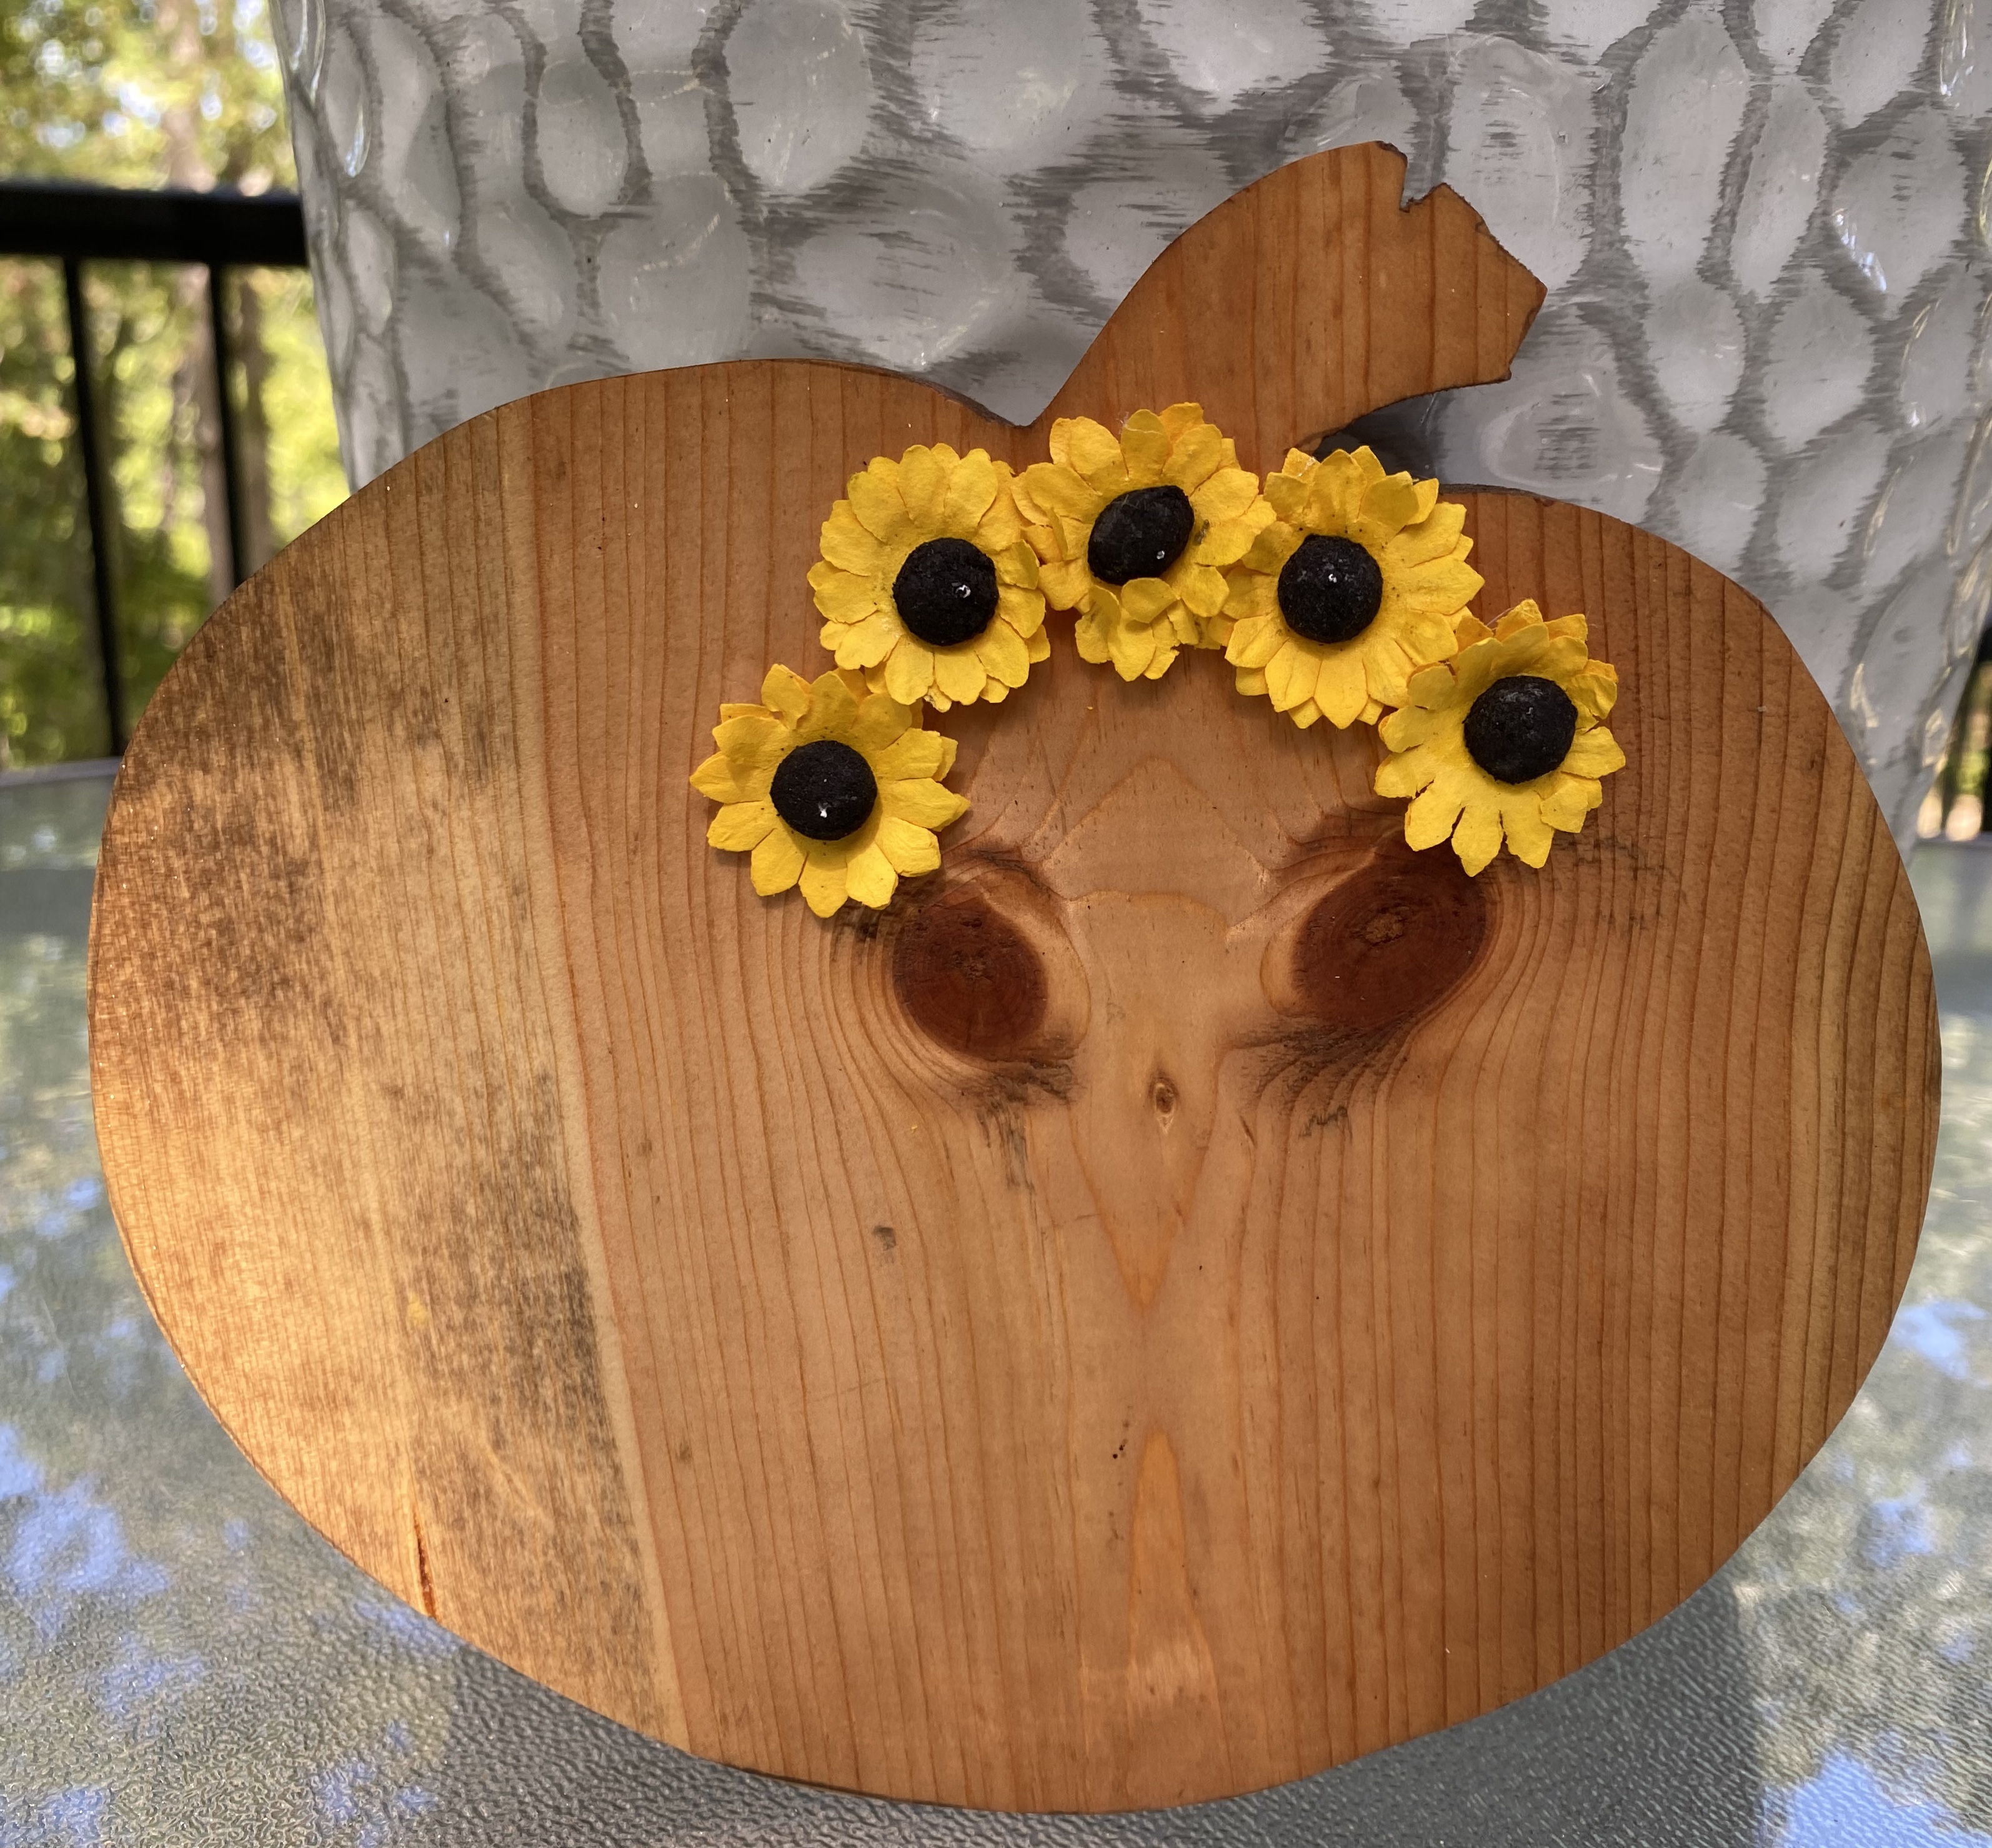
First up…. I was going through my fall decor boxes and ran across a box with a bunch of wood cut outs I hadn’t seen since I stored them. It was a jackpot of pumpkins, ghost, cats, and a few other goodies. One pumpkin had a very unique wood grain on the front and back. I just saw someone posted one very similar. It looked like an ostrich! I could see an ostrich in this one, too! Not only that, I saw an owl on the back!
I wasn’t sure what to do with it, but finally settled on using Howard’s Restore-a-Finish to bring out the grain and then I sealed it with Wise Owl salve. I named the Ostrich in a Pumpkin Woodette and the owl Woodsy. Soooo cute!
Then my friend, Midge, had an idea: flowers, a tiara, or crown for Woodette. I happened to have some small sunflowers and with just a dab of glue, they will come right off. I can change them out for each season! I think I might need to make Woodette a princess for Halloween and find a little crown for her.
In the same box as my Ostrich in a Pumpkin, I ran across this little shelf sitter or hanger. I passed over it at first, thinking….Wow! The 80s!
But then, I got this fall dish drying mat out of the Dollar Tree bag I just purchased. I realized some of the colors went so well with it and the other fall things I have in the corner of my kitchen. So..now, it is out of the box and in the corner of my kitchen counter. 🙂
Oh no! Another gnome …. after I said no gnomes this year! But the Gnome and Backyard lady had this idea I couldn’t resist. She made a quick and easy gnome out of the small plastic ghosts from Dollar Tree. I spray painted one for the hat with a copper color because that’s what I had on hand and added tiny Dollar Tree sunflowers for embellishment. The other I left white and glued it upside down to the hat. I gassed a wooden bead for his nose. I bought two big ghosts, too, to make a larger gnome.
I spray painted a Dollar Tree wire pumpkin form white with a green stem and attached my cute little gnome to it with jute twine and now have a cute fall door hanger for my front door. He hangs from a magnetic hook on my stork door by the stem
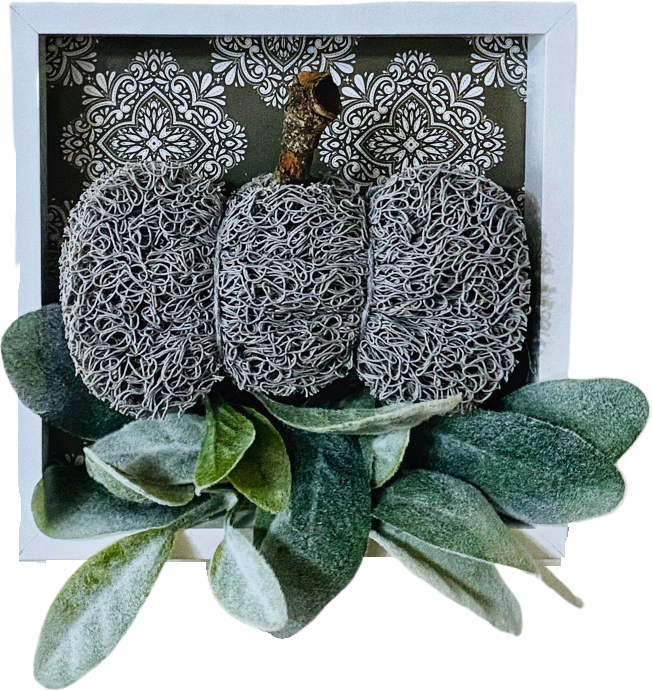
This awesome creator also had a tutorial for making a pumpkin out of a Dollar Tree soap saver. What? Check it out! https://fb.watch/fOIcejAF2x/
Of course I had to make one, too. This one I left gray and put it inside a Dollar Tree shadow box. It looks so cute with my gray pumpkins I made (the striped fabric came from DT), but I bought a few more to paint! 🙂
I still hadn’t gotten to my other pumpkin cut outs, so onto more decor!
I made this arrangement in three different sizes and used a Dollar Tree napkin decoupage technique. I was going to add embellishments but I love the rustic vintage look of them just as they are. They stand up on their own and are perfect for shelf sitters or tiered trays.
I also decoupaged a little 3 1/4” square natural wood trinket box. I made the little leaf ladder tall last year. It goes perfectly with this arrangement.
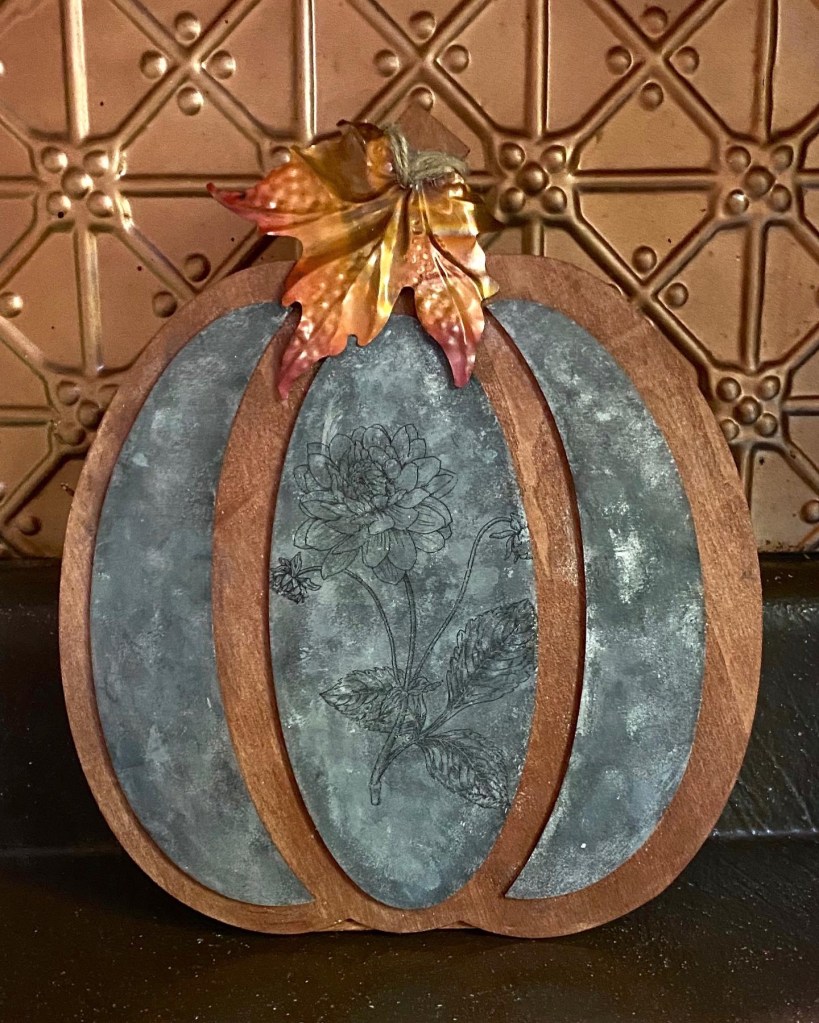
This next project is one of the larger pumpkin cut outs and will stand alone. I glued one of the Dollar Tree faux tin panels to it.
For this finish I did a kind of an aged terra-cotta color I’ve been seeing others do. I painted it with a color I mixed and added just a bit of baking soda to it. Then I sprinkled more baking soda on it while still tacky. After the paint dried I blended the baking soda on with a bit more paint then sealed with a matte sealer. I used a bit of the napkin I was using earlier on the stem.
So pretty! I really enjoy creating a more neutral look for fall decor.
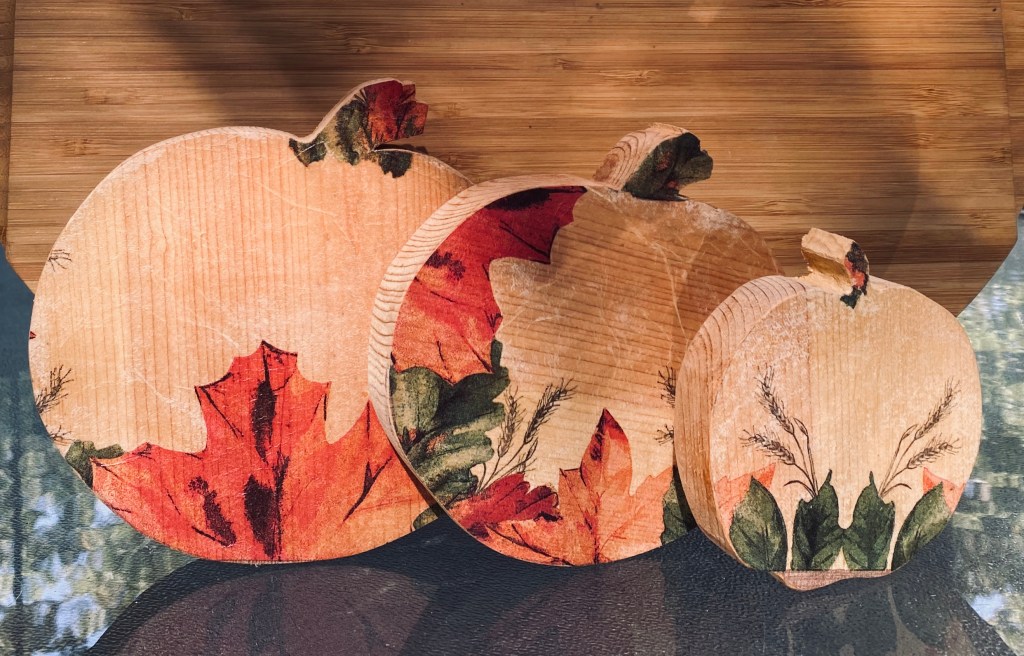
And finally, I ended my marathon crafting this morning. Maybe. Lol I started this project last night and finished today. I still had more pumpkin cut outs in 3 different sizes so painted the face of each with the terra-cotta color I mixed. I used a bit of left over napkin for the stems.
I distressed them a bit with sandpaper and then used the new Dollar Tree brown parchment paper rub on transfers on them. I apologize in advance for finding more of these transfers in different designs. They are so hard to find, but I found these in the same store I found the others in Ballwin, MO on Manchester Road. But, oh how I love working with them and hope they make more. I’ve not seen them online yet, either.
That’s not all! I’m now working on a natural wood napkin decoupage riser and it should be finished soon! 🤷🏼♀️
Update: The last of this grouping is complete. 🙂
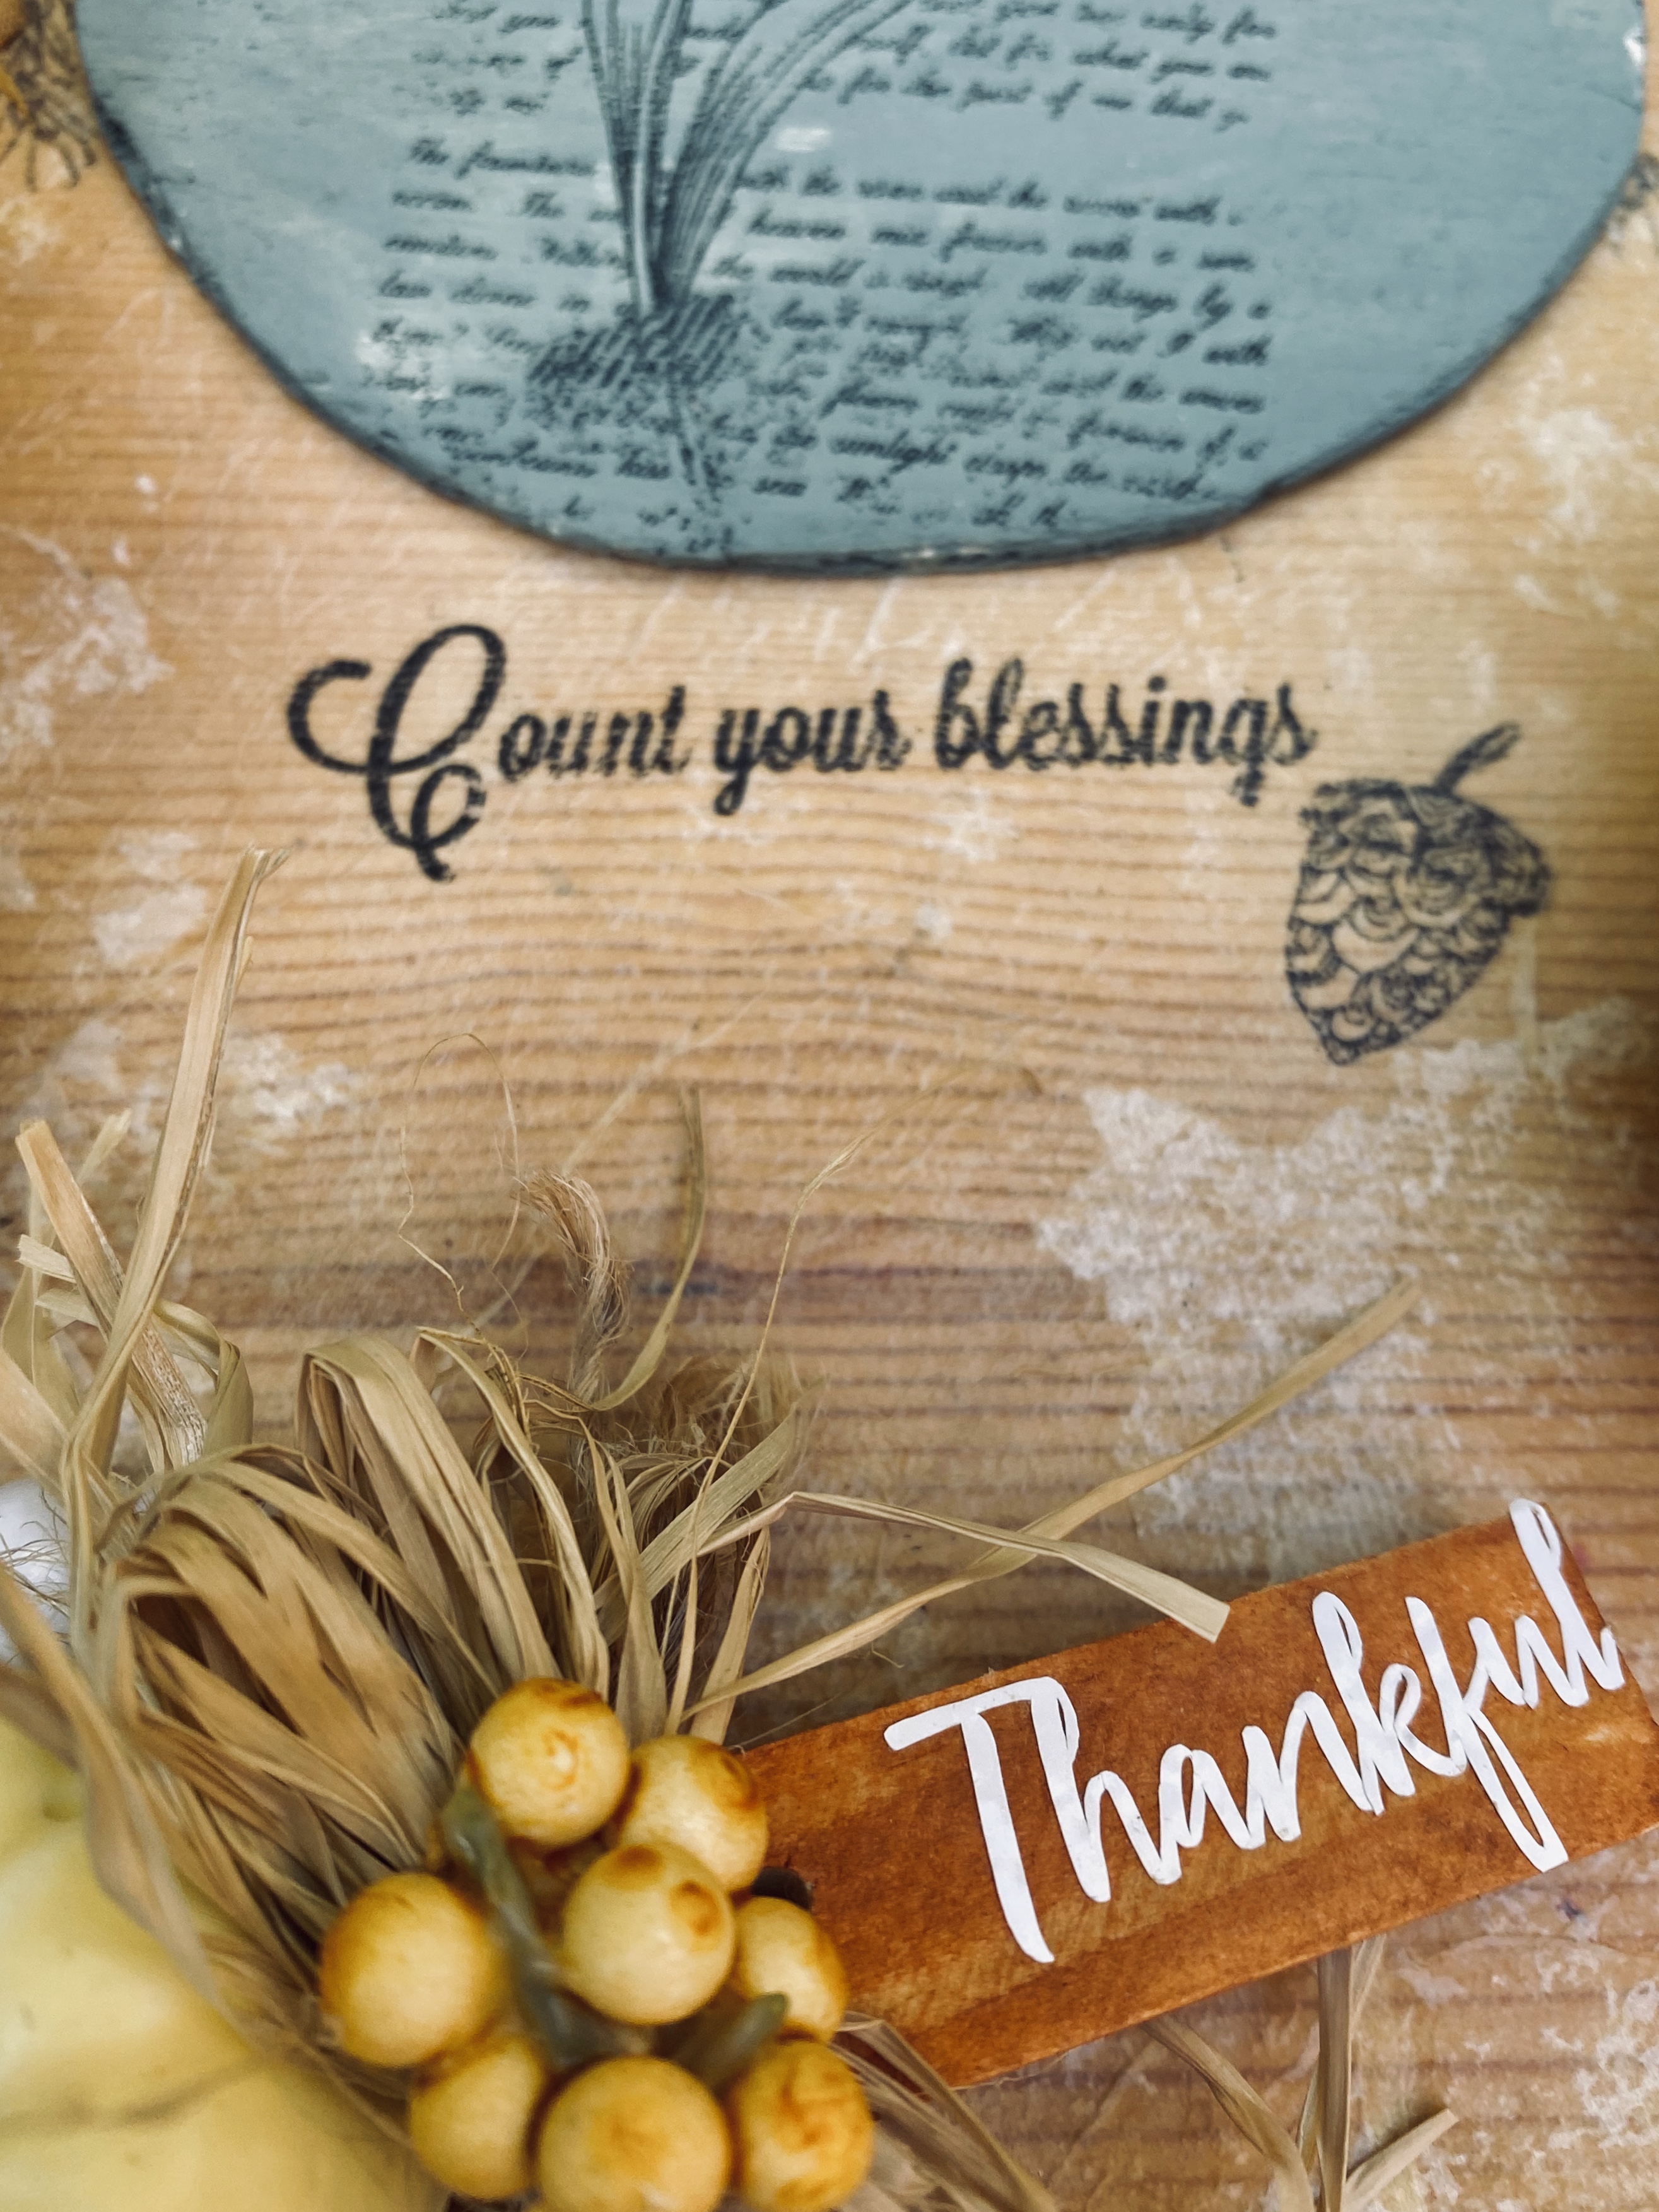
I had this 12” round wooden plate. I had the fall napkins. I had the decoupage medium. I had some little rub on transfers and the wood beads from the foot exerciser I bought a couple of weeks ago at a yard sale to use for feet. I have items to display.
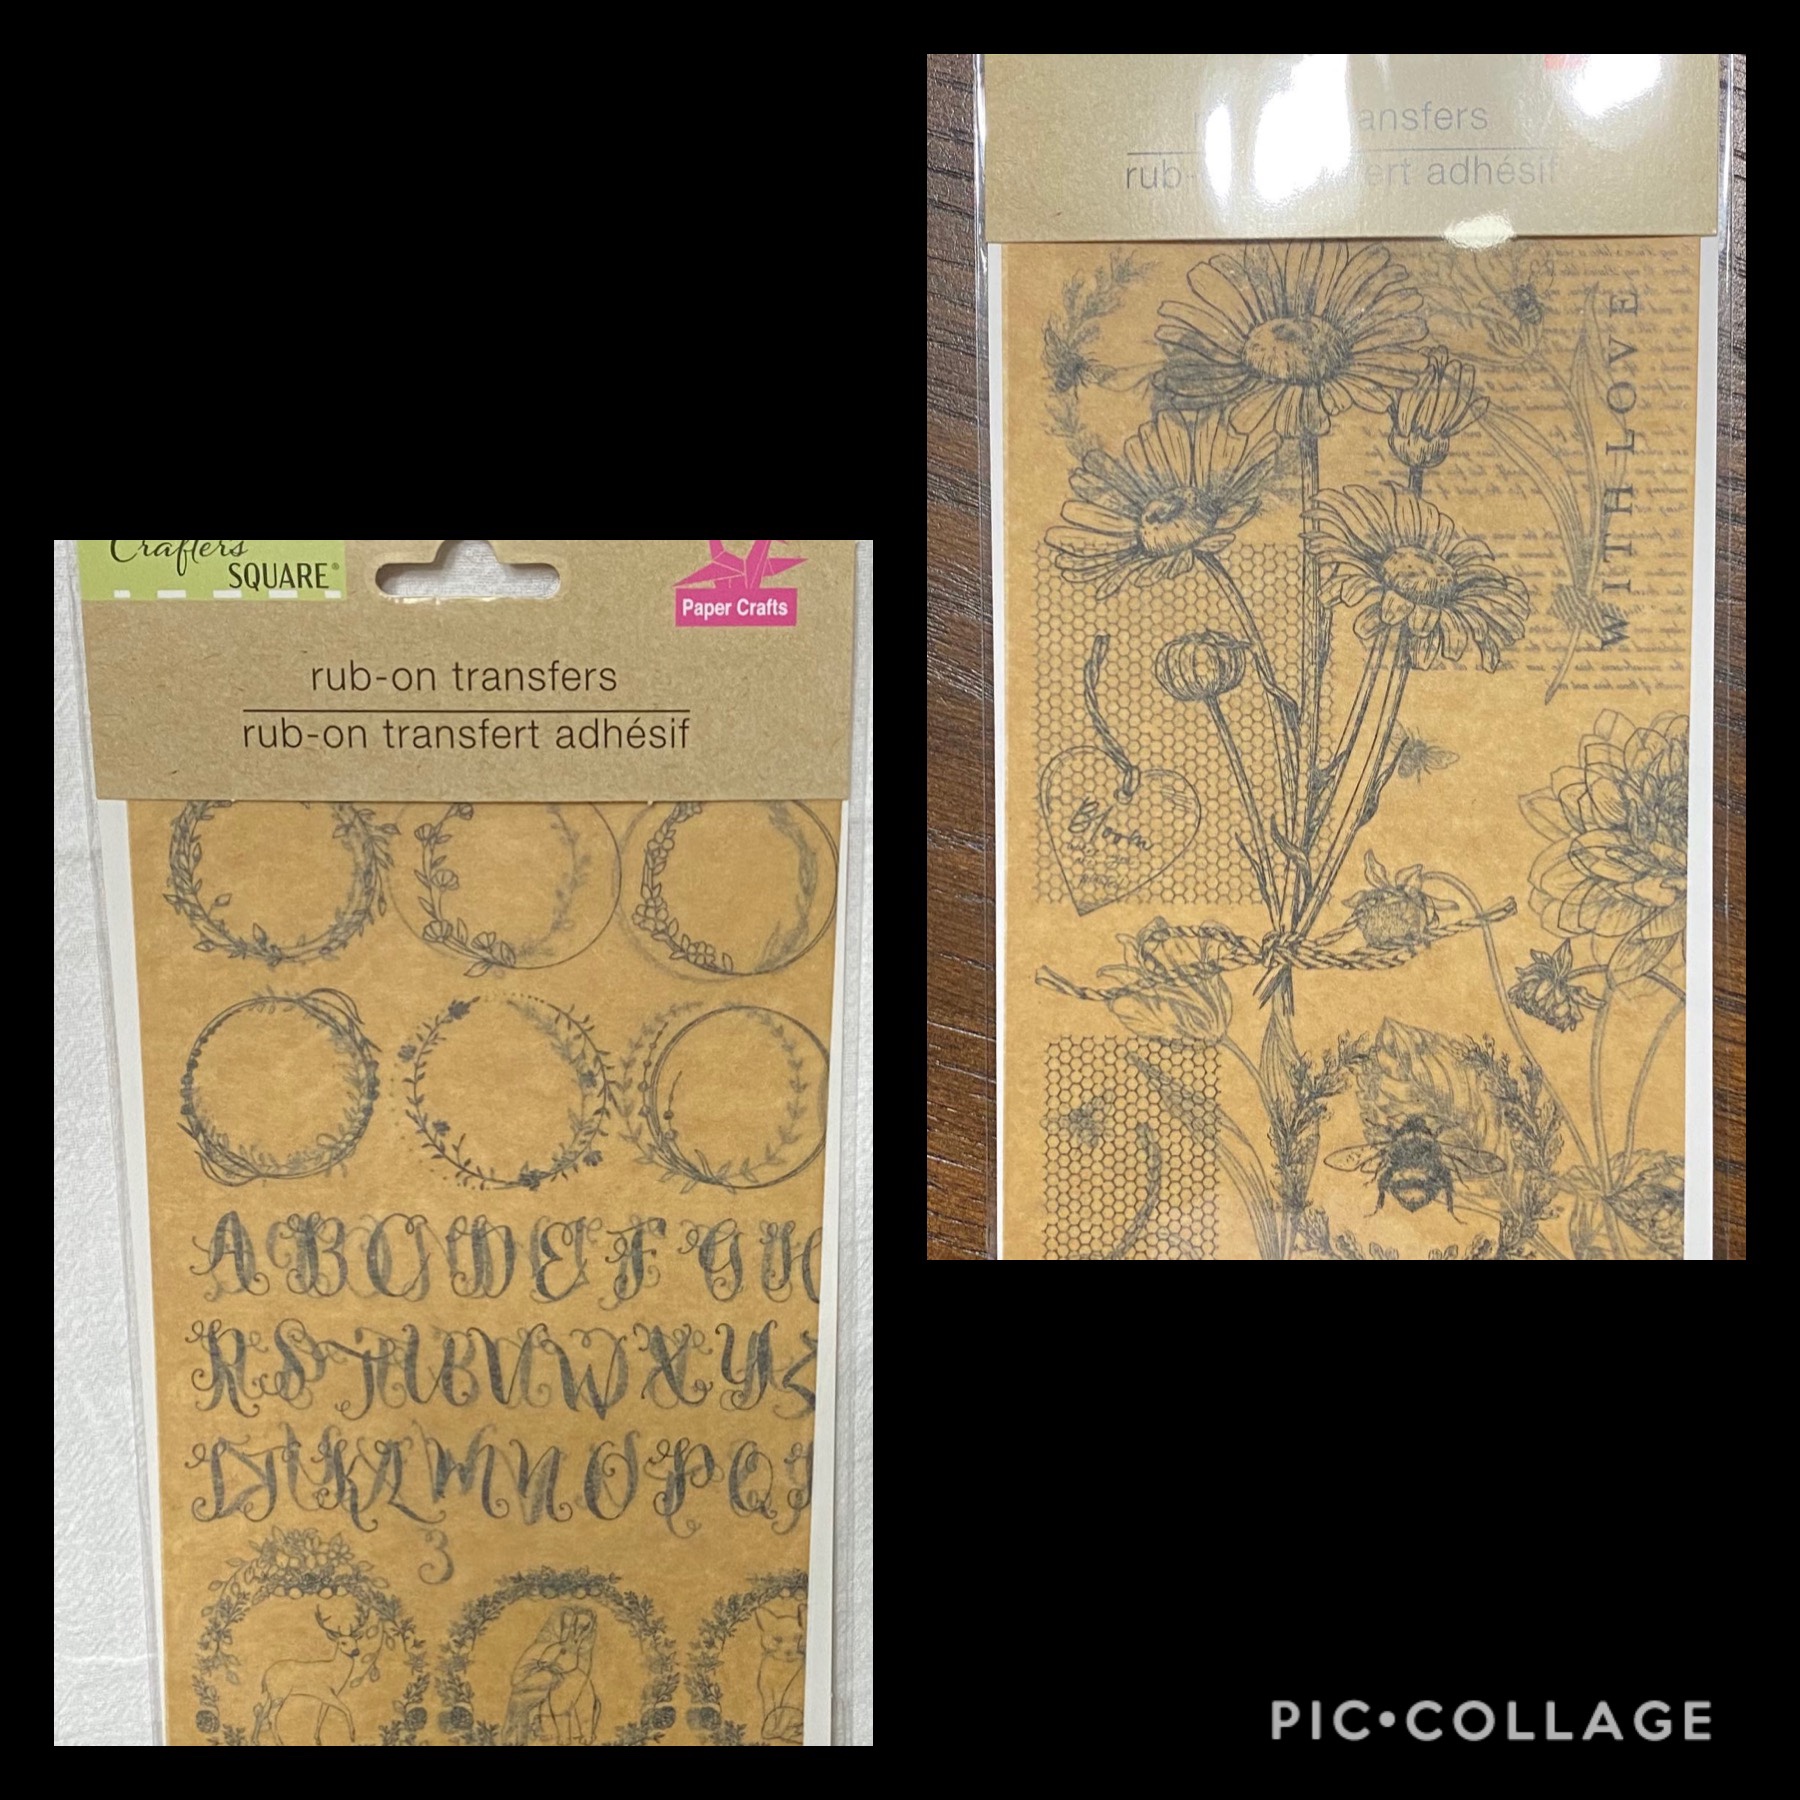
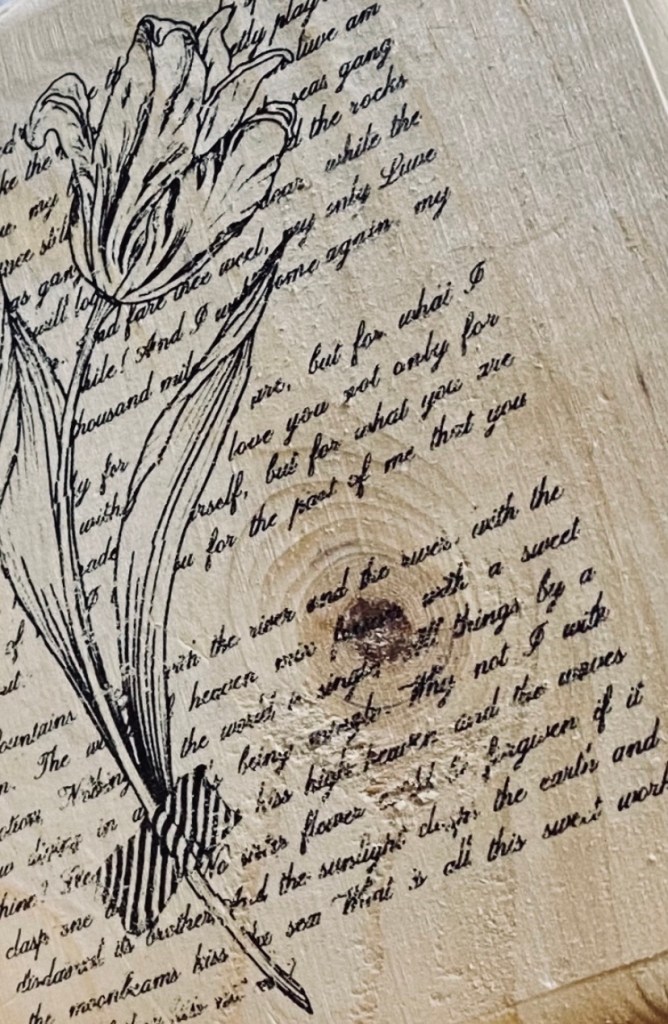
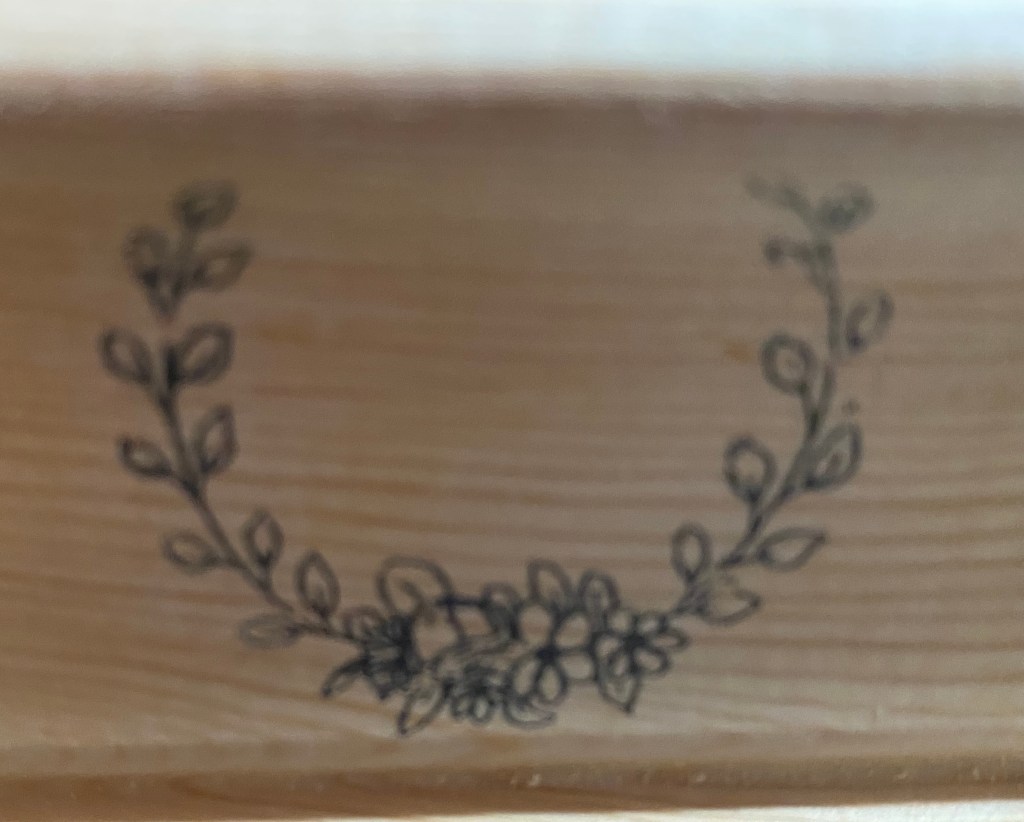
I sure wish these Dollar Tree parchment paper rub on transfers were more widely available. They have several designs. I liked the two shown below. I am having so much fun trying them on a variety of surfaces. I have found out once thoroughly dry, you can seal them with Mod Podge. I did try wax and it removed the ink. It could have been that the ink was still wet, but I didn’t want to try it again. For little things I like the Mod Podge matte spray.
They basically work like the other rub on transfers. Sometimes you need to rub hard and lift up and rub again to get every little last bit off. Sometimes, I taped them down, other times I just held them down.
#1 A remake of last year’s 8 1/2” w x 10” high wood pumpkin wall hanging with Dollar Tree parchment paper transfer
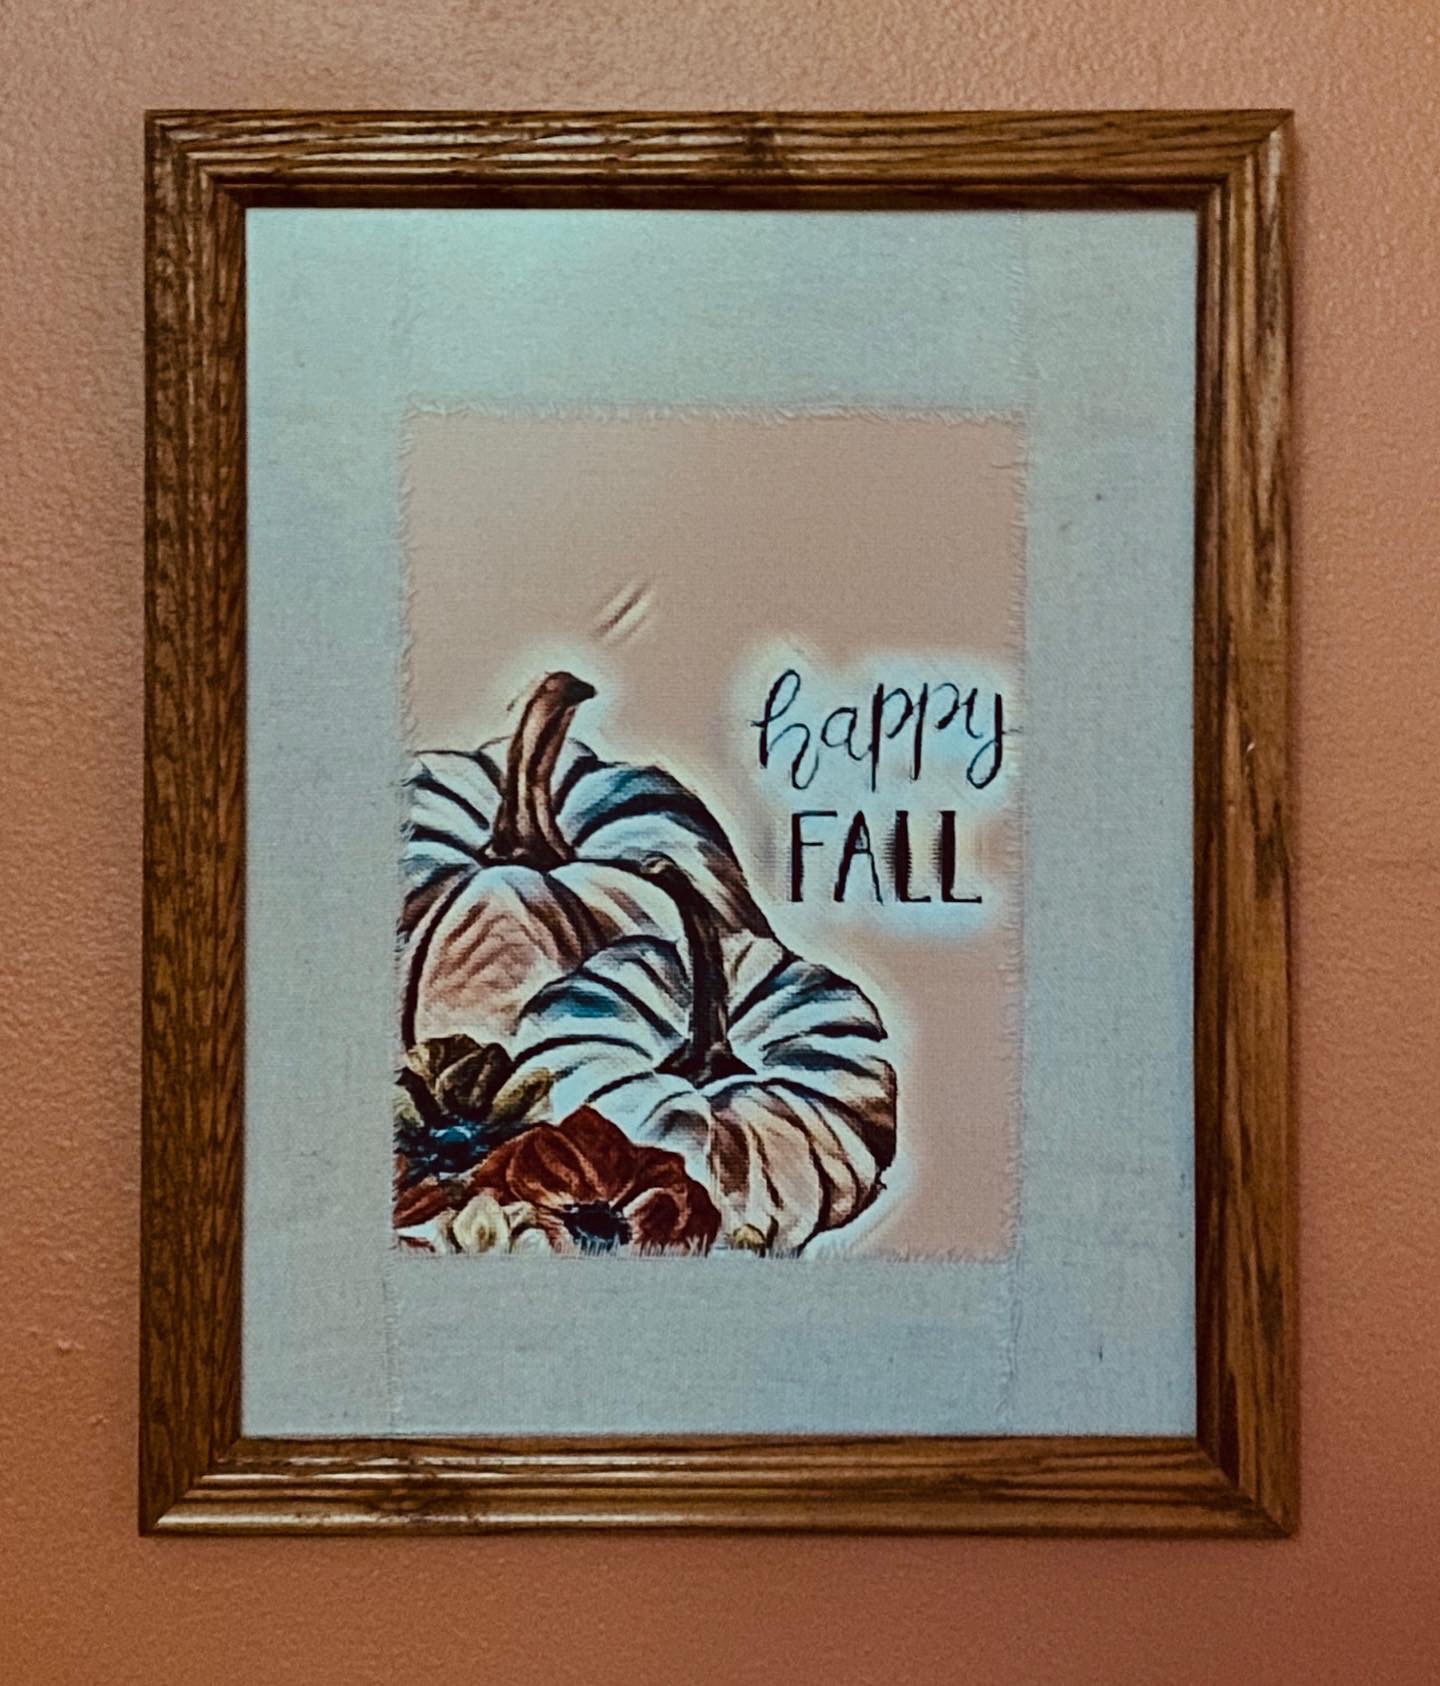
#2 This recycled 12×15” wood photo frame has a new life as a piece of fall decor. The print (61/2” x 10”) has had an artistic flair added along with a textured look. It is printed on card stock and framed with strips of ravelled canvas. The glass is the glare free kind.
The closeup shows the look of the texture on the paper.
Original graphic courtesy of creativediypurpose.
6” wide x 12” high
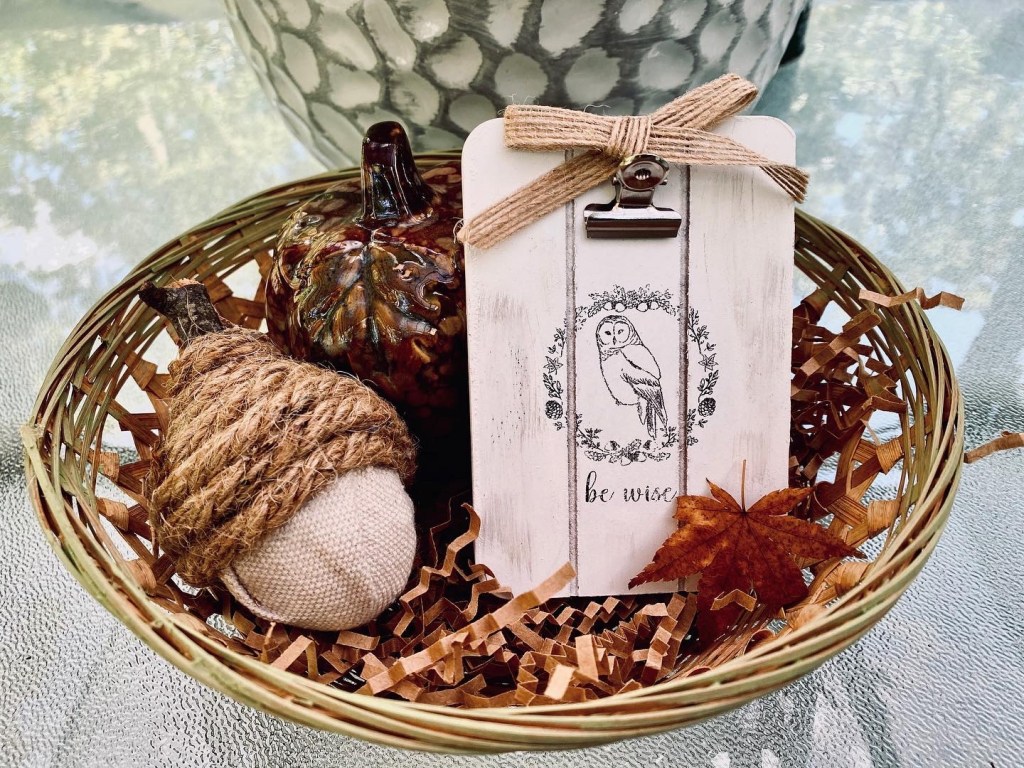
#3 A cutting board wall decor – Hello Pumpkin
The text was a template from Canva. I used carbon paper and an embossed to transfer it to the board and colored it in with a pen.
Created a rag bow with strips of canvas and added a small painted styrofoam pumpkin.
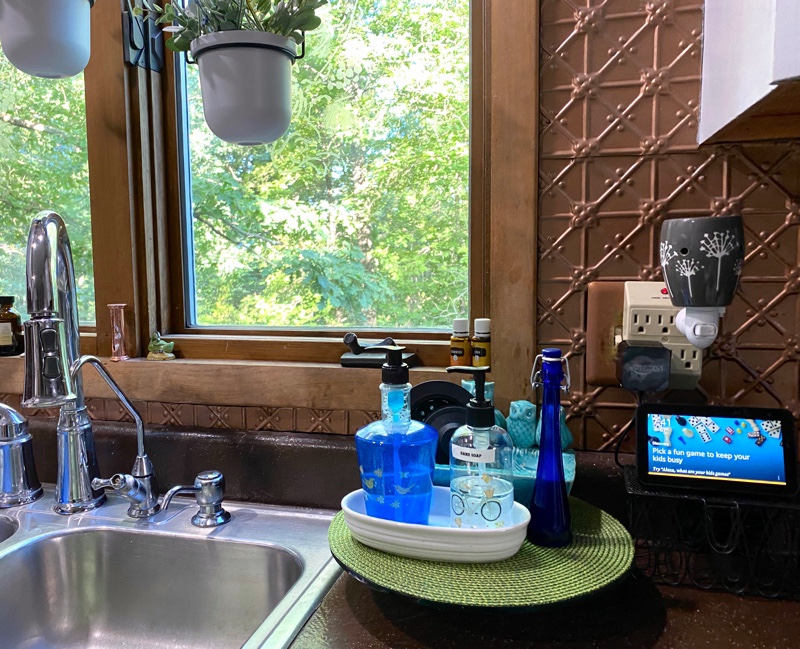
It all started this morning when I decided to give myself the incentive I needed to start some deep cleaning I’ve been putting off….so I started with my sink area.
I saw an idea for adding a pedestal to your sink area for your dish soap, etc. I just happened to have one I made.
I glued a round piece of glass I had to the bottom of a small bowl. I’ve been using it in other places. I had this thick round piece of glass I got at a flea market one time, but a wood round would work, maybe even the plate from an old microwave.
Then I cut a placemat to fit it. I had a plastic hand soap dispenser I already made and cleaned off the label on another one.
Of course, I just had to add some small transfers I found at Dollar Tree just because.
Then I was ready to start deep cleaning……
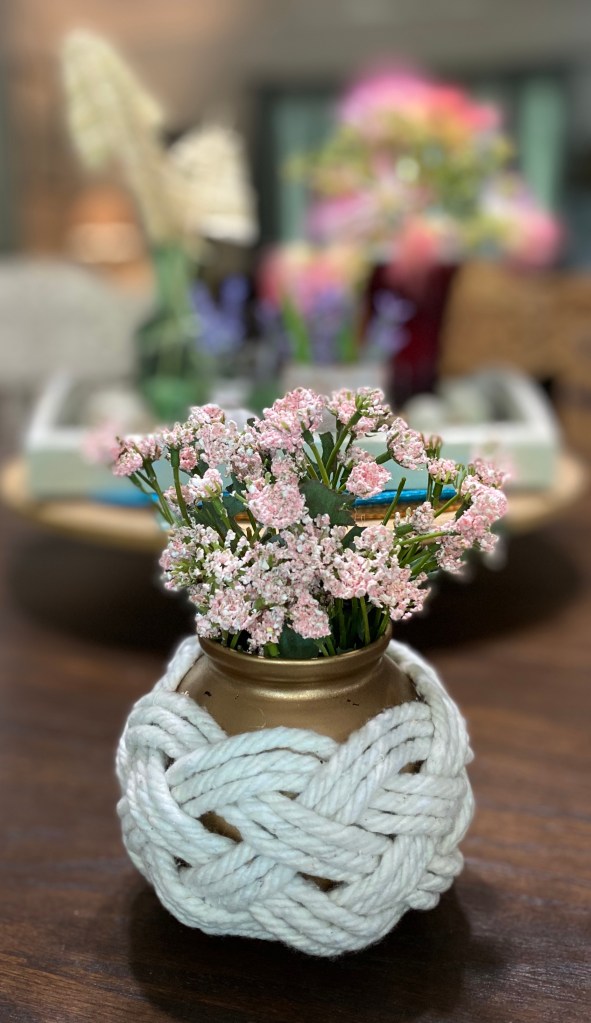
My kitchen is now clean! Yay! So my reward to myself was creating this little boho woven rope vase!
I’ve been seeing similar rope vases all over. In fact, I could buy one for $50 from this vendor. Or…. I could create one myself, which is so much for fun and cost saving, too! 🙂
I saw this woven rope idea and tutorial on Pinterest.
I had already spray painted a little red glass vase I had with metallic gold paint.
The rope was from a Dollar Tree mop head I cut apart. I used 15 strands of it and hot glued each strand side by side from bottom to top, laying the vase on its side to work. Then I separated the strands into groups of 3 and wove them over and under (spot gluing ever so often to hold them in place) until I got back to the beginning. I cut each group of 3 even with the beginning edge and hot glued in place.
Whew! Oh! And my clean kitchen. Here you go!
Now, for a late lunch and a much needed rest before I tackle another room. 😂
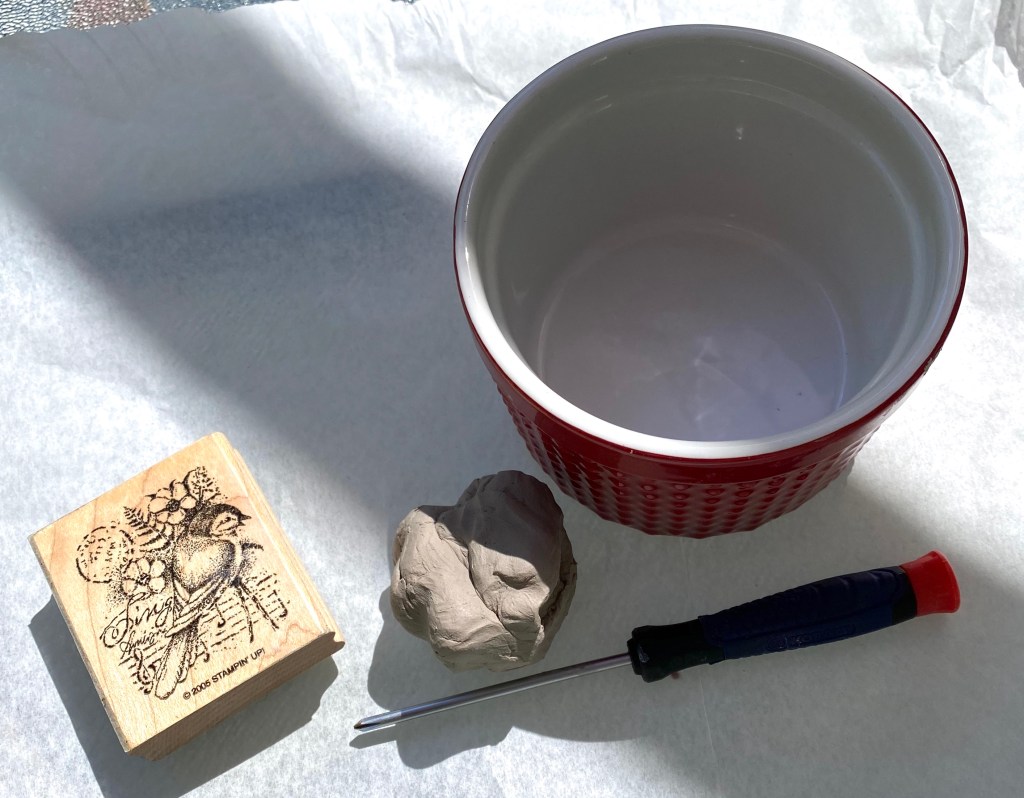
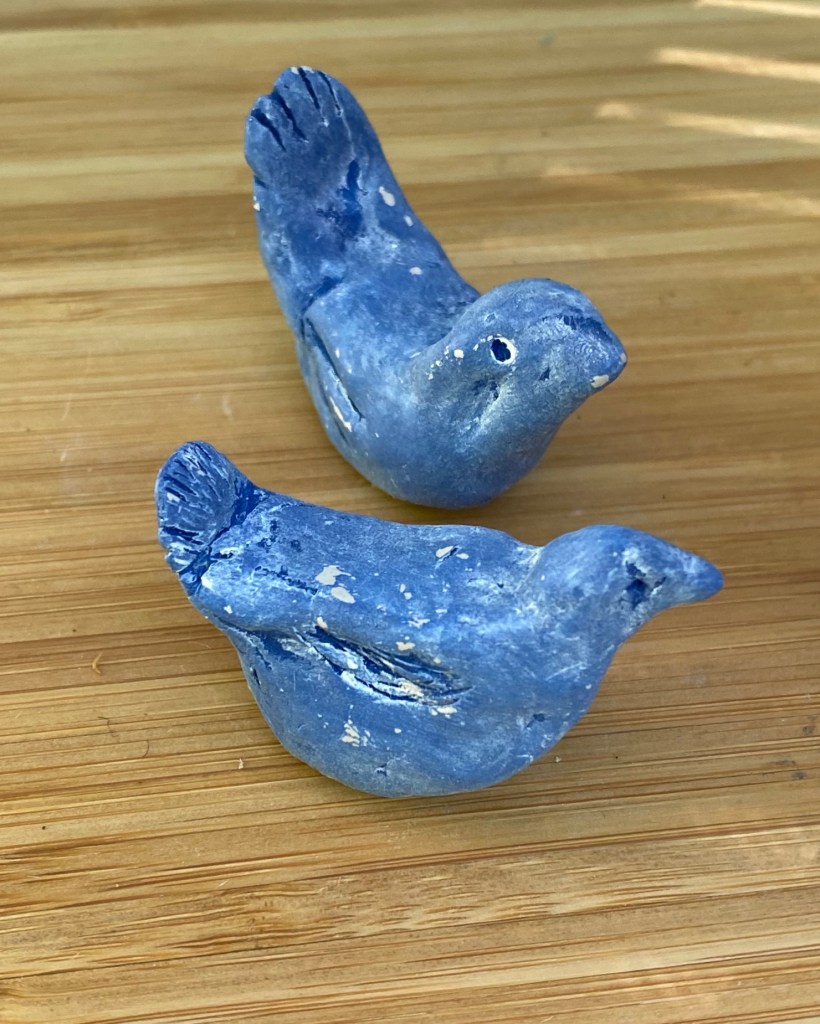
I saw an idea for making a bud holder using air dry clay so I just had to try it. I had a bit of clay left over so I made a couple of little birds, too.
Amazing how fast air dry clay dries on a hot, sunny day. 🙂
I made a bud holder to fit the small red glass vase I had, painted the bud holder white, sealed it with Mod Podge spray, then used watered down gray paint to bring out the detail of the stamp. If you look carefully, you might be able to see the image of a bird imprinted into the clay. Then I sprayed it with Mod Podge Pearlized Spray for a bit of glimmer.
I painted my little birds a dark blue and distressed them with white wax.
Then I added some Mimosa blooms from my tree. Beautiful!! And Wow! They smell sooo good!
A very early morning project – I can still hear a rooster crowing in the distance and I live in the city limits. Lol
I made these big clay beads for a friend yesterday. They dried quickly in the hot sun. This morning I painted them, dried the paint and added white wax and rubbed it in. I strung them on jute rope. This will still need to fully cure a few more days.
Yesterday was a snow day (in public school terms) so as a retired teacher I respected the tradition of doing nothing but play. I discovered a new painting technique in the process.
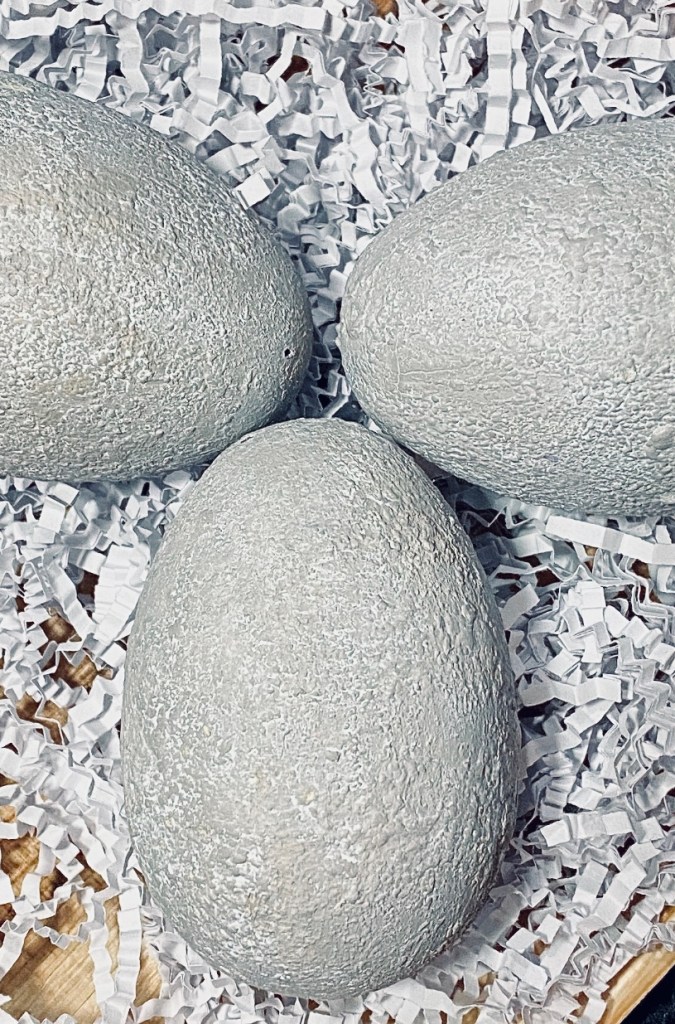
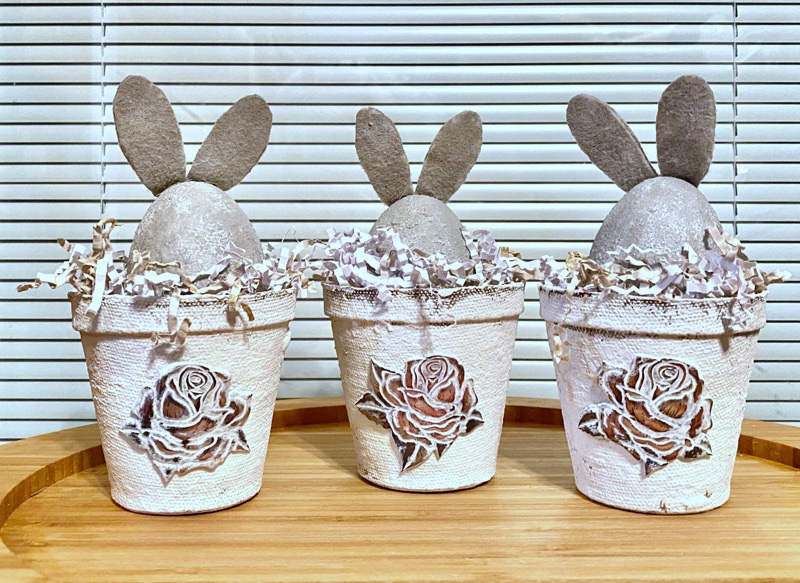
Earlier I painted plastic eggs to make some egg bunnies, but that’s another tutorial. Basically, I glued them shut, scuffed them up, gave them a coat of chalk paint, dabbed more paint along with picking up at the same time with my brush some Howard’s Chalk-tique
After I made ears for them I decided they needed to be in their own egg cups.
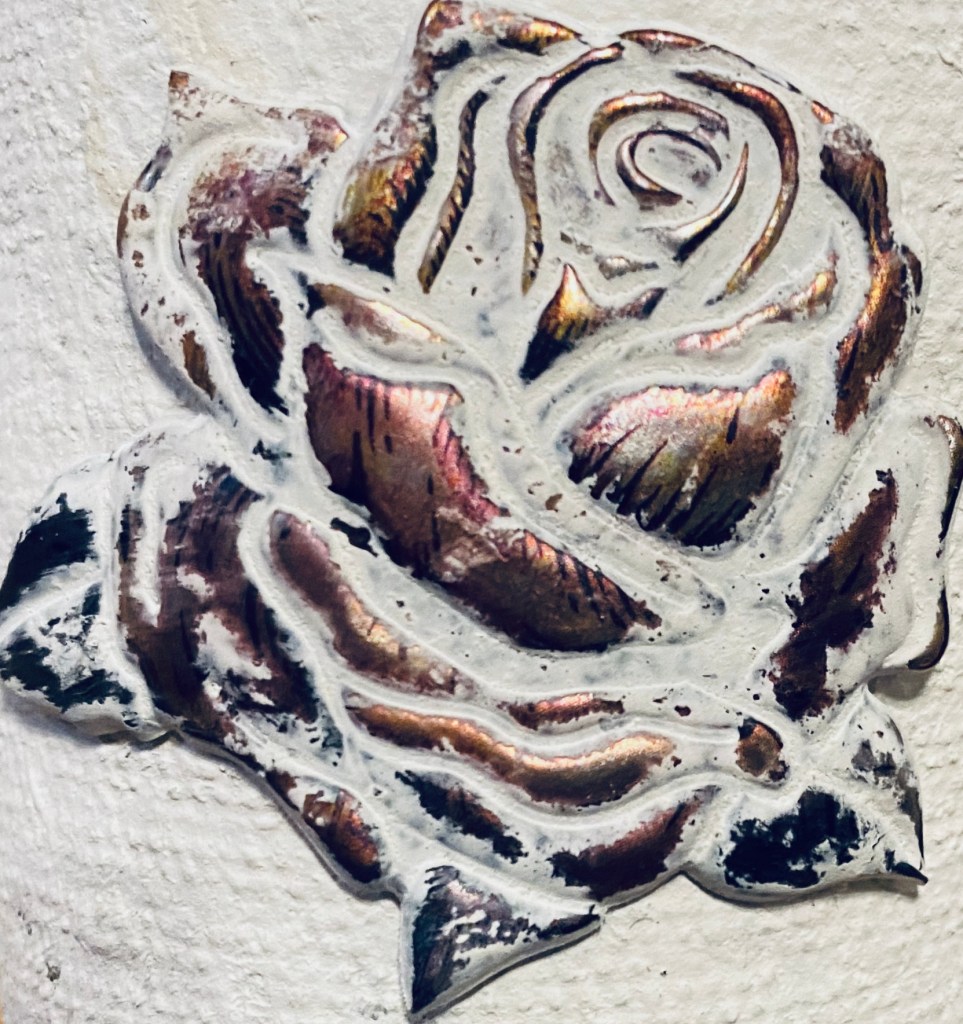
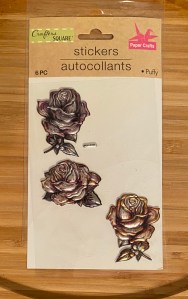
So I painted some peat pots and tried out an idea I’ve had since I bought some plastic puffy stickers at Dollar Tree. My thought was I could glue the rose stickers on, paint over them, then distress them. They had a metallic finish on them and so I was hoping the metallic finish would come through, and Oh….yes it did!!! I found these at Dollar Tree. I also found keys and butterflies and now can’t wait to use them, too..
I used a fast drying glue called Quick Hold. It is made by E6000 but sets up much quicker. It sets in about 45 de ones and cures within 4-6 hours. It has been working great on almost everything I’ve used it on. It was holding well on these attaching to the peat pot but they were a little stiff and the ends kept popping up. I wasn’t concerned as I thought I’d reglue them after I painted over them.
I then painted over them and used a mini heat gun to dry them. An amazing thing happened. The heat must have softened the plastic and did something to the glue (possibly reactivating it) because I was able to easily push down and press them for a few seconds and they stayed put! Not sure why or how, but they lay down now. Just fine!
Then I took a damp towel and rubbed away the paint on the raised part of the roses…..and there was the metallic finish coming to life right before my eyes. To really enhance it I rubbed a bit of clear wax over it and Wow! As you can see in the photo above, my idea worked! I’m so happy!
I could do snow days every day (for awhile anyway. Lol)