Decoupaged Slippers – Wow!

Materials used

I can’t believe it’s been so long since I’ve posted anything. I have been busy creating, though, so I will share my Instagram page at the end so you can see what I’ve been up to. Many of the posts explain the process I used when creating my projects.

But today, I actually have pics of the steps I took to make these awesome slippers. So, sit back and enjoy. This was so much fun to do!

Early this morning I happened on a Pinterest post that showed a pair of slippers similar to ones I just purchased from Temu and how the crafter decoupaged them with napkins. Of course, I had to try it and am so glad I did!

Bathroom slippers from Temu

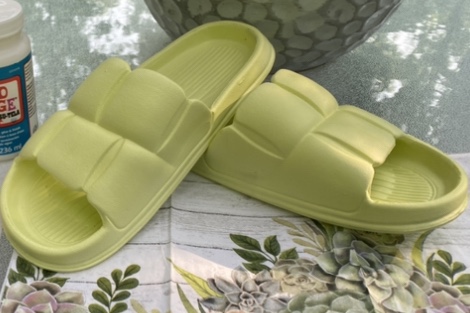
I apologize to the Pinterest crafter. I was in such a hurry to do this, I forgot to save the post and now I can’t find it again. Sorry, original crafter. She actually cut the napkins into small pieces and decoupaged all areas of the napkin. I decided just to use one large piece across the top and sides.

I had purchased this pair of slippers from Temu. There were a very bright greenish yellow color and I wasn’t sure I liked the color until ….. I added the napkin to them. Wow!

One piece of the napkin covered the top and sides

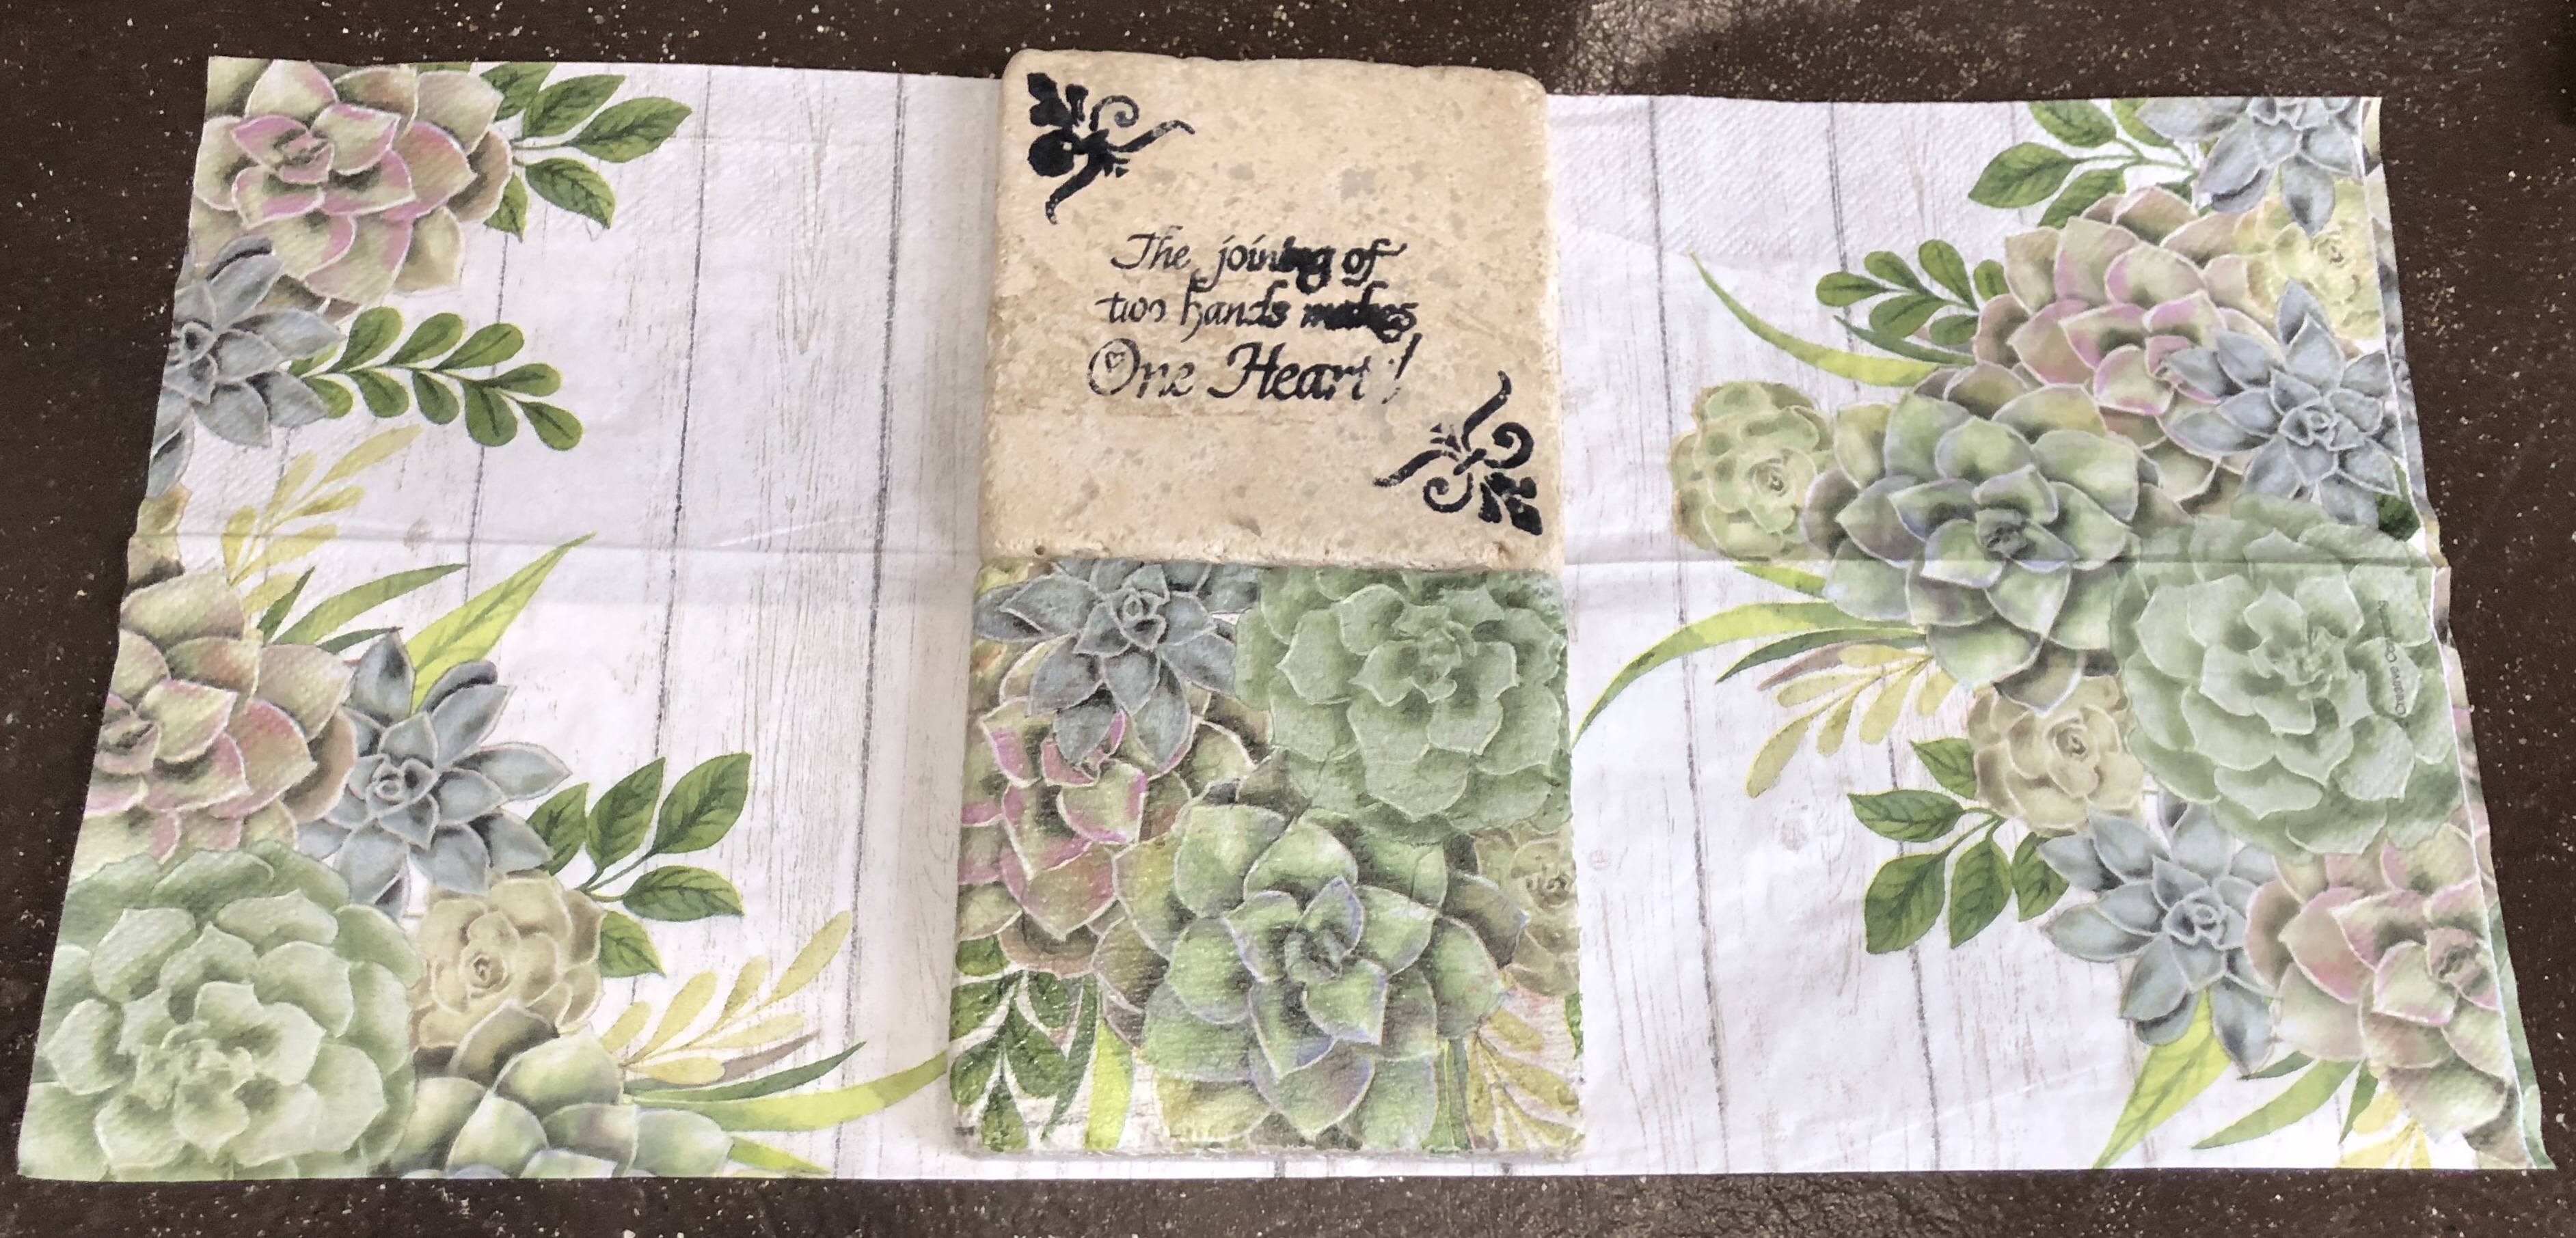
Step 1. You must remove all the extra layers of the napkin. This one happened to have 2 extra layers. You only use the layer with the image. I cut around the image part of the napkin: I cut around all the succulents and greenery of the napkin and then took the other end of the napkin and cut it into small pieces.

The napkin laying across the top of the slipper.

Step 2: Once I laid the large part of the napkin over the slipper, I knew I wanted to only use it so I didn’t use the small pieces except to fill in on the sides where needed. I used a bit of water to wet down around the areas I didn’t want and tore that away, leaving only what I was going to decoupage.

Adding Mod Podge to the slipper

Step 3: The original crafter used Mod Podge for fabric. I’m not sure you’d have to use that, but I happened to have the fabric one so that’s what I used. Mine has been around awhile and was pretty thick, so I had a bowl of water to dip my brush in first and that thinned it out just enough. I applied the Mod Podge to the whole top and sides of the slipper. (I did the second slipper with another identical napkin cut out and placed it in the same position so they would match.)

Step 3: I laid the napkin where I wanted it, added more Mod Podge to my brush, and started smoothing the napkins down, getting into all the grooves and around the edges.

Step 4: Once the Mod Podge was dry, I gave it two more coats to seal the napkin well. When the final coat was dry, I applied a coat of water based polyurethane just for a bit more protection.

UPDATE: Just to make sure I would give it 2 coats of the sealer and even spray it with an outdoor spray sealer.

Close up

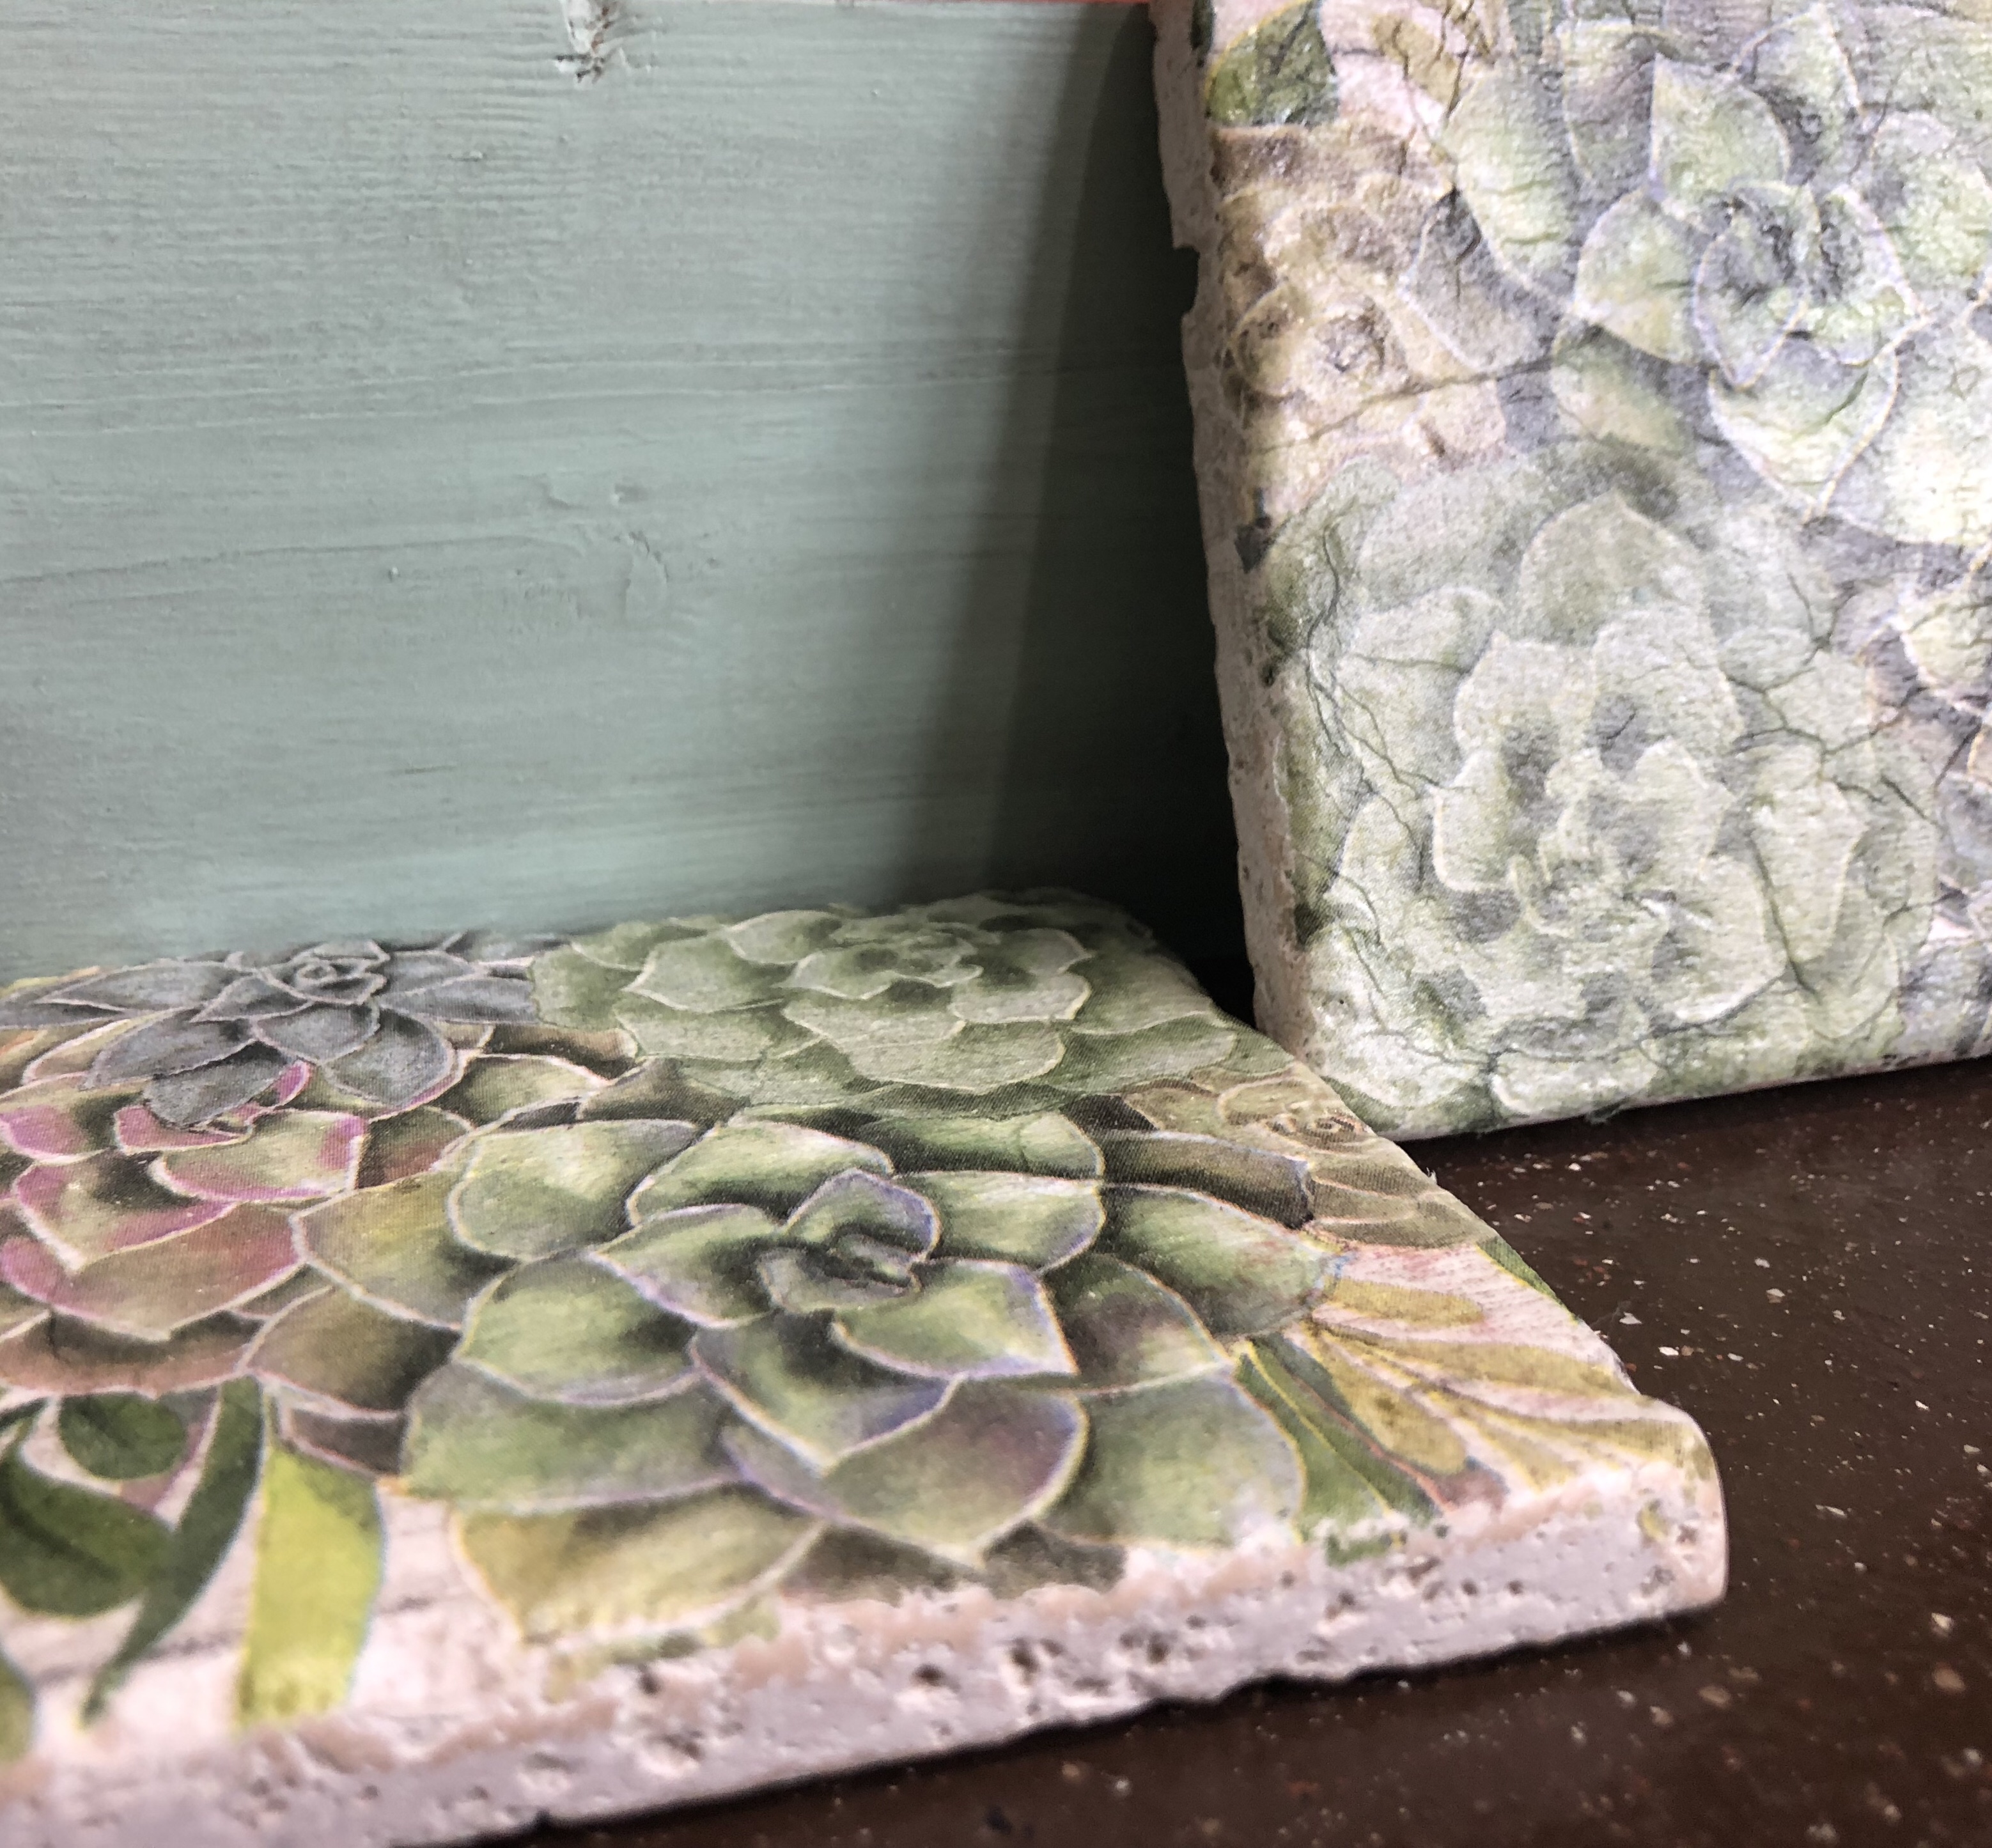
This close up shows how the raised puffiness of the slipper almost gives the napkin a 3D look.

I love how they turned out! It is amazing how the napkin color took on the color of the slippers. They truly are beautiful! The original crafter said hers were holding up well. These slippers are really not meant for shopping trips, etc. but I think you could even if you get caught in a rainstorm. They are perfect for pool shoes or wearing around the house, inside or out.

Projects in January – 1st through the 20th, 2023

Still busy creating so I haven’t had time to post how we did some of these projects. Here they are, though, for inspiration for you.

This is a vignette I put together for winter decor. I had a Christmas transfer on one side of this pitcher and a winter one on the other. I turned it around and added some branches from a tree in my yard then added lights. I made the snowman last year and added the Winter sign I’ve had for a long time.

Danny cut this cute gnome out of a scrap piece of plywood, drew the details and painted and sealed him. He added some stakes so we can put him in the pot’s dirt.

I crocheted another bunch of hats to sell to a friend’s daughter. She adds them to the baskets of herbal remedies she sells.

And more crochet… which begat more crochet that I’m still working on. I made a couple of gnome towel rings. I had made some boho type ones for a couple of friends and then decided to find a pattern for making more. I’ve sold 10 so far of them.

And then I saw a post for a group called Random Acts of Crochet Kindness and cute little worry worms to make and spread around town so I had to make some of those. I plan on making more later on. But I figured out a way to make a cute Valentine one for kids and ended up with 86 orders. Still working on those.

Then my cousin sent me a video of someone crocheting a woven heart. I had to find the tutorial and make one. Then I saw a video on making a heart with wine corks so I had to do that, too. And then someone else told me about decoupaging on a candle with wax paper. Yep! I had to do that, too. I’ve used the hot iron method with parchment paper before, but not on a candle. Worked like a charm. And the little tag- I wrote love on it with a s or h marker and burned it and then painted it. That worked, too.

Whew! I’m getting tired just typing all we’ve done so far this month. But wait! There’s more!

And then came a couple of jewelry boxes. I have a huge stash of them but haven’t painted any in awhile. These sold quickly so plan on painting ring more soon.

I saw an idea for a date night jar on Pinterest. This is my version. Jar from Dollar Tree. I painted the glass lid. If you spray glass with a clear sealer first, chalk paint will adhere well.

I don’t have staged pics of this beautiful library table. It is going to one of our booths this week. Danny sanded the top. I stained it with a w at teenaged stain. It has five coats of Varathane Crystal Clear Water based polyurethane in matte finish. The rest is painted with our Missouri Limestone Paint Company “Cupboard Green” and sealed. I love how it turned out.

Danny created this white washed hanging rack from a vintage ladder.

Another project is this gorgeous half table console. This is a long description but hopefully will inspire those who like boho with some ideas. I think this is one of my most favorite projects ever. I had so much fun with it.

We’ve had this table (and matching lamps) since soon after we built our house in 1985. Holy cow! That was 38 years ago!! The other day, I decided we didn’t need them anymore so decided to paint them. Danny suggested painting the top with our Missouri Limestone Paint Company “Bourbon Street”, a dark teal color. I thought Rustoleum metallic gold on the metal legs would look good with the teal. I also painted the metal on the lamps with it. They all turned out gorgeous!

Then, when I showed the table to a friend, she said I should style it as a boho piece. I agreed.

So pretty much all day today, I have been creating items for it to sell from things I have in my supplies:

1) Picture frame: gifted by a neighbor- funny thing, my mom had our pictures in frames almost exactly like this growing up. The back is velvet. It can still stand up, but it makes a great tray, too. This frame is old!
2) This awesome fabric which was once valances with bead trim, was gifted by a friend. I’ve already used it as a curtain, as you can see, to hide Danny’s power tools and to create a little boho hanging. Lol I simply put a piece of the fabric under the glass of the picture frame for an instant boho tray!
3) A bowl of boho goodness. I had all the ingredients including this cute wood bowl I thrifted. I just added the beads around it for a true boho style. It took me a good bit to figure out how to do it to look finished, then decided to rip it out (it was sewn in with nylon thread). But when I got it all out, it was attached to this beautiful piece of fabric tape in this awesome color! I just hot glued it around the bowl!
4) Picture frame: gifted by the same neighbor: I did a line drawing on the glass of similar leaves in the table and put a piece of scrapbook paper behind it in a coordinating color and now have a boho print!
5) Bottle of peacock feathers: the bottle I think came with fragrance oil and bamboo sticks at some point. I did paint the lid that sits around it metallic gold this morning. I’m pretty sure I picked up the peacock feathers at a yard sale.

And then, we came up with a few more boho accessories.

And when we found this mirror shopping, we knew we had to get it! Danny painstakingly covered all the mirrors. I painted it metallic gold and then he removed all the tape. I cleaned it and….it is just stunning!

We also found this cute little kid’s drawing table. We added a couple of stools to it and took it to our booth at Sweet Repeats in Sullivan.

The wood base on this candle holder is a bed riser I turned upside down and painted. the dish for the candle is a vintage ashtray.

Coming up…. Danny is working on a new project. We are busy figuring out a way to make a table top for it. Stay tuned!

You probably wouldn’t want to use both lamps on the table, but maybe in the same room would be perfect!

A “Skeleton” Key Rack

Halloween will soon be here. I brought supplies along with me to my babysitting gig and this morning I made this skeleton key holder. I have some cool skeleton keys to hang from it when I get home. I think I might have gotten the chalkboard hanger at either Dollar Tree, Dollar General, or Walmart. I’ve had it awhile. The skeleton napkin came from Dollar Tree.

I tore away the napkin around the head and decoupaged it on using Varathane water based polyurethane in a matte finish. Then put a coat on top and on the whole chalkboard area. I did not paint it a light color first. I wanted it to be dark and gloomy and full of wrinkles.

A skeleton key rack needs skeleton keys. 🙂

The items staged with it are Halloween decorations I made for them last year. The bottles were a brand of hot sauce my neighbors used a lot and gave the empties to me. Lol I found the labels online and how to make the bottles look old and dirty. Visit my blog post below to learn how to make these potion bottles.

https://sharsumpaint.com/?s=Potion+bottles&submit=Search

Dollar Tree Napkin Two Ways

Played with the super pretty Dollar Tree napkins today. I made a riser from a pumpkin cut out. For this I painted the board white with slight distressing on the edges. It creates a completely different look than when applying it to raw wood. The other items were on the raw wood, with some distressing done using antique wax.

Love the colors. And they have a dish towel to match! Not to mention glasses, paper plates, and a dish drying pad.

Decoupage Napkins in a Faux Galvanized Tin Holder

Here are the steps I took to create the coasters:

1. I purchased these stone tiles as part of a package at Home Depot. I cleaned the them thoroughly.

2. I usually paint the tops and sides with our Missouri Limestone Paint Company chalk-style paint in “January” as white paint will really help the print stand out. But these coasters were already white on one side so I skipped this step.

3. I chose areas of the napkin that would look good centered on the tiles and cut them a little bigger than the coaster. I peeled off the two white layers of the napkin so that I was left with only the printed part. Sometimes napkins will only have one white layer.

4. For the decoupage medium, I used Mod Podge on this set. I applied a layer over the white paint and while still wet I applied the napkin. I used a piece of plastic wrap to press the napkin into the stone, making sure I had no bubbles.this plastic wrap helps to keep the napkin from sticking to my fingers.

5. Once dry, I used 220 sandpaper to sand the edges.

6. I then used 2 coats of Rustoleum spray lacquer on the tops and sides to seal the napkin. Using lacquer will not reactivate the poly, so no bubbles formed.

I used a painting technique to create a faux galvanized tin look to a plain black coaster holder.

You can see how I did this technique in another blog post, found here.

I enjoyed doing this technique so much I have used it on a variety of items.

Upcycle a Stone Coaster with a Decoupaged Napkin

I ran across a set of four stone coasters in a thrift store one day. Someone had tried to stencil and had a fail with bleed through. Their loss was my gain so I bought them with the idea I could do something with them some day.

Update: these coasters were already made but a friend told me she gets the stone tile at Lowes and then adds felt pads to the bottom for coasters. 🙂

Today is that day. We are going to deliver this beautiful bistro set to its new owner this weekend (hopefully the snow stops soon), but we wrapped and loaded it before the snow started in case we can’t go until Sunday.

This is a repeat client and I wanted to have a little gift for her. As I am such a hoarder….I mean a person who is always prepared …… with supplies, I just happened to also have a package of napkins I purchased in a shop somewhere that I knew would look great with the color of paint I used, Missouri Limestone Paint Company Chalk-style paint “Clothesline”, one of my favorite colors.

Here are the steps I took to create two coasters for her that will look great on the stained table top. Sorry, I forgot to take pics of this part.

1. I cleaned the coasters thoroughly.

2. I painted the tops and sides (to cover the black stencil) white “January” color. The white paint will really help the print stand out.

3. While the paint dried, I cut out the flower area a little bigger than the coaster. I peeled off the two white layers of the napkin so that I was left with only the printed part.

4. For the decoupage medium, I did not use Modpodge. I used Varathane water-based Polyurethane. I find it works great for decoupage. I applied a layer over the white paint and while still wet I applied the napkin. I used a sponge dipped in the poly to press the napkin into the stone, making sure I had no bubbles.

5. Once dry, I used 220 sandpaper to sand the edges.

6. I then used 2 coats of Rustoleum spray lacquer on the tops and sides to seal the napkin. Using lacquer will not reactivate the poly, so no bubbles formed.

The coasters look beautiful! I think my client will be very happy with her gift.