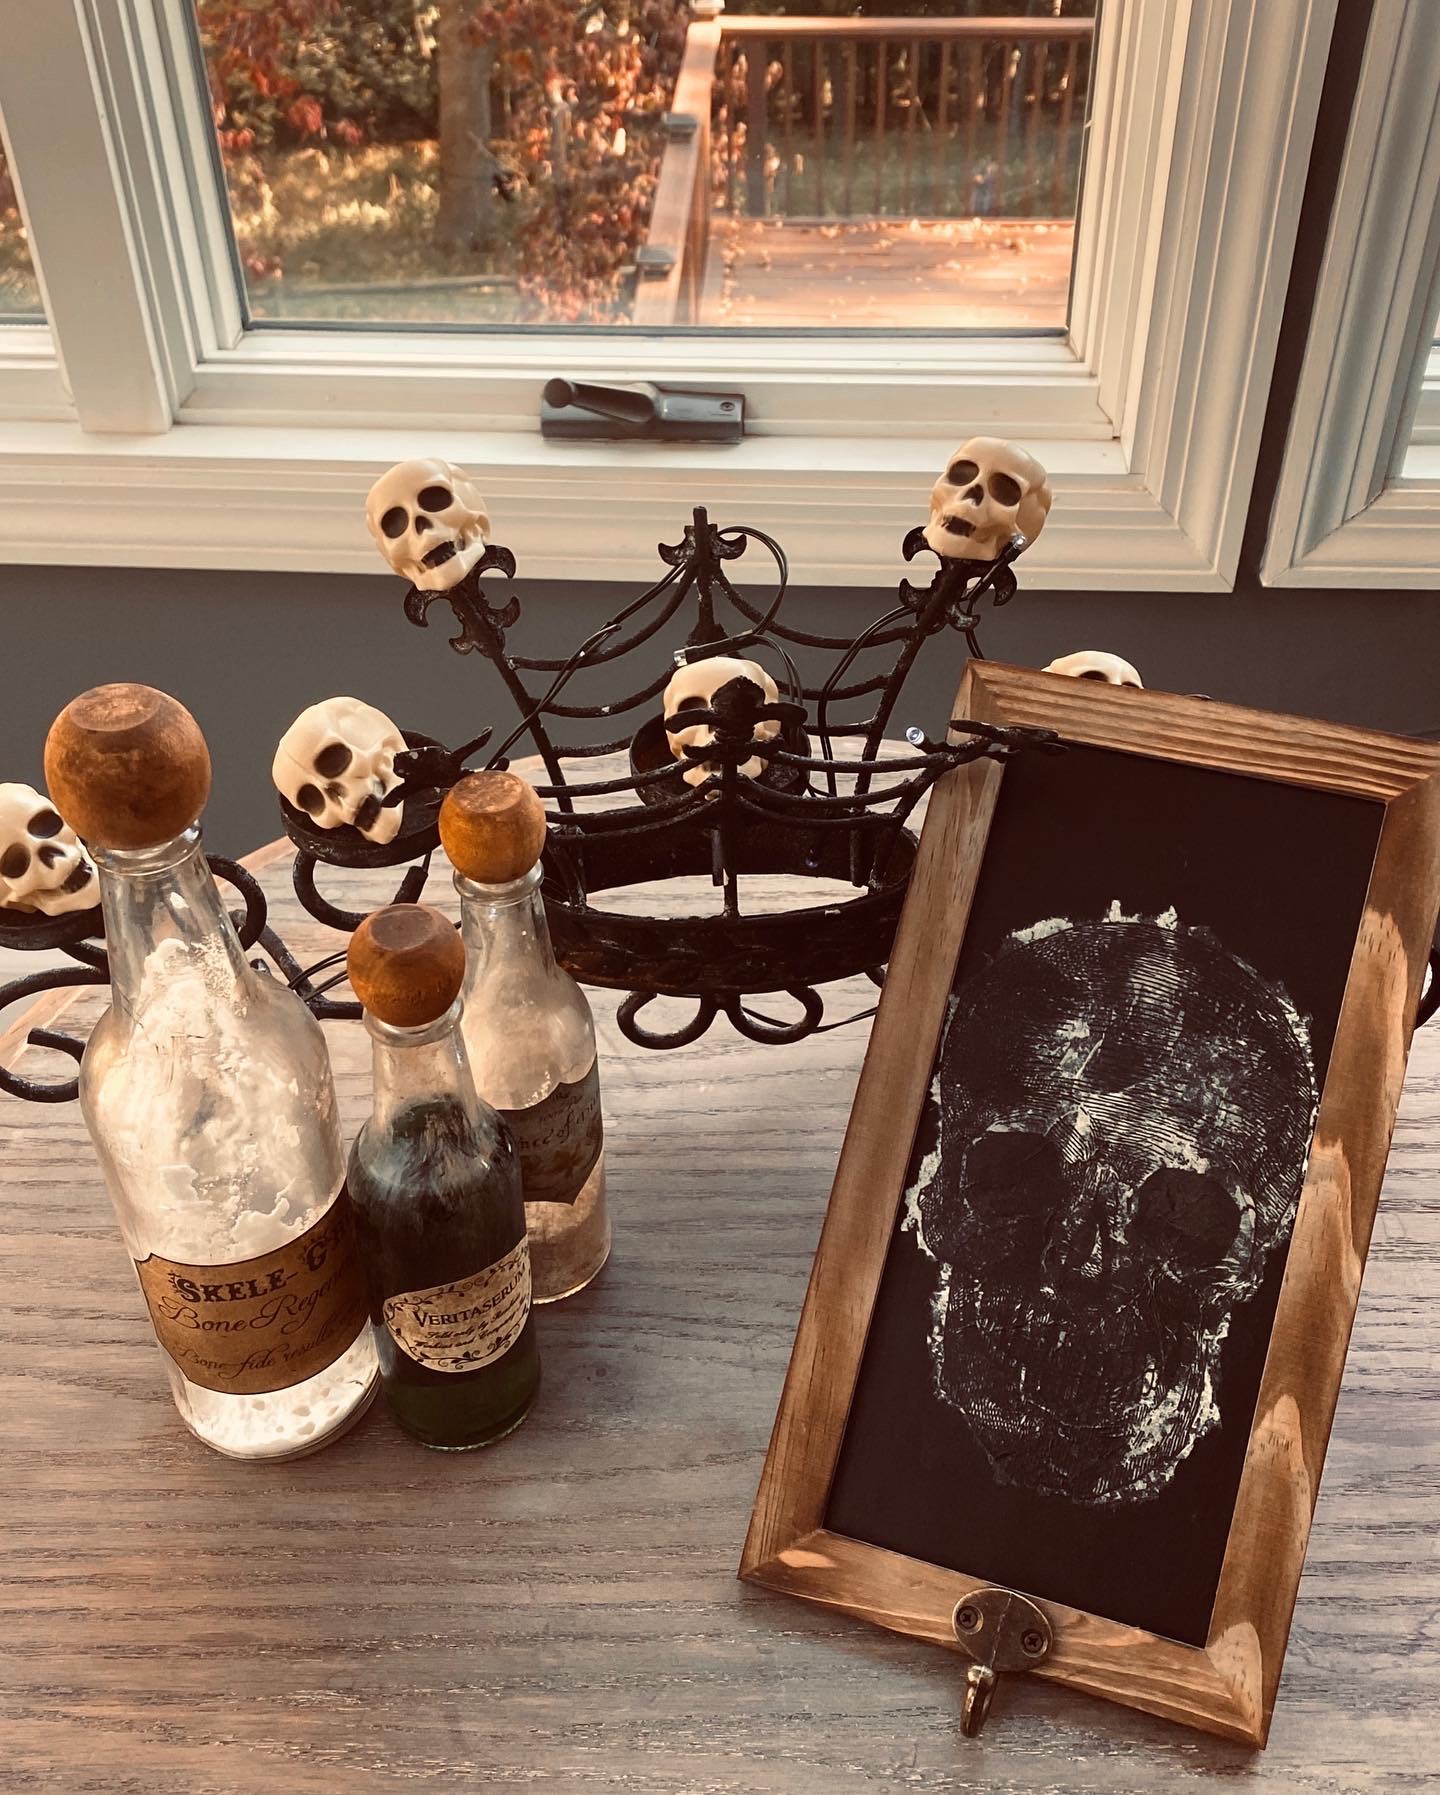
Halloween will soon be here. I brought supplies along with me to my babysitting gig and this morning I made this skeleton key holder. I have some cool skeleton keys to hang from it when I get home. I think I might have gotten the chalkboard hanger at either Dollar Tree, Dollar General, or Walmart. I’ve had it awhile. The skeleton napkin came from Dollar Tree.
I tore away the napkin around the head and decoupaged it on using Varathane water based polyurethane in a matte finish. Then put a coat on top and on the whole chalkboard area. I did not paint it a light color first. I wanted it to be dark and gloomy and full of wrinkles.
A skeleton key rack needs skeleton keys. 🙂
The items staged with it are Halloween decorations I made for them last year. The bottles were a brand of hot sauce my neighbors used a lot and gave the empties to me. Lol I found the labels online and how to make the bottles look old and dirty. Visit my blog post below to learn how to make these potion bottles.
For some reason I’m on a roll with crafting….oh wait…. I know why. I should be cleaning.
It’s my neighbor’s fault. They are moving and not wanting to take some things with them, so they have been gifting and selling things to us. My hallway is full of their treasures.
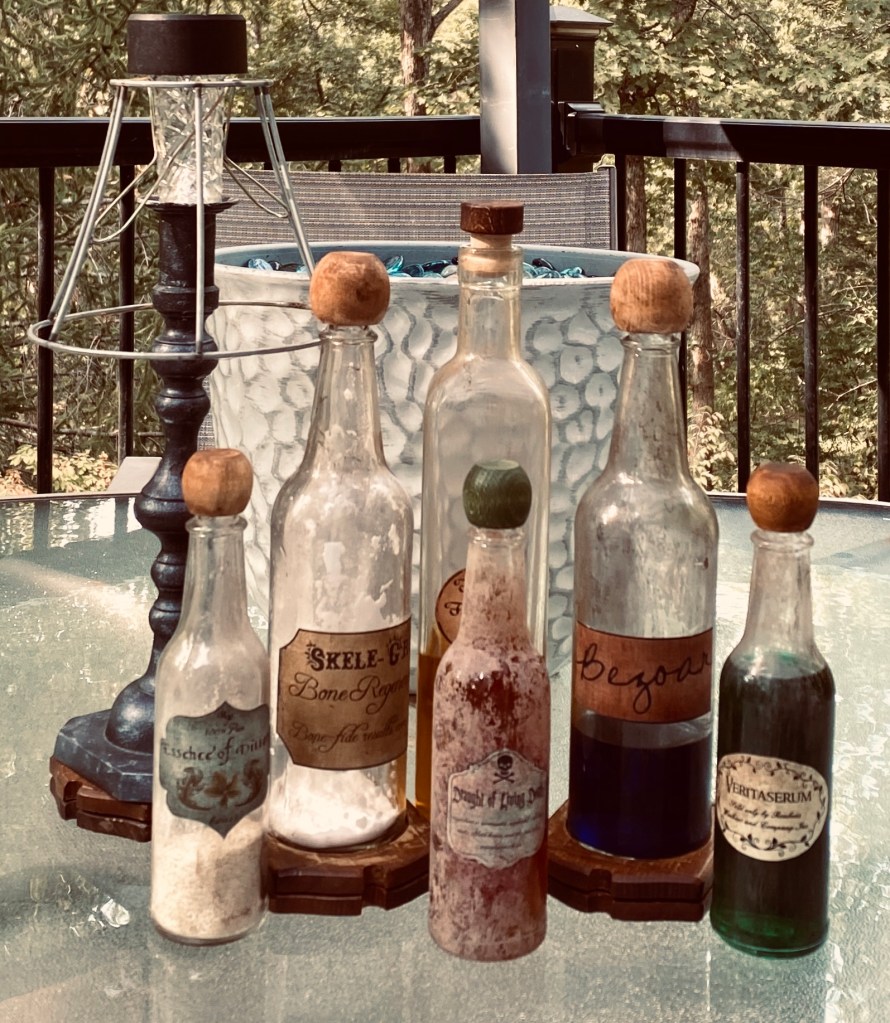
Today, I am clearing a small amount out by making these cool potion bottles. Believe me I have probably another dozen bottle. I was inspired by some I saw on Pinterest. They even had printable labels to download. I saved that post and pretty much followed the tutorial there. https://overthebigmoon.com/halloween-decor-harry-potter-potion-bottles-free-printable/
And then….my neighbors came bearing a gift of about a dozen or so hot sauce bottles they saved. They really like this hot sauce. I knew right away those would make awesome potion bottles. So, of course, I had to make one. Just one…to see how it would look.
I loved how it turned out so much, I knew I had to make a few more. So, I did. I also used one of the other bottles they had given me. I think it might have been an olive Oil jar.
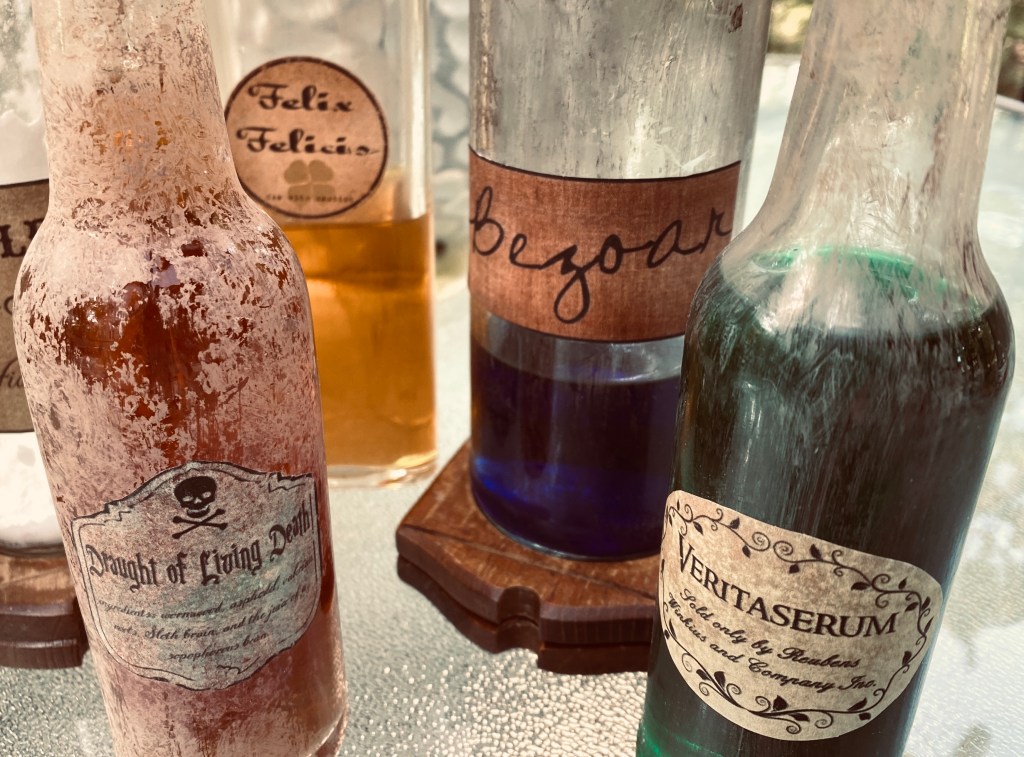
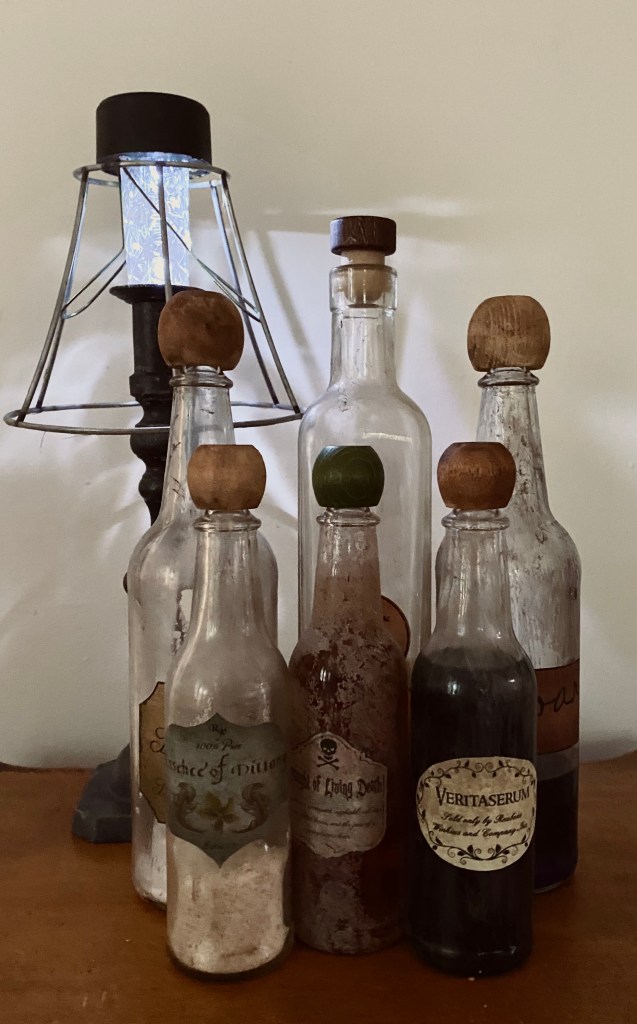
Here’s my first set of Harry Potter-Style Potions. I used various colors of our Missouri Limestone Paint Company chalk-style paint to get the look of dirty glass. I filled them with colored water, weak tea, Cream of Wheat, and Baking Soda. 🙂 One stopper was already green. The others I stained darker.
This set is available for porch pickup now or will be in one of my booths closer to Halloween.
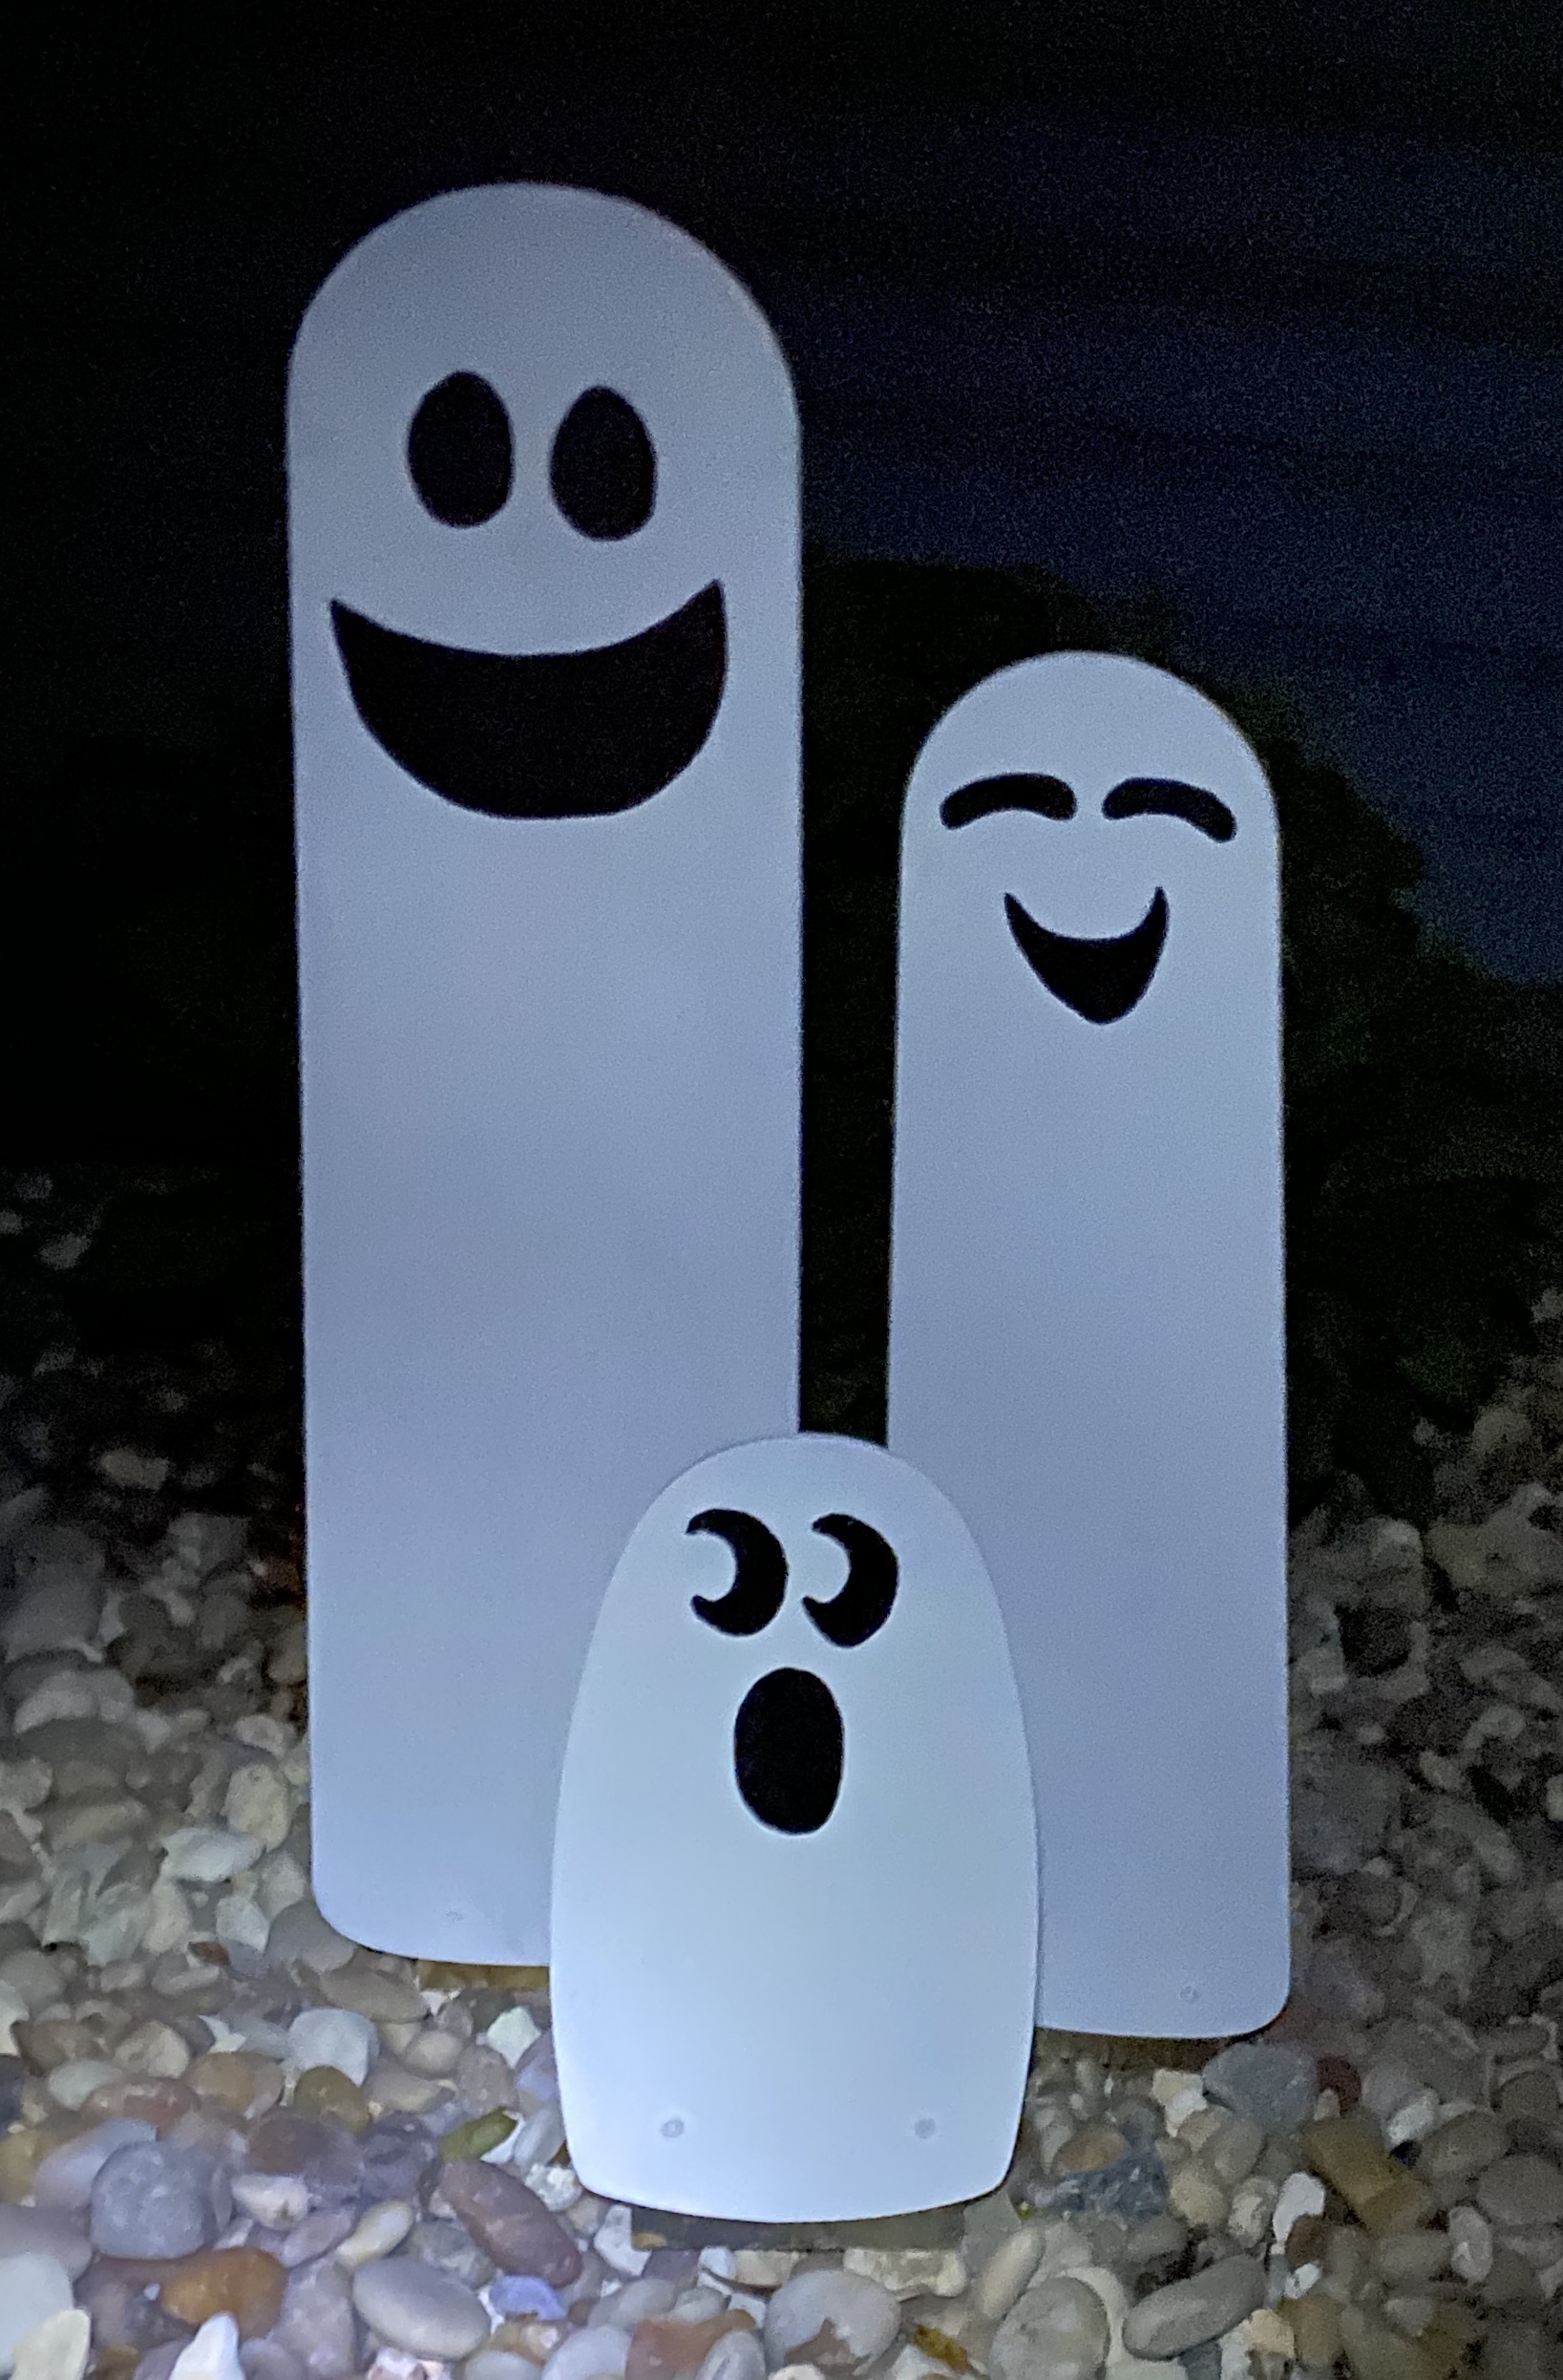
Meet Gus, Gertie, and Georgie, my latest project. They are a happy garden ghost family….not scary at all!
Boooo!!!
Who knew when I bought a small ceiling fan with short blades at a yard sale several years ago, one of the blades would become Georgie. My original intent was to paint the blades for my grandson’s bedroom with a bunk bed, but never got around to doing that. So Georgie and his three friends have been patiently waiting for some action.
Then, along comes our neighbors doing some remodeling, and gifts us with a ceiling fan and a ceiling fan with lights. I’ve already started making lanterns with the light covers, and am now the proud owner of two different sizes of fan blades from this gift. 🤗
So what’s a crafter to do? And then it hit me….. make some spooky? families for the yard. I put them up against a door and Yes! I could see a dad, mom, and kid. Can’t you?
1. Prep – I cleaned them thoroughly with Windex, my go to cleaner.
2. I filled in the holes with KwikWood, my favorite wood repair putty, just so I’d have more of a finished look when finished. After all, who wants a ghost with holes in his head?
3. Once the filler was dry, I sanded it and scuffed up the blades front and back with 220 sandpaper.
5. Next, I free hand drew their faces on a piece of card stock and cut them out to use as stencils. I traced the faces onto the blades with a pencil, then used a black oil-based Sharpie paint pen to color them in.
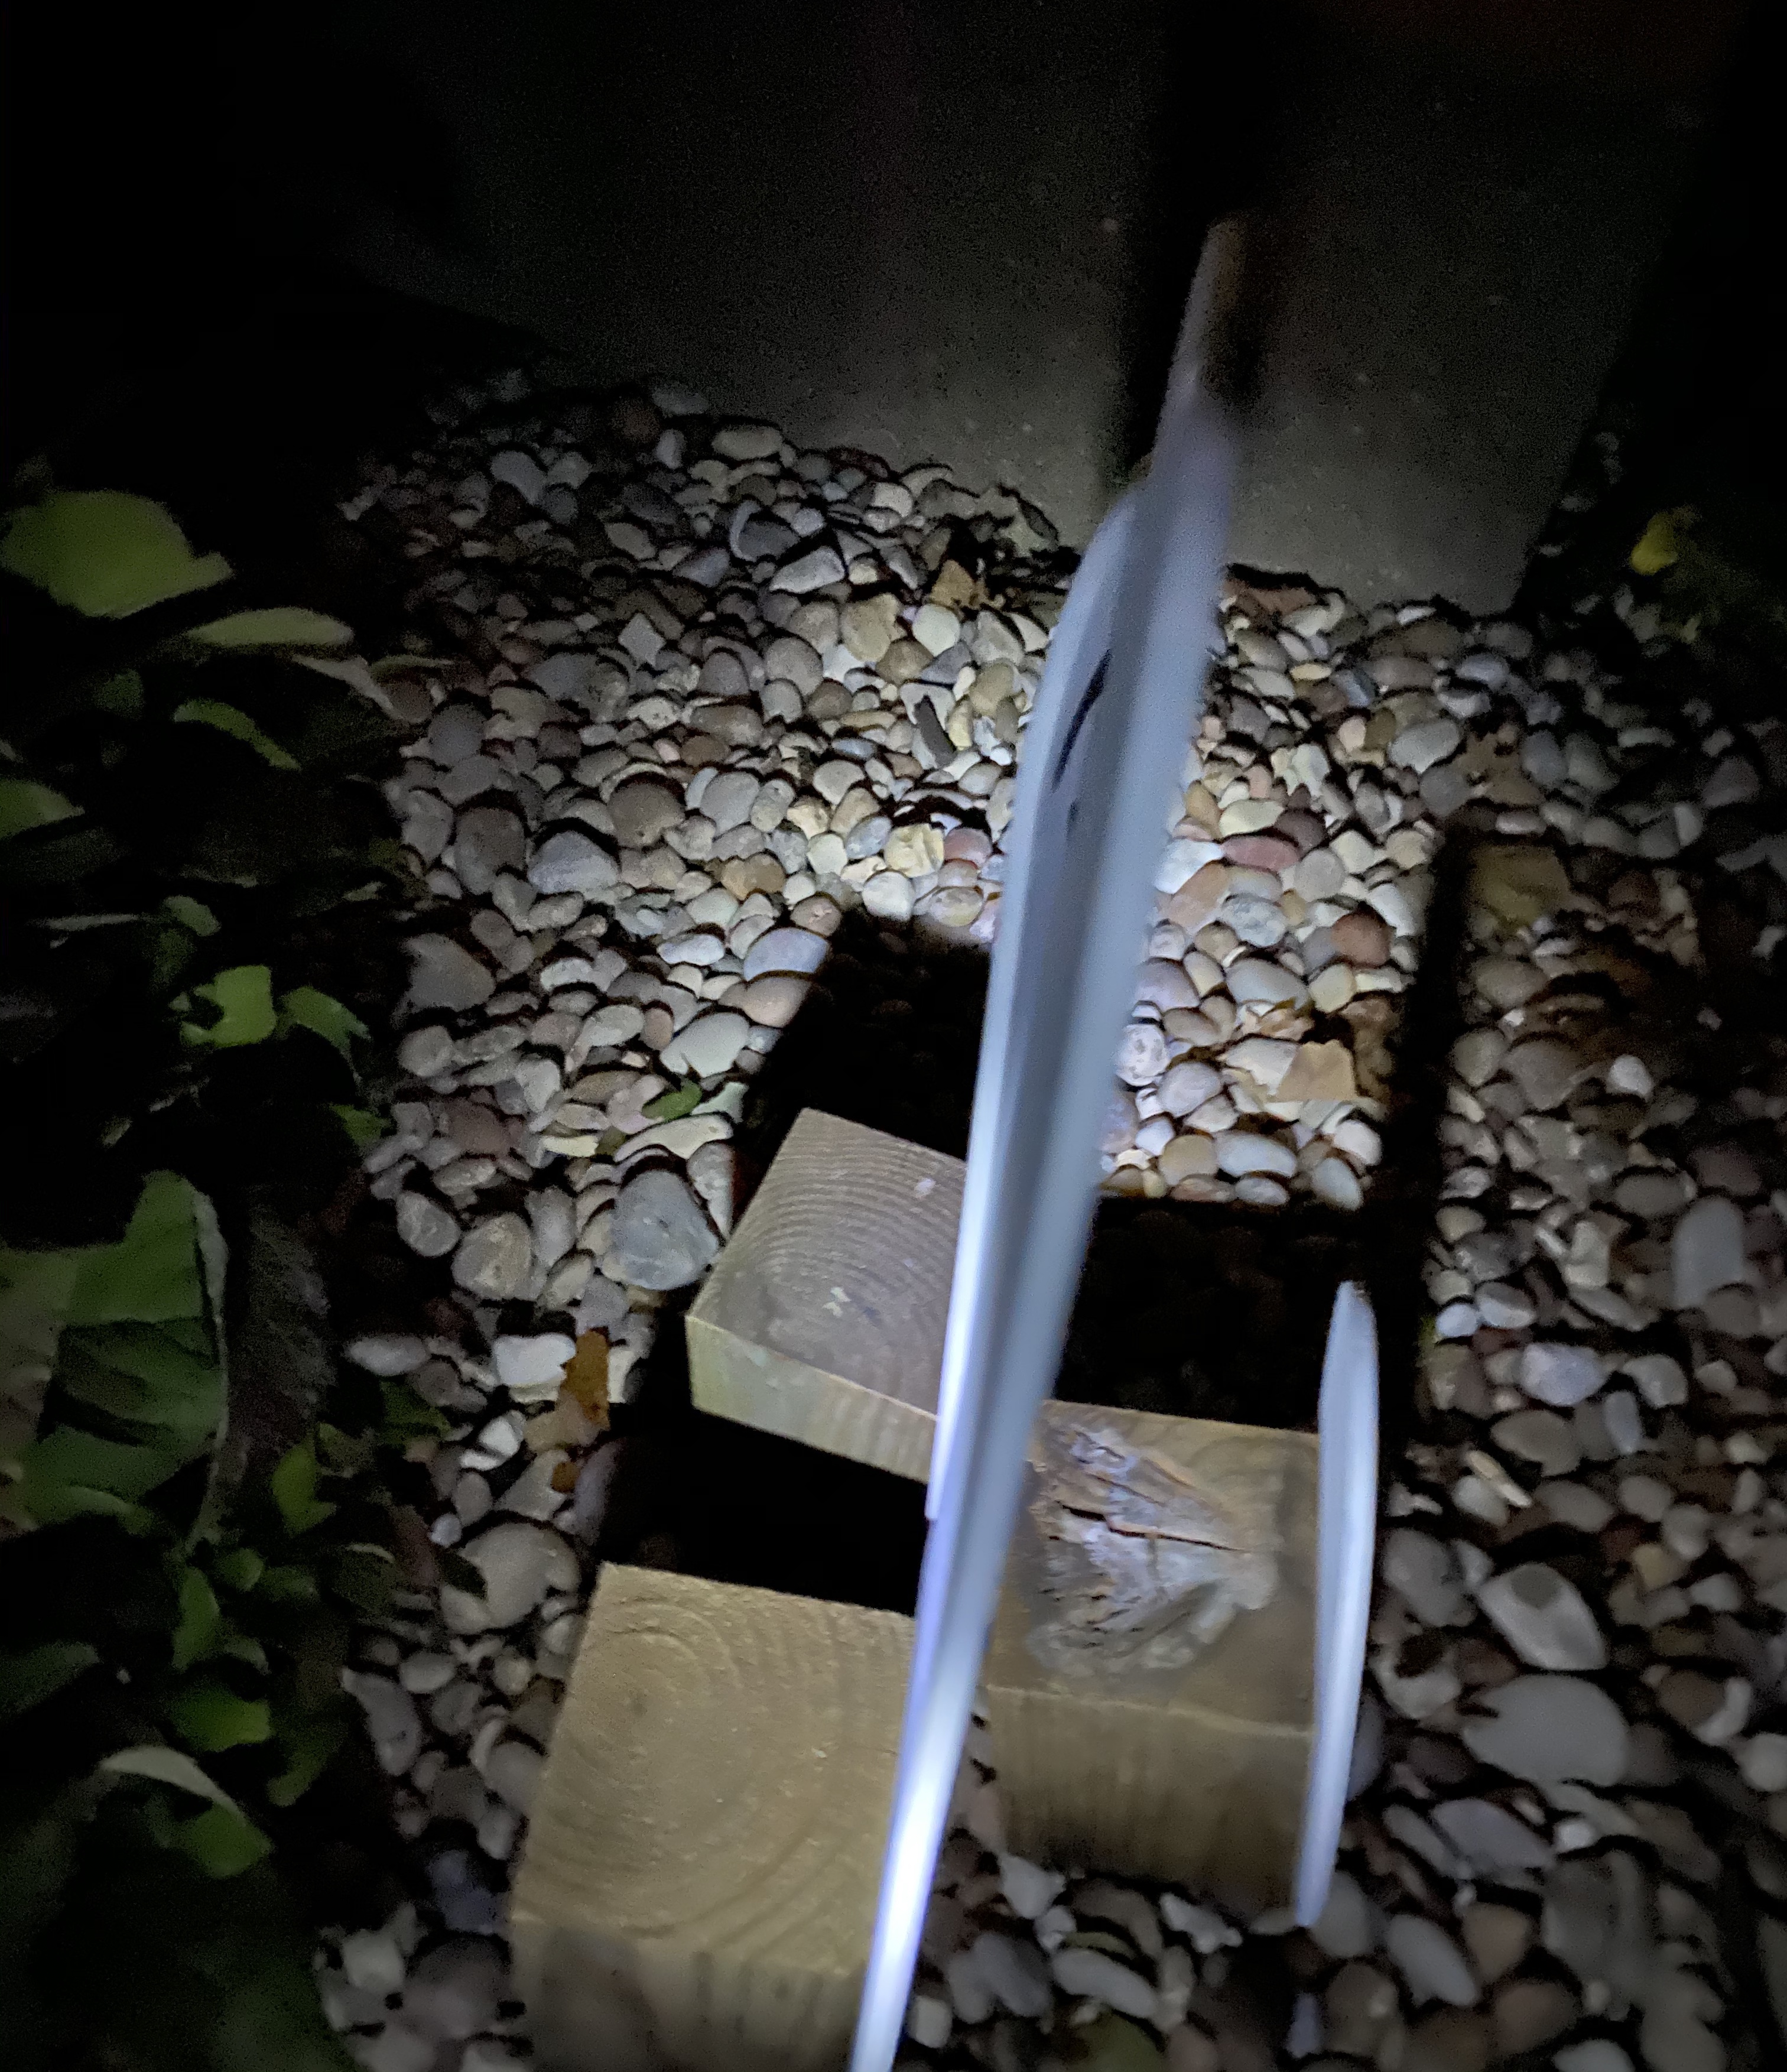
6. I didn’t want them falling over in the garden and getting hurt so Danny found 3 4×4” blocks about 4” tall and screwed them to the wood blocks. These happened to be left over pieces of treated lumber he had stored away in the shed. He left a bit of the treated lumber showing just so the fan blade would be resting on the ground.
7. My final step is spraying them with Varathane SPAR Urethane to protect them from the weather. Fan blades are a manufactured wood product (MDF). Even though they won’t be out in the weather for a long period, this will help keep them nice for many Halloweens to come.
And here they are again! They seem so happy to be in the garden. I’m a fan! How about you? 🥰
Happy Halloween!
I’m now making two more families. These are for my kids. The first set is complete and has been delivered. We have Dad, Mom, sister, brother, and can’t forget the family dog.
Getting started!
Our granddaughter helped screw each one to a block of wood so they would stand up without falling over. A girl is never too young to learn to use a power tool.
We put mom and dad on a bit of a slant toward the kids. And here they are!
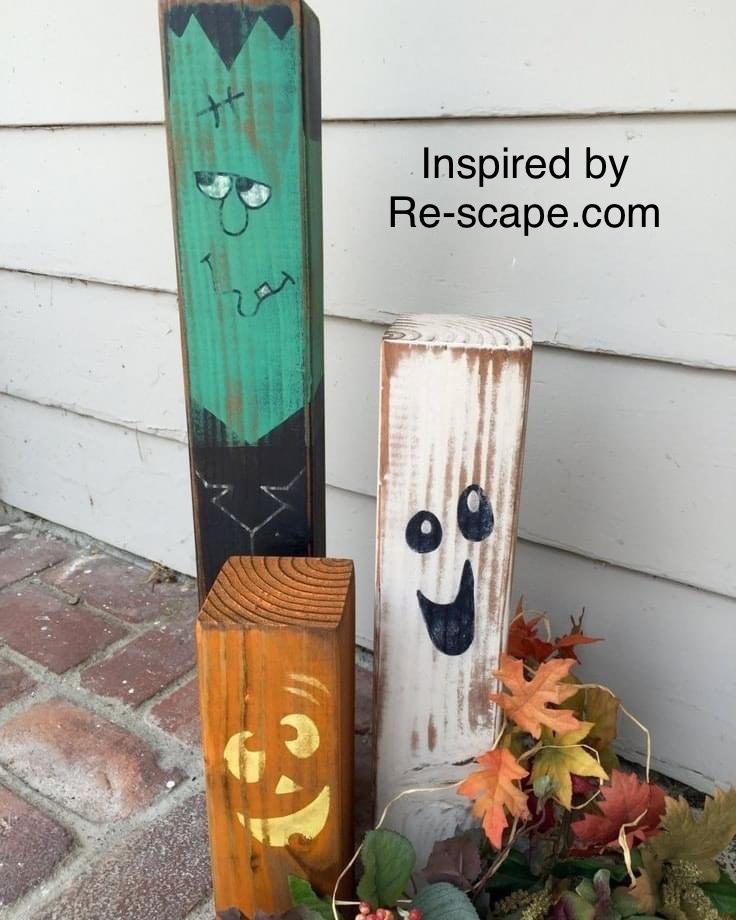
Today is September 30th and it is a beautiful Fall day in Missouri ….. the perfect day to make a Halloween decoration for my Halloween Deck Display “Tree”. See my summer garden and fall displays below.
I used our Missouri Limestone Paint Company chalk-style paint (colors: Crisp Kale, Coal Shovel, January, and Harvest Pumpkin) and Sharpie oil paint pens. I had to have an inspiration piece to look at or I wouldn’t have been able to draw the faces. This is the inspiration photo I saw that was posted by https://www.facebook.com/ReScapedotcom/ I found the artist and they are for sale on Etsy for $74.95. https://pin.it/7DjaZfV
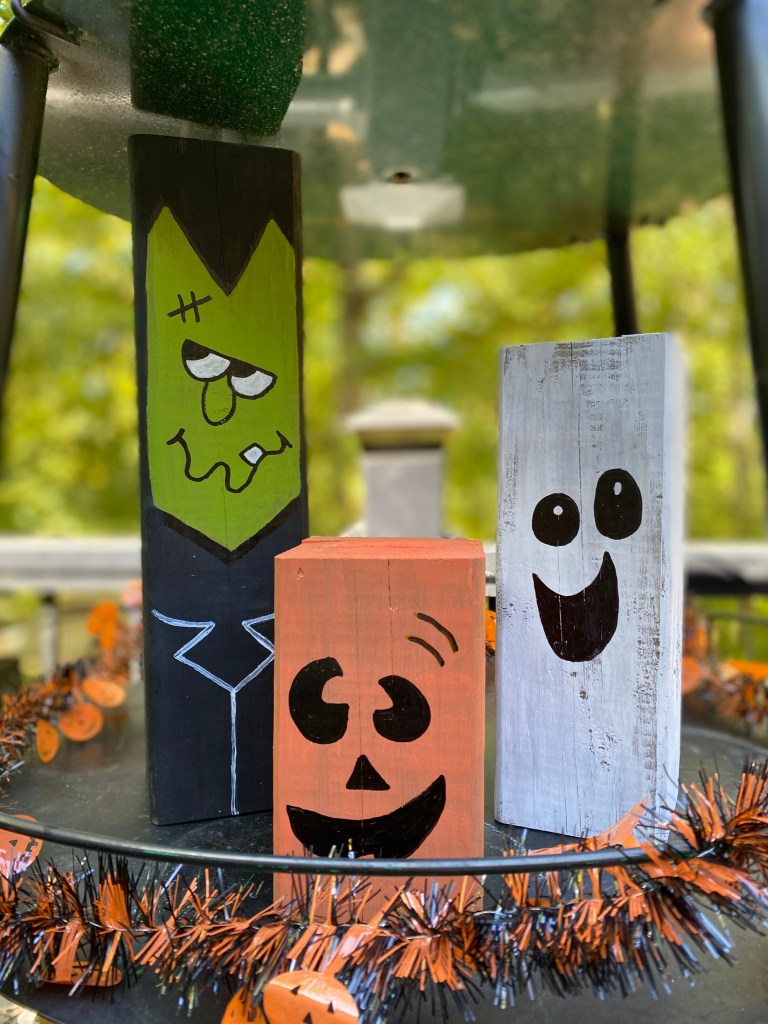
I used the photo above to help guide me when drawing the faces on mine below. FYI – if I can do this anyone can. We sell our paint in 2 oz ($3.99) containers that are perfect for projects like this as well as other sizes. Message me if interested in a porch pickup of paint. We can also ship.
Here’s my version of these cute and easy to make blocks.
And now here is my Halloween Deck Display “Tree”.
I used a silver tray and glued to a base. The painted and distressed it and the candelabra. The skeleton head are from Dollar Tree.4×4 blocks are 15”, 10”x and 6” tall.Dollar Tree idea I saw.This pumpkin’s face is a vinyl cut out.It didn’t take long to turn off the motion detector sounds on these Dollar Tree finds.Fall DisplaySummer Deck Garden