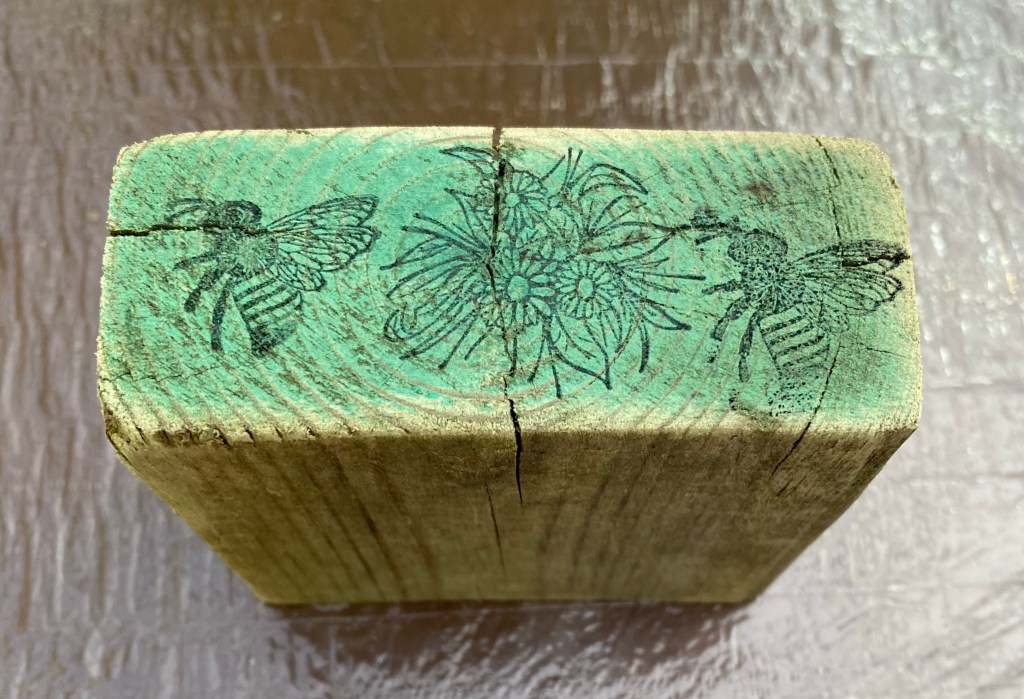
I’ve been seeing risers made from blocks of scrap wood so thought I’d make one, too. My 3.5” x 1.5” square block of scrap wood had one end that was painted green. I didn’t want to cut it off so I just made it the front of my project.
I did sand the block well, including the green part and that lightened it up a bit.
I like to work on this lazy susan. I bought 100 disposable shower caps on Amazon and stretched one over the lazy susan to protect it. These work great and I just throw them away when finished.
I gathered up my supplies and got started.
Step 1: I used black ink and stamped flowers and bees on the green side of my block. I put it aside to dry.
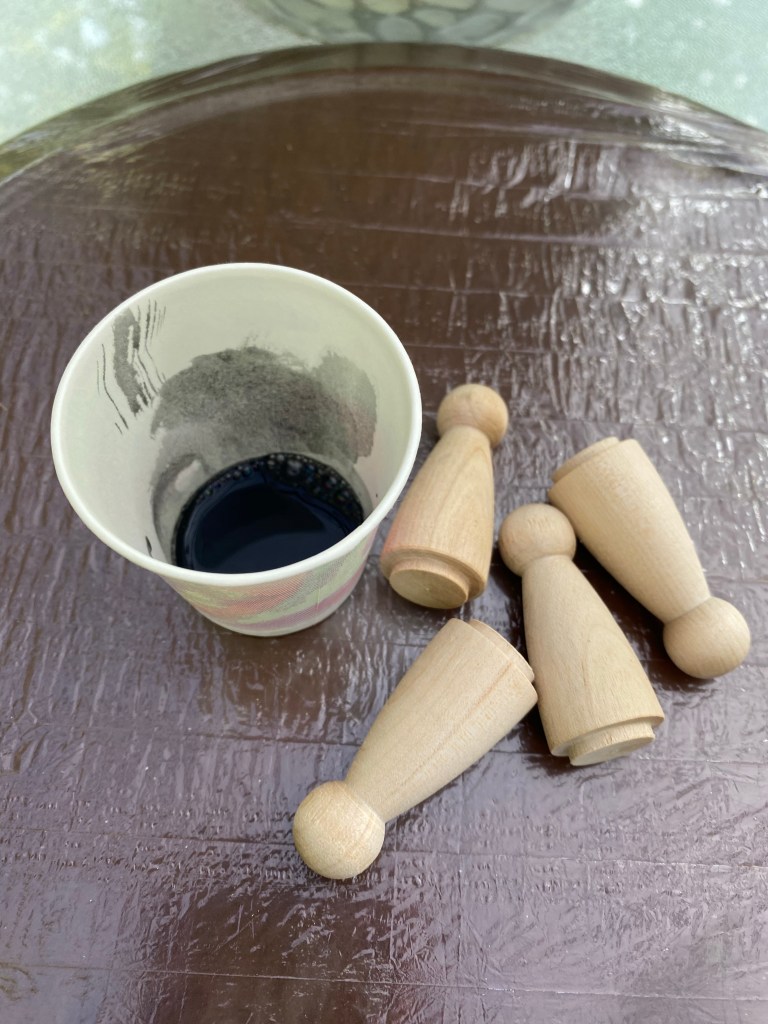
Step 2: I purchased wood peg dolls from Amazon to use as feet. I watered down a bit of our Missouri Limestone Paint Company chalk-style paint (Coal Shovel) and covered the feet I would be attaching to the block. This will give them a rustic look similar to the block. I wiped the excess away and put them aside to dry.
Step 3: I wrapped the block with a paper towel only leaving the green inked part exposed. I sprayed that part with the Krylon spray matte sealer. I believe I got it at Lowes. This sealed the ink to make sure it wouldn’t smear when I applied wax to it later.
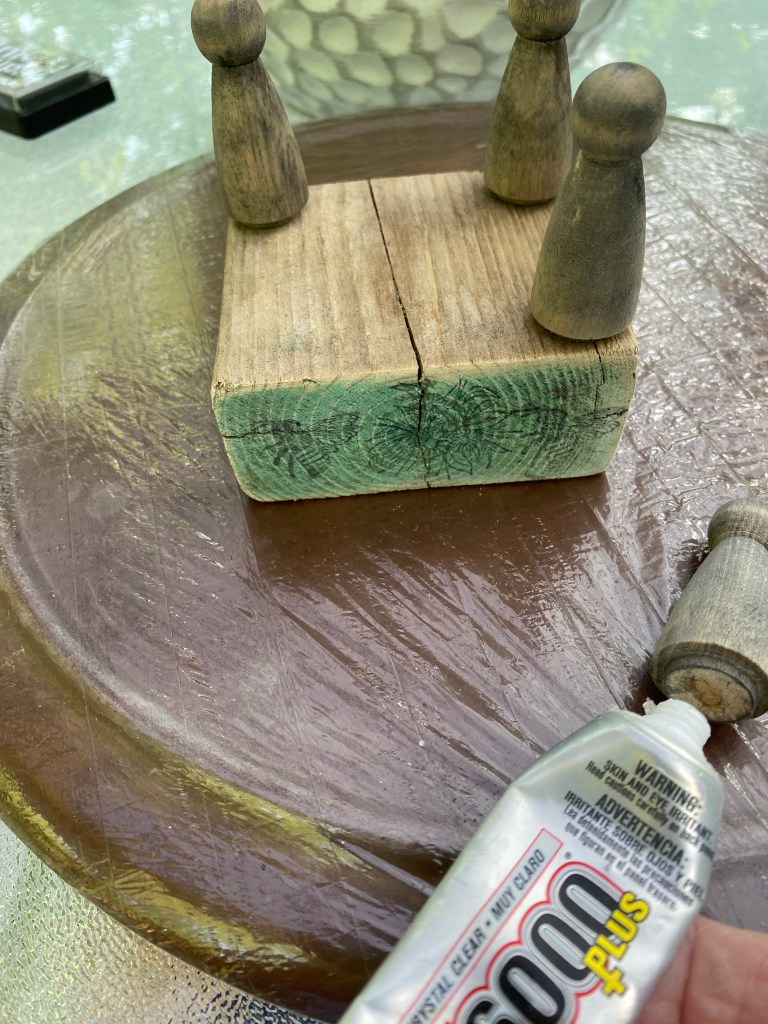
Step 4: It was time to glue on the legs. I used a combination of E6000 for permanent hold and hot glue for immediate hold.
Step 5: Once the hot glue set up, I applied Wise Owl Salve (ordered from a retailer) to the whole piece.
My rustic riser was now complete. I added a small painted terra cotta pot I had applied Dollar Tree rub on transfers to, added faux flowers, and displayed it on my rustic wood block riser.
I love how it now looks like the whole riser has been outside in the weather for years!
I’m at my son Trevor’s helping out with the kids while Lydia is at a conference, but I brought along enough supplies to keep me busy while they are at school. 🙂
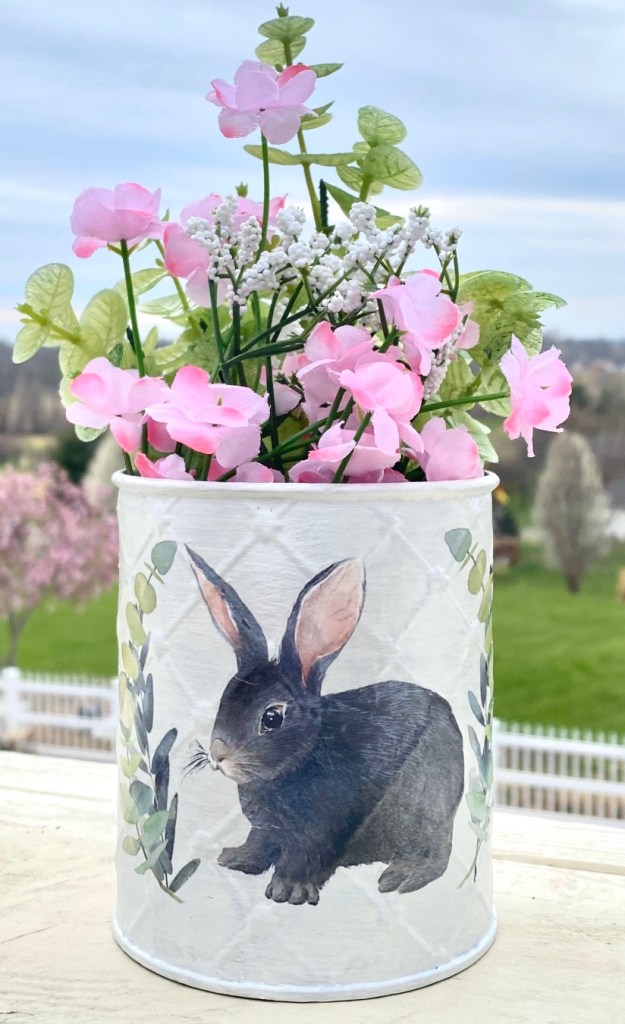
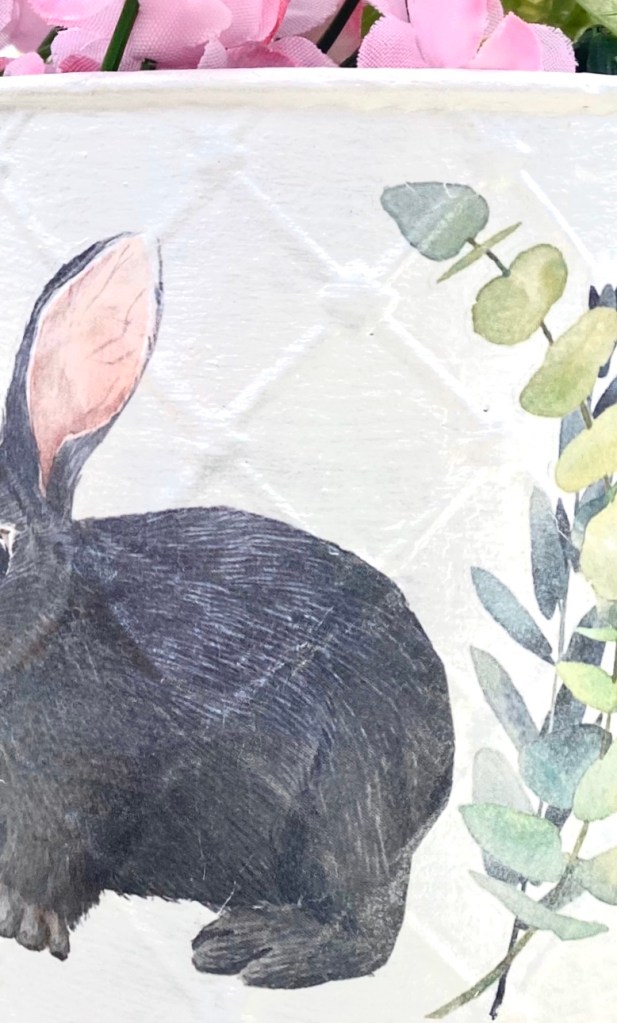
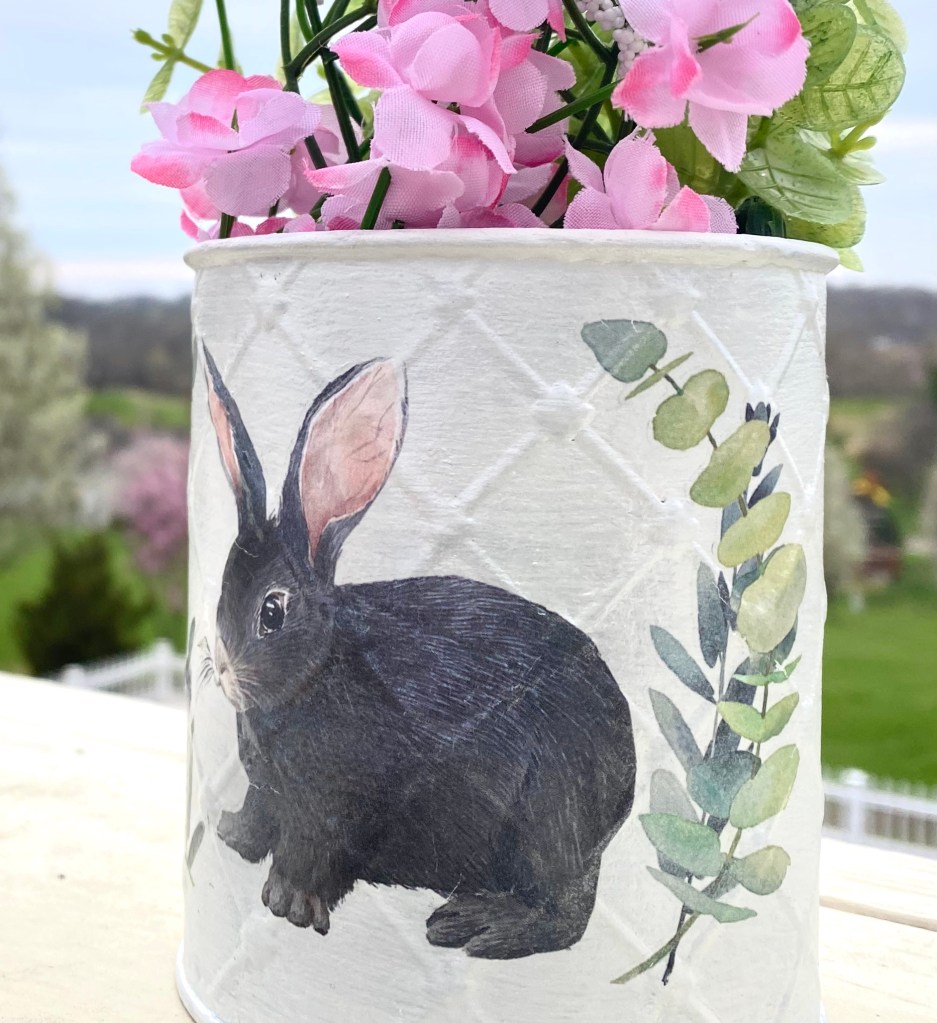
I was going to paint a duck today, but instead decided on painting this little 4 1/2” tall by 3 1/2” round embossed galvanized tin. I brought the perfect bunny framed with greenery Prima transfer I bought at The Gray Wall to go on it.
I’m so glad I did! It’s a little overcast today but the lighting seemed perfect when I used their beautiful view as a background for photos.
I usually spray a clear coat on metal or glass first but this tin was not shiny and the Mod Podge sprays I used uusially create a nice hard finish.
I painted the tin with 3 coats of our Missouri Limestone Paint Company “January” and let it dry. Then I gave it a coat of Mod Podge clear matte spray, followed by Mod Podge Pearlized Glaze spray.
I then applied the transfer. I sealed the transfer with another coat of the clear matte spray and a very light coat of the pearlized spray. I didn’t want to use too much as I really wanted the details in the transfer to show up. I just wanted a little shimmer. It’s hard to see on the photos, but it is there.
I love how it turned out and love how the photos show it off!
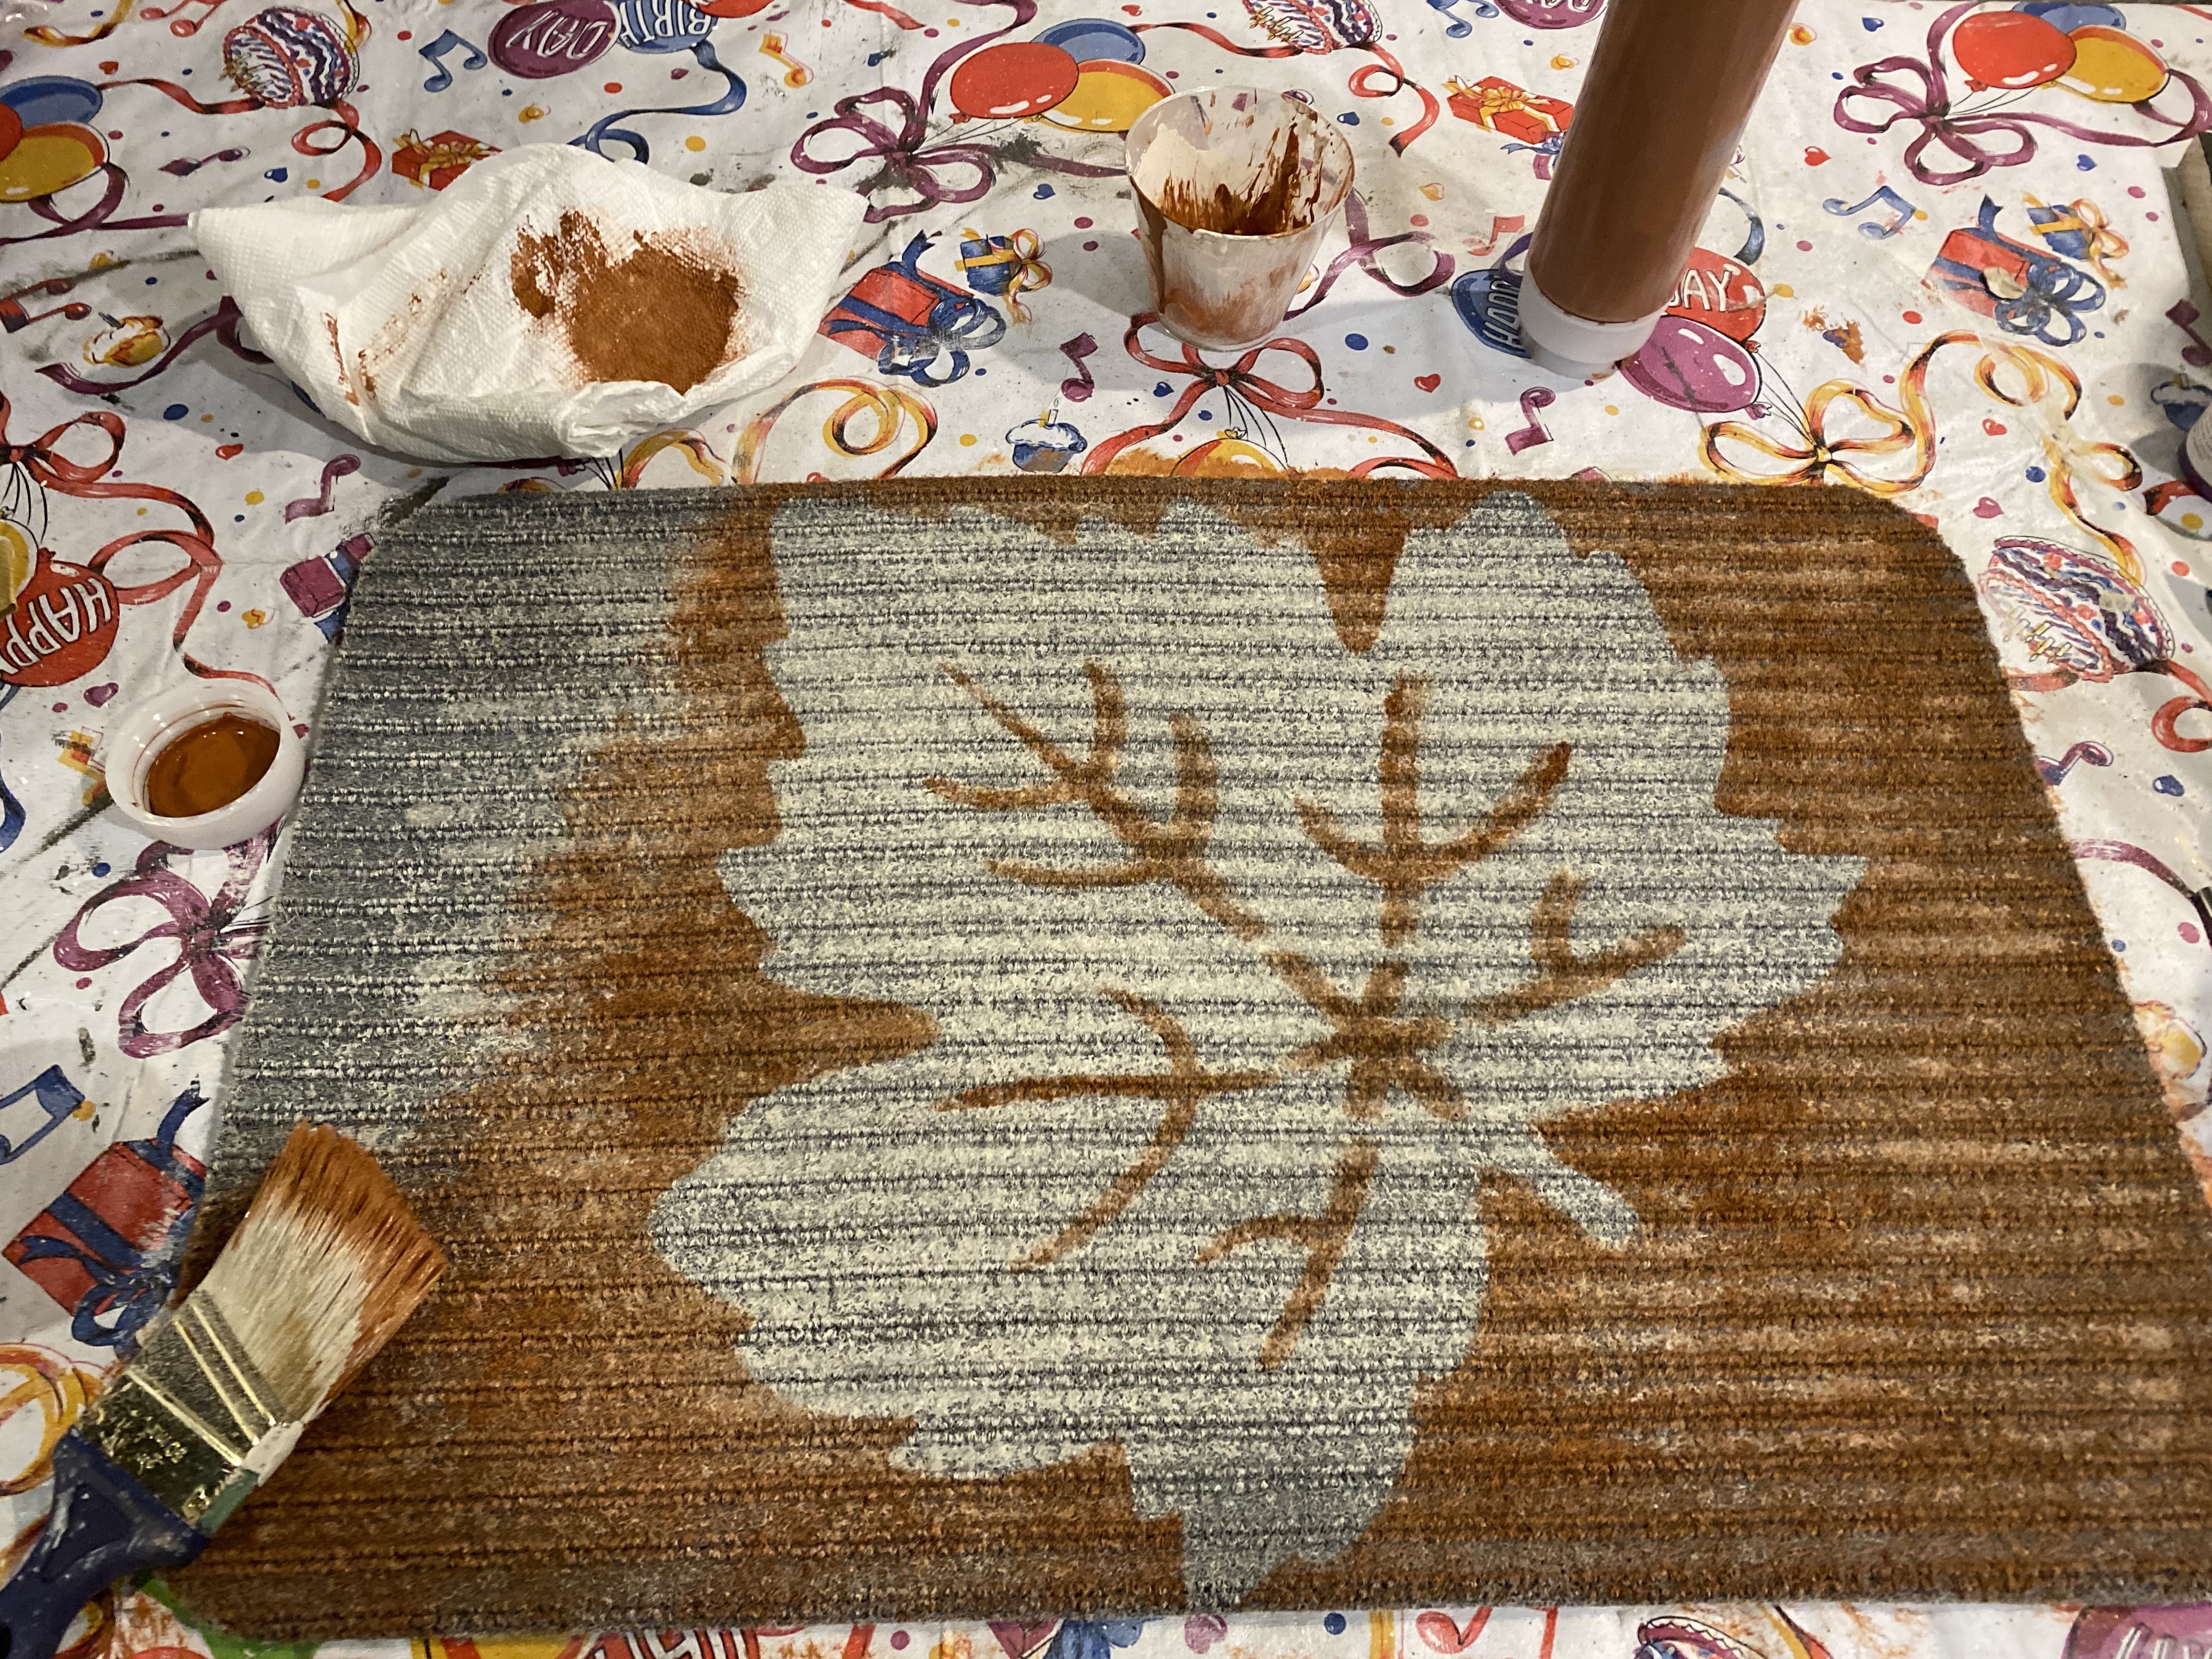
I’ve been seeing the Dollar Tree Felt Pumpkins, Leaves, and Acorns used as stencils on the Dollar Tree gray door mats. This morning, I used the leaf one to create this beautiful door mat. You can do it, too!
Yes, I made that cute little fall gnome door hanger, too.
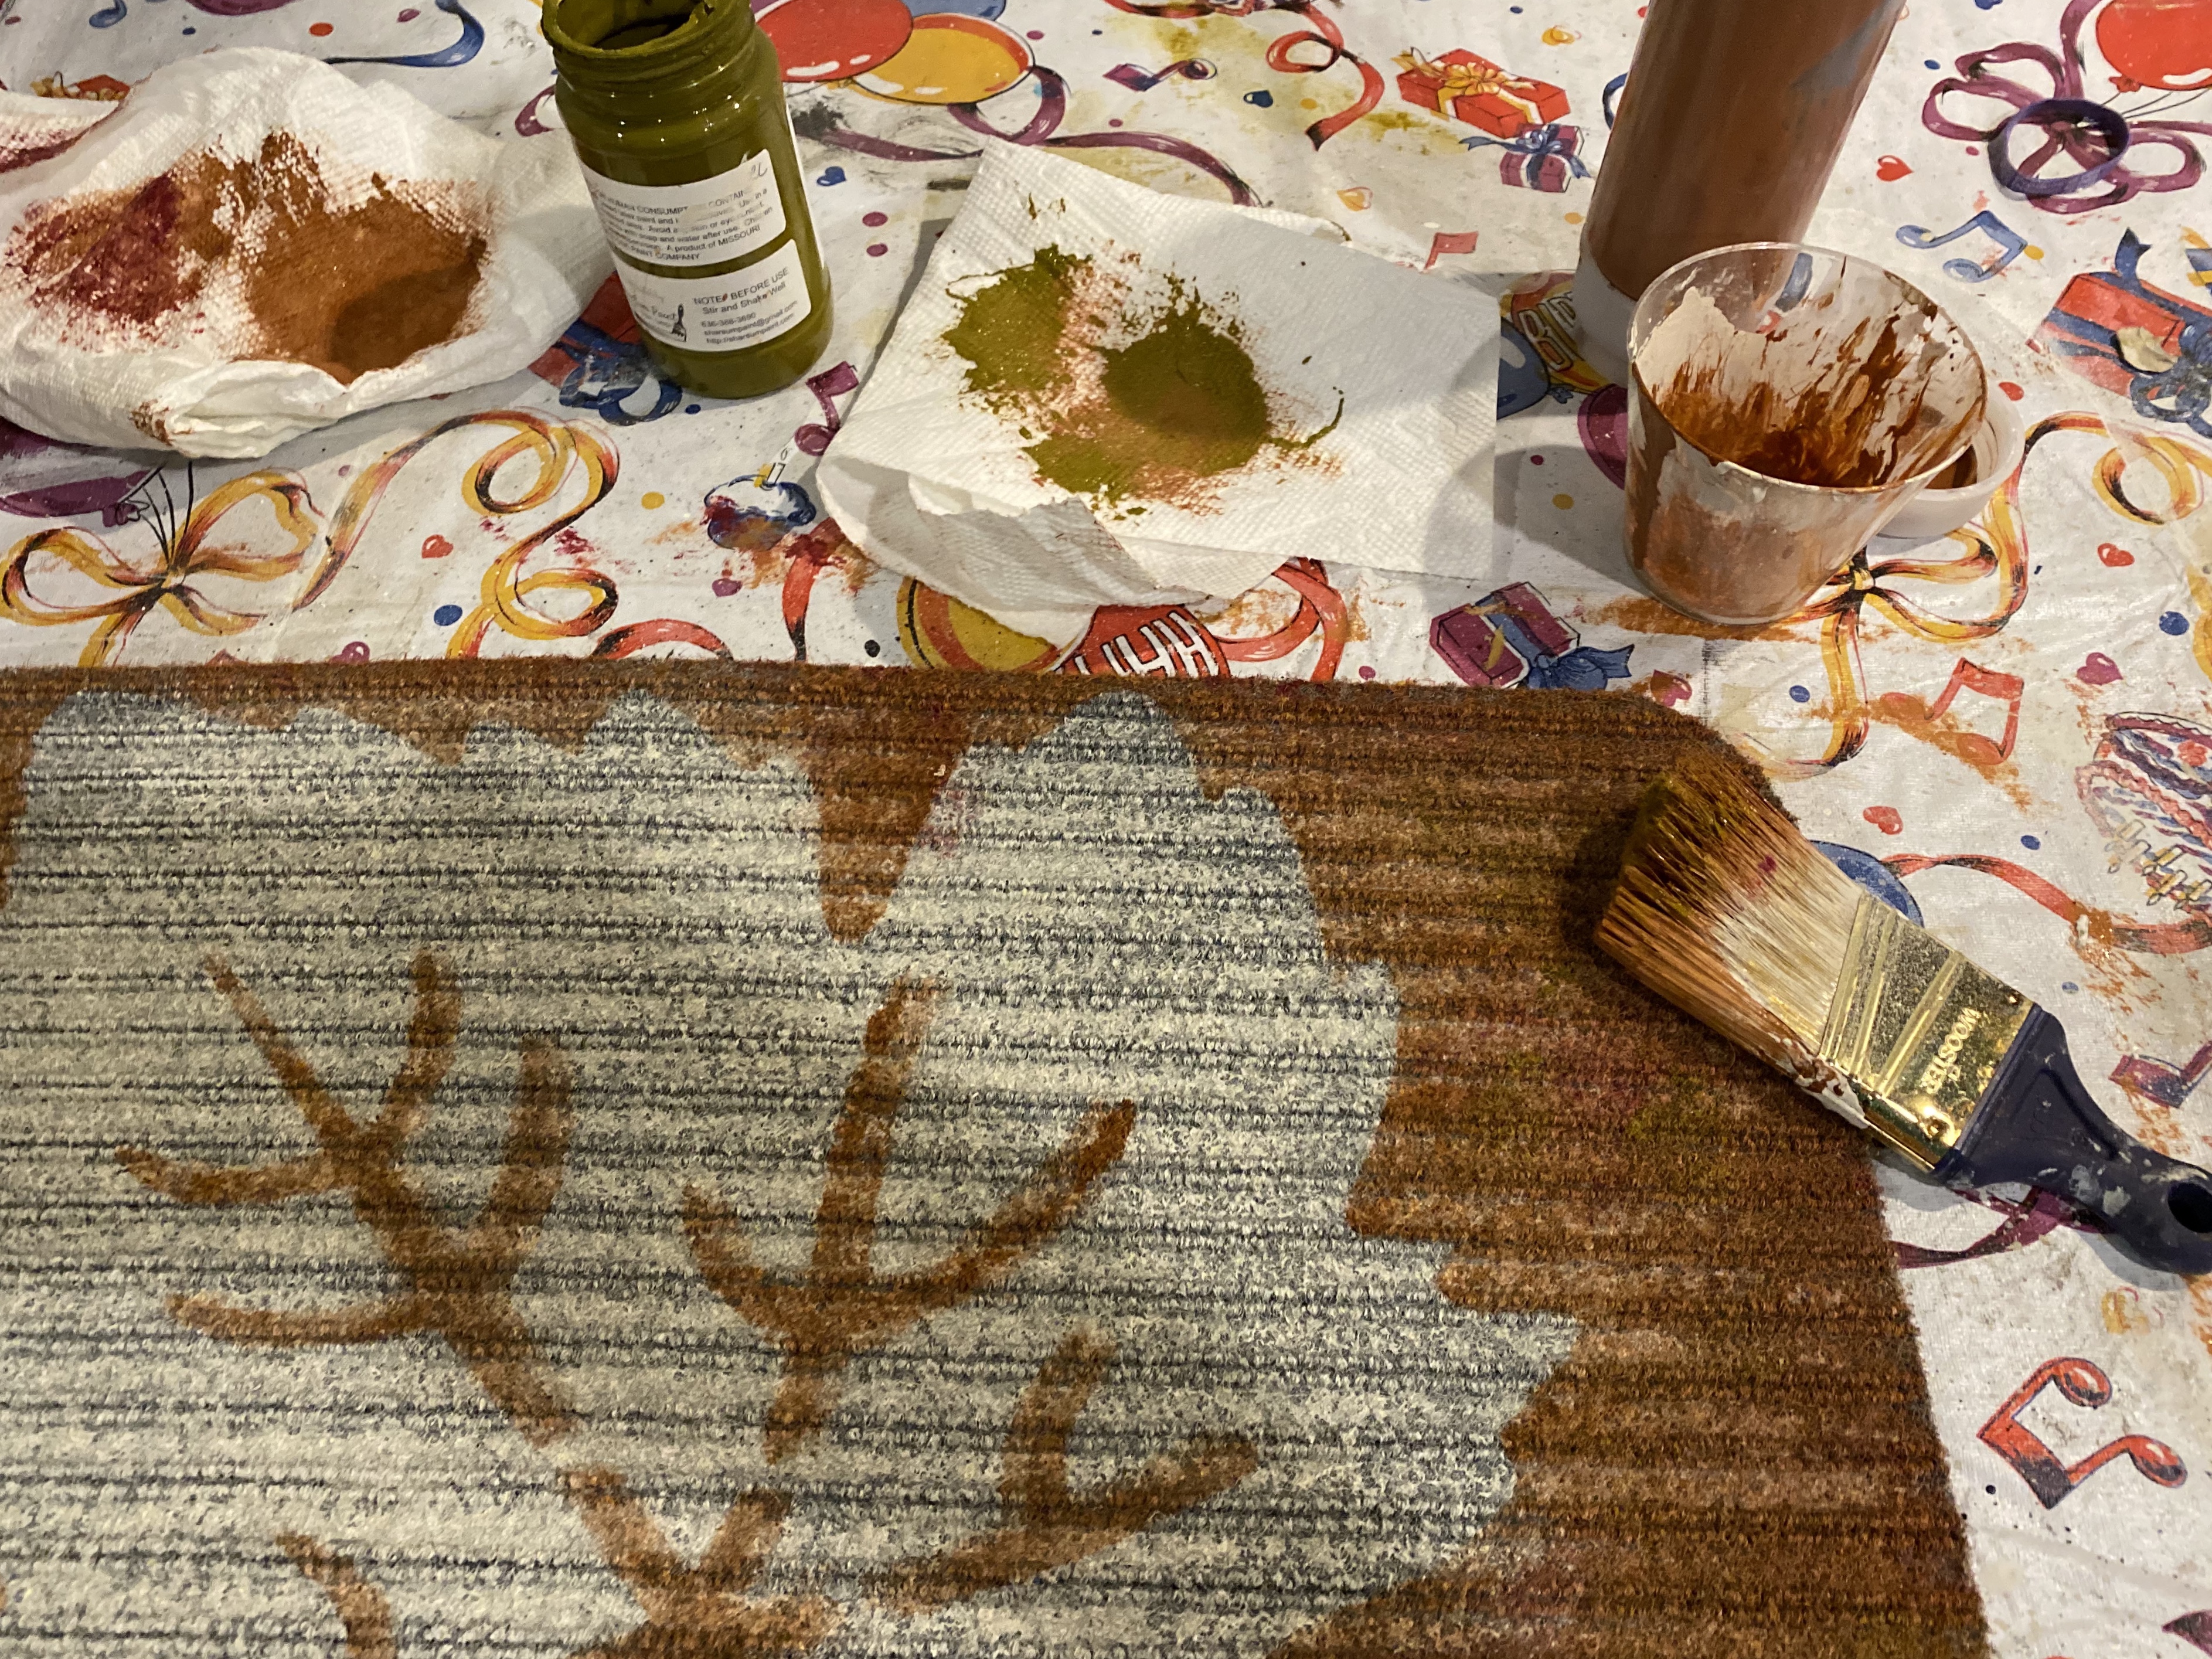
These are the materials I used. I used our paint brand we own and produce, Missouri Limestone Paint Company chalk-style paint: Grannies Lace, Old Tin Barn, Bordeaux, English Ivy, and Possum Grape Jam. However, any brand and type of paint should do fine.
I used the side that was more ribbed. On my next one I will use the flatter side. This mat really soaks up the paint. This is the first coat. I eventually did two coats and then a little more to cover well the area that will be under the leaf stencil. The rest can have a more dry brush look.
I then placed the stencil on the mat and just started pounding the Old Tin Barn color on the spines and all around the leaf. You don’t have to do the whole thing at this point. I just did around the leaf area then removed the leaf stencil.
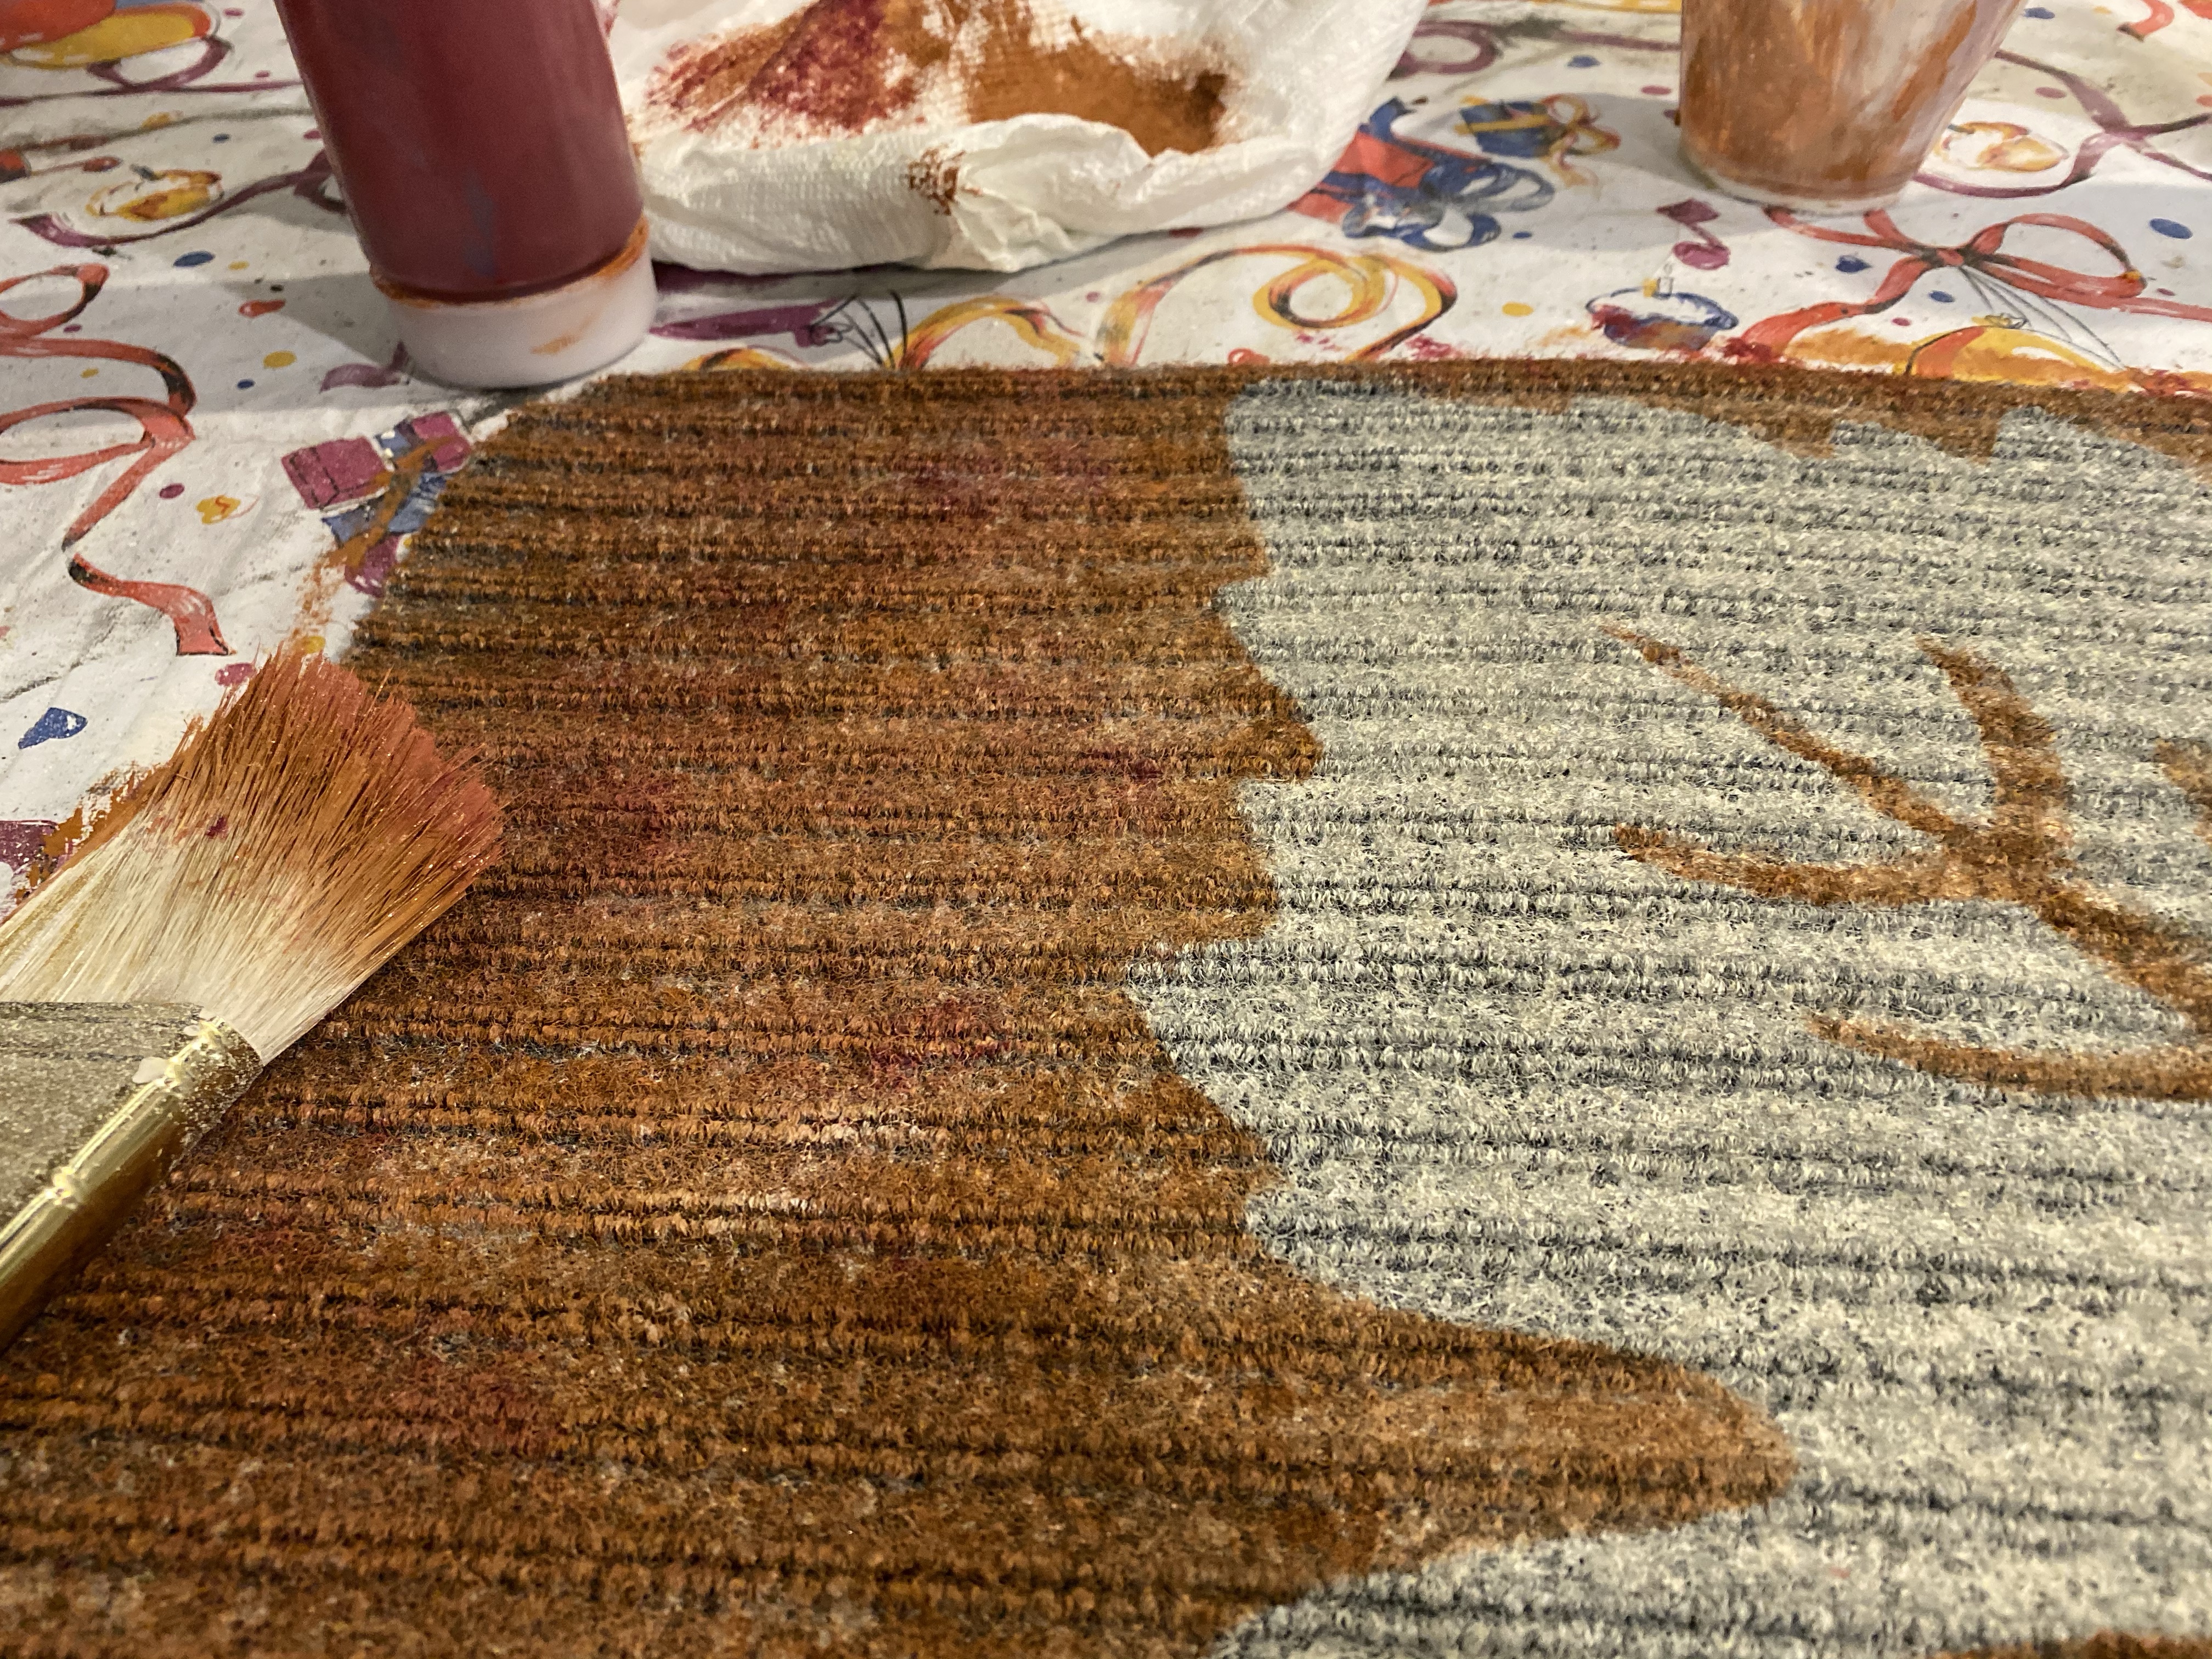
I then continued pouncing the Old Tin Barn color all around.
Using the same brush, without washing it out, I pounced the Bordeaux color on randomly over the Old Tin Barn, trying to blend it a bit.
Using the same brush again, I pounced on randomly the English Ivy color.
Using the same process, I added a bit of Possum Grape Jam color.
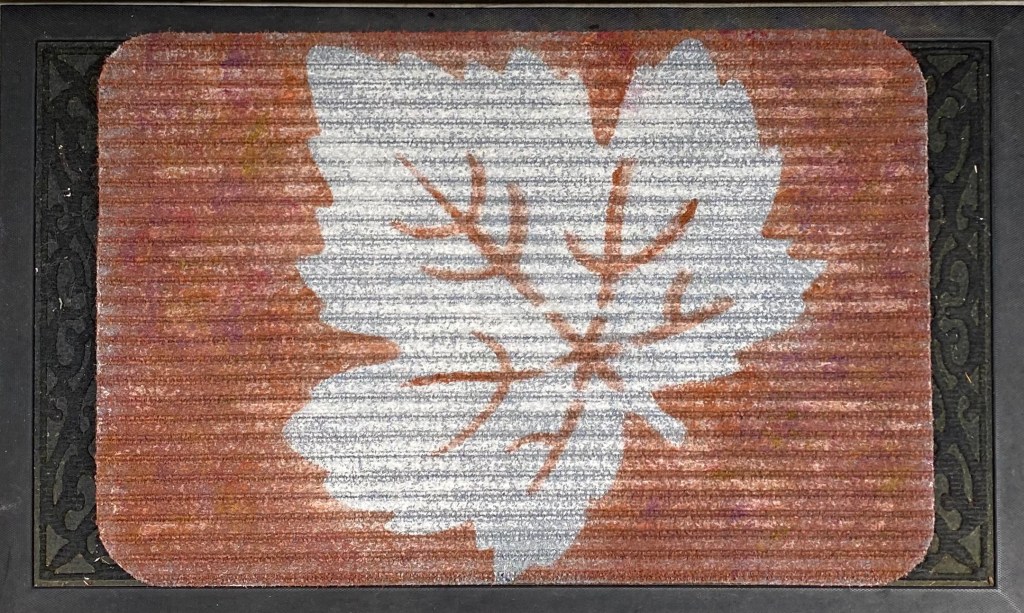
This photo shows all the different colors, much like you would see in nature in the fall.
The last step is to take the mat outside and give it a couple coats of the SPAR Urethane waterbased exterior sealer. It says it is gloss, but doesn’t show up gloss on the mat. I don’t think, once chalk-style paint cures for 30 days, a sealer is really needed, but in the meantime I think it just helps protect it a little.
And there it is! A beautiful Fall door mat. The pumpkin and acorn would also look nice.
And here’s my acorn one. I’m keeping this one. It’s pretty appropriate since we have a ton of oak trees (not to mention leaves) in our yard.
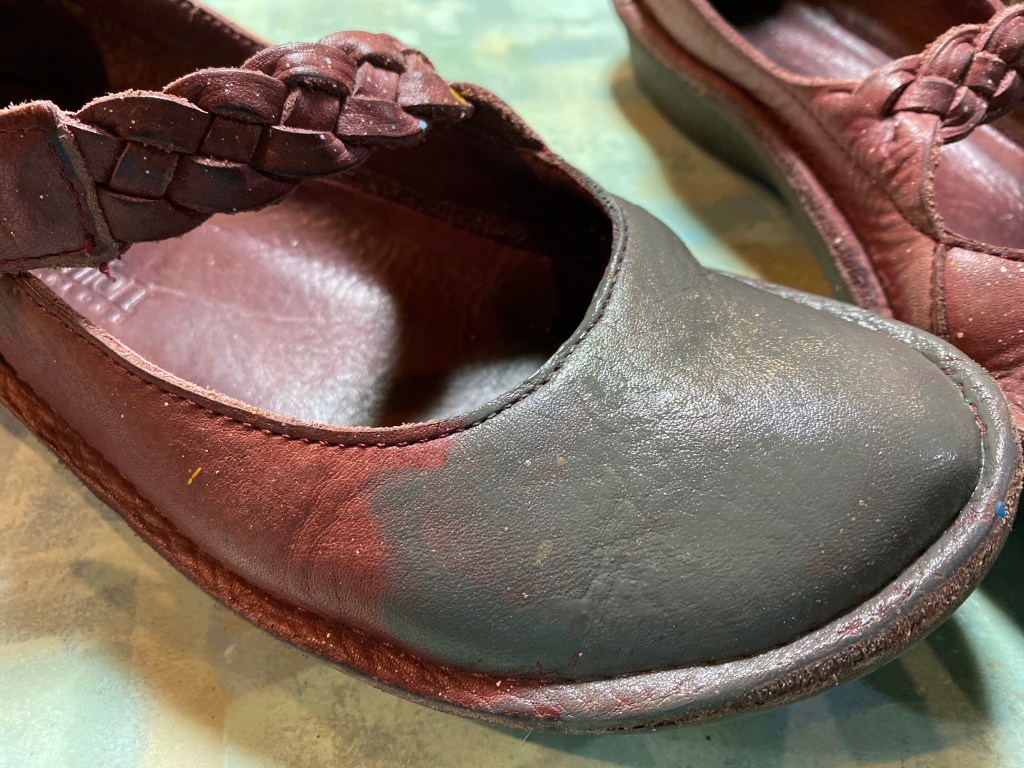
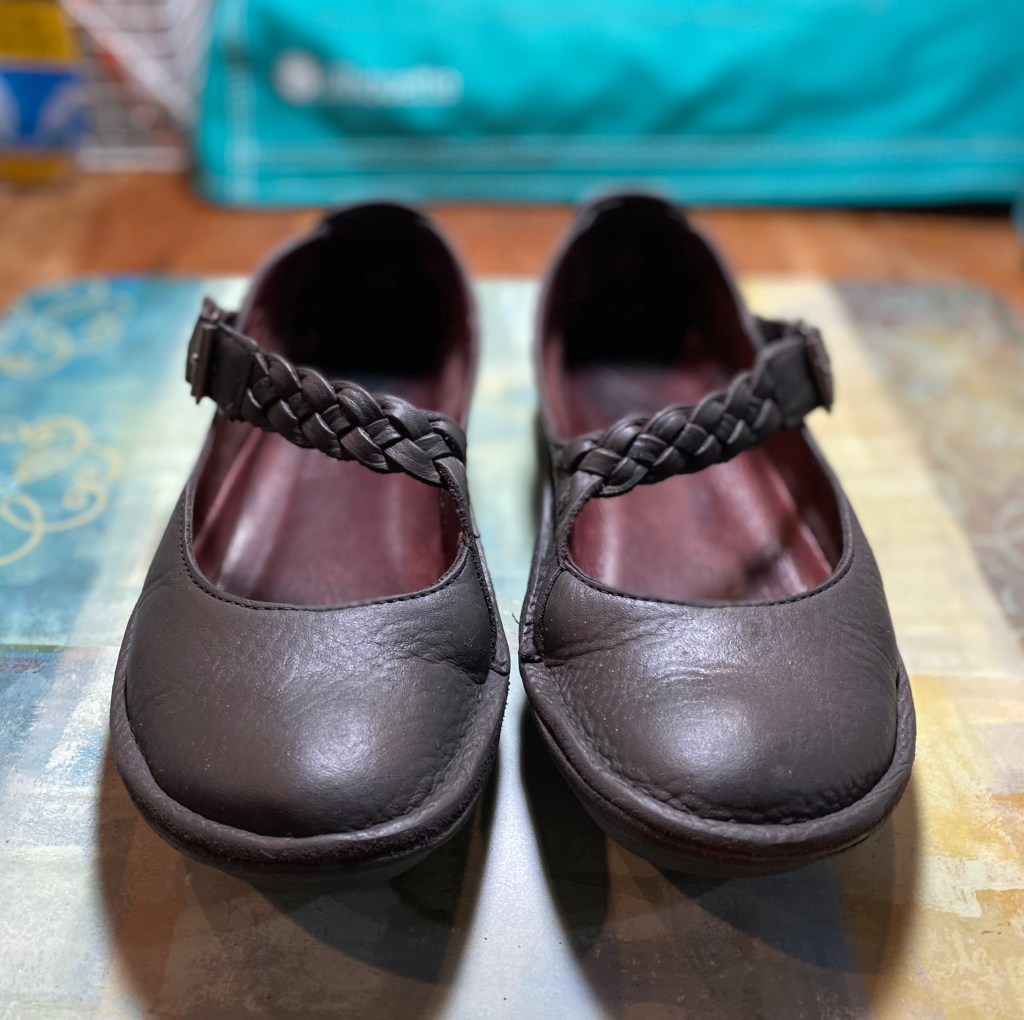
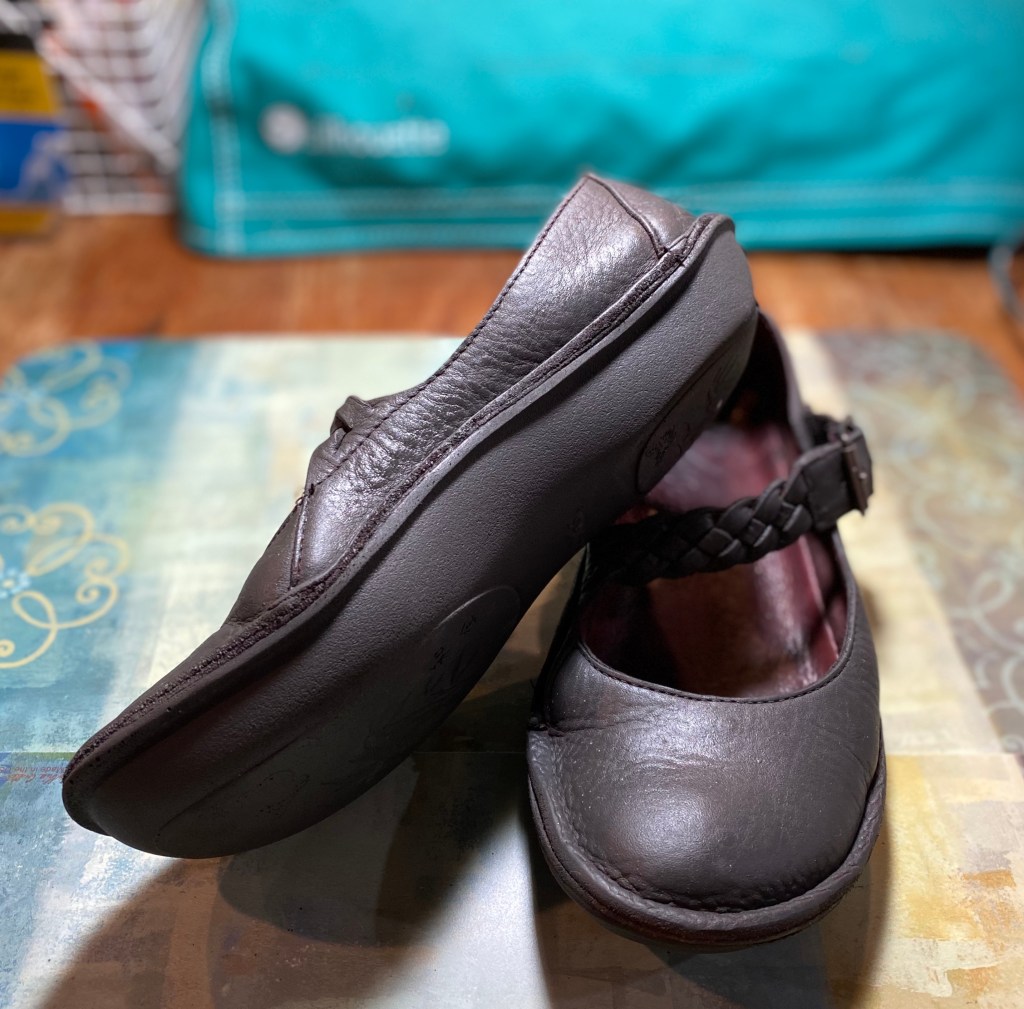
I am not a newbie when it comes to painting shoes with chalk-style paint, specifically the brand we own and produce “Missouri Limestone Paint Company”. I’ve painted shoes made of quality leather as well as those that are from cheap man-made materials. Then I’ve worn the heck out of them. This latest pair I painted two coats and applied two coats of salve – all in less than an hour.
Oh my! These look ready for the trash! But they are so comfortable! Especially when I’m on my feet painting, apparently. Lol But no more painting in this beautiful pair of shoes! They look brand new, don’t they?
Would you like to know how I did it? First, a sneak peek to see the transformation in progress.
I started out by cleaning the shoes well with Windex. This is my go to cleaner for many things I paint.
All the added color on this pair is from our chalk-style paint. This paint is on there for good, trust me. Cleaning didn’t remove it, nor could I scratch it off. I didn’t want to sand it or use chemicals on it, so…. I painted over it. 😏
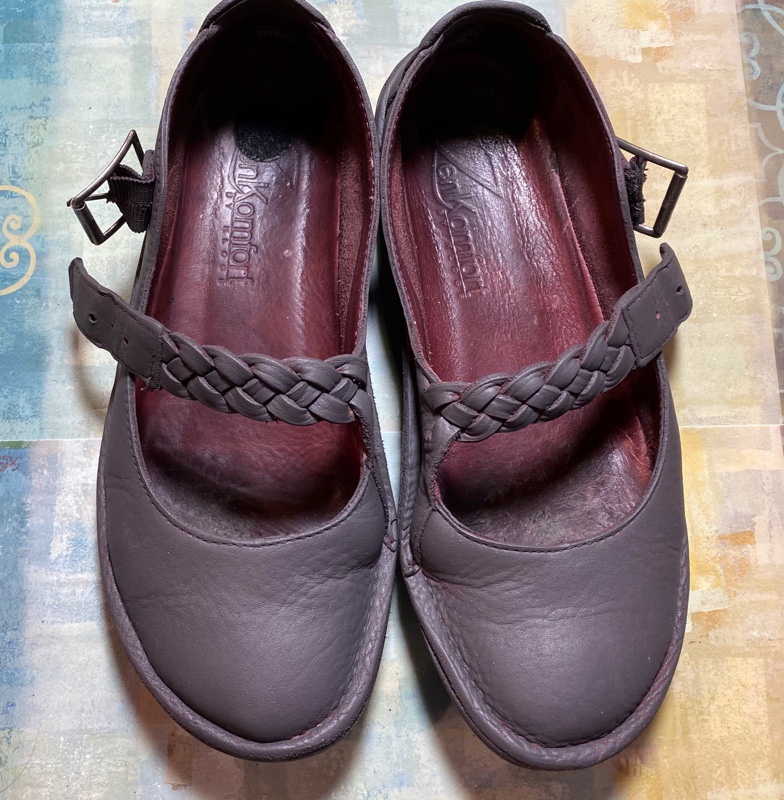
Missouri Limestone Paint Company chalk-style paint Color: Gray GooseI painted the elastic on the strap, too.I even painted the soles!
I also know from experience, our paint does very well on rubber. I painted a Rubbermaid mailbox several years ago….no sealer….and it still looks brand new today. So, I also painted the soles of this pair of shoes, but did not seal them.
Needs a second coat of paint
I painted the first coat. It dried quickly, but so also helped it along with a hair dryer. You can see the reddish look coming through along with the spots from the original paint splatters. But look! No brush strokes! Our paint (when applied in thin coats), does not leave brush strokes.
2nd coat covered well
It is time to apply the salve. I love Wise Owl Salve and keep it on hand for projects like this.
Can you tell which shoe has had the Wise Owl Salve applied? If you said the left one, you are correct!
As you can see, I applied the Wise Owl salve on the left shoe so you can see what a difference it makes.
Wow, right?
I applied the first coat of salve and buffed it. Then, I applied a light second coat and just rubbed it in, but did not buff. Remember, I DID NOT use the salve on the soles.
And there you have it! Another pair of shoes given a new life. I promise not to paint in these! I will periodically apply another coat of salve and buff it in.
It was in good shape, but dated. It needed a makeover. We had sanded the top almost all the way, but it still needed a bit more to get it down to bare wood.
However, life got in the way and so it sat in our basement waiting patiently for its makeover.
A few days ago, it happened. I took the heat gun and stripped away the rest of the residue on the top, then sanded it smooth and hand scuffed the base. I cleaned it well.
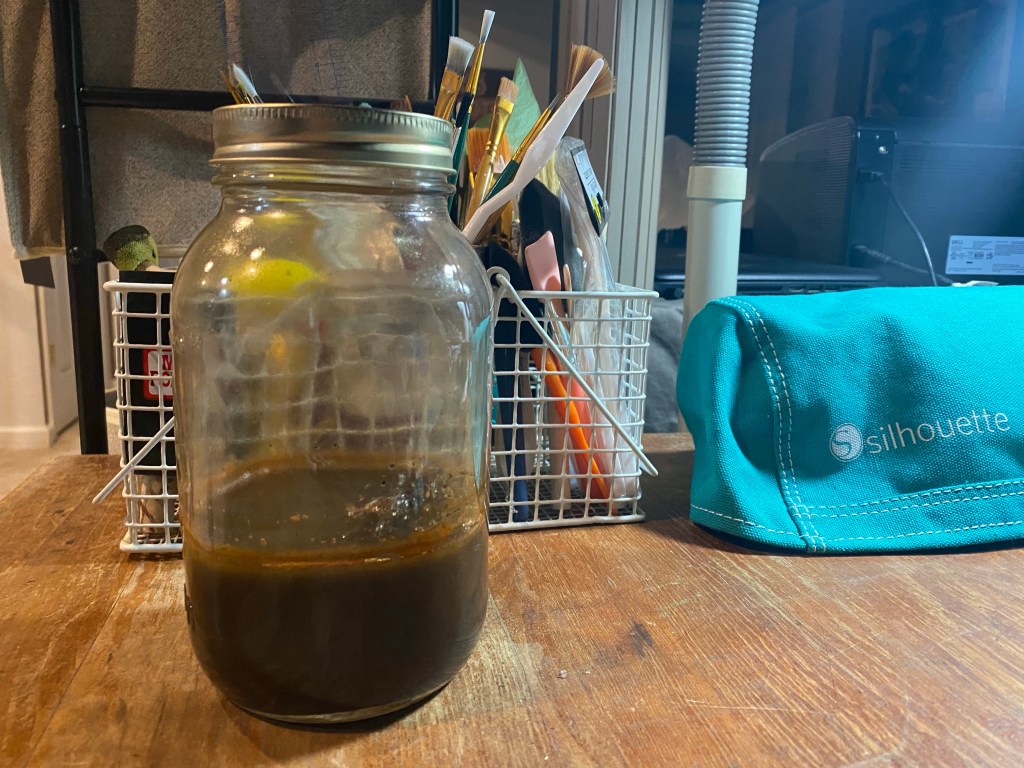
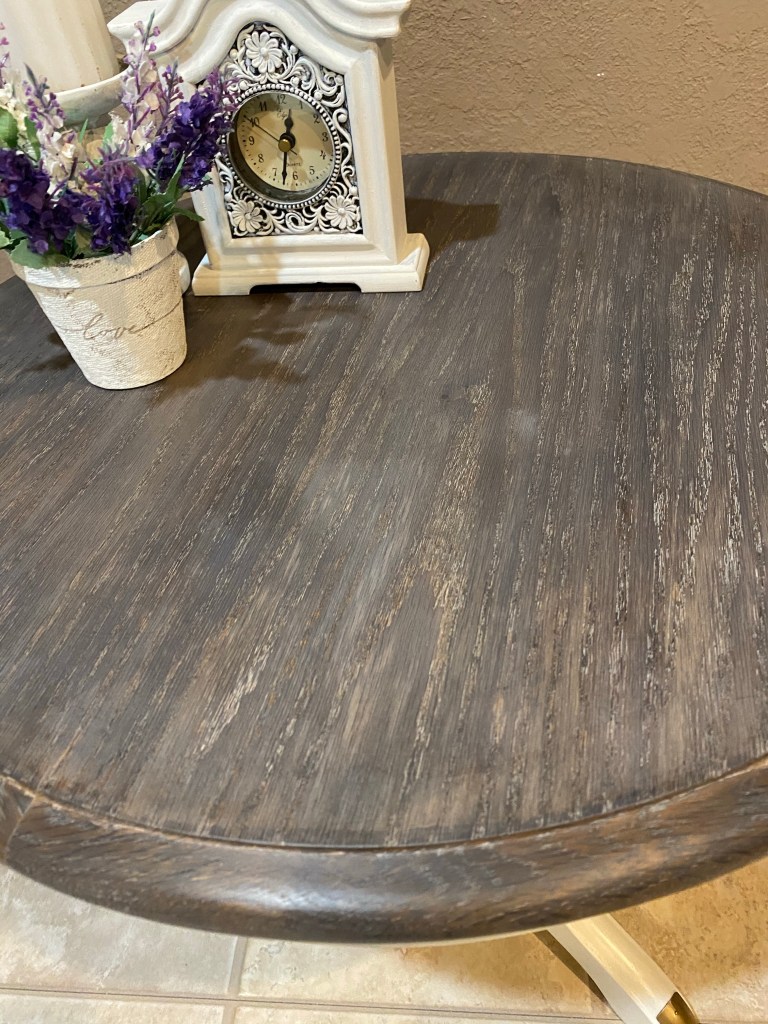
I couldn’t wait to try out the DIY wood aging stain recipe I found and mixed up. It had been sitting waiting to be used for several weeks. I had tried it right after I mixed it up on a board. I think it reacts differently on different types of wood and it really hadn’t had a chance to darken the wood much. But, it turned out with a beautiful, natural wood look that I loved.
The stain is a mix of used coffee grounds, vinegar and steel wool. It doesn’t look very pretty in the jar, but wait until you see it on this oak table top!
The interesting thing is you don’t see how it is working until it dries. At first it looks like it is just darkening the wood (and it darkens more as it dries) but when it dries, ahhhh….there is that beautiful grayish cast….just like old barn wood that has been left out in the weather for years. And this photo doesn’t even do it justice.
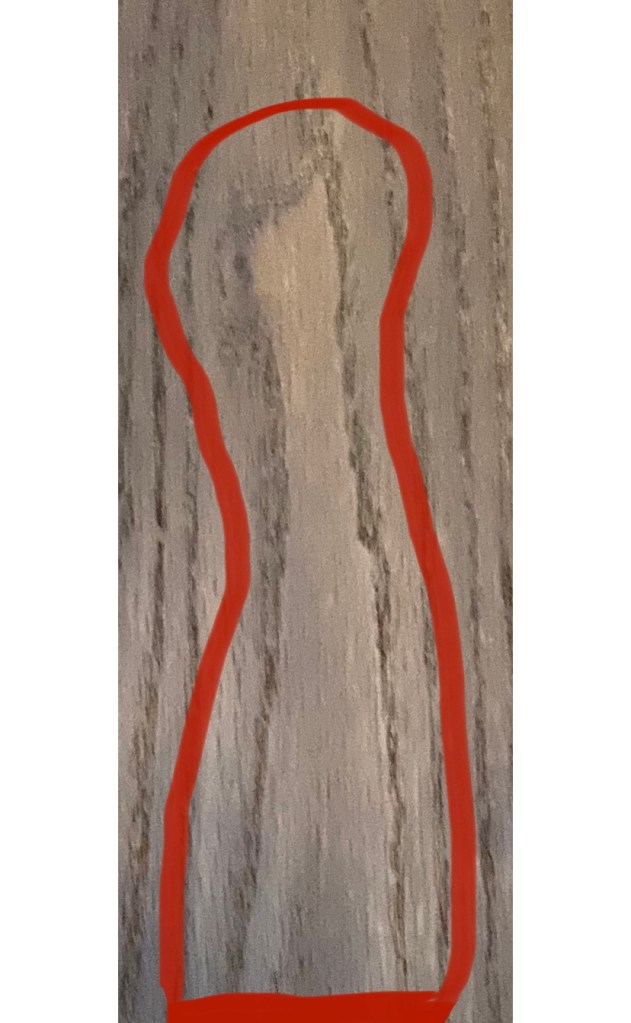
Hmmm…..At this point I happened to notice a strange formation in the grain going across the top. In my eye, I saw a llama head and neck. There are actually 4 of them, seeming to march in a line across the table, but this one stands out more than others. Still not seeing it? Let me help you. Lol
So now I had the stain on, but I wanted to really enhance the old wood look so I sealed it with a mix of liming wax and clear wax.
I wanted to open up the grain for the liming wax to get into it and stay so I used a wire brush and carefully ran it across the table top, going with the grain.
The liming wax I used is by Briwax. I mixed some of it with Howard’s Chalk-tique light wax. You can use any brand of clear wax, though. Mixing them together gives you a little more control over the liming wax and provides a nice finish. I think you can purchase both of these products from several places like Amazon online.
The next photo shows half the table top with the liming wax combo and half without. What a difference the liming wax makes!!
Can you see my 4 marching llamas? I know…. they are hard to see. Lol
Let me help. 🙂
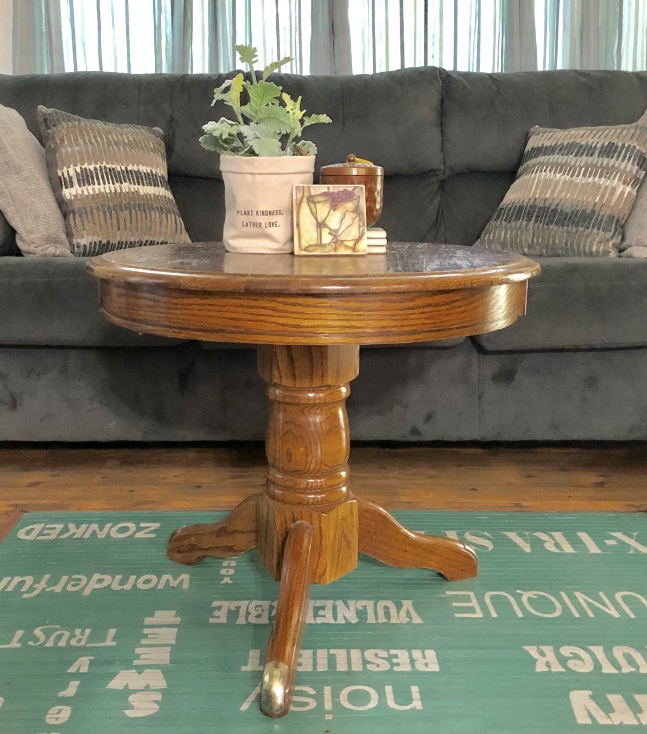
Here is the top all waxed and buffed. Again, pics don’t really show just how beautiful this table top is. The sheen of the wax is gorgeous!
By the way, did you know wax helps repel dust? So using wax on furniture that isn’t going to get a lot of heavy use will save you dusting time, too!
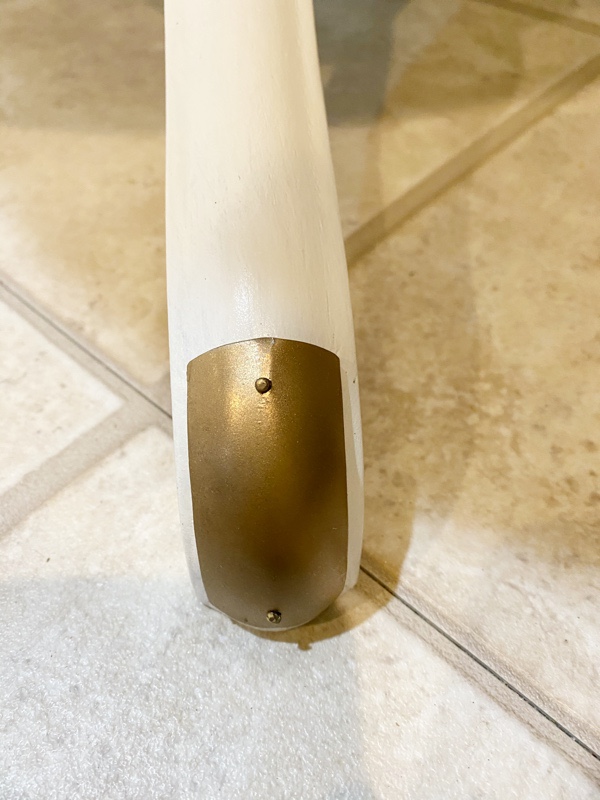
The little metal feet needed a makeover, too, so I took them off and spray painted them a metallic gold. So pretty now!
Now it was time to paint the base. Sometimes I use primer, sometimes I don’t. I didn’t on this one. I had just cleaned and scuffed it up really well. In retrospect, I wish I had primed this and I wouldn’t have had to use as many coats of chalk-style paint, especially since I wasn’t going to distress this piece. I used 4 coats of Missouri Limestone Paint Company “January”, a pure white. You tend to need more coats when using white or very light colors.
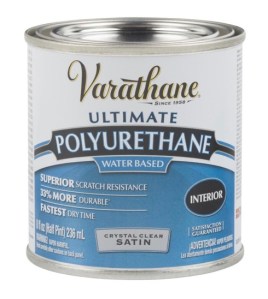
But all is well as chalk-style paint dries so quickly. Once the paint coats had all dried well I sealed the base with several thin coats of Varathane Crystal Clear water based polyurethane. I never have had a problem with yellowing in the 6 years I’ve been using it.
The secret is thin coats and no drips or pooling. I use a round damp car wax sponge to put on a thin coat and follow it with a sponge brush if needed to clear up any drips or pooling. For long areas I go in one direction only and work quickly. You can’t go back and forth or overwork the sealer or you will have a mess as it dries so quickly.
And now…. drum roll ….. My finished “llama table!” 😉 What a difference, right?
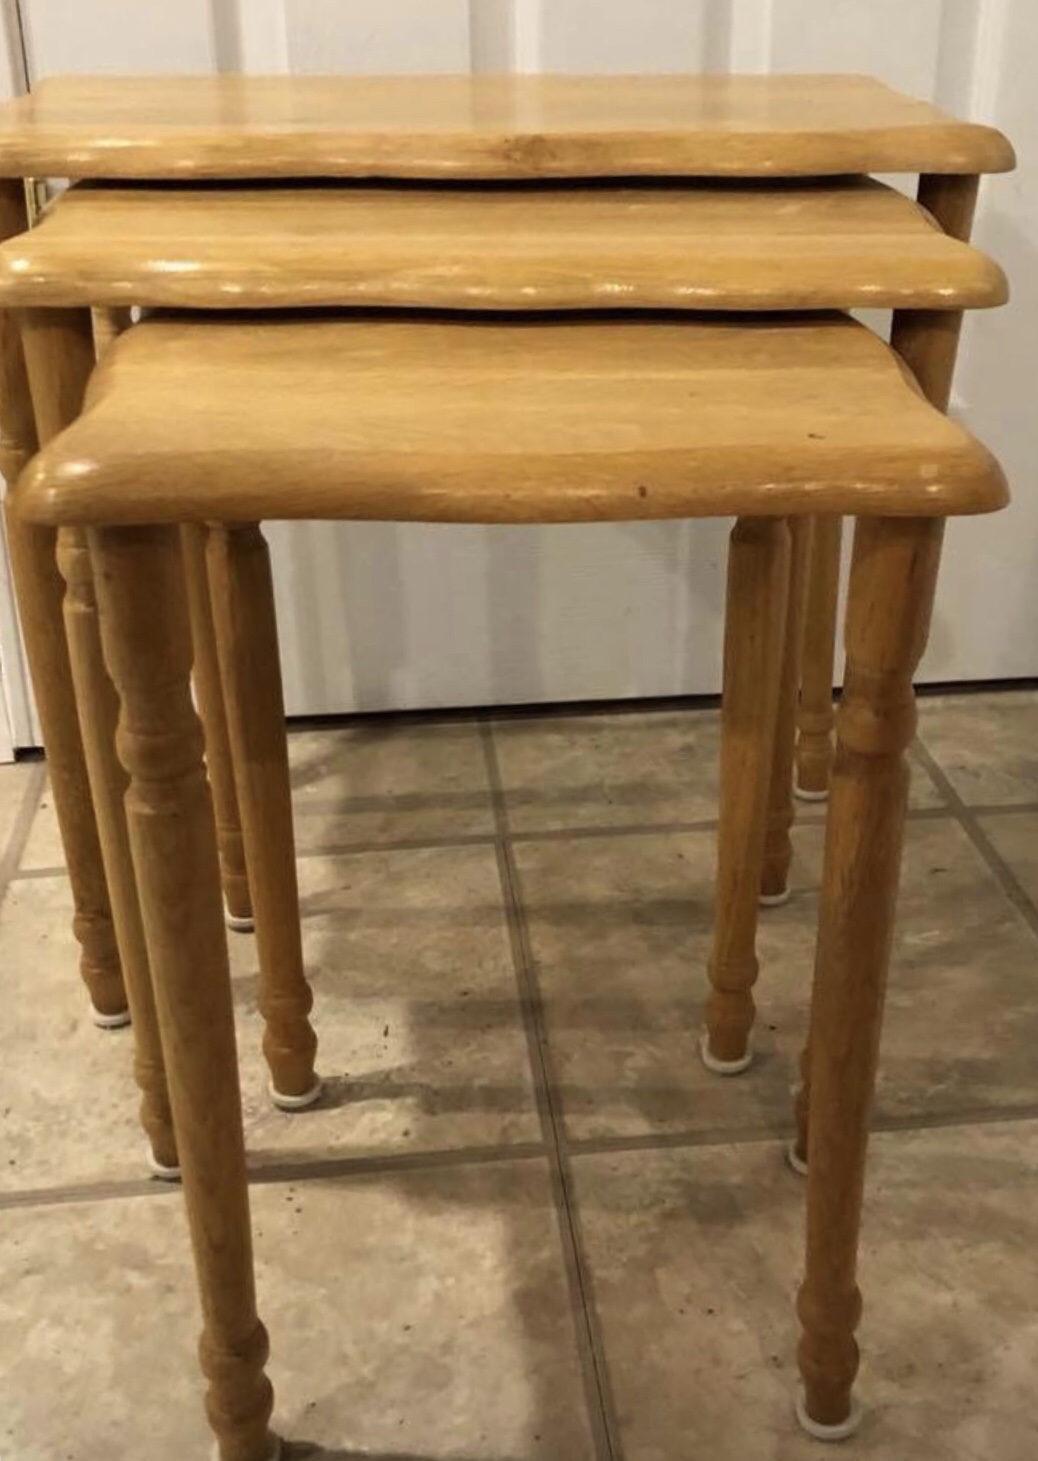
I have been searching for a good way to create a gray weathered wood look for a table top ever since I saw my cousin’s new dining room table. I was sure I could paint something similar.
These nesting tables had been waiting patiently for me to work the gray weathered wood magic on them. The time was now.
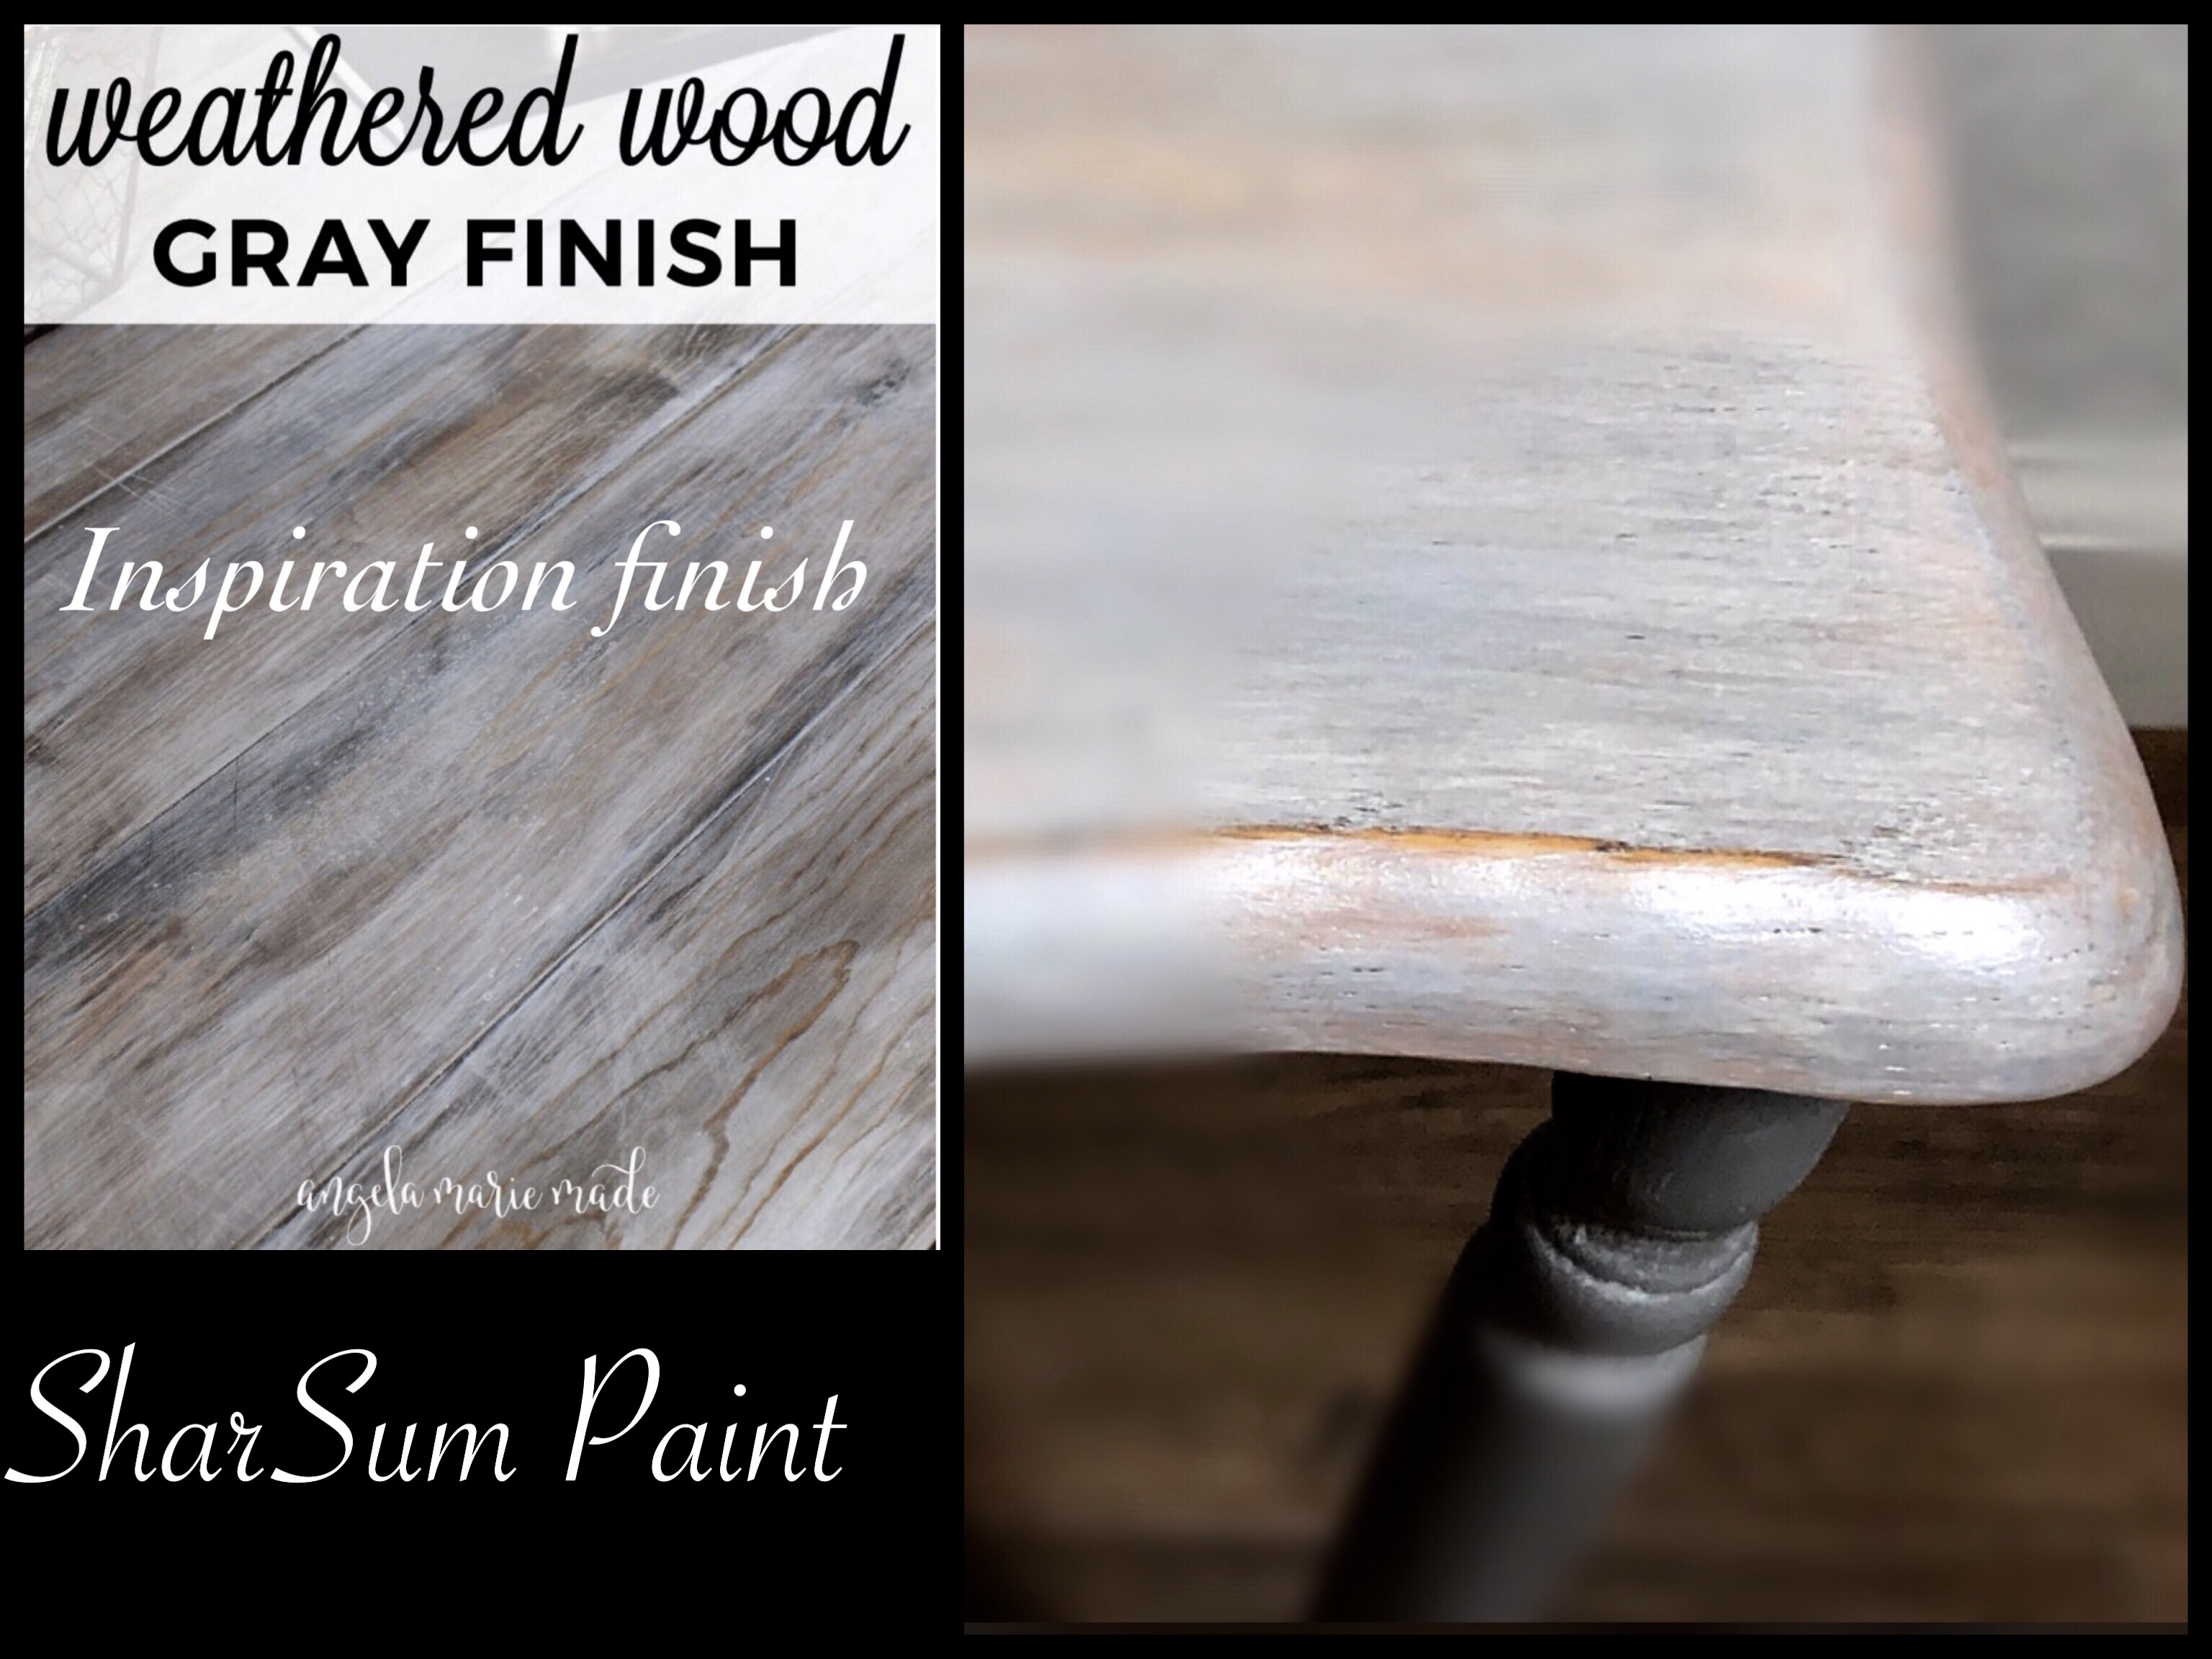
I came across a tutorial from Angela Marie Made which showed the look I was going for so I pinned it and waited for the right time to try it. Thank you so much for sharing this technique!
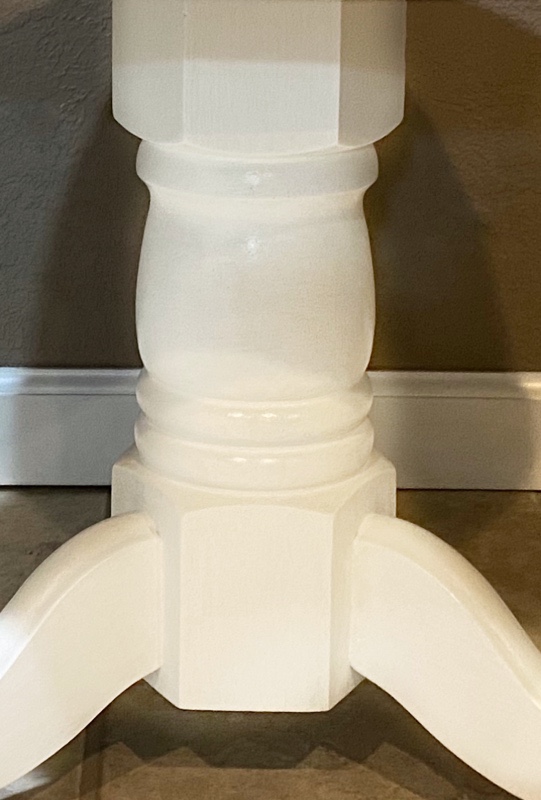
First up, the legs – the tables are well made – solid wood with metal inserts for the legs to screw into. I’m sure there is a furniture term for that but I do not know what that is. Just know the legs easily screw on and off with no worries. We cleaned, hand sanded, then cleaned again and they were ready for paint.
My original idea was to paint the legs a light gray, but once I painted one with a new custom color “MO Graystone” we created in our Missouri Limestone Paint Company chalk-style paint line, I knew it would be too light. So I started dry brushing “Sunday Silver” over the lighter gray, lightly in the detail areas and heavier on the rest! I used just a small amount of paint, dabbing most paint on the brush on paper towel first. This is a great way to distress without sanding and it was fun to watch it happen.
Two down, 10 to go!
Love this distressing technique
Table tops: My husband cleaned, sanded, and cleaned again (top and bottom) and I used Varathane Premium Fast dry stain in Kona. I stained the bottoms for a finished look but did not do the weathered wood finish on them. I thought that Kona would darken them a lot, but actually didn’t. The wood is a very hard wood so I probably could have given them another couple of coats, but I lack patience in waiting for oil stain to dry so I chose to do just one coat.
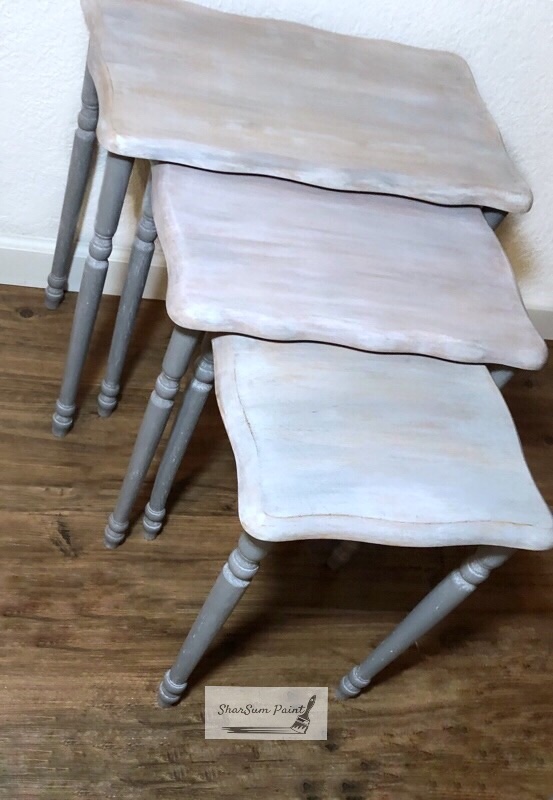
I watered down the “January” color 50/50 and painted it on, then wiped off excess and rubbed in what was left. I could tell it was going to be lighter so I also used a little “Sunday Silver” here and there and rubbed it in. Yes, it turned out lighter than my inspiration, but I love how it turned out.
Love when the furniture decides how a technique is going to look.
I put five coats of Varathane water based Crystal Clear polyurethane Satin on each table, sanding lightly between coats. I love the satin finish!
Now that I’ve experienced how nice this technique is, my plans are to use this finish on this farm table set I have to paint and sell. But that’s a project for another day.
I ran across a set of four stone coasters in a thrift store one day. Someone had tried to stencil and had a fail with bleed through. Their loss was my gain so I bought them with the idea I could do something with them some day.
Update: these coasters were already made but a friend told me she gets the stone tile at Lowes and then adds felt pads to the bottom for coasters. 🙂
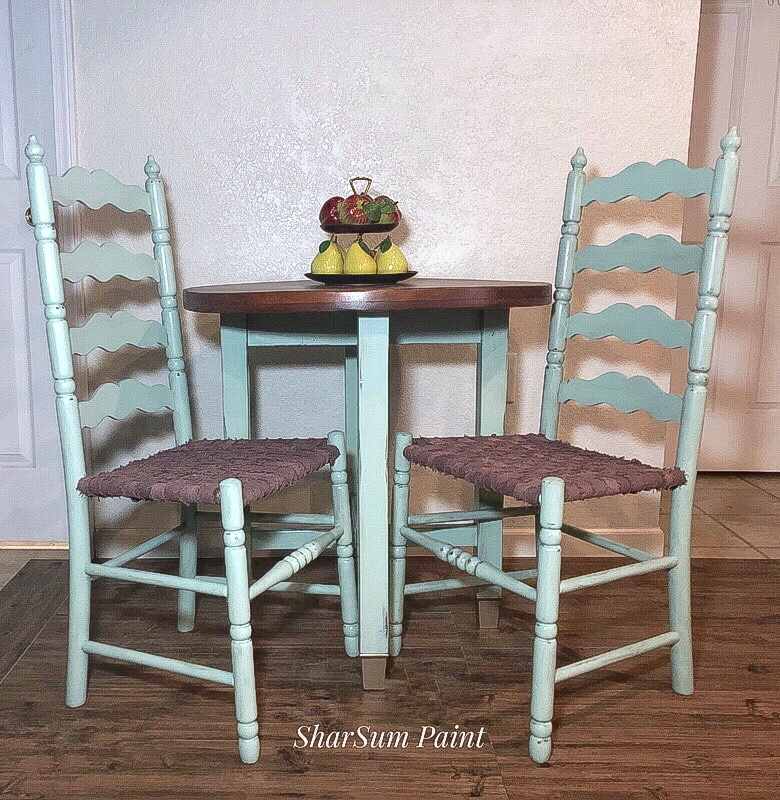
Today is that day. We are going to deliver this beautiful bistro set to its new owner this weekend (hopefully the snow stops soon), but we wrapped and loaded it before the snow started in case we can’t go until Sunday.
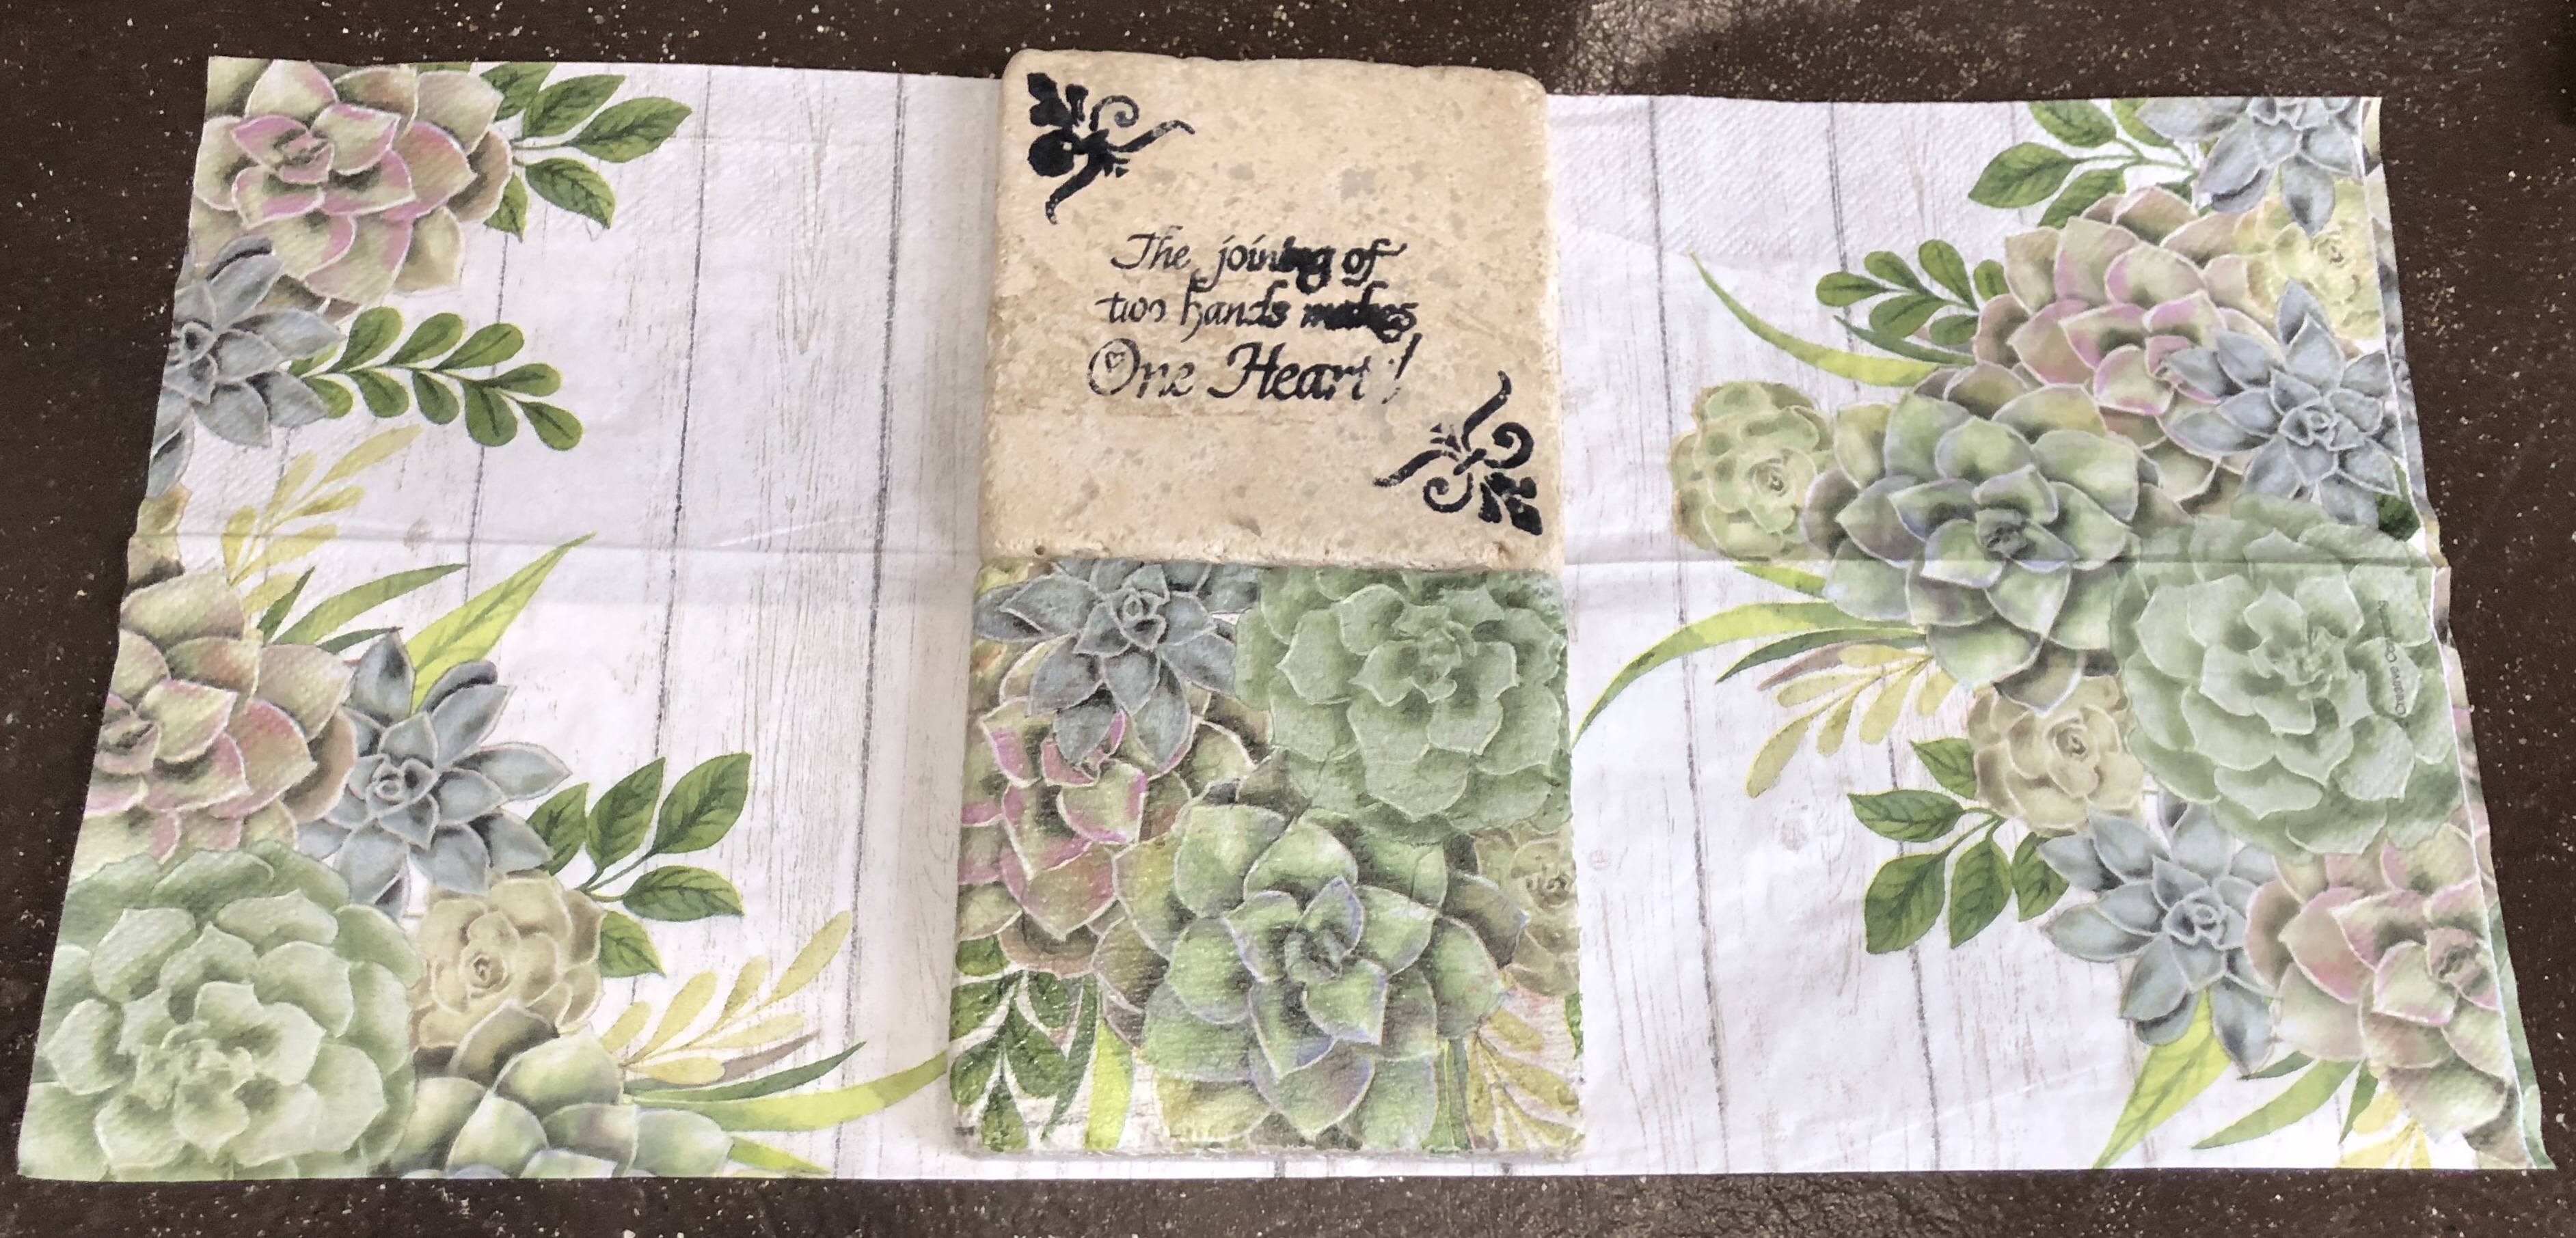
This is a repeat client and I wanted to have a little gift for her. As I am such a hoarder….I mean a person who is always prepared …… with supplies, I just happened to also have a package of napkins I purchased in a shop somewhere that I knew would look great with the color of paint I used, Missouri Limestone Paint Company Chalk-style paint “Clothesline”, one of my favorite colors.
Here are the steps I took to create two coasters for her that will look great on the stained table top. Sorry, I forgot to take pics of this part.
1. I cleaned the coasters thoroughly.
2. I painted the tops and sides (to cover the black stencil) white “January” color. The white paint will really help the print stand out.
3. While the paint dried, I cut out the flower area a little bigger than the coaster. I peeled off the two white layers of the napkin so that I was left with only the printed part.
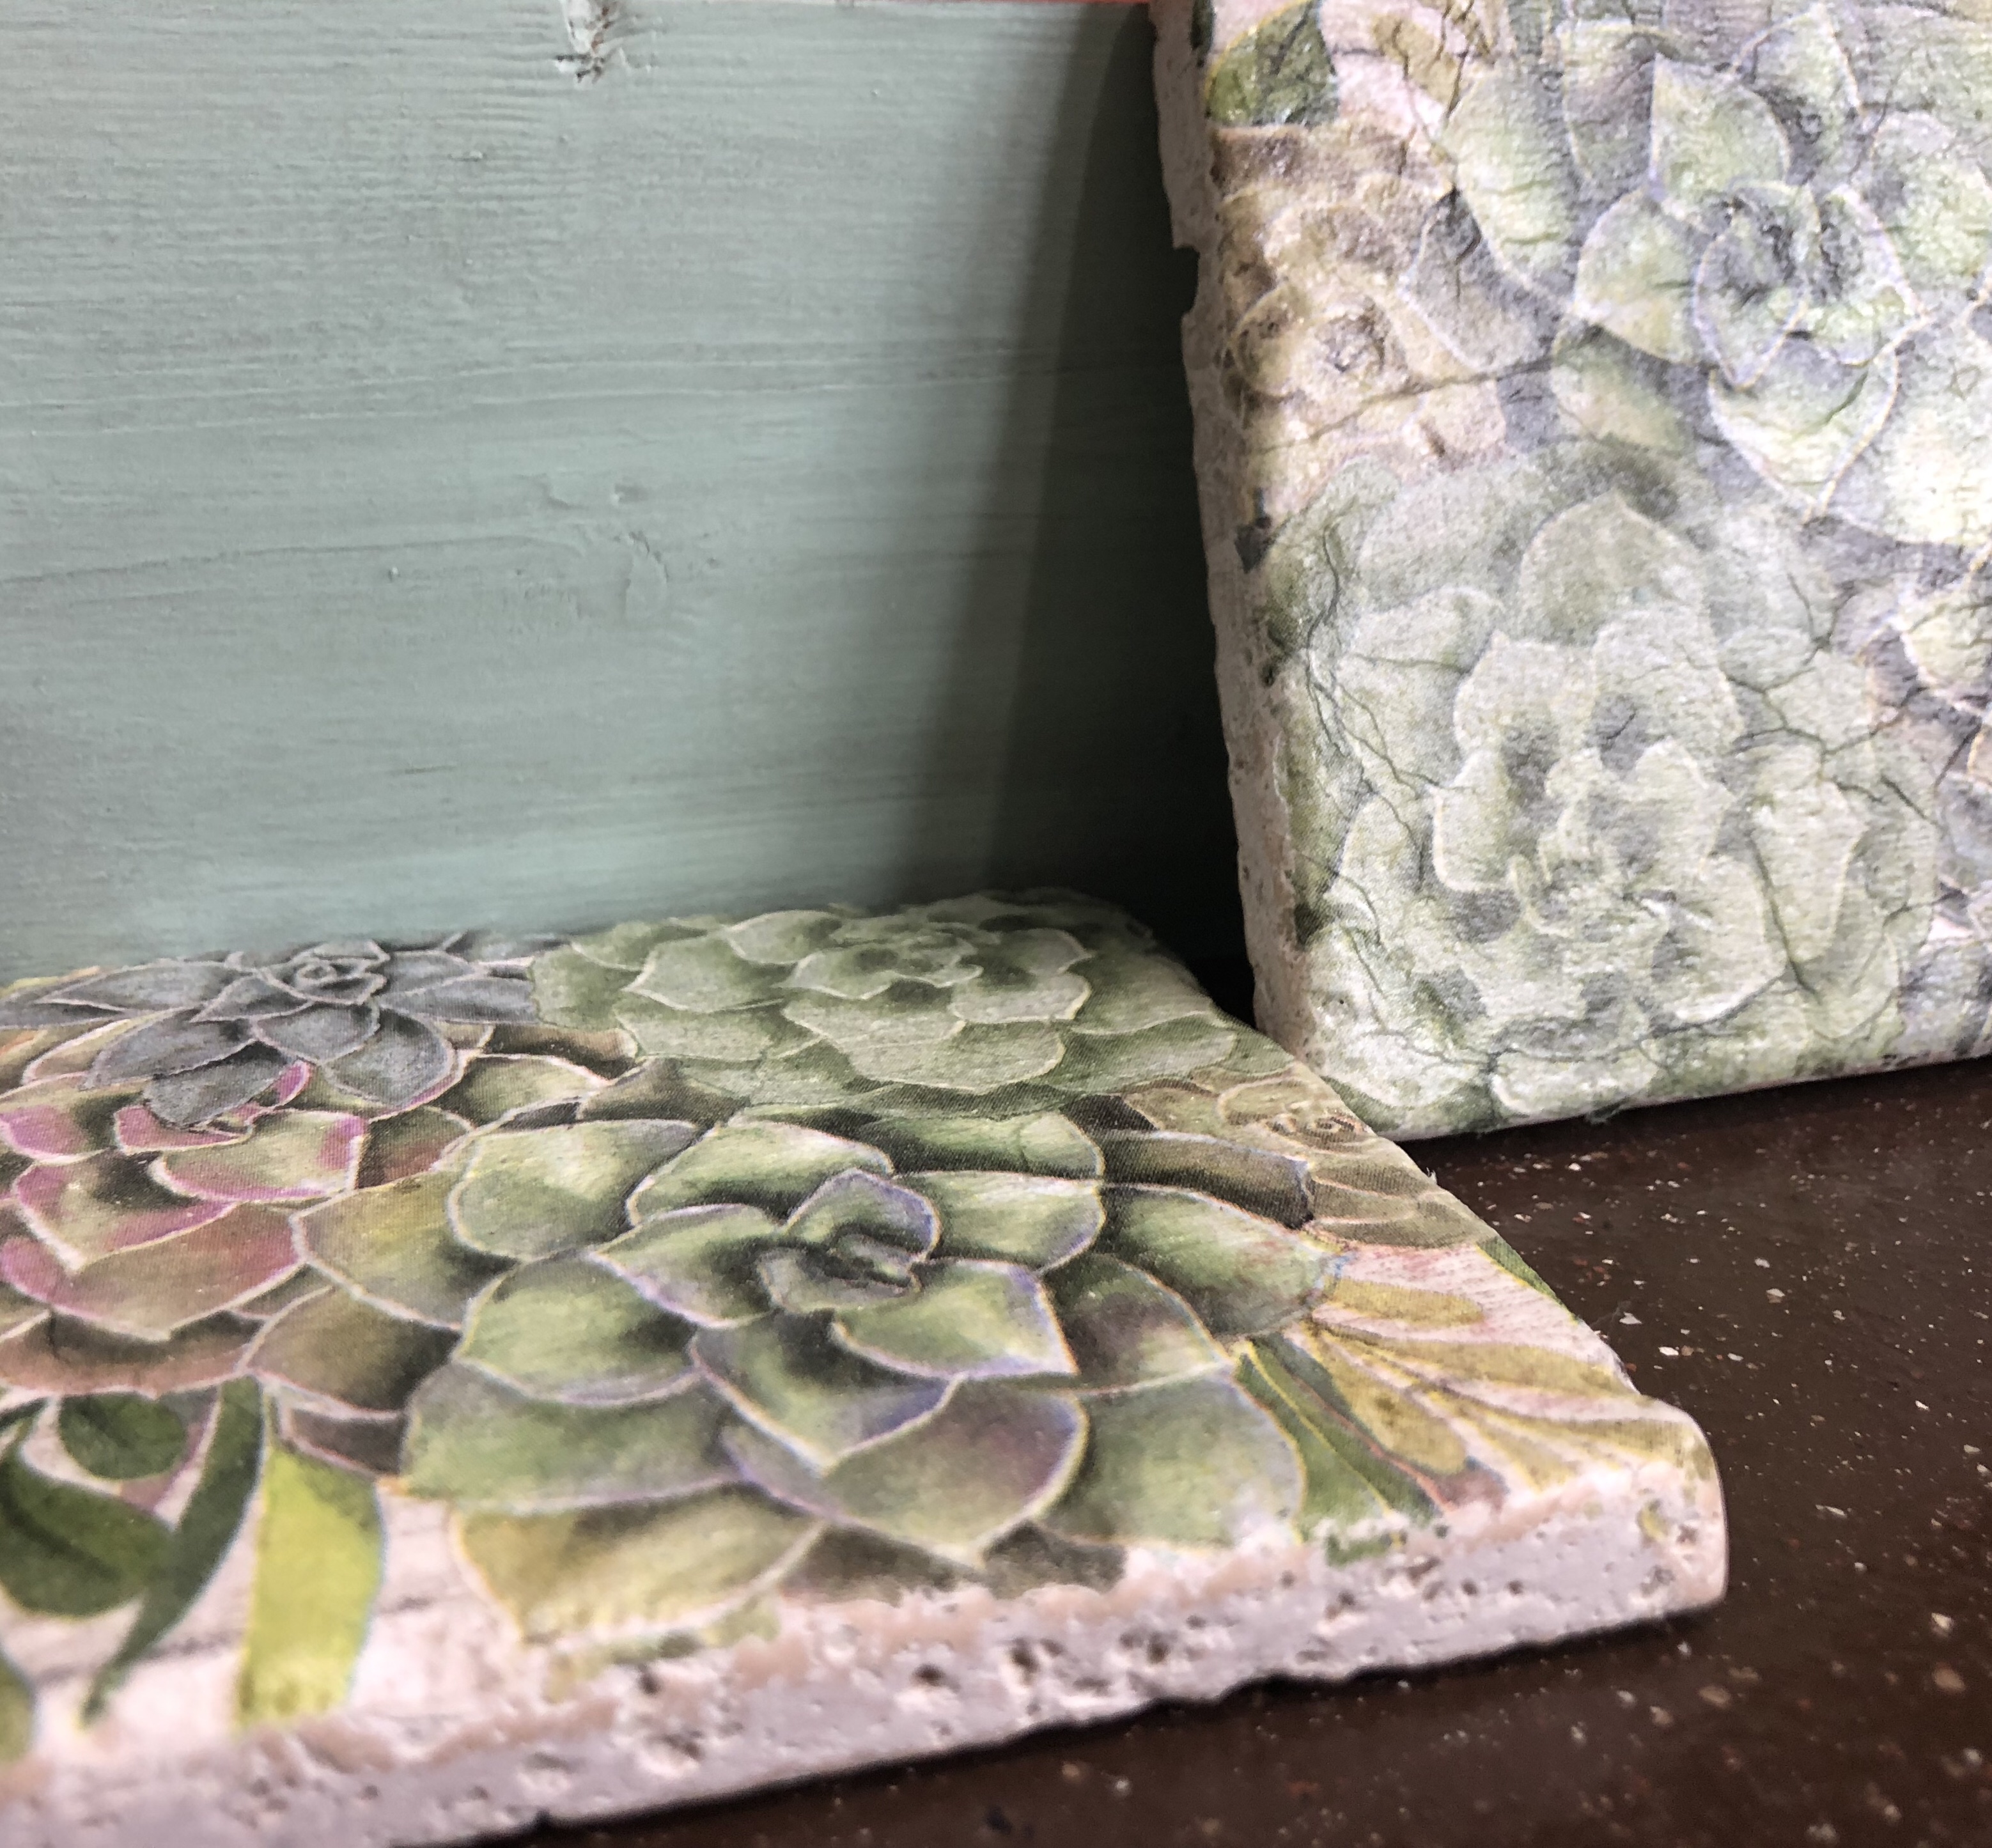
4. For the decoupage medium, I did not use Modpodge. I used Varathane water-based Polyurethane. I find it works great for decoupage. I applied a layer over the white paint and while still wet I applied the napkin. I used a sponge dipped in the poly to press the napkin into the stone, making sure I had no bubbles.
5. Once dry, I used 220 sandpaper to sand the edges.
6. I then used 2 coats of Rustoleum spray lacquer on the tops and sides to seal the napkin. Using lacquer will not reactivate the poly, so no bubbles formed.
The coasters look beautiful! I think my client will be very happy with her gift.
Last Friday evening, I sat down to do my first Live Video on Facebook. After stressing pretty much all day about it and primping like I was getting ready for a first date, I was ready. It seemed almost too easy to set up so I was a little worried. I got in about 5 minutes early just to make sure I knew what I was doing and 30 seconds later, I got the message that I had a poor connection and the little hamster wheel just started spinning. Great! I’ve had enough experience with technology, though, I just canceled it and started over. That time I connected and it was smooth sailing (kind of) the rest of the evening.
Another lesson I learned was that there is evidently a rule that says you can only do an hour. Oops…didn’t know that. One hour in and people weren’t wanting to leave, so I did 45 more minutes. I also learned you can stop after an hour. Wait 5 minutes, then reconnect. I’m glad I didn’t do that and I’m glad Facebook didn’t cut me off, recorded the whole thing, and didn’t put me in Facebook jail for not following rules. Whew! Live and learn.
The biggest thing I would do differently would be to actually use the laptop sitting in front of me. I was so stressed about it failing the first time, that when I saw the comments start coming up on my phone, I was so relieved, I didn’t think to start it on my computer. In fact, I remember wondering why I wasn’t seeing it on my computer. So, I spent the whole time leaning forward peering into the phone to see that tiny little print. LOL
But once into it, I really enjoyed it. There were a lot of questions and I was able to share a lot (although it was hard to share when questions kept scrolling through). I tried to go back to see them but there were some I missed. I did go back after and answered them on the recorded video. It was also a little bit fun to “have the floor” so to speak with no one interrupting and me not talking over anyone else. LOL
It was a great experience, all in all, and I will do it again. In fact, one viewer suggested doing a live video during a painting class we have coming up on September 30, so we will be working that into the class. Stay tuned for an update on that.
It is also important that you create an Event for a live video, usually about a week ahead of time. Then people can join it and will be reminded when it is time for the live video. I did this quickly, so I only had the event for the day. I had so many viewers and reached so many people by sharing it with the online course I’m taking and the instructor shared it with one of the other groups she admins. That was extremely helpful. I also shared it in the groups I’m in that allows that, on my personal page, and on Instagram.
So…..are you ready to view my very first Live Video. It really was like having friends come over on a Friday evening. Too bad I didn’t think to serve wine. LOL . I do want to warn you that sometime after the first hour, someone asked me to show something I had painted, so I grabbed my phone and tripod and took them on a tour of my living room. LOL. I was afraid I might have made them seasick.
You can create a barn wood like look on a table top using Missouri Limestone Company chalk-based paint and a stain_sealer. I have a step-by-step tutorial here to show you how!
The tip of the week is a little late thanks to Thanksgiving holidays. One of my sons and his two sons ages 4 and 17 months came to visit the week before Thanksgiving so need I say more.
My tip of the week for the Thanksgiving holidays shows you how I created a barn wood look on a table top. Plus I get to share the final results of the farm table set. This is one of those projects I sure wished I had #1 – a garage to work in and #2 – that my dining room was big enough for me to keep it. I posted pics of the progress and that generated so much interest, I sold it the day I finished it, so others liked it, too.
I did manage to get some time in to finish the huge farm table set I started (hoping to finish before Thanksgiving) the day after so that wasn’t too bad. It took a couple of mornings getting up at 4:30 am to work on it before the little ones were up. I really needed to get it out of the basement before everyone got here so we could get to the bed. I was thinking we might have to sleep on it. It sure was big enough. LOL
TIP OF THE WEEK
How to create a barn wood look with paint and Varathane’swater-based stain and sealer (I call this my magic stain). I love it! I debated about keeping this as my secret weapon, but I can’t do that. I’m an educator and I just have to share what I have learned myself. Hence the name of our paint company….SharSum Paint, a play of words based on my name Sharon Sumner (Share Some – get it?)
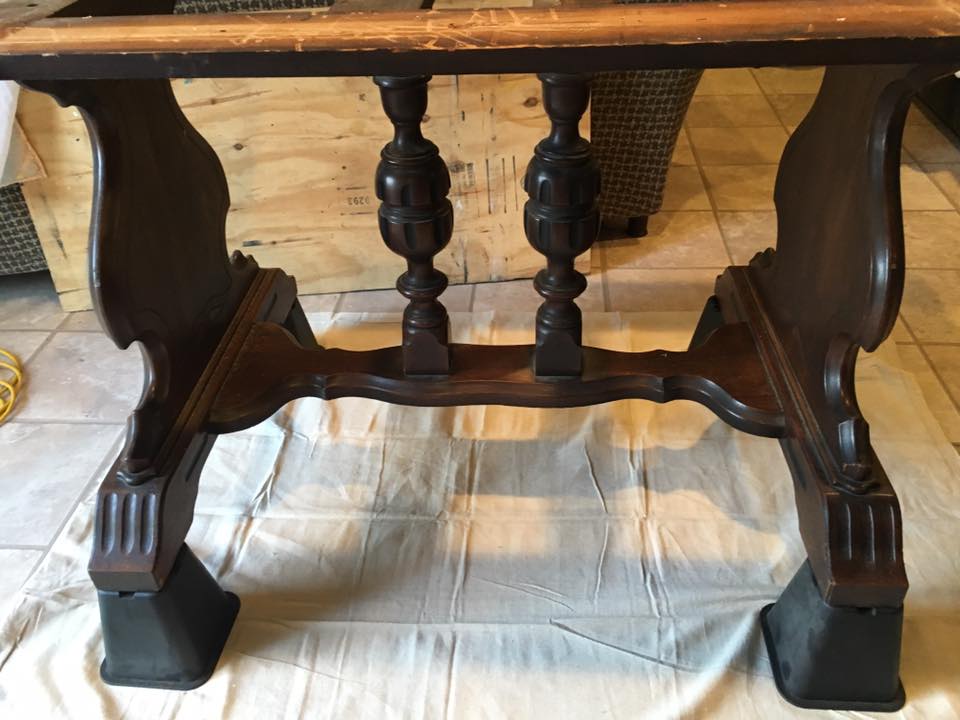
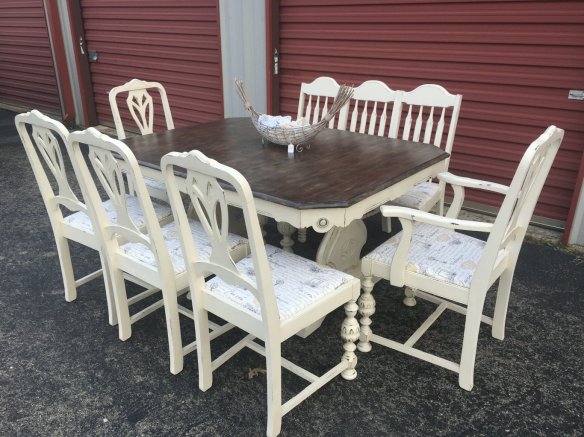
But first, some before pics of the table and chairs.
The table and chairs were basically in pretty good shape. We had to do some repair on some of the veneer under the table top and on the leaves and had to put the sliding mechanism back together, but this was a good sturdy set.
TIP #1: Creating a barnwood type look on a table top. I really didn’t know how this was going to turn out, so I did a practice piece and then decided to just go with it. I really do love how it turned out and it is all due to my magic stain/sealer technique.
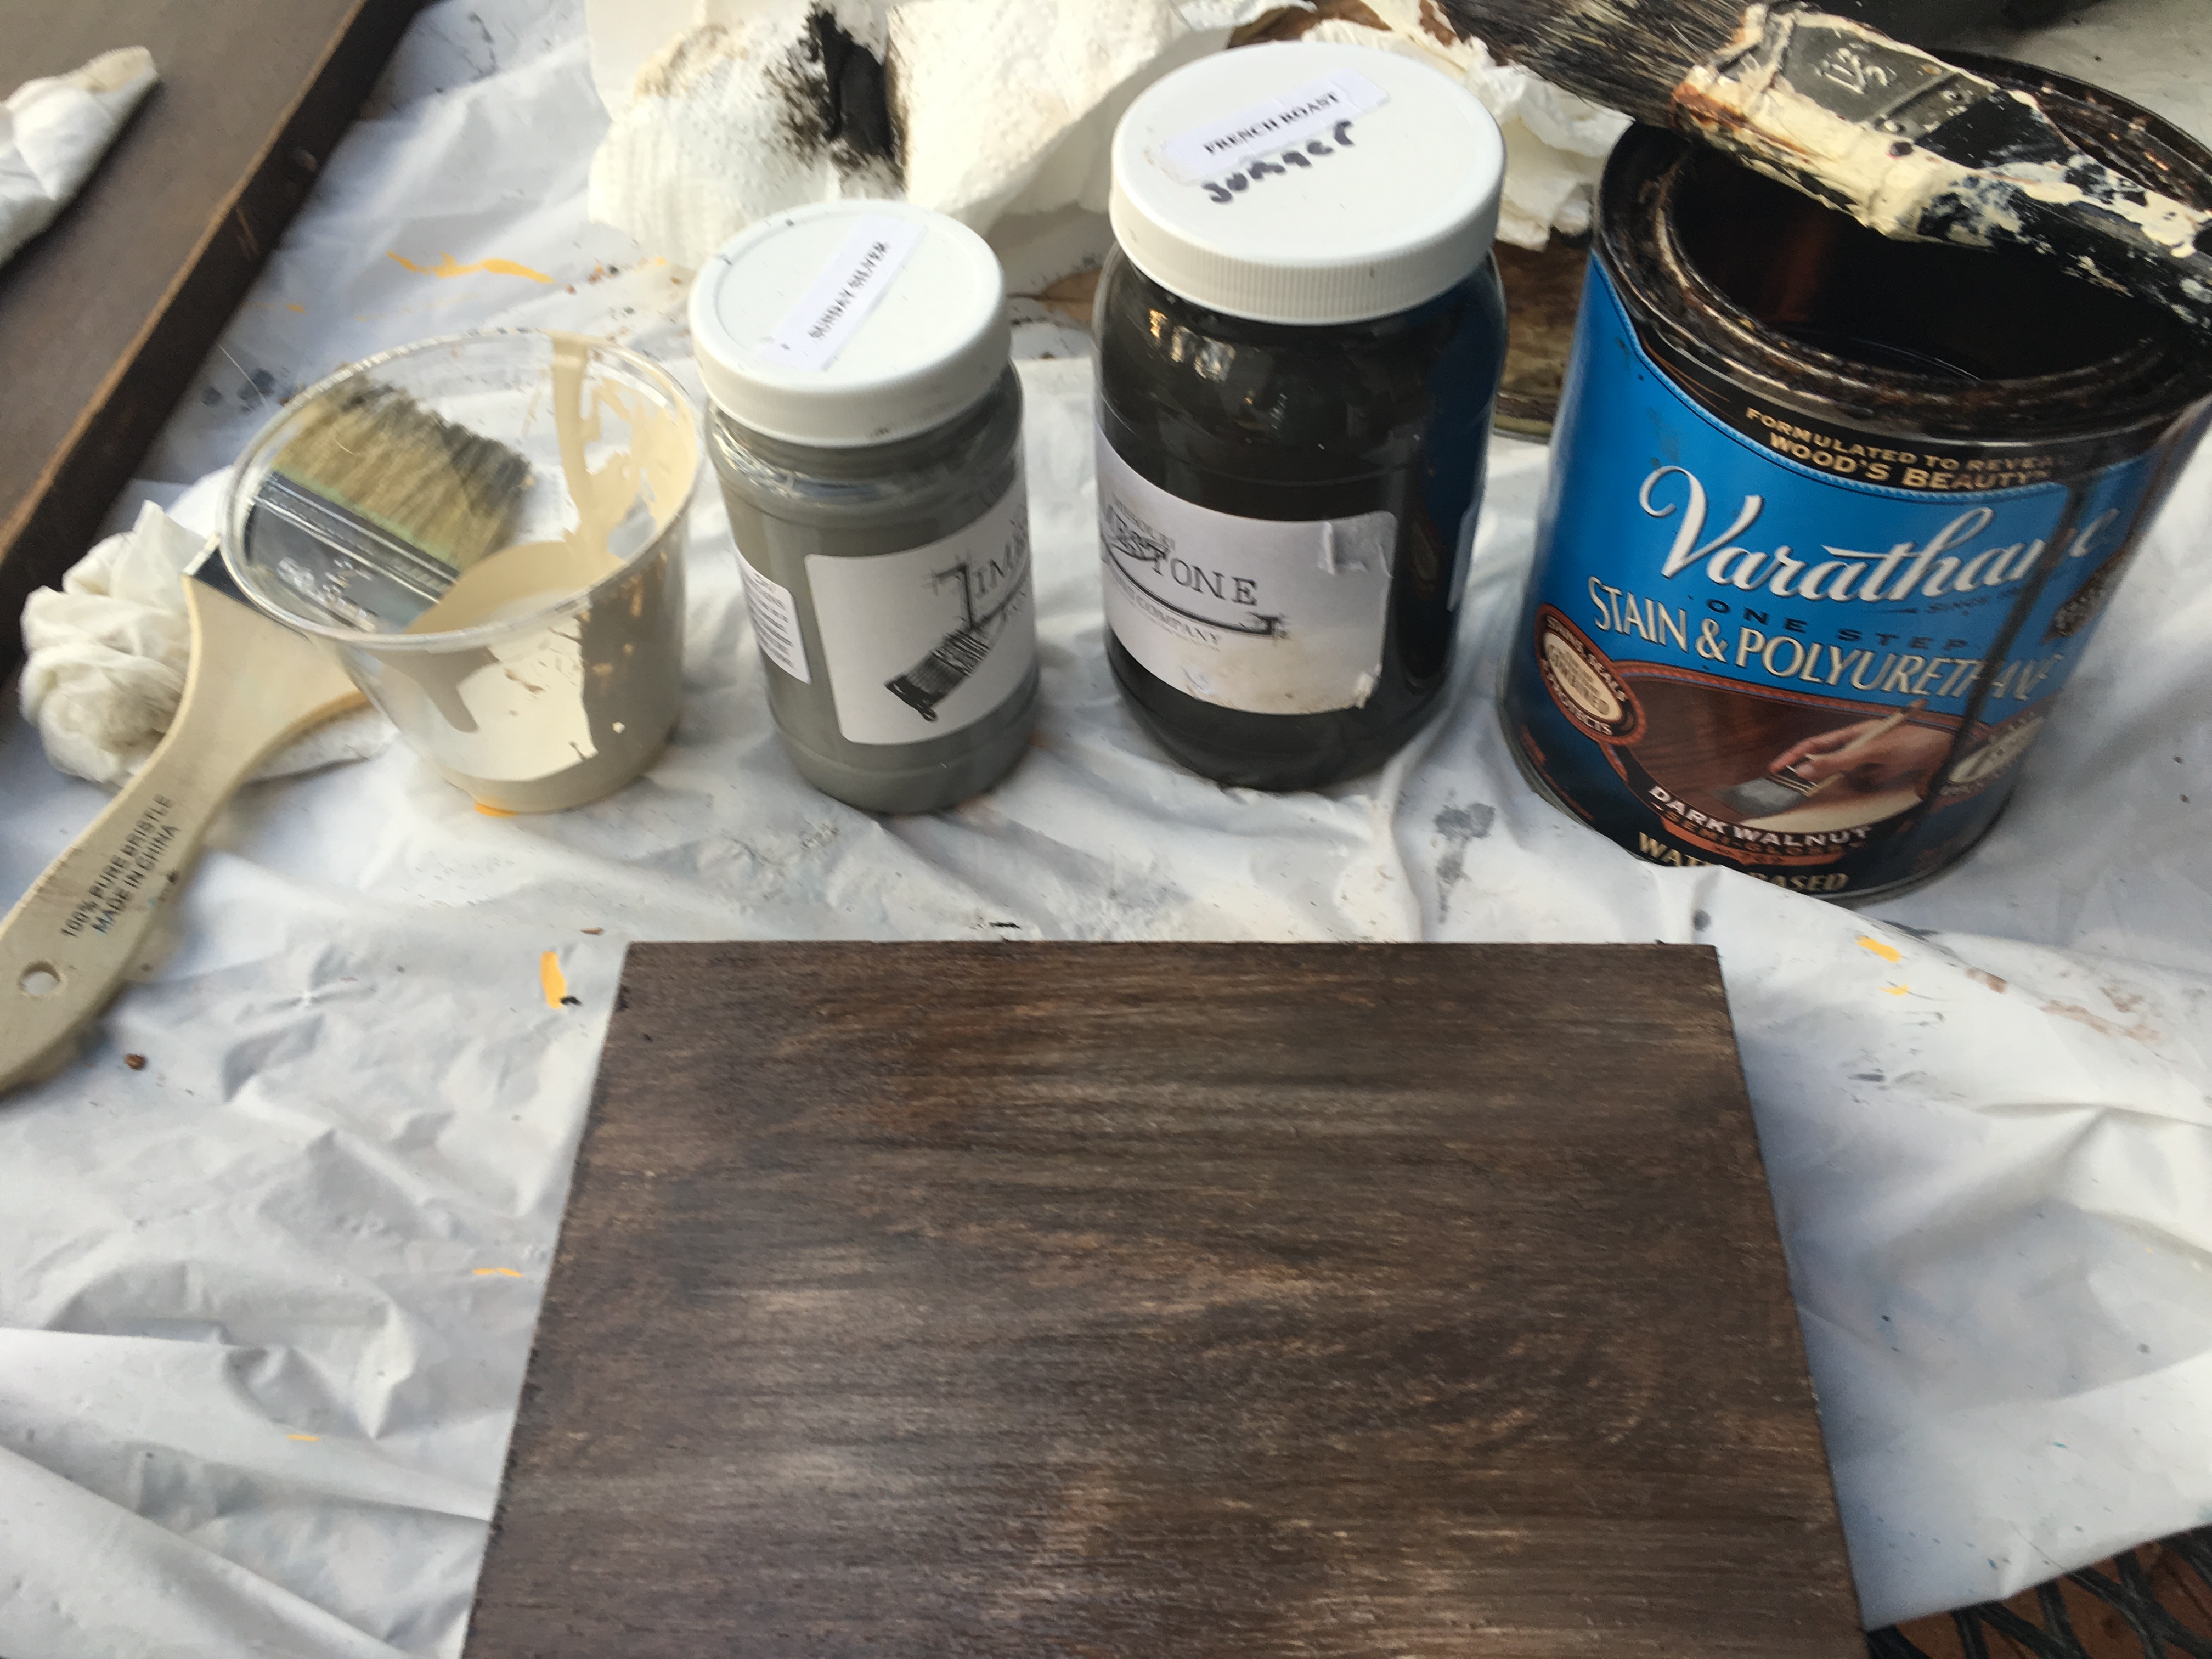
First, I gathered my supplies. I used Missouri Limestone Paint Company’s chalk-based paint. I needed Grannie’s Lace (an off white) Sunday Silver (a medium gray), French Roast (a dark brown) and Varathane water-based stain and sealer in Dark Walnut.
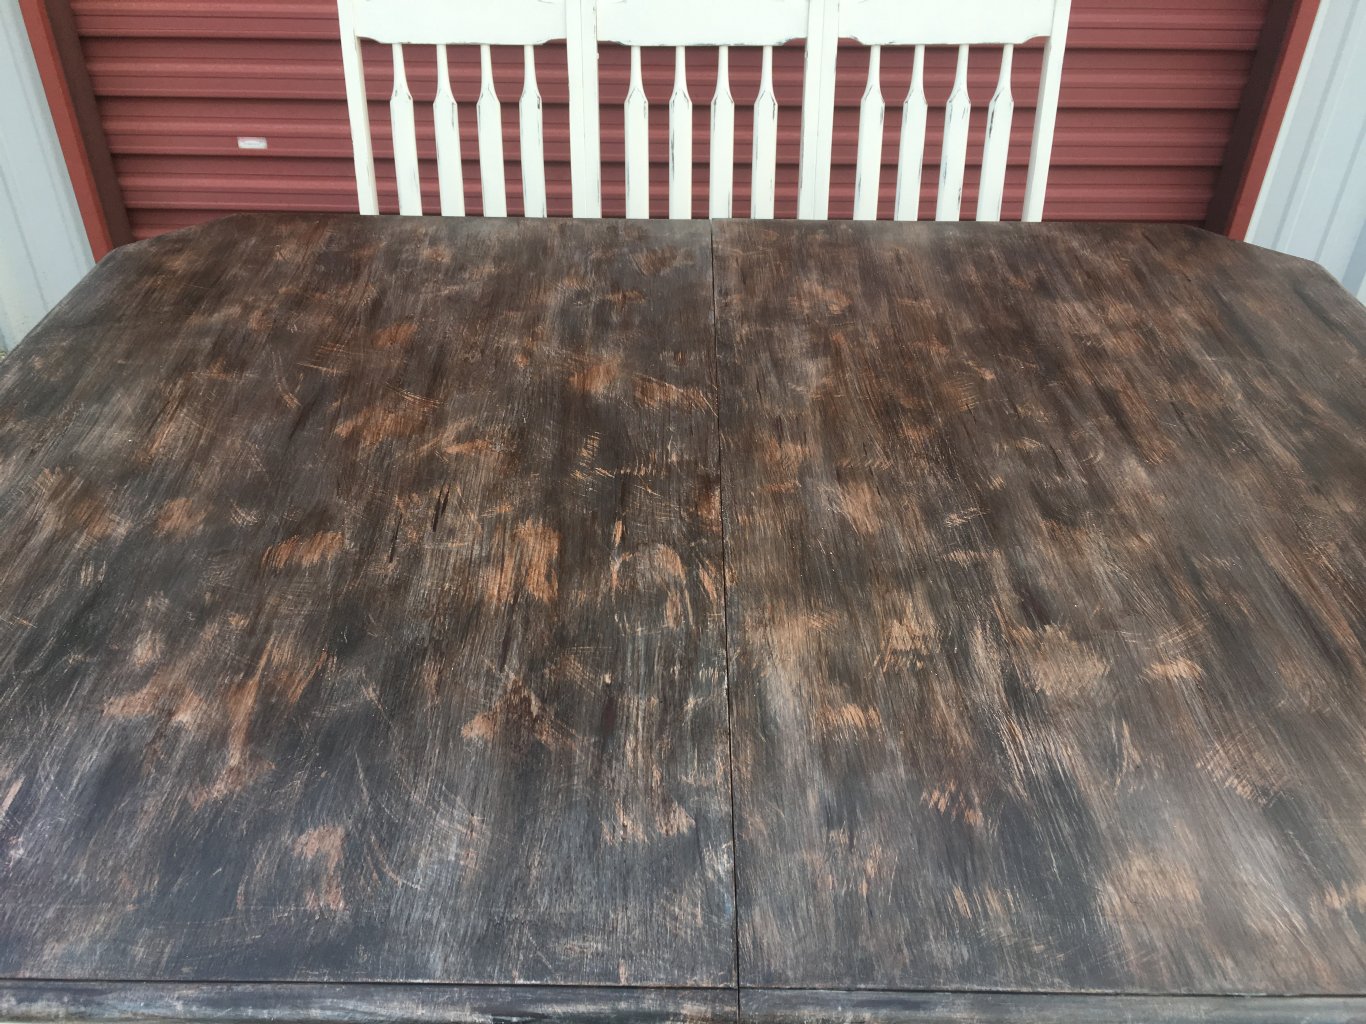
I painted the leaves and table first with the French Roast. The pic shows a finished sample.
Next, I used Grannie’s Lace and dry-brushed over the French Roast. Then, just a little of the Sunday Silver dry-brushed, and even less of French Roast again. I then did a light wash of Grannie’s Lace. I took dry paper towel and just started rubbing that wash in. Sometimes I rubbed down to the French Roast and sometimes even harder down to the original finish. The picture below shows the dry brushing. UPDATE: I did another table top after this (see pics at bottom of post). I didn’t bother using the paper towel and rubbing it in. Instead, I did a dry brush technique on the other colors (adding just a bit of water – not much) and tried to keep the brushing as straight as possible.) It turned out as nice, if not better, with much less work.
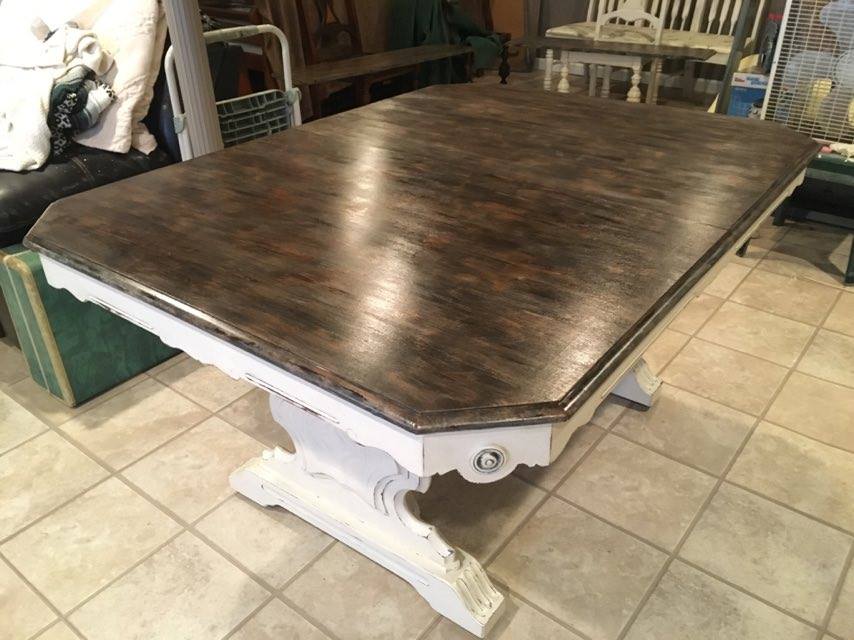
The magic comes when I add the Varathane water-based stain and sealer. I used Dark Walnut. It somehow just blends everything all together and seals it at the same time. You can see the white wash on the picture below.
The more coats you put on, the darker it becomes. I used 3 coats on this table and leaves. I very lightly sanded in between coats. The result was a very smooth finish. The sealer has a little shinier finish than I like, though, plus I always want to have a really durable surface on a table, so I added two coats of Varathane water-based satin polyurethane, which toned down the shine. Every single time I would walk past the table top, I just had to admire it and feel the smoothness. : )
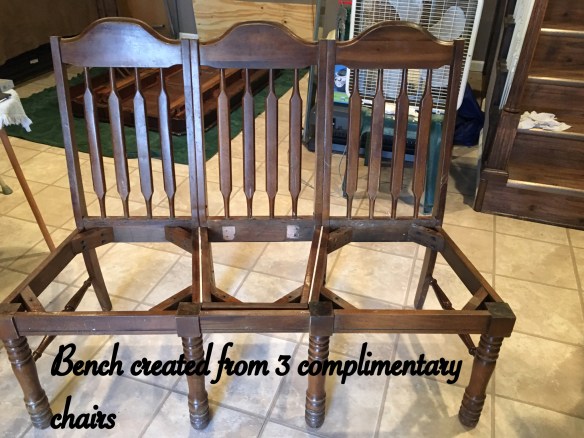
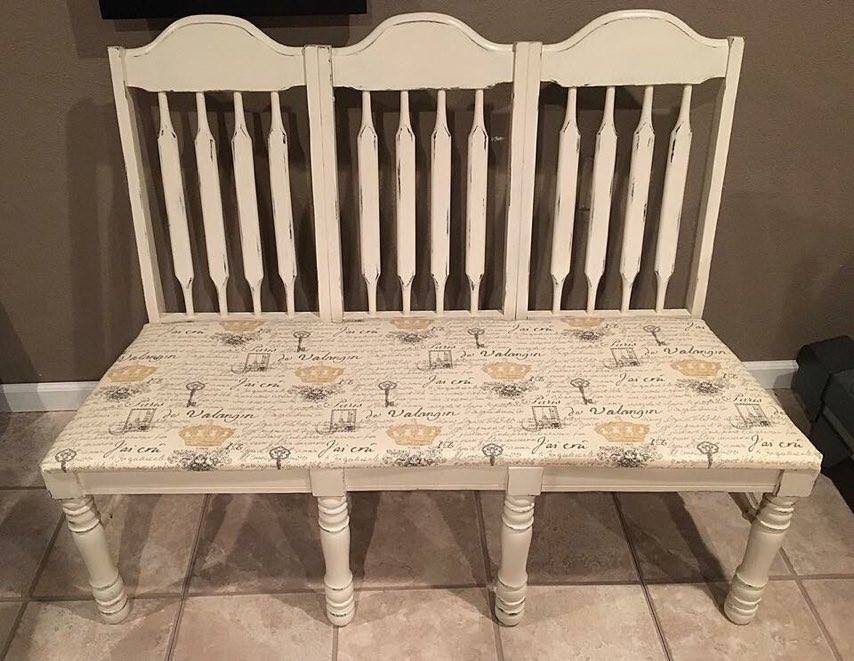
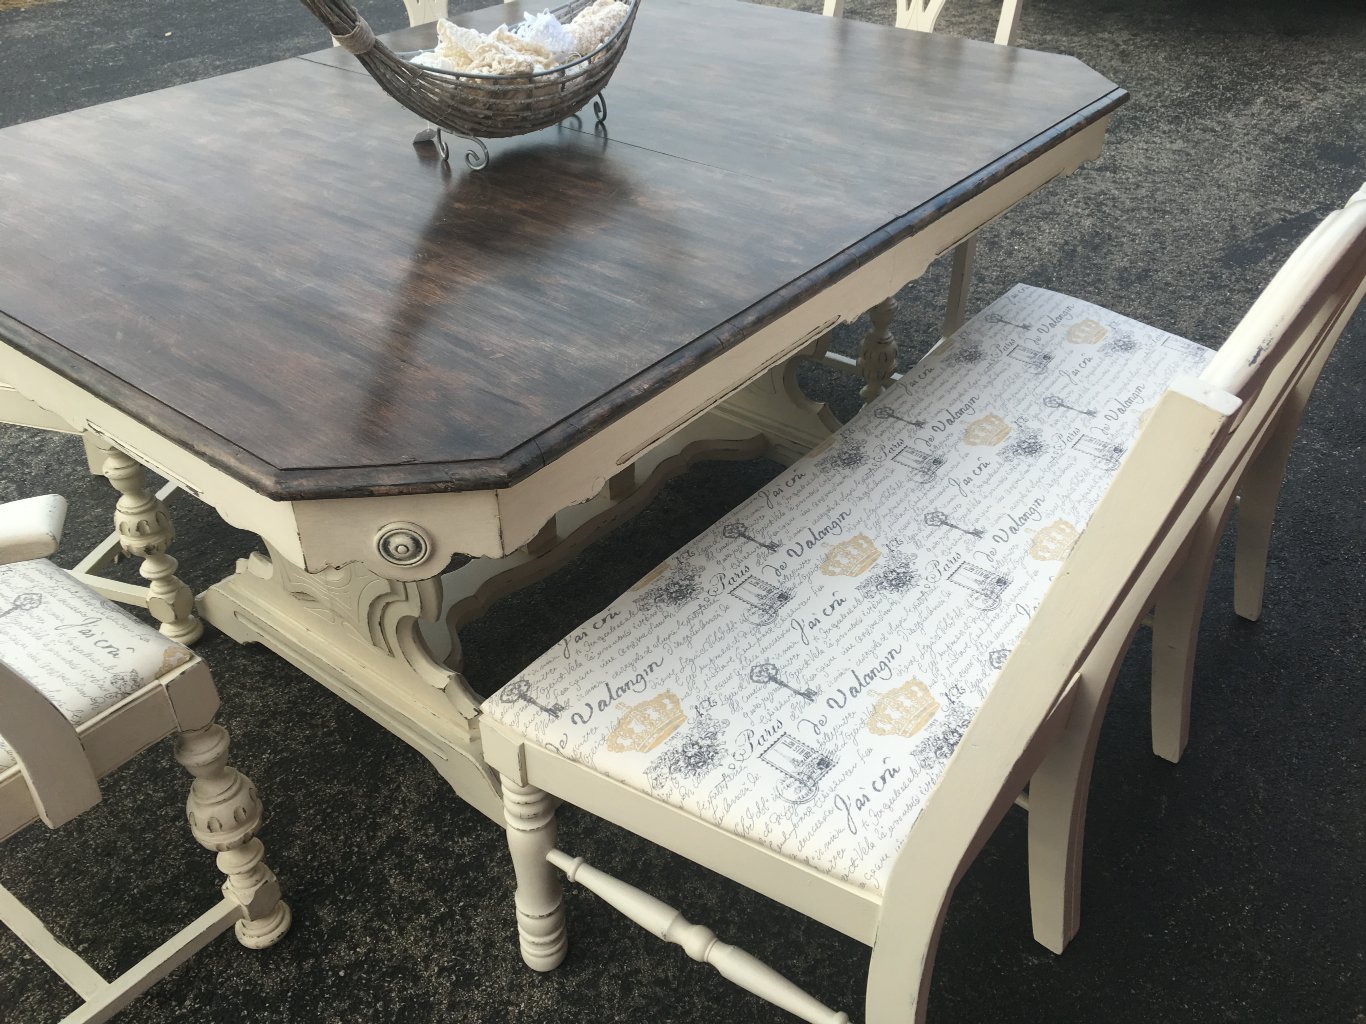
So, there’s your tip of the week. And now for the finished farm set. By the way, we made a bench for this table out of 3 complimentary chairs. Check it out on a previous tip of the week.The lady buying the set loved the bench. She has two little ones and one on the way and she said she was worried about the benches with no backs and afraid the kids would turn them over too easily. She loved how heavy and sturdy the chair bench was.
We put together this list of tips and tricks on things we’ve learned when painting, waxing and sealing. These are our opinions and what has worked and not worked for us. Others may have had different experiences.