I have been a bit busy the last few days creating fall decor. Some days are just like that. You can’t stop. We’ve had some beautiful fall days in Missouri this week so I took advantage of the weather. It felt good to be outside working on my projects.
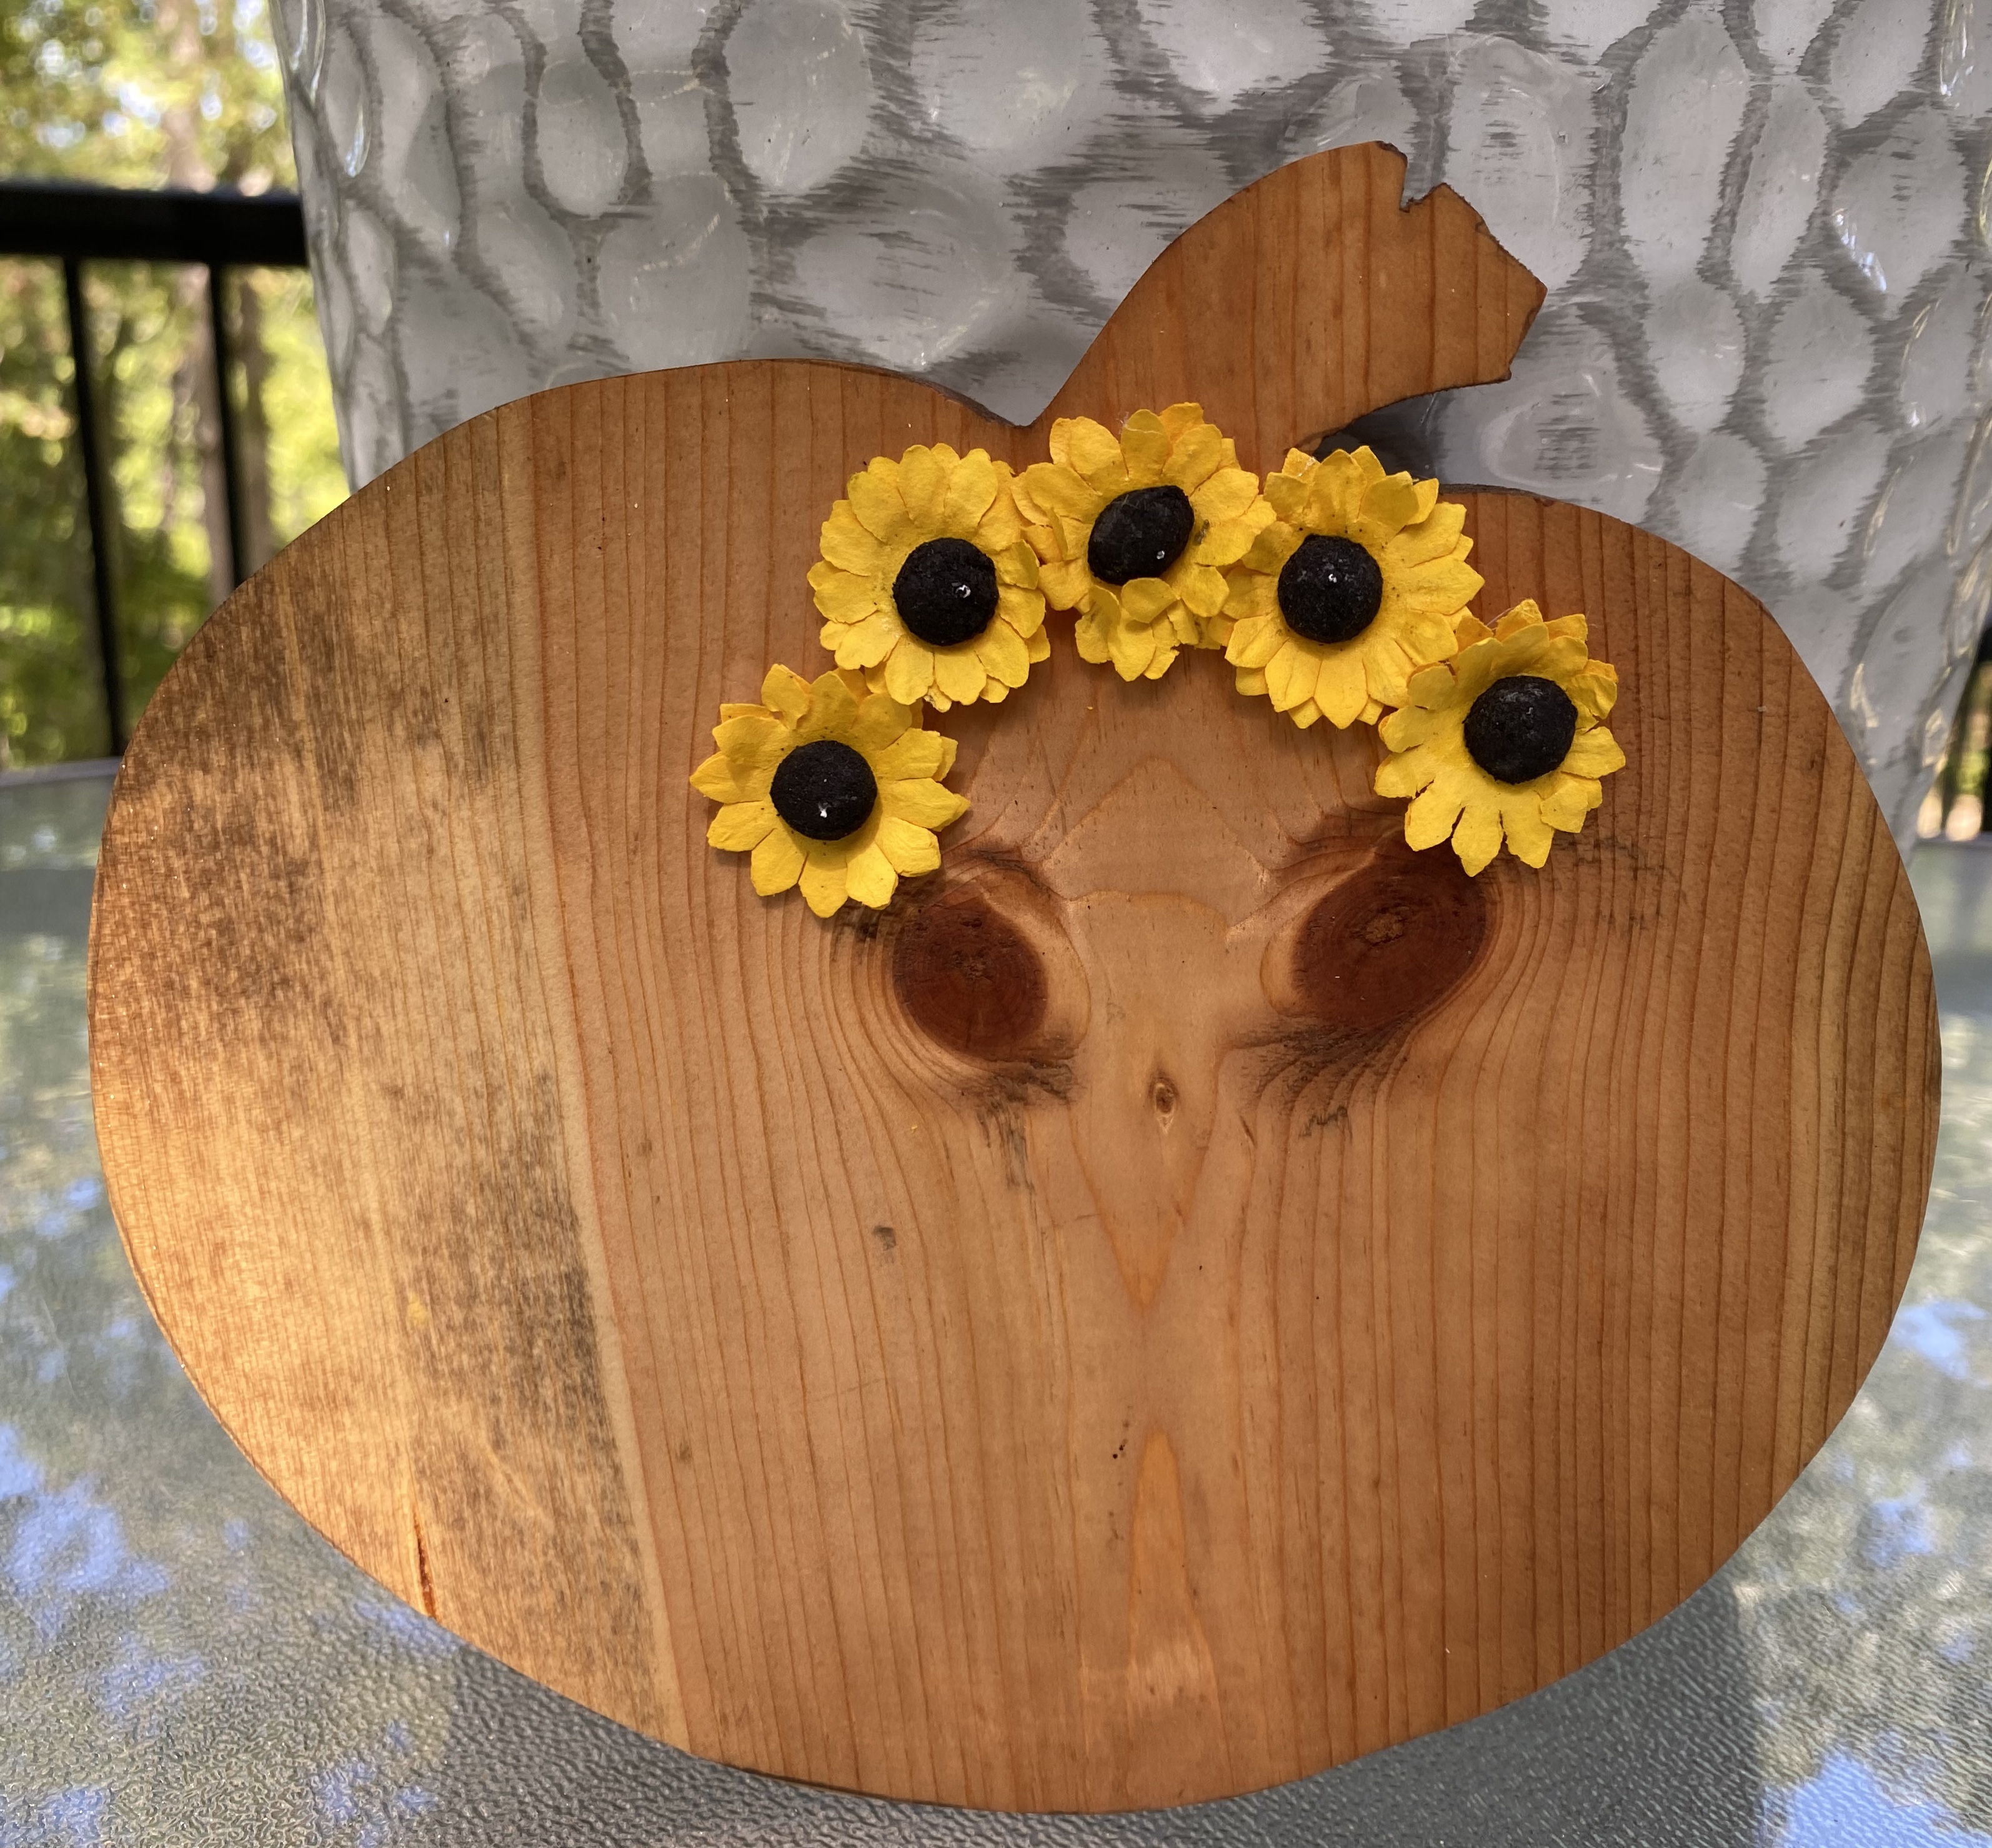
First up…. I was going through my fall decor boxes and ran across a box with a bunch of wood cut outs I hadn’t seen since I stored them. It was a jackpot of pumpkins, ghost, cats, and a few other goodies. One pumpkin had a very unique wood grain on the front and back. I just saw someone posted one very similar. It looked like an ostrich! I could see an ostrich in this one, too! Not only that, I saw an owl on the back!
I wasn’t sure what to do with it, but finally settled on using Howard’s Restore-a-Finish to bring out the grain and then I sealed it with Wise Owl salve. I named the Ostrich in a Pumpkin Woodette and the owl Woodsy. Soooo cute!

Then my friend, Midge, had an idea: flowers, a tiara, or crown for Woodette. I happened to have some small sunflowers and with just a dab of glue, they will come right off. I can change them out for each season! I think I might need to make Woodette a princess for Halloween and find a little crown for her.
In the same box as my Ostrich in a Pumpkin, I ran across this little shelf sitter or hanger. I passed over it at first, thinking….Wow! The 80s!
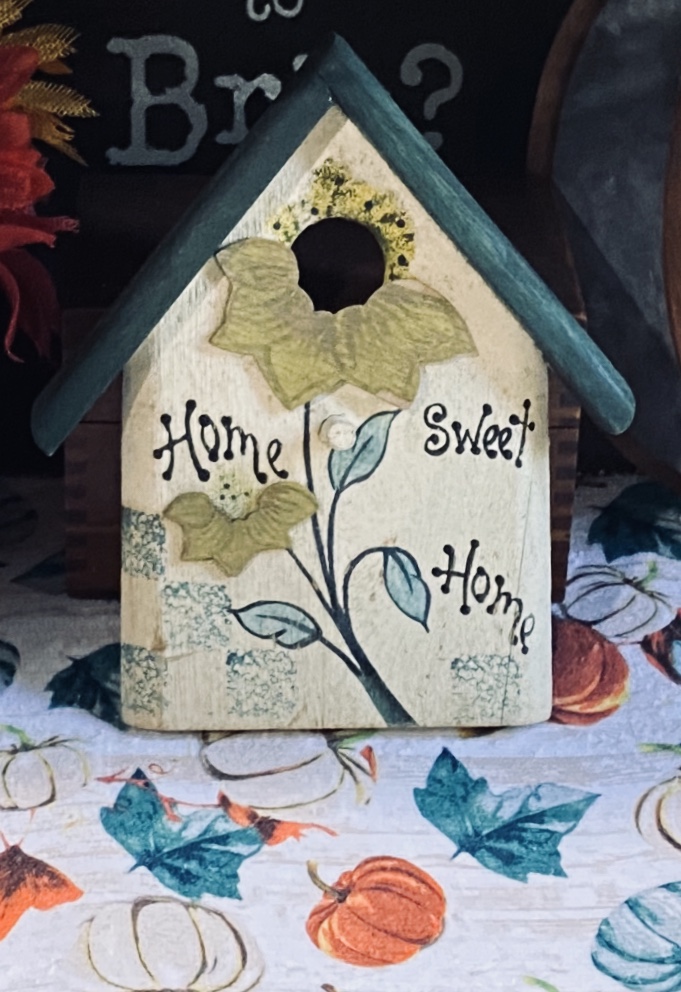
But then, I got this fall dish drying mat out of the Dollar Tree bag I just purchased. I realized some of the colors went so well with it and the other fall things I have in the corner of my kitchen. So..now, it is out of the box and in the corner of my kitchen counter. 🙂

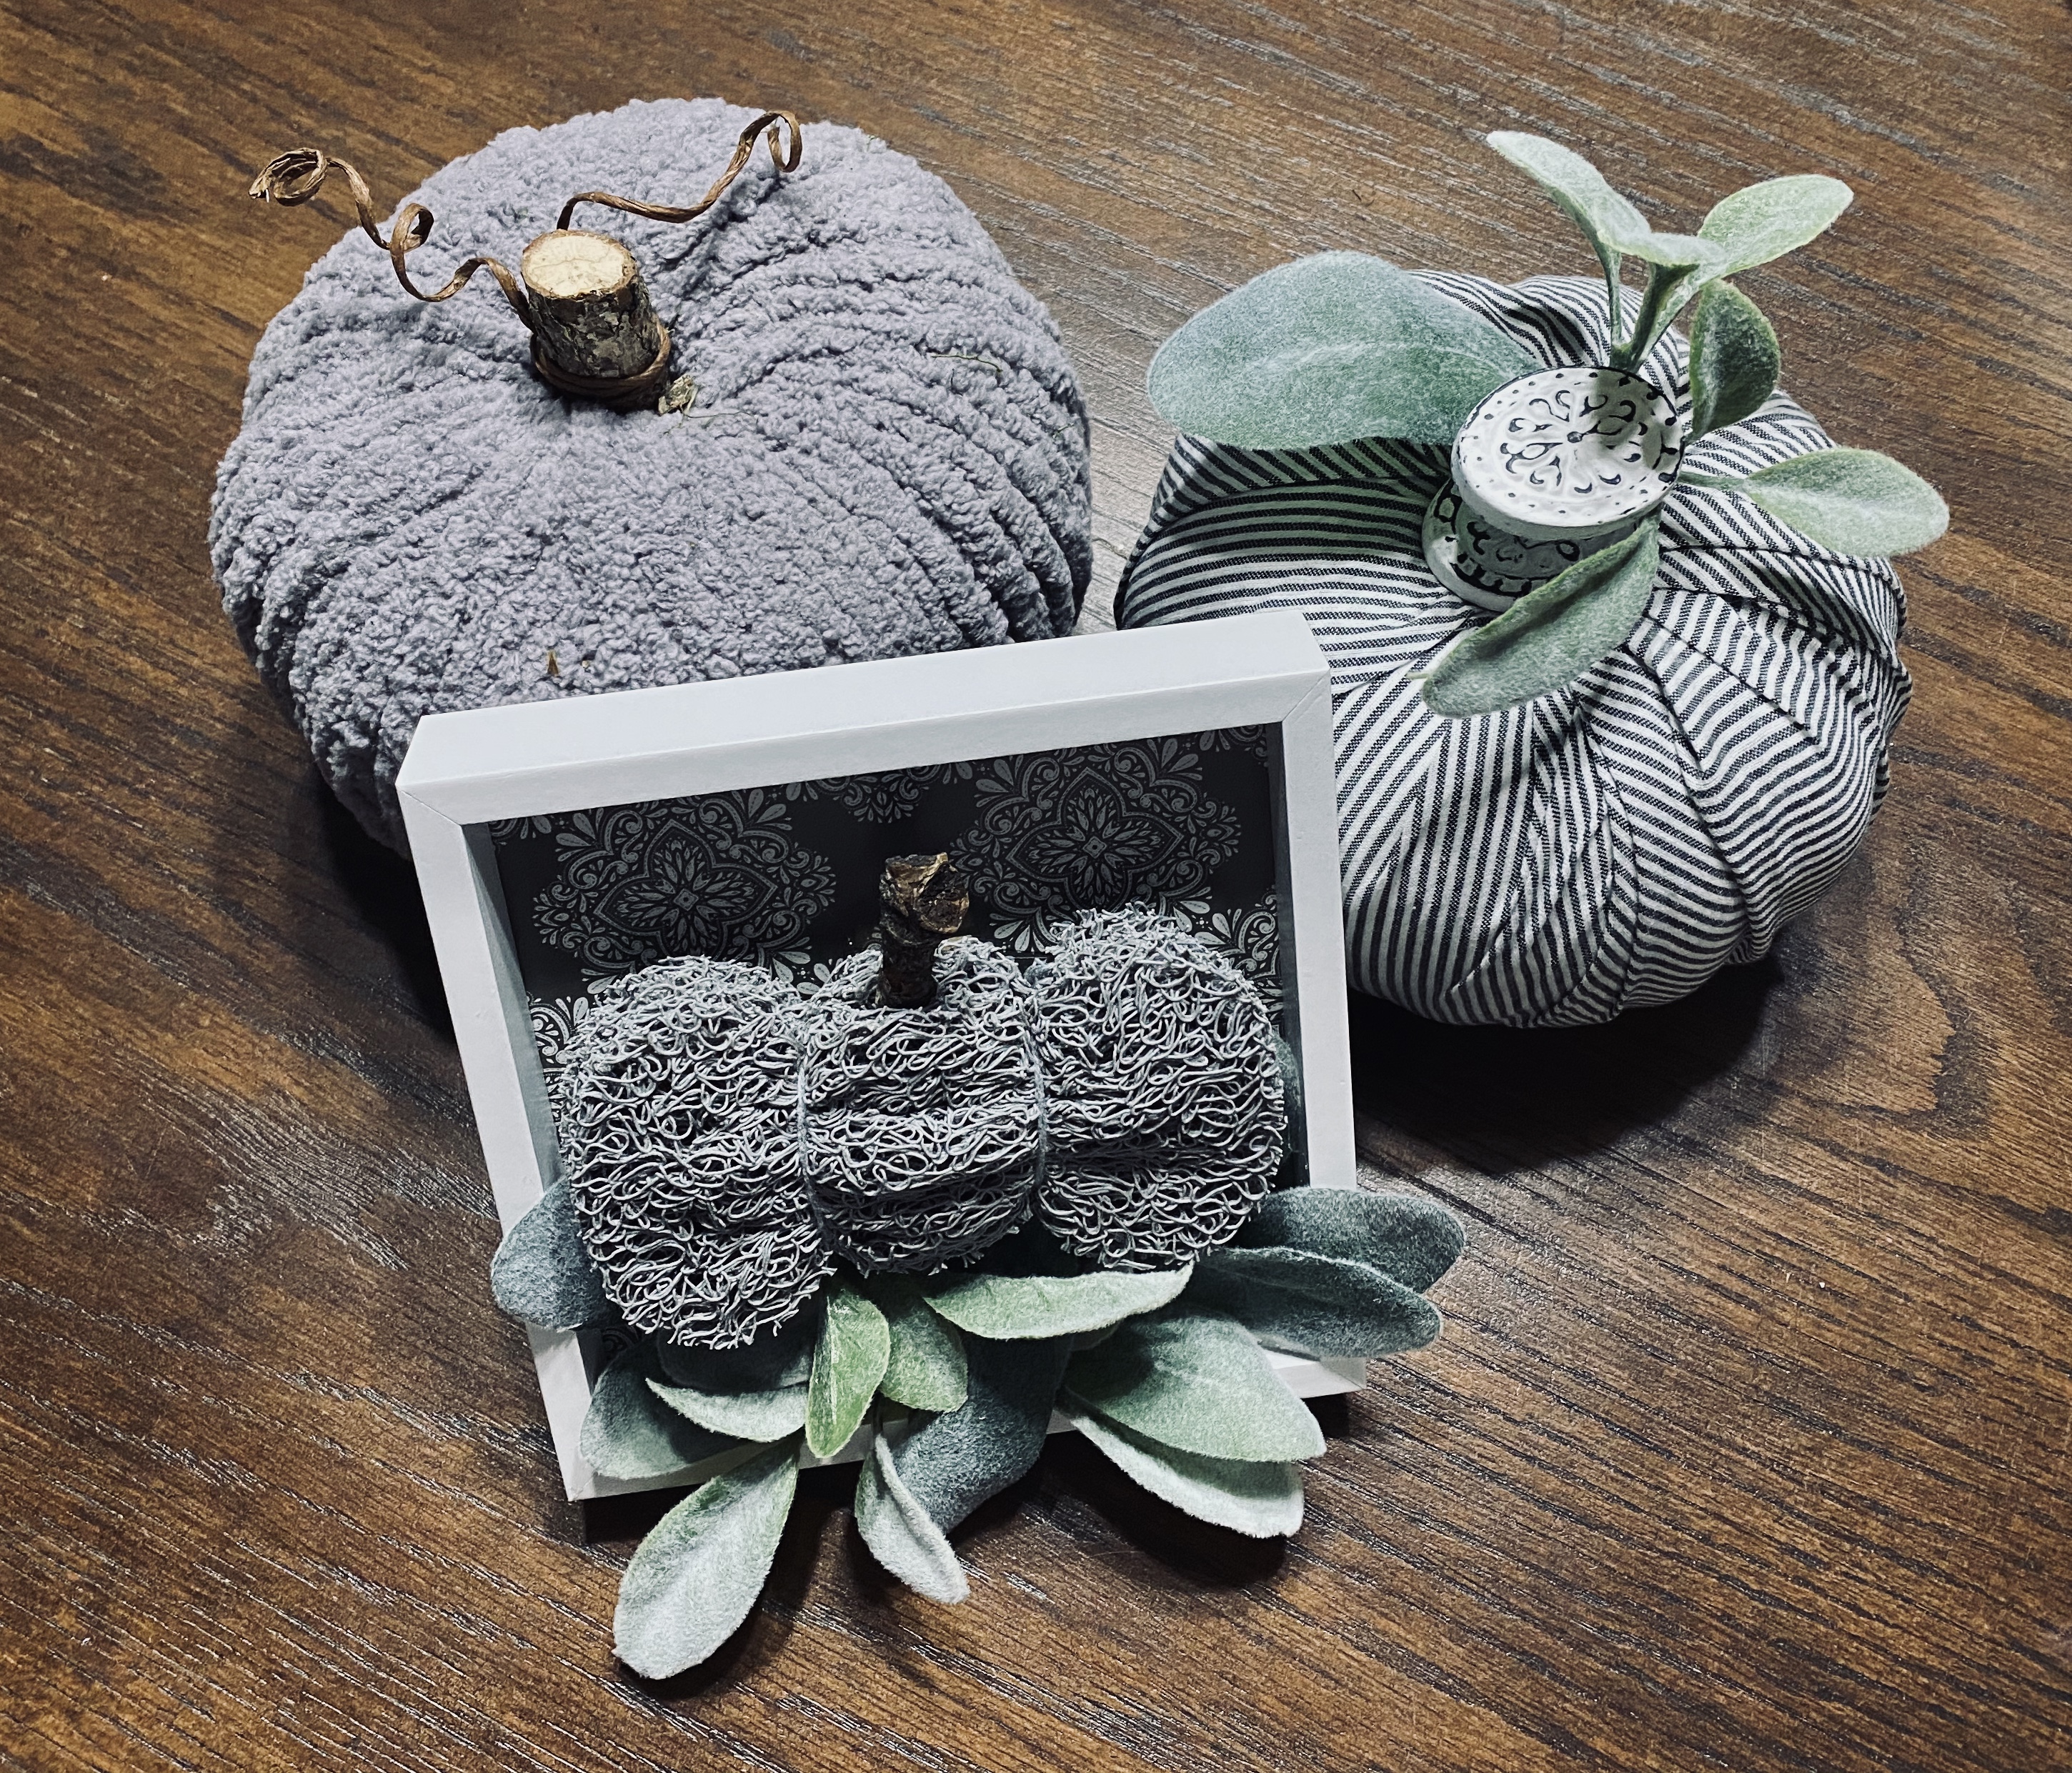
Oh no! Another gnome …. after I said no gnomes this year! But the Gnome and Backyard lady had this idea I couldn’t resist. She made a quick and easy gnome out of the small plastic ghosts from Dollar Tree. I spray painted one for the hat with a copper color because that’s what I had on hand and added tiny Dollar Tree sunflowers for embellishment. The other I left white and glued it upside down to the hat. I gassed a wooden bead for his nose. I bought two big ghosts, too, to make a larger gnome.
I spray painted a Dollar Tree wire pumpkin form white with a green stem and attached my cute little gnome to it with jute twine and now have a cute fall door hanger for my front door. He hangs from a magnetic hook on my stork door by the stem


Here’s Gnome and Backyard’s tutorial!
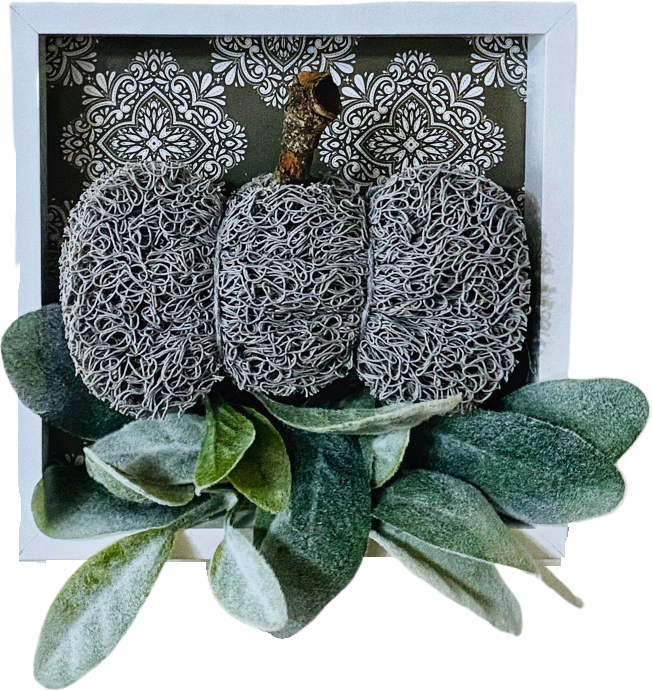
This awesome creator also had a tutorial for making a pumpkin out of a Dollar Tree soap saver. What? Check it out! https://fb.watch/fOIcejAF2x/
Of course I had to make one, too. This one I left gray and put it inside a Dollar Tree shadow box. It looks so cute with my gray pumpkins I made (the striped fabric came from DT), but I bought a few more to paint! 🙂
I still hadn’t gotten to my other pumpkin cut outs, so onto more decor!
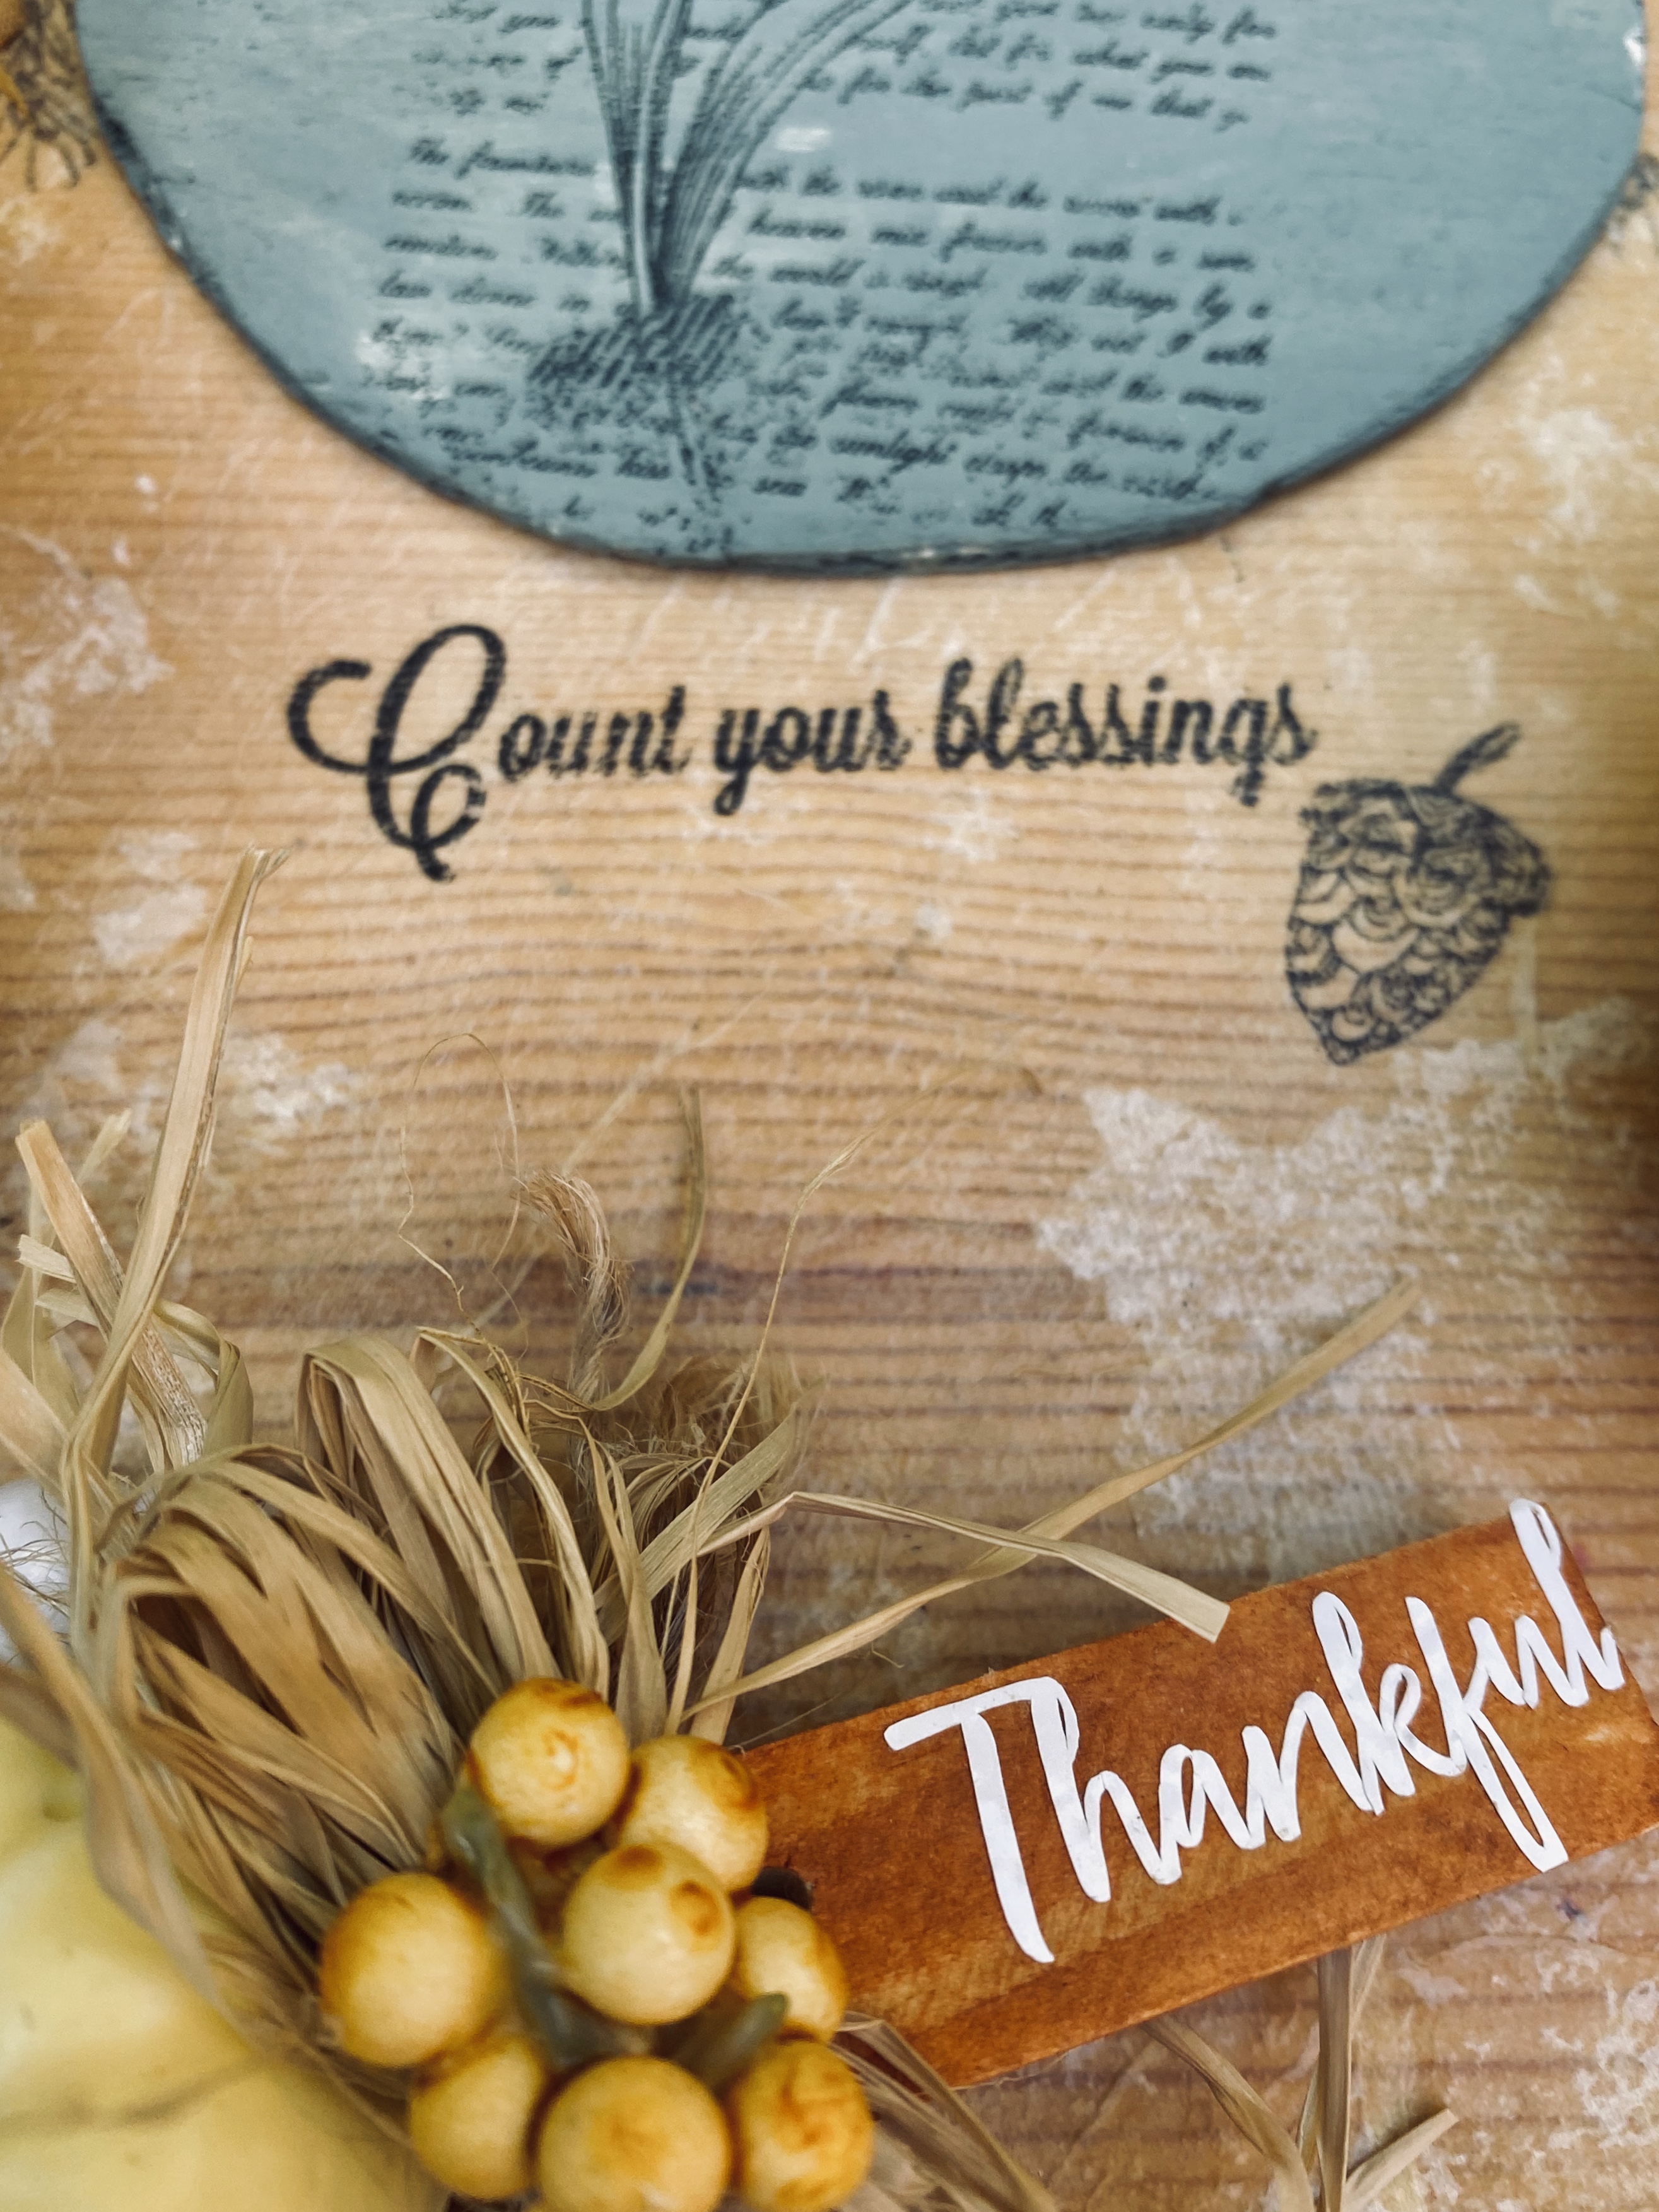
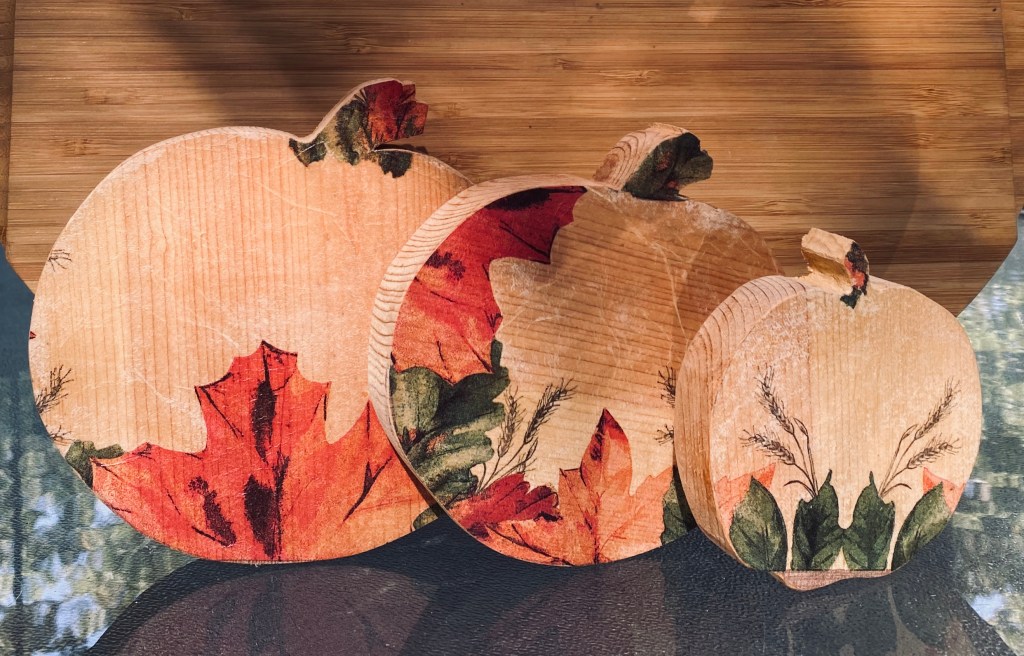
I made this arrangement in three different sizes and used a Dollar Tree napkin decoupage technique. I was going to add embellishments but I love the rustic vintage look of them just as they are. They stand up on their own and are perfect for shelf sitters or tiered trays.
I also decoupaged a little 3 1/4” square natural wood trinket box. I made the little leaf ladder tall last year. It goes perfectly with this arrangement.


This next project is one of the larger pumpkin cut outs and will stand alone. I glued one of the Dollar Tree faux tin panels to it.
For this finish I did a kind of an aged terra-cotta color I’ve been seeing others do. I painted it with a color I mixed and added just a bit of baking soda to it. Then I sprinkled more baking soda on it while still tacky. After the paint dried I blended the baking soda on with a bit more paint then sealed with a matte sealer. I used a bit of the napkin I was using earlier on the stem.
So pretty! I really enjoy creating a more neutral look for fall decor.


And finally, I ended my marathon crafting this morning. Maybe. Lol I started this project last night and finished today. I still had more pumpkin cut outs in 3 different sizes so painted the face of each with the terra-cotta color I mixed. I used a bit of left over napkin for the stems.
I distressed them a bit with sandpaper and then used the new Dollar Tree brown parchment paper rub on transfers on them. I apologize in advance for finding more of these transfers in different designs. They are so hard to find, but I found these in the same store I found the others in Ballwin, MO on Manchester Road. But, oh how I love working with them and hope they make more. I’ve not seen them online yet, either.


That’s not all! I’m now working on a natural wood napkin decoupage riser and it should be finished soon! 🤷🏼♀️
Update: The last of this grouping is complete. 🙂
I had this 12” round wooden plate. I had the fall napkins. I had the decoupage medium. I had some little rub on transfers and the wood beads from the foot exerciser I bought a couple of weeks ago at a yard sale to use for feet. I have items to display.
So I made a riser.