I thrifted a vintage spice rack at an estate sale awhile ago. It was in great shape and I don’t think the jars had ever been used. I knew I could update it and make it work for today’s kitchen decor and be functional as well.
I also ordered some spice jar labels from Temu for it. They arrived, so it was time for this makeover.
Today, I cleaned the spice rack well, took off the eagle and stars and painted the spice rack with black chalk paint (3 coats), then distressed it. A friend from one of my groups collects eagles, so I am sending the little eagle to her for her collection.
The secret for no brush strokes with the chalk paint I use is thin coats.
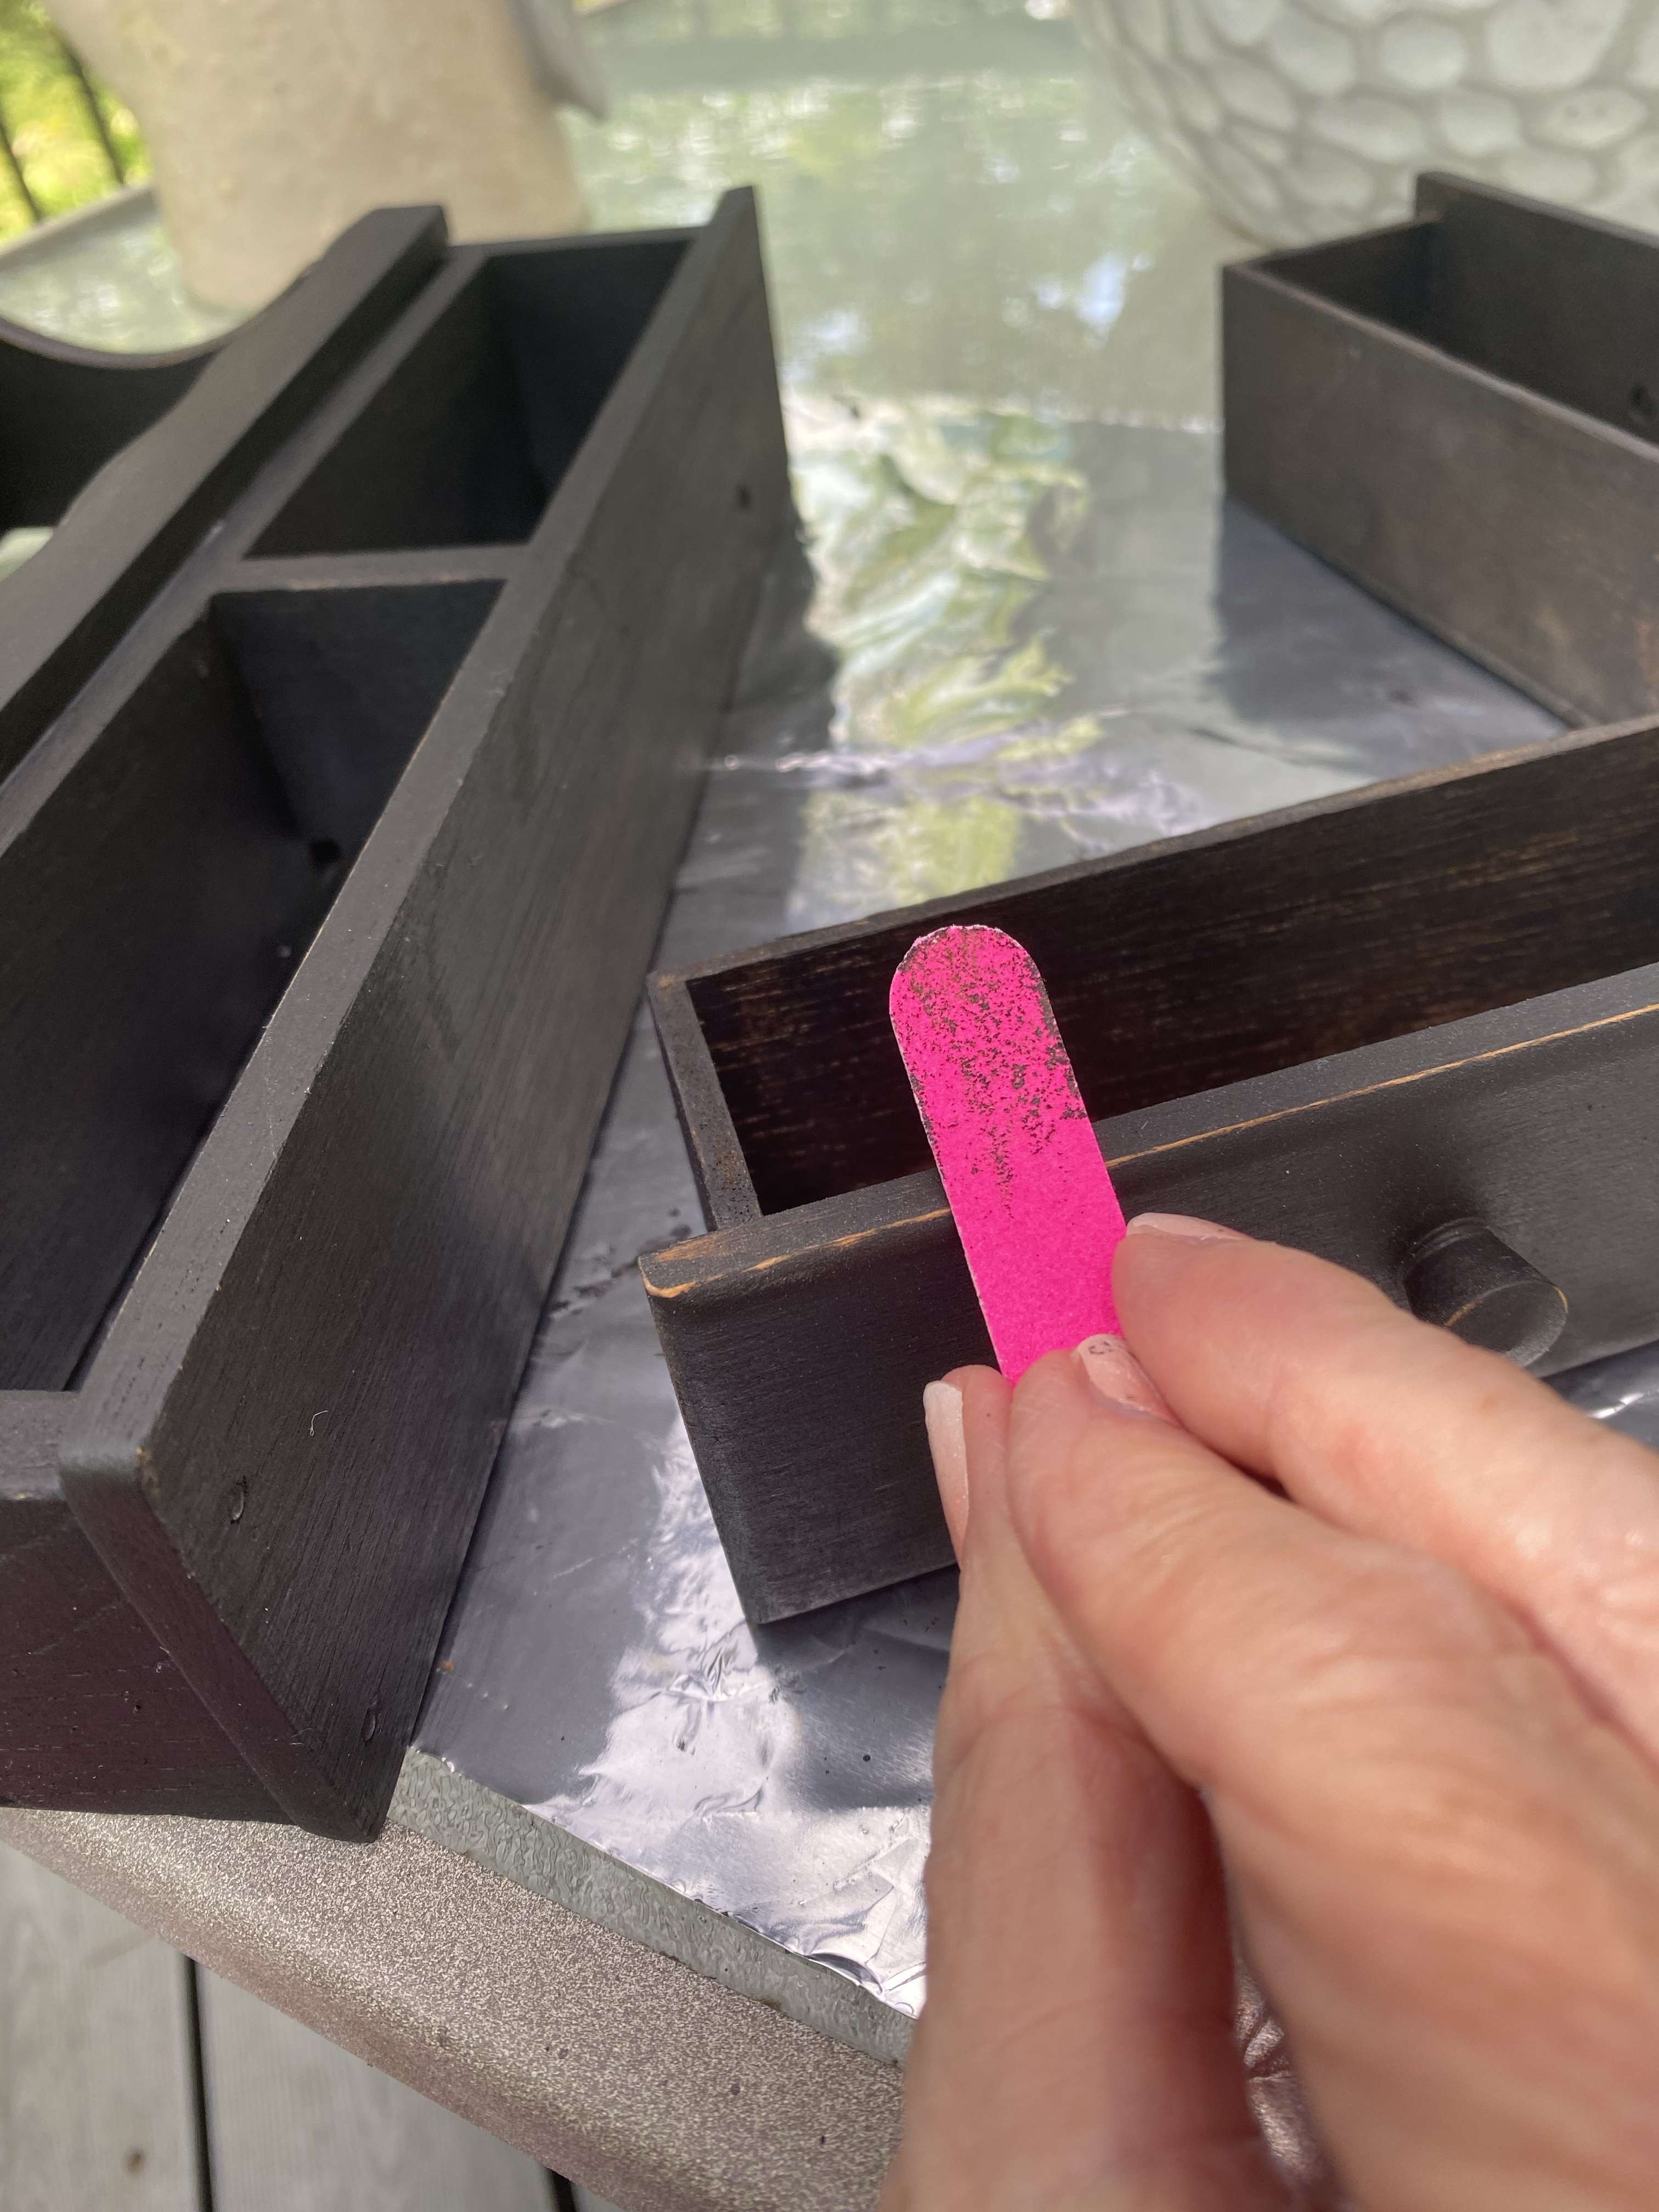
Even an emery board will lightly distress wood.
I then sealed it with Wise Owl Salve.
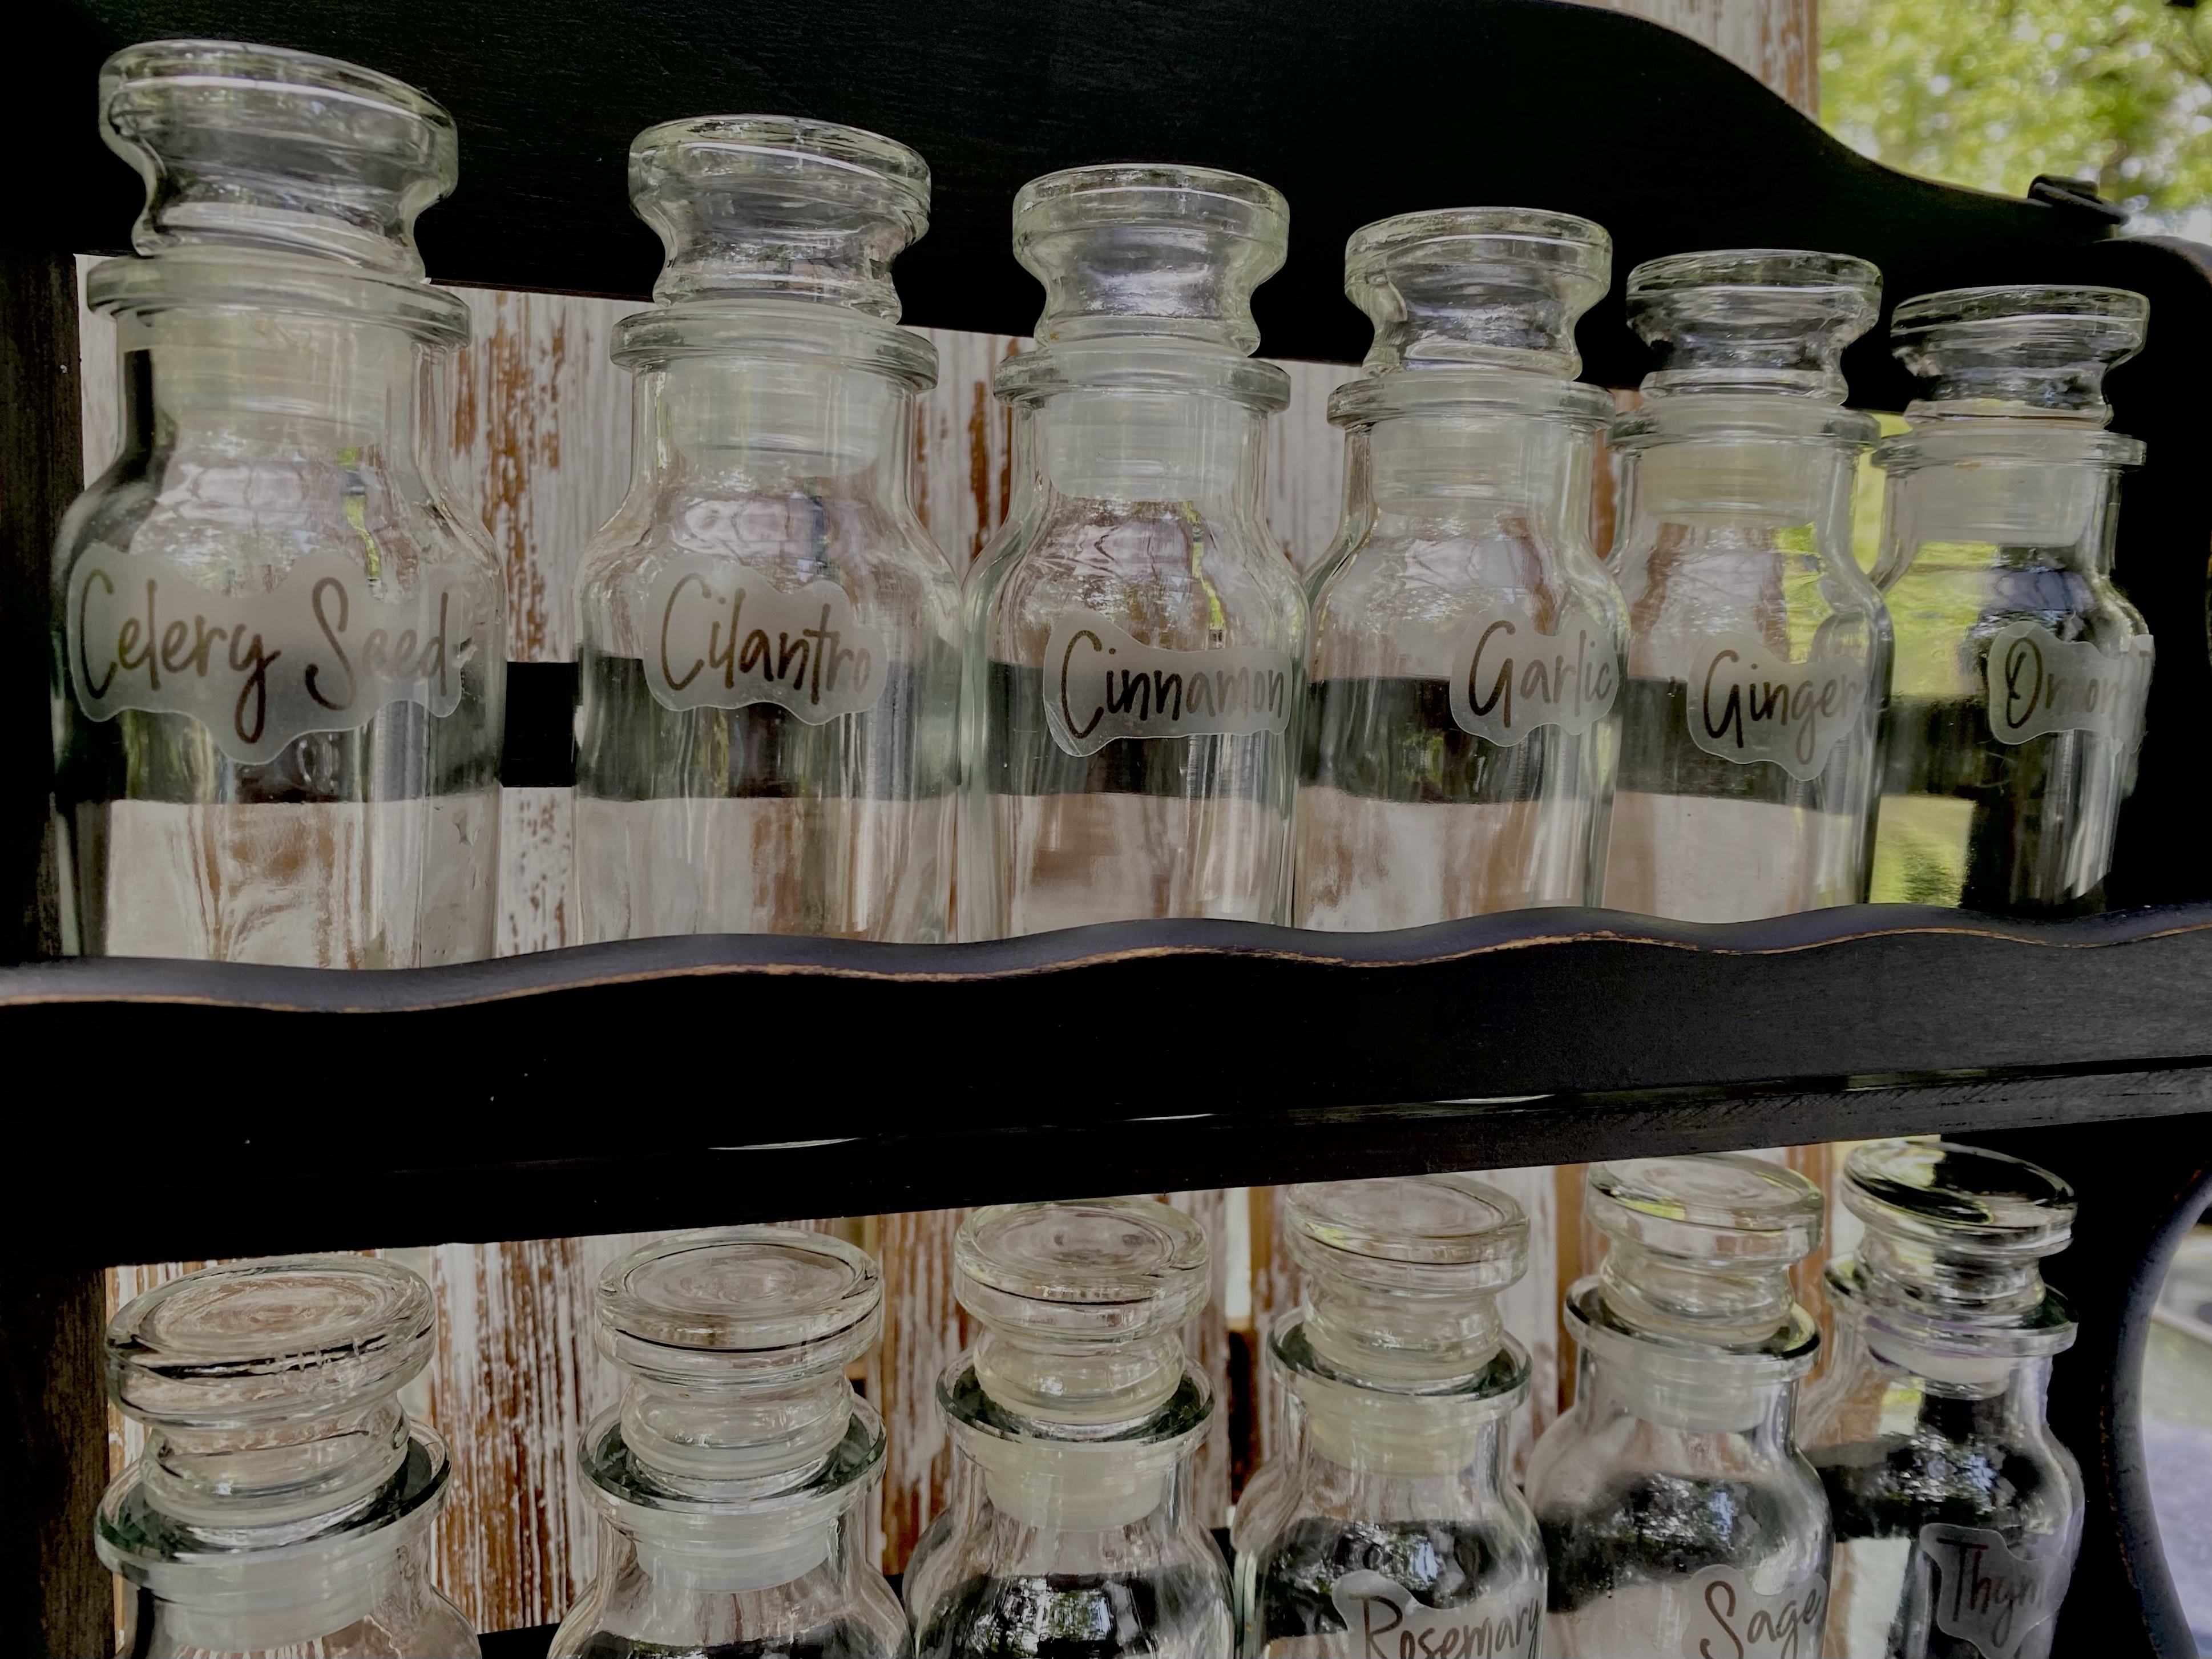
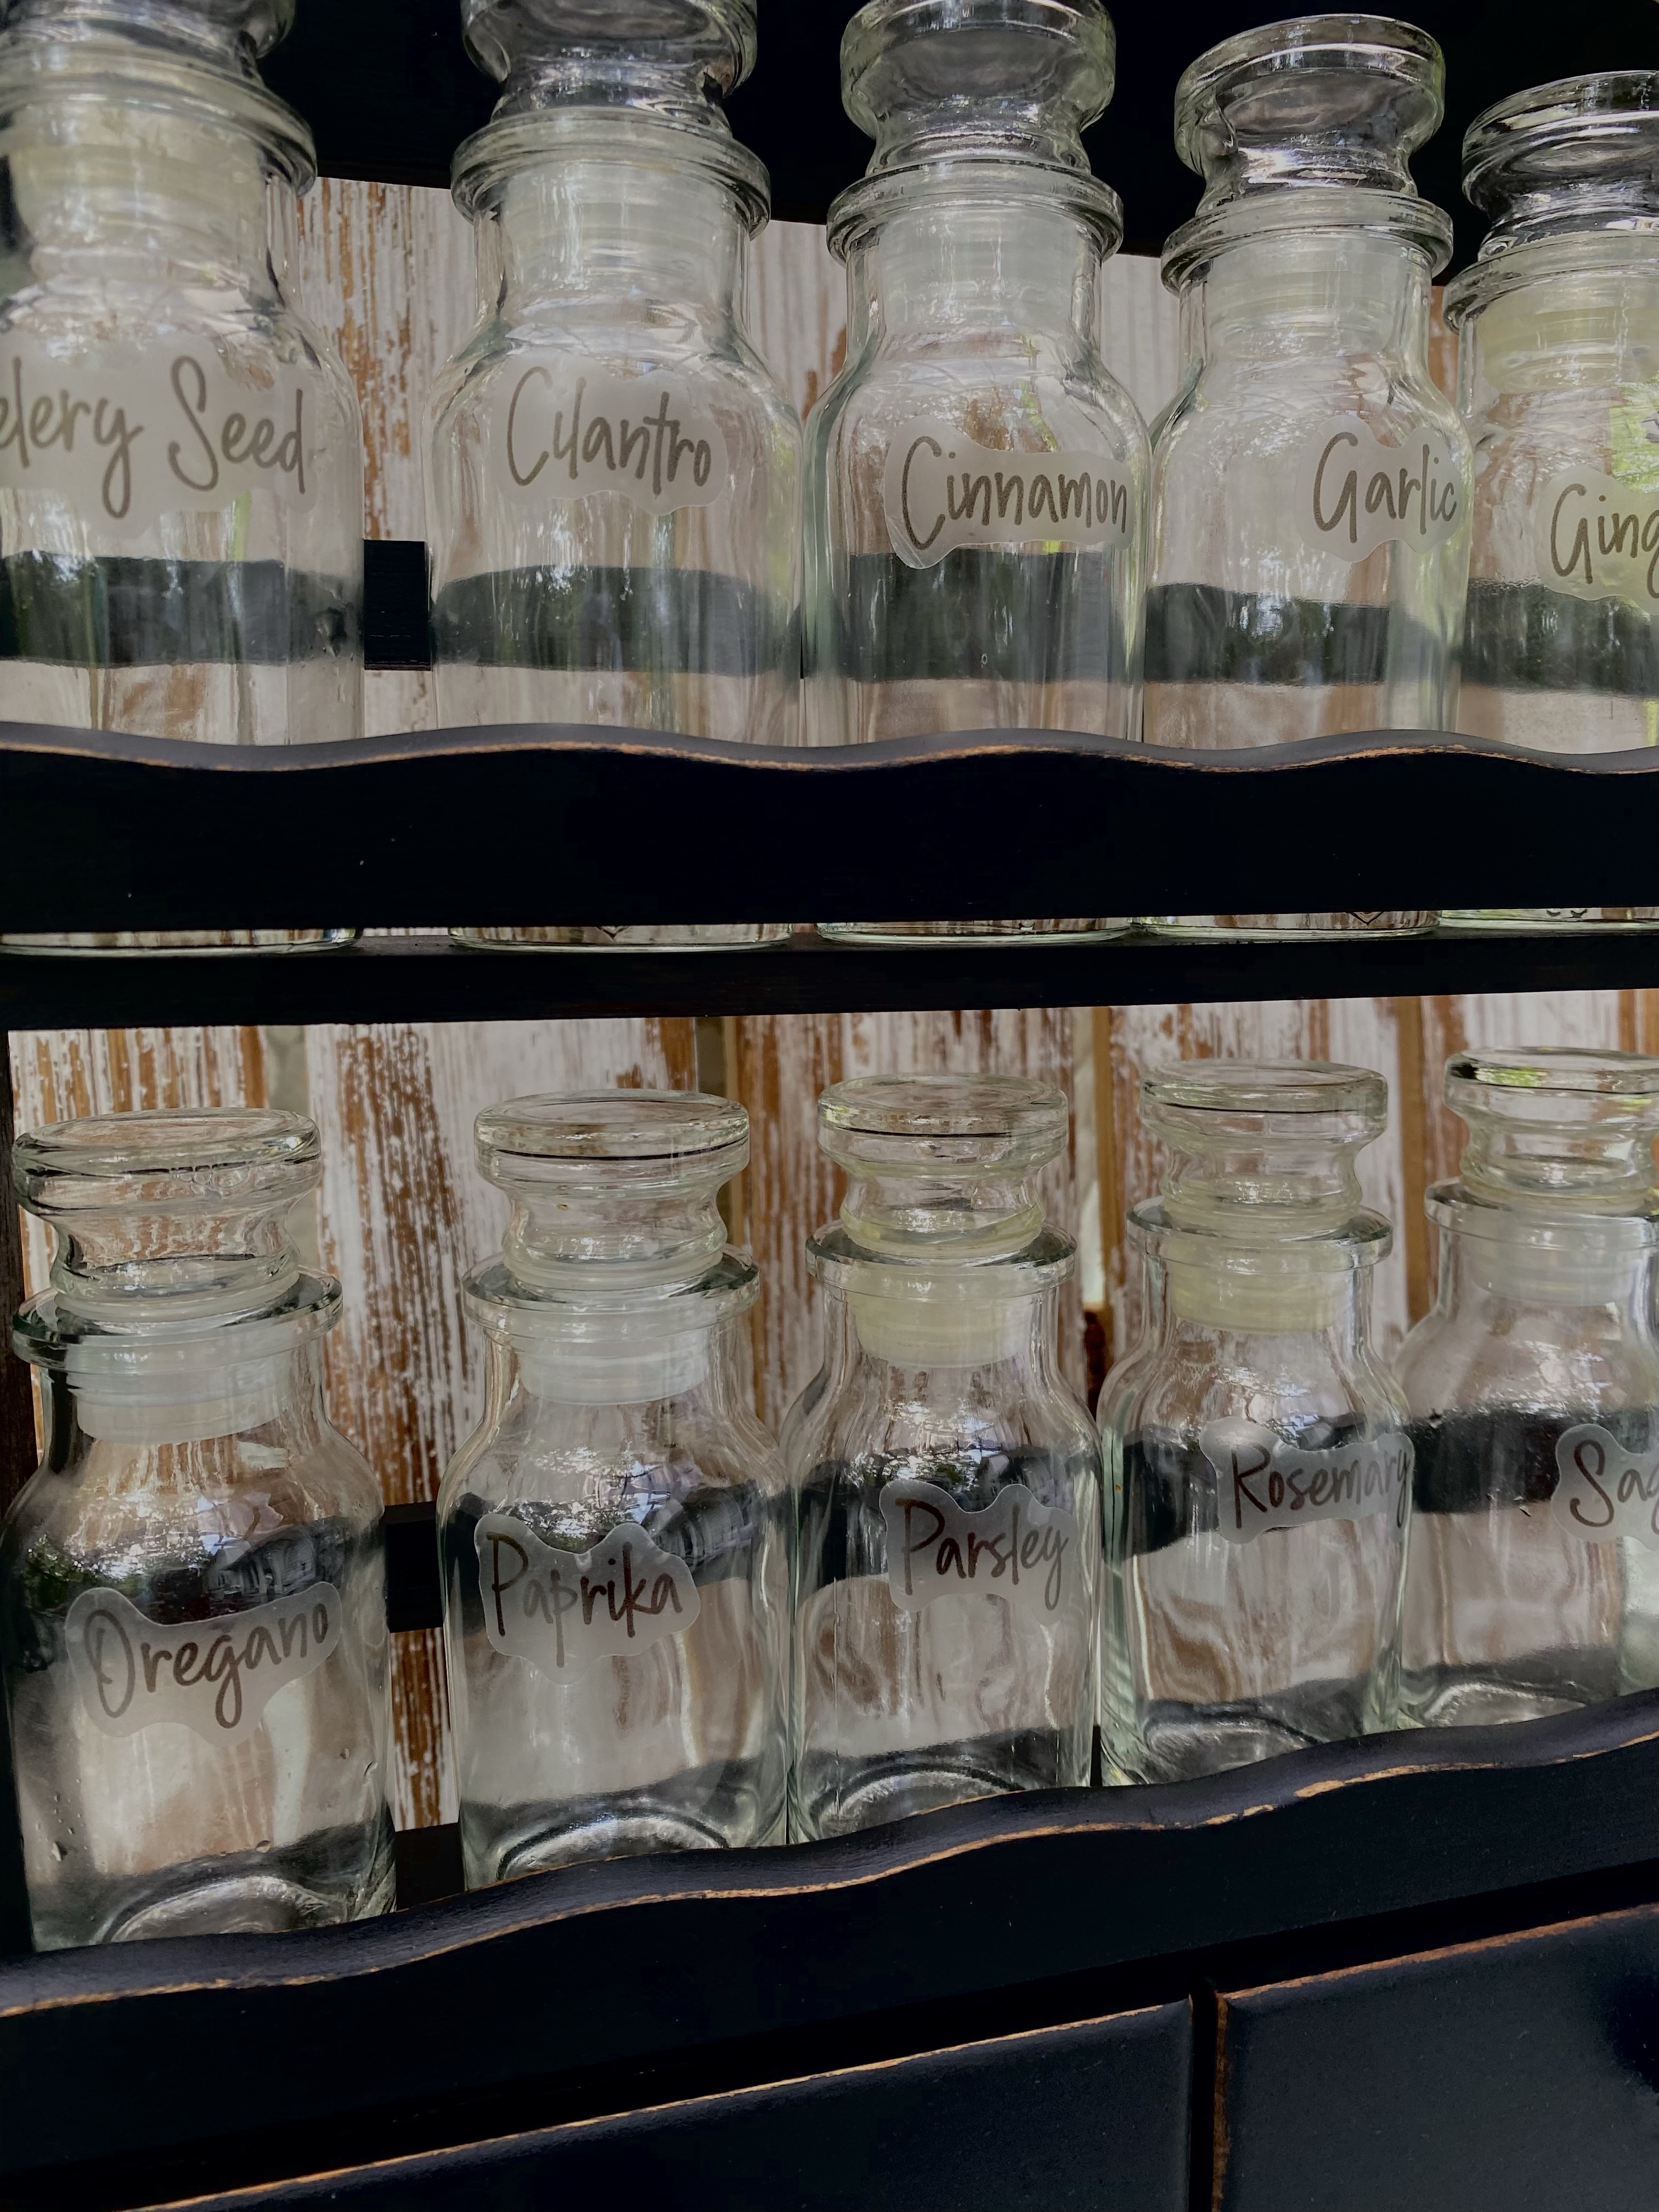
I took the old labels off the jars. They all, except for two of them easily slid off by soaking them in hot, soapy water. Only two required a little scrubbing. I then applied the labels I thought people would use most often.
The purple chalk style paint we created to paint a vintage wooden chair is such a pretty color, we decided to name it MO Eureka Purple.
I decided after seeing a similar chair painted purple by Junk Chick, I knew I had to paint one, too. I sold it even before it was finished to a customer whose favorite color is purple!
This is your Missouri History lesson for today. George Hearst was born in Franklin County, Missouri … some say near what was to become Sullivan, Missouri. His wife, Phoebe, was born in Anaconda, near St. Clair. George named his copper mine, Anaconda. I’m not sure but would like to think he yelled “Eureka” when his mines would produce. I haven’t found out if this is true or not but since that is the city where one of our sons lived in and still is close by and our grandson still goes to elementary school there, and the school color is purple…. MO Eureka Purple is the perfect name. I wonder if that is why the city is named Eureka.
Painting this chair reminds me that the second thing I ever painted with chalk paint was in January 2014. My best friend had been painting some furniture and gave me some left over Annie Sloan gray paint in 2013. It took me a year to try it. After that, I was hooked.
You can click on this link: Annie Sloan and Me to see my first experiences with chalk paint.
I liked Annie Sloan paint but after trying Missouri Limestone Paint Company’s chalk-style paint in 2015, produced in Ozark, Missouri, I was hooked and SharSum Paint company was born. I love how smoothly it goes on with no brush strokes at all as long as you apply a very thin coat for the first coat. This is the gripping coat. The second coat usually does full coverage. It dries so fast (usually 15-20 minutes), by the time you have finished the first coat, it is ready for the second.
Introducing MO Eureka Purple – a vintage chair painted purple and displaying my favorite faux purple flowers!
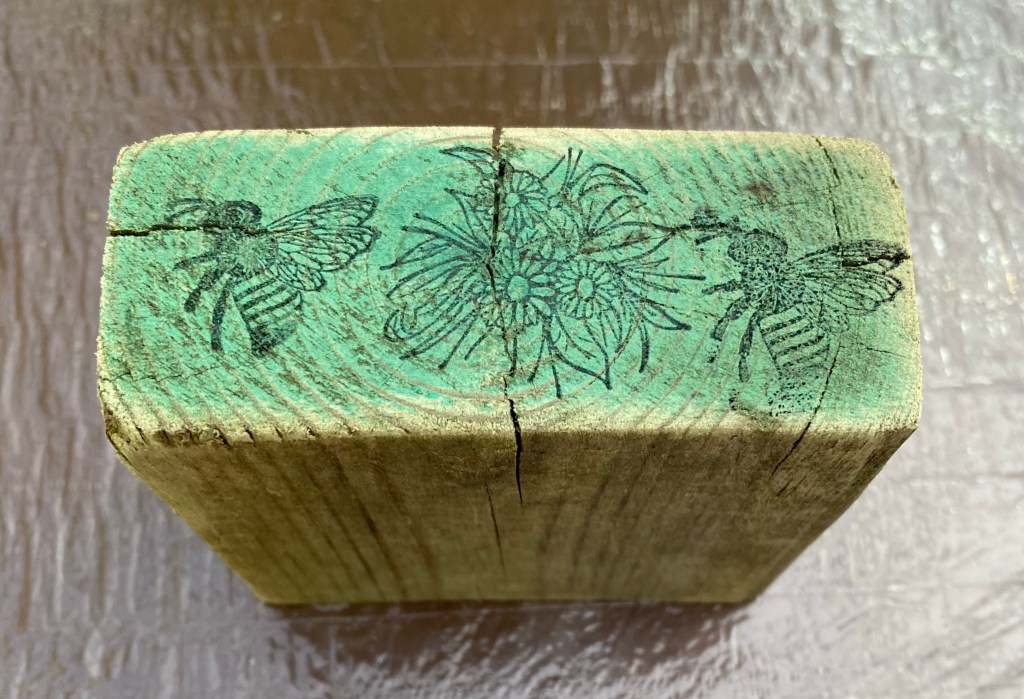
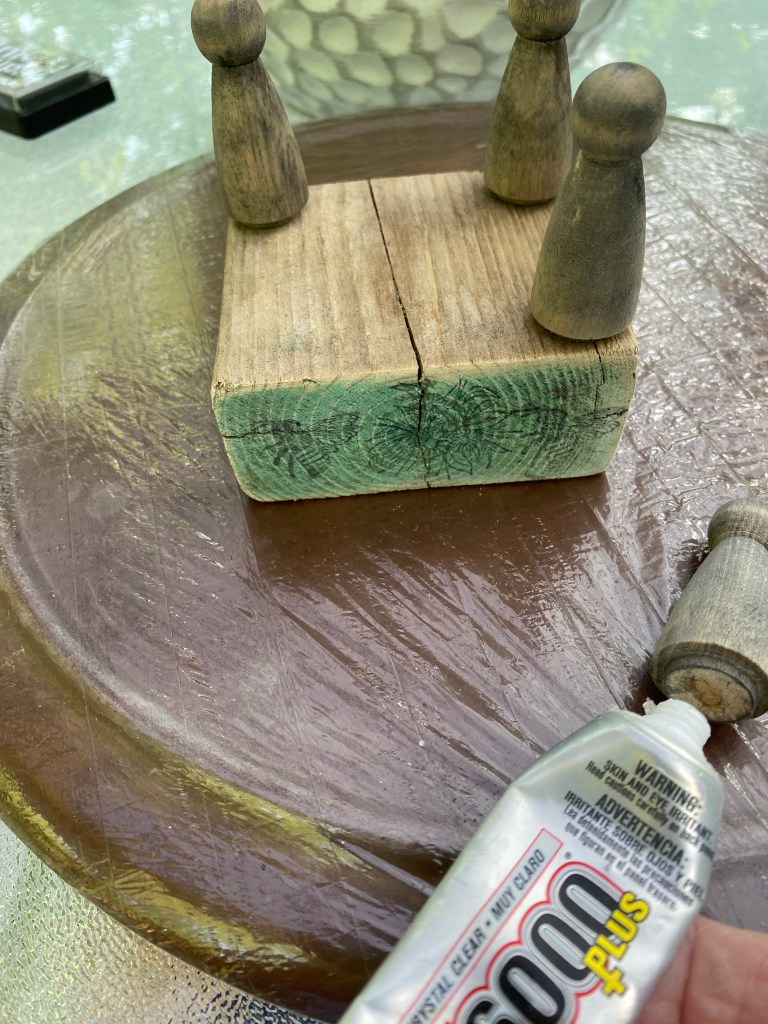
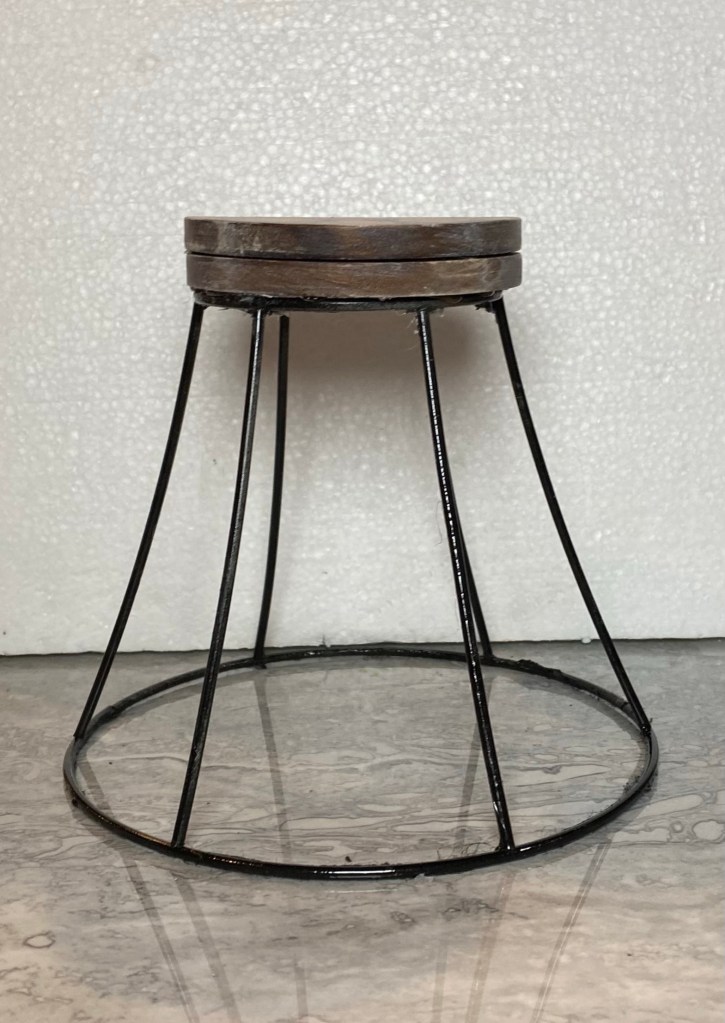
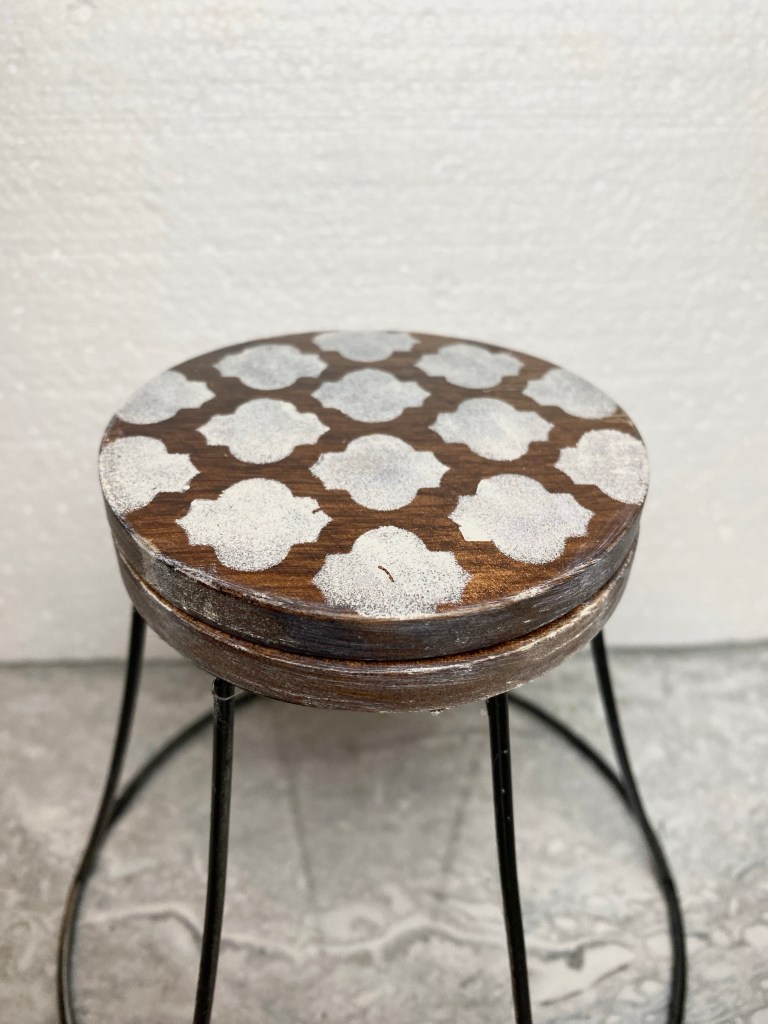
I’ve been seeing risers made from blocks of scrap wood so thought I’d make one, too. My 3.5” x 1.5” square block of scrap wood had one end that was painted green. I didn’t want to cut it off so I just made it the front of my project.
I did sand the block well, including the green part and that lightened it up a bit.
I like to work on this lazy susan. I bought 100 disposable shower caps on Amazon and stretched one over the lazy susan to protect it. These work great and I just throw them away when finished.
I gathered up my supplies and got started.
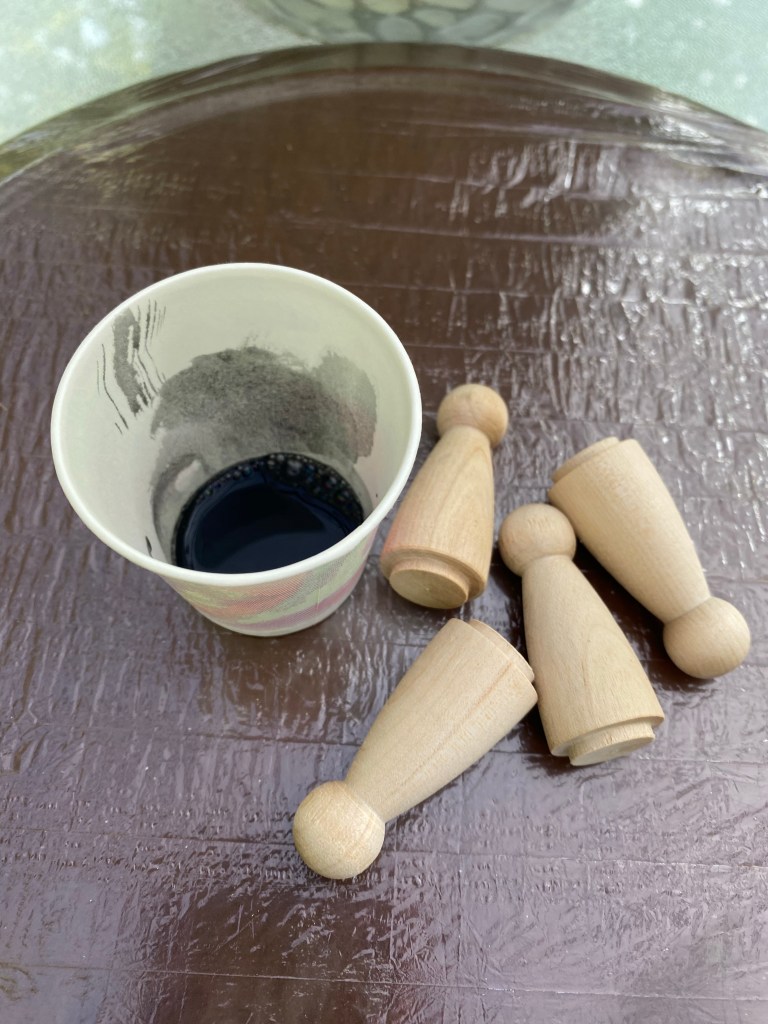
Step 1: I used black ink and stamped flowers and bees on the green side of my block. I put it aside to dry.
Step 2: I purchased wood peg dolls from Amazon to use as feet. I watered down a bit of our Missouri Limestone Paint Company chalk-style paint (Coal Shovel) and covered the feet I would be attaching to the block. This will give them a rustic look similar to the block. I wiped the excess away and put them aside to dry.
Step 3: I wrapped the block with a paper towel only leaving the green inked part exposed. I sprayed that part with the Krylon spray matte sealer. I believe I got it at Lowes. This sealed the ink to make sure it wouldn’t smear when I applied wax to it later.
Step 4: It was time to glue on the legs. I used a combination of E6000 for permanent hold and hot glue for immediate hold.
Step 5: Once the hot glue set up, I applied Wise Owl Salve (ordered from a retailer) to the whole piece.
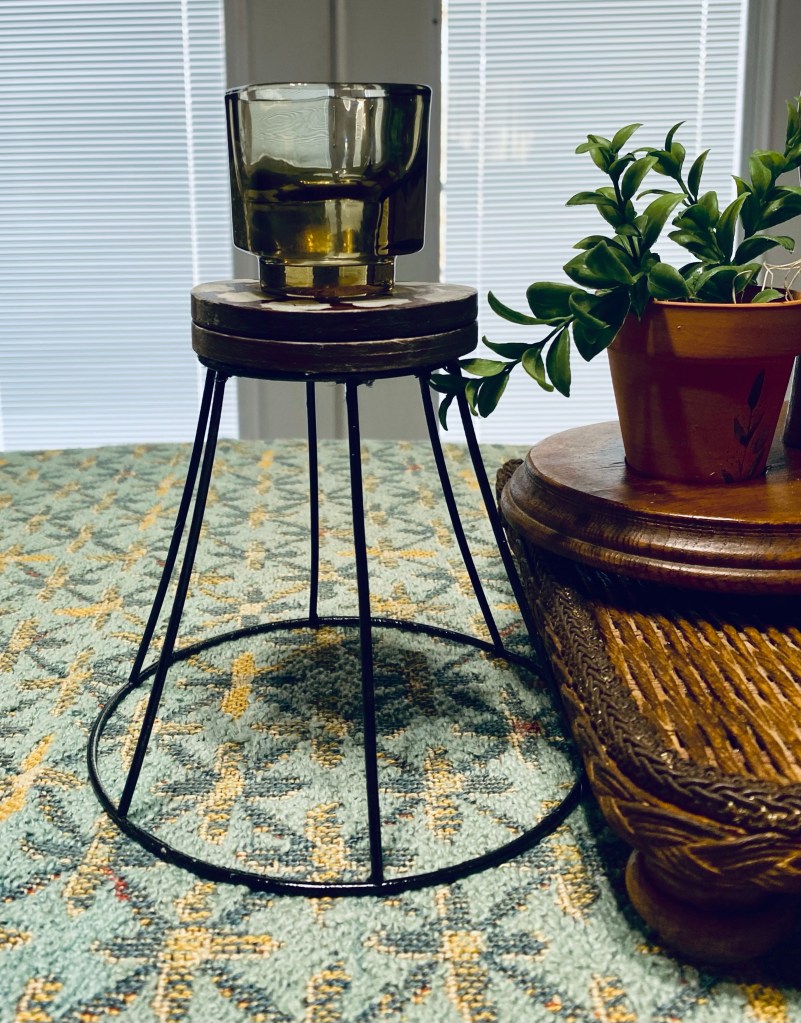
My rustic riser was now complete. I added a small painted terra cotta pot I had applied Dollar Tree rub on transfers to, added faux flowers, and displayed it on my rustic wood block riser.
I love how it now looks like the whole riser has been outside in the weather for years!
#1 – I have a French Country look going on in this first thrifted find – a bird cage item which needed some repair and a metal basket. I painted a Dollar Tree peat pot and decoupaged with tissue paper.
The metal finial on the birdcage was just hot glued on and popped right off after I got it home. Not only was hot glue alone not good idea but there was hardly any surface area for gluing. I used E6000 and hot glue to attach a small wood round to the birdcage and I painted it white. Then I used E6000 and hot glue to attach the finial. I added jute around the wood round where I had glued it together. I also stuck my hot glue inside and upside down dropped some hot glue along the inside. It is on for good now.
The birch round came from a fallen branch and that cute bird I found in a thrift store. The faux flowers came with the birdcage.
I love putting this kind of thrifting together.
#2 – Next up is this awesome cutting board/serving board. I love cutting and charcuterie boards. When I found this wine bottle shaped bamboo cutting board, I knew immediately that I wanted to add a stencil to one side for decor purposes. The other side could still be used as a cutting board or both sides could be a specialty charcuterie tray that would make a beautiful cheese and fruit spread serving board.
I stenciled just a part of the board and then seasoned both sides with food safe Howard Cutting Board 0il.
Dimensions approx. 21″ x 7″ x 1/2”
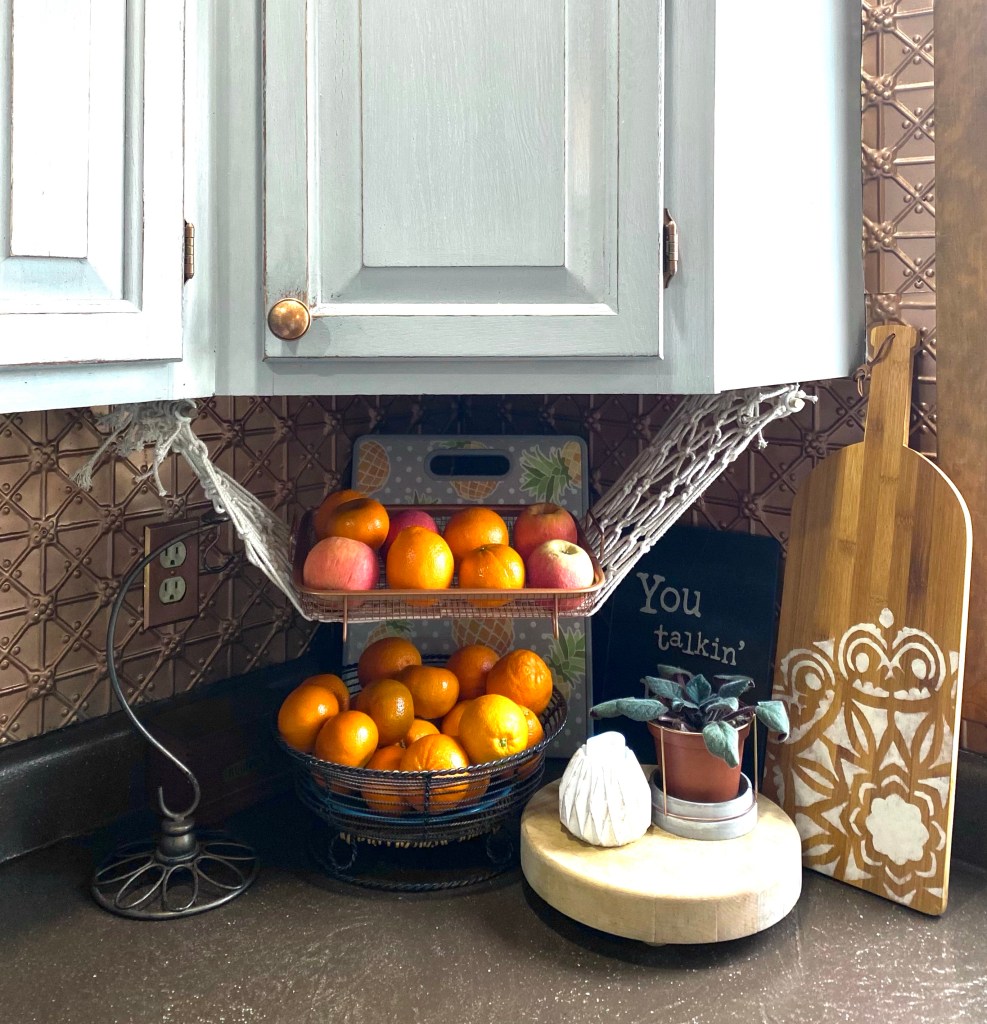
#3 – I like thrifting, but I really like it when I find something just for me. I don’t have a lot of storage space in my pantry so things like cereal and crackers and chips, etc. always seem to end up on top of the refrigerator.
I found these awesome Harry and David copper colored metal baskets at Goodwill yesterday for $7.87 each. I knew they would go perfectly with the copper colored tin on the wall behind them. The one on the left holds snacks and the one on the right, cereal and crackers.
I saw them listed online anywhere from $14 – $46 each so these were a pretty good price. Yay!
#4 My final thrifted item project for the week came about because of the stalk of dried wheat I found at Goodwill. They had just put out several bunches of these. I only bought one bunch but now wish I had gotten more. I used several pieces in this beautiful tall vase a friend gave me. It will be going on the floor next to my fireplace. I do have enough left over for several future projects. so that’s good.
That’s all for now. I thrifted more things, but haven’t decided yet how I will use them. So keep checking back. I will be sharing when the inspiration comes.
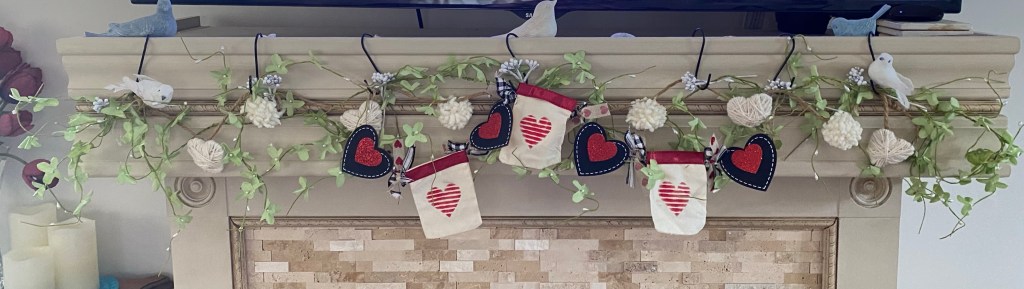
I took down my winter display this morning (I’m so over winter here in Missouri) and put up a Valentine one. I don’t decorate a lot for Valentine’s Day and since this is across from my recliner, I get to enjoy it quite a bit. 😁
I don’t remember where I got those faux tulips, but I love the color and the quality. I’ve had the cut glass vase forever. I made the wired rope heart earlier this week and love it so much I’m keeping it. Lol
The fireplace garland I made last year. I leave the greenery and the yarn hearts and pom pom garland up all year and just add to it each season.
I found the Valentine screensaver on YouTube. So many cool TV art screensavers on YouTube. Just do a search for TV art and you will find all kinds. Since my mantle is so close to my TV, I found the screensavers do a good job of decorating my mantle area.
Simple, but inviting. This screensaver plays relaxing music and several different images. So relaxing! But not for long. We are headed to a couple of our booths for some makeovers in a few minutes.
We’ve been working on an Art Deco dresser. Danny has taken it all apart and is rebuilding it. It is going to be beautiful! The detail is so pretty! But the drawer pulls are spectacular! They were so worn and discolored but still all in one piece. The red Bakelite inserts are in perfect shape and by themselves are valuable. I cleaned them, scrubbed them with Bar Keepers Friend, then waxed them and applied gold leaf RubnBuff. They are amazing!
The dresser had been painted in an earlier life. The only thing now is to decide what color to paint it. My thought right now is to paint it a bluish green color with our Missouri Limestone Paint Company chalk paint color we named “Something Blue”. Then highlight the details on the front, the trim on the back of the top, and the feet with gold leaf RubnBuff.
Still busy creating so I haven’t had time to post how we did some of these projects. Here they are, though, for inspiration for you.
This is a vignette I put together for winter decor. I had a Christmas transfer on one side of this pitcher and a winter one on the other. I turned it around and added some branches from a tree in my yard then added lights. I made the snowman last year and added the Winter sign I’ve had for a long time.
Danny cut this cute gnome out of a scrap piece of plywood, drew the details and painted and sealed him. He added some stakes so we can put him in the pot’s dirt.
I crocheted another bunch of hats to sell to a friend’s daughter. She adds them to the baskets of herbal remedies she sells.
And more crochet… which begat more crochet that I’m still working on. I made a couple of gnome towel rings. I had made some boho type ones for a couple of friends and then decided to find a pattern for making more. I’ve sold 10 so far of them.
And then I saw a post for a group called Random Acts of Crochet Kindness and cute little worry worms to make and spread around town so I had to make some of those. I plan on making more later on. But I figured out a way to make a cute Valentine one for kids and ended up with 86 orders. Still working on those.
Then my cousin sent me a video of someone crocheting a woven heart. I had to find the tutorial and make one. Then I saw a video on making a heart with wine corks so I had to do that, too. And then someone else told me about decoupaging on a candle with wax paper. Yep! I had to do that, too. I’ve used the hot iron method with parchment paper before, but not on a candle. Worked like a charm. And the little tag- I wrote love on it with a s or h marker and burned it and then painted it. That worked, too.
Whew! I’m getting tired just typing all we’ve done so far this month. But wait! There’s more!
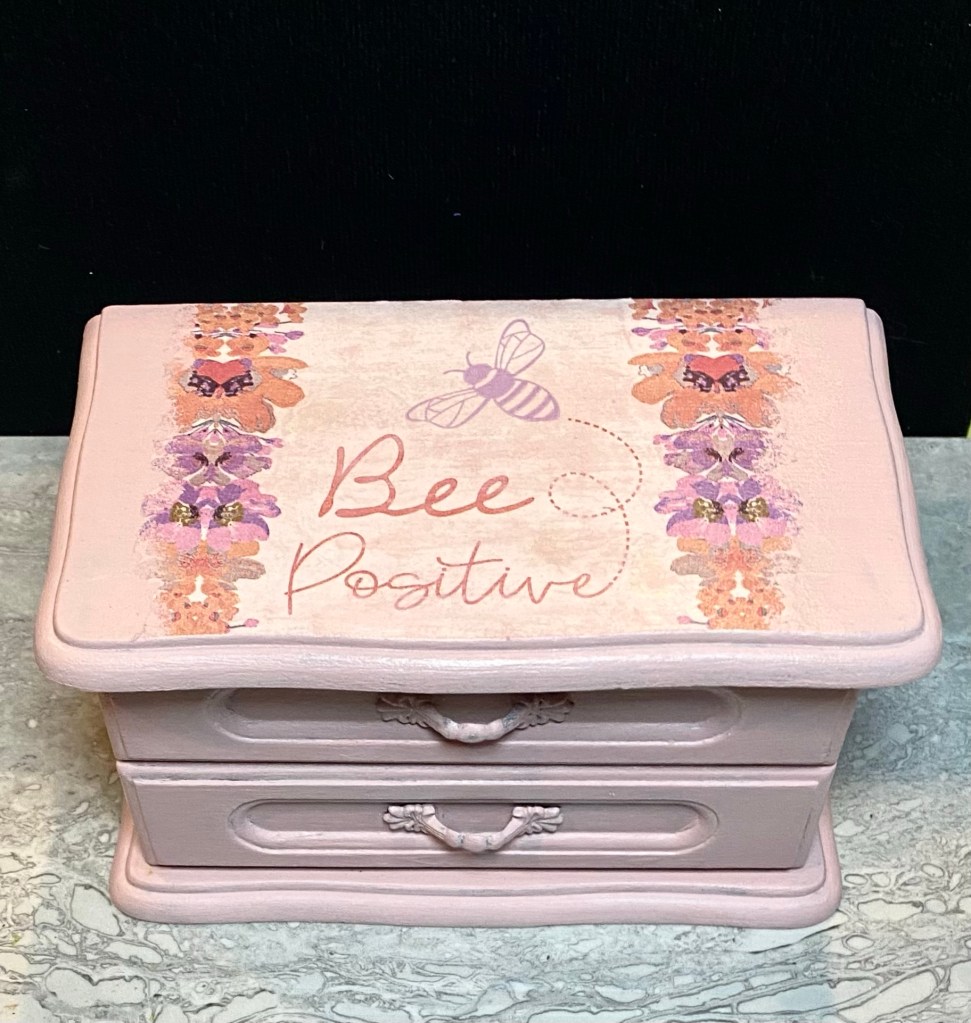
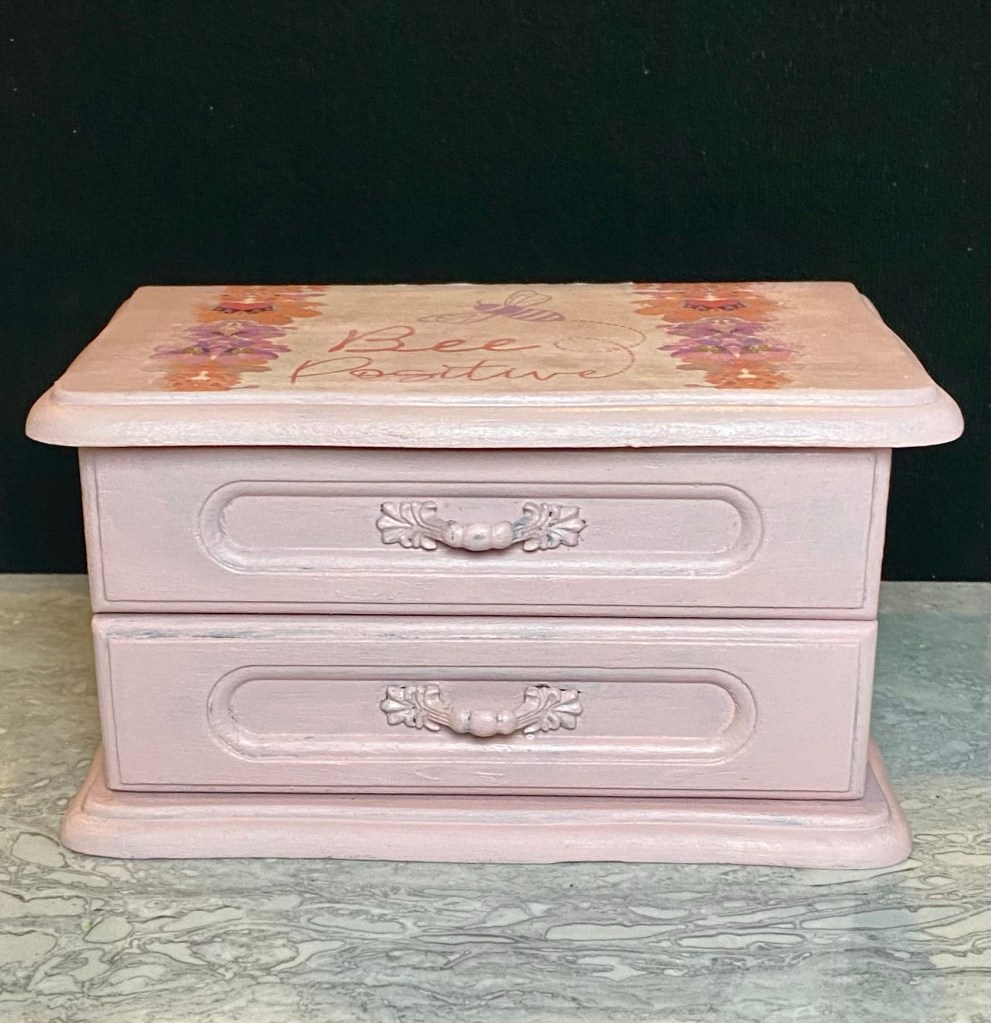
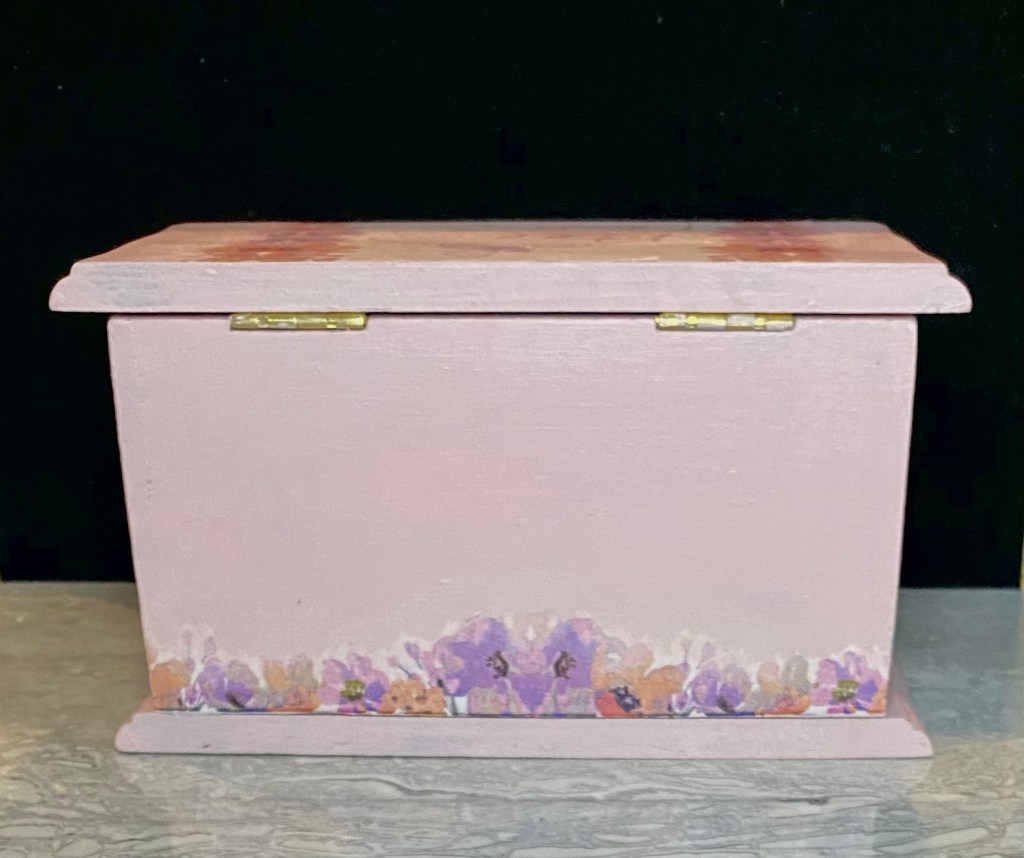
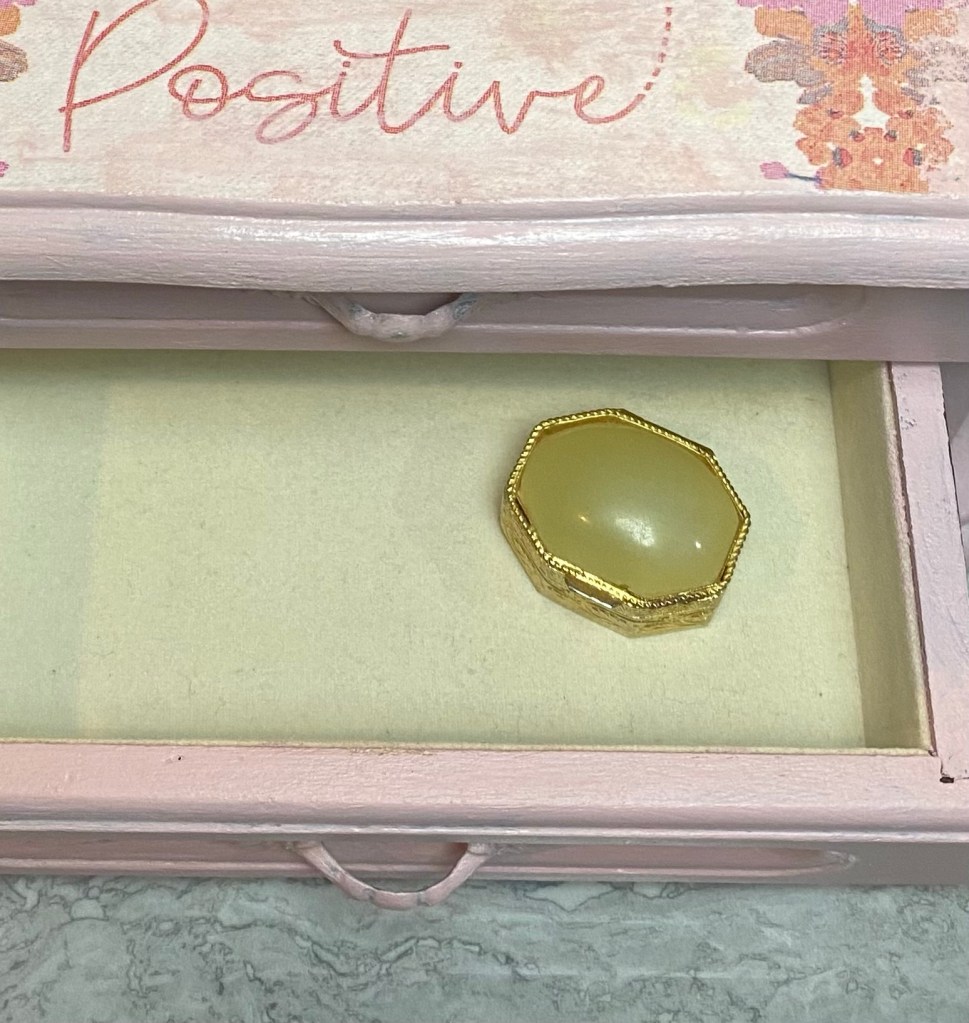
And then came a couple of jewelry boxes. I have a huge stash of them but haven’t painted any in awhile. These sold quickly so plan on painting ring more soon.
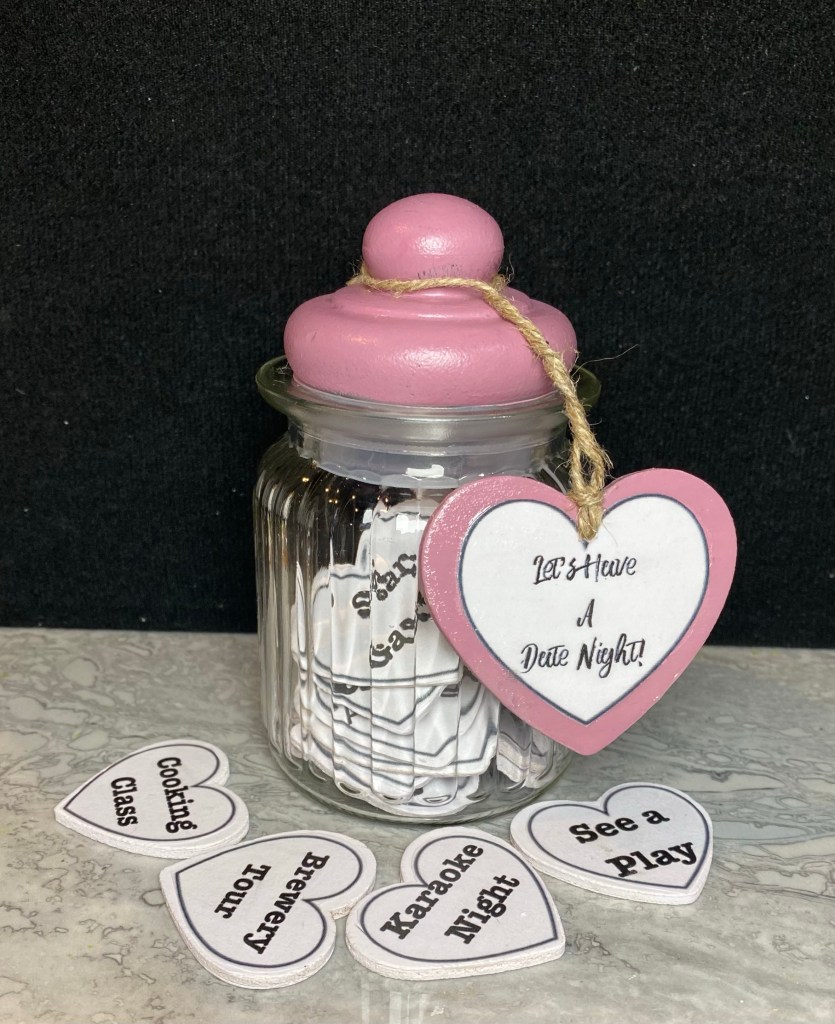
I saw an idea for a date night jar on Pinterest. This is my version. Jar from Dollar Tree. I painted the glass lid. If you spray glass with a clear sealer first, chalk paint will adhere well.
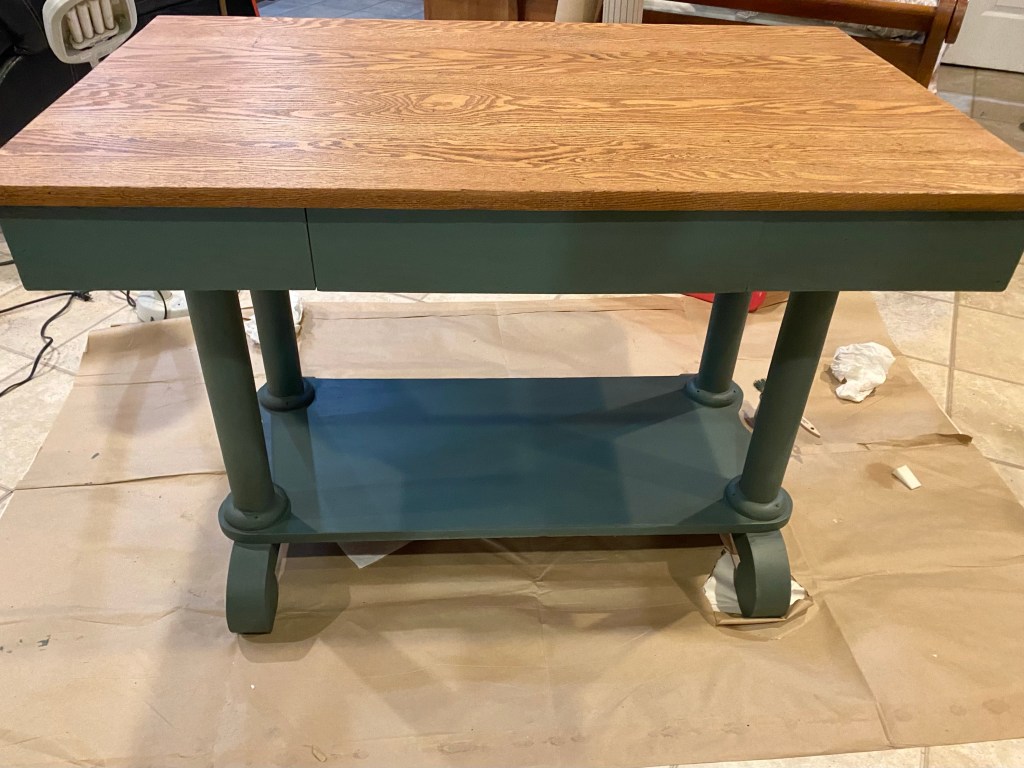
I don’t have staged pics of this beautiful library table. It is going to one of our booths this week. Danny sanded the top. I stained it with a w at teenaged stain. It has five coats of Varathane Crystal Clear Water based polyurethane in matte finish. The rest is painted with our Missouri Limestone Paint Company “Cupboard Green” and sealed. I love how it turned out.
Danny created this white washed hanging rack from a vintage ladder.
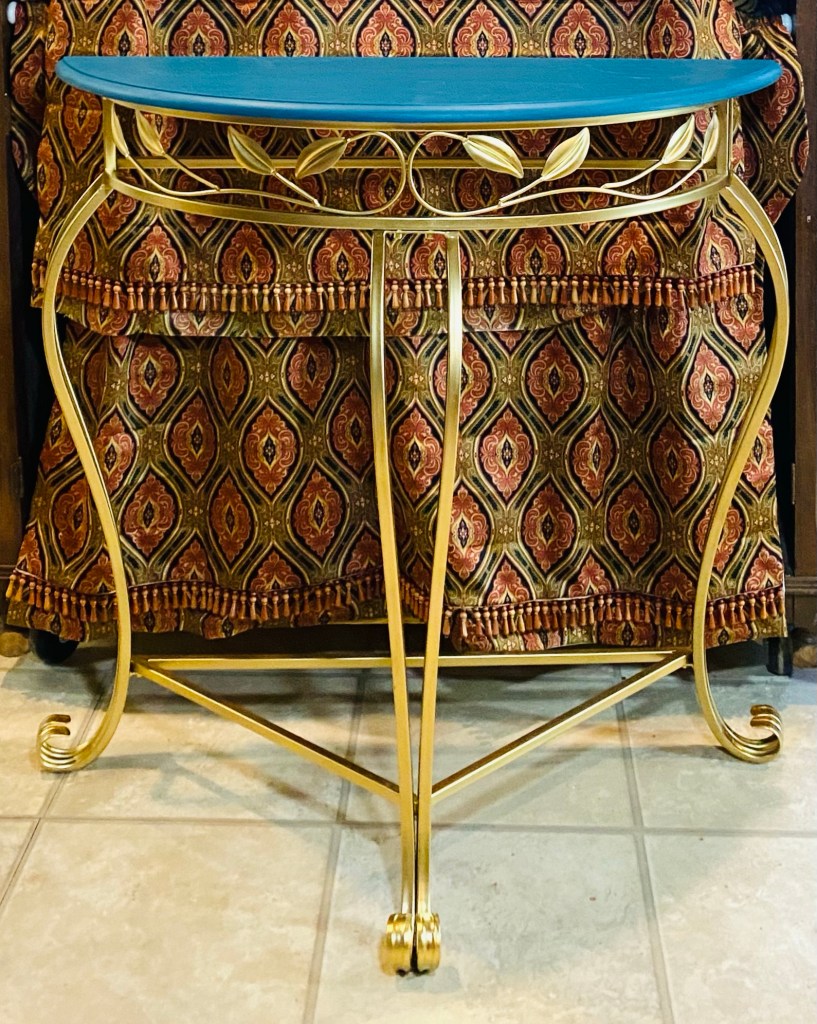
Another project is this gorgeous half table console. This is a long description but hopefully will inspire those who like boho with some ideas. I think this is one of my most favorite projects ever. I had so much fun with it.
We’ve had this table (and matching lamps) since soon after we built our house in 1985. Holy cow! That was 38 years ago!! The other day, I decided we didn’t need them anymore so decided to paint them. Danny suggested painting the top with our Missouri Limestone Paint Company “Bourbon Street”, a dark teal color. I thought Rustoleum metallic gold on the metal legs would look good with the teal. I also painted the metal on the lamps with it. They all turned out gorgeous!
Then, when I showed the table to a friend, she said I should style it as a boho piece. I agreed.
So pretty much all day today, I have been creating items for it to sell from things I have in my supplies:
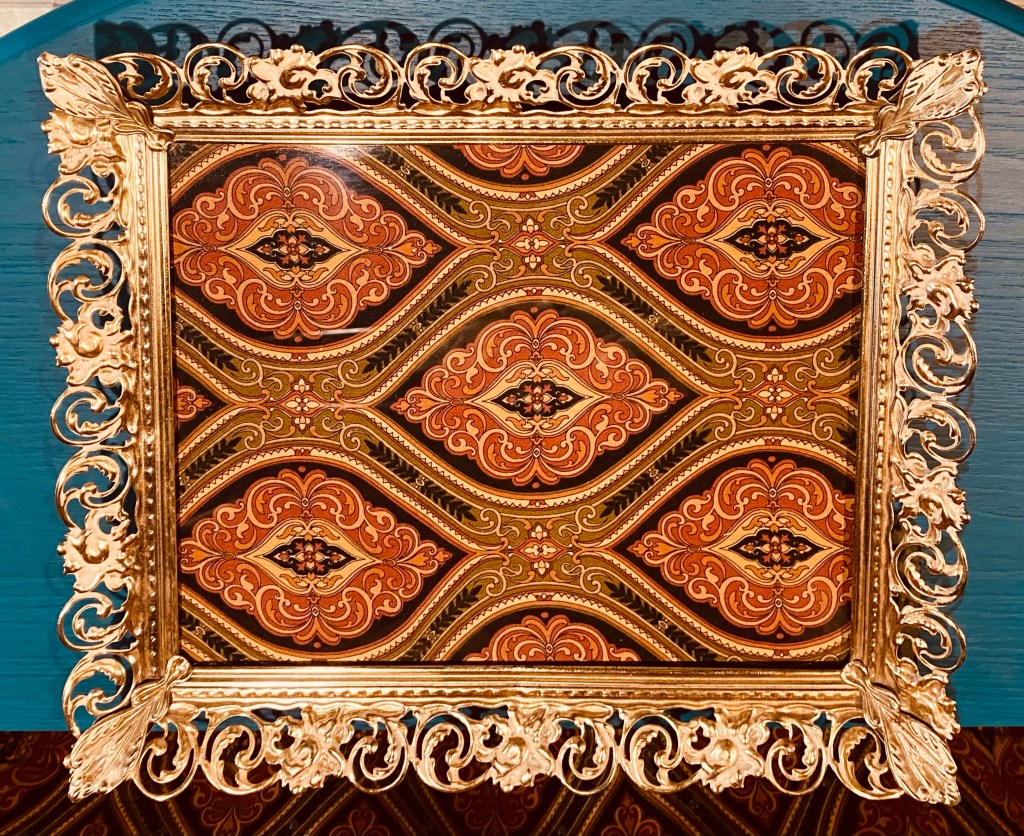
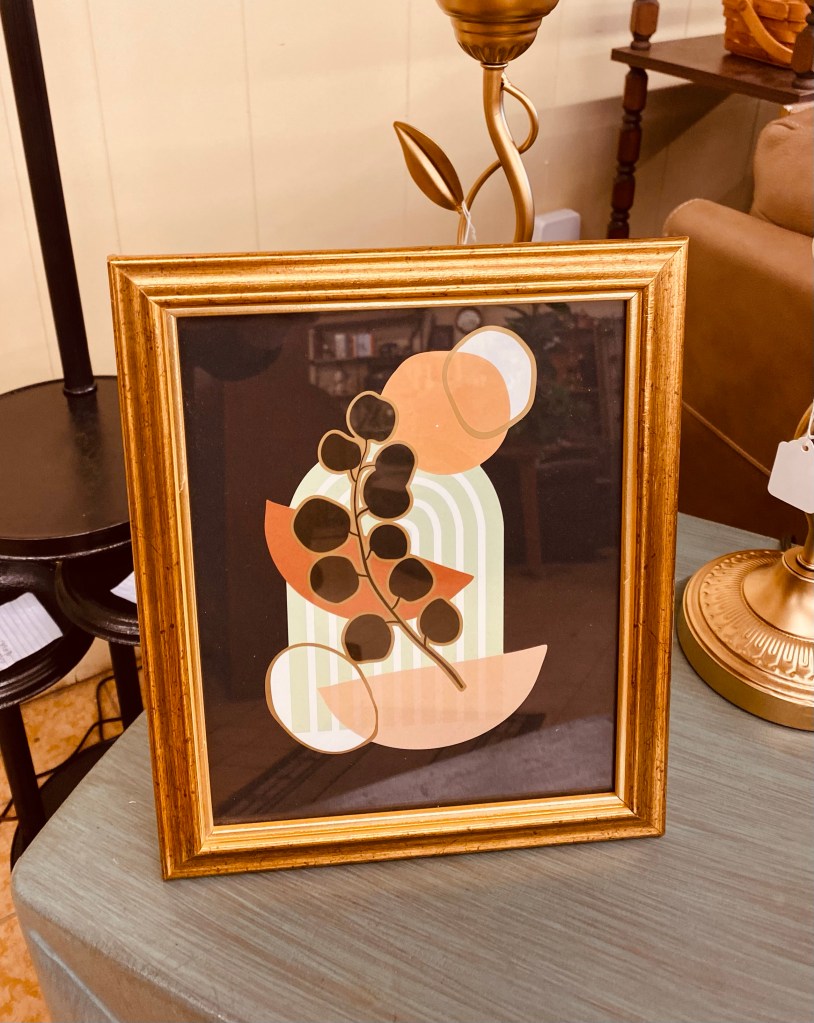
1) Picture frame: gifted by a neighbor- funny thing, my mom had our pictures in frames almost exactly like this growing up. The back is velvet. It can still stand up, but it makes a great tray, too. This frame is old! 2) This awesome fabric which was once valances with bead trim, was gifted by a friend. I’ve already used it as a curtain, as you can see, to hide Danny’s power tools and to create a little boho hanging. Lol I simply put a piece of the fabric under the glass of the picture frame for an instant boho tray! 3) A bowl of boho goodness. I had all the ingredients including this cute wood bowl I thrifted. I just added the beads around it for a true boho style. It took me a good bit to figure out how to do it to look finished, then decided to rip it out (it was sewn in with nylon thread). But when I got it all out, it was attached to this beautiful piece of fabric tape in this awesome color! I just hot glued it around the bowl! 4) Picture frame: gifted by the same neighbor: I did a line drawing on the glass of similar leaves in the table and put a piece of scrapbook paper behind it in a coordinating color and now have a boho print! 5) Bottle of peacock feathers: the bottle I think came with fragrance oil and bamboo sticks at some point. I did paint the lid that sits around it metallic gold this morning. I’m pretty sure I picked up the peacock feathers at a yard sale.
And then, we came up with a few more boho accessories.
And when we found this mirror shopping, we knew we had to get it! Danny painstakingly covered all the mirrors. I painted it metallic gold and then he removed all the tape. I cleaned it and….it is just stunning!
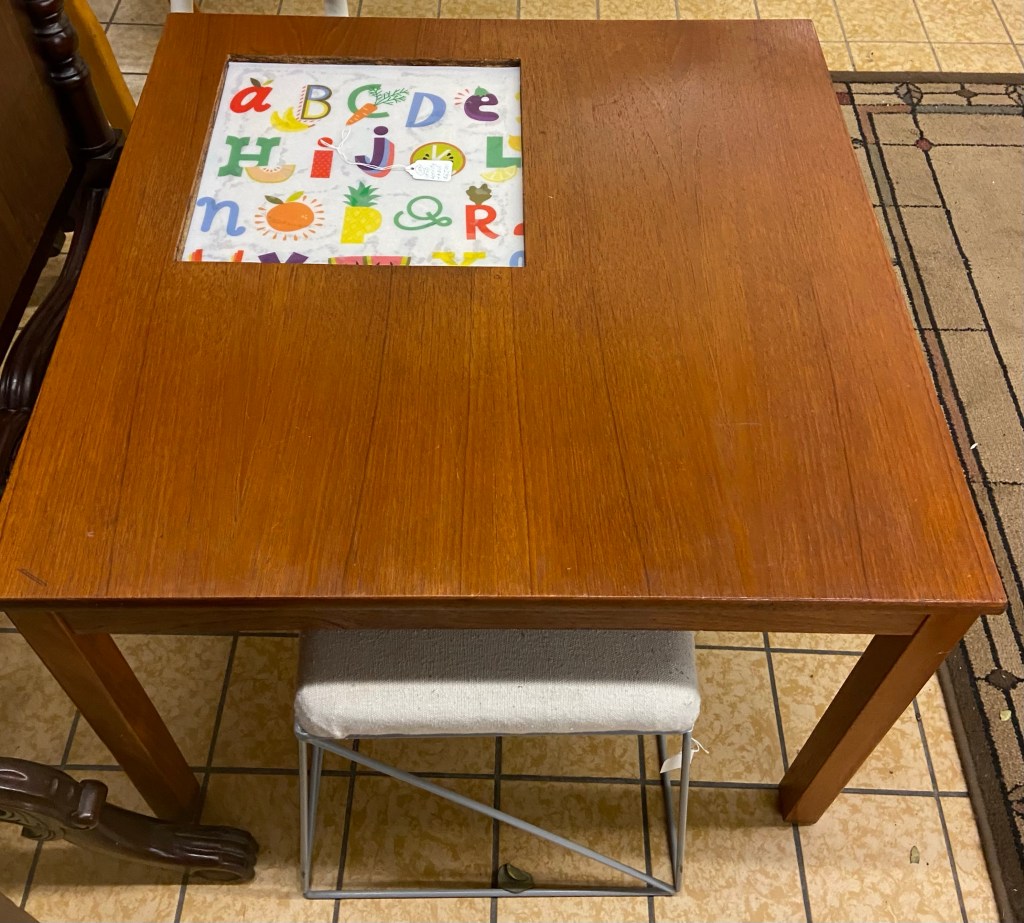
We also found this cute little kid’s drawing table. We added a couple of stools to it and took it to our booth at Sweet Repeats in Sullivan.
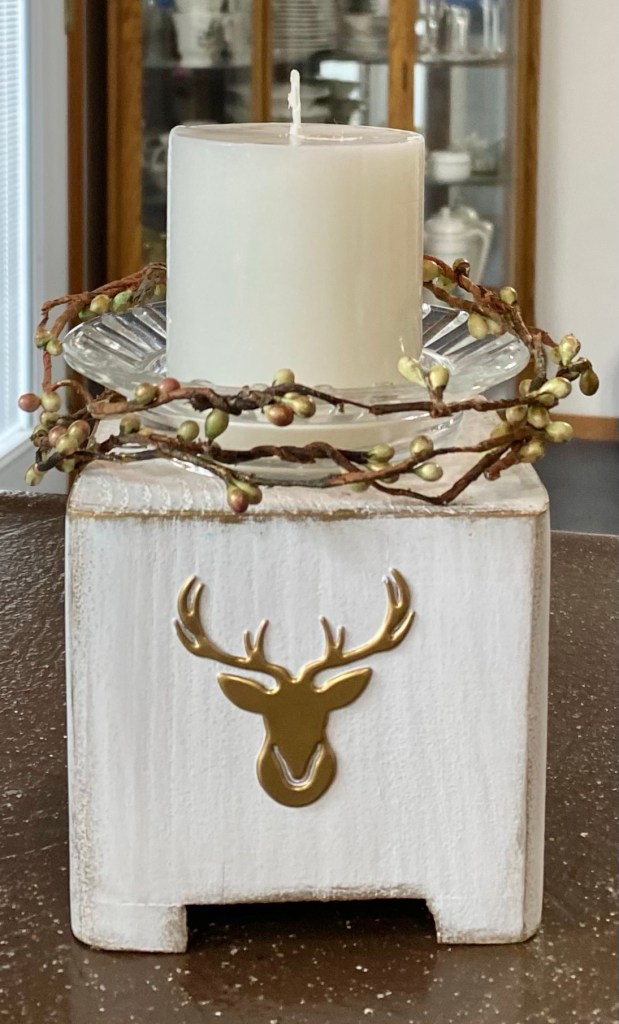
The wood base on this candle holder is a bed riser I turned upside down and painted. the dish for the candle is a vintage ashtray.
Coming up…. Danny is working on a new project. We are busy figuring out a way to make a table top for it. Stay tuned!
You probably wouldn’t want to use both lamps on the table, but maybe in the same room would be perfect!
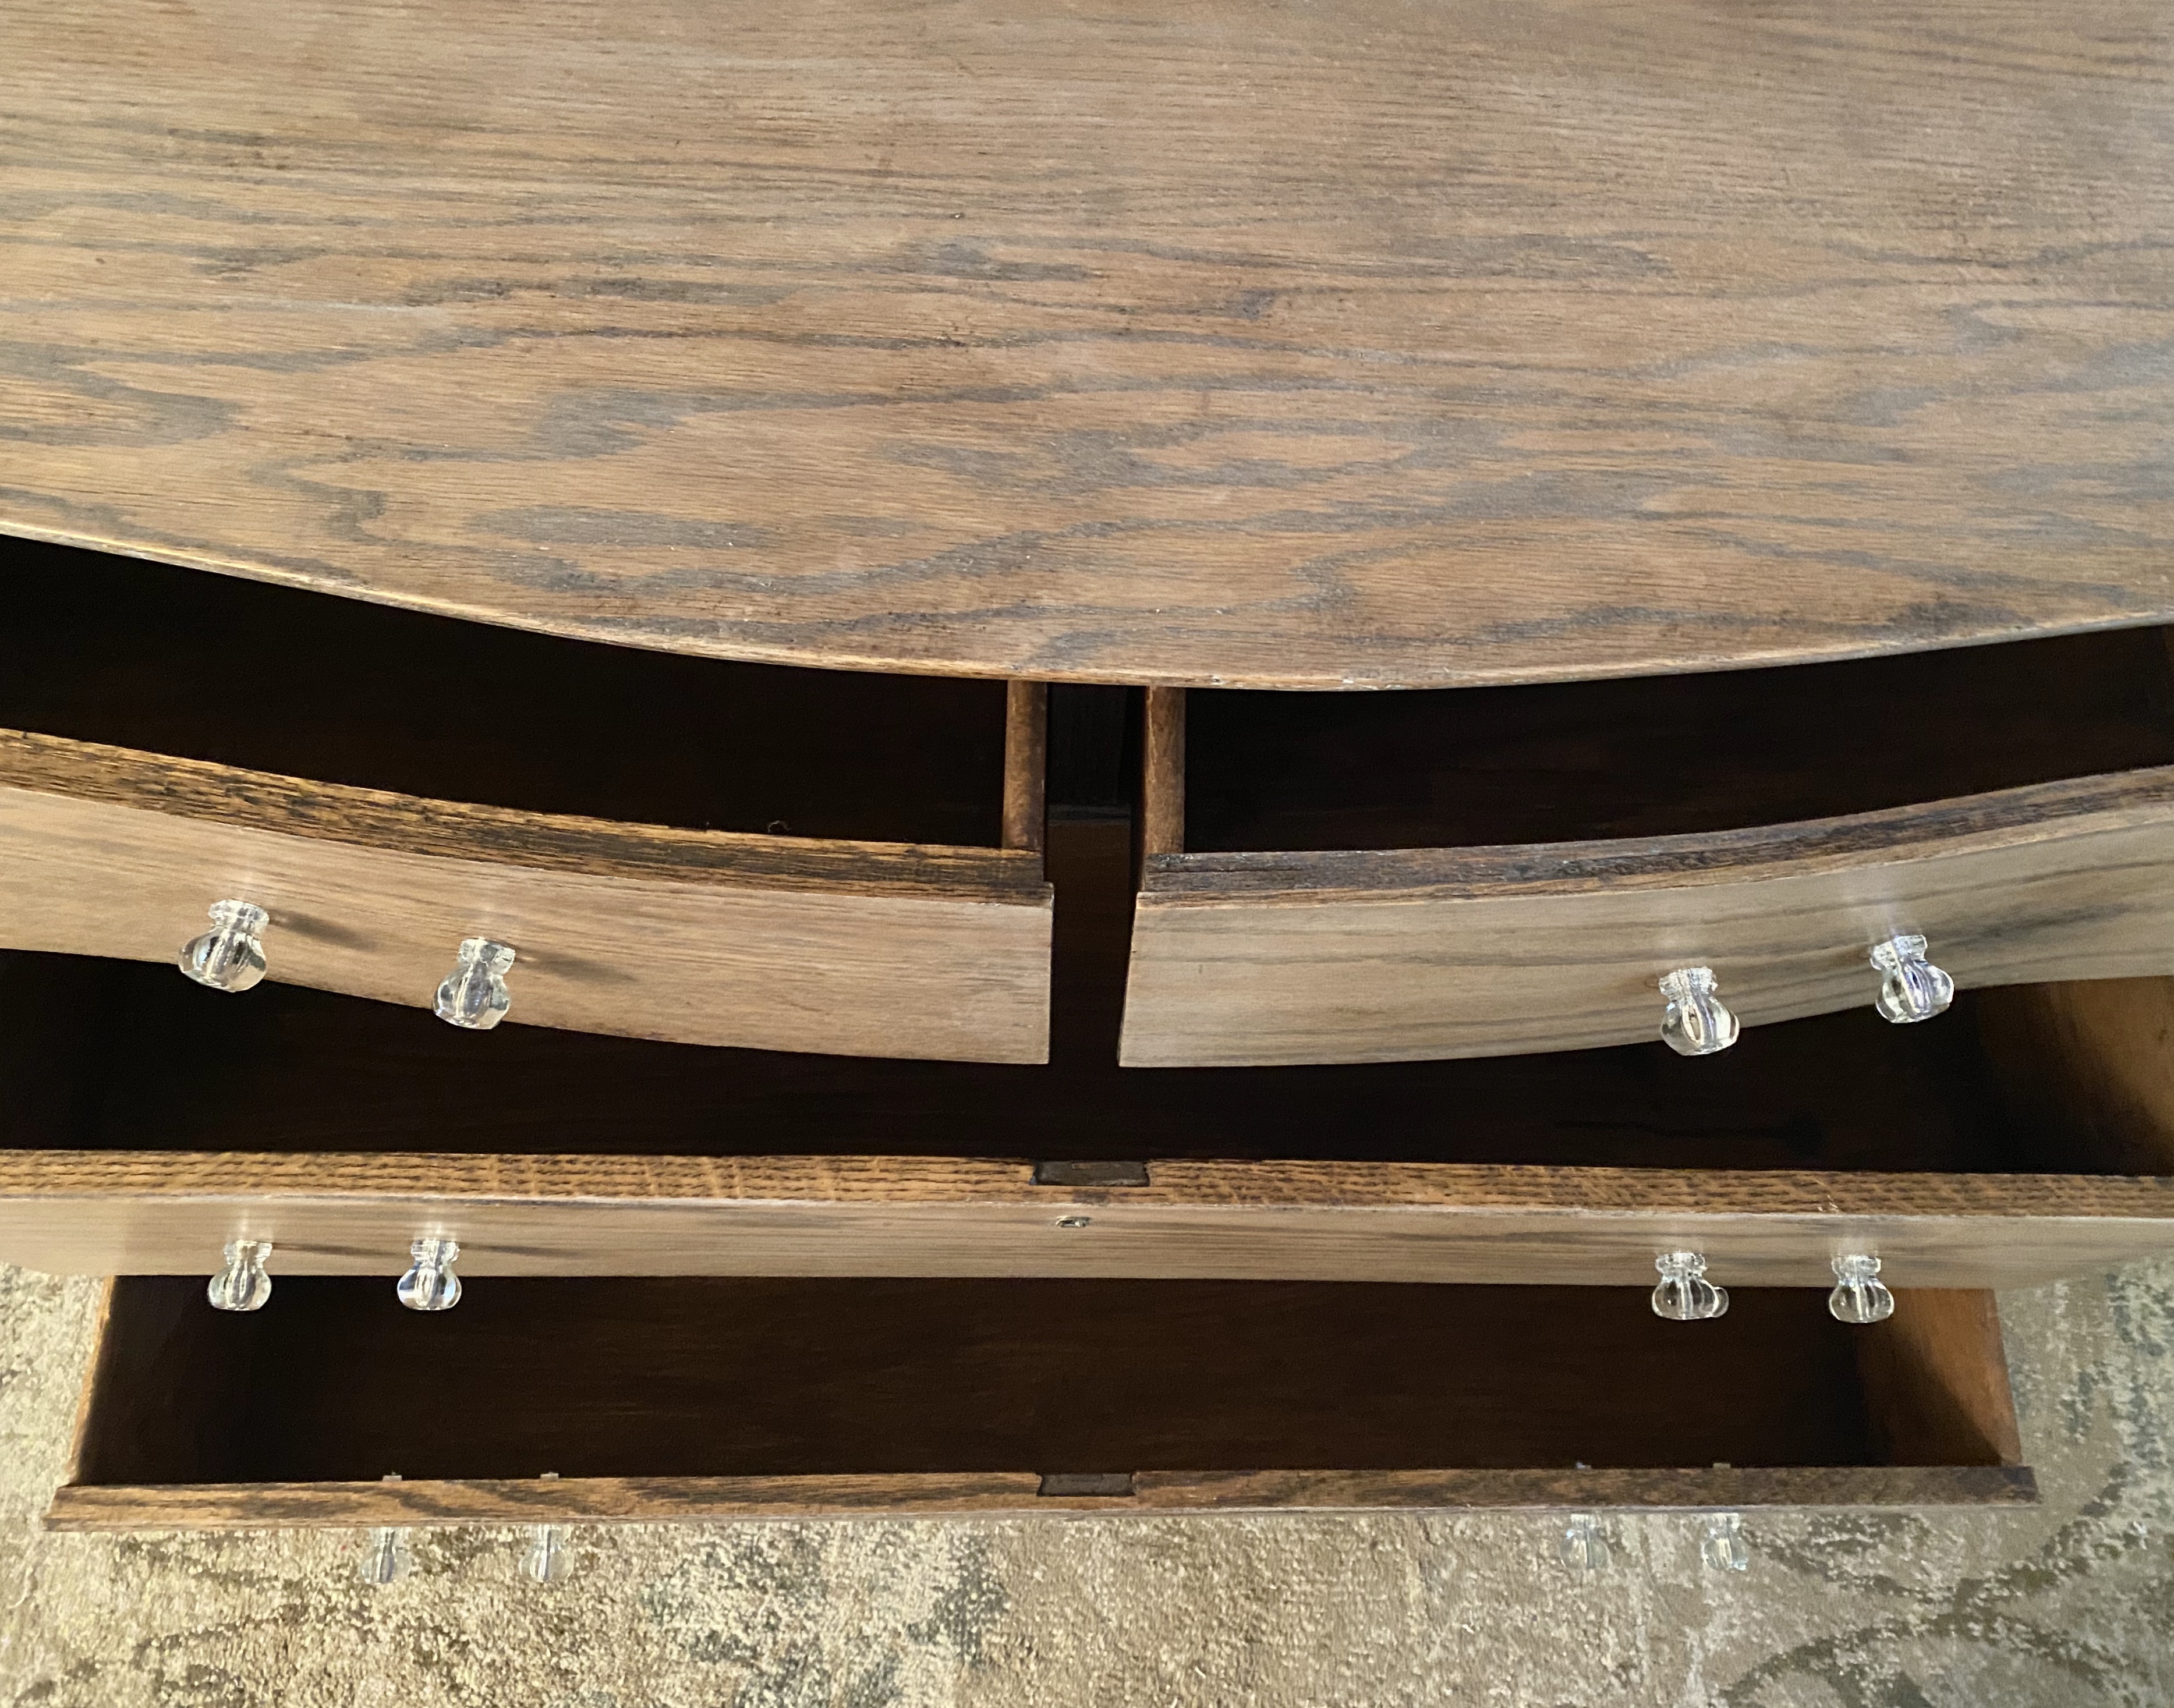
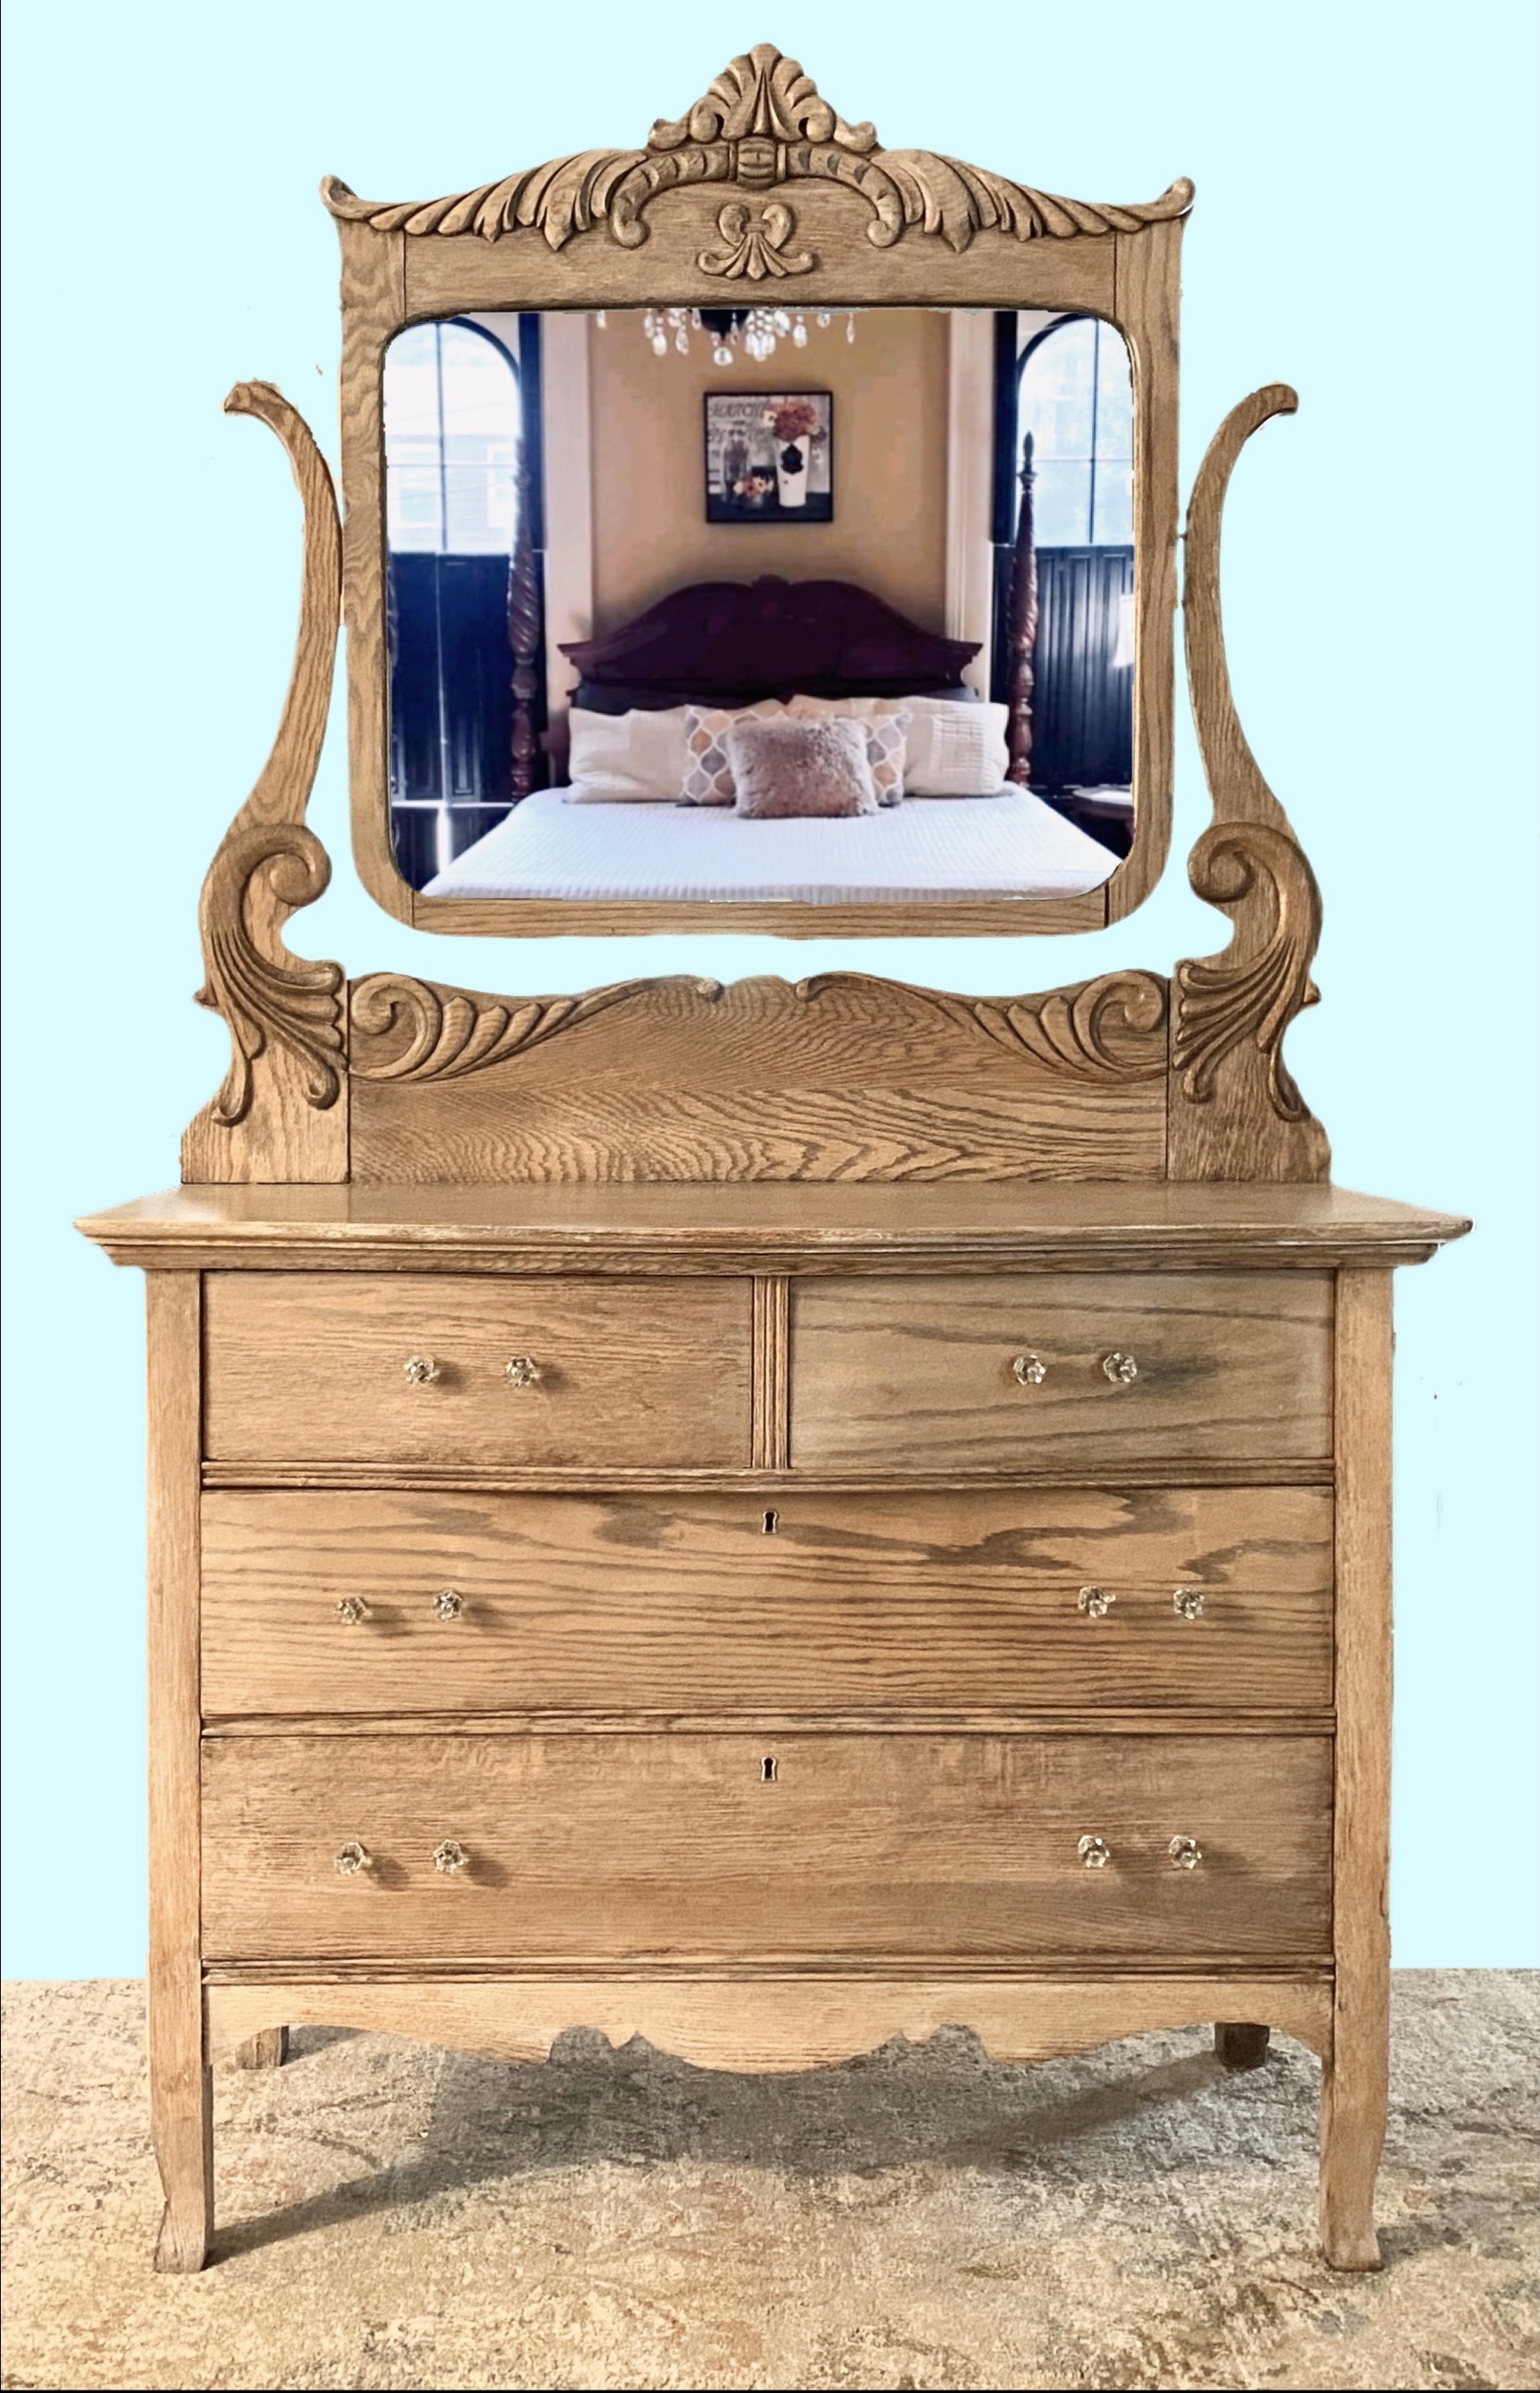
The oak dresser we’ve had for several years in storage is now refurbished. When we bought it, the base literally fell apart as we were loading it, but that mirror was so worth all the work it was going to take to bring it back to life. The mirror is beveled and has just a bit of aged patina.
Researching it, we found the company Estey Furniture produced it in the late 1800s or early 1900s. The original handles were a bail type handle, but were replaced at some point by these Depression knobs from the 1930s.
Danny took the dresser completely apart. He loaded the base into our SUV and took it to a grands babysitting gig and stripped it. A few weeks ago, he loaded it again and when we were babysitting another grand in another city, sanded it, and put it back together.
We had completely forgotten what the mirror looked like. Wow! It changed my whole idea of how I wanted to refinish it. I decided a whitewash look would bring out the grain detail and take away the orangeish look oak raw oak sometimes has. The drawers were not pretty on the inside and sides so I stained the insides and stenciled a pattern on the outside.
This is the difference between the whitewashed look and raw wood after stripping and sanding. After whitewashing everything, I gave the base and mirror 3 coats of water-based Crystal clear Varathane Polyurethane in satin finish and 5 coats on the top of the dresser.
I couldn’t wait to take pics. I used an app called ProKnockOut to remove the mirror reflection and change it out to a new image of a bedroom I found on pixels.com and to cut out the dresser itself and to apply a plain background.
It already has a new home. This piece ranks right up there as one of my favorite pieces we have ever refurbished.
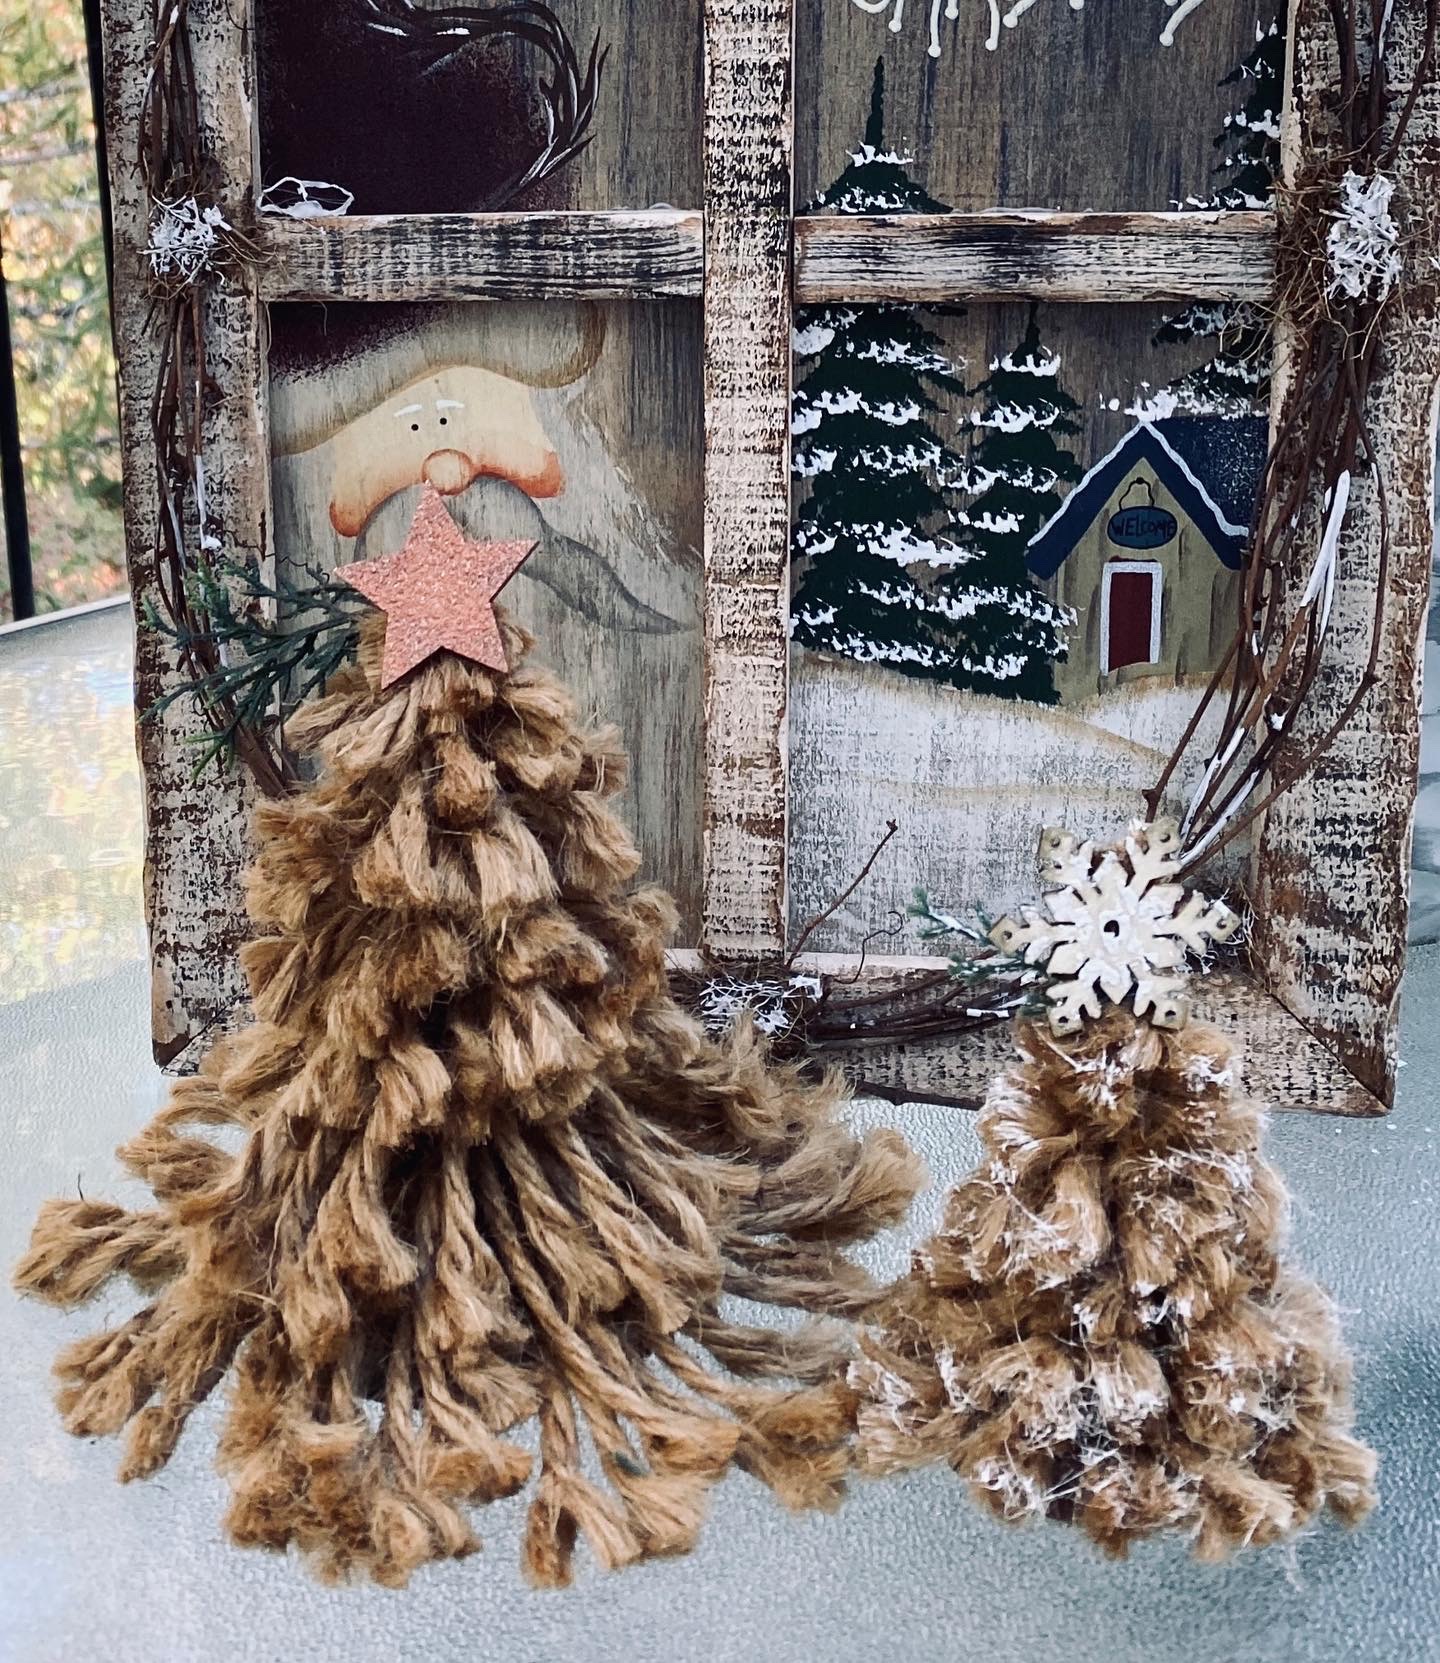
I changed it up a little. This one is 5” tall. I used a small 2 1/4” wood slice for the base and cut down the size of the skewer some. It still has a point on it for piercing each strand of jute. I just cut it off at the end.
The jute pieces I used:
12 – 4” 12 – 3” 12 – 2” 2 – 1” And a half inch piece. For this one I used more glue and pressed and molded it to round off the top.
I cut off the skewer and left enough to glue the greenery and the star to the skewer and glued some jute to the back of it to cover.
This one got caught in a snow storm so has a bit of snow (paint) on the branches.