Projects in January – 1st through the 20th, 2023

Still busy creating so I haven’t had time to post how we did some of these projects. Here they are, though, for inspiration for you.

This is a vignette I put together for winter decor. I had a Christmas transfer on one side of this pitcher and a winter one on the other. I turned it around and added some branches from a tree in my yard then added lights. I made the snowman last year and added the Winter sign I’ve had for a long time.

Danny cut this cute gnome out of a scrap piece of plywood, drew the details and painted and sealed him. He added some stakes so we can put him in the pot’s dirt.

I crocheted another bunch of hats to sell to a friend’s daughter. She adds them to the baskets of herbal remedies she sells.

And more crochet… which begat more crochet that I’m still working on. I made a couple of gnome towel rings. I had made some boho type ones for a couple of friends and then decided to find a pattern for making more. I’ve sold 10 so far of them.

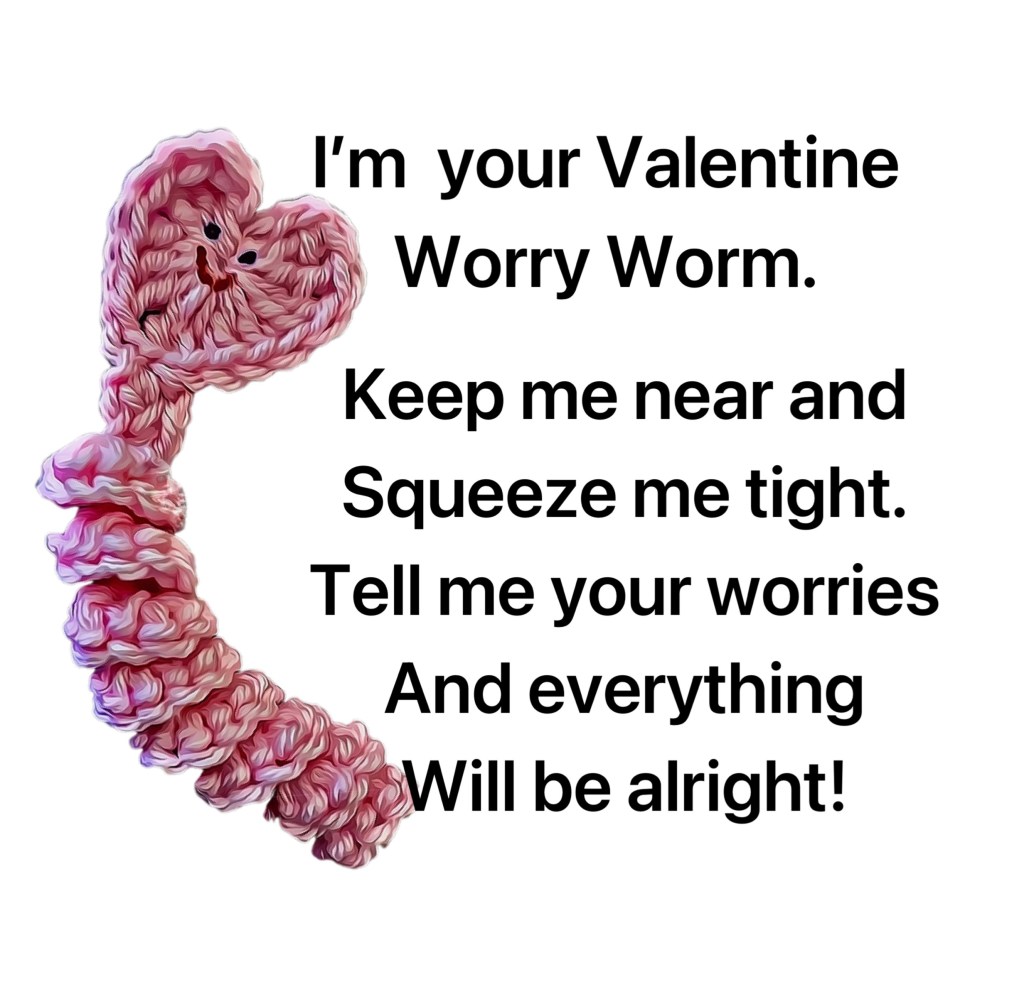
And then I saw a post for a group called Random Acts of Crochet Kindness and cute little worry worms to make and spread around town so I had to make some of those. I plan on making more later on. But I figured out a way to make a cute Valentine one for kids and ended up with 86 orders. Still working on those.

Then my cousin sent me a video of someone crocheting a woven heart. I had to find the tutorial and make one. Then I saw a video on making a heart with wine corks so I had to do that, too. And then someone else told me about decoupaging on a candle with wax paper. Yep! I had to do that, too. I’ve used the hot iron method with parchment paper before, but not on a candle. Worked like a charm. And the little tag- I wrote love on it with a s or h marker and burned it and then painted it. That worked, too.

Whew! I’m getting tired just typing all we’ve done so far this month. But wait! There’s more!

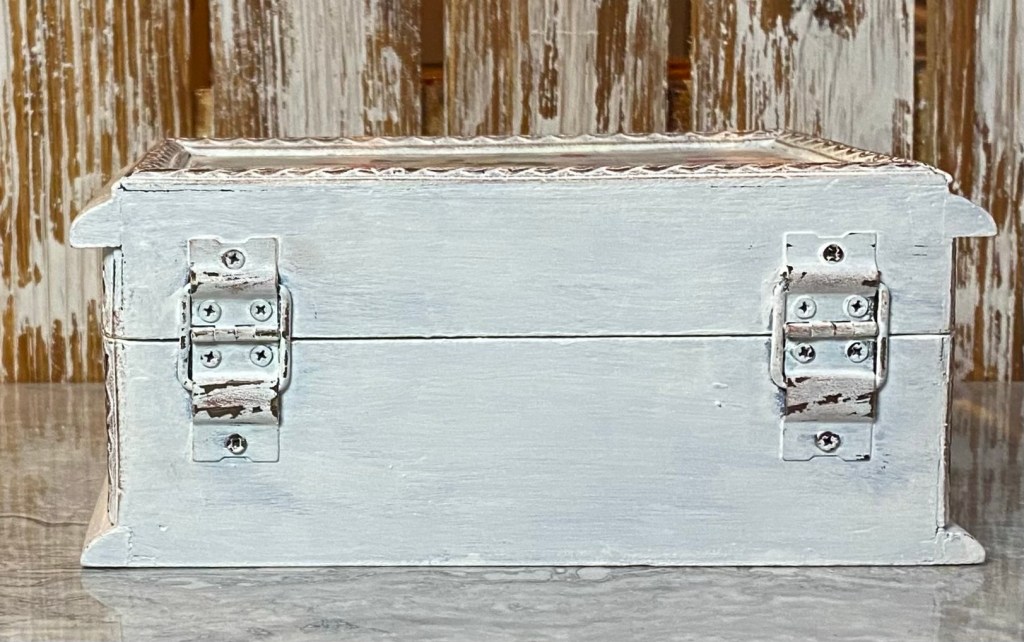
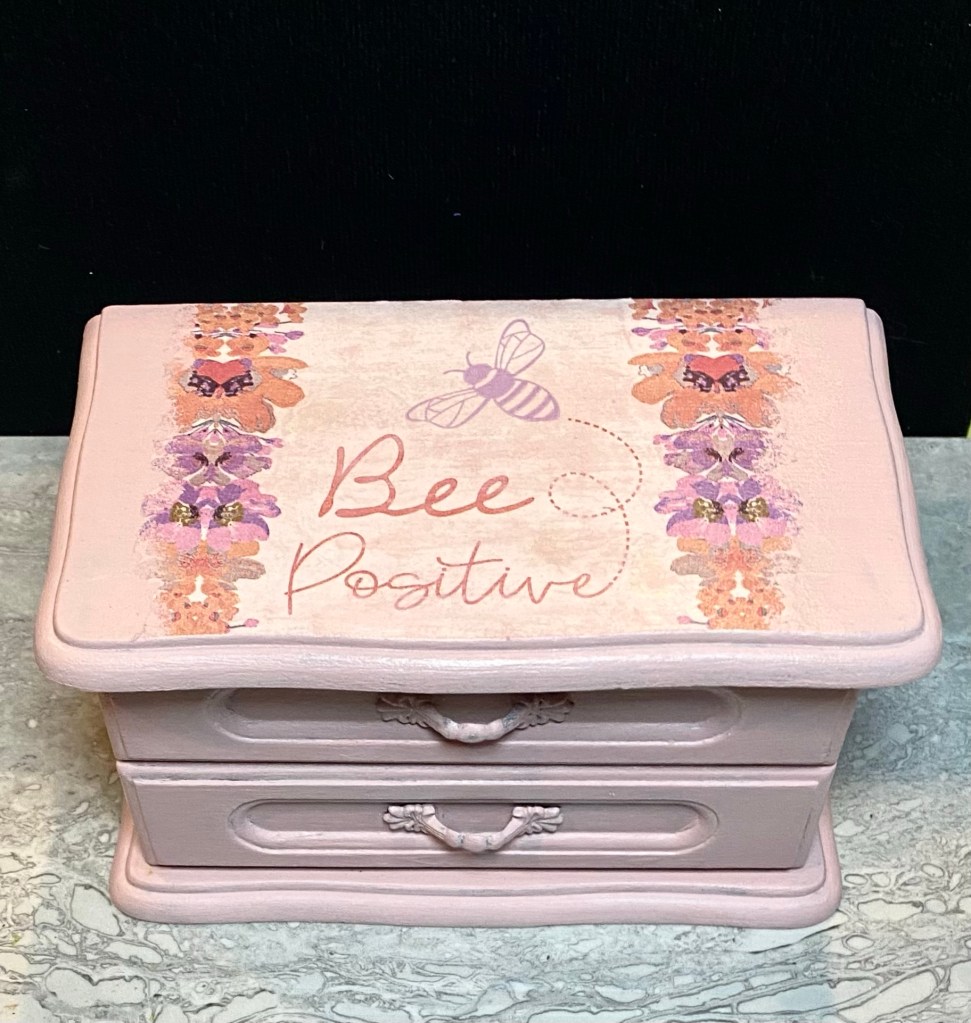
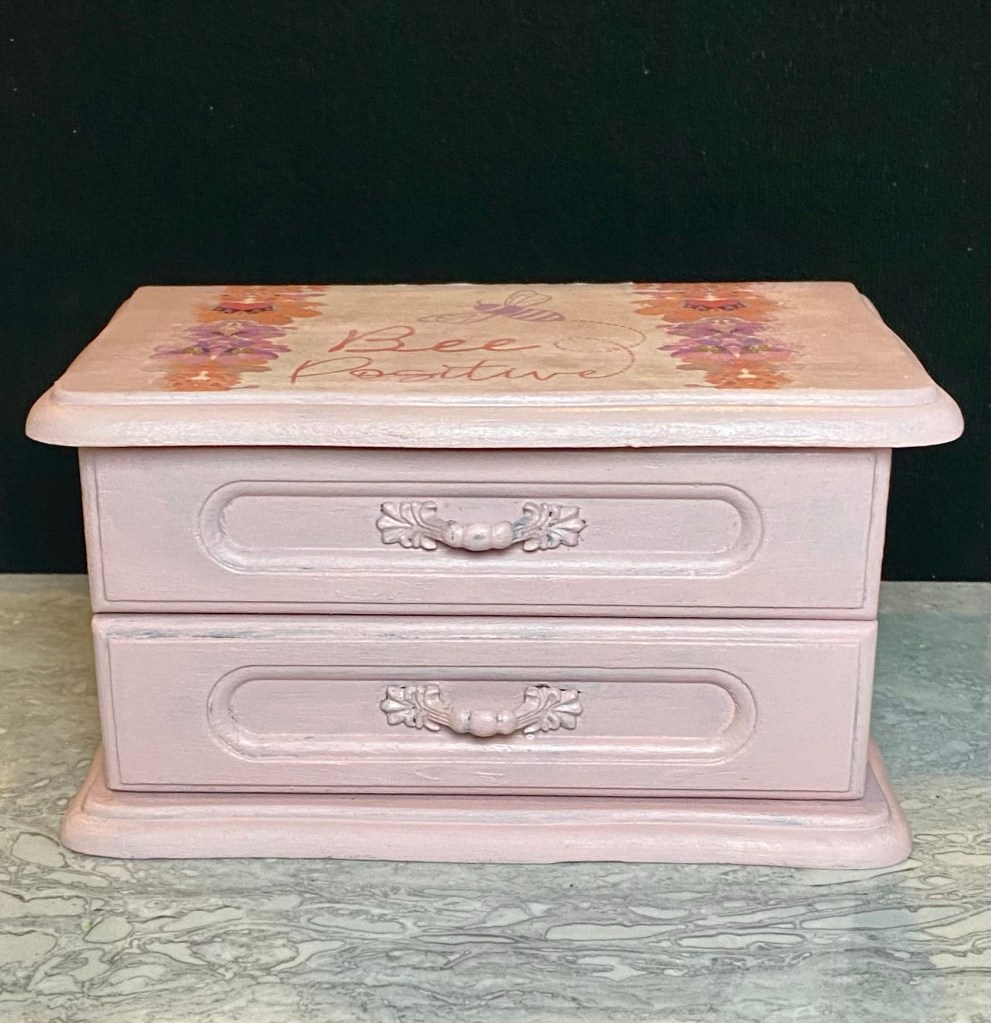
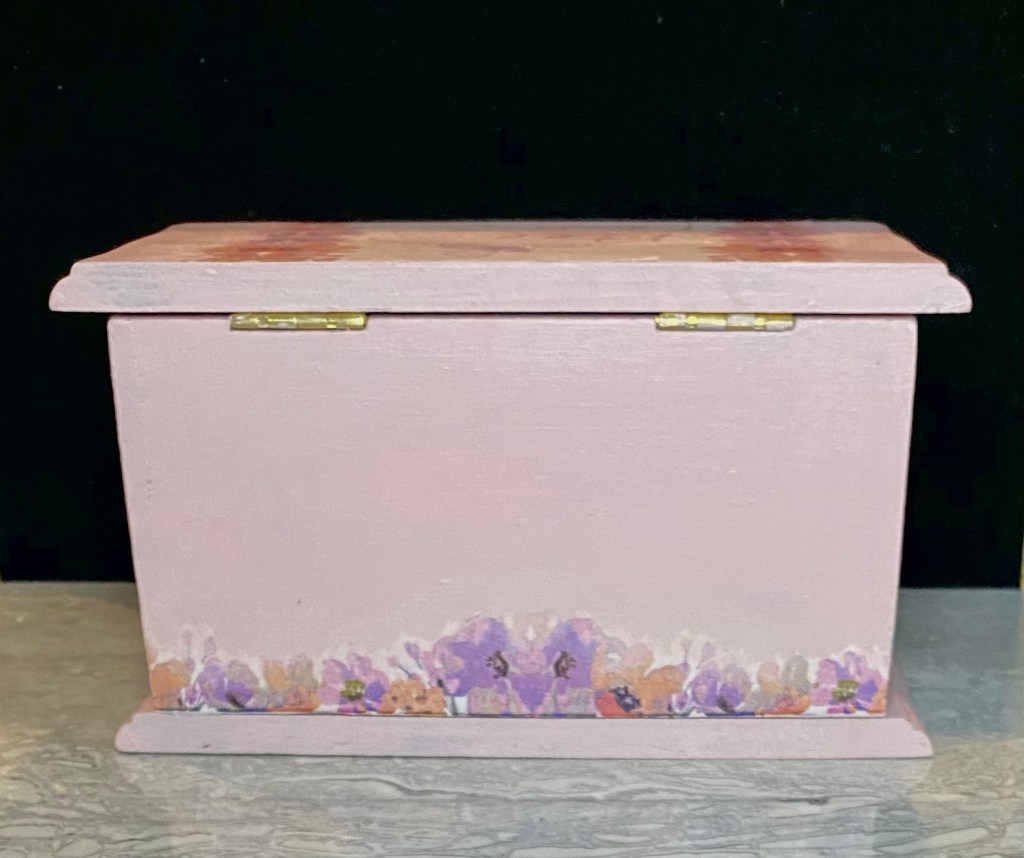
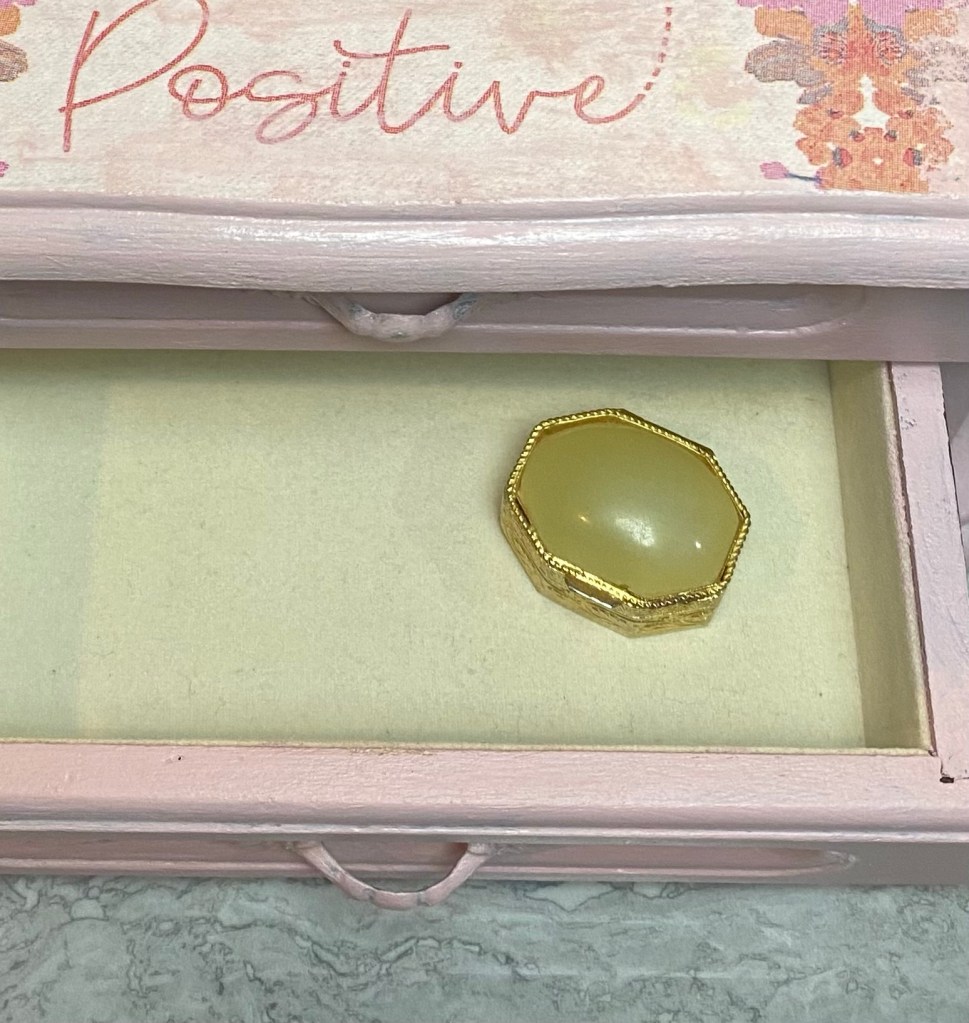
And then came a couple of jewelry boxes. I have a huge stash of them but haven’t painted any in awhile. These sold quickly so plan on painting ring more soon.

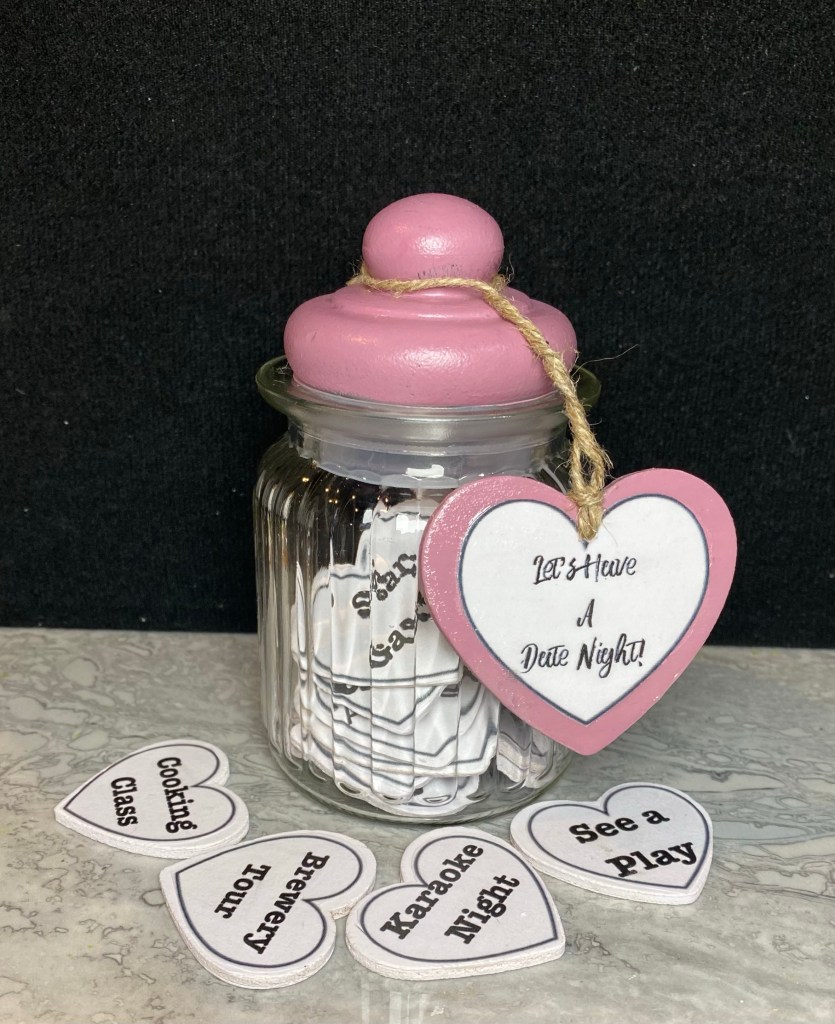
I saw an idea for a date night jar on Pinterest. This is my version. Jar from Dollar Tree. I painted the glass lid. If you spray glass with a clear sealer first, chalk paint will adhere well.

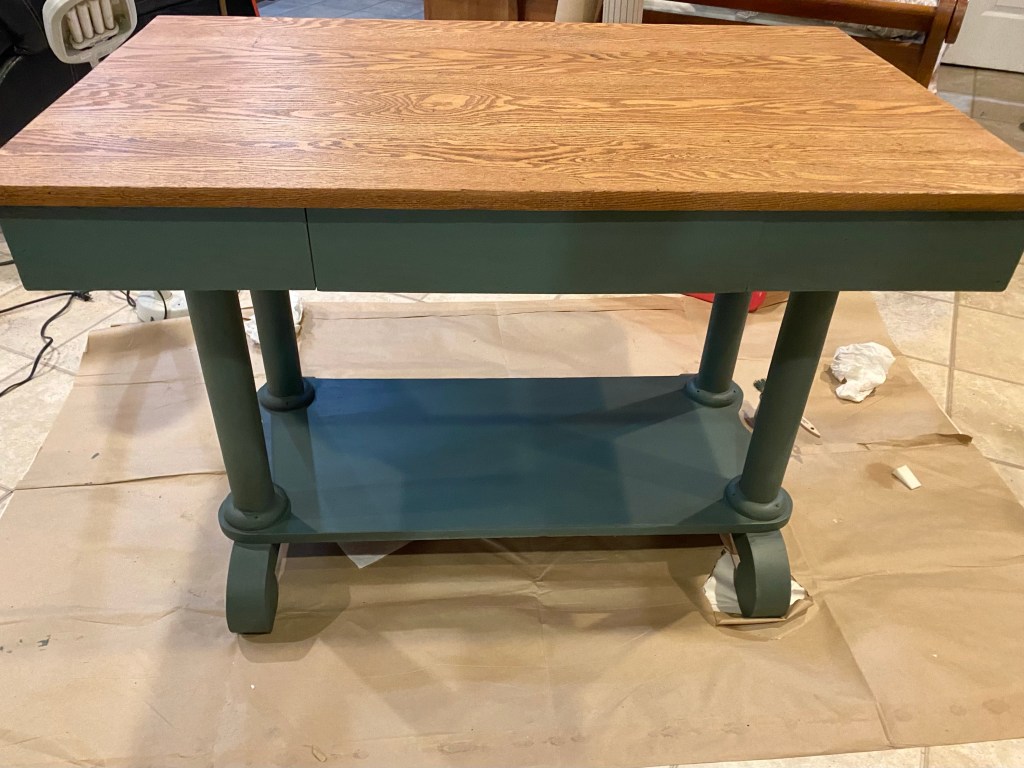
I don’t have staged pics of this beautiful library table. It is going to one of our booths this week. Danny sanded the top. I stained it with a w at teenaged stain. It has five coats of Varathane Crystal Clear Water based polyurethane in matte finish. The rest is painted with our Missouri Limestone Paint Company “Cupboard Green” and sealed. I love how it turned out.

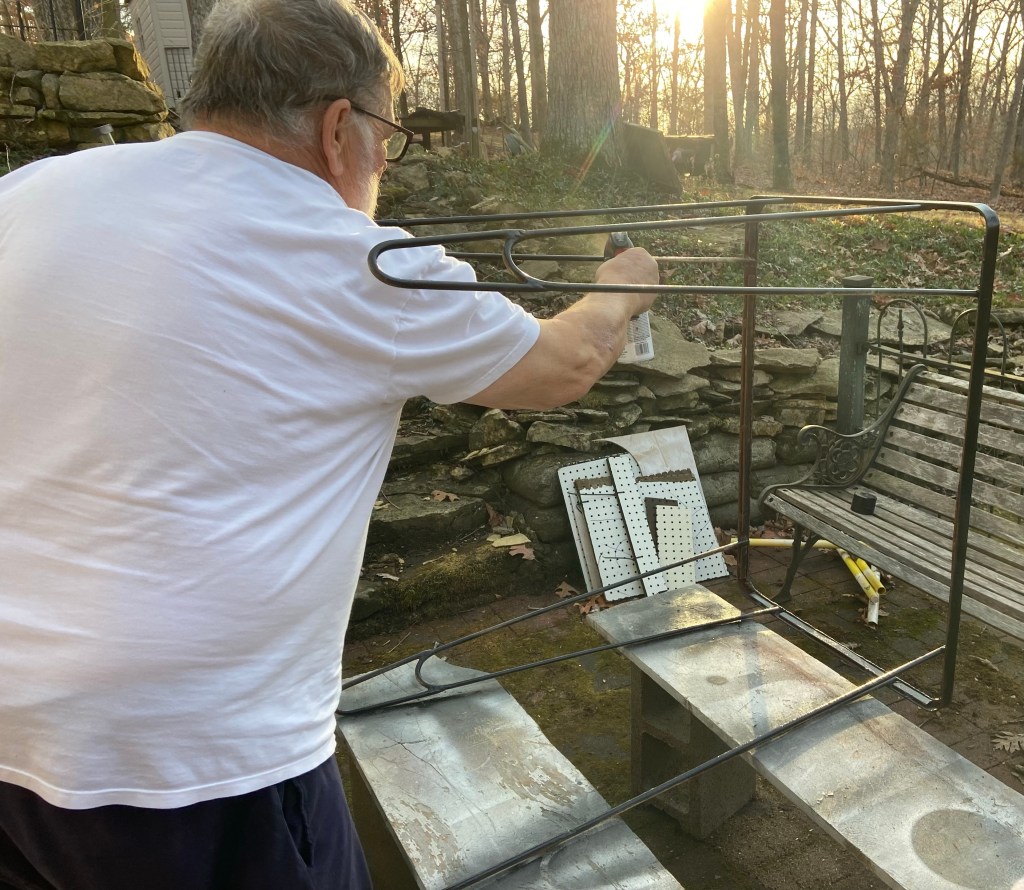
Danny created this white washed hanging rack from a vintage ladder.

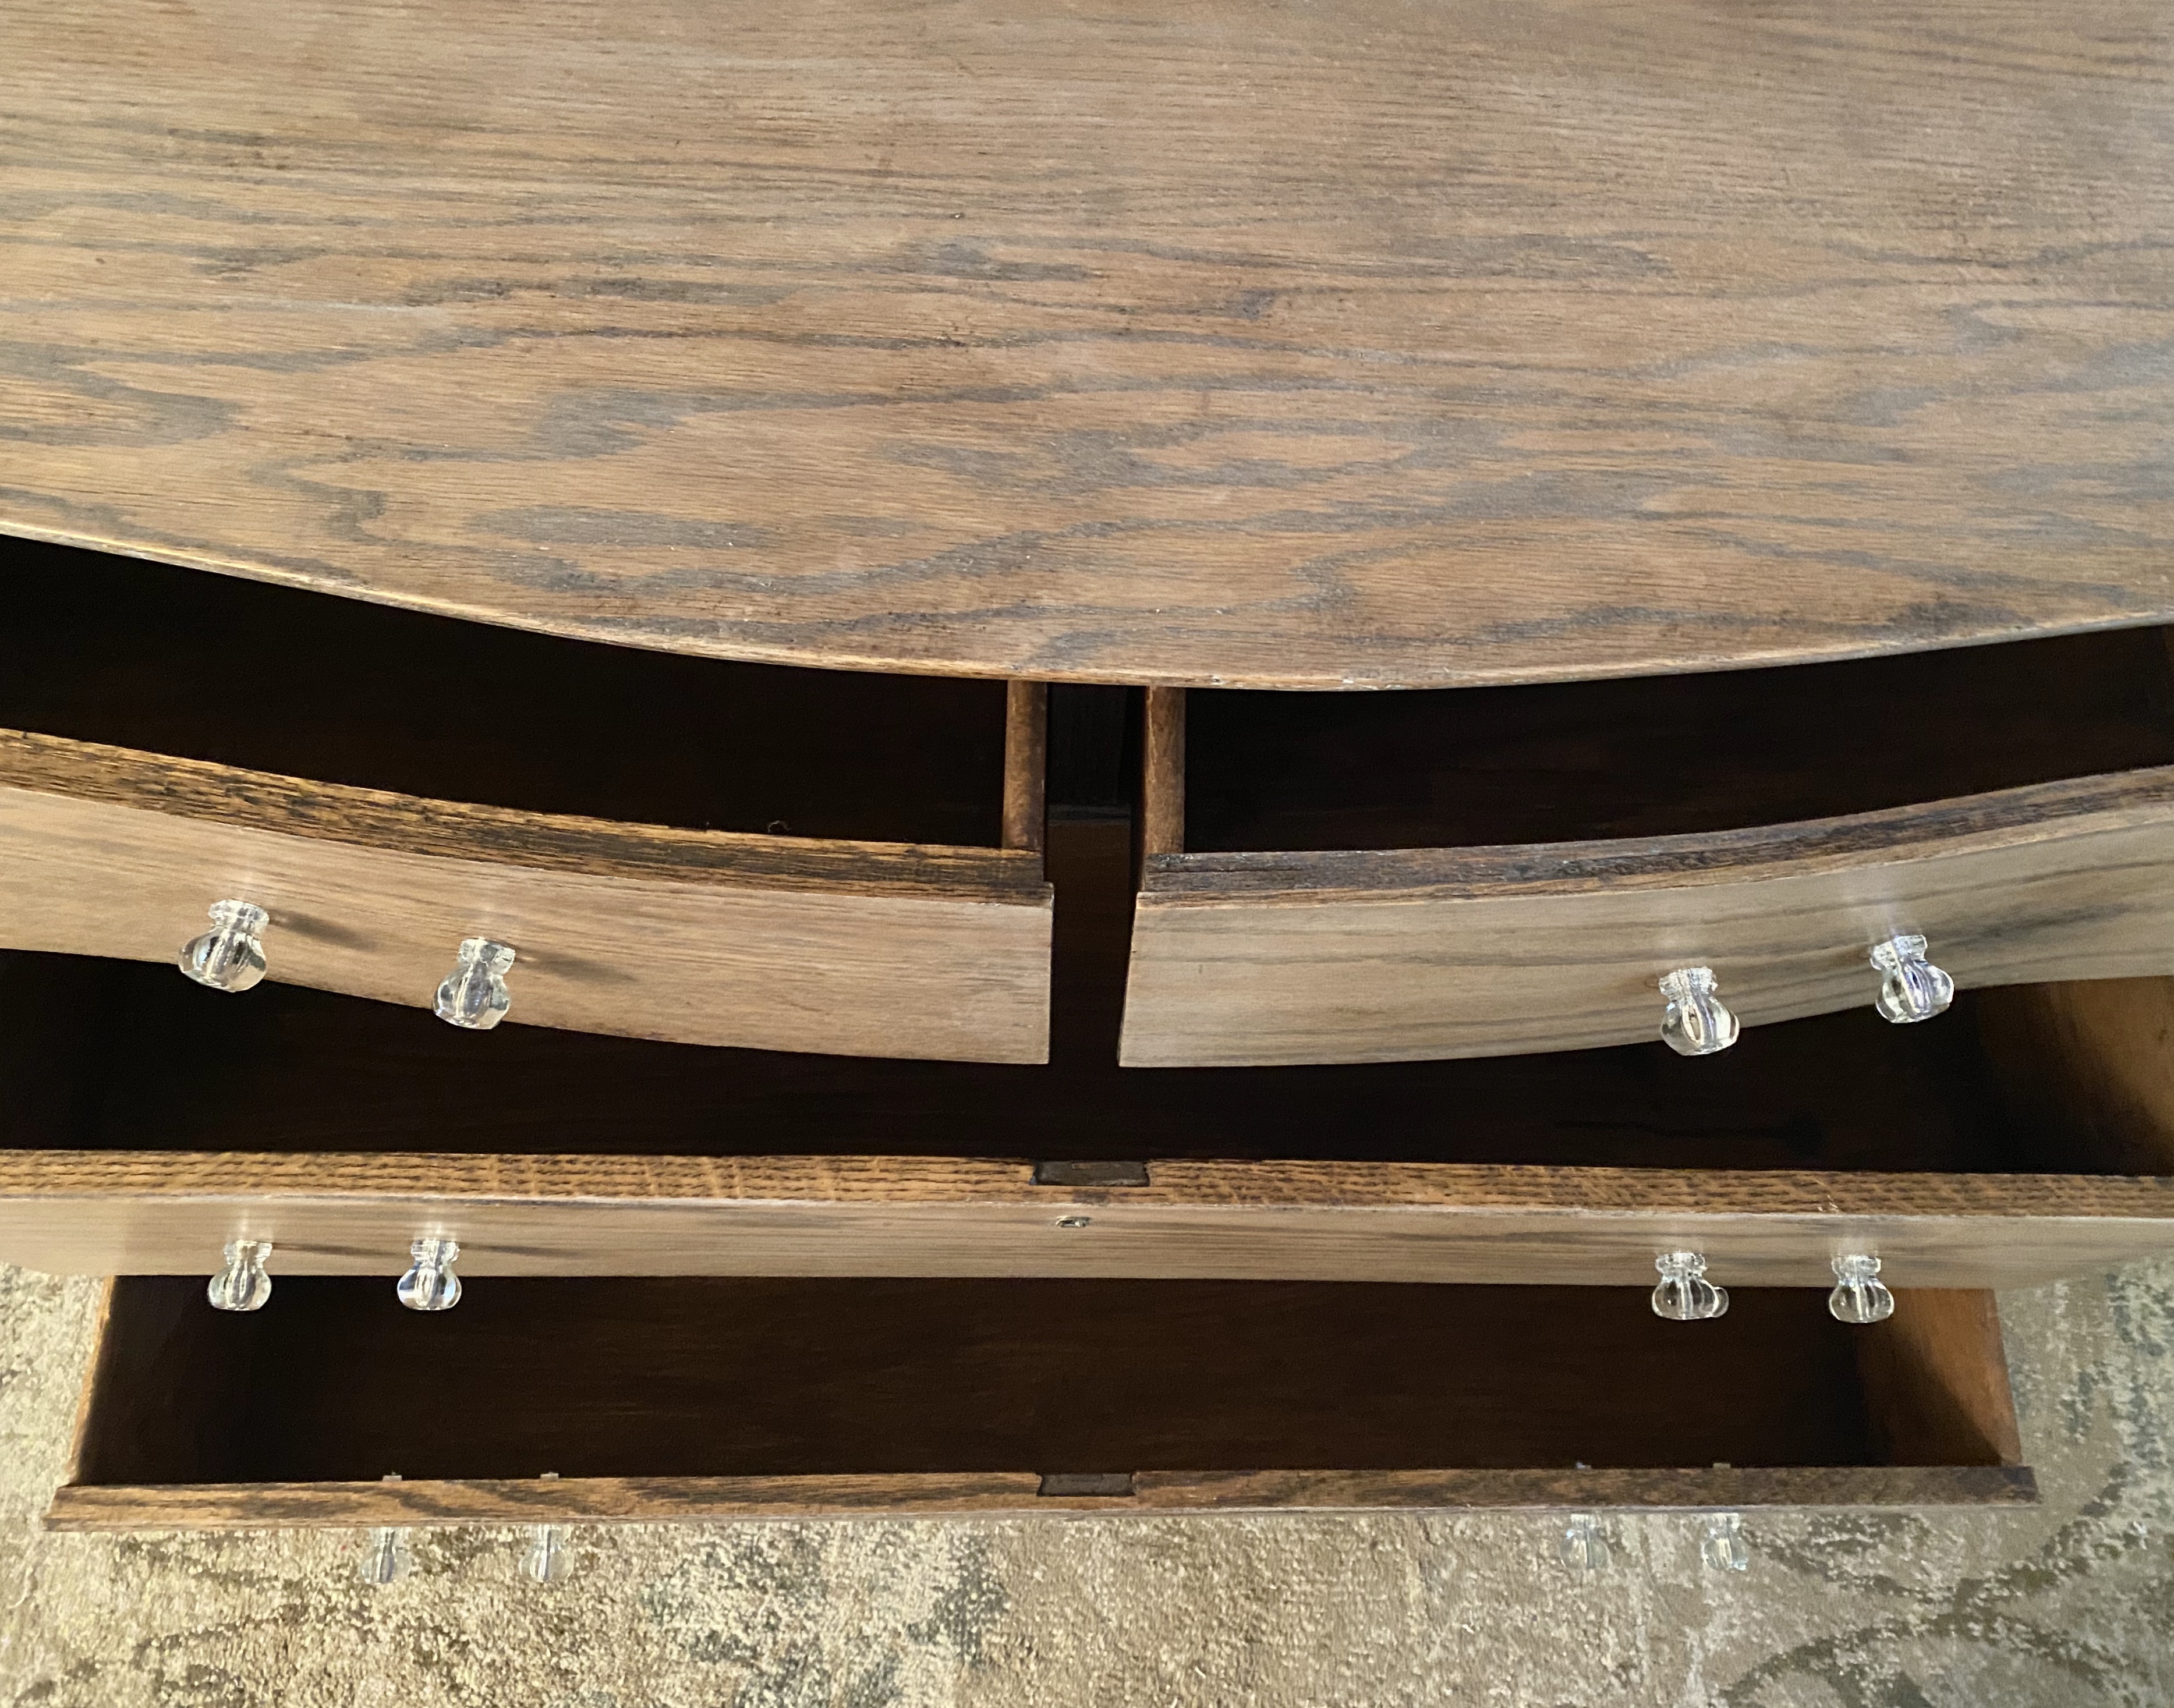
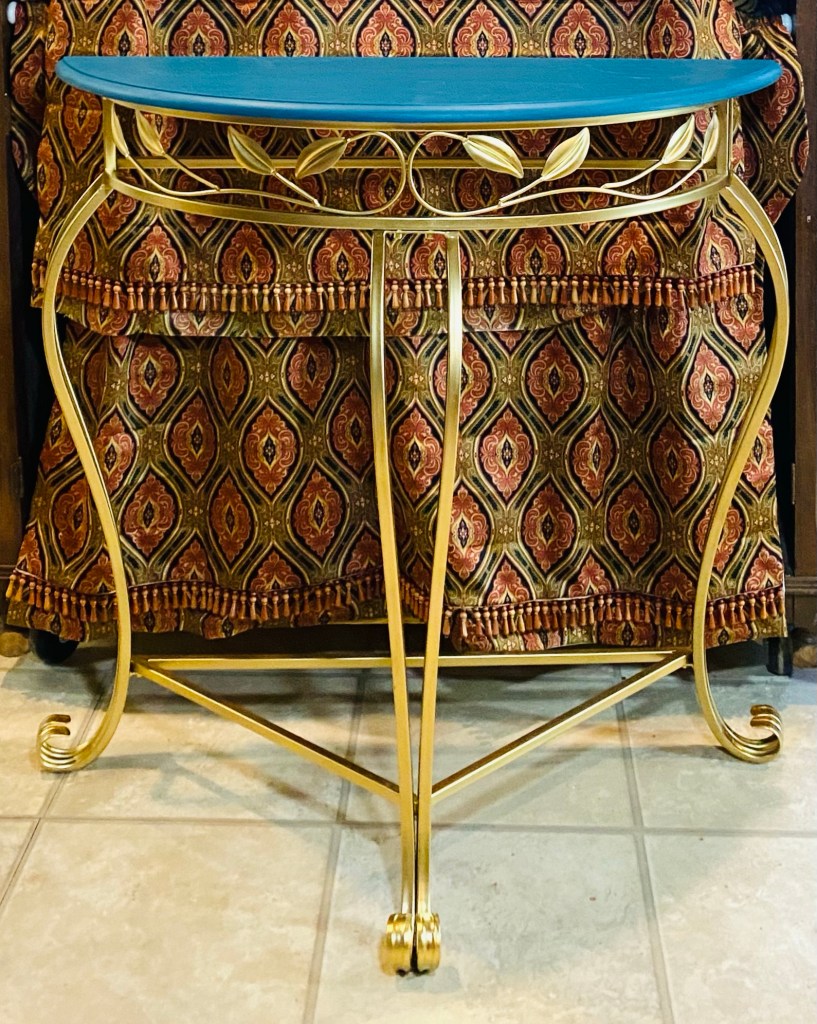
Another project is this gorgeous half table console. This is a long description but hopefully will inspire those who like boho with some ideas. I think this is one of my most favorite projects ever. I had so much fun with it.

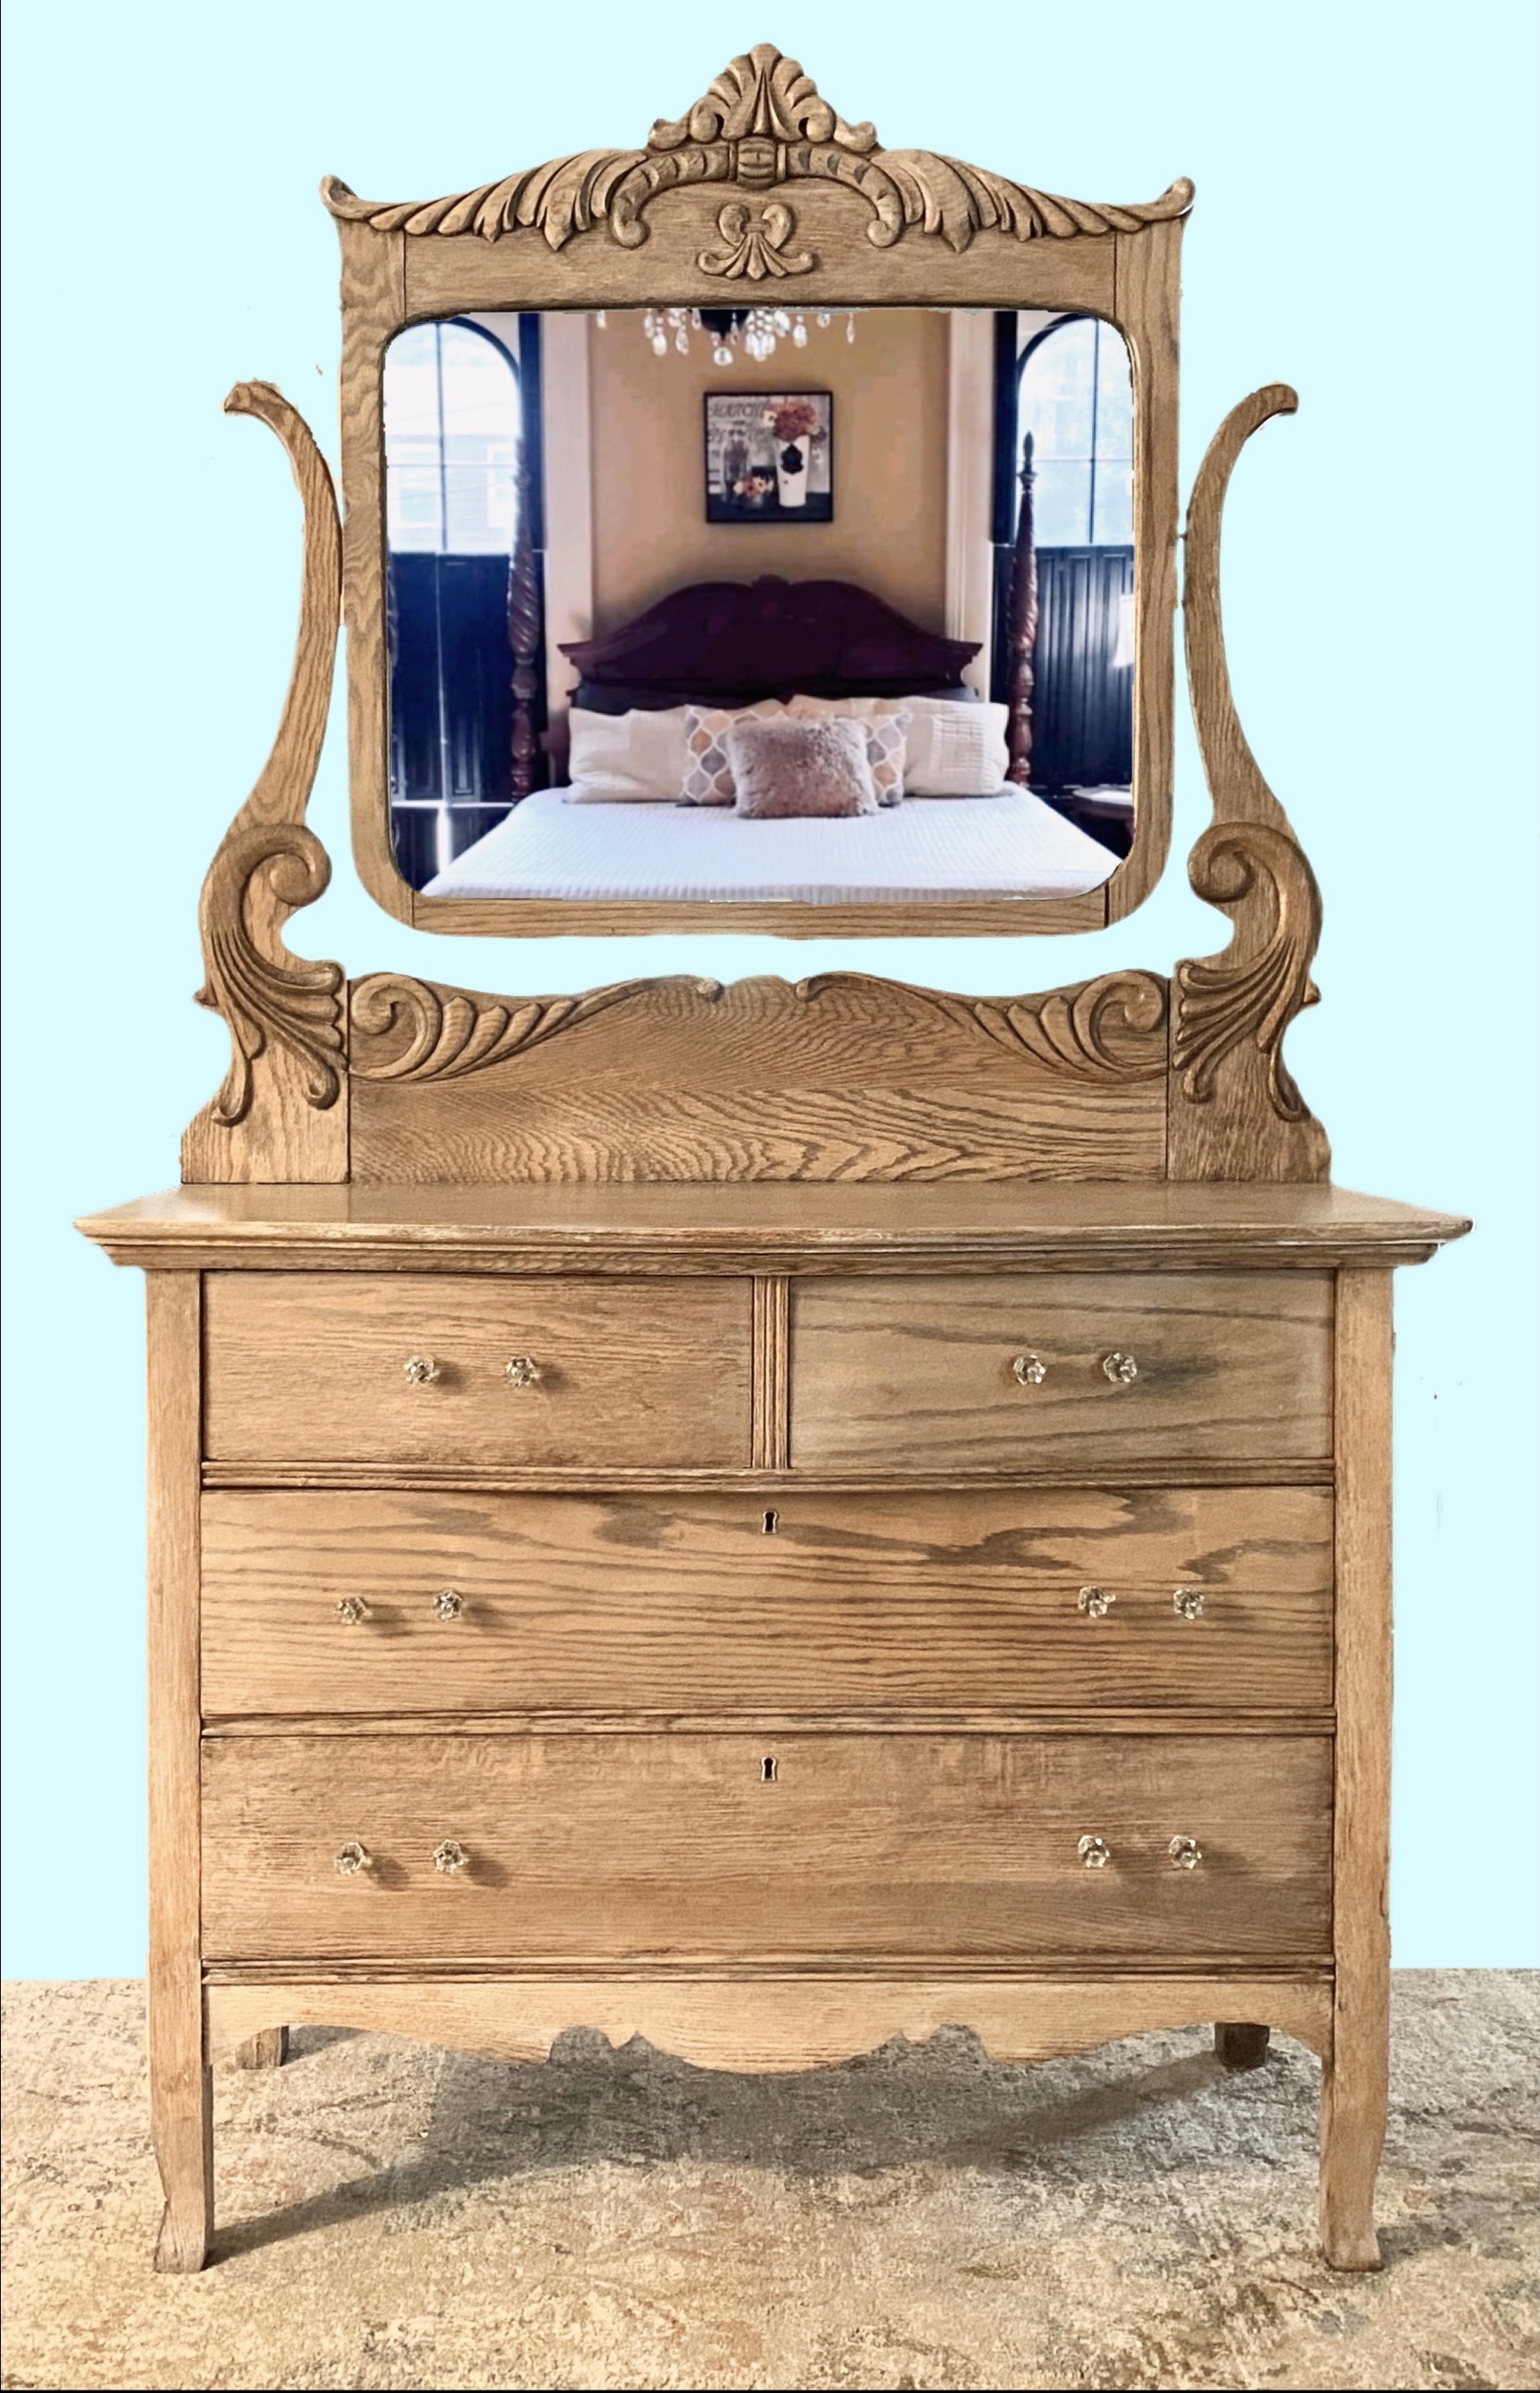
We’ve had this table (and matching lamps) since soon after we built our house in 1985. Holy cow! That was 38 years ago!! The other day, I decided we didn’t need them anymore so decided to paint them. Danny suggested painting the top with our Missouri Limestone Paint Company “Bourbon Street”, a dark teal color. I thought Rustoleum metallic gold on the metal legs would look good with the teal. I also painted the metal on the lamps with it. They all turned out gorgeous!

Then, when I showed the table to a friend, she said I should style it as a boho piece. I agreed.

So pretty much all day today, I have been creating items for it to sell from things I have in my supplies:

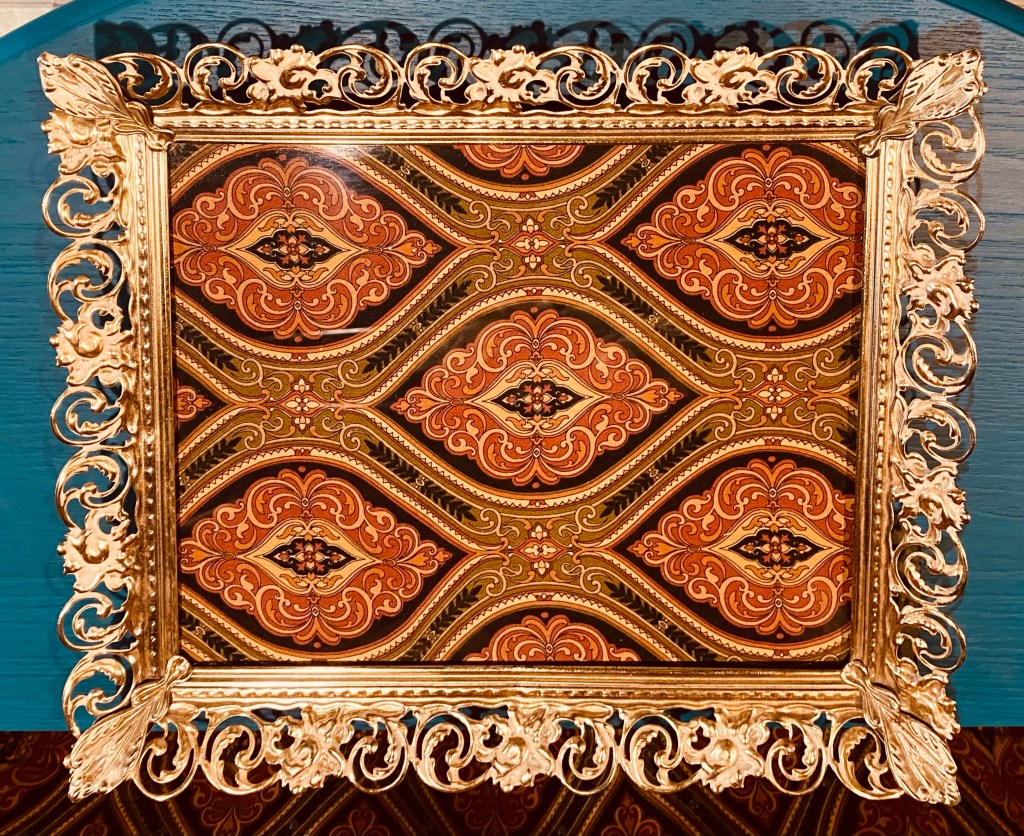
1) Picture frame: gifted by a neighbor- funny thing, my mom had our pictures in frames almost exactly like this growing up. The back is velvet. It can still stand up, but it makes a great tray, too. This frame is old!
2) This awesome fabric which was once valances with bead trim, was gifted by a friend. I’ve already used it as a curtain, as you can see, to hide Danny’s power tools and to create a little boho hanging. Lol I simply put a piece of the fabric under the glass of the picture frame for an instant boho tray!
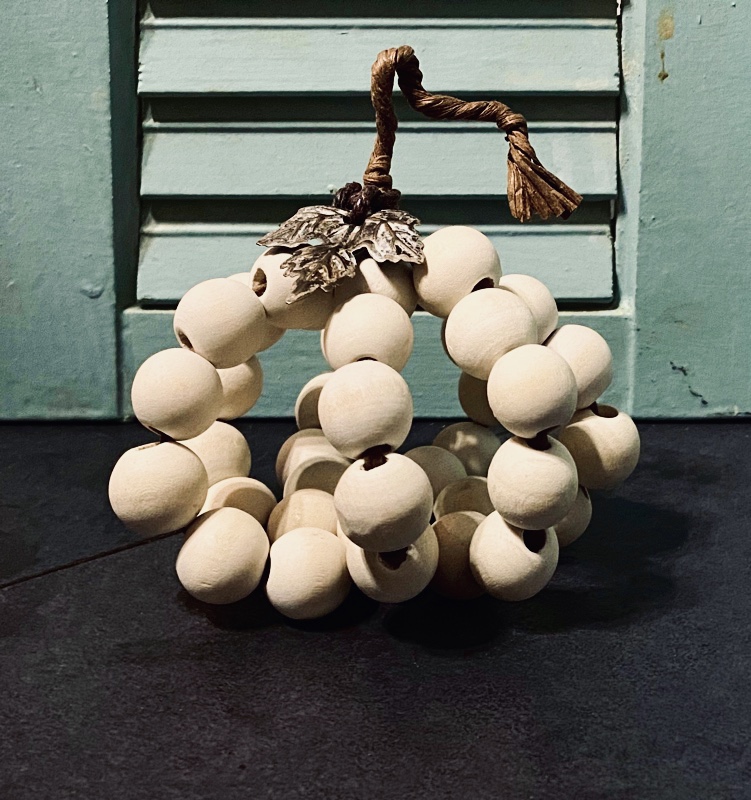
3) A bowl of boho goodness. I had all the ingredients including this cute wood bowl I thrifted. I just added the beads around it for a true boho style. It took me a good bit to figure out how to do it to look finished, then decided to rip it out (it was sewn in with nylon thread). But when I got it all out, it was attached to this beautiful piece of fabric tape in this awesome color! I just hot glued it around the bowl!
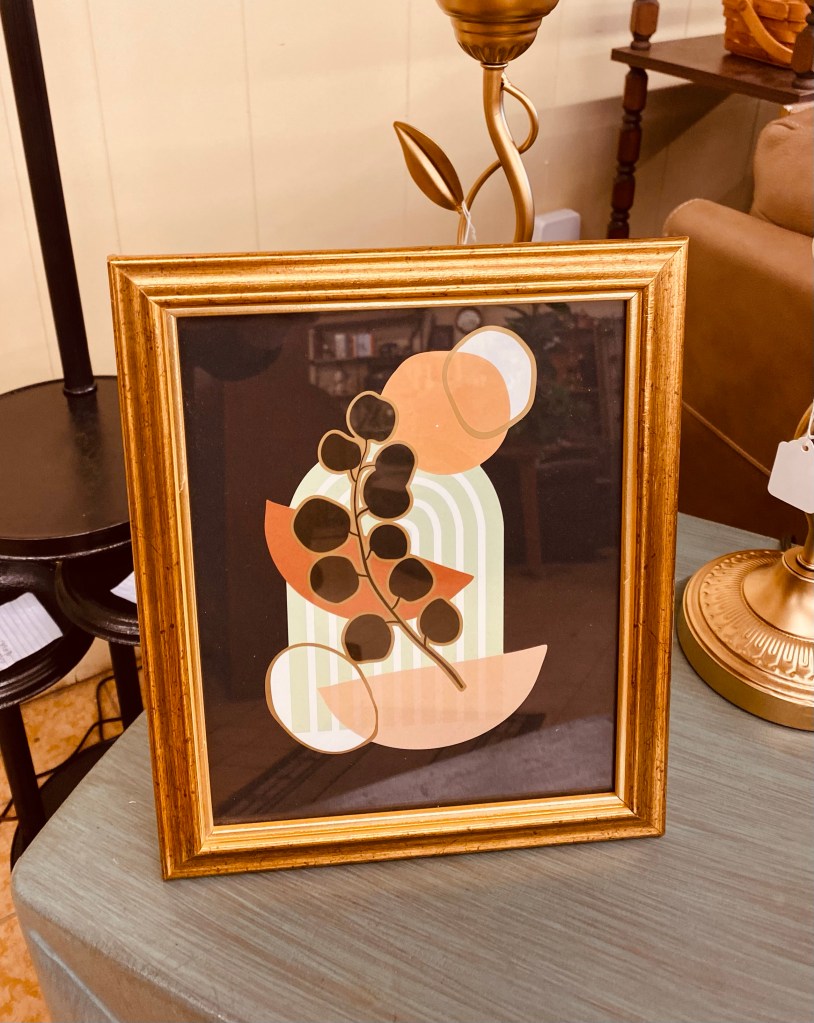
4) Picture frame: gifted by the same neighbor: I did a line drawing on the glass of similar leaves in the table and put a piece of scrapbook paper behind it in a coordinating color and now have a boho print!
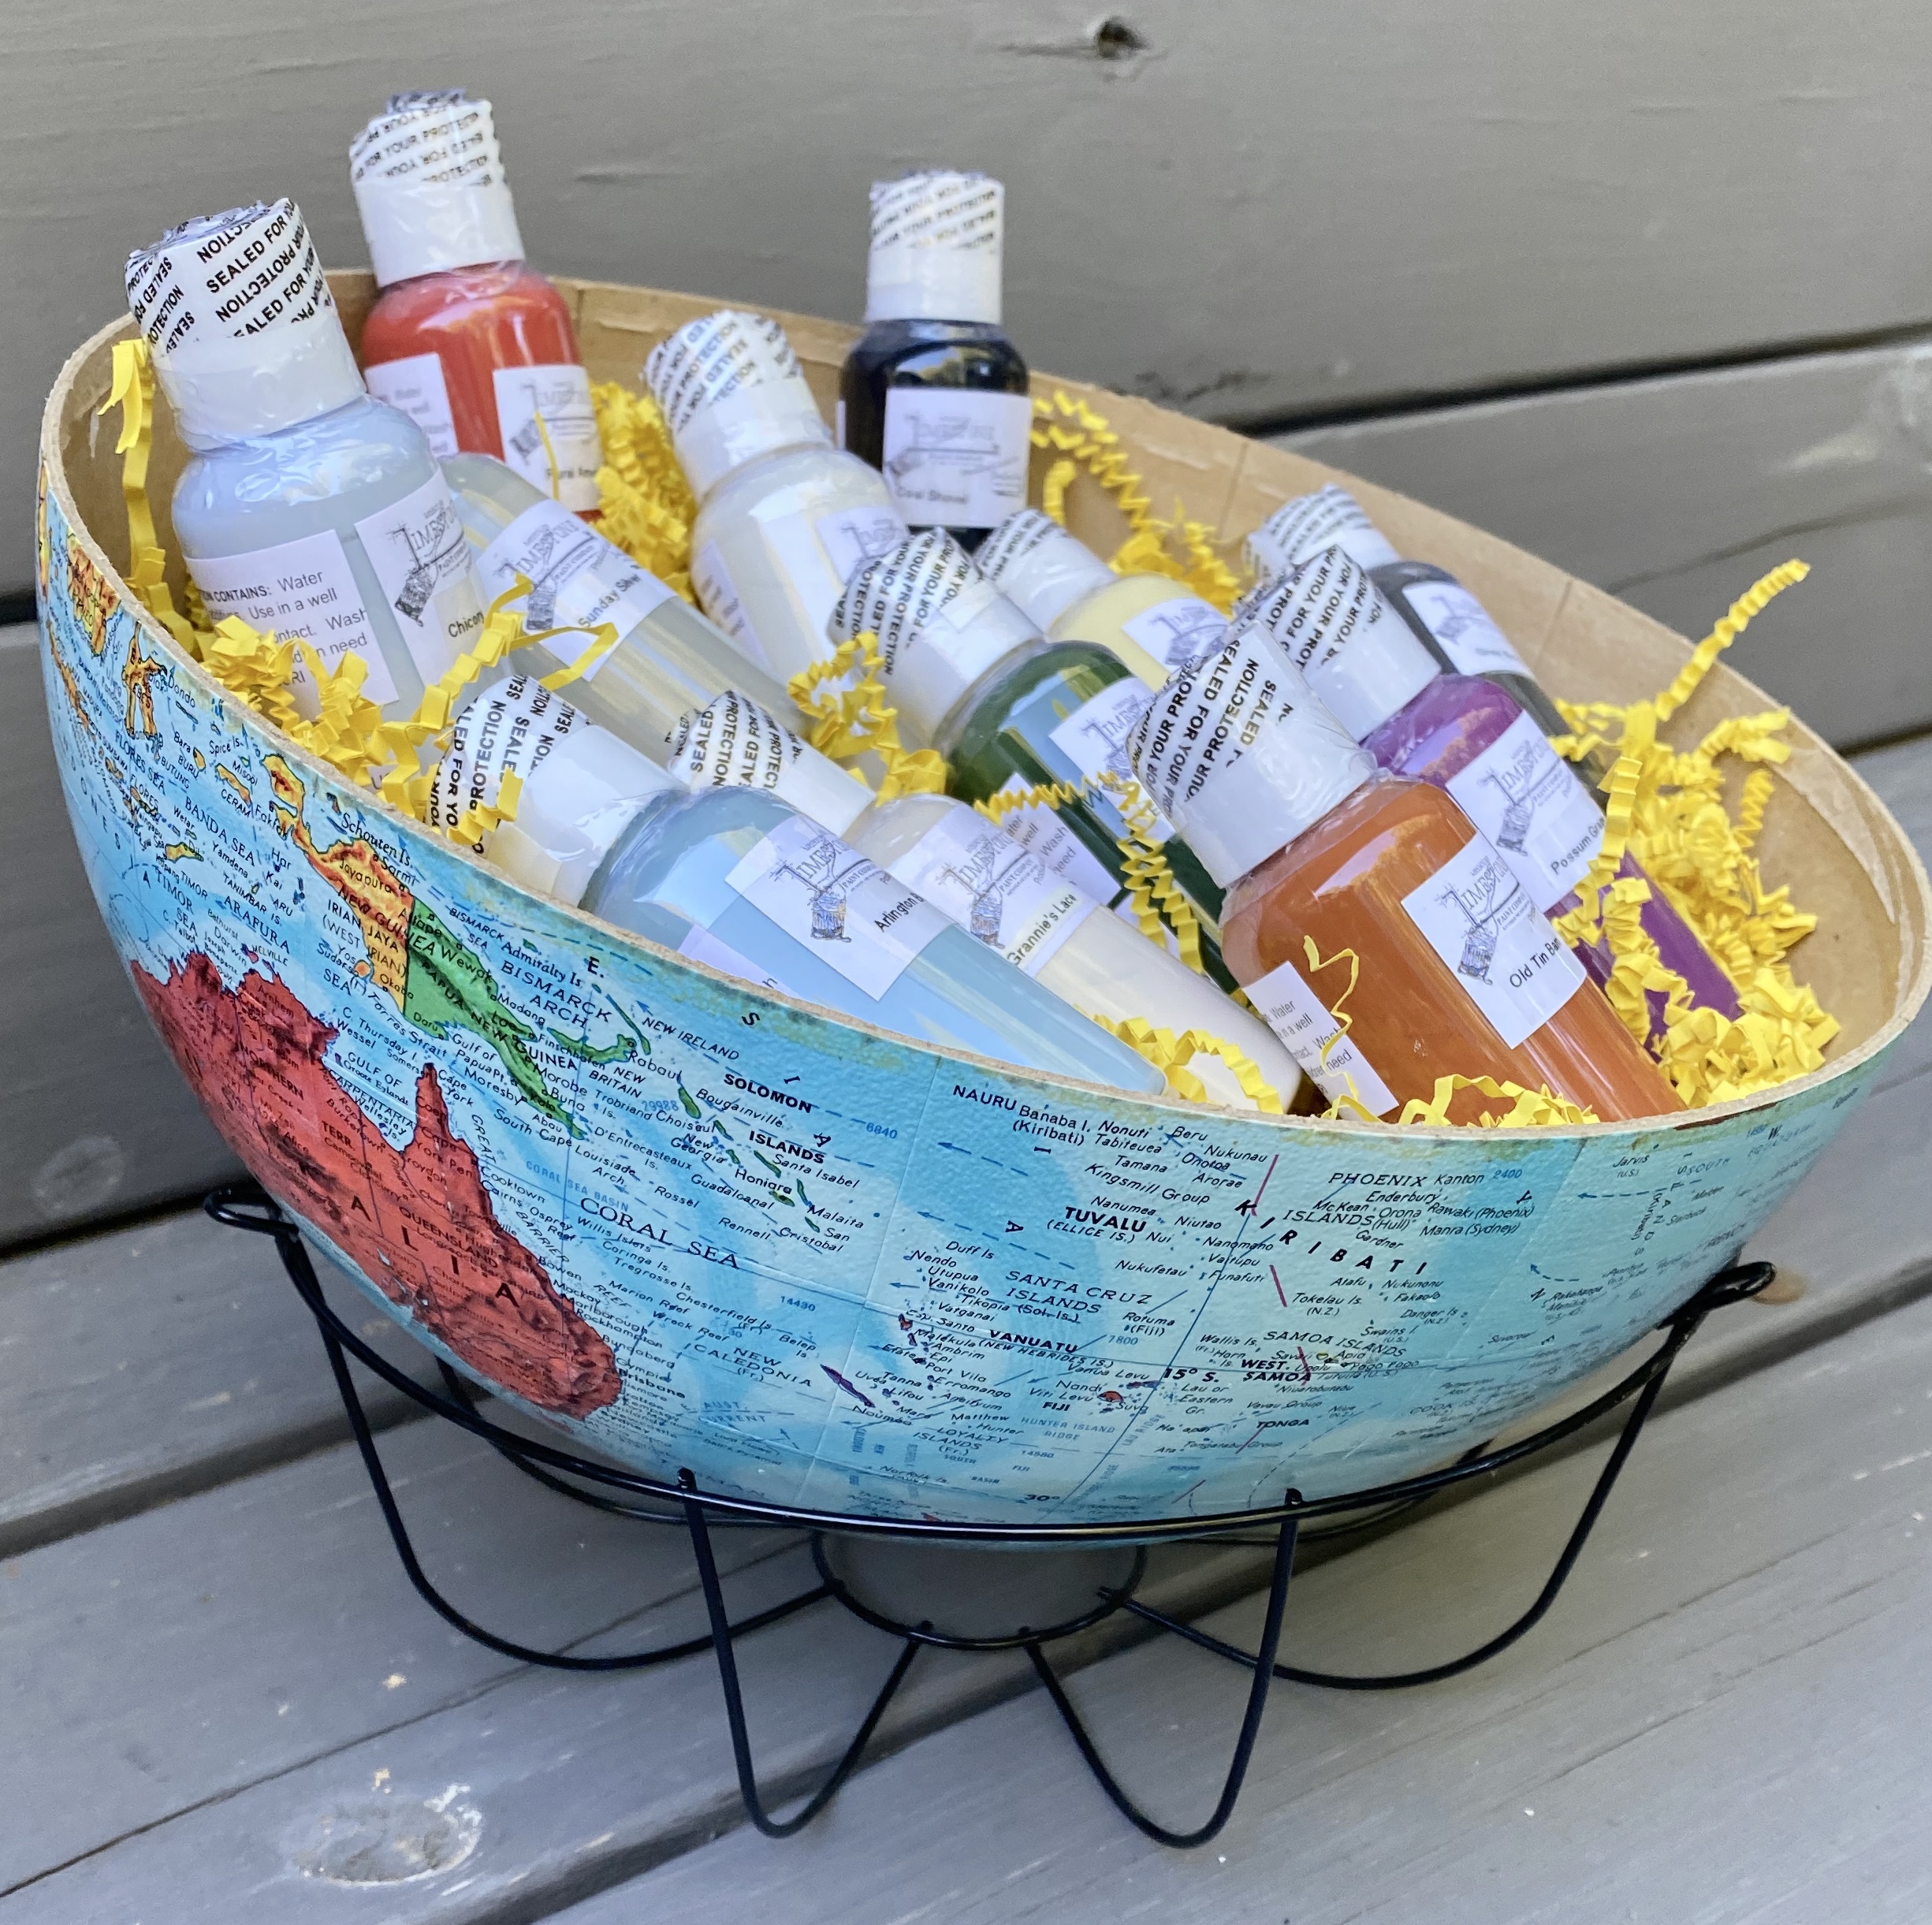
5) Bottle of peacock feathers: the bottle I think came with fragrance oil and bamboo sticks at some point. I did paint the lid that sits around it metallic gold this morning. I’m pretty sure I picked up the peacock feathers at a yard sale.

And then, we came up with a few more boho accessories.

And when we found this mirror shopping, we knew we had to get it! Danny painstakingly covered all the mirrors. I painted it metallic gold and then he removed all the tape. I cleaned it and….it is just stunning!

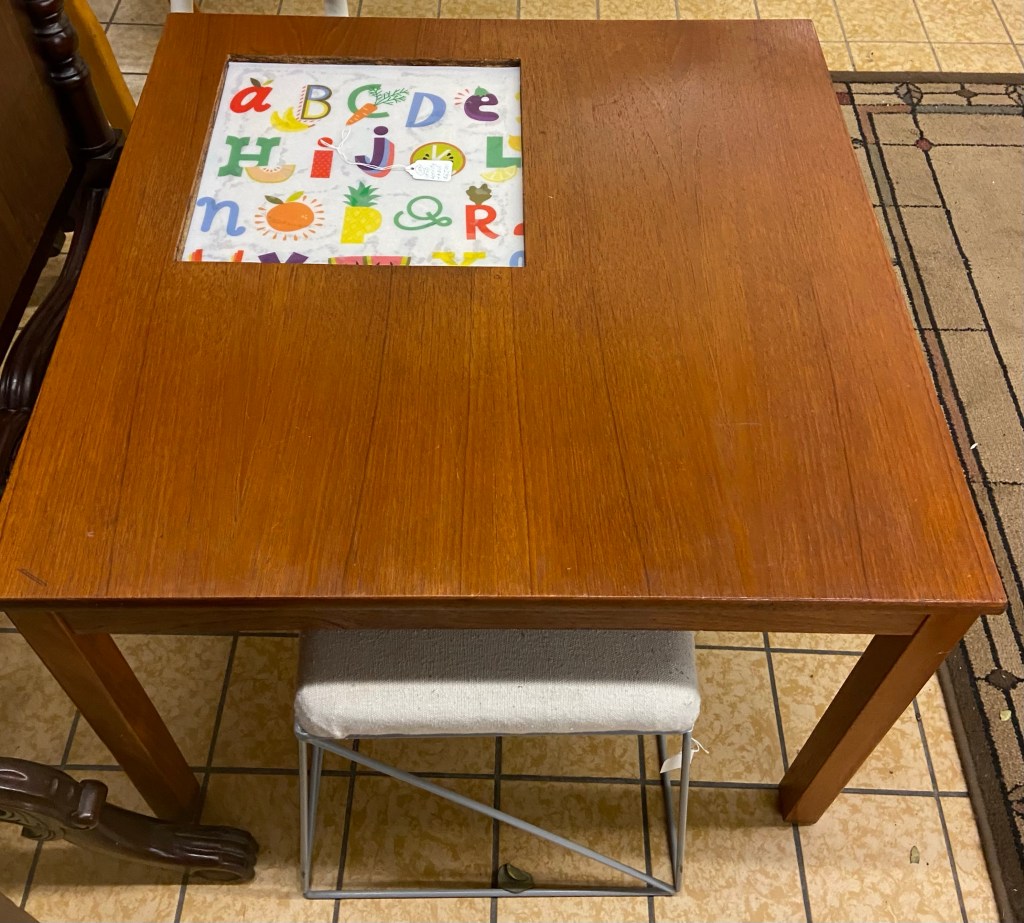
We also found this cute little kid’s drawing table. We added a couple of stools to it and took it to our booth at Sweet Repeats in Sullivan.

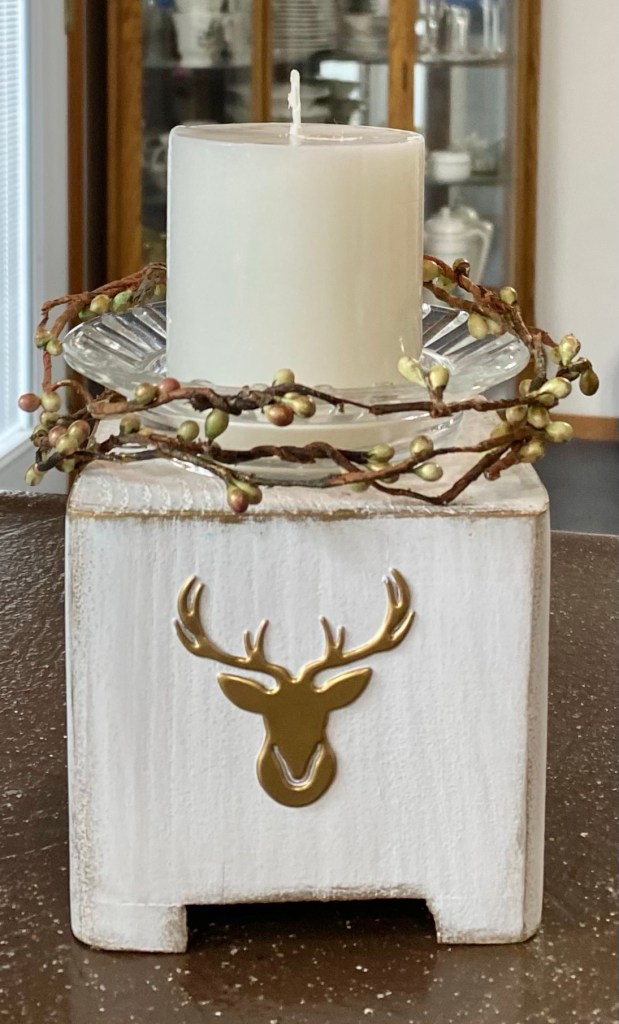
The wood base on this candle holder is a bed riser I turned upside down and painted. the dish for the candle is a vintage ashtray.

Coming up…. Danny is working on a new project. We are busy figuring out a way to make a table top for it. Stay tuned!

You probably wouldn’t want to use both lamps on the table, but maybe in the same room would be perfect!

We Refurbished This Oak Dresser

The oak dresser we’ve had for several years in storage is now refurbished. When we bought it, the base literally fell apart as we were loading it, but that mirror was so worth all the work it was going to take to bring it back to life. The mirror is beveled and has just a bit of aged patina.

Researching it, we found the company Estey Furniture produced it in the late 1800s or early 1900s. The original handles were a bail type handle, but were replaced at some point by these Depression knobs from the 1930s.

Danny took the dresser completely apart. He loaded the base into our SUV and took it to a grands babysitting gig and stripped it. A few weeks ago, he loaded it again and when we were babysitting another grand in another city, sanded it, and put it back together.

We had completely forgotten what the mirror looked like. Wow! It changed my whole idea of how I wanted to refinish it. I decided a whitewash look would bring out the grain detail and take away the orangeish look oak raw oak sometimes has. The drawers were not pretty on the inside and sides so I stained the insides and stenciled a pattern on the outside.

This is the difference between the whitewashed look and raw wood after stripping and sanding. After whitewashing everything, I gave the base and mirror 3 coats of water-based Crystal clear Varathane Polyurethane in satin finish and 5 coats on the top of the dresser.

I couldn’t wait to take pics. I used an app called ProKnockOut to remove the mirror reflection and change it out to a new image of a bedroom I found on pixels.com and to cut out the dresser itself and to apply a plain background.

It already has a new home. This piece ranks right up there as one of my favorite pieces we have ever refurbished.

Mini Jute Rope Christmas Tree

I had such fun making my 8” tall jute tree https://sharsumpaint.com/2022/10/17/spiral-jute-rope-christmas-tree/, I had to make a smaller one this morning.

I changed it up a little. This one is 5” tall. I used a small 2 1/4” wood slice for the base and cut down the size of the skewer some. It still has a point on it for piercing each strand of jute. I just cut it off at the end.

The jute pieces I used:

12 – 4”
12 – 3”
12 – 2”
2 – 1”
And a half inch piece. For this one I used more glue and pressed and molded it to round off the top.

I cut off the skewer and left enough to glue the greenery and the star to the skewer and glued some jute to the back of it to cover.

This one got caught in a snow storm so has a bit of snow (paint) on the branches.

Olaf Found His Head!

This is why I seem to never get anything other than crafting done. Lol

I made this Olaf out of wood slices last year and still had him. One of my favorite enablers, sent me this inspiration Olaf this morning.

I knew I could adapt him to hold up his head with his little arms after he lost it, so I did. Lol

My Olaf now belongs to her. 🤪

Spiral Jute Rope Christmas Tree

I found another way to use some of the roll of jute rope I thrifted. I created a spiral tree with it. 🙂

I used a long stem piece of green floral wire and using craft glue to secure, twisted the jute around the wire.

I then shaped it into a spiral form. The center of the spiral I thumbtacked into this chunk of birch tree I had. I used craft glue to glue the rest of the bottom edge to the base. I added sprigs of faux cedar and daubed on white paint to represent snow. I also daubed a bit of paint on the jute.

I added little balls of a muted green, red and cream color from a garland I had. They had wire attached so I just wired them on.

I cut a star from a piece of aluminum foil I spray painted copper and daubed white paint on it. I used a small piece of Velcro to attach the star to the top.

I sat the tree on a little round base then sprinkled some of the fallen copper dried hydreanga blooms I had left from another project around the base for the photo.

I’m having so much fun finding ways to use my big roll of jute rope I thrifted. 🙂

Stenciled Cutting But add Book Stand

Another morning project. I paid more than I usually do for a thrifted item, but this piece was in perfect condition.

This book stand is perfect for propping your phone, your iPad, the book you are reading, or an old fashioned cookbook.

I added the Dollar Tree stencil, using a light gray chalk paint. One trick for getting crisp lines with no bleeding is to use a clear sealer first. Let that dry and then paint over the stencil with your color of choice. The front is sealed with Wise Owl Salve.

When you Decide to Keep the Fall Crafts You Make

Early this morning, since I hadn’t put away the beads from the beaded pumpkin I made the other day, 🙄 I decided to make another smaller one.

This one is only about 4” tall so I didn’t double the paper wrapped wire. I also only used 7 strands instead of 8.

Taking photos of it, I decided I loved it so much in the letter tray hanger with the acorn I made the other day, I was going to have to keep them. It is hard to tell in the picture, but it looks so neat on my rust color accent wall at the bottom of the stairs. The early morning light is coming in through the window panel on my front door.

SOLD! 😂😂

What Grandparents are for….

What Grandparents are for….

Today we will drive to St. Genevieve, MO (about 2 hours one way) to give Grandson Ben’s mom some sample bottles of paint. She’s at the bank there today so we don’t have to drive all the way to their house. Because, of course, he needs it by tomorrow. Lol

5th grade Middle School and Ben has an Entrepreneur class. 😳

He was to create a business and will sell items in the school store. Of course he chose to sell paint. 😂 He said his teacher approved of it. We will see. 😬 At least we seal the bottles so hopefully they won’t open them at school. 🙏

He plans to donate 1/2 of his profit to charity and keep the rest. This boy is smart. He knew we would give him the paint so he will have more profit. 😂 The other part of his business is that he will have a donation box where people will drop off broken items and he will try to fix them and sell them. He has learned a lot from his PopPop. Lol

But no problem. We will thrift shop on the way there and back.

Of course, I made him a display for his paint. I had a half of an old globe. It fit perfectly into a Dollar Tree hanging basket. I added a bunch of shredded paper my sister-in-law gave me. Instant display.

Ben also knows once he is in middle school we will pay $5 for any As each grandchild gets per semester. He needed a clarification on that the other day as he got all As this first quarter. He was hoping it was every quarter. Lol He’s a planner. He says he needs a new laptop so…..

Farmhouse Animals w/Rub on Transfers

I had a bit of a brainstorm this morning. I was inspired by a YouTube video where someone decoupaged napkins on animal cut outs.

I had these cool pig and rooster wood cut outs. They stand alone. The rooster is 4 3/4“ tall x 4 1/2” w. The pig is 4” tall x 5 3/4” w.

I also had a sheet of Dollar Tree rub on transfers with farmhouse images.

So….. I gave them a coat of white paint so the transfers would stand out and then applied the transfers as they were on the sheet and filled in where needed. They are protected with Mod Podge matte spray. Sorry, forgot to get a pic of spraying them.

I love how they turned out!

Gray Pumpkin Decor?

I may have gotten a little carried away on the gray pumpkin decor. 🤪 And yes. I decoupaged fabric (from Dollar Tree) onto a small wood pumpkin cut out and used one of the Dollar Tree brown parchment paper rub on transfers on it. 🤷🏼‍♀️