I’ve been Learning More about Boho Decor and I am Liking what I See

I’ve been seeing a lot of the “boho” (bohemian) style lately! As I looked into it more, I have come to the conclusion that I really like the contemporary boho style, also known as modern boho or boho chic. I love the eclectic feel of using many different styles together. Although my Beatles themed guest room has that vintage bohemian look that I love.

I think I have been leaning toward the contemporary (modern, chic) bohemian style for awhile now with my love of natural colors, wood, elements of nature, and color. I just didn’t know it had a name.

This video really explains boho style well. https://m.youtube.com/watch?v=Nxe8-61WWaI

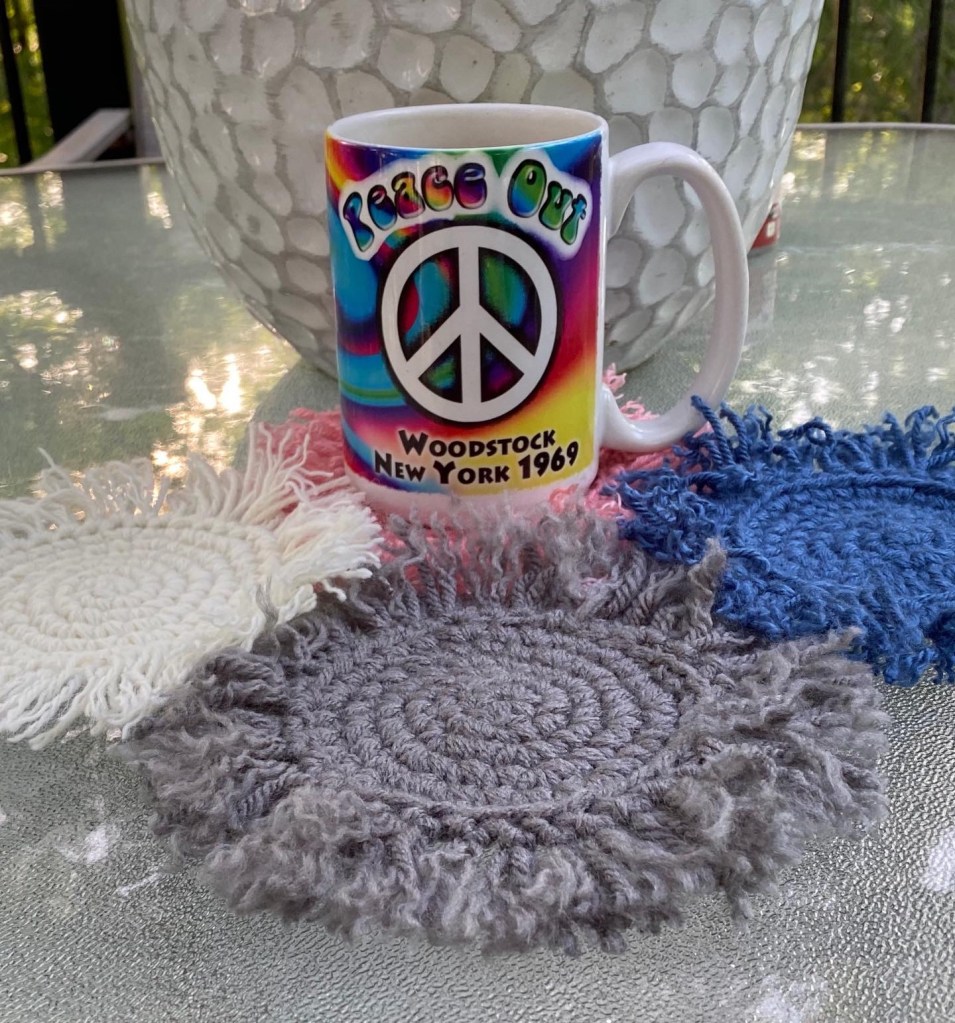
As a result of my research, I’m beginning to create some modern boho style projects in the coming days. I love that macrame and crochet is trending so I’m definitely going to making some coasters for sure.

This lady also explains boho really well. I think it is becoming very popular.

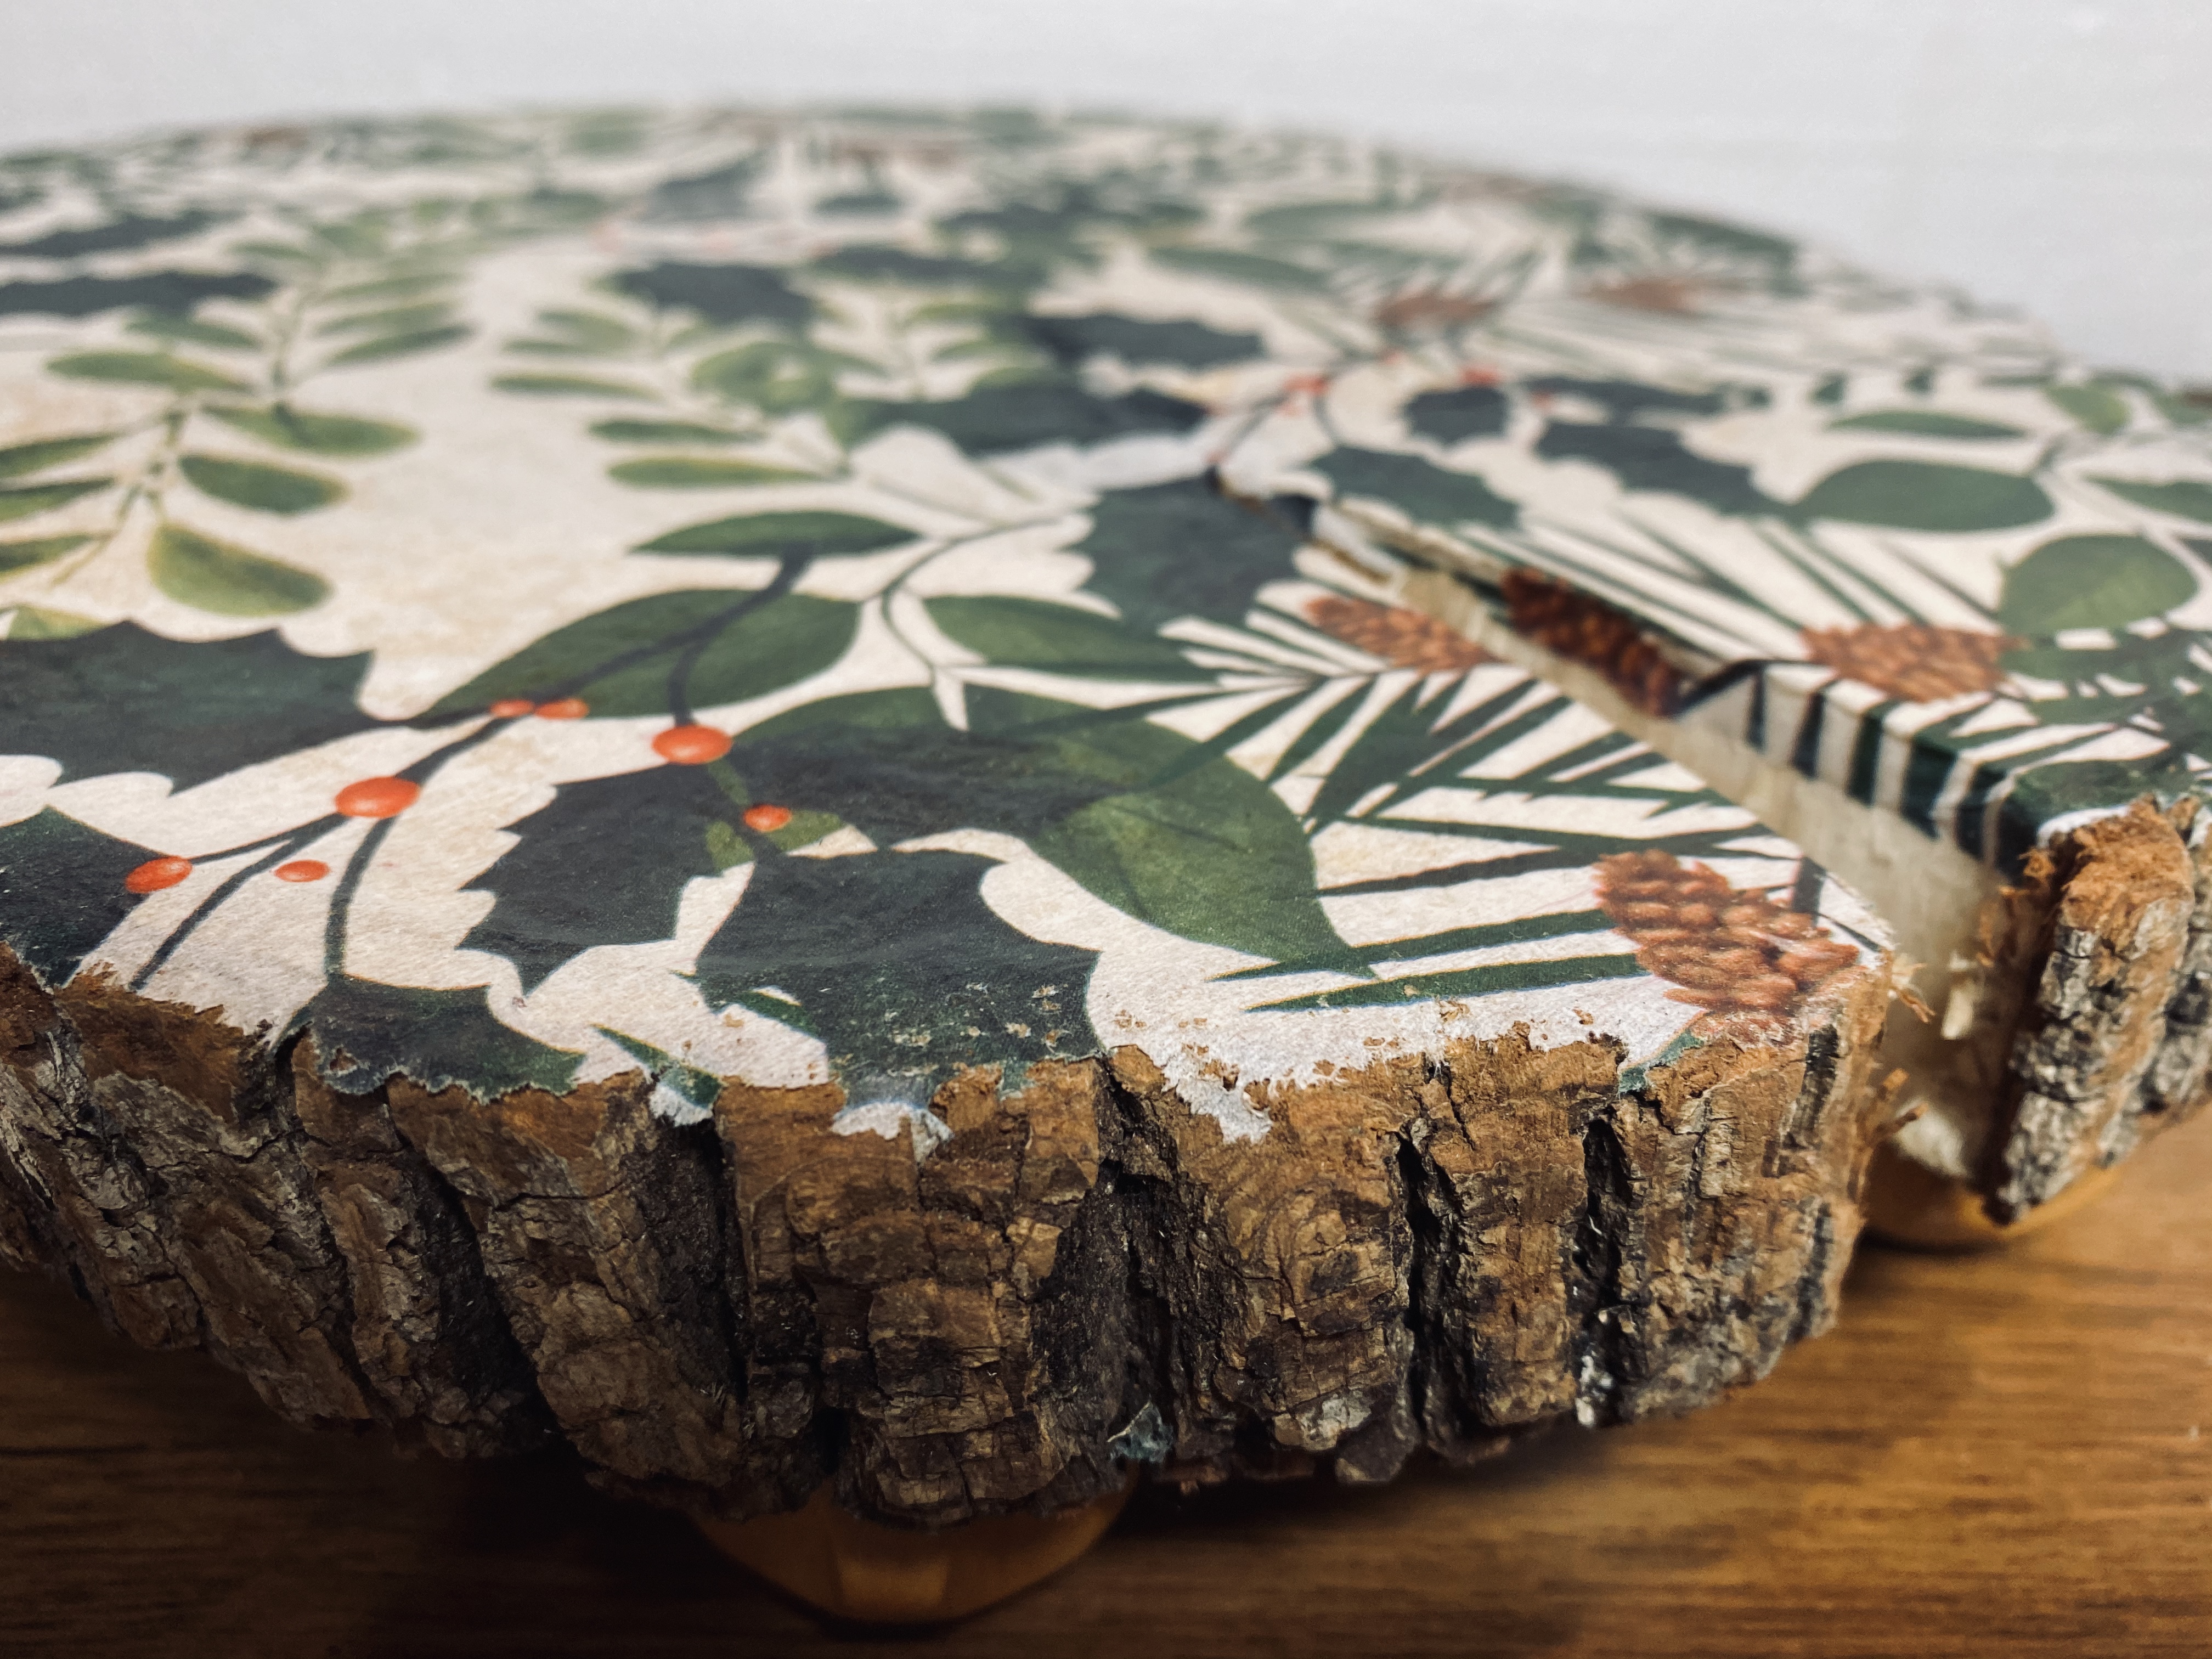
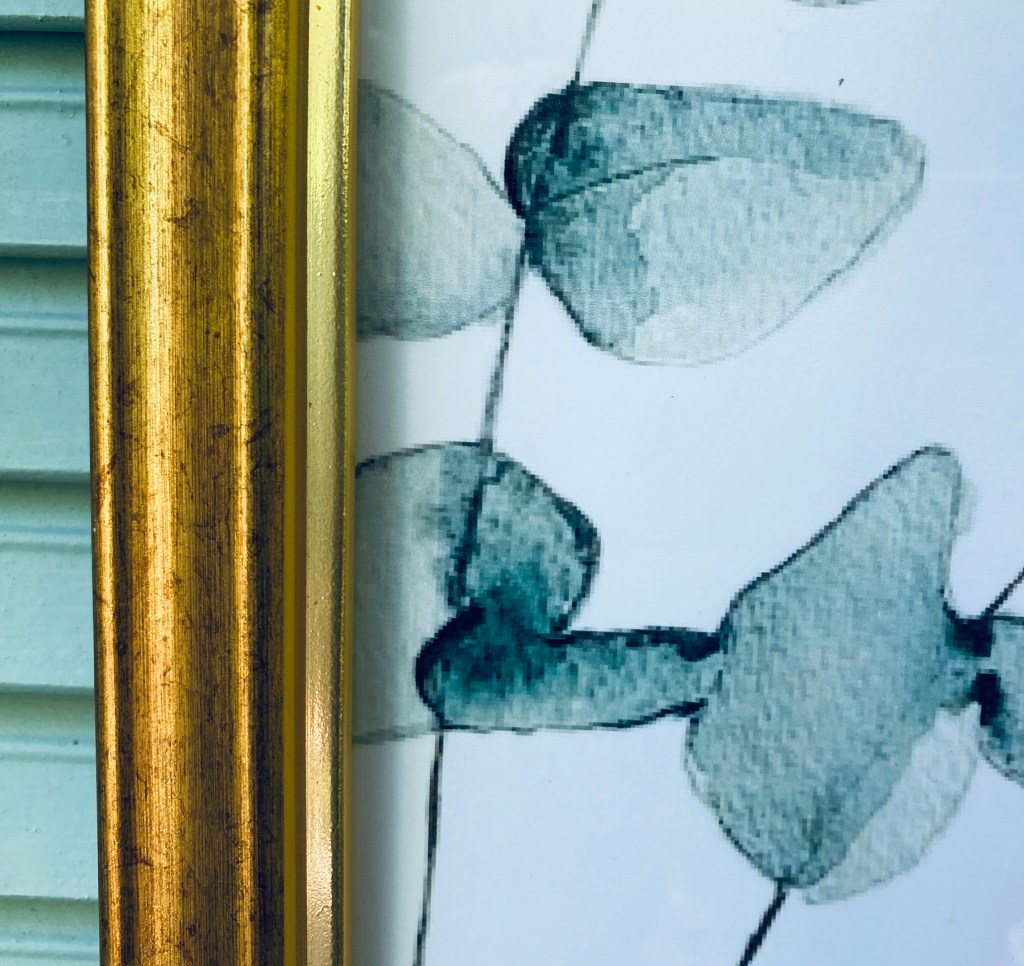
She gives away a free 8×10 print so I printed it out this morning and put it in a gold frame. Simple to do.

I printed her 8×10 botanical watercolor image and put it in a gold metallic frame. A simple project that will look great with any style, but especially with the modern boho (bohemian) Look I’m going for.

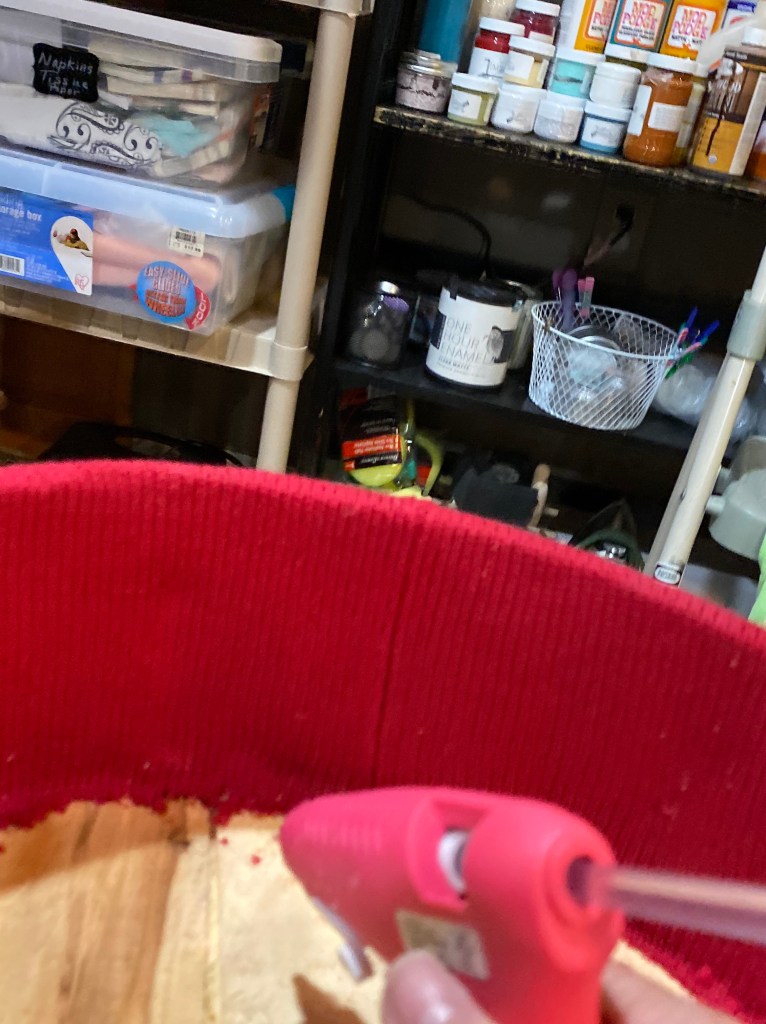
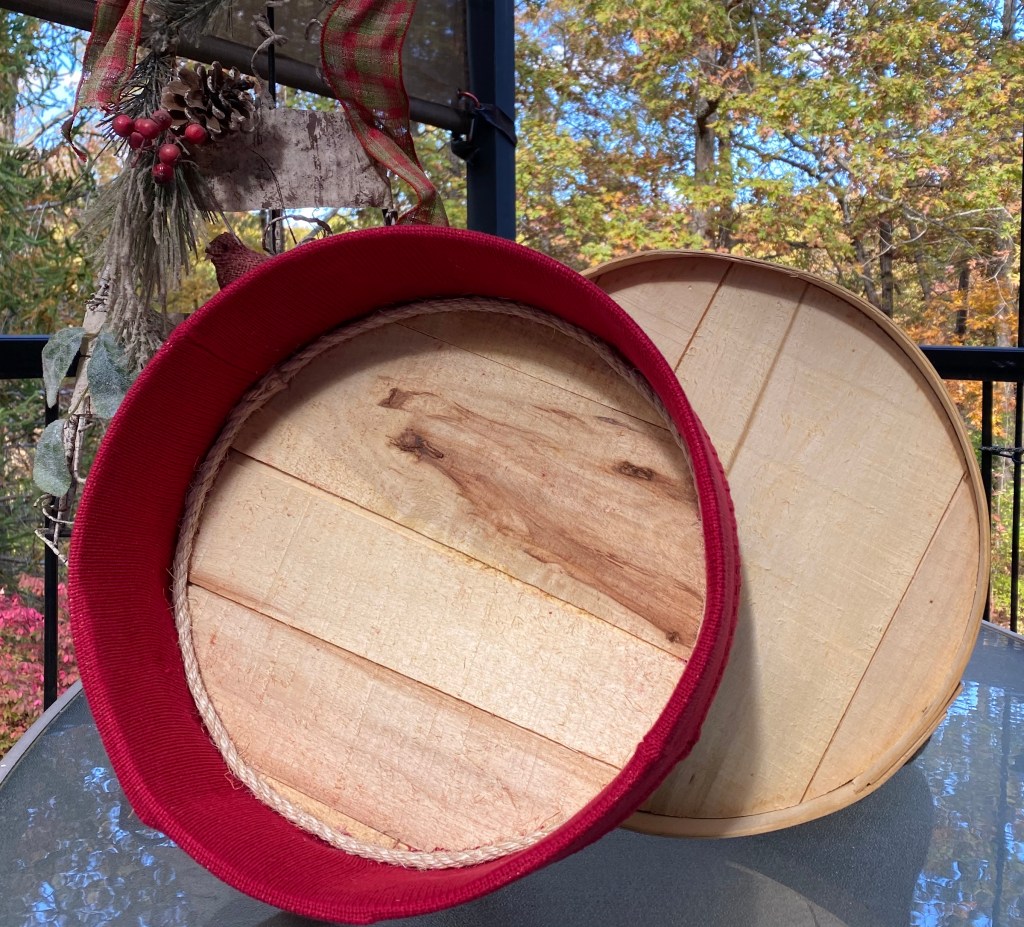
With the boho style in mind, I then crocheted a couple of sets of coasters from this free pattern: https://forthefrills.com/boho-crochet-coasters-easy-free-pattern-beginners/

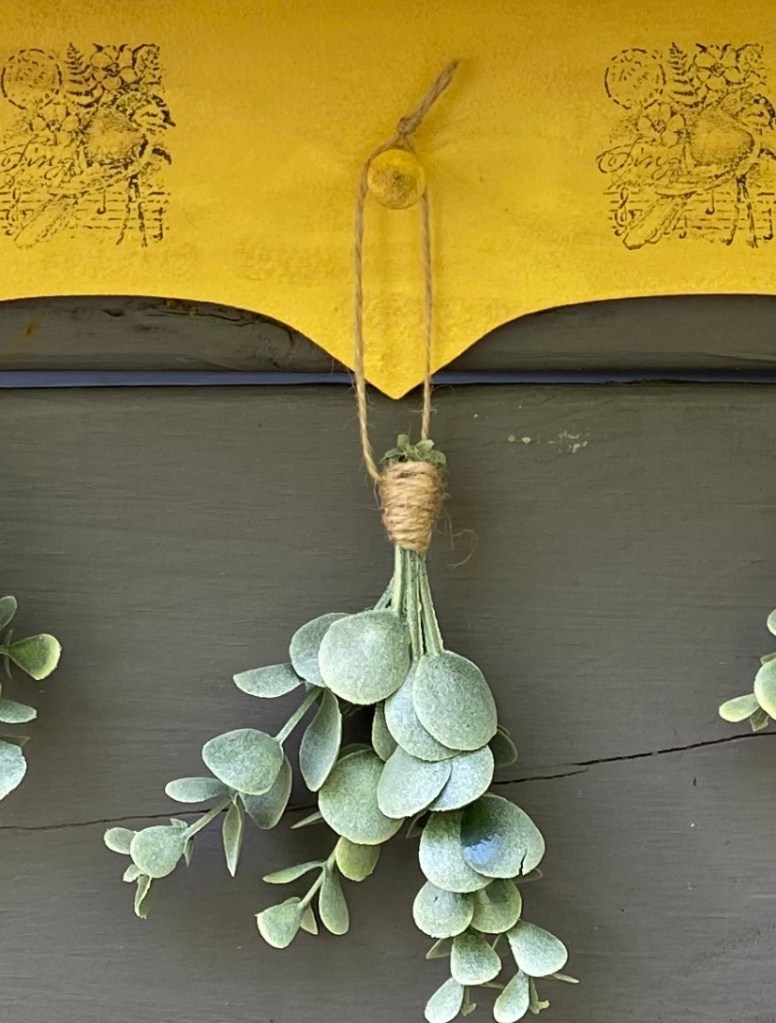
A garden shelf display that shouts “SUMMER”! This could easily fit in boho decor or any style.

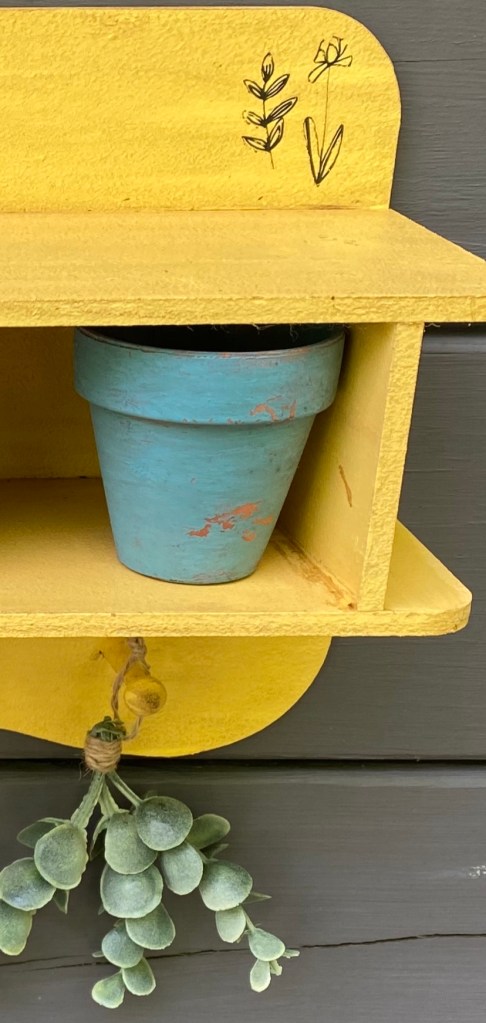
Dimensions: 15” wide x 15” high (with greenery) x 5” deep

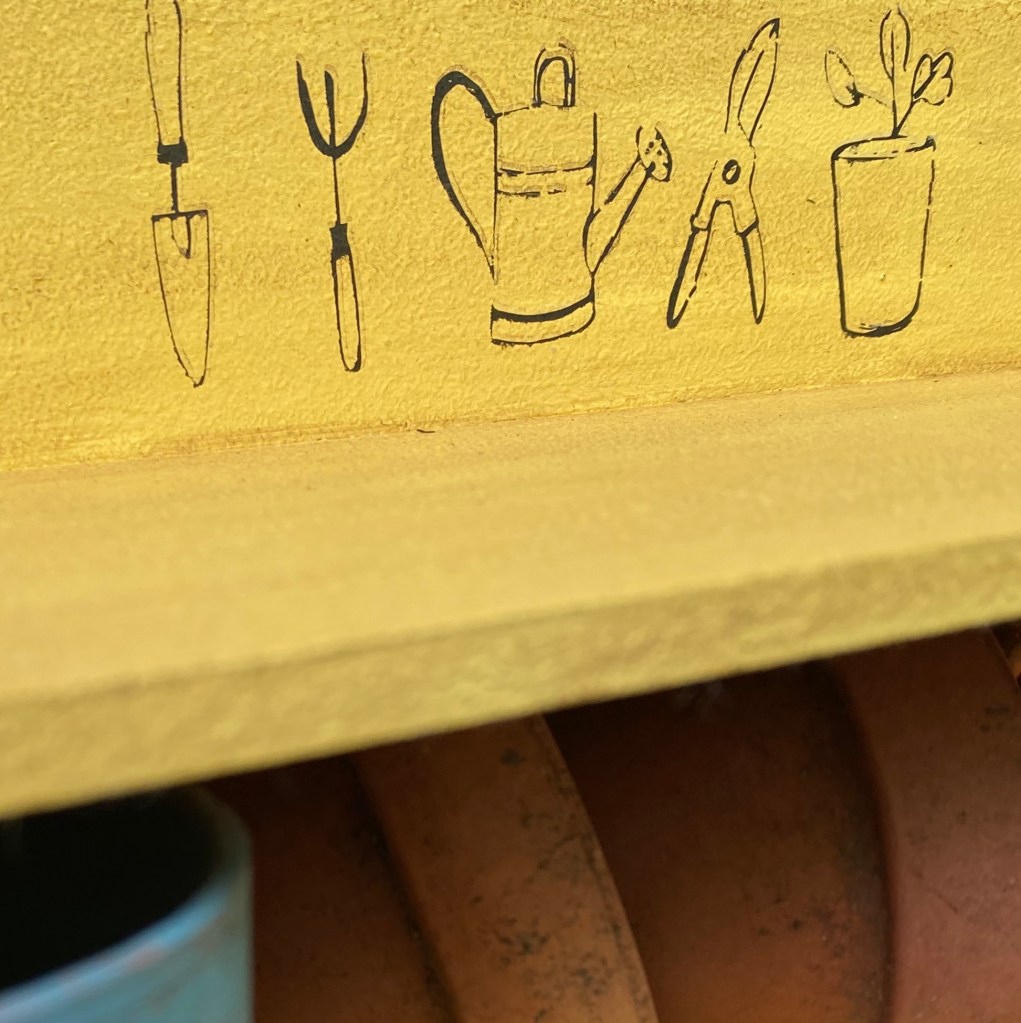
Transfers and bird stamps were applied to this cute yellow shelf. Stain was applied for a distressed vintage look. Small, well worn clay pots fit inside the 12” wide 3” high and 4” deep inside shelf. Faux greenery hangs from the pegs.

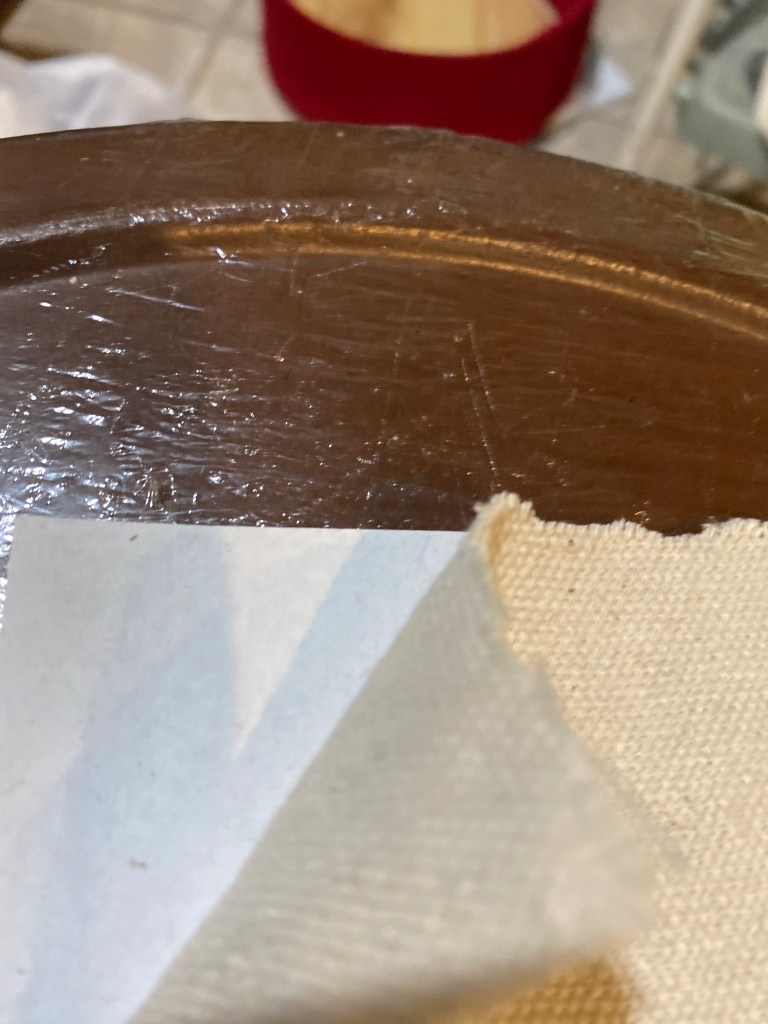
I had started painting these 3 storage cases with metal trim some time ago but was not sure how I wanted to finish them. When I realized they would make the perfect Boho display, I knew what to do.

I painted them lightly with black and distressed them. The top I opened and filled with greenery, a beautiful green silk sunflower and a cloche I made earlier from a light fixture. I added some boho looking transfers and put a coral rose inside. I also added a crocheted coaster for color.

As I was crocheting boho coasters, I thought making a bigger one would look pretty cool as a wall hanging. So, that’s what I did.

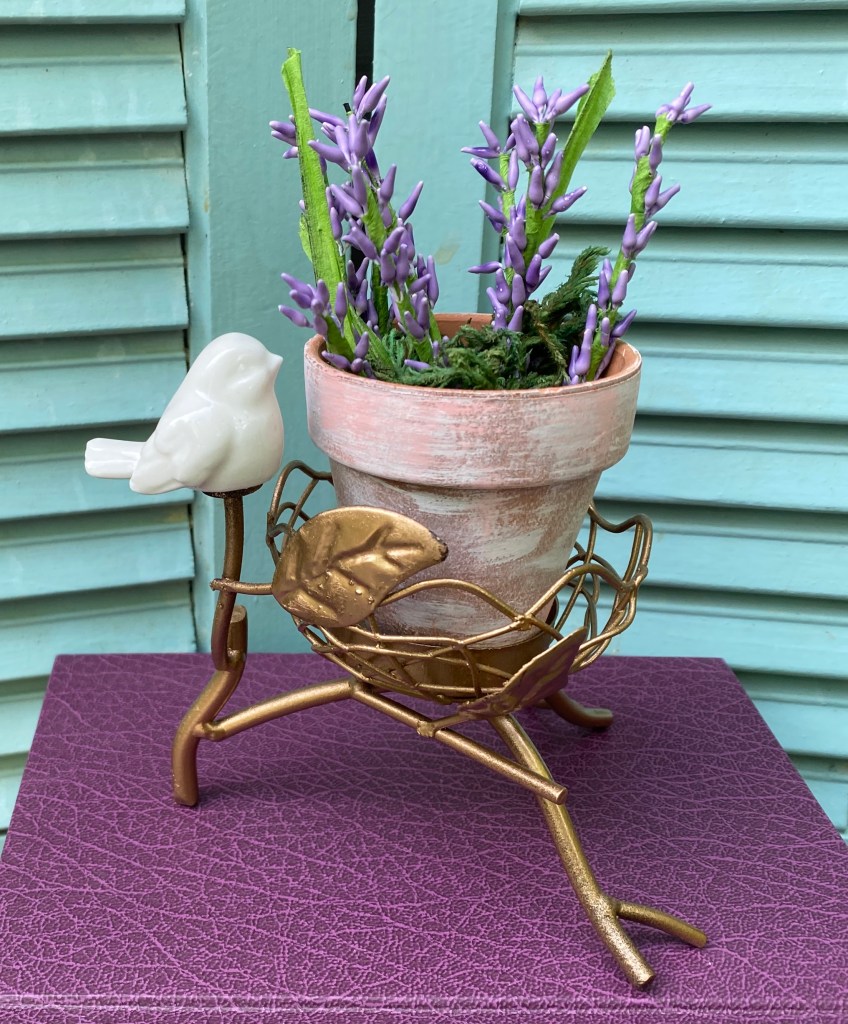
I had also thrifted a little votive holder with a tiny ceramic bird. Keeping in mind the boho look likes metallics, I spray painted the base a metallic gold and added a little clay pot with faux lavender.

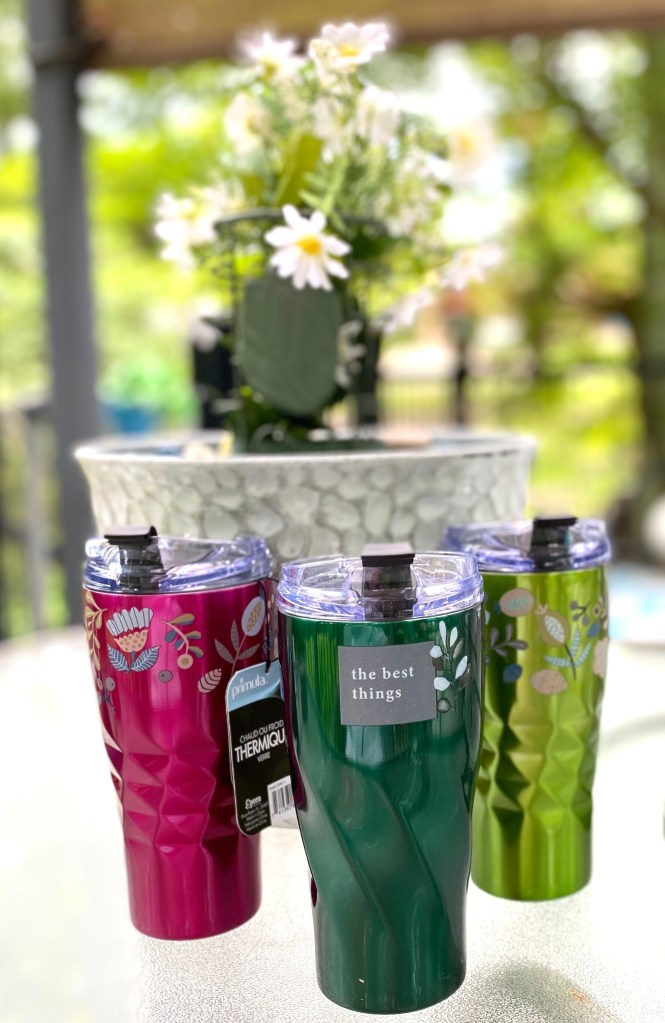
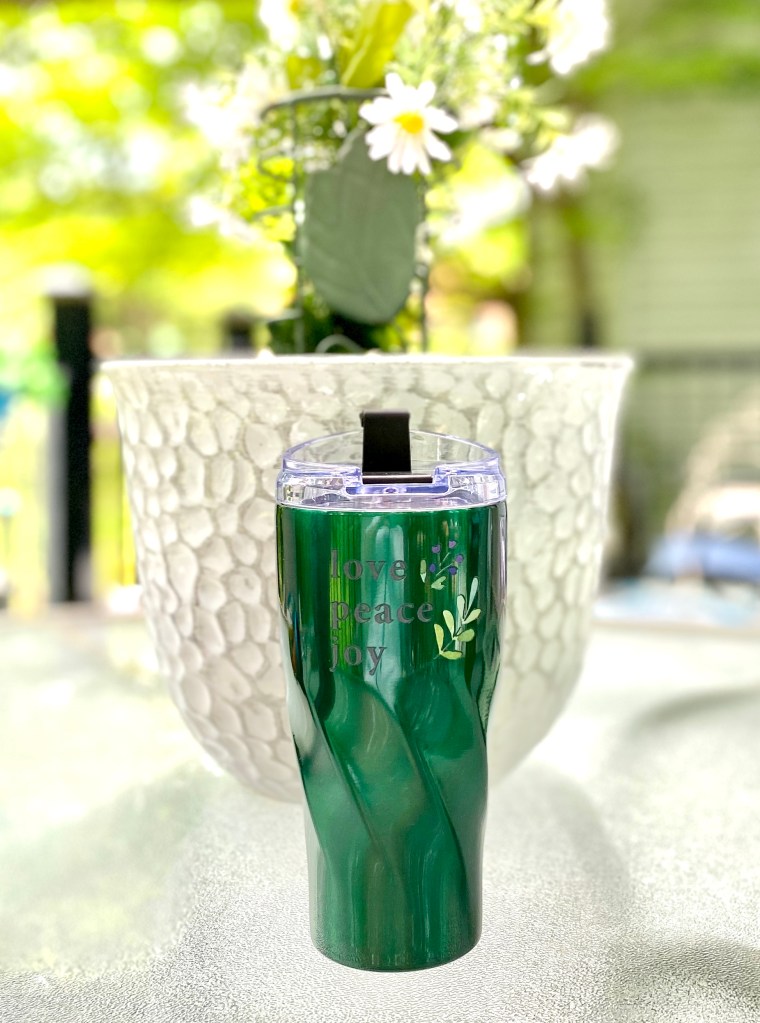
Yep, I’m obsessed with boho. I have 3 new Primula hot/cold tumblers. I had to boho them up a little with some transfers from Dollar Tree (sealed for protection). After all they are metallic and colorful!

That’s all for now. I’m sure I will have more coming up.

Shutter and Iron Wall Art

We had an old and chippy shutter. Danny cut it in half and sanded most of the old paint off the front so that what was left was a combination of natural and some old white paint. The back was painted brown and chipping off so he removed the big chippy pieces but let it as is.

Then, we had this iron vase holder. I learned it was from Southern Living At Home. He centered it and screwed it to the shutter.

We also had a tall wide mouth canning jar and a Bedspring. I put faux flowers and foliage into the Bedspring with the wider part on top and then placed it in the jar with the narrow part at the bottom. The flowers fit snugly into the spring and will not blow or fall out and the spring fit perfectly into the jar.

22 1/2” high x 16” wide

Forget Making Moulds – I Had An Idea and it Worked!

Yesterday was a snow day (in public school terms) so as a retired teacher I respected the tradition of doing nothing but play. I discovered a new painting technique in the process.

Earlier I painted plastic eggs to make some egg bunnies, but that’s another tutorial. Basically, I glued them shut, scuffed them up, gave them a coat of chalk paint, dabbed more paint along with picking up at the same time with my brush some Howard’s Chalk-tique

After I made ears for them I decided they needed to be in their own egg cups.

So I painted some peat pots and tried out an idea I’ve had since I bought some plastic puffy stickers at Dollar Tree. My thought was I could glue the rose stickers on, paint over them, then distress them. They had a metallic finish on them and so I was hoping the metallic finish would come through, and Oh….yes it did!!! I found these at Dollar Tree. I also found keys and butterflies and now can’t wait to use them, too..

I used a fast drying glue called Quick Hold. It is made by E6000 but sets up much quicker. It sets in about 45 de ones and cures within 4-6 hours. It has been working great on almost everything I’ve used it on. It was holding well on these attaching to the peat pot but they were a little stiff and the ends kept popping up. I wasn’t concerned as I thought I’d reglue them after I painted over them.

I then painted over them and used a mini heat gun to dry them. An amazing thing happened. The heat must have softened the plastic and did something to the glue (possibly reactivating it) because I was able to easily push down and press them for a few seconds and they stayed put! Not sure why or how, but they lay down now. Just fine!

Then I took a damp towel and rubbed away the paint on the raised part of the roses…..and there was the metallic finish coming to life right before my eyes. To really enhance it I rubbed a bit of clear wax over it and Wow! As you can see in the photo above, my idea worked! I’m so happy!

I could do snow days every day (for awhile anyway. Lol)

And here’s the final project. 🥰

Lots of Crafting Going On and Today I’m Sharing How I Made This Two-Sided Tin Can Pocket

One pocket – two different looks

I have neglected my blog for awhile, but I have been on a crafting frenzy. I have been posting on my personal Facebook page, though, until I can transfer them here, so at least they aren’t lost. You can do a search for my name, Sharon Sumner if you like to see. Most of my Facebook posts are private, but my crafts are all public. I do not accept Friends on my page, though, unless I know you. I would love for you to follow my SharSum Paint page. I sometimes post them there, too. Facebook.com/sharsumpaint. I do post most of them in my Instagram page also. You can follow along there, too. instagram.com/sharsumpaint

Today, I am sharing how I made this tin can pocket. I’ve been a little obsessed with these. They are just a can from your pantry. You open both ends, smash the bottom and decorate. You can do a Google Search for tin dan pockets and find videos popping up on how to make this. Some use a vise, some a hammer and some just stomp on them. Like this fellow crafter, Junk Gypsy. lol https://www.facebook.com/1646948723/posts/10224724308128875/?d=nu

I’ve decided my goal in life must be to come up with as many ways possible as I can in making these pockets.

It became pretty involved and took awhile, but I so love how it turned out. The steps I took have kind of became a tutorial. I’m pretty wordy so bear with me. 🙂

I had to smash my own can this morning. Danny didn’t have a supply ready for me. 🤷🏼‍♀️ I basically used the idea from Junk Gypsy’s tutorial 😂😂😂 by first stomping on it with my foot, but then I put it on the vise and finally used the hammer to finish it off. Glad Danny wasn’t awake yet to video me.

~ Painting the can


* I first spray the can with an acrylic sealer. This helps chalk paint adhere to metal.
* I then daubed on white chalk paint. This gives an awesome texture I love using on metal and glass.
* When dry, I sprayed the can with Mod Podge Pearlized Spray – this gave it a shimmer. If I didn’t want the shimmer, I would have used Mod Podge clear matte spray.

~ Creating the dragonfly design and Decoupaging the napkin

* I had this awesome dragonfly stamp given to me by awesome friends (formerly known as neighbors Boot Pierce and Rhonda Pierce). So I stamped a plain sheet of napkin (left from peeling off from another napkin project). I wet the sides in a jagged line and tore it. This helps to blend in when decoupaging.
* I used Mod Podge matte finish to decoupage the napkin, applying it to the can and laying the napkin down, then on top, pressing lightly into the ridges and making sure it is smooth. I dry it with a hair dryer, making sure I lightly press with my fingers as I dry it.

~ The other side is Rub on Transfers

* The other side I used the gold rub on transfers from Dollar Tree. These are not perfect and the first sheet I tried was already attached to the sheet that was supposed to come off so I couldn’t use it. The second one was ok, but the details are so delicate it was almost impossible getting it down into the ridges. I ended up just using my fingernail to adhere the butterflies. I ended up liking the distressed look it had so all was well. I then sprayed both sides with the Mod Podge spray again.

~ The hanger

* I didn’t drill holes in the can so I glued the hanger inside. I used wired jute and strung it with white beads. The beads have a shiny ceramic look to them. I’m like the crow who sees something shiny and has to have it. I found a little a couple little mini basketball nets at a thrift store. Net, who cared? Shiny white beads for my stashe? You bet! I cut off all the strings and now have a whole container of shiny white beads ….minus the 20 I used for this project.

~ Embellishments

* I thought ribbon glued on the bottom would be a cool look. On the dragonfly side I even used a few flowers from my flowers I used.
* The flowers are flocked and from Dollar Tree. These are very high end looking and beautiful. I pushed all of them into a small piece of styrofoam and glued them into the styrofoam. Then I just put the whole thing into the can.
* The shiny vinyl butterflies. I’m in love with these 3D butterflies from Dollar Tree. I glued them to skewers and stuck them in. For each side showing, just turn the butterflies around to the front.

And that’s it. This is my 5th tin can pocket…..so far. But who’s counting?🤪

Here are my others. Some are decorated only on one side, others are two sided.

Two sided

These Are a Few of my Favorite Things….

I have been cranking out a few crafts for our booths. It’s been so nice crafting in my clean craft area.

These are just a few things of my favorite things…..

A Well Dressed Cheese Box

I found this cheese box (15” round x 5 1/2” tall) when thrifting this summer while on vacation. I knew the glued on flowers had to go, but hadn’t decided how I was going to upcycle it….until today.

It’s getting cold out and that cheese box needed a sweater. I just happened to have a new red sweater that came in an Ugly Sweater kit I thrifted last year.

The first thing I did was sand off those flowers as much as I could and then I cut the sweater in half about 4” below the armpits. Then I covered the outside of the box and down the inside. The lid still fits fine around the sweater.

I glued the seams first, inside, outside, and underneath. Then I glued all around, securing the sweater to the box.

I was left with a lot of fuzz, which was hard to remove on that rough wood. I didn’t want to get out a vacuum, so I used rolled up masking tape to pick it up. It worked like a charm.

Next, I finished the rough edges by gluing sisal rope around the sides and bottom.

And then came the image I downloaded and adapted to cover up the old flowers I had mostly sanded away. This is a technique I’ve used several times now. I found this image, free on The Graphics Fairy Site. I had to do several things to get it the way I wanted, though. First, I had to make the image transparent and I cut it into a round shape using the free app Pro Knockout. But I wanted it to have a more vintage look so I uploaded it to the free website Lunapic and saved it as a pen drawing.

All of this is free, so I’m sharing my image I created here. Please credit The Graphics Fairy and this blog post if you do use it. Thanks.

Pen drawing created in Lunapic.com from a free image found on The Graphics Fairy.

I then inserted the image into a Google Document, enlarged it to fit the paper, and saved it as a pdf file. Next, I used a product called Pixi Spray to temporary adhere a piece of drop cloth to a sheet of printer paper. I trimmed the drop cloth to the size of the paper, then printed it on my personal black and white laser printer.

I am always blown away how cool this look is on drop cloth. I cut around the circle and adhered the image to the box using Elmer’s Craft Bond.

I cut the neck off and used what I learned from the wise words of all mothers, “Don’t pull on the neck of your sweater, you will stretch it out!” They are right! I pulled and pulled and stretched it enough so that it would fit around my image and then hot glued it in place. It is on there forever. 🙂 And while I was at it, I used a red paint pen and colored in the berries on his hat for just a bit of color.

This finished my cheese box. I posted it for sale on my Facebook page and it sold almost immediately!

Now, what to do with the sweater arms?? I’m thinking my early morning project will be dressing a few Oui yogurt jars. 🙂

Beautiful Lanterns from Light Covers from the 80s

Remember these? I love the beveled glass panels!

Our neighbors gifted these to us along with the fan/light fixture, another fan, and the fan blades for both. You’ll have to check out what I did with some of the fan blades already!

I have made two lanterns so far.

The first one I decorated for Christmas. I wanted a top for it and found a bell ornament that worked perfectly. I painted the light cover to match the bell. I used a candle plate with faux snow glued to it. I “planted” 3 trees to represent a Christmas tree farm and added a little red truck ornament and a tea light with a 6 hour timer.

Once the lantern was in place, I added the red berry garland.

I went Shabby Chic with the second one. I was stumped on how to make a lid for this one. But then I noticed one of my cans of spray sealer would work if I cut it down. I did that and painted it inside and out with our brand of chalk-style paint Missouri Limestone Paint Company in Vintage Linen and added a prism cut drawer pull.

I glued the lid to the top of the cover with hot glue and E6000 and used metallic aged brass wax to distress.

I also painted a small mirror, distressed it with sandpaper and added a touch of the metallic aged brass wax.

The lantern sits over a hydrangea bloom I dried and a tea light with a 6 hour timer.

Very elegant!

Now, to think up another lantern or two or three to make. 😁

I’m a True “Fan” of this Garden Ghost Family

Meet Gus, Gertie, and Georgie, my latest project. They are a happy garden ghost family….not scary at all!

Boooo!!!

Who knew when I bought a small ceiling fan with short blades at a yard sale several years ago, one of the blades would become Georgie. My original intent was to paint the blades for my grandson’s bedroom with a bunk bed, but never got around to doing that. So Georgie and his three friends have been patiently waiting for some action.

Then, along comes our neighbors doing some remodeling, and gifts us with a ceiling fan and a ceiling fan with lights. I’ve already started making lanterns with the light covers, and am now the proud owner of two different sizes of fan blades from this gift. 🤗

So what’s a crafter to do? And then it hit me….. make some spooky? families for the yard. I put them up against a door and Yes! I could see a dad, mom, and kid. Can’t you?

1. Prep – I cleaned them thoroughly with Windex, my go to cleaner.

2. I filled in the holes with KwikWood, my favorite wood repair putty, just so I’d have more of a finished look when finished. After all, who wants a ghost with holes in his head?

3. Once the filler was dry, I sanded it and scuffed up the blades front and back with 220 sandpaper.

4. Then I painted each side with our paint brand Missouri Limestone Paint Company in “January”, a pure white. I used two coats.

Smile for the camera!

5. Next, I free hand drew their faces on a piece of card stock and cut them out to use as stencils. I traced the faces onto the blades with a pencil, then used a black oil-based Sharpie paint pen to color them in.

6. I didn’t want them falling over in the garden and getting hurt so Danny found 3 4×4” blocks about 4” tall and screwed them to the wood blocks. These happened to be left over pieces of treated lumber he had stored away in the shed. He left a bit of the treated lumber showing just so the fan blade would be resting on the ground.

7. My final step is spraying them with Varathane SPAR Urethane to protect them from the weather. Fan blades are a manufactured wood product (MDF). Even though they won’t be out in the weather for a long period, this will help keep them nice for many Halloweens to come.

And here they are again! They seem so happy to be in the garden. I’m a fan! How about you? 🥰

Happy Halloween!

I’m now making two more families. These are for my kids. The first set is complete and has been delivered. We have Dad, Mom, sister, brother, and can’t forget the family dog.

Getting started!

Our granddaughter helped screw each one to a block of wood so they would stand up without falling over. A girl is never too young to learn to use a power tool.

We put mom and dad on a bit of a slant toward the kids. And here they are!

Remembering “Antiquing” Kits from the 1960’s

Up-cycling is nothing new…Americans have been doing it forever (and trust me 55 years seems like forever).  Does anyone remember the old “antiquing” kits from the 1960’s?

I realized recently that I had about 55 years ago, what was probably my first experience with up-cycling furniture.. A friend sent me a pic of a piece of furniture her grandmother “antiqued” around then. Look closely and you’ll see little flecks of paint.

table

Small table “antiqued” 55 years ago

It reminded me of an old vanity my mom bought for our cabin on the river and an antiquing kit. She probably bought the kit at our local Davis Paint store. I was just a kid, but remember helping to paint this vanity one summer.  I even remember where we put it to paint it. It was outside by the tire swing. Crazy things you remember. You first painted a base coat, which was off white. Then you somehow distressed it with this really, really ugly green. The final touch was putting the green on a toothbrush and flicking little dots strategically all over. I think that was to represent worm holes maybe. I just remember it looking like mold on a piece of off white furniture. That vanity would bring big bucks now. I’m sure I  have a pic of it somewhere. May have to look sometime. It had drawers on both sides of a lower shelf and a mirror of some kind attached.  It looked a little like this one, but not near so fancy.  At that time, it would NOT have been considered an antique, just an old vanity no one wanted and I’m sure my mother paid next to nothing for it.  It was for the cabin!

antique vanity

I wish the vanity we had looked as nice as this one.

It made me realize that, as a family, we’ve been into painting, upcycling, and refinishing, making things old new again for a long time. Mom and Dad went on to really refinishing furniture. They did a lot of really nice things. Kathy and I are still using furniture they refinished. Kathy remembers them mixing up some kind of concoction with linseed oil and a sealer of some kind. Beautiful wooden pieces like that, I would keep as is. But give me something that needs a new life and I’m ready to paint! So, maybe I should be advertising on SharSum Paint that I have over 50 years experience upcycling furniture. : ) Dad even made, by hand, bookcases for Kathy and me. We still have these. We can’t bear to part with them…they are not attractive at all, and not very sturdy, but he lovingly fashioned them for us out of the lumber from the outhouse  when he bought the rights to tear down the cabin and the outhouse from the Corps of Engineers. : ) Yes, he was quite the jokester.