Creating Aged Stoneware

Relaxing with my crafting. I can truthfully say I am going to be obsessed with white wax for a few days. I started yesterday and have already completed 4 projects.

Project #1 – I updated a duck that already had a lot of detail.

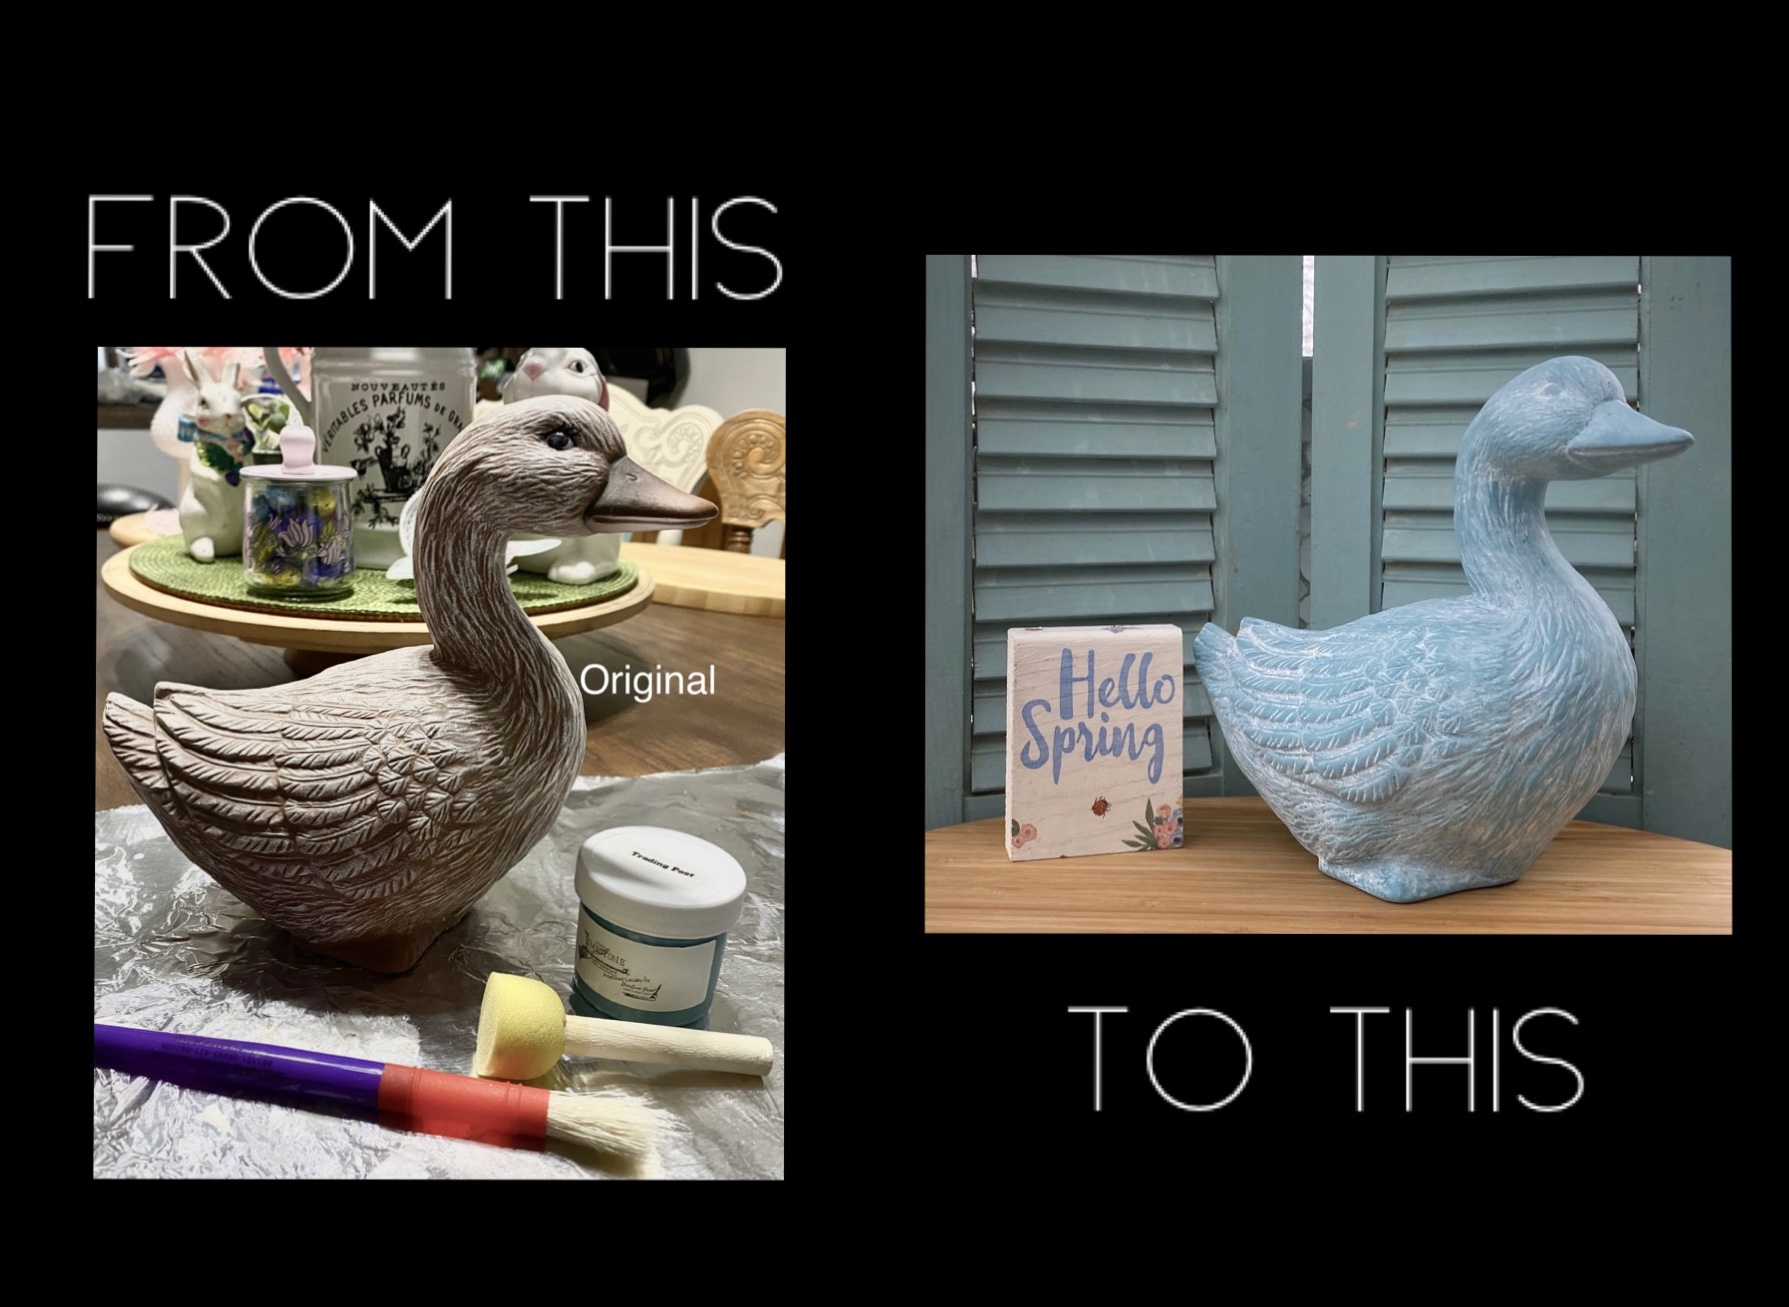
I’ve been seeing many crafters updating vintage ceramic ducks. I bought this one several years ago. I think it was from the ‘80s.

I decided to finally update this one. What a difference a little paint and Briwax Liming Wax makes!

Julie’s Designs and Signs has a great tutorial on painting ducks. I think the ones she painted may even be from the same company, just a different design. I basically followed her tutorial. My paint was different and my wax, but the idea is pretty much the same.

https://youtu.be/MN8eWuiwbNM

I gave the duck two light coats of our Missouri Limestone Paint Company chalk paint in the color “Trading Post”. I didn’t want heavy coat of paints because I didn’t want to cover up the texture.

First coat
2nd coat

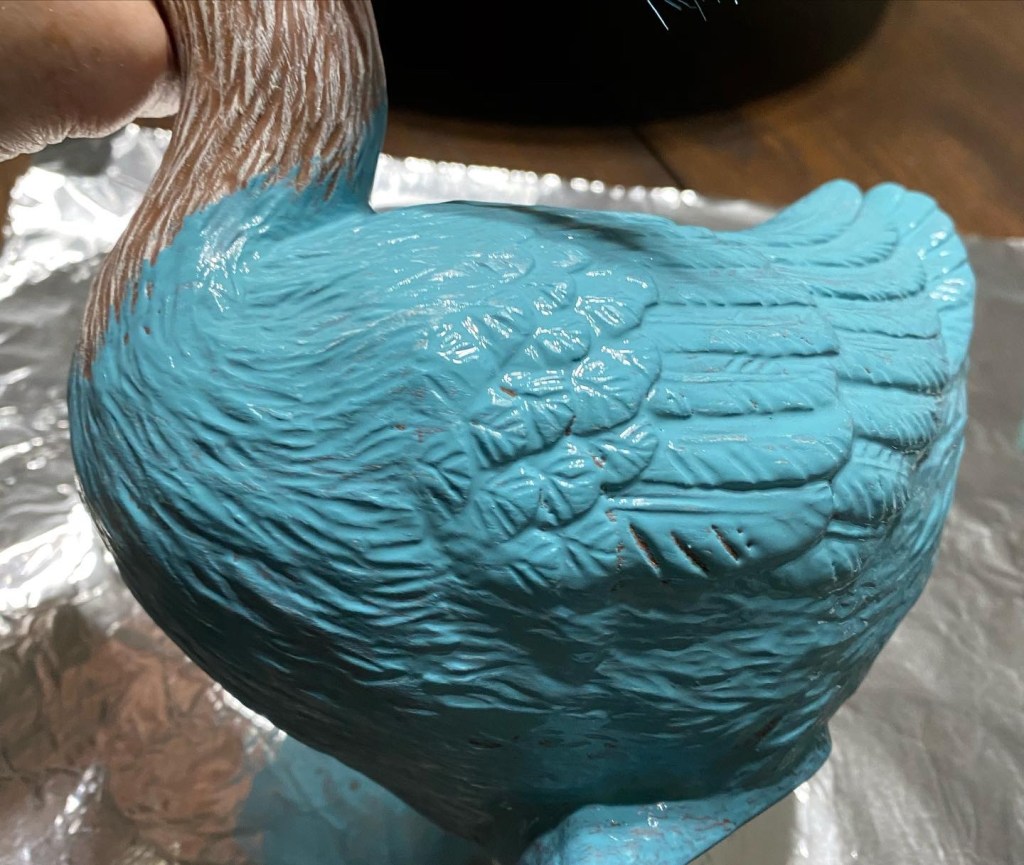
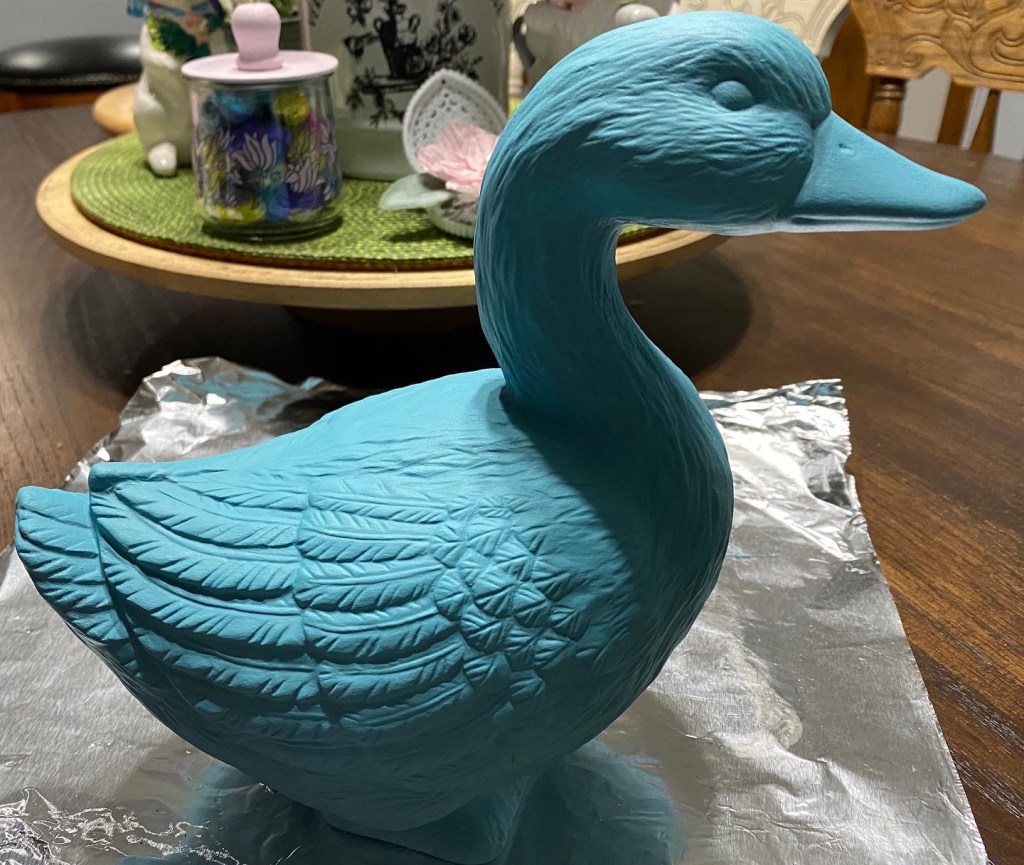
Once both coats were thoroughly dry, I covered the duck in white wax. I use the Briwax brand white wax because I’ve had it forever. It works well.

Once the wax was on and pushed into the details well with a Dollar Store stencil brush I have, I took a soft paper towel and wiped it off.

I love the end result!!

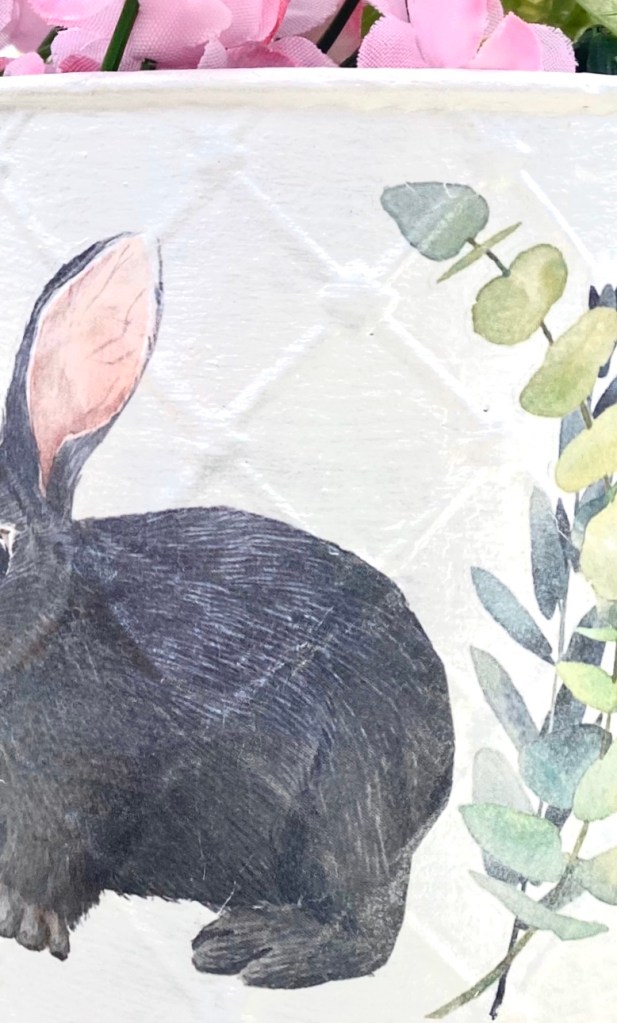
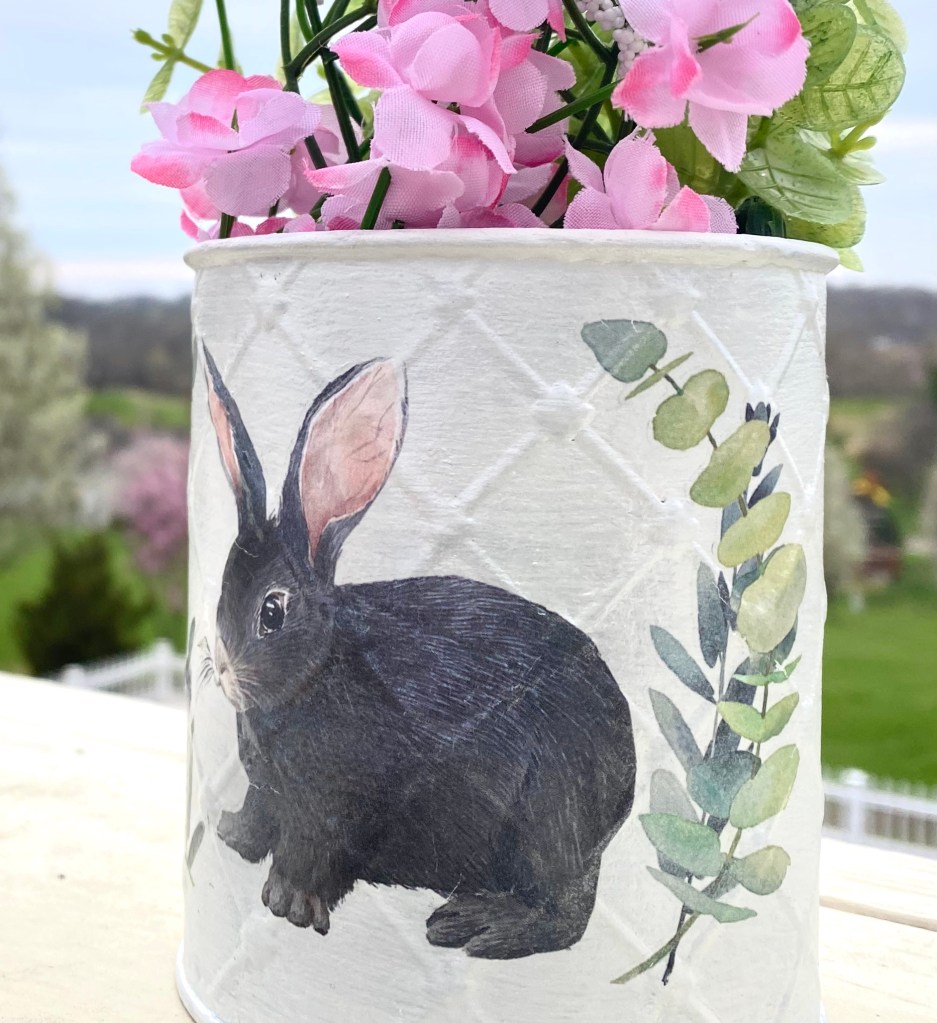
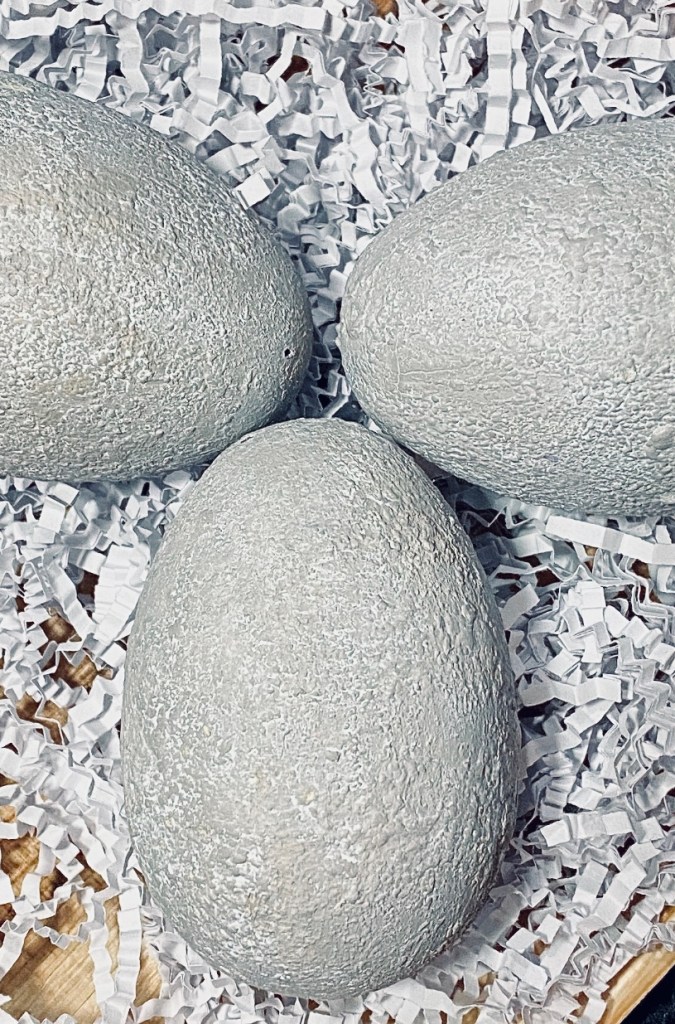
Project #2: Mexican pottery transformed to an aged stone look

After using the Briwax Liming Wax on the duck earlier, I started looking around. I have had this piece of Mexican pottery for a long time. The texture of it was perfect. If it wasn’t, from all the videos I’ve been watching, I could easily add some texture to my paint with baking soda to get the rough look.

By painting this piece with our “Missouri Limestone Paint Company “Gray Goose”, letting it dry, then applying the lining wax by dabbing it into the paint, making sure it got onto the crevices with a stencil brush , then wiping it away carefully, I was able to get this aged stone effect.

I thought I’d try some stamps on it after and they worked great.

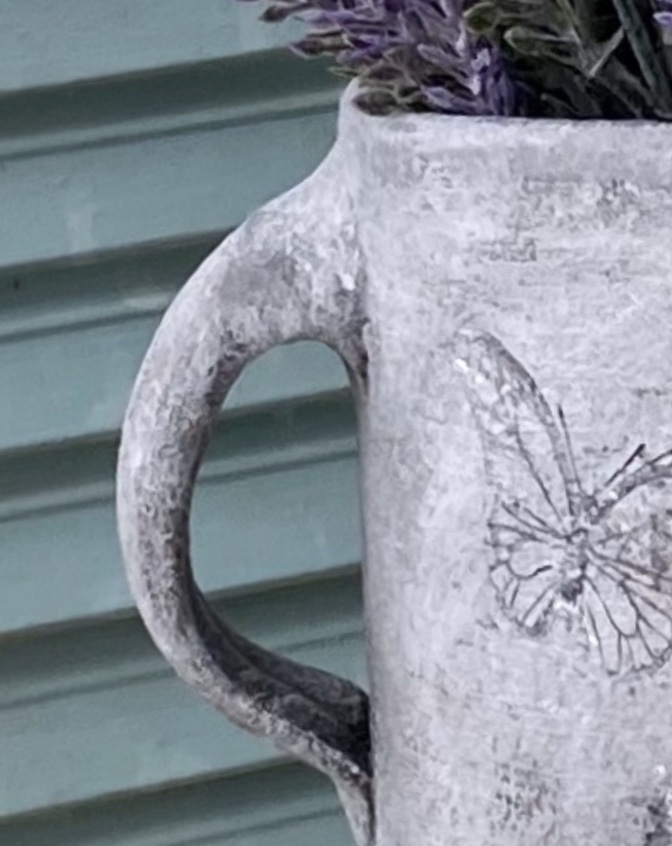
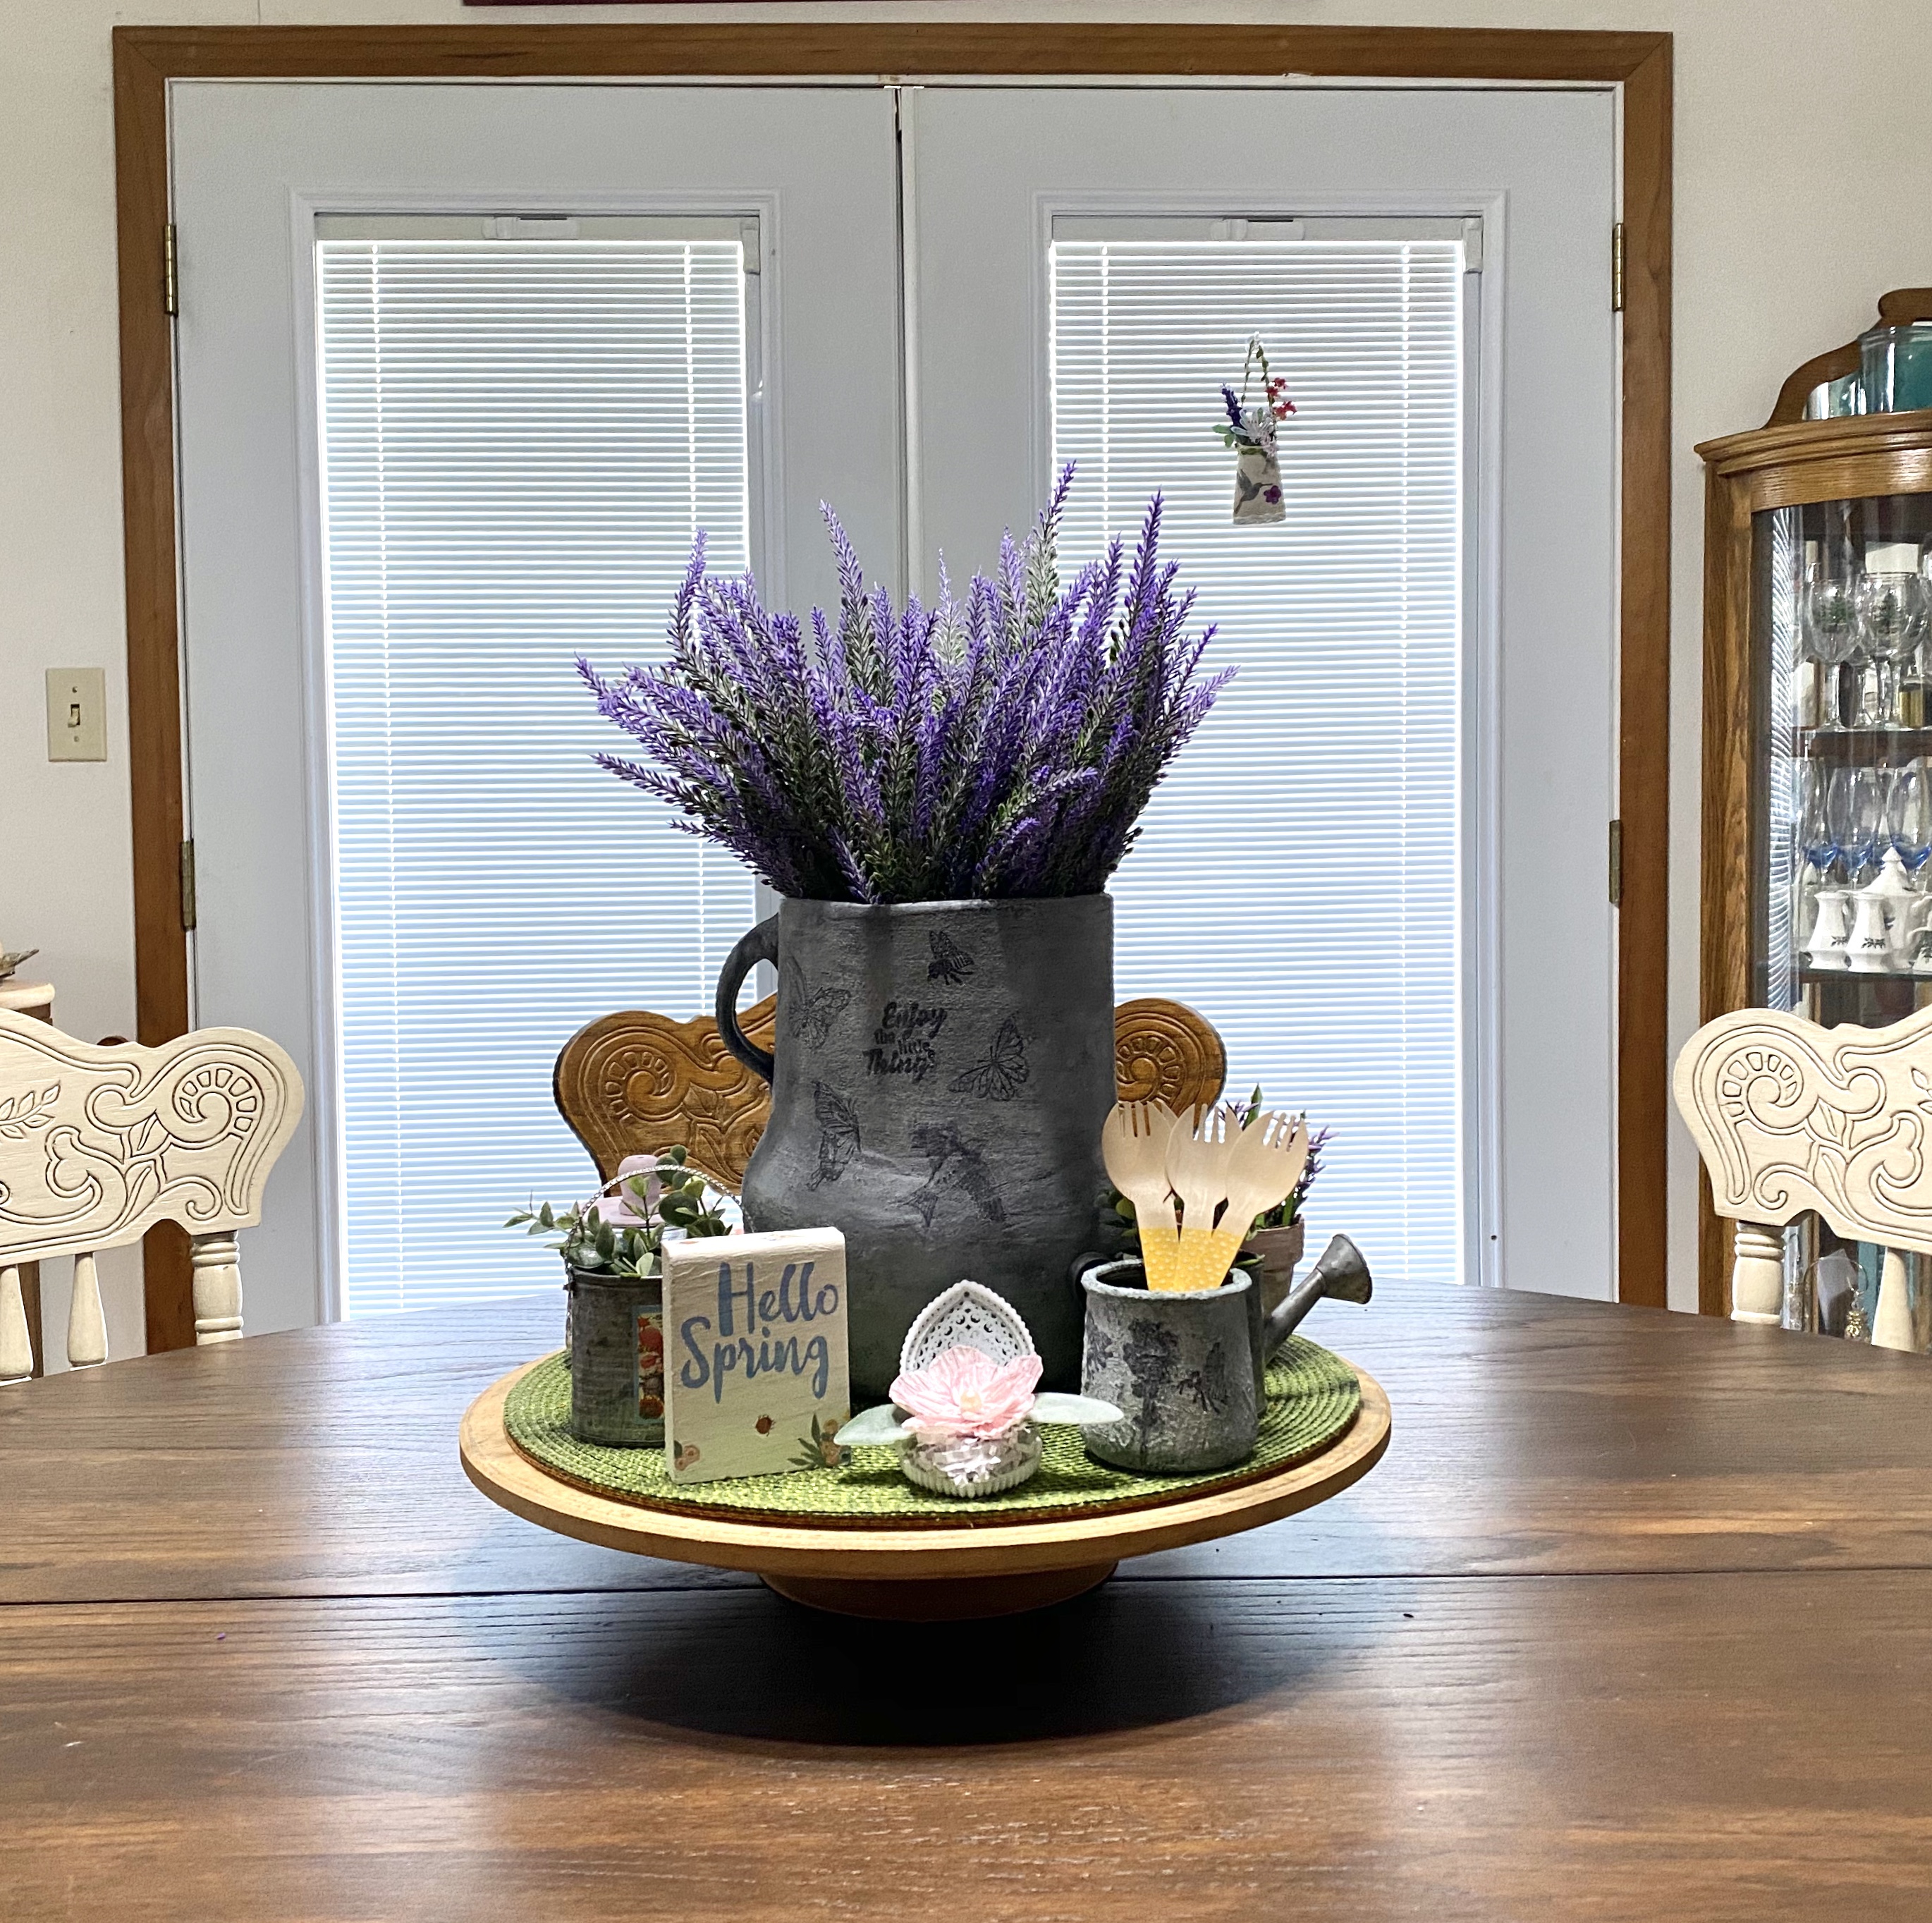
I added a few more stamps and this one is going on my dining room table. I’m sure I will be making some more aged stone look vases, even if they once started out as glass jars. 🙂

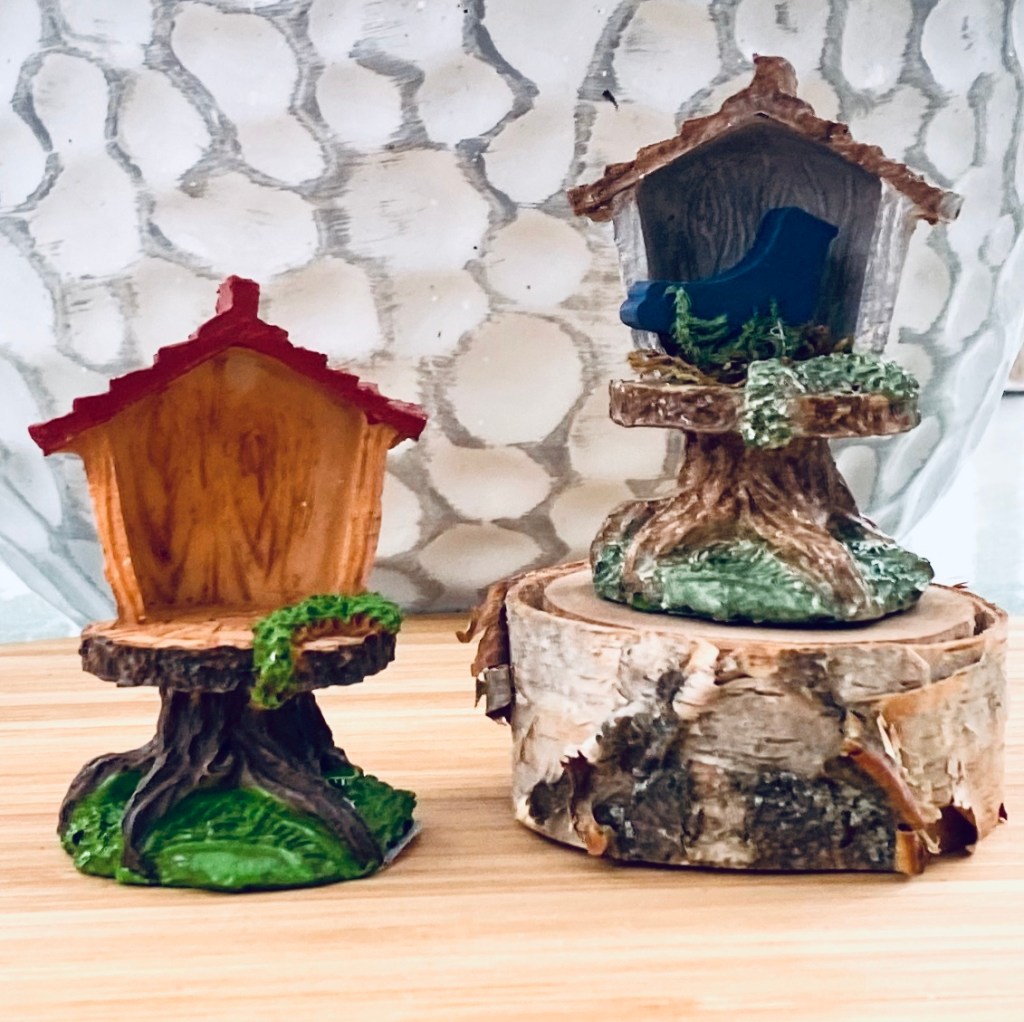
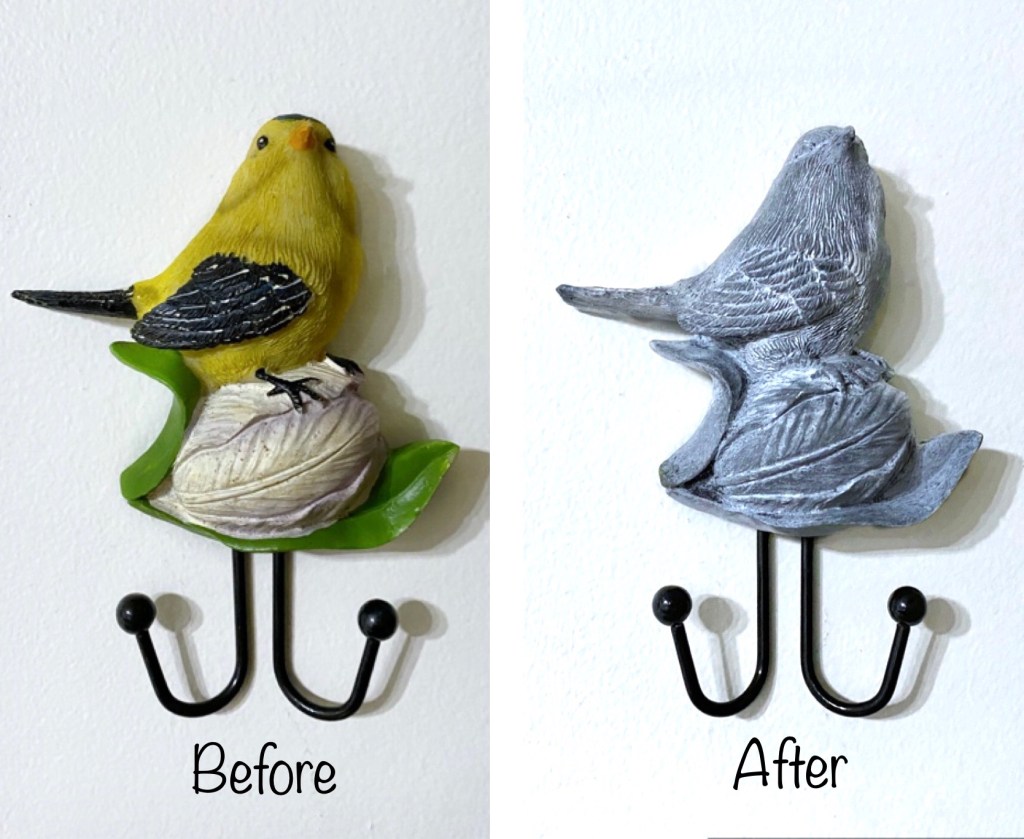
Project #3: An Aged Stone Look Bird Hook

I just had to do this aged stone look again. I knew this little 3 1/2” w x 5” high bird hook would work as it is a textured resin material.

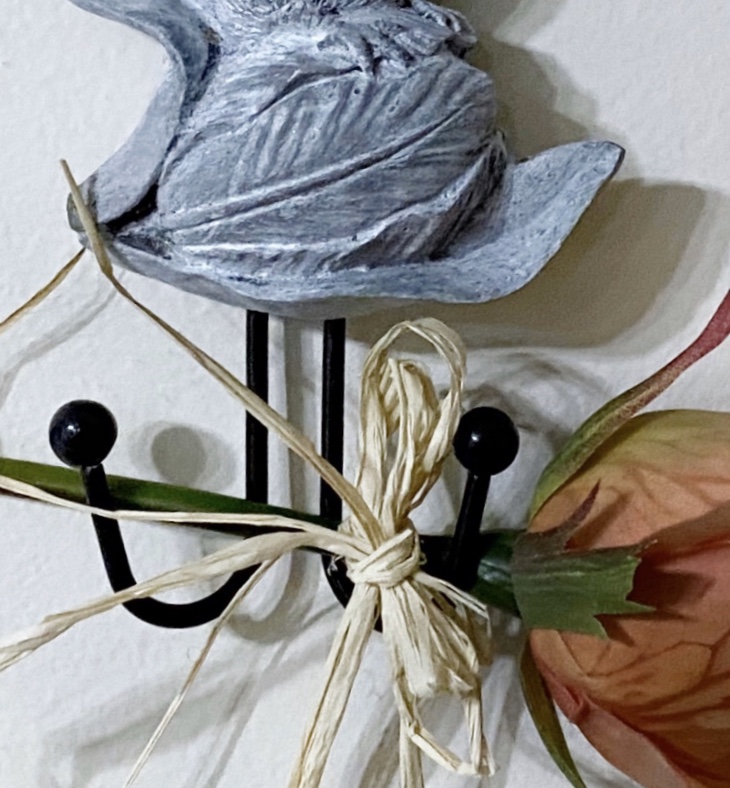
I love how the dark gray paint and Briwax Liming Wax gave it a bluish tint.

Project #4: A Oui Jar transformed into a little aged stone crock

I’m still playing with Briwax Liming Wax. This time I took a plain Oui yogurt jar and made a utensil holder for some cute dessert “sporks”.

I wondered what dark green under the wax would look like. I loved the color it became.

But first I sprayed the Oui jar with a sealer so the paint would adhere well. I added several teaspoons of baking soda to my Missouri Limestone Paint Company “Evening Shade”, a dark green. The baking soda will make the paint nice and thick and grainy.

I painted and dabbed it on thick this time as I wanted a lot of texture that would be like concrete when finished. I let the first coat dry, then applied the second coat.

Once the jar was thoroughly dry, I added the white wax, then wiped it off. Love, love, love this look.

I added a couple of stamps and filled it with the colorful dessert sporks. 🙂

This turned out so well, it will be available, complete with the “sporks”!

Decoupage a Dollar Tree Makeup Bag

I have been discovering all sorts of things to decoupage. This idea of decoupaging a makeup bag is the latest and greatest.

I ran across this Decoupage Queen’s youtube channel – Joan-Marie Domino. She has many great ideas, but the one I saw and had to try was decoupaging a makeup bag.

I was so inspired when I watched her tutorial. I had just bought 3 makeup bags. I knew I could find an idea on line and Wow! I sure did.

I found three beautiful napkins in my stashe I knew would look beautiful with the pink and gray on the bags. Friends had given me these napkins so I have no idea where they came from originally.

Her makeup bag was canvas. These Dollar Tree bags were kind of a brushed fabric and were plastic lined. Good for makeup that might leak, but…..not for the iron on decoupage she used on hers. I was afraid the hot iron would melt the plastic liners.

So I ended up doing regular decoupage, using Saran Wrap to help me push the napkins down onto the fabric. Here are the steps I used.

Step 1: Buy a makeup bag. These plastic lined makeup bags came from Dollar Tree.

Step 2: Place parchment paper inside just in case the decoupage medium goes through. I didn’t think it would being plastic lined, but didn’t want to take any chances.

Step 3: This step is important, according to Joan-Marie’s tutorial. Make sure you use Fabric Mod Podge. I assume it helps with not only adhering well, but also makes the napkin supple and keeps it from cracking.

I applied one coat of the Fabric Mod Podge over the top area of the bag. DO NOT apply to the zipper area. I let that coat dry well.

Step 4: I then applied a second coat and lay the napkin over it. I used Saran Wrap to help press the napkin (cut a bit longer on all sides) into the fabric. I tried to have a very straight line on the bottom edge of the napkin so that it went right up to the edge of the pink area. I let that coat dry thoroughly.

Step 5: Next, I trimmed the napkin a bit more then used a nail Emory board (sandpaper would work) to get a clean edge on the sides and top.

Step 6: Once dry, I added a second coat of the Mod Podge. Note: It will be tacky after both coats even after fully drying.

Steps 7 and 8: It is now ready for TWO coats of a clear matte water based LIQUID sealer. Make sure you use a liquid and not a spray. Let the first coat dry thoroughly before applying the second. I happened to have some wise owl clear matte one hour enamel, but any clear matte water based sealer will work.

Once dry the bag will no longer be sticky and the napkin will very supple. You can wad it up and smooth it out and it will not crack.

And …. just look at the beautiful makeup bags now!

Just a Few of the Crafts I’ve Done Lately – Part 2

Click here to see Part 1

For the basket, I painted it an off white. I cut out and glued bunnies from a napkin to some burlap type fabric with spray adhesive, then Mod Podged them to the basket and added a little jute twine bow I made. I crocheted egg covers last year and I stamped and stuffed the little fabric bag last year, too. I sprayed plastic eggs this morning with Mod Podge pearlized spray to make a soft shimmer. I also sprayed the Happy Easter sign and attached a skewer stick to the back. I made the bow with some awesome fabric yarn I have.
I had a Dollar Tree tinsel rabbit face and purple yarn. I wanted to see if this yarn would work.
I started at the bottom and made sure the loops lay so that I covered them all the way to the neck when I wrapped the yarn around. Then I did each ear individually and started from the top, making sure the loops lay so that I covered them and ended up meeting the other loops at the neck. I think it gives her a French Poodle haircut. 😁
I reused the eyes and mouth and used felt for the nose and inner ear pieces. I had purple ribbon the exact color. I wired it on and added a jewel in the center.
She turned out pretty cute, I think.
I’ve had several friends over the last couple of years shared with me examples of crafters that have painted pinecones to look like zinnias. I got out that bag this morning and the pinecones it held were the exact kind I needed, so….. I painted and planted some. I also had the little sign so I cut the “bloom where you are planted” out of vinyl and added to the sign.
I also had these cute little tin containers so I planted some faux greenery in them.
You can bring this sweet girl out year after year. She looks good enough to eat, doesn’t she? But she is just a styrofoam bunny. I gave her two coats of a dark chocolate brown – Missouri Limestone Paint Company “French Roast”. I even gave her candy/like eyes using white and pink paint pens. I then sprayed her with a clear gloss spray to seal in that rich color. I added a bow around her neck and stuck in and glued a skewer stick in her bottom, cut to fit the bowl, to help her stay upright in the white shredded filler.
I painted, distressed, sealed and waxed a wooden bowl for her and she is now complete.
I made the Dollar Tree racetrack cloche. The interesting thing is that the white and orange gave it a pretty pinkish cast, so I left it like that. I sealed it with clear matte spray and a coat of Pearlized Mod Podge. I also added nautical rope all around and painted it, too. I added a pretty ceramic drawer knob to the top and paint dyed some gauzy fabric ribbon to put around it.
I used paperback books and covered each book with this cool vinyl wallpaper I thrifted. Made a messy bow, spray painted some keys, added a Dollar Tree wood cut out bird, and tried to used the Dollar Tree Transfer words. They didn’t want to cooperate with the uneven vinyl, so I did the best I could then hand wrote the letters over the glittery gold with a metallic gold marker pen.
I think I could easily become addicted to making these flowers. I did a lot of searching and finally started finding some using some of the vintage twisted paper I thrifted. Even the tutorial by Artful Affirmations I found on this flower was from 2016. It was very popular in the 80’s but not so much now. It looks like crepe paper, but is much sturdier. This paper, and the little heart shaped plastic box came from the grab bag I got at a thrift store.
The flower adhered inside the box is sitting on a napkin. Tutorial found on Pinterest by Artful Affirmations.
I saw a technique to use hairspray when you were wanting small crackles. It works! 🙂
I cleaned a 40 oz. tomato juice can and then sprayed it with a clear sealer to help the chalk paint adhere. I let it dry and then sprayed a heavy coat of hairspray all over. I dried it with a blow dryer then put on a thick coat of chalk paint, painting in one direction and did not go back and forth or overwork it or the crackle won’t happen. I then used a hair dryer and the crackled appear. The hair dryer seems to make better crackle. Do not use screws to attach the handle of you want it to hold water.
This was the first can I made. I had this old chippy handle I wanted to use. I attached it with screws (not a good idea if you want it to hold water. It didn’t matter on this one because I cut both ends out of the can! What was I thinking!!! I guess I thought I was going to make a smashed can basket. It holds faux flowers, nicely, though. I ended up putting a fake bottom on it because every time I picked it up, the flowers dropped out. Lol

Just A Few Crafts I’ve Done Lately – Part 1

Click here to see Part 2

I painted and distressed this 6 pack of Dollar Tree eggs.
I went to an Antique mall and came out with some bargains. Then I had to go to Dollar Tree to pick up a cute little bunny. So, basically I just added some rub on transfer carrots to plastic eggs, changed out the greenery on a carrot I had, changed the bow on the rabbit, coffee died some white filler to an off white and mixed it with some brown filler and created this 6” high x 12” wide display.
The little stand alone Peter Rabbit was a little 3 1/4”wide x 3 3/4” tall vintage sign with a fabric heart glued to it, probably from the 80’s. Danny sanded off the top and I repainted it white and made a copy of Peter Rabbit from a book I brought with me, cut him out, glued him on, then lightly distressed him and the white paint. Then I sealed him with a clear spray sealer.
Dry brushed metal cross wired to a dropcloth covered wire wreath form. Wire hanger in back.
I finished another nursing home door hanger. This one is for a friend for the birthday of her friend’s mom.
I reimagined a little Dollar Tree birdhouse with paint and stain, then sealed it. I painted a little wooden bird and glued it and a little moss to the birdhouse. I adhered it to a birch round to create a 4” high x 3” wide display. The original birds house is next to it to show what a difference a little paint can make.
The little posey pockets look like they could be tiny tin can pockets I’ve been making, but they aren’t. They are made from cardboard tubes. I saw someone do this by cutting a tube about 2” long, pressing the bottom together and gluing it. I painted them white.
I took the white part of a napkin layer I saved and used various stamps I had to make my own napkin, then cut and decoupaged the pieces onto the little pockets. I added dragonfly stickers to the board and to the pockets and filled the pockets with Spring flowers. I glued them in so they would stay.
I gave the grapevine some white dry brush over the original color of the sign.

A Bunny Tin Filled with Flowers and Greenery

I’m at my son Trevor’s helping out with the kids while Lydia is at a conference, but I brought along enough supplies to keep me busy while they are at school. 🙂

I was going to paint a duck today, but instead decided on painting this little 4 1/2” tall by 3 1/2” round embossed galvanized tin. I brought the perfect bunny framed with greenery Prima transfer I bought at The Gray Wall to go on it.

I’m so glad I did! It’s a little overcast today but the lighting seemed perfect when I used their beautiful view as a background for photos.

I usually spray a clear coat on metal or glass first but this tin was not shiny and the Mod Podge sprays I used uusially create a nice hard finish.

I painted the tin with 3 coats of our Missouri Limestone Paint Company “January” and let it dry. Then I gave it a coat of Mod Podge clear matte spray, followed by Mod Podge Pearlized Glaze spray.

I then applied the transfer. I sealed the transfer with another coat of the clear matte spray and a very light coat of the pearlized spray. I didn’t want to use too much as I really wanted the details in the transfer to show up. I just wanted a little shimmer. It’s hard to see on the photos, but it is there.

I love how it turned out and love how the photos show it off!

DIY Fabric Carrots

I made a couple of carrots for Easter. They turned out pretty cute and made a great back drop for the little stand up bunny!

They were easy to do. I saw the carrot treat bags at Dollar Tree and bought a package of two, thinking I would do something with them.

The first thing I did was cut off the green polka dot tops.

Next, I used a pencil eraser and white paint to make random polka dots on the front and back of the orange fabric.

I had some green Dollar Tree wired ribbon. I cut thin strips of various lengths, using both the wired pieces and the plain ones.

Next, I glued the strips randomly across the inside, both sides.

I pulled the drawstrings together very tight and hot glued around to keep it tight. I fluffed all the greenery and bent the wired pieces in place.

Then, I stuffed my carrots.

I glued the greenery to the inside on one side of the carrot, and then glued the other side to it.

I then glued the edges to it and anything sticking out I gathered and glued that, too.

As a final touch, I glued some jute twine to the front, leaving about a 3” length, then wrapped it around the top several times, ending back at the front, tyed a bow and glued it in place.

The final project, displayed with other items I have crafted, just in time for Easter.

Forget Making Moulds – I Had An Idea and it Worked!

Yesterday was a snow day (in public school terms) so as a retired teacher I respected the tradition of doing nothing but play. I discovered a new painting technique in the process.

Earlier I painted plastic eggs to make some egg bunnies, but that’s another tutorial. Basically, I glued them shut, scuffed them up, gave them a coat of chalk paint, dabbed more paint along with picking up at the same time with my brush some Howard’s Chalk-tique

After I made ears for them I decided they needed to be in their own egg cups.

So I painted some peat pots and tried out an idea I’ve had since I bought some plastic puffy stickers at Dollar Tree. My thought was I could glue the rose stickers on, paint over them, then distress them. They had a metallic finish on them and so I was hoping the metallic finish would come through, and Oh….yes it did!!! I found these at Dollar Tree. I also found keys and butterflies and now can’t wait to use them, too..

I used a fast drying glue called Quick Hold. It is made by E6000 but sets up much quicker. It sets in about 45 de ones and cures within 4-6 hours. It has been working great on almost everything I’ve used it on. It was holding well on these attaching to the peat pot but they were a little stiff and the ends kept popping up. I wasn’t concerned as I thought I’d reglue them after I painted over them.

I then painted over them and used a mini heat gun to dry them. An amazing thing happened. The heat must have softened the plastic and did something to the glue (possibly reactivating it) because I was able to easily push down and press them for a few seconds and they stayed put! Not sure why or how, but they lay down now. Just fine!

Then I took a damp towel and rubbed away the paint on the raised part of the roses…..and there was the metallic finish coming to life right before my eyes. To really enhance it I rubbed a bit of clear wax over it and Wow! As you can see in the photo above, my idea worked! I’m so happy!

I could do snow days every day (for awhile anyway. Lol)

And here’s the final project. 🥰

Lots of Crafting Going On and Today I’m Sharing How I Made This Two-Sided Tin Can Pocket

One pocket – two different looks

I have neglected my blog for awhile, but I have been on a crafting frenzy. I have been posting on my personal Facebook page, though, until I can transfer them here, so at least they aren’t lost. You can do a search for my name, Sharon Sumner if you like to see. Most of my Facebook posts are private, but my crafts are all public. I do not accept Friends on my page, though, unless I know you. I would love for you to follow my SharSum Paint page. I sometimes post them there, too. Facebook.com/sharsumpaint. I do post most of them in my Instagram page also. You can follow along there, too. instagram.com/sharsumpaint

Today, I am sharing how I made this tin can pocket. I’ve been a little obsessed with these. They are just a can from your pantry. You open both ends, smash the bottom and decorate. You can do a Google Search for tin dan pockets and find videos popping up on how to make this. Some use a vise, some a hammer and some just stomp on them. Like this fellow crafter, Junk Gypsy. lol https://www.facebook.com/1646948723/posts/10224724308128875/?d=nu

I’ve decided my goal in life must be to come up with as many ways possible as I can in making these pockets.

It became pretty involved and took awhile, but I so love how it turned out. The steps I took have kind of became a tutorial. I’m pretty wordy so bear with me. 🙂

I had to smash my own can this morning. Danny didn’t have a supply ready for me. 🤷🏼‍♀️ I basically used the idea from Junk Gypsy’s tutorial 😂😂😂 by first stomping on it with my foot, but then I put it on the vise and finally used the hammer to finish it off. Glad Danny wasn’t awake yet to video me.

~ Painting the can


* I first spray the can with an acrylic sealer. This helps chalk paint adhere to metal.
* I then daubed on white chalk paint. This gives an awesome texture I love using on metal and glass.
* When dry, I sprayed the can with Mod Podge Pearlized Spray – this gave it a shimmer. If I didn’t want the shimmer, I would have used Mod Podge clear matte spray.

~ Creating the dragonfly design and Decoupaging the napkin

* I had this awesome dragonfly stamp given to me by awesome friends (formerly known as neighbors Boot Pierce and Rhonda Pierce). So I stamped a plain sheet of napkin (left from peeling off from another napkin project). I wet the sides in a jagged line and tore it. This helps to blend in when decoupaging.
* I used Mod Podge matte finish to decoupage the napkin, applying it to the can and laying the napkin down, then on top, pressing lightly into the ridges and making sure it is smooth. I dry it with a hair dryer, making sure I lightly press with my fingers as I dry it.

~ The other side is Rub on Transfers

* The other side I used the gold rub on transfers from Dollar Tree. These are not perfect and the first sheet I tried was already attached to the sheet that was supposed to come off so I couldn’t use it. The second one was ok, but the details are so delicate it was almost impossible getting it down into the ridges. I ended up just using my fingernail to adhere the butterflies. I ended up liking the distressed look it had so all was well. I then sprayed both sides with the Mod Podge spray again.

~ The hanger

* I didn’t drill holes in the can so I glued the hanger inside. I used wired jute and strung it with white beads. The beads have a shiny ceramic look to them. I’m like the crow who sees something shiny and has to have it. I found a little a couple little mini basketball nets at a thrift store. Net, who cared? Shiny white beads for my stashe? You bet! I cut off all the strings and now have a whole container of shiny white beads ….minus the 20 I used for this project.

~ Embellishments

* I thought ribbon glued on the bottom would be a cool look. On the dragonfly side I even used a few flowers from my flowers I used.
* The flowers are flocked and from Dollar Tree. These are very high end looking and beautiful. I pushed all of them into a small piece of styrofoam and glued them into the styrofoam. Then I just put the whole thing into the can.
* The shiny vinyl butterflies. I’m in love with these 3D butterflies from Dollar Tree. I glued them to skewers and stuck them in. For each side showing, just turn the butterflies around to the front.

And that’s it. This is my 5th tin can pocket…..so far. But who’s counting?🤪

Here are my others. Some are decorated only on one side, others are two sided.

Two sided

These Are a Few of my Favorite Things….

I have been cranking out a few crafts for our booths. It’s been so nice crafting in my clean craft area.

These are just a few things of my favorite things…..

My Organized Craft Area and Decluttered Basement

We started this process the end of September. We have finally, for all intents and purposes, finished. There is still more to do and it’s a never ending process, but we are very happy with the results. Follow this link to see the beginning of this huge transformation.

And now, for more pics of my new and improved basement. We can now also enjoy the living space there once again.