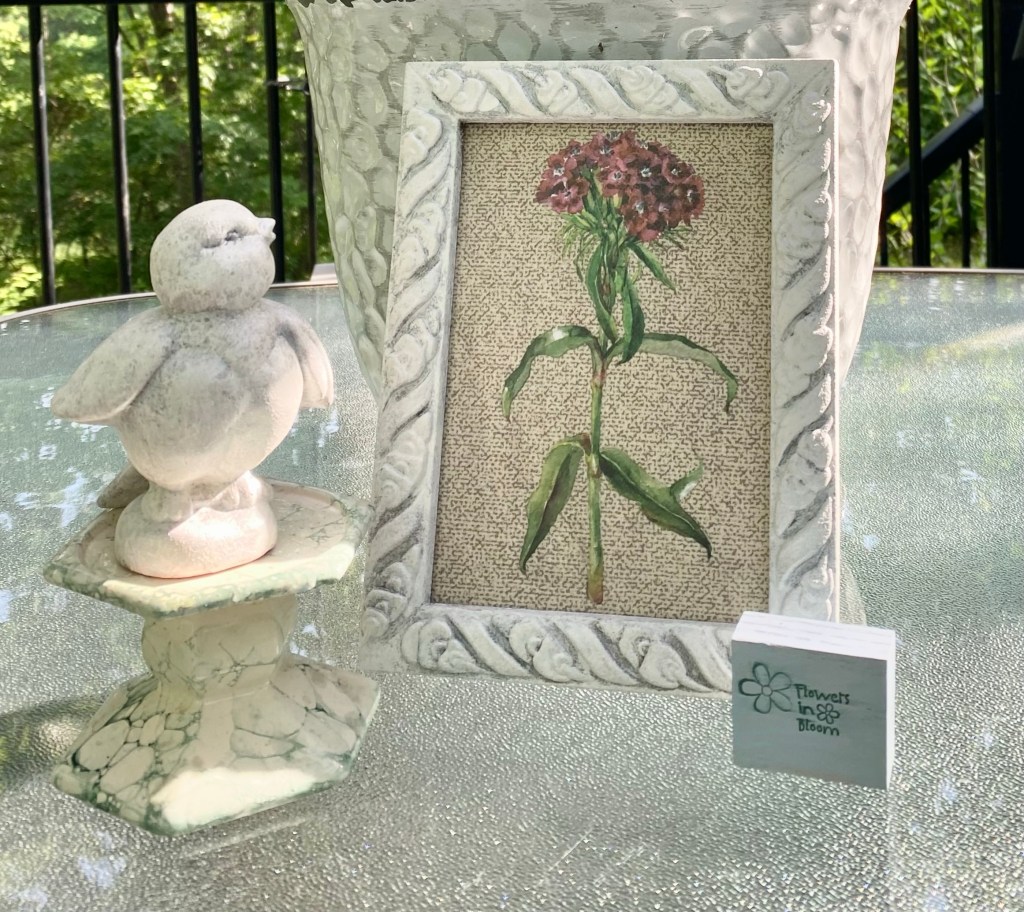
For today’s project I am up-cycling an old gold frame and adding a Redesign with Prima transfer from the Floral Collection. The transfer is applied to a unique background – a piece of one of Dollar Tree’s storage bins.
Cutting apart a Dollar Tree storage bin
The material is kind of a paper/fabric with cardboard in between layers. I cut off a piece to use as background for the transfer.
I cut the cardboard to fit the frame.
I used a glue stick to glue the material onto the cardboard.
I then trimmed the material to the size of the cardboard.
It was time to paint the frame. I mixed a little baking soda with a littler chalk paint to achieve the texture of stone.
It took two coats. On the first coat I used a brush to pounce the paint/baking soda mixture on so I didn’t get brush strokes. For the second coat I used a foam dauber. I love the distressed shading this technique produced. I set it aside to dry well.
Once dry, I gave it two coats of Mod Podge Pearlized Glaze Spray to seal it.
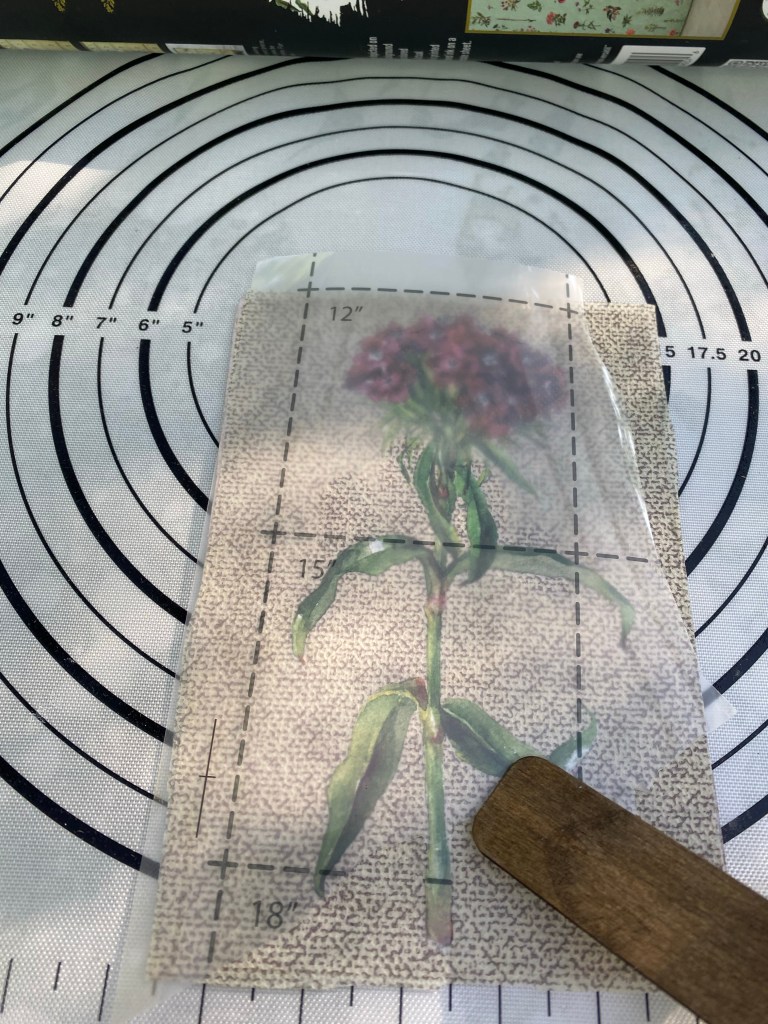
It was then time to apply the transfer to the material I had adhered to the piece of cardboard. I didn’t seal it as it is a decor piece and will not be handled much.
The sheet underneath is a silicone baking sheet I use to work on. Paint does not adhere well to silicone, so it is easy to clean after I finish a project.
I added the transfer to the frame. You could add the glass back in but I did not use the glass.
The final reveal – The material under the transfer looks almost like a piece of linen. It makes a very nice background.
I can’t believe it’s been so long since I’ve posted anything. I have been busy creating, though, so I will share my Instagram page at the end so you can see what I’ve been up to. Many of the posts explain the process I used when creating my projects.
But today, I actually have pics of the steps I took to make these awesome slippers. So, sit back and enjoy. This was so much fun to do!
Early this morning I happened on a Pinterest post that showed a pair of slippers similar to ones I just purchased from Temu and how the crafter decoupaged them with napkins. Of course, I had to try it and am so glad I did!
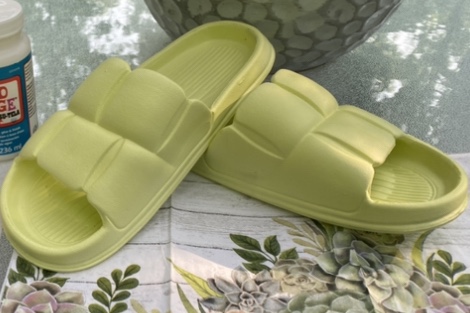
Bathroom slippers from Temu
I apologize to the Pinterest crafter. I was in such a hurry to do this, I forgot to save the post and now I can’t find it again. Sorry, original crafter. She actually cut the napkins into small pieces and decoupaged all areas of the napkin. I decided just to use one large piece across the top and sides.
I had purchased this pair of slippers from Temu. There were a very bright greenish yellow color and I wasn’t sure I liked the color until ….. I added the napkin to them. Wow!
One piece of the napkin covered the top and sides
Step 1. You must remove all the extra layers of the napkin. This one happened to have 2 extra layers. You only use the layer with the image. I cut around the image part of the napkin: I cut around all the succulents and greenery of the napkin and then took the other end of the napkin and cut it into small pieces.
The napkin laying across the top of the slipper.
Step 2: Once I laid the large part of the napkin over the slipper, I knew I wanted to only use it so I didn’t use the small pieces except to fill in on the sides where needed. I used a bit of water to wet down around the areas I didn’t want and tore that away, leaving only what I was going to decoupage.
Adding Mod Podge to the slipper
Step 3: The original crafter used Mod Podge for fabric. I’m not sure you’d have to use that, but I happened to have the fabric one so that’s what I used. Mine has been around awhile and was pretty thick, so I had a bowl of water to dip my brush in first and that thinned it out just enough. I applied the Mod Podge to the whole top and sides of the slipper. (I did the second slipper with another identical napkin cut out and placed it in the same position so they would match.)
Step 3: I laid the napkin where I wanted it, added more Mod Podge to my brush, and started smoothing the napkins down, getting into all the grooves and around the edges.
Step 4: Once the Mod Podge was dry, I gave it two more coats to seal the napkin well. When the final coat was dry, I applied a coat of water based polyurethane just for a bit more protection.
UPDATE: Just to make sure I would give it 2 coats of the sealer and even spray it with an outdoor spray sealer.
Close up
This close up shows how the raised puffiness of the slipper almost gives the napkin a 3D look.
I love how they turned out! It is amazing how the napkin color took on the color of the slippers. They truly are beautiful! The original crafter said hers were holding up well. These slippers are really not meant for shopping trips, etc. but I think you could even if you get caught in a rainstorm. They are perfect for pool shoes or wearing around the house, inside or out.
I have had this vintage Spring tea towel for several years and keep forgetting to get it out every Spring. I happened to rediscover it this morning so it was meant to be.
It is made to hang as it has a pocket for a dowel rod to go through, so I added the dowel rod and used a jute rope with leaves to hang it. It is large – 16” wide and 33 1/2” long from the top of the hanger to the bottom.
The colors are very vivid and I love the Wordsworth poem! Welcome Spring! you can’t come soon enough!
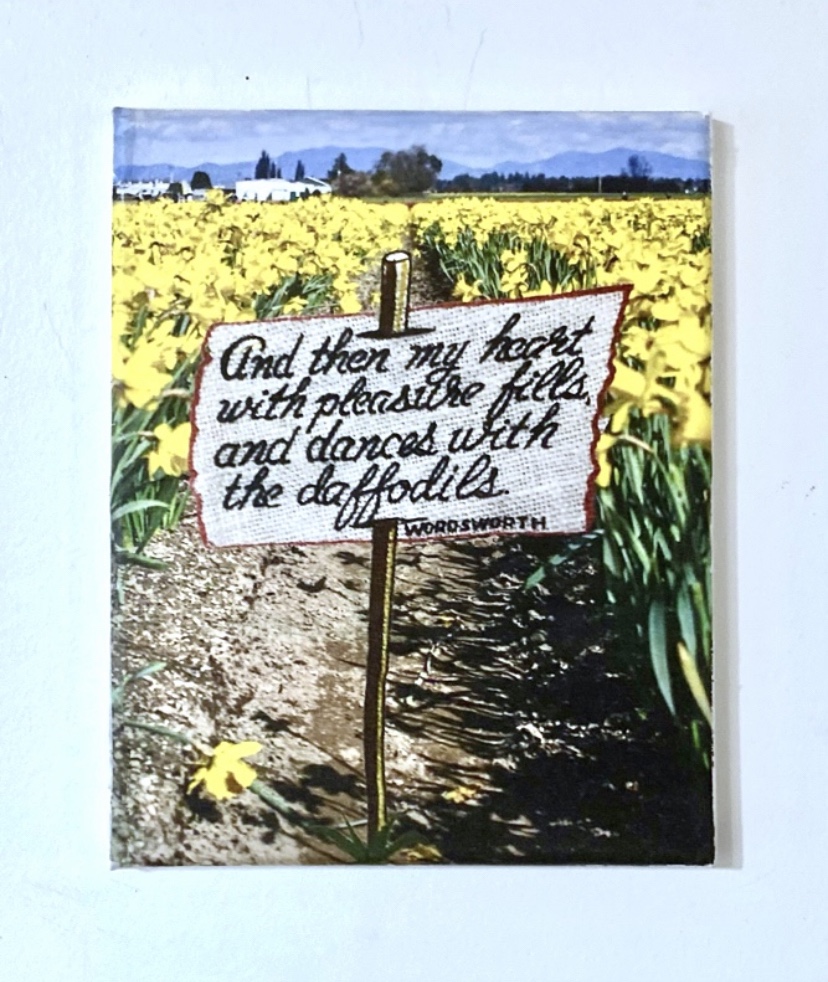
So then I created an 8×10 canvas by taking a photo of the sign with the poem from the Spring wall hanging I have and cut out just that image in a free app I use called ProKnockout. I saved it with a transparent background.
I found and saved a free image of a field of daffodils on the pexels website.
I married them together as an image and printed it out on tissue paper with my ink jet printer. I use Pixie Spray ( I get on Amazon) as a temporary spray on a sheet of copy paper and applied white tissue paper and trimmed it to fit. The Pixie spray allows me to peel the tissue paper off when printed. I sprayed the tissue paper image (when dry) with hair spray to keep it from bleeding.
I then decoupaged the tissue paper image onto a blank canvas and sanded the extra paper off the edges. I sealed the whole thing when dry with Mod Podge matte sealer.
Daffodils by William Wordsworth
I wandered lonely as a cloud That floats on high o’er vales and hills, When all at once I saw a crowd, A host, of golden daffodils; Beside the lake, beneath the trees, Fluttering and dancing in the breeze.
Continuous as the stars that shine And twinkle on the milky way, They stretched in never-ending line Along the margin of a bay: Ten thousand saw I at a glance, Tossing their heads in sprightly dance.
The waves beside them danced; but they Out-did the sparkling waves in glee: A poet could not but be gay, In such a jocund company: I gazed—and gazed—but little thought What wealth the show to me had brought:
For oft, when on my couch I lie In vacant or in pensive mood, They flash upon that inward eye Which is the bliss of solitude; And then my heart with pleasure fills, And dances with the daffodils.
We have a problem. I see an idea. I ask Danny if he can make it. He says he can. So….. here we are again with another project and putting off other things we need to do.
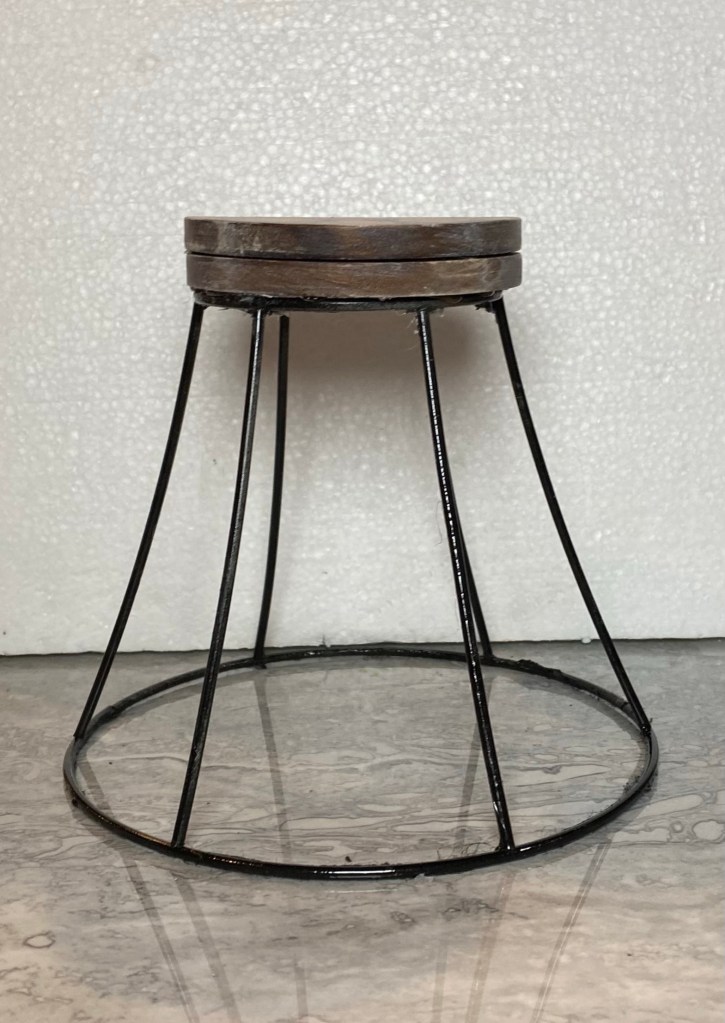
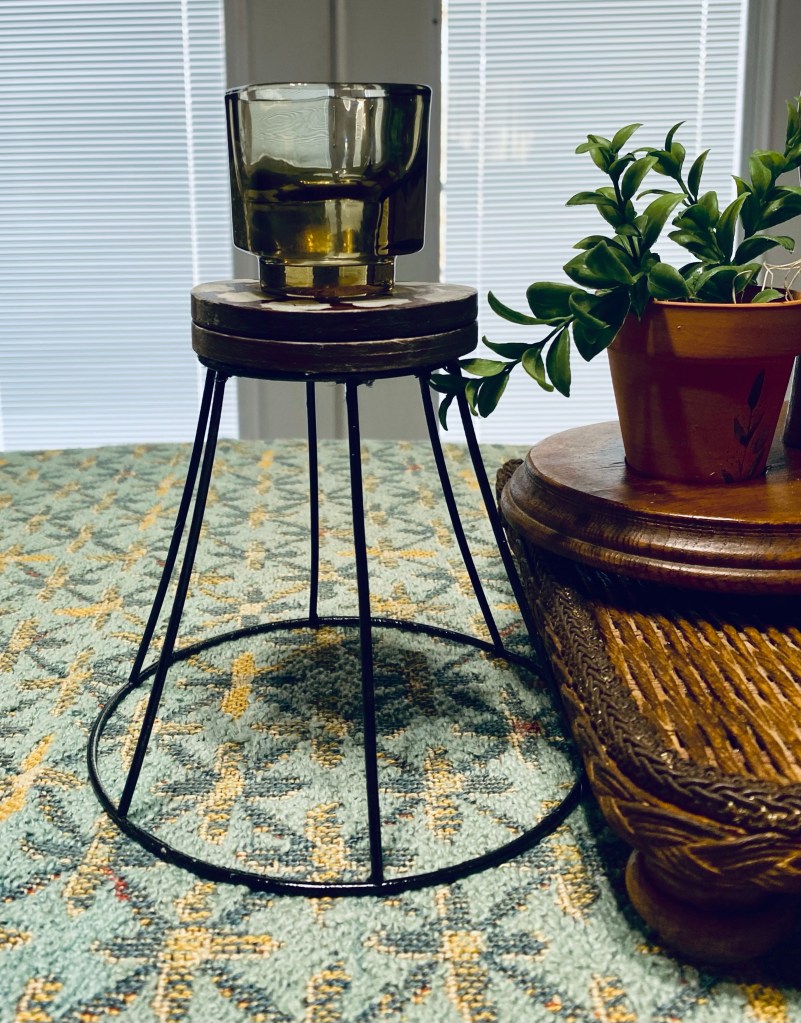
Would you believe these plant stands are all upcycled lampshades? Danny took off the fabric on each and spray painted the metal black.
We then bought 3 wood rounds. He sanded them and added a dowel on the bottom of each to fit down into the shades.
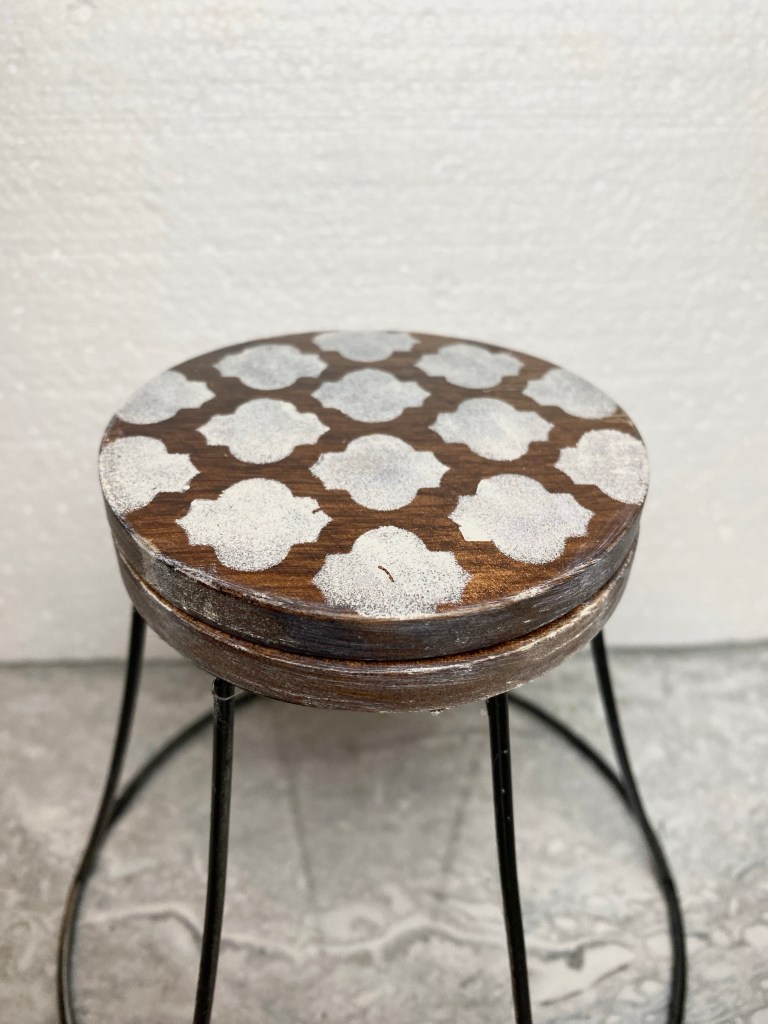
I used a driftwood weathering compound on each round that brings out the grain and weathers it a bit. I still need to seal them with a matte top coat.
They are lightweight but very sturdy. The cut crystal vase filled with glass beads and faux tulips is quite heavy.
These plant stands (minus the decor) will be going to The Gray Wall soon, so if you are local and wanting one or all for porch pickup, now’s your chance.
I had this piece of barn wood. My husband cut it into two pieces for me.
I painted them with a heavy dry brush of white pretty much where I was going to apply the transfers.
Then I applied the transfers.
It was a very rough surface and slow going. It wasn’t easy to apply but in the end it all applied and adhered perfectly. I sealed everything with Wise Owl Salve.
In hindsight, it would have helped to seal the painted area first, but I just took my time and at times actually used my finger underneath the plastic sheet to get over a particularly rough spot and it worked out fine.
#1 – I have a French Country look going on in this first thrifted find – a bird cage item which needed some repair and a metal basket. I painted a Dollar Tree peat pot and decoupaged with tissue paper.
The metal finial on the birdcage was just hot glued on and popped right off after I got it home. Not only was hot glue alone not good idea but there was hardly any surface area for gluing. I used E6000 and hot glue to attach a small wood round to the birdcage and I painted it white. Then I used E6000 and hot glue to attach the finial. I added jute around the wood round where I had glued it together. I also stuck my hot glue inside and upside down dropped some hot glue along the inside. It is on for good now.
The birch round came from a fallen branch and that cute bird I found in a thrift store. The faux flowers came with the birdcage.
I love putting this kind of thrifting together.
#2 – Next up is this awesome cutting board/serving board. I love cutting and charcuterie boards. When I found this wine bottle shaped bamboo cutting board, I knew immediately that I wanted to add a stencil to one side for decor purposes. The other side could still be used as a cutting board or both sides could be a specialty charcuterie tray that would make a beautiful cheese and fruit spread serving board.
I stenciled just a part of the board and then seasoned both sides with food safe Howard Cutting Board 0il.
Dimensions approx. 21″ x 7″ x 1/2”
#3 – I like thrifting, but I really like it when I find something just for me. I don’t have a lot of storage space in my pantry so things like cereal and crackers and chips, etc. always seem to end up on top of the refrigerator.
I found these awesome Harry and David copper colored metal baskets at Goodwill yesterday for $7.87 each. I knew they would go perfectly with the copper colored tin on the wall behind them. The one on the left holds snacks and the one on the right, cereal and crackers.
I saw them listed online anywhere from $14 – $46 each so these were a pretty good price. Yay!
#4 My final thrifted item project for the week came about because of the stalk of dried wheat I found at Goodwill. They had just put out several bunches of these. I only bought one bunch but now wish I had gotten more. I used several pieces in this beautiful tall vase a friend gave me. It will be going on the floor next to my fireplace. I do have enough left over for several future projects. so that’s good.
That’s all for now. I thrifted more things, but haven’t decided yet how I will use them. So keep checking back. I will be sharing when the inspiration comes.
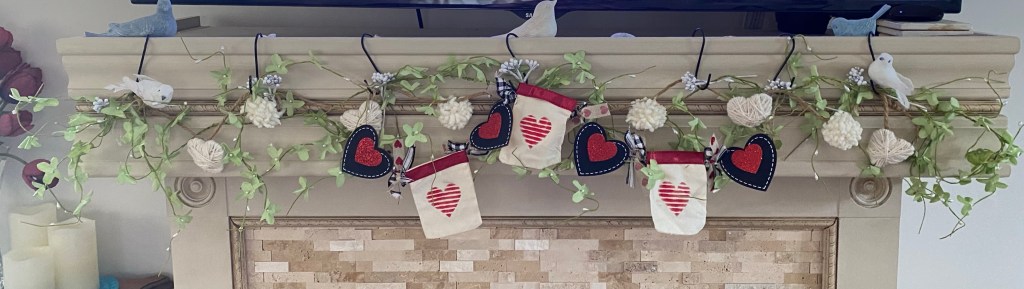
I took down my winter display this morning (I’m so over winter here in Missouri) and put up a Valentine one. I don’t decorate a lot for Valentine’s Day and since this is across from my recliner, I get to enjoy it quite a bit. 😁
I don’t remember where I got those faux tulips, but I love the color and the quality. I’ve had the cut glass vase forever. I made the wired rope heart earlier this week and love it so much I’m keeping it. Lol
The fireplace garland I made last year. I leave the greenery and the yarn hearts and pom pom garland up all year and just add to it each season.
I found the Valentine screensaver on YouTube. So many cool TV art screensavers on YouTube. Just do a search for TV art and you will find all kinds. Since my mantle is so close to my TV, I found the screensavers do a good job of decorating my mantle area.
Simple, but inviting. This screensaver plays relaxing music and several different images. So relaxing! But not for long. We are headed to a couple of our booths for some makeovers in a few minutes.
We’ve been working on an Art Deco dresser. Danny has taken it all apart and is rebuilding it. It is going to be beautiful! The detail is so pretty! But the drawer pulls are spectacular! They were so worn and discolored but still all in one piece. The red Bakelite inserts are in perfect shape and by themselves are valuable. I cleaned them, scrubbed them with Bar Keepers Friend, then waxed them and applied gold leaf RubnBuff. They are amazing!
The dresser had been painted in an earlier life. The only thing now is to decide what color to paint it. My thought right now is to paint it a bluish green color with our Missouri Limestone Paint Company chalk paint color we named “Something Blue”. Then highlight the details on the front, the trim on the back of the top, and the feet with gold leaf RubnBuff.
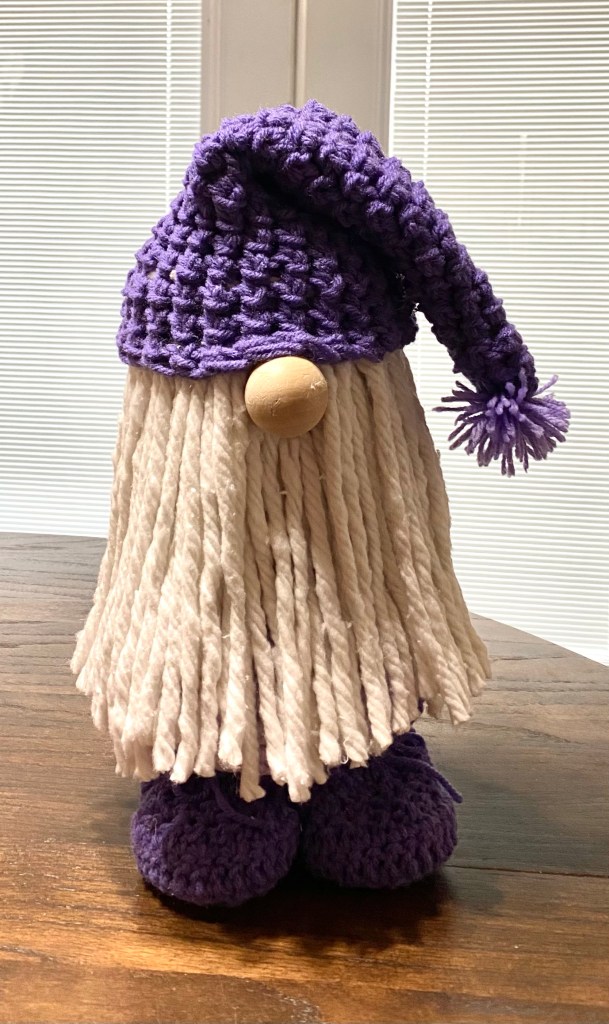
A friend saw the picture I posted of a gnome I made a couple of years ago and wanted one, do I crocheted a hat, body covering, and boots for it in her favorite color – purple. A Dollar Tree mop head became his beard.
I hot glued the body covering over a large water glass with lid from Dollar Tree. I made wood forms for his feet and stuck them in the crocheted boots I made and glued them to the lid of the glass, using hot glue and super glue. Then added more hot glue all around the wood.
I cut the strands off the mop head and applied two layers of them all around the edge of the glass bottom. Then hot glued the hat on and added a wood nose. He stands about 12” high.
Gnomes are still popular. Anytime I make one, it sells quickly. So the other day, a friend sent me a link for making one around a wooden ring with the hat being created with yarn around a piece of toilet paper holder. So, of course I had to make one. My ring was a little bigger so I improvised and added purple yarn around it and glued the hat to the ring. I added a little pink heart. I also glued the whole thing to a Dollar Tree stand up frame to display him.