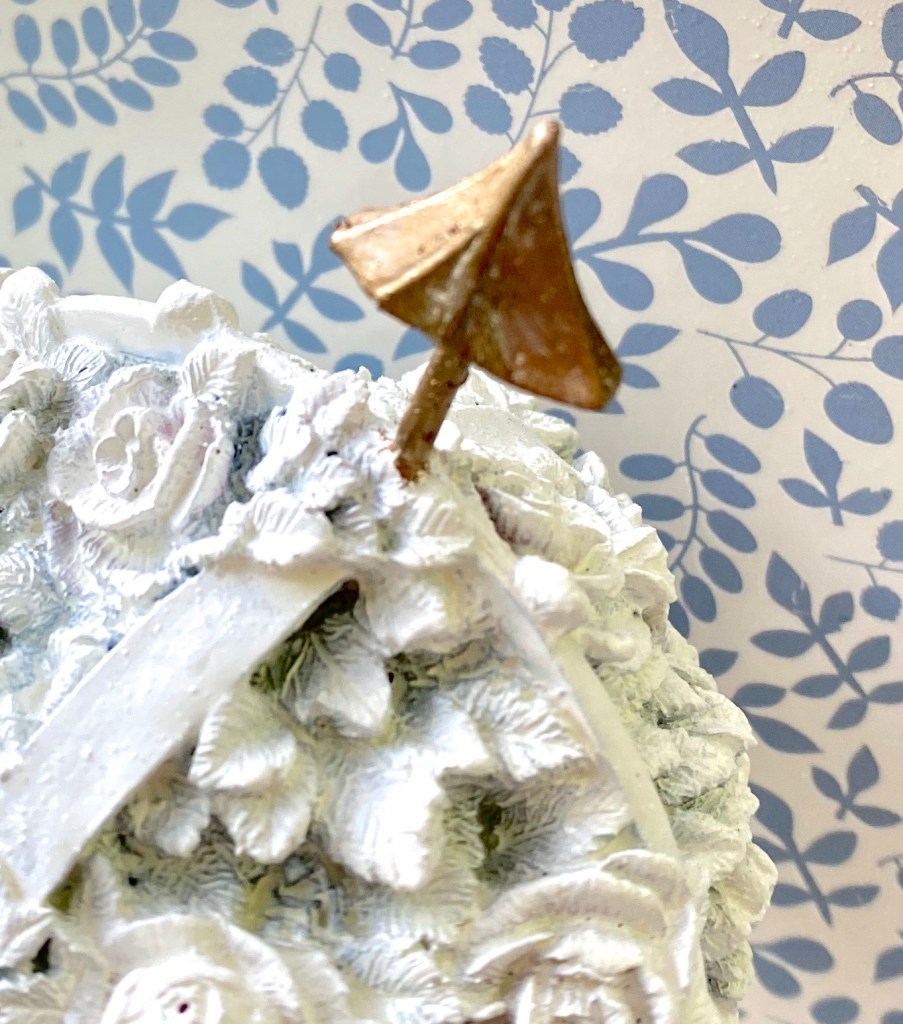
I have this bookend I thrifted some time ago. Originally the flower part was painted with various colors and outdated. I gave it a second life and painted the whole thing white.
Then today, I thought I would change it up a little more and give it a third life. I found this rub on transfer at Dollar Tree and applied it to the back. I also sprayed a little bit of metallic gold spray paint on a paper plate, then used a brush to apply it to the arrow.
What a difference!
If you haven’t fallen in love with rub on transfers yet, then try the ones at Dollar Tree to practice with before committing to the expensive ones if you are wanting to see how they work. I guarantee you will become addicted.
Meet Agatha, my yard angel. After making some other yard decor yesterday and seeing some cute angels in a garden group I’m in, I knew I had to have one. So I made her this morning…. all by myself …. with materials I had here and my husband’s power tools. Ok … his battery drill with a screwdriver bit. But “power tools” sounds better.
Head and neck: a thrifted cutting board Halo: a grapevine wreath from Dollar Tree Hair: bed springs he cut off an old mattress he found on trash pick up day awhile ago. It kept him busy for two days cutting them off. 👍🏻 Necklace: I made gold bells out of big pill bottles for a wreath I made at Christmas. Agatha wanted them for a necklace. Body: a wonderfully rustic shutter a friend gifted me. Arms: braces from an old chair Wings: leftover pieces from my son’s new deck. They were already triangles. Bag of flowers: tote bag from our trip to Amsterdam several years ago. Flowers from Dollar Tree. I will be changing that out to a watering can soon but I wanted a photo before the rain and the watering can is In my booth for sale right now. Lol
I gave her wings and arms a touch of paint to blend them in.
I screwed the pieces on (I even found that metal stuff with holes in it to attach the wings) and placed her on the hill by the pond.
Thrifting can be so much fun and when you decide what to do with your finds, it is even better.
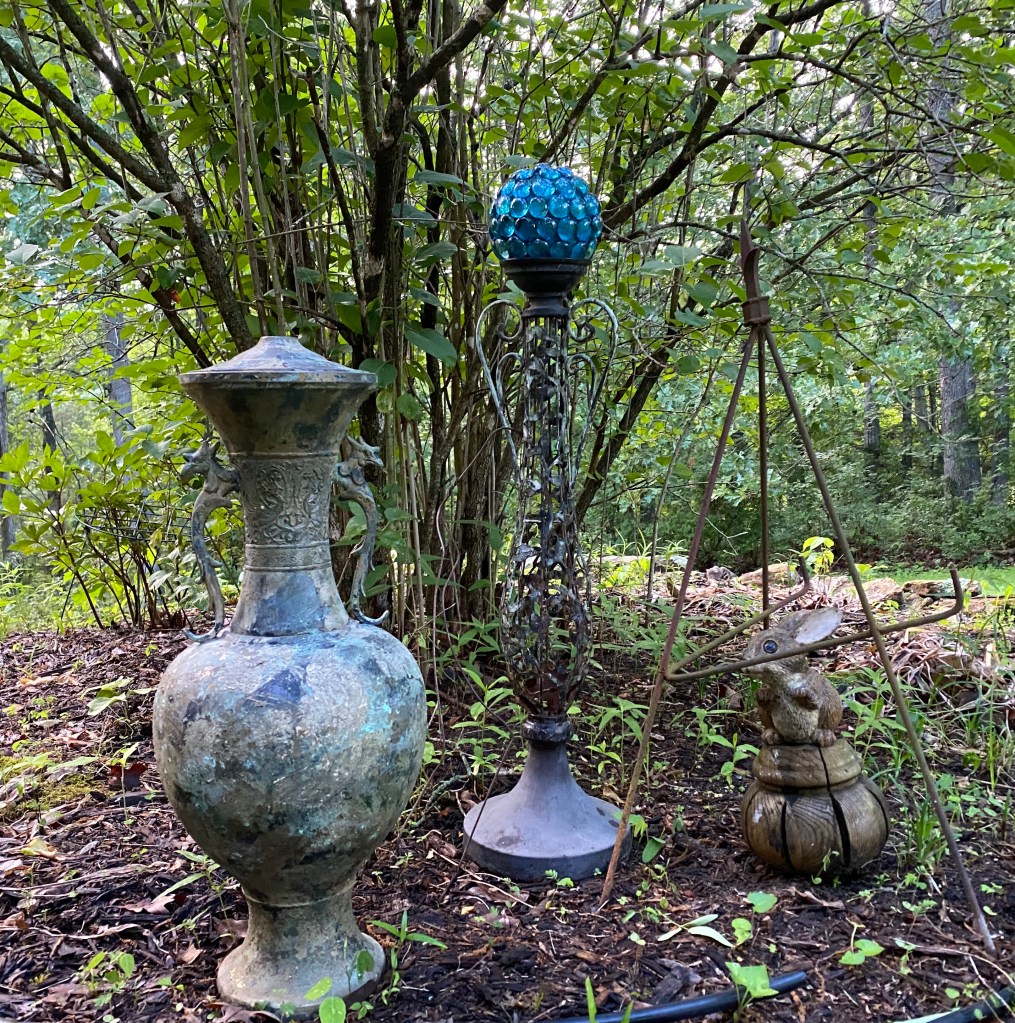
Yesterday we made a plant stand from this metal stand that was in a storage unit my husband bought a couple of years ago (just like on Storage Wars Lol)! I had looked at this stand the other day and remembered a metal basket a friend had given me. Sure enough…. it fit. So he put the basket on the stand and secured it, then spray painted the base black. Voila`! Instant plant stand!
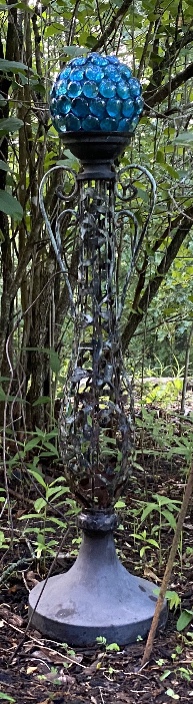
I have no idea what it was originally, but there were two of them. One is in our flower bed holding a blue gazing ball I made last year.
Thus cool urn thing was in the storage unit, too. The patina on that urn after being in the weather for a year! ❤️
When I posted this photo in one of my groups, someone asked me if the metal piece on the right was an easel. I hadn’t thought of that but I believe it is now it was pointed out. They suggested adding a frame and centering it over a pretty plant, etc. Now I’m going to have to try that!
I had to borrow my Portulaca (It looks so good right now and has really grown) off my big plant stand to get a photo, but I’m thinking of planting just some ivy so it will trail down the sides. We still have some coming up around the deck we can’t get rid of. Surely I won’t kill it.
Anyway…..it is so much fun making something out of nothing.
I’ve been seeing a lot of the “boho” (bohemian) style lately! As I looked into it more, I have come to the conclusion that I really like the contemporary boho style, also known as modern boho or boho chic. I love the eclectic feel of using many different styles together. Although my Beatles themed guest room has that vintage bohemian look that I love.
I think I have been leaning toward the contemporary (modern, chic) bohemian style for awhile now with my love of natural colors, wood, elements of nature, and color. I just didn’t know it had a name.
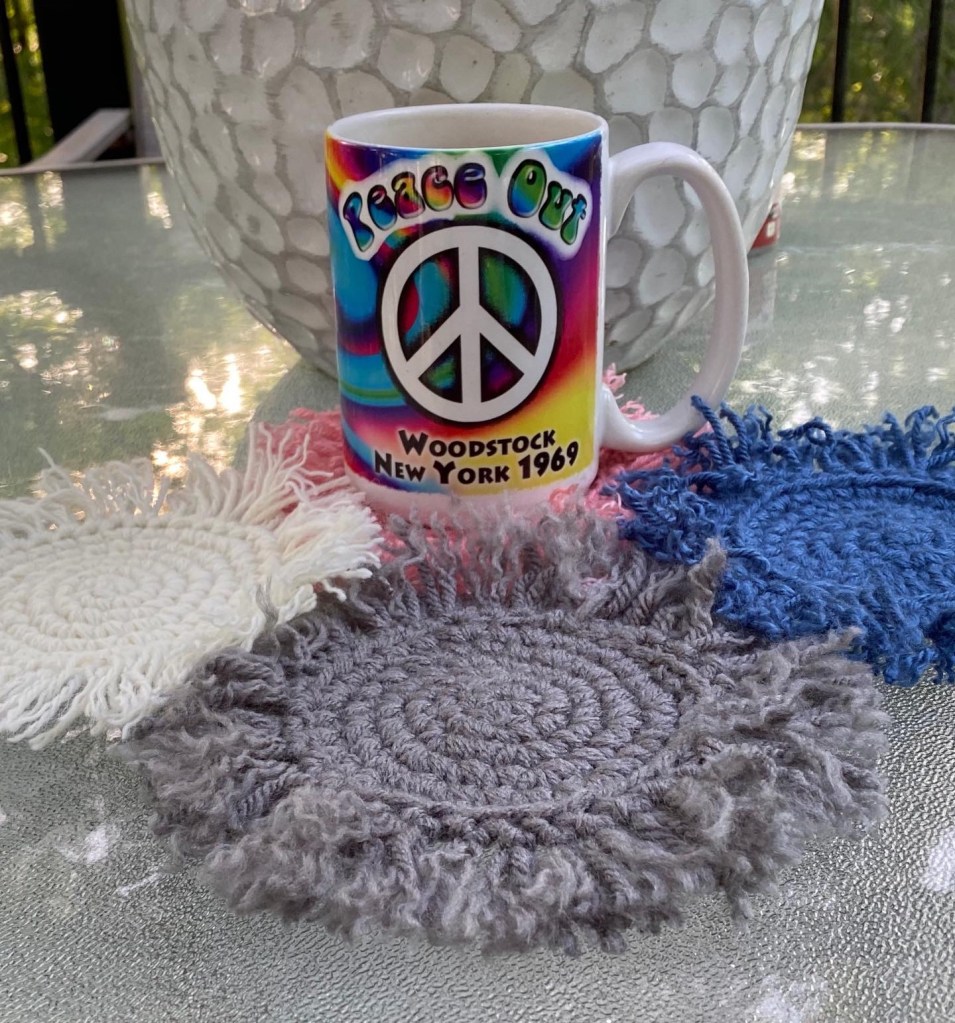
As a result of my research, I’m beginning to create some modern boho style projects in the coming days. I love that macrame and crochet is trending so I’m definitely going to making some coasters for sure.
This lady also explains boho really well. I think it is becoming very popular.
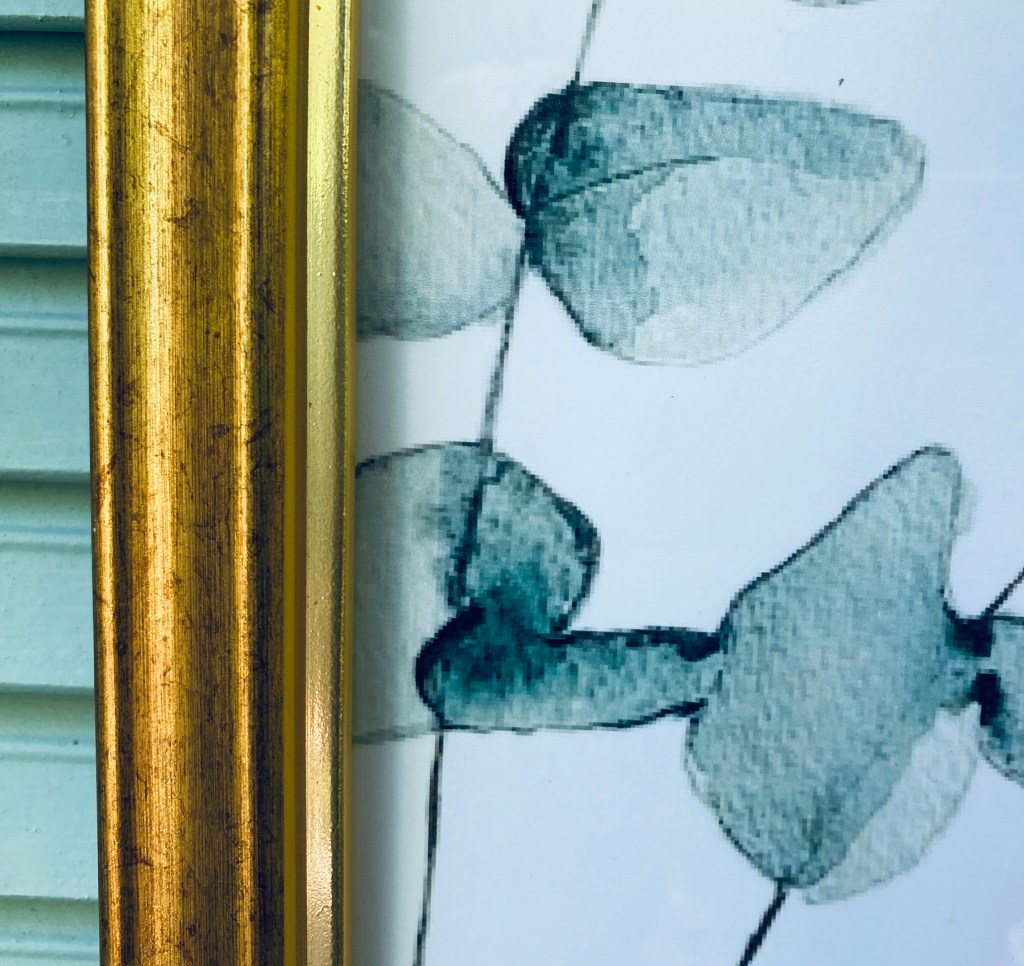
She gives away a free 8×10 print so I printed it out this morning and put it in a gold frame. Simple to do.
I printed her 8×10 botanical watercolor image and put it in a gold metallic frame. A simple project that will look great with any style, but especially with the modern boho (bohemian) Look I’m going for.
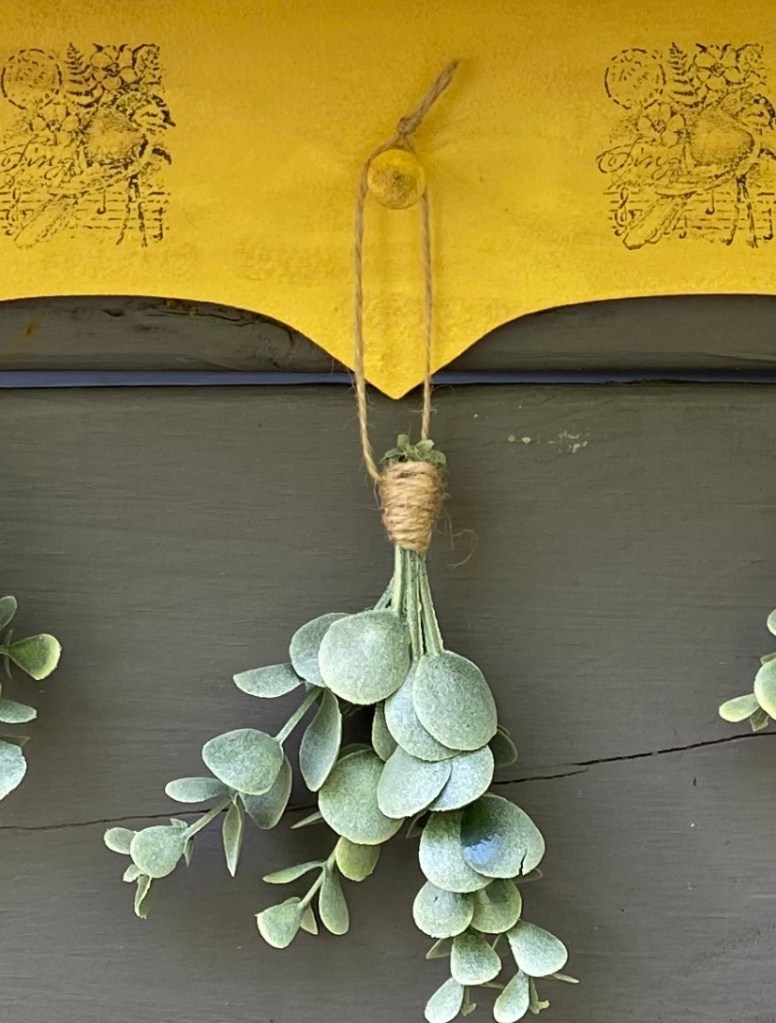
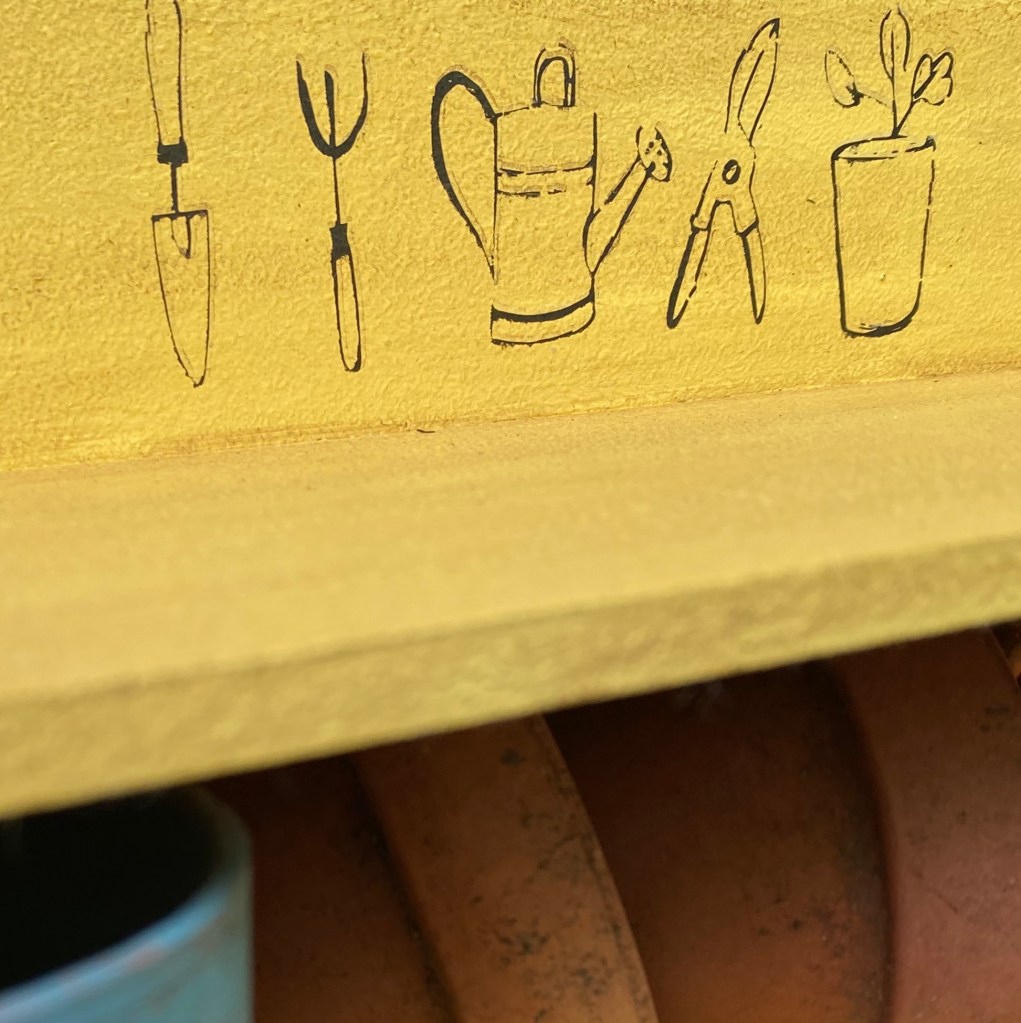
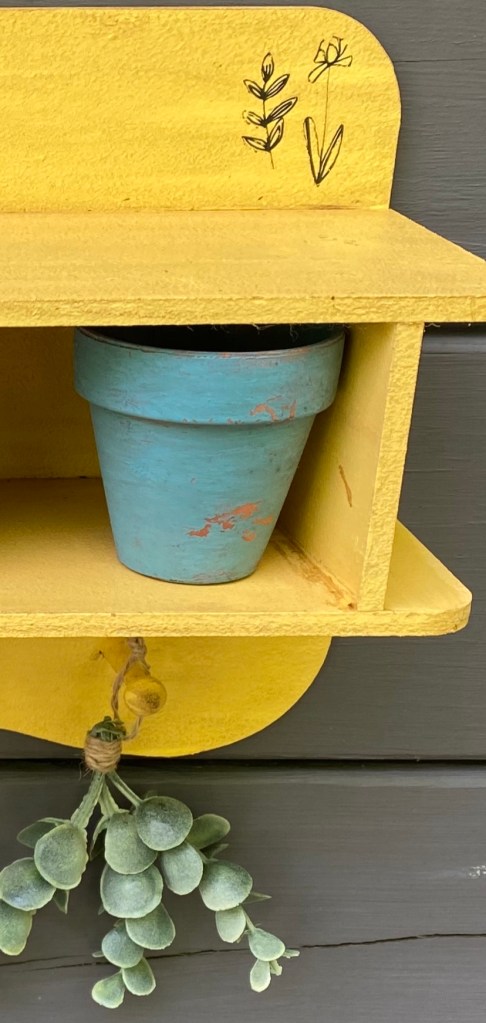
A garden shelf display that shouts “SUMMER”! This could easily fit in boho decor or any style.
Dimensions: 15” wide x 15” high (with greenery) x 5” deep
Transfers and bird stamps were applied to this cute yellow shelf. Stain was applied for a distressed vintage look. Small, well worn clay pots fit inside the 12” wide 3” high and 4” deep inside shelf. Faux greenery hangs from the pegs.
I had started painting these 3 storage cases with metal trim some time ago but was not sure how I wanted to finish them. When I realized they would make the perfect Boho display, I knew what to do.
I painted them lightly with black and distressed them. The top I opened and filled with greenery, a beautiful green silk sunflower and a cloche I made earlier from a light fixture. I added some boho looking transfers and put a coral rose inside. I also added a crocheted coaster for color.
As I was crocheting boho coasters, I thought making a bigger one would look pretty cool as a wall hanging. So, that’s what I did.
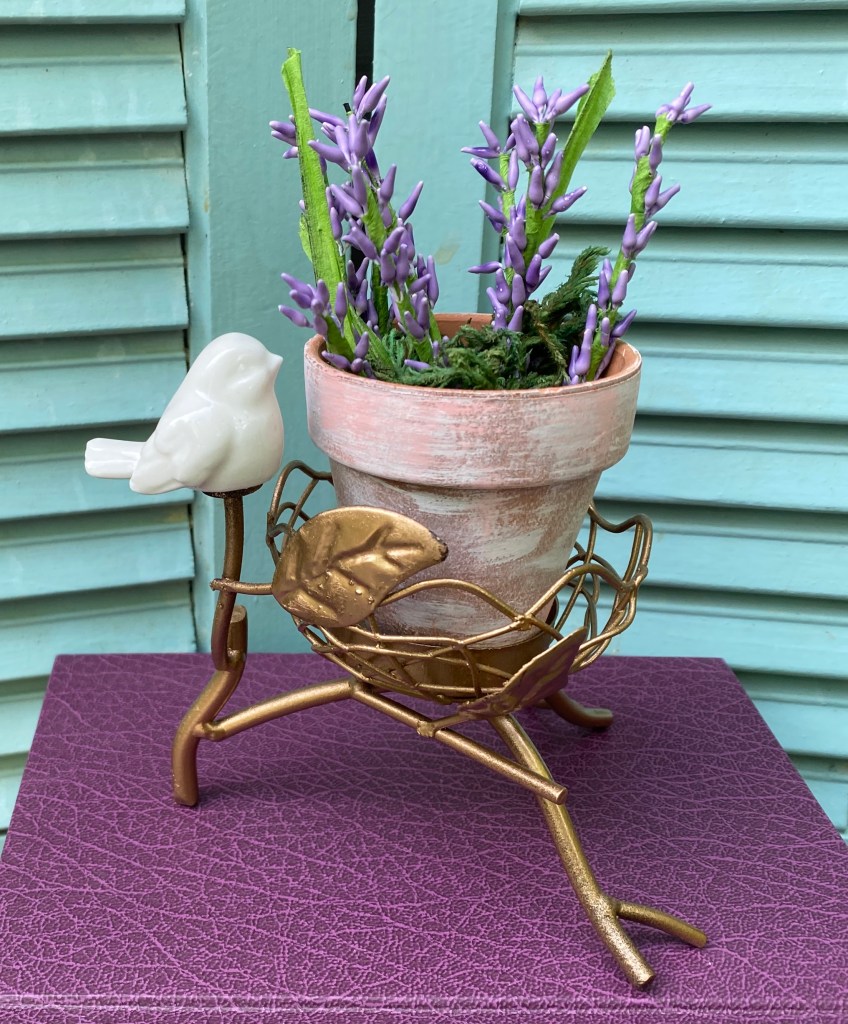
I had also thrifted a little votive holder with a tiny ceramic bird. Keeping in mind the boho look likes metallics, I spray painted the base a metallic gold and added a little clay pot with faux lavender.
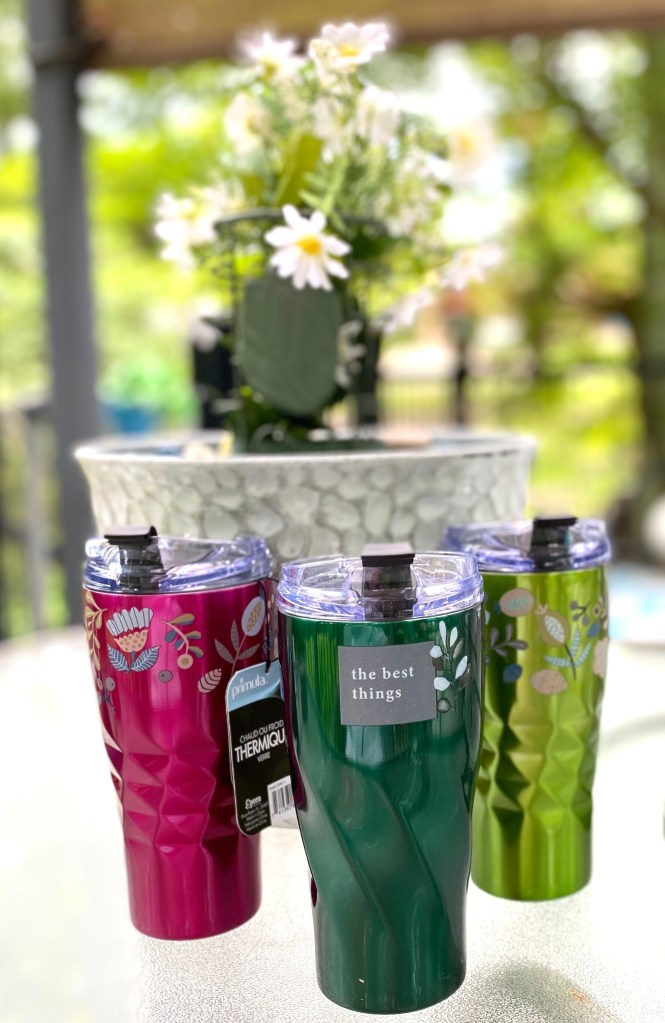
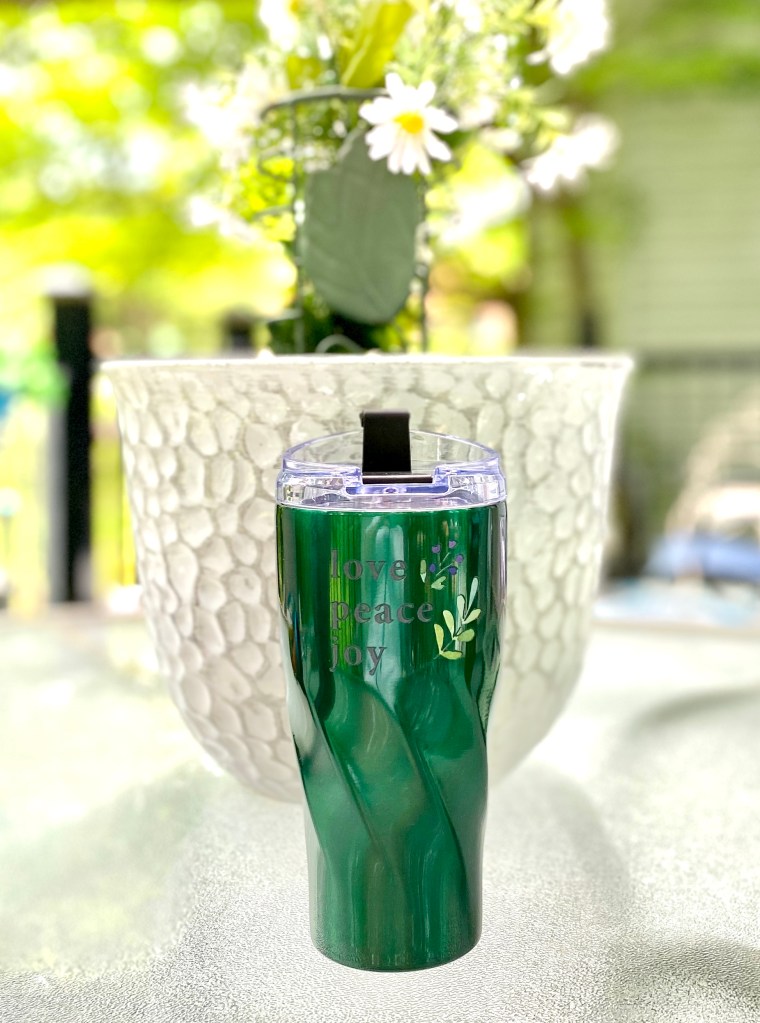
Yep, I’m obsessed with boho. I have 3 new Primula hot/cold tumblers. I had to boho them up a little with some transfers from Dollar Tree (sealed for protection). After all they are metallic and colorful!
That’s all for now. I’m sure I will have more coming up.
We had an old and chippy shutter. Danny cut it in half and sanded most of the old paint off the front so that what was left was a combination of natural and some old white paint. The back was painted brown and chipping off so he removed the big chippy pieces but let it as is.
Then, we had this iron vase holder. I learned it was from Southern Living At Home. He centered it and screwed it to the shutter.
We also had a tall wide mouth canning jar and a Bedspring. I put faux flowers and foliage into the Bedspring with the wider part on top and then placed it in the jar with the narrow part at the bottom. The flowers fit snugly into the spring and will not blow or fall out and the spring fit perfectly into the jar.
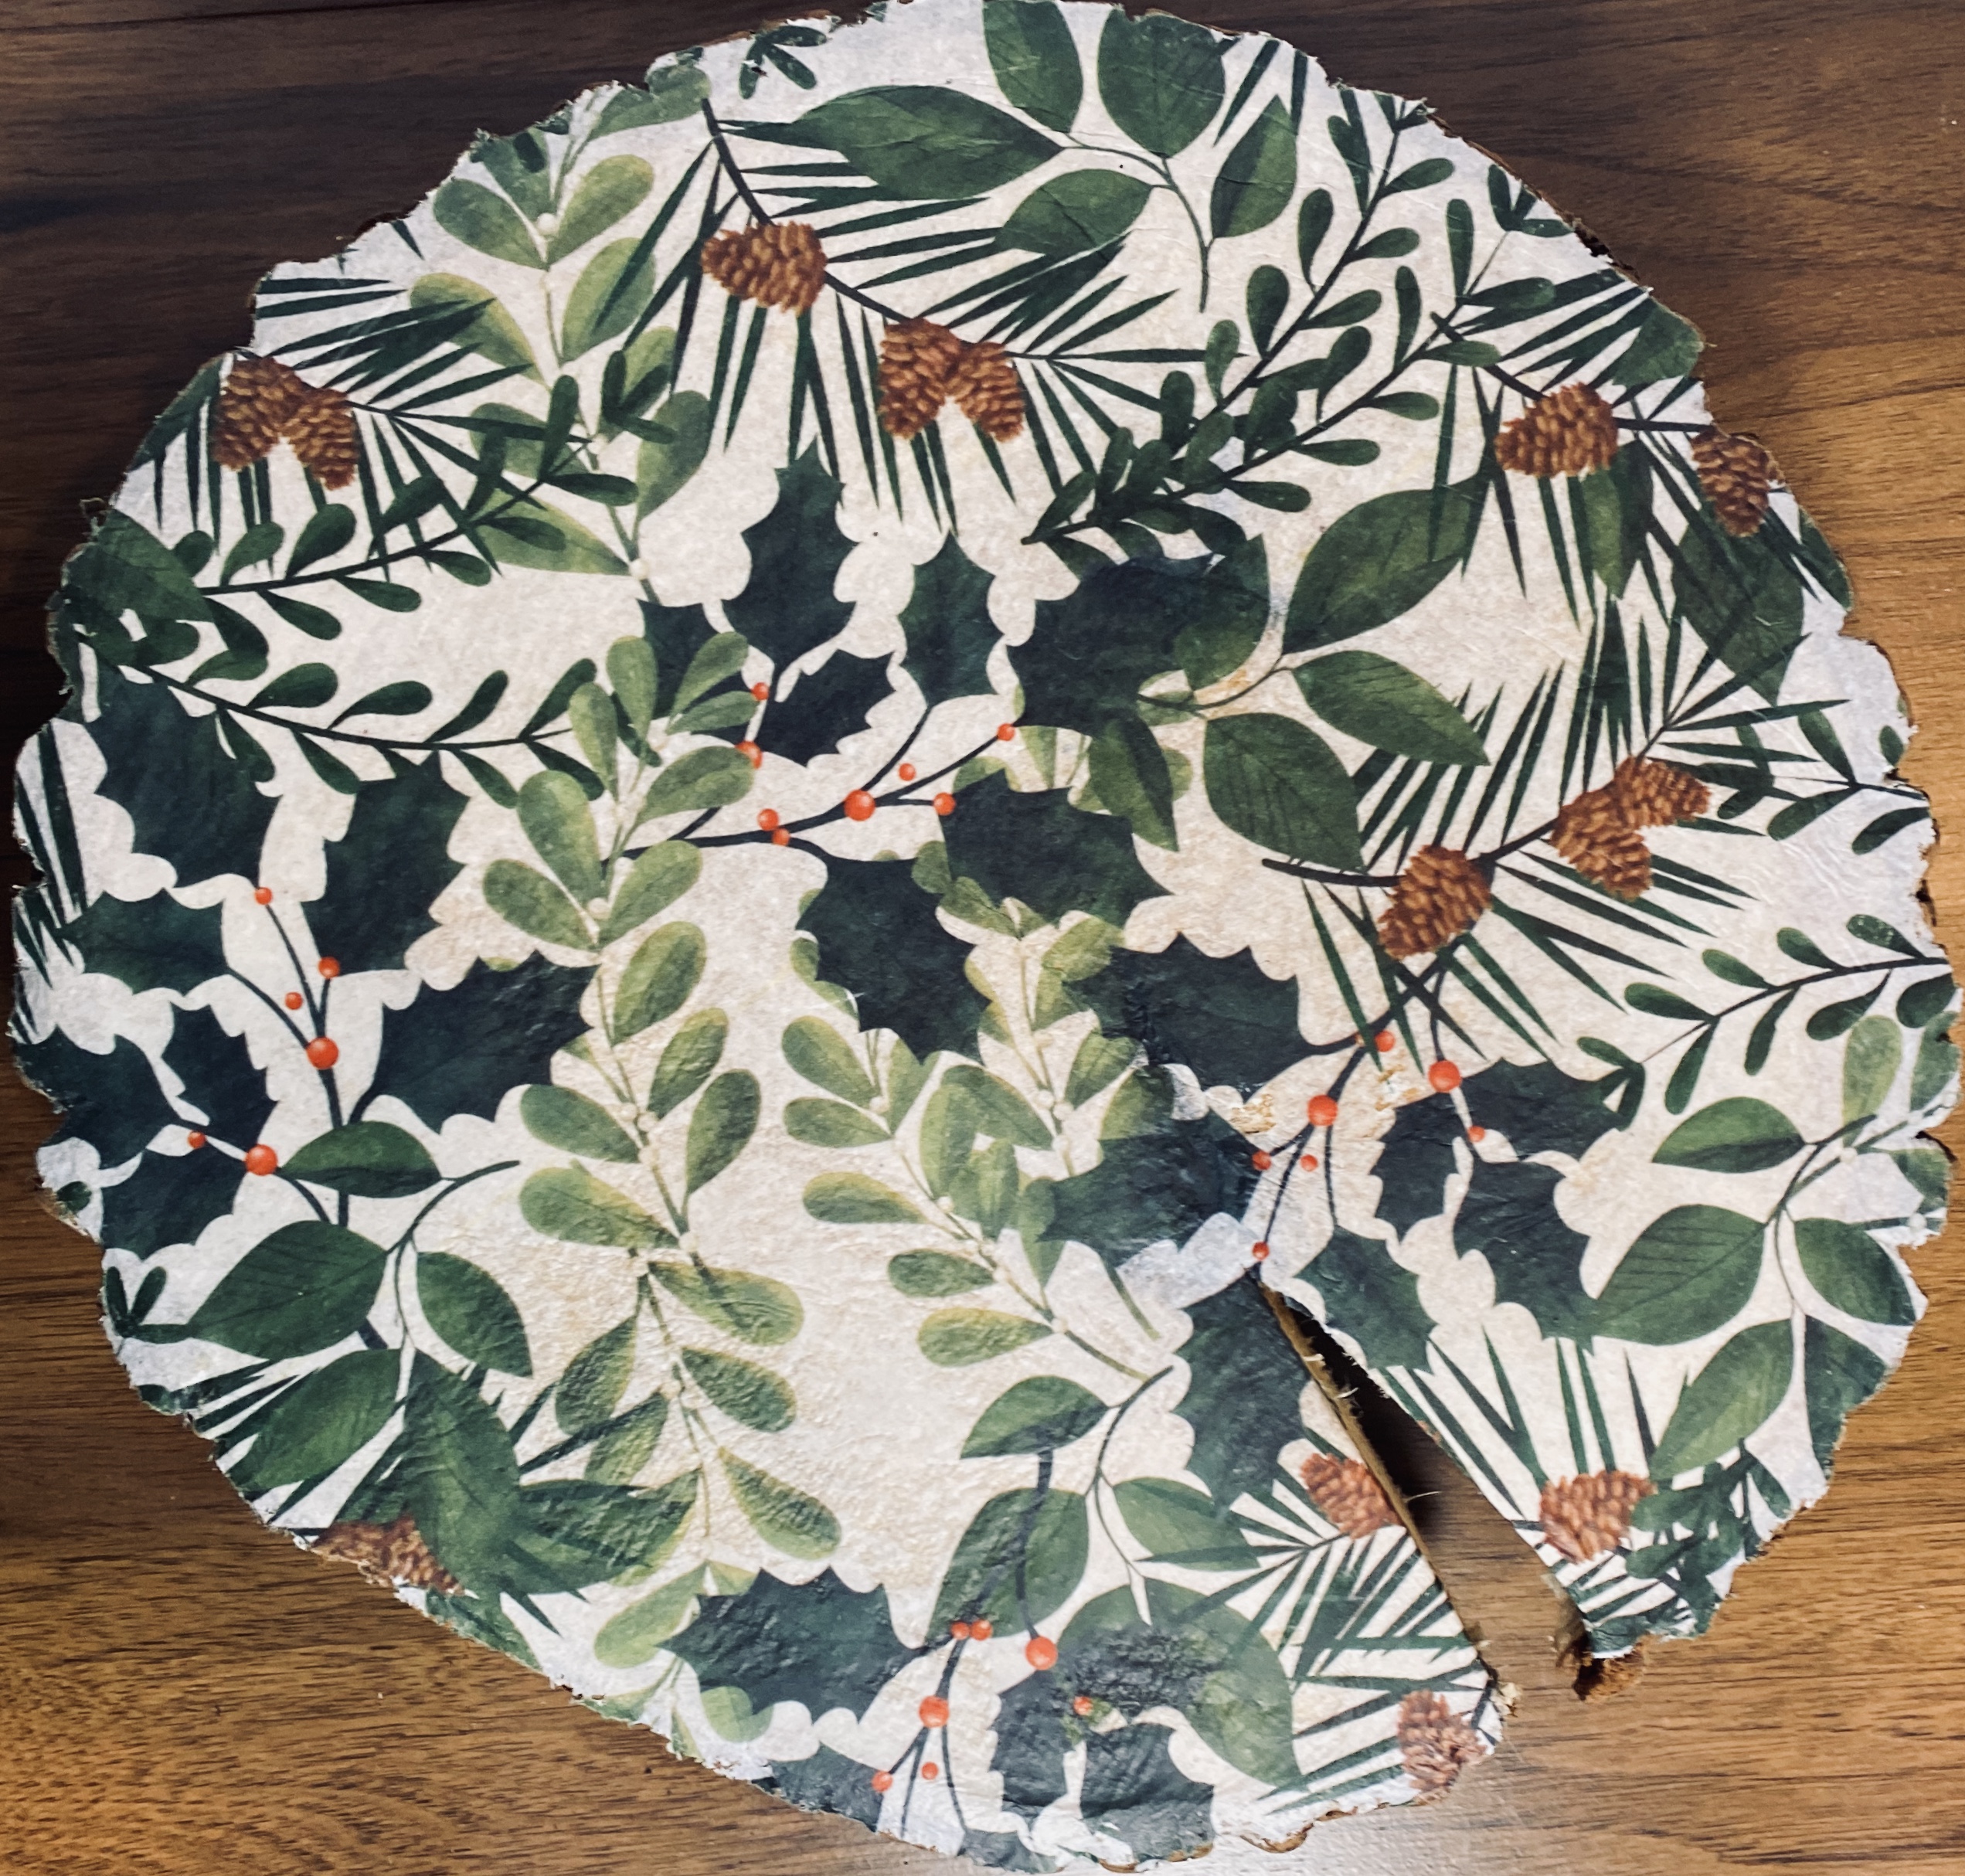
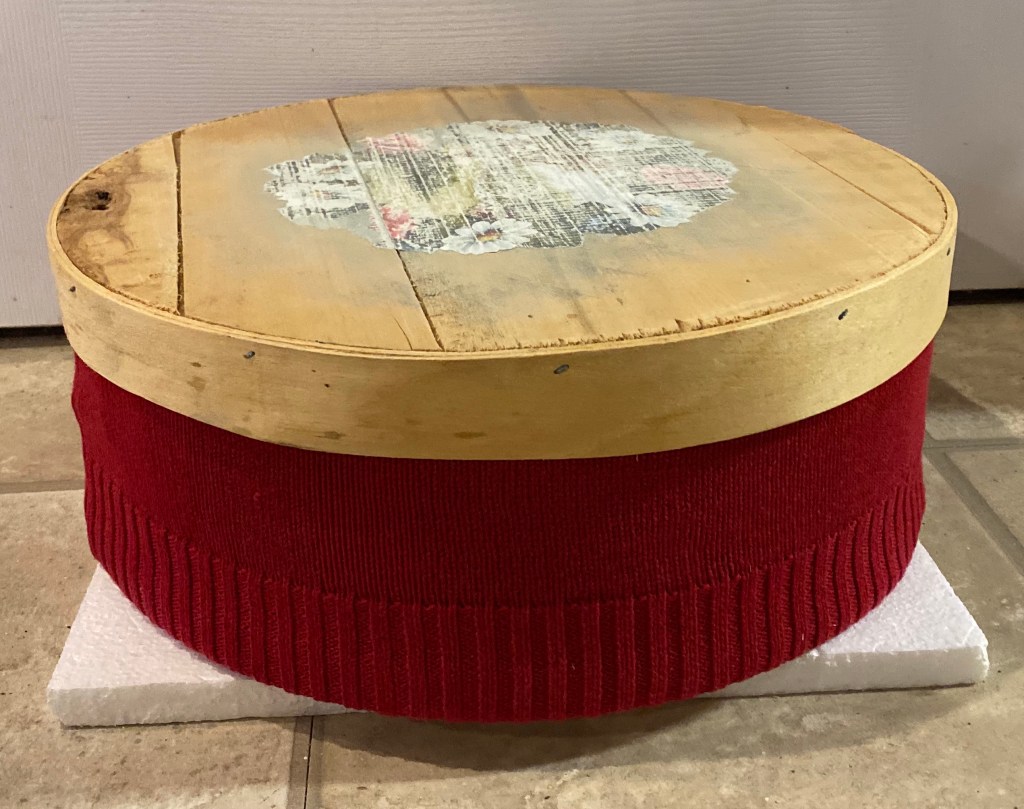
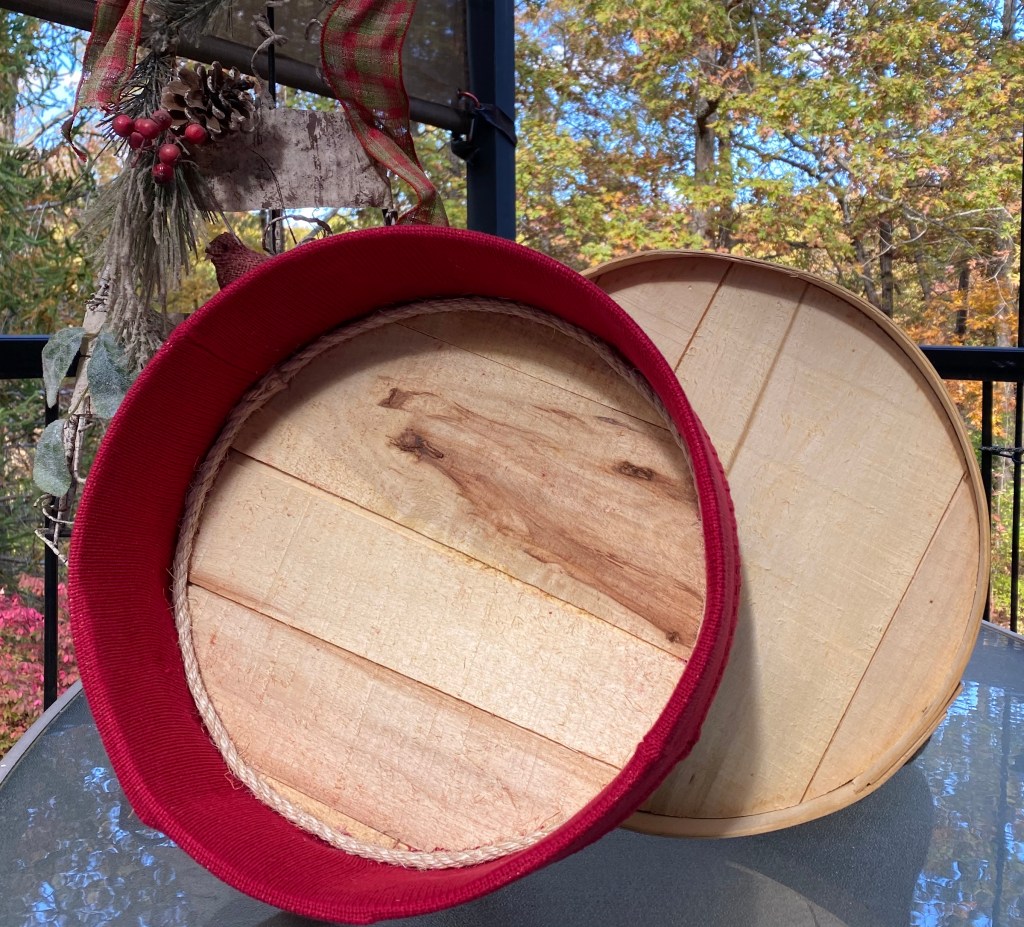
I found this cheese box (15” round x 5 1/2” tall) when thrifting this summer while on vacation. I knew the glued on flowers had to go, but hadn’t decided how I was going to upcycle it….until today.
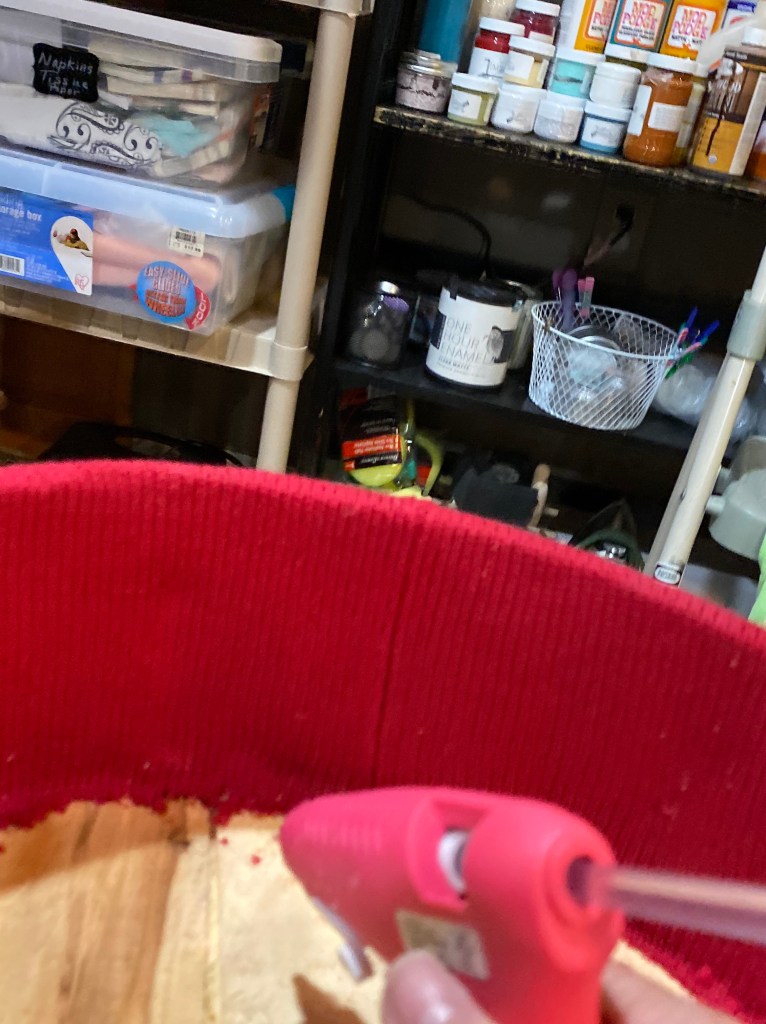
It’s getting cold out and that cheese box needed a sweater. I just happened to have a new red sweater that came in an Ugly Sweater kit I thrifted last year.
The first thing I did was sand off those flowers as much as I could and then I cut the sweater in half about 4” below the armpits. Then I covered the outside of the box and down the inside. The lid still fits fine around the sweater.
I glued the seams first, inside, outside, and underneath. Then I glued all around, securing the sweater to the box.
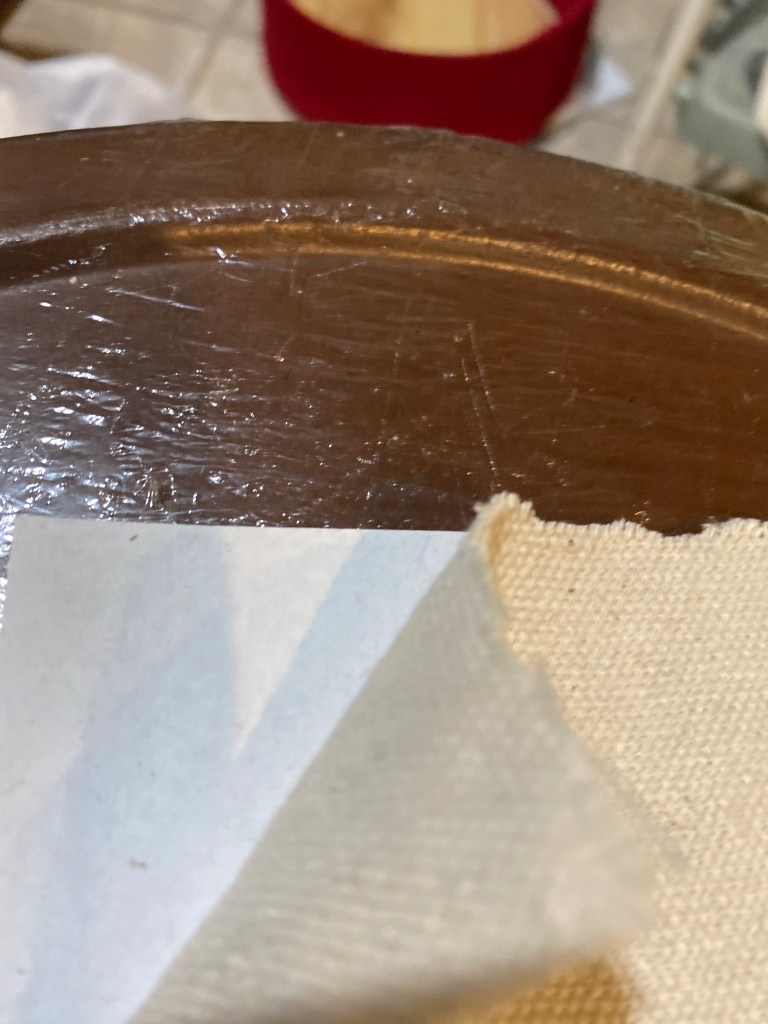
I was left with a lot of fuzz, which was hard to remove on that rough wood. I didn’t want to get out a vacuum, so I used rolled up masking tape to pick it up. It worked like a charm.
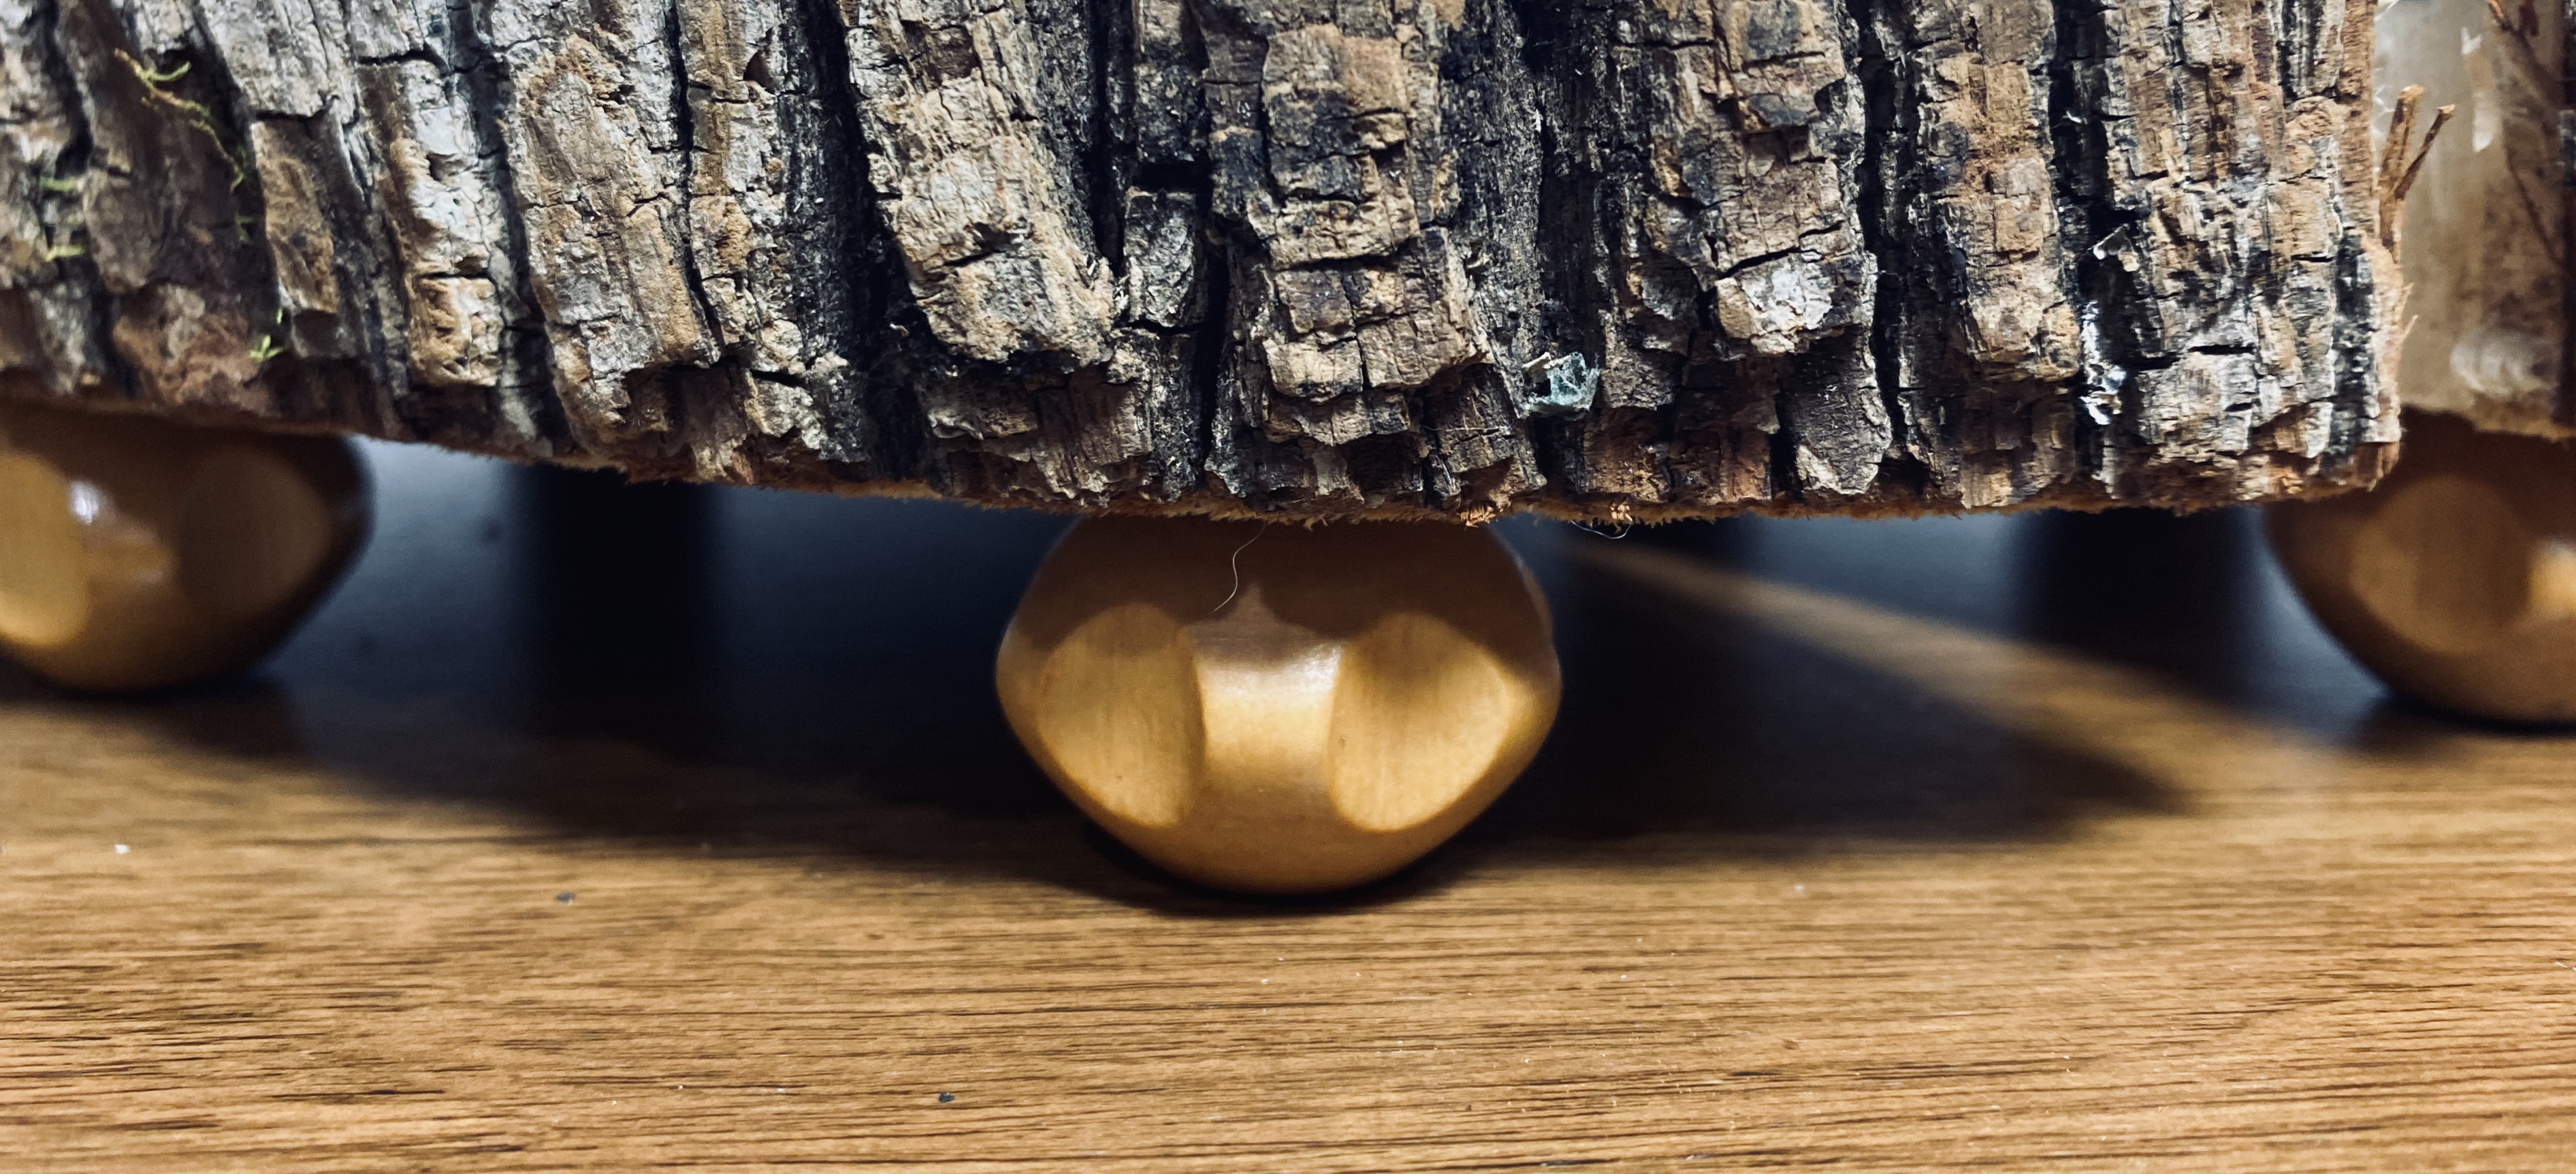
Next, I finished the rough edges by gluing sisal rope around the sides and bottom.
And then came the image I downloaded and adapted to cover up the old flowers I had mostly sanded away. This is a technique I’ve used several times now. I found this image, free on The Graphics Fairy Site. I had to do several things to get it the way I wanted, though. First, I had to make the image transparent and I cut it into a round shape using the free app Pro Knockout. But I wanted it to have a more vintage look so I uploaded it to the free website Lunapic and saved it as a pen drawing.
All of this is free, so I’m sharing my image I created here. Please credit The Graphics Fairy and this blog post if you do use it. Thanks.
Pen drawing created in Lunapic.com from a free image found on The Graphics Fairy.
I then inserted the image into a Google Document, enlarged it to fit the paper, and saved it as a pdf file. Next, I used a product called Pixi Spray to temporary adhere a piece of drop cloth to a sheet of printer paper. I trimmed the drop cloth to the size of the paper, then printed it on my personal black and white laser printer.
I am always blown away how cool this look is on drop cloth. I cut around the circle and adhered the image to the box using Elmer’s Craft Bond.
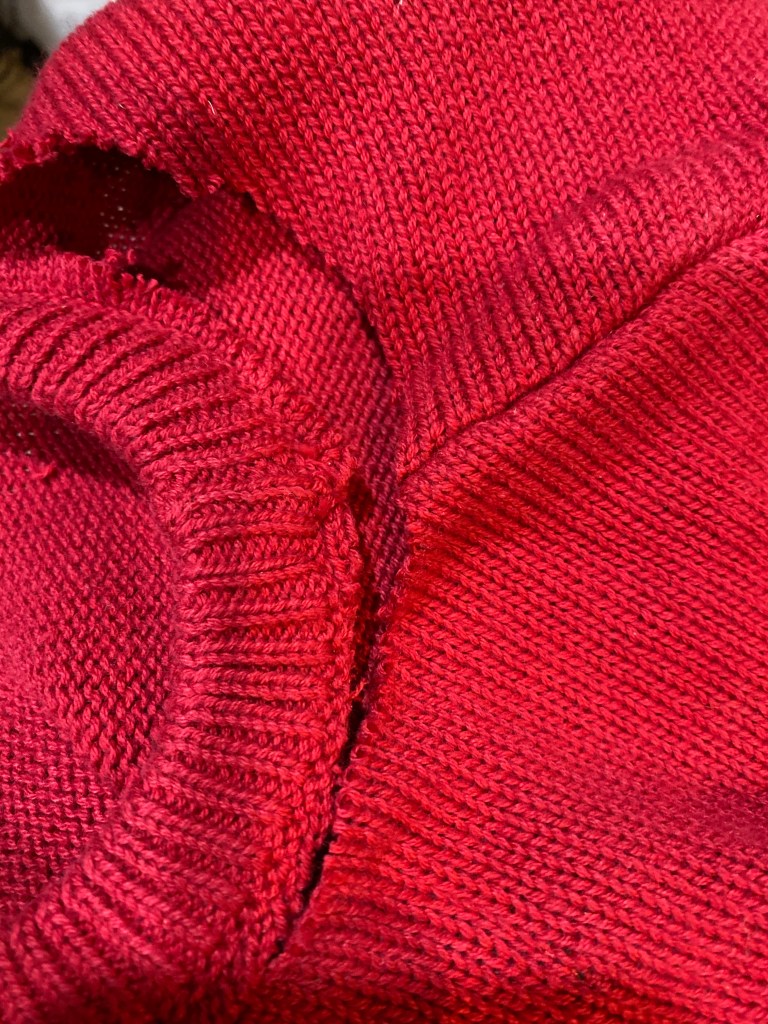
I cut the neck off and used what I learned from the wise words of all mothers, “Don’t pull on the neck of your sweater, you will stretch it out!” They are right! I pulled and pulled and stretched it enough so that it would fit around my image and then hot glued it in place. It is on there forever. 🙂 And while I was at it, I used a red paint pen and colored in the berries on his hat for just a bit of color.
This finished my cheese box. I posted it for sale on my Facebook page and it sold almost immediately!
Now, what to do with the sweater arms?? I’m thinking my early morning project will be dressing a few Oui yogurt jars. 🙂
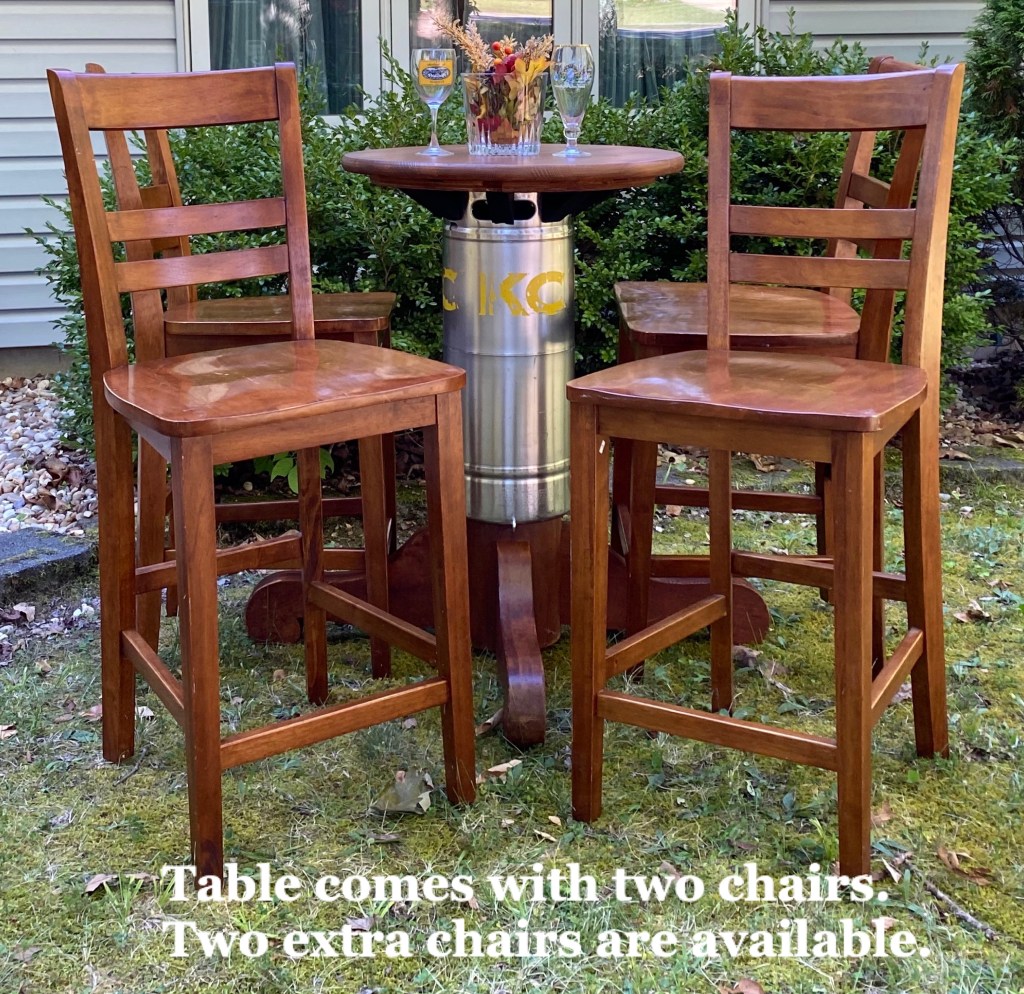
Danny made a pub table out of an old beer keg. He’s worked on this project off and on for awhile and today it is complete. The round wood top is new. It has been stained and has 5 coats of sealer on it. The keg, leg base and chairs are used and have character marks to show their age, just like in a real pub. 🙂.
The pub table and 2 chair set is $225.00. Two additional chairs are available for $25 each. Local pickup only.
The table is 35” high and the top is a 24” round. The 4 spokes of the leg base make it 36” round.
The bar chair seats are 24” high.
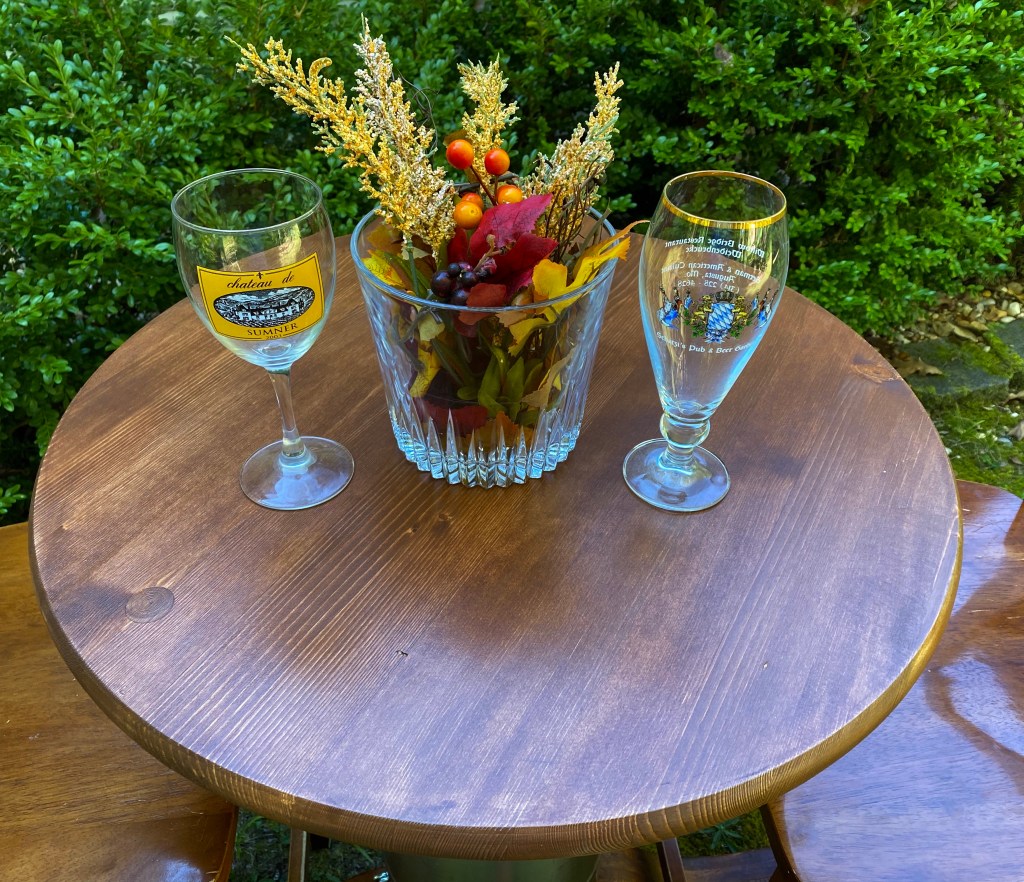
It’s not every pub table that has a giant shot glass for a centerpiece. This one does. We will include the shot glass centerpiece for free. 🙂 Wine and beer glasses are not included.
For some reason I’m on a roll with crafting….oh wait…. I know why. I should be cleaning.
It’s my neighbor’s fault. They are moving and not wanting to take some things with them, so they have been gifting and selling things to us. My hallway is full of their treasures.
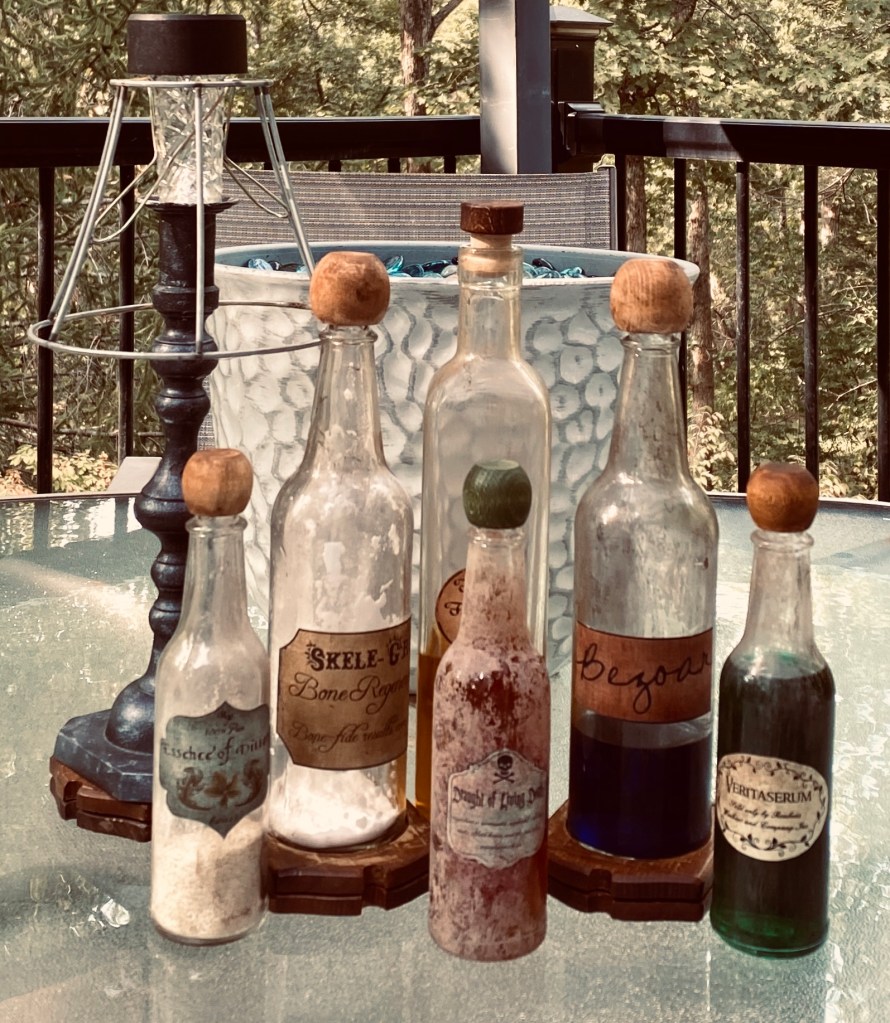
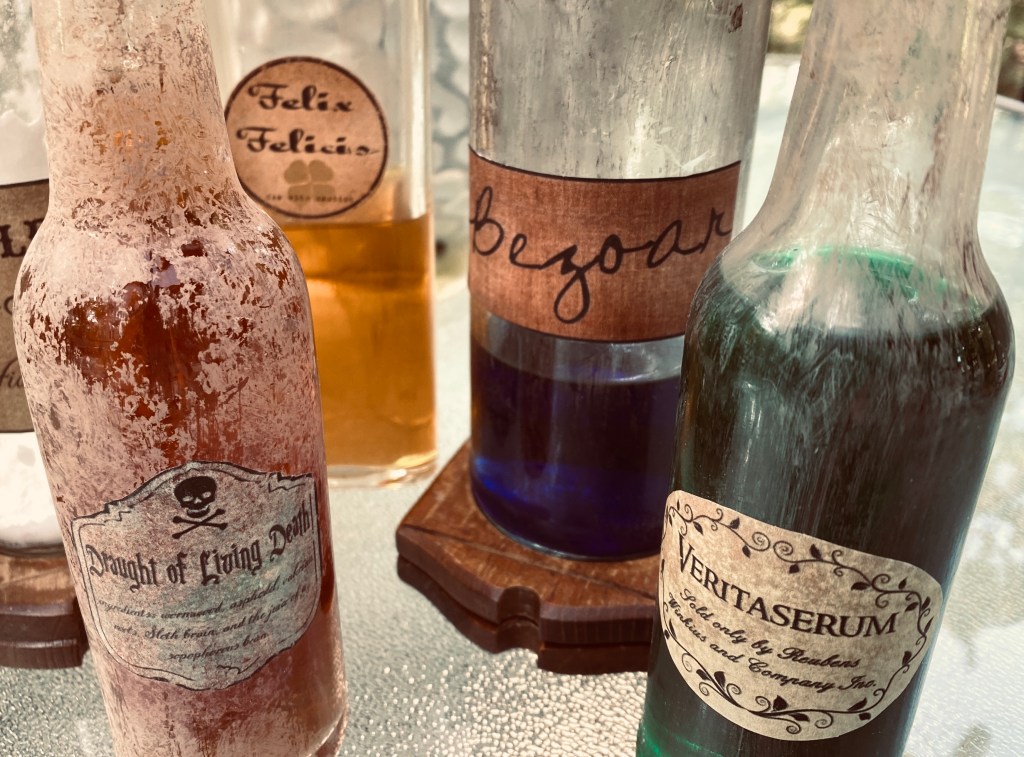
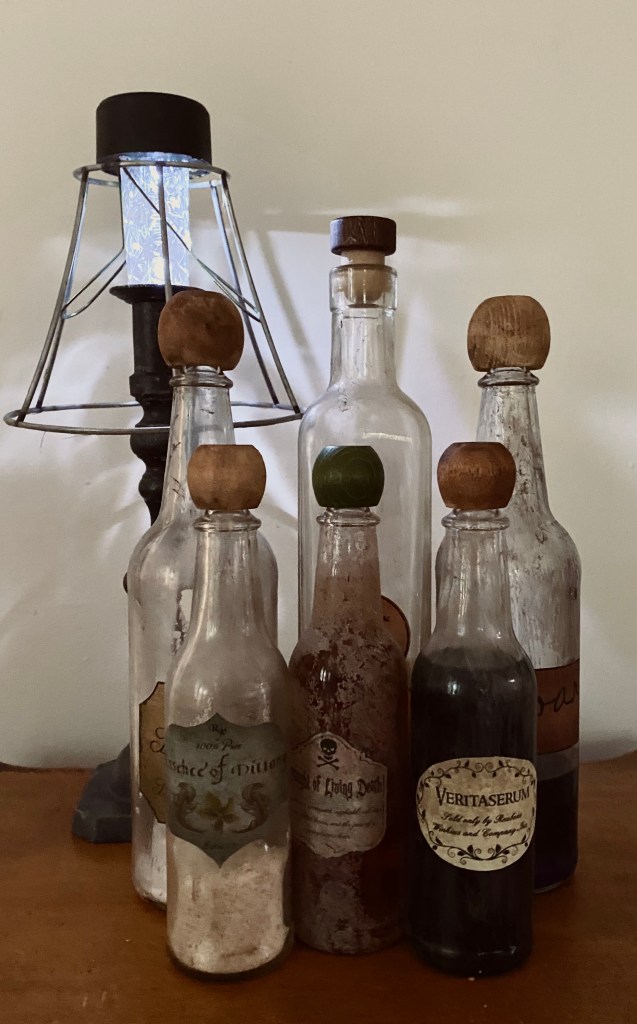
Today, I am clearing a small amount out by making these cool potion bottles. Believe me I have probably another dozen bottle. I was inspired by some I saw on Pinterest. They even had printable labels to download. I saved that post and pretty much followed the tutorial there. https://overthebigmoon.com/halloween-decor-harry-potter-potion-bottles-free-printable/
And then….my neighbors came bearing a gift of about a dozen or so hot sauce bottles they saved. They really like this hot sauce. I knew right away those would make awesome potion bottles. So, of course, I had to make one. Just one…to see how it would look.
I loved how it turned out so much, I knew I had to make a few more. So, I did. I also used one of the other bottles they had given me. I think it might have been an olive Oil jar.
Here’s my first set of Harry Potter-Style Potions. I used various colors of our Missouri Limestone Paint Company chalk-style paint to get the look of dirty glass. I filled them with colored water, weak tea, Cream of Wheat, and Baking Soda. 🙂 One stopper was already green. The others I stained darker.
This set is available for porch pickup now or will be in one of my booths closer to Halloween.
Today’s early morning project: I went shopping in my basement, then started creating.
You won’t believe it but this sweet little ceramic vase with the silicone base started out in life as some kind of egg cooker. (I still have the lid to save for another project sometime.) 😳 You never know what you will find thrifting. 😁 I filled it with some fall flowers and a fall pick. So pretty now.
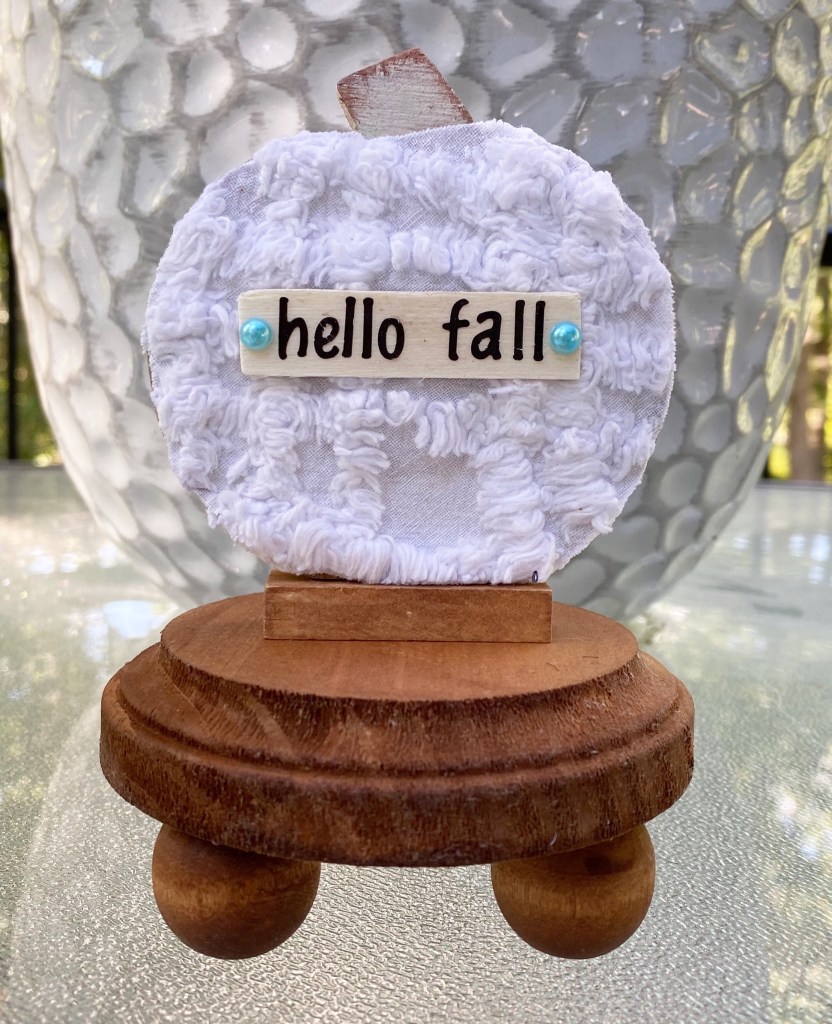
Then I found a little riser I had made but hadn’t used yet. I stained it and I couldn’t believe how perfectly the vase fit the top of the riser.
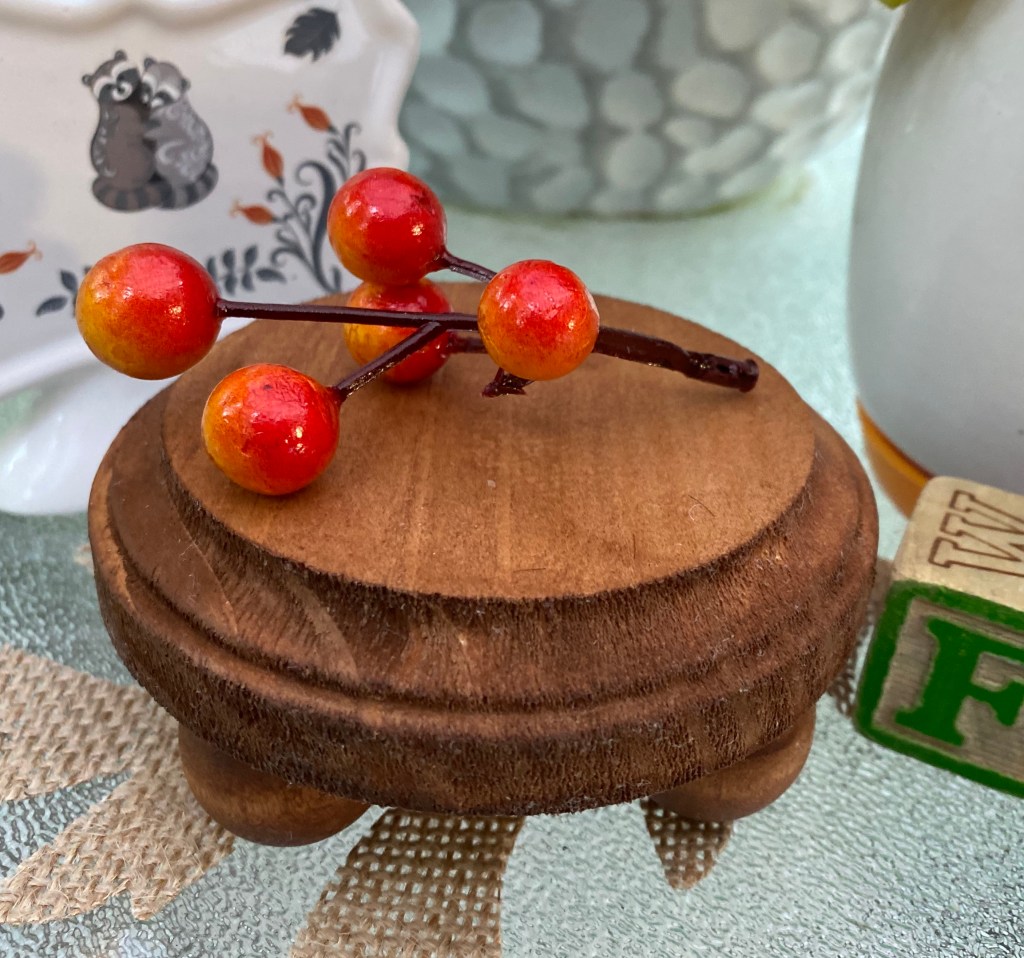
I also searched the stash of vintage blocks I had and glued these together for a fall decor.
And the final project I actually did last night. This was a little Dollar Tree ceramic blank place card stand. I added these sweet little Dollar Tree woodland transfers. The colors and the woodland animals work well for fall.
Update: A couple more projects I finished today.
All will be in our outside booth tomorrow at the 3rd Saturday Downtown Flea Market somewhere in the area around The Gray Wall. Be sure to stop by!