I’ve been busy creating Fall decor, both for my booth and for me.
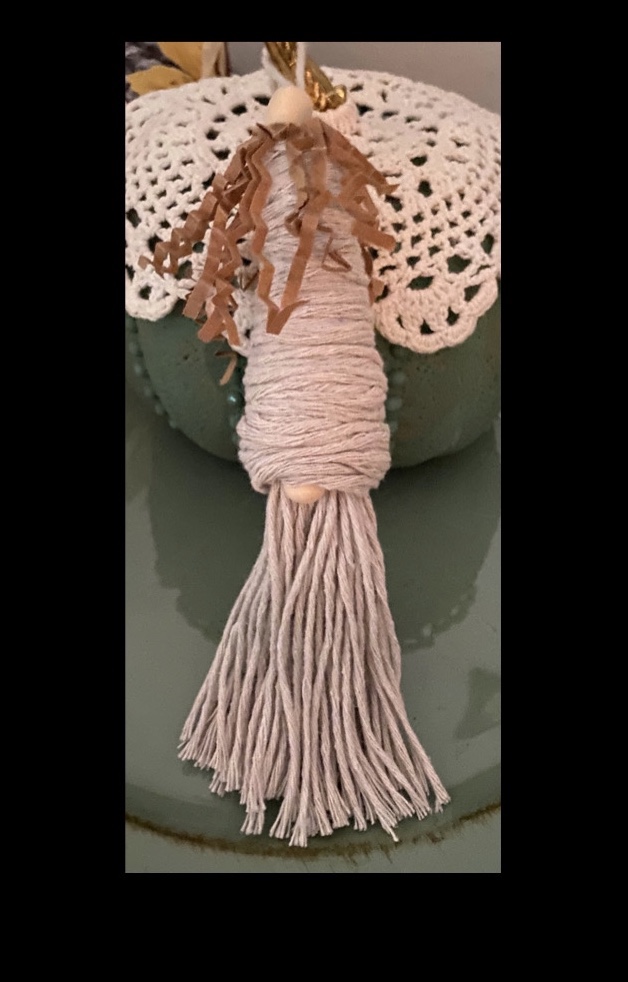
Lady night, while watching TV, I made my first gnome of the season. I saw this idea of creating a tassel gnome on Pinterest and couldn’t wait to make one. I am so going to make some for my booth. They will make such cute ornaments!
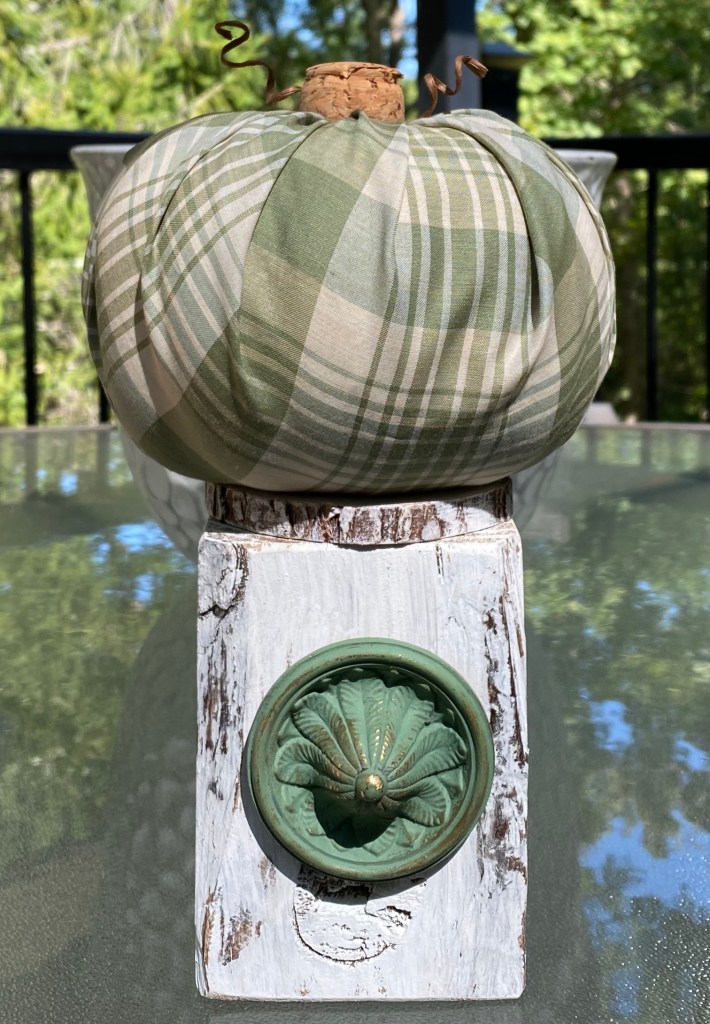
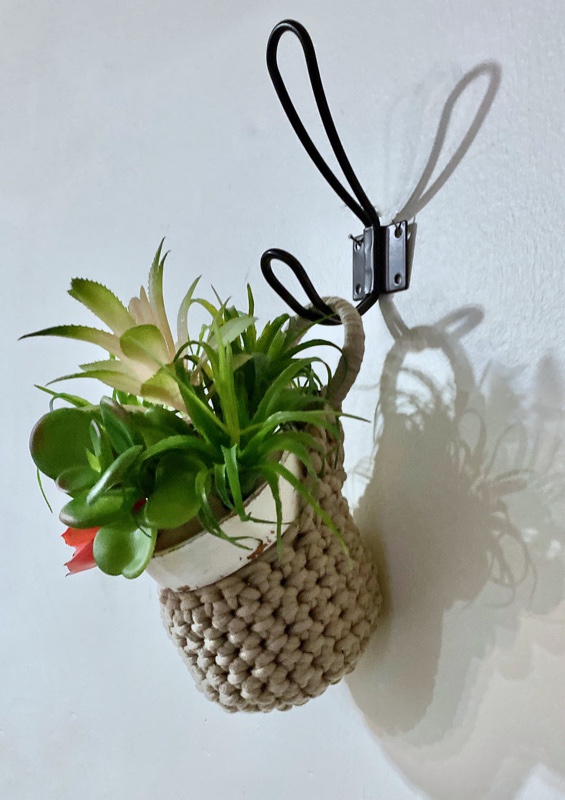
But then, I had to create a pumpkin for him to hang on. My Dollar Tree finally got in some of the bead stickers so I added some to a DT orange styrofoam pumpkin and painted it with my new custom color. It is a 50/50 mix of our Missouri Limestone Paint Company Chalk-style paint “Evening Shade” and our newest color “Soothing Sage.”
I only gave it one coat as I wanted some of the orange poking through. I also dry brushed a tiny bit of “Soothing Sage”. I added a small round doily And look at that stem! Yes, it is a decorative hook.
Here’s the link for the tutorial I used to make the twine gnome ornament.
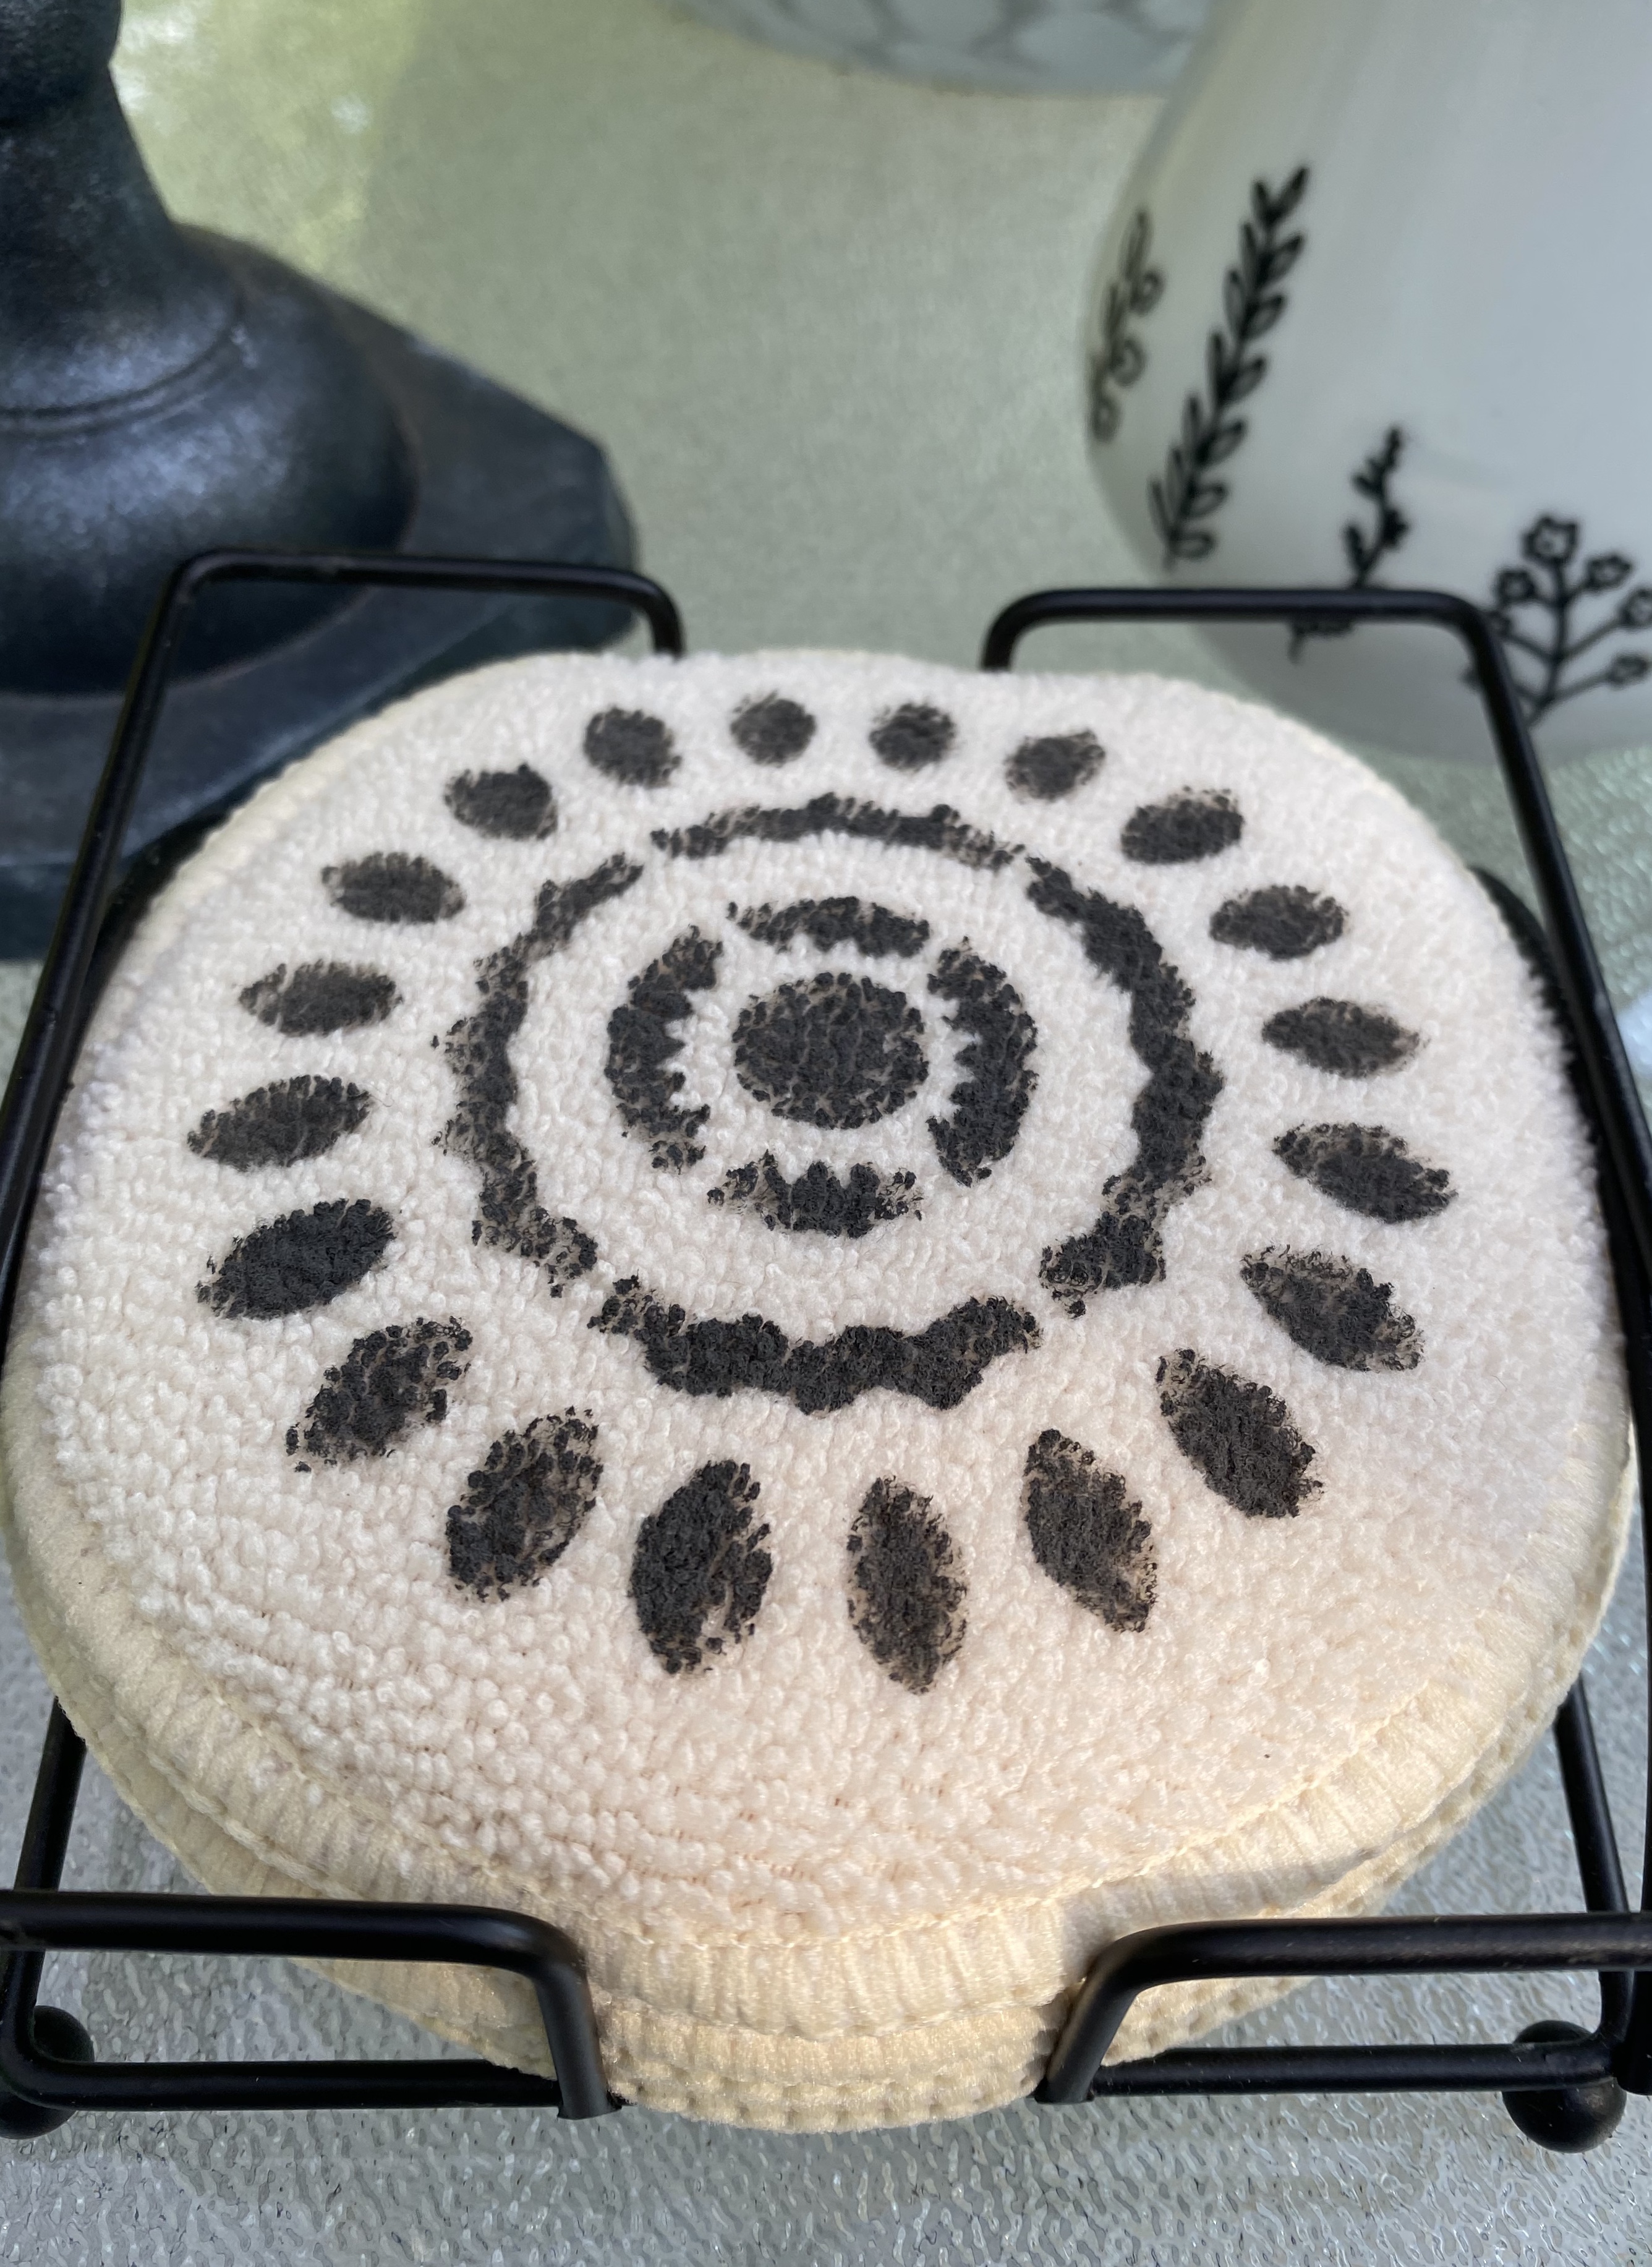
While waiting for my visiting grandson to wake up, I strolled around my basement wondering what I could declutter first. Then I happened upon a package of terry cloth coasters called “Thirsty Coasters”.
I bought several packages of these at one point, thinking I could do something with them sometime. Another time I bought several cool little coaster holders. Same. Lol
Forget decluttering for now. I started wondering if I could stencil a design on them. I had a little boho mandala stencil that fit perfectly and I had lots of chalk-style paint from our brand we produce and sell Missouri Limestone Paint Company, so I chose “Gray Goose”.
They stenciled beautifully. Once they have had a good 30 day cure, our paint will be indestructible no matter how many sweaty glasses or hot coffee cups are set on it as the paint becomes part of the fabric.
This will make an awesome Christmas gift – just thinking ahead. 😂
So, I have done a bit of decluttering, too! Lol
I gathered my supplies and my coffee and was ready to begin.
I like using the makeup sponges I get at Dollar Tree for stenciling and small projects. I off load a little of the paint onto the paper plate so that when I stencil, it doesn’t seep under.
The terry cloth took the stenciling beautifully. I love how they turned out!
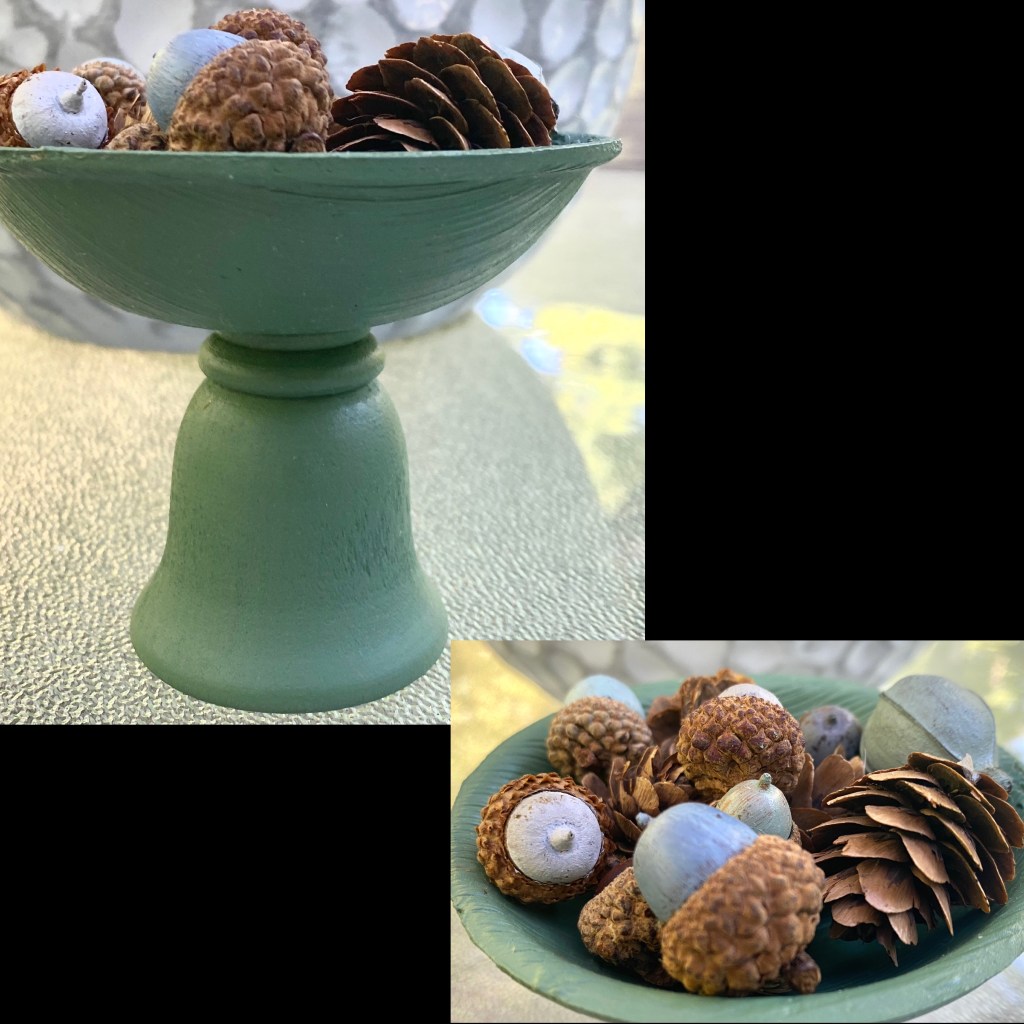
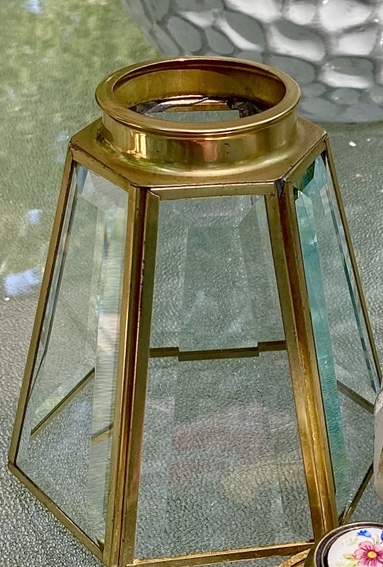
I decided I would go shopping in my basement this morning. I found some treasures, so I created a little cloche covering a pot of flowers.
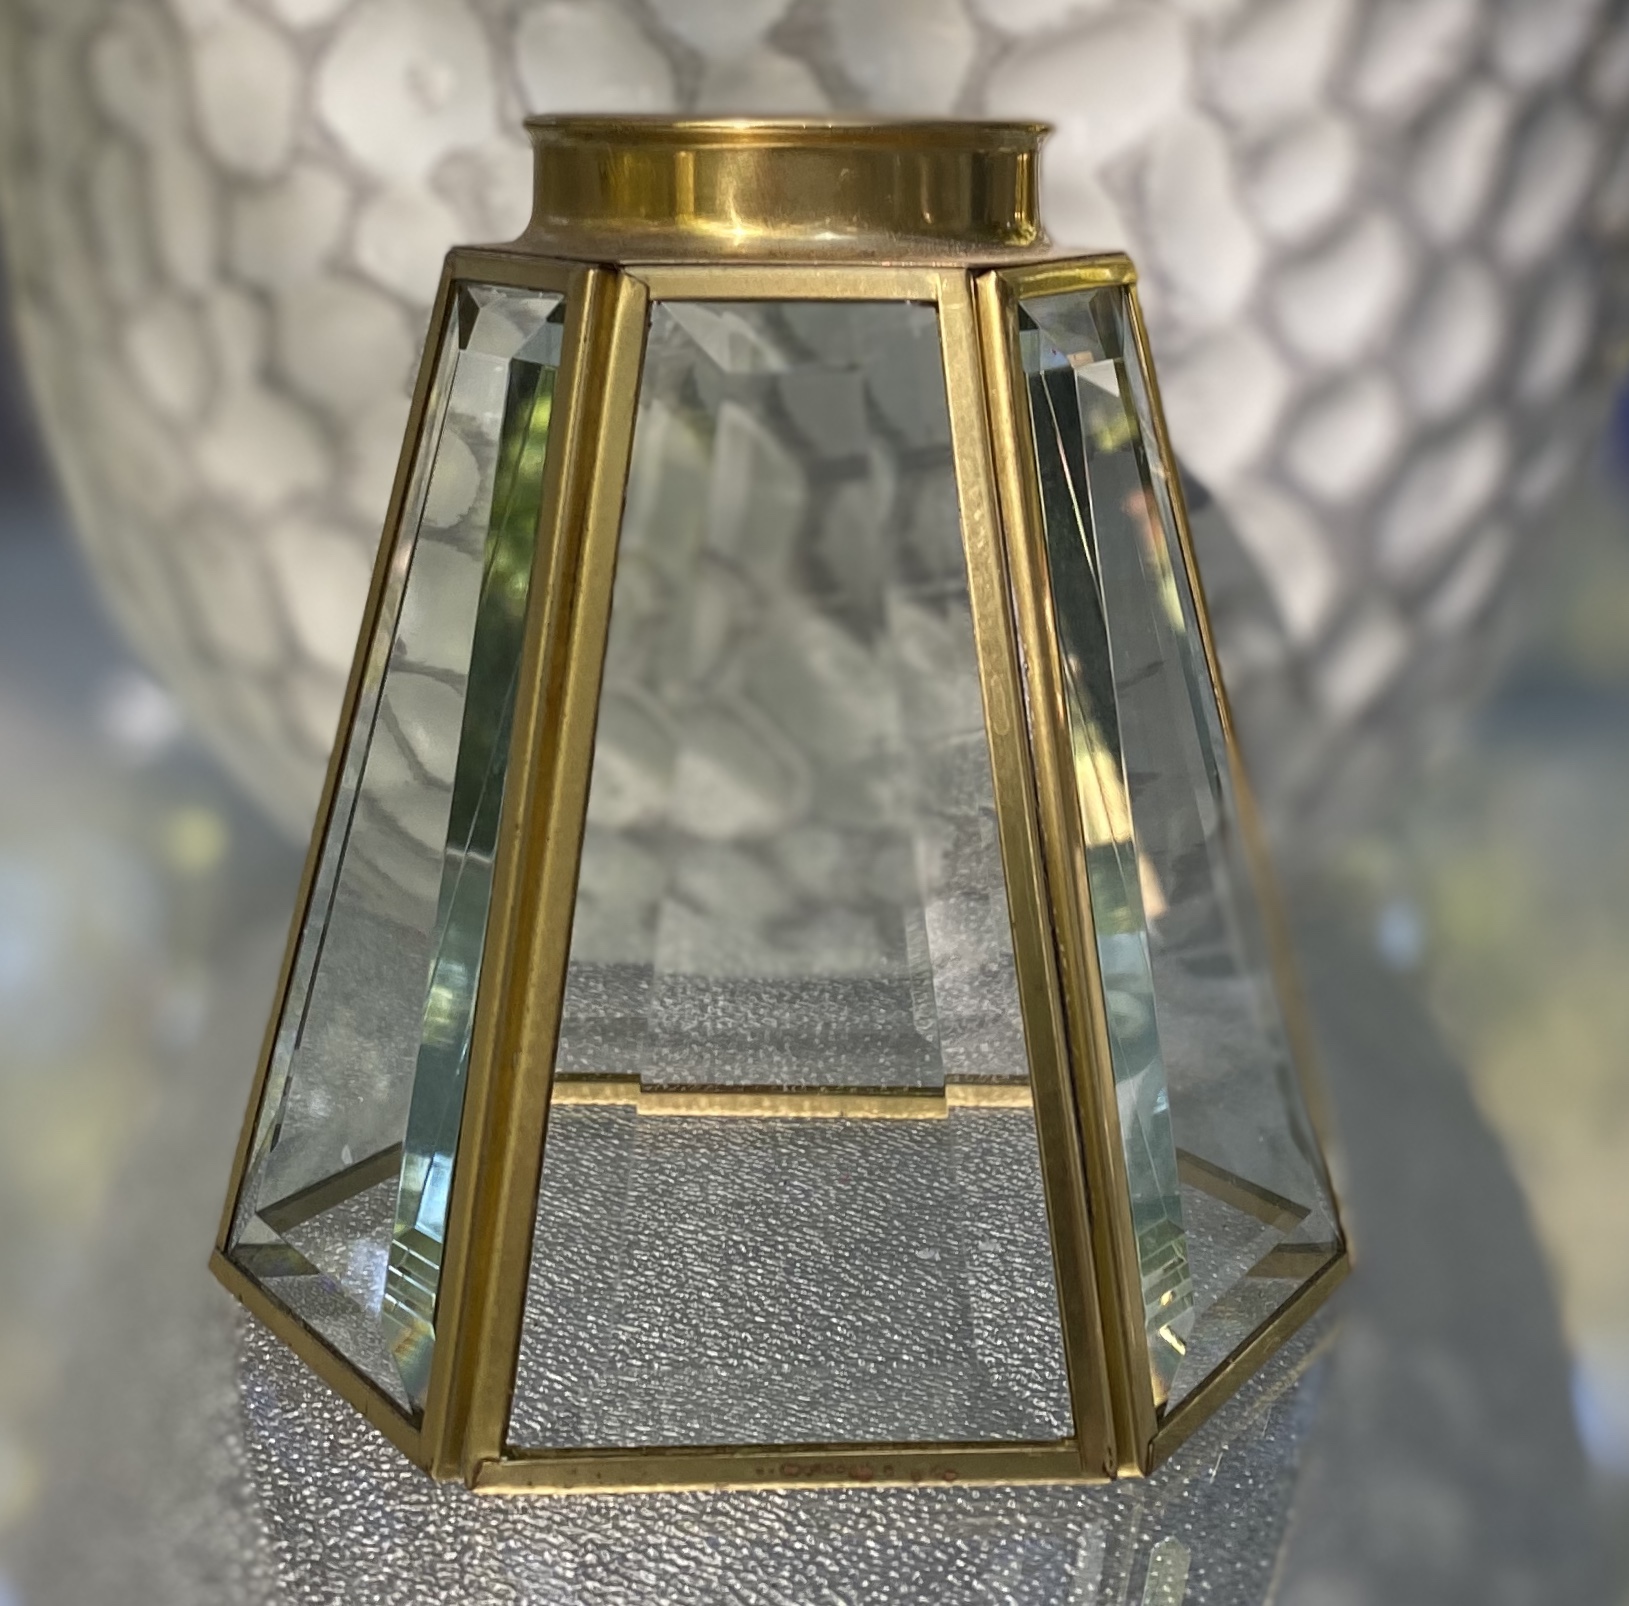
1) I had a shade from a fan light. The beveled glass in it is beautiful. I left it metallic gold because I’ve been seeing metallic gold trending lately.
2) I also had this little white tea light holder so I gave it a little metallic gold paint here and there (just like Pottery Barn would) and added a few faux flowers.
3) I had a plastic lid that fit perfectly on the shade, but it was white, so I painted it a metallic gold to match.
4) The lid needed a knob to lift the cloche, so I found the perfect knob in my collection that coordinated with the flowers. I super glued it to the lid then super glued the lid to the shade.
And there you have it…my Pottery Barn inspired cloche and pot. Place the cloche over the pot of flowers, or if you don’t want to display flowers, just remove them and add a battery operated tea light or votive. I wouldn’t use a real candle since this is enclosed and the lid is a plastic.
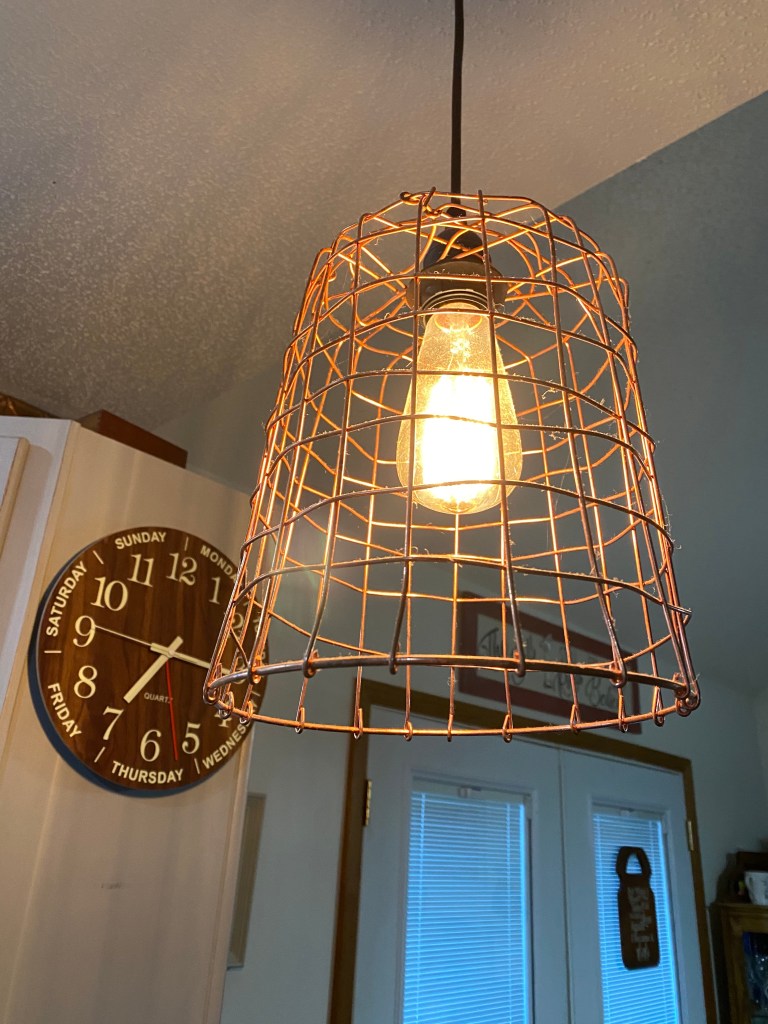
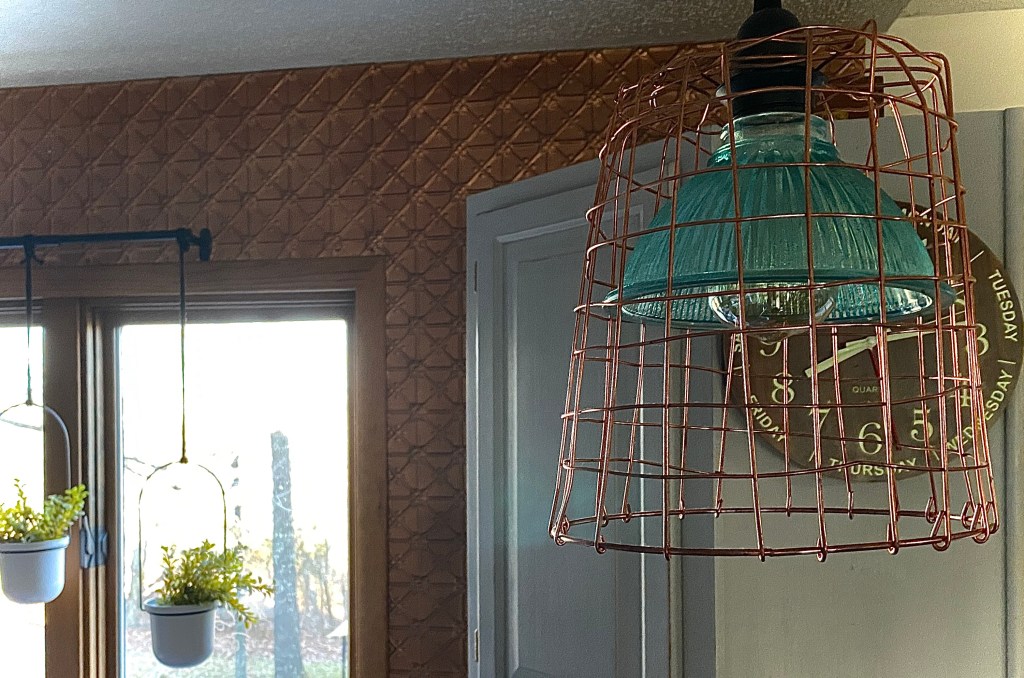
I’ve been looking at my pendant light in my kitchen and have not been feeling the copper wire basket I replaced the original pendant shade with a couple of years ago. The original was a tan color. I had the basket and didn’t want to buy a new shade. My kitchen walls are copper painted tin so it looked pretty neat with it.
But that was then and this was now. And now it seemed rather plain.
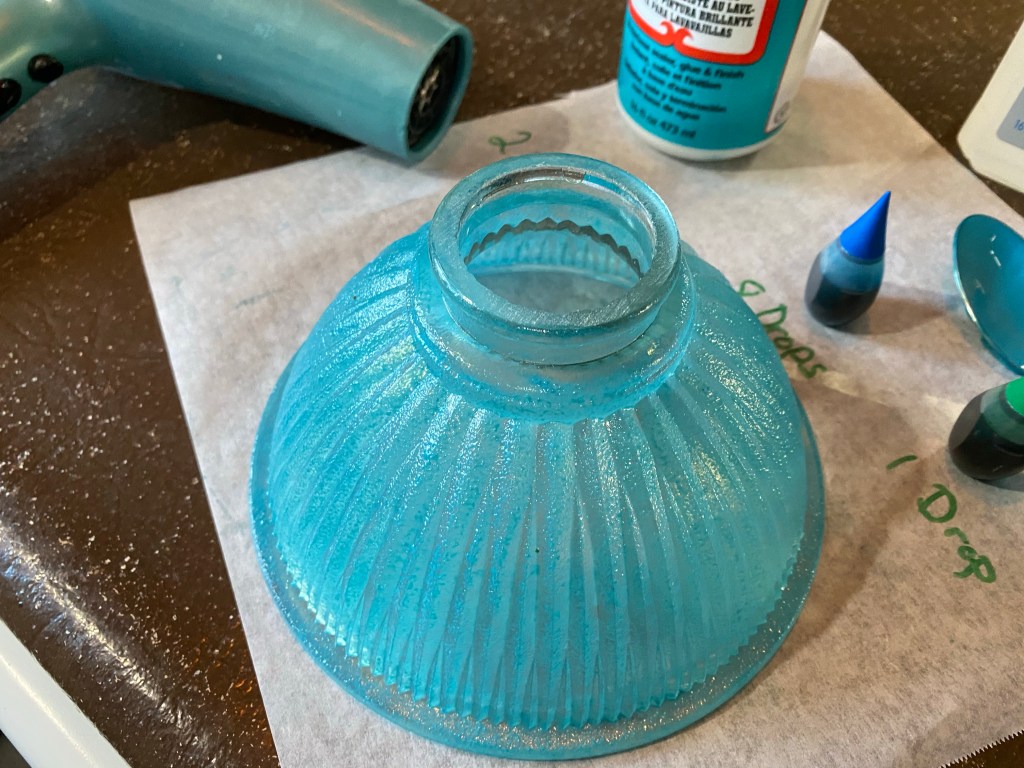
This morning, while browsing Pinterest, I saw someone had taken clear pendant shades and painted them with translucent paint and made little organizer bowls with them. Hold that thought because I see another project coming up. 😁
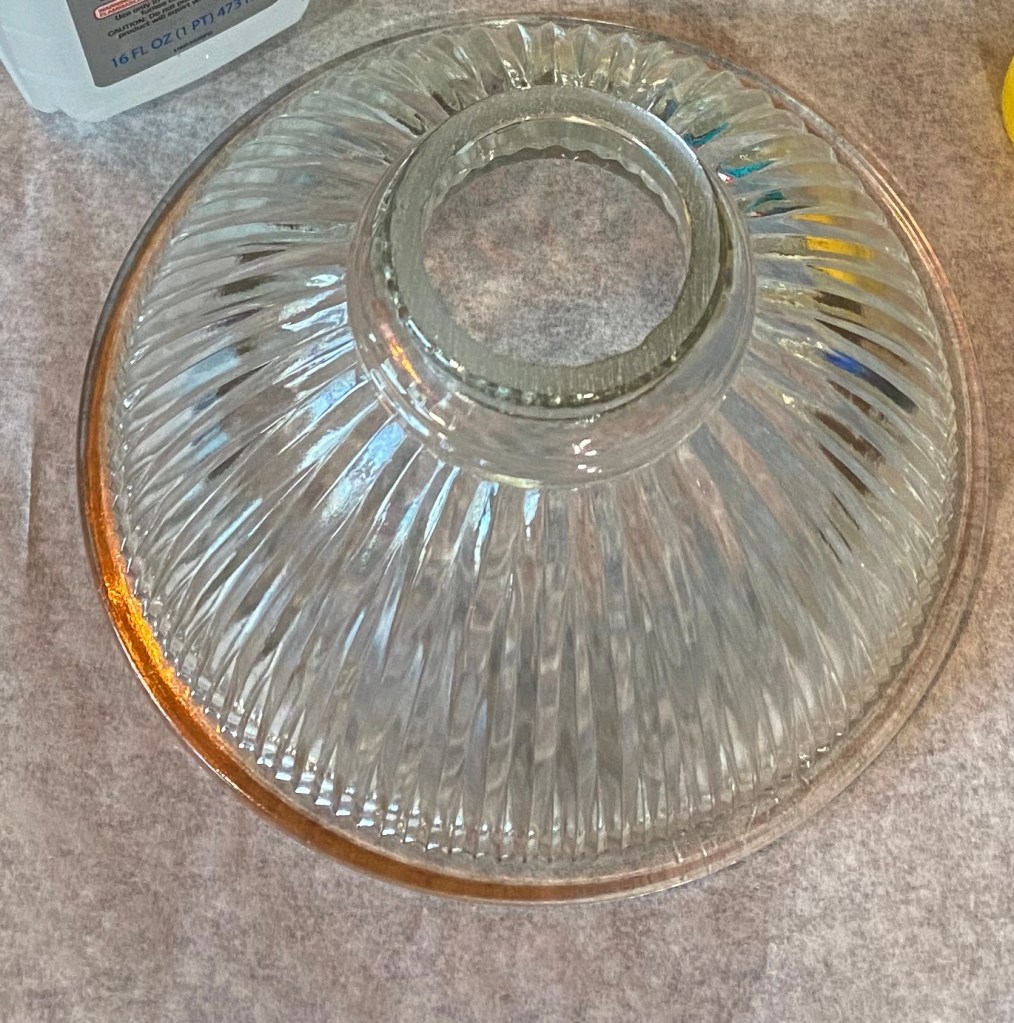
We just do happen to be the proud owners of 3 clear pendant shades. I’m not sure how we acquired them anymore. I checked, and the opening fit.
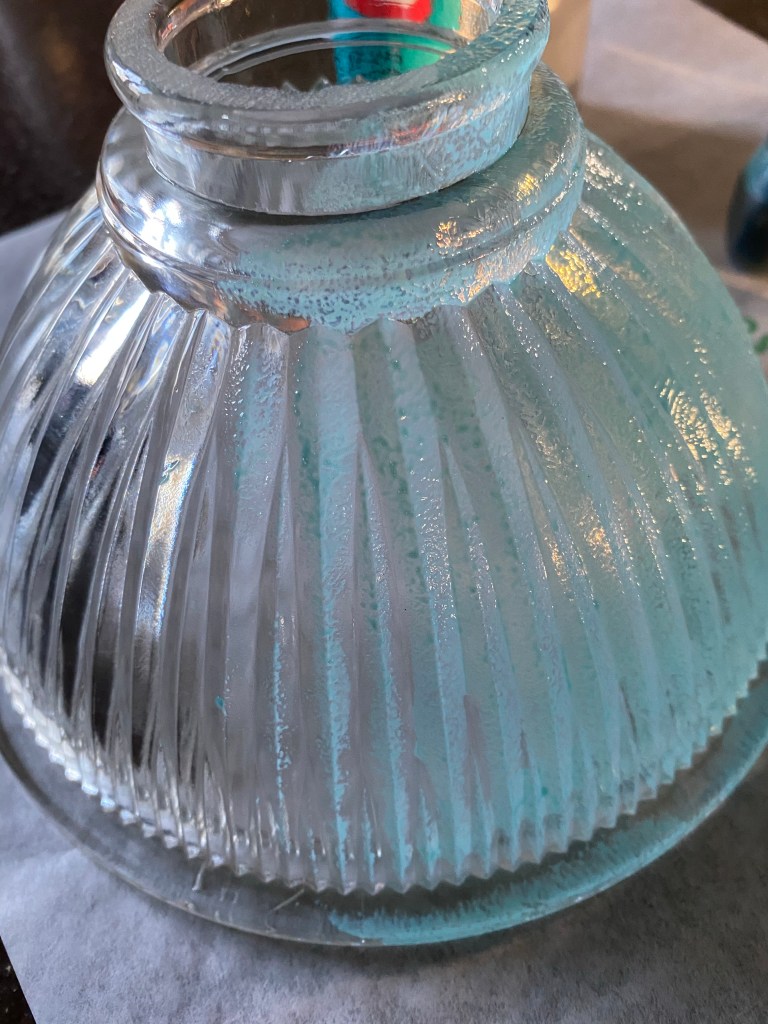
This project didn’t take long at all. I’m an impatient crafter so, I helped drying time along with my hair dryer.
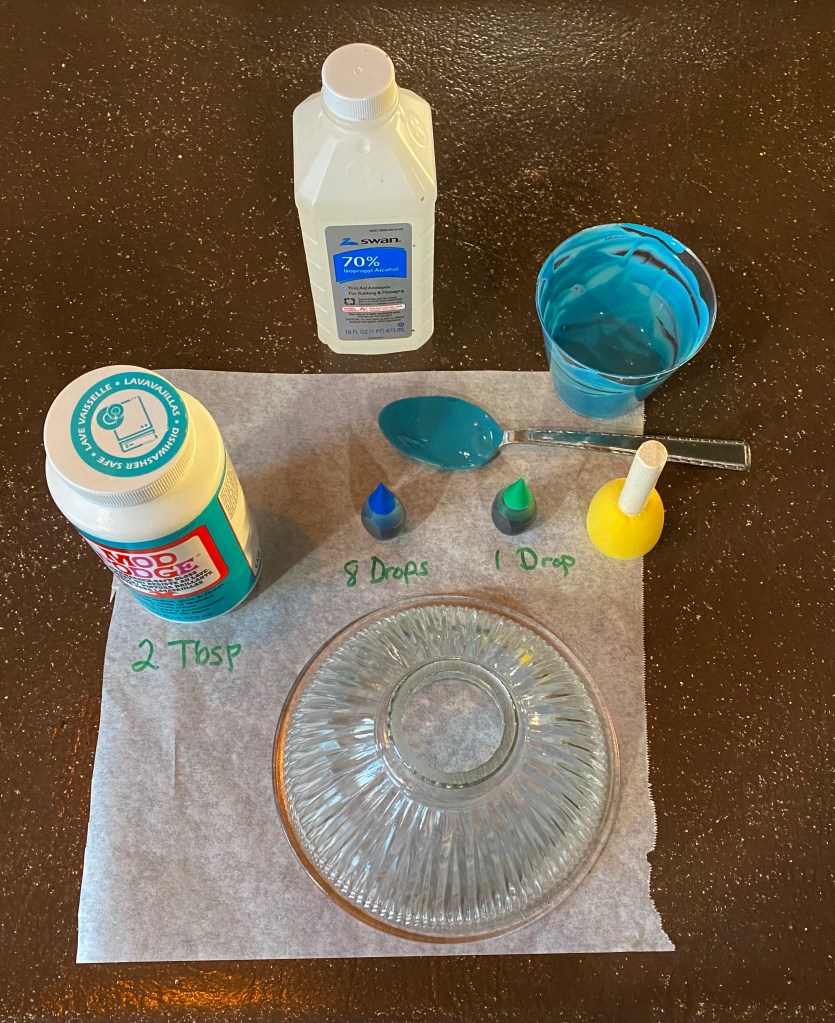
Materials used
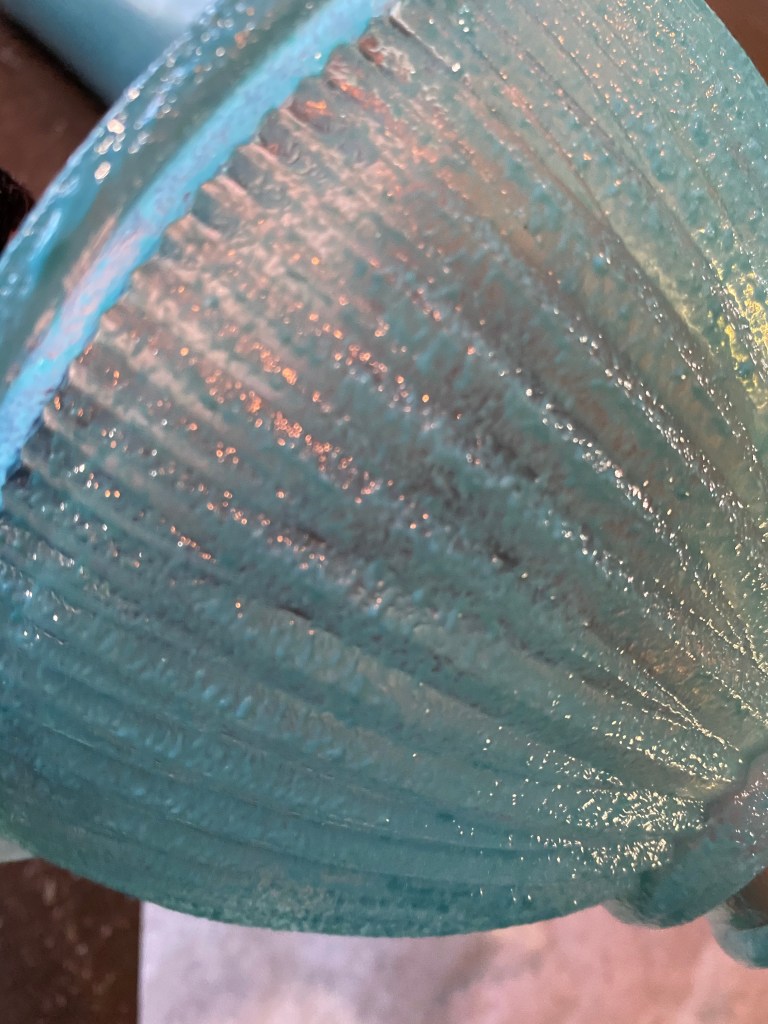
I used Dishwasher safe Mod Podge. Not because I’m putting it in the dishwasher. I am not even going to use water when I need to clean it. I just like to work with it and like the glossiness of it. You can use any glossy Mod Podge. Just make sure it’s glossy.
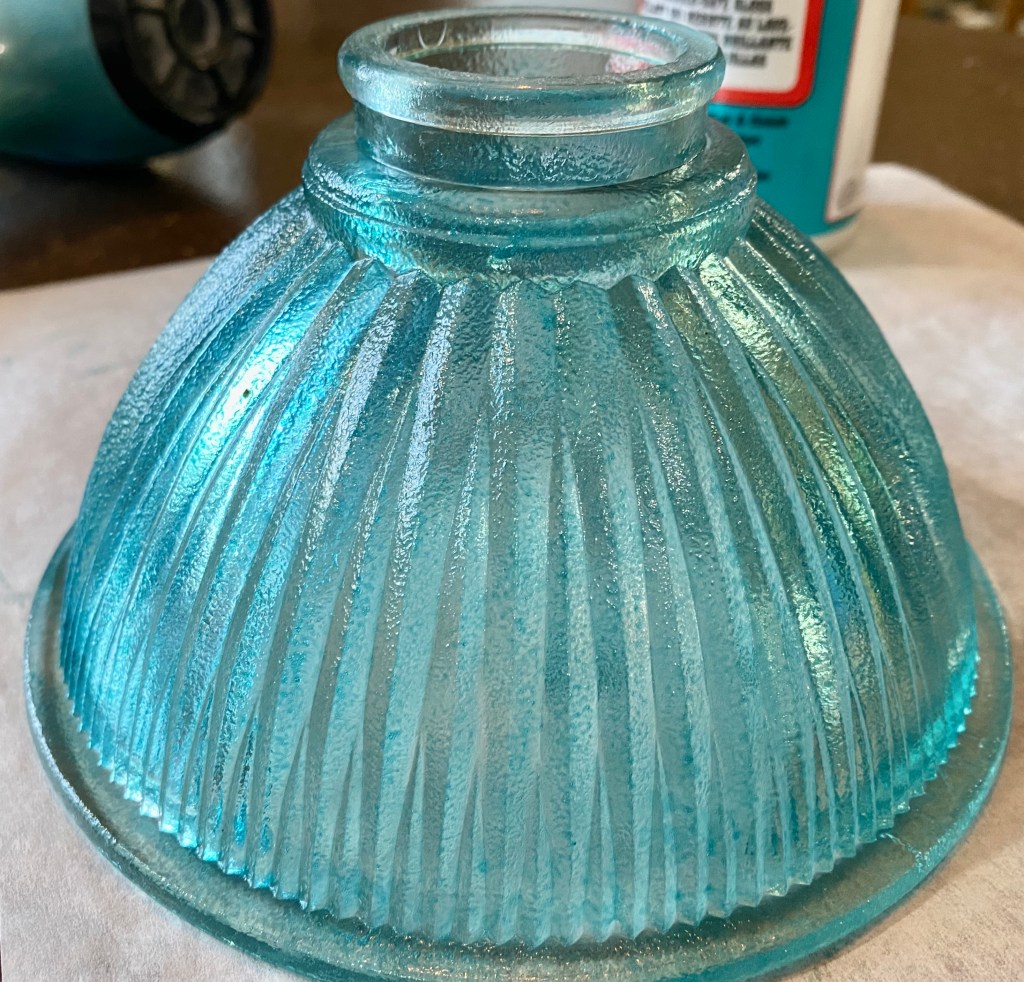
Applying the first coat. I used a stencil dauber, but makeup sponges work great, too.First coat dried. Used a hair dryer to help it dry faster.Applying the 2nd coat2nd coat applied and ready for the hair dryer.2nd coat dry. I’m amazed every time!
Originally, I was going to remove the copper basket, but by adding the new turquoise shade, I like how it looks with the copper tin walls now!
Our neighbors gifted these to us along with the fan/light fixture, another fan, and the fan blades for both. You’ll have to check out what I did with some of the fan blades already!
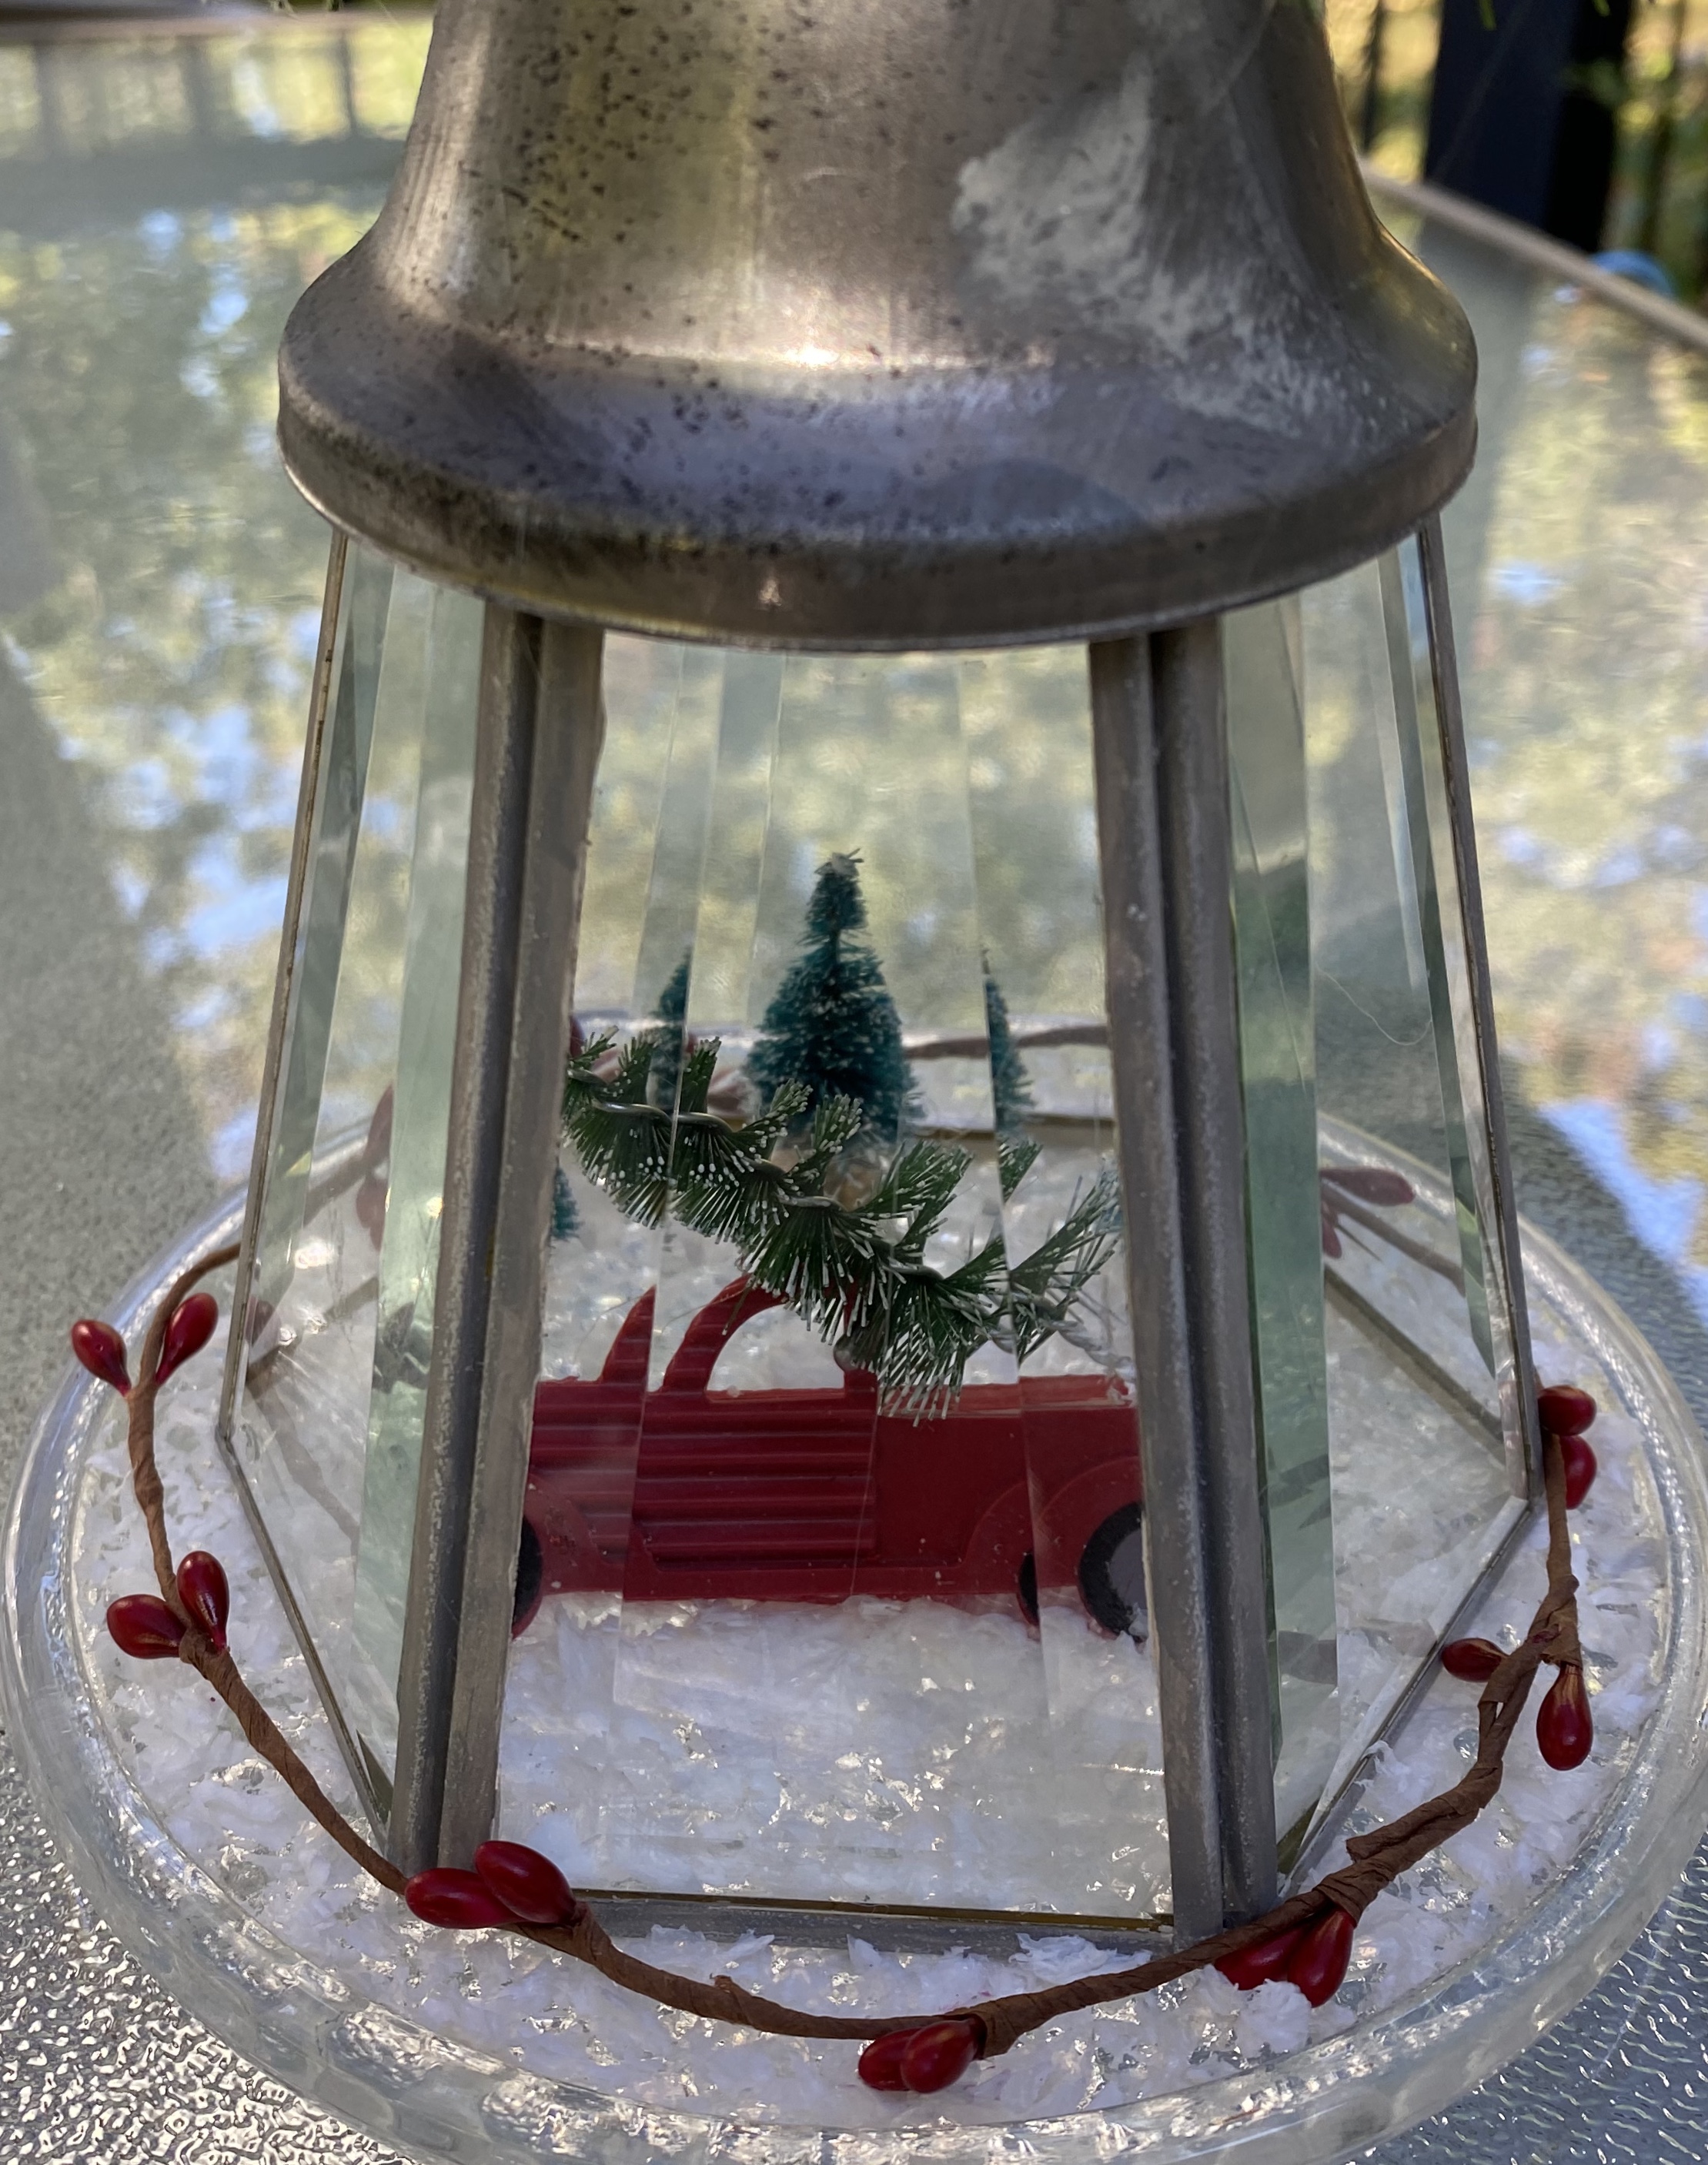
I have made two lanterns so far.
The first one I decorated for Christmas. I wanted a top for it and found a bell ornament that worked perfectly. I painted the light cover to match the bell. I used a candle plate with faux snow glued to it. I “planted” 3 trees to represent a Christmas tree farm and added a little red truck ornament and a tea light with a 6 hour timer.
Once the lantern was in place, I added the red berry garland.
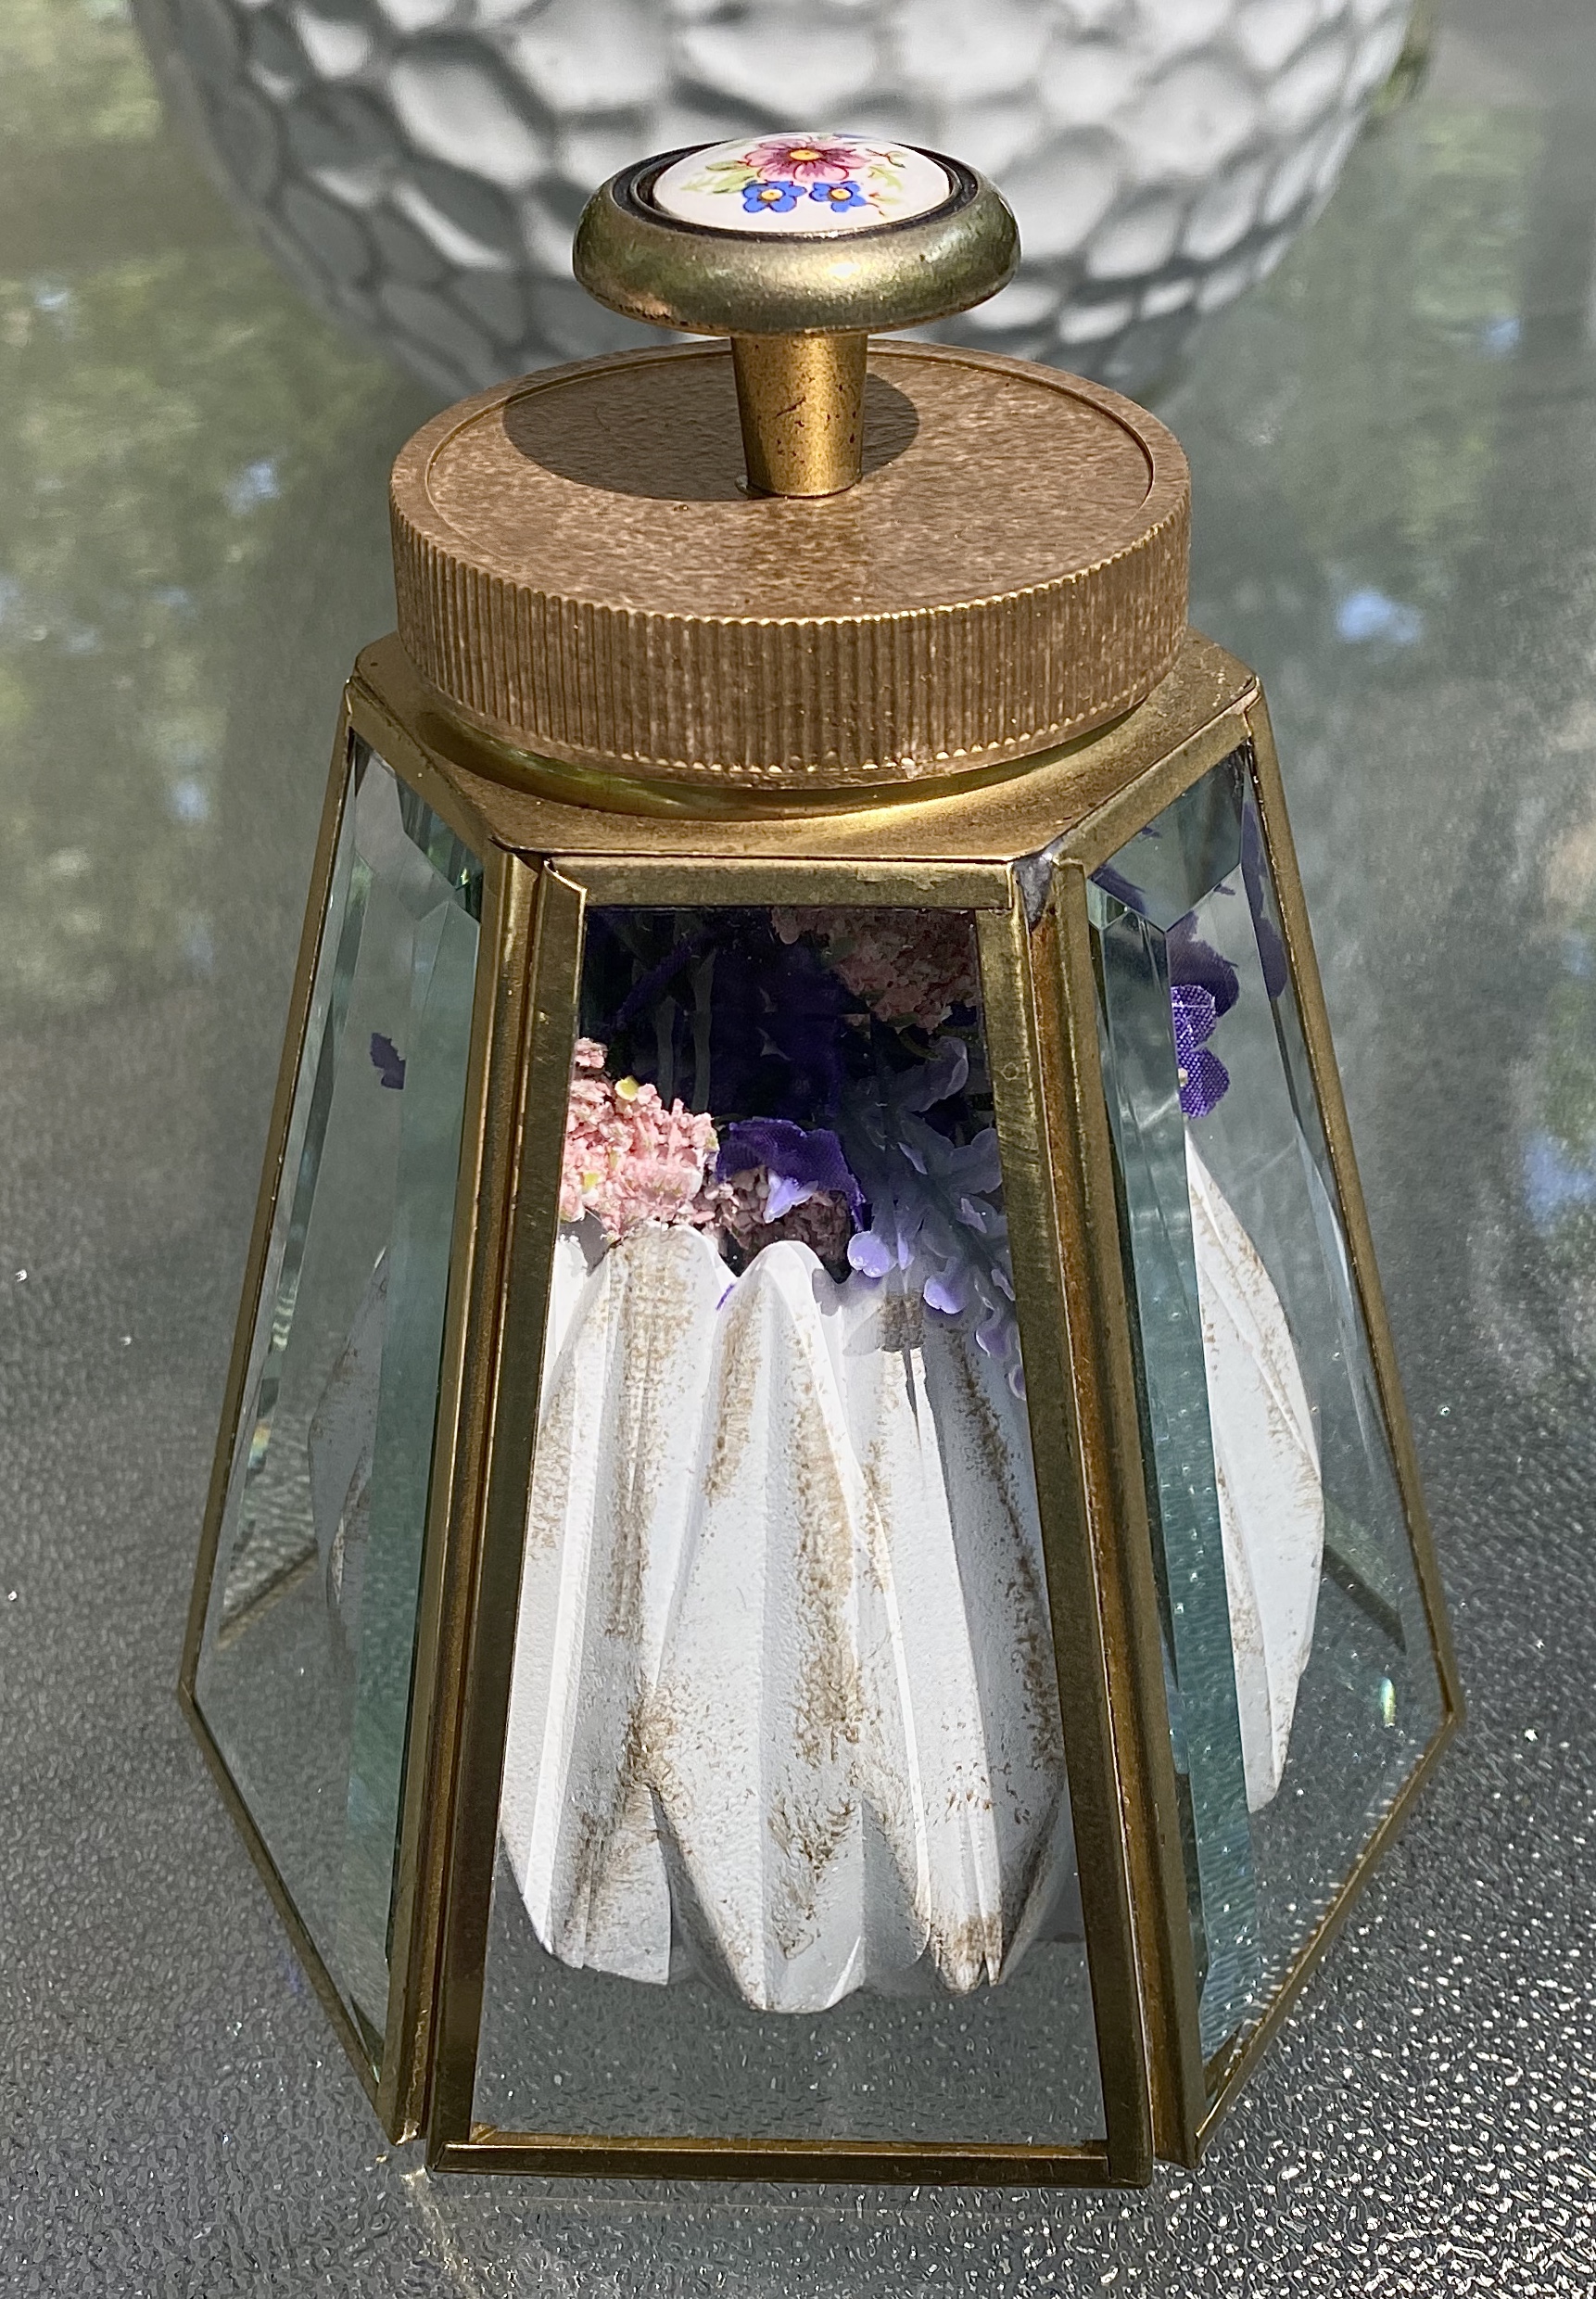
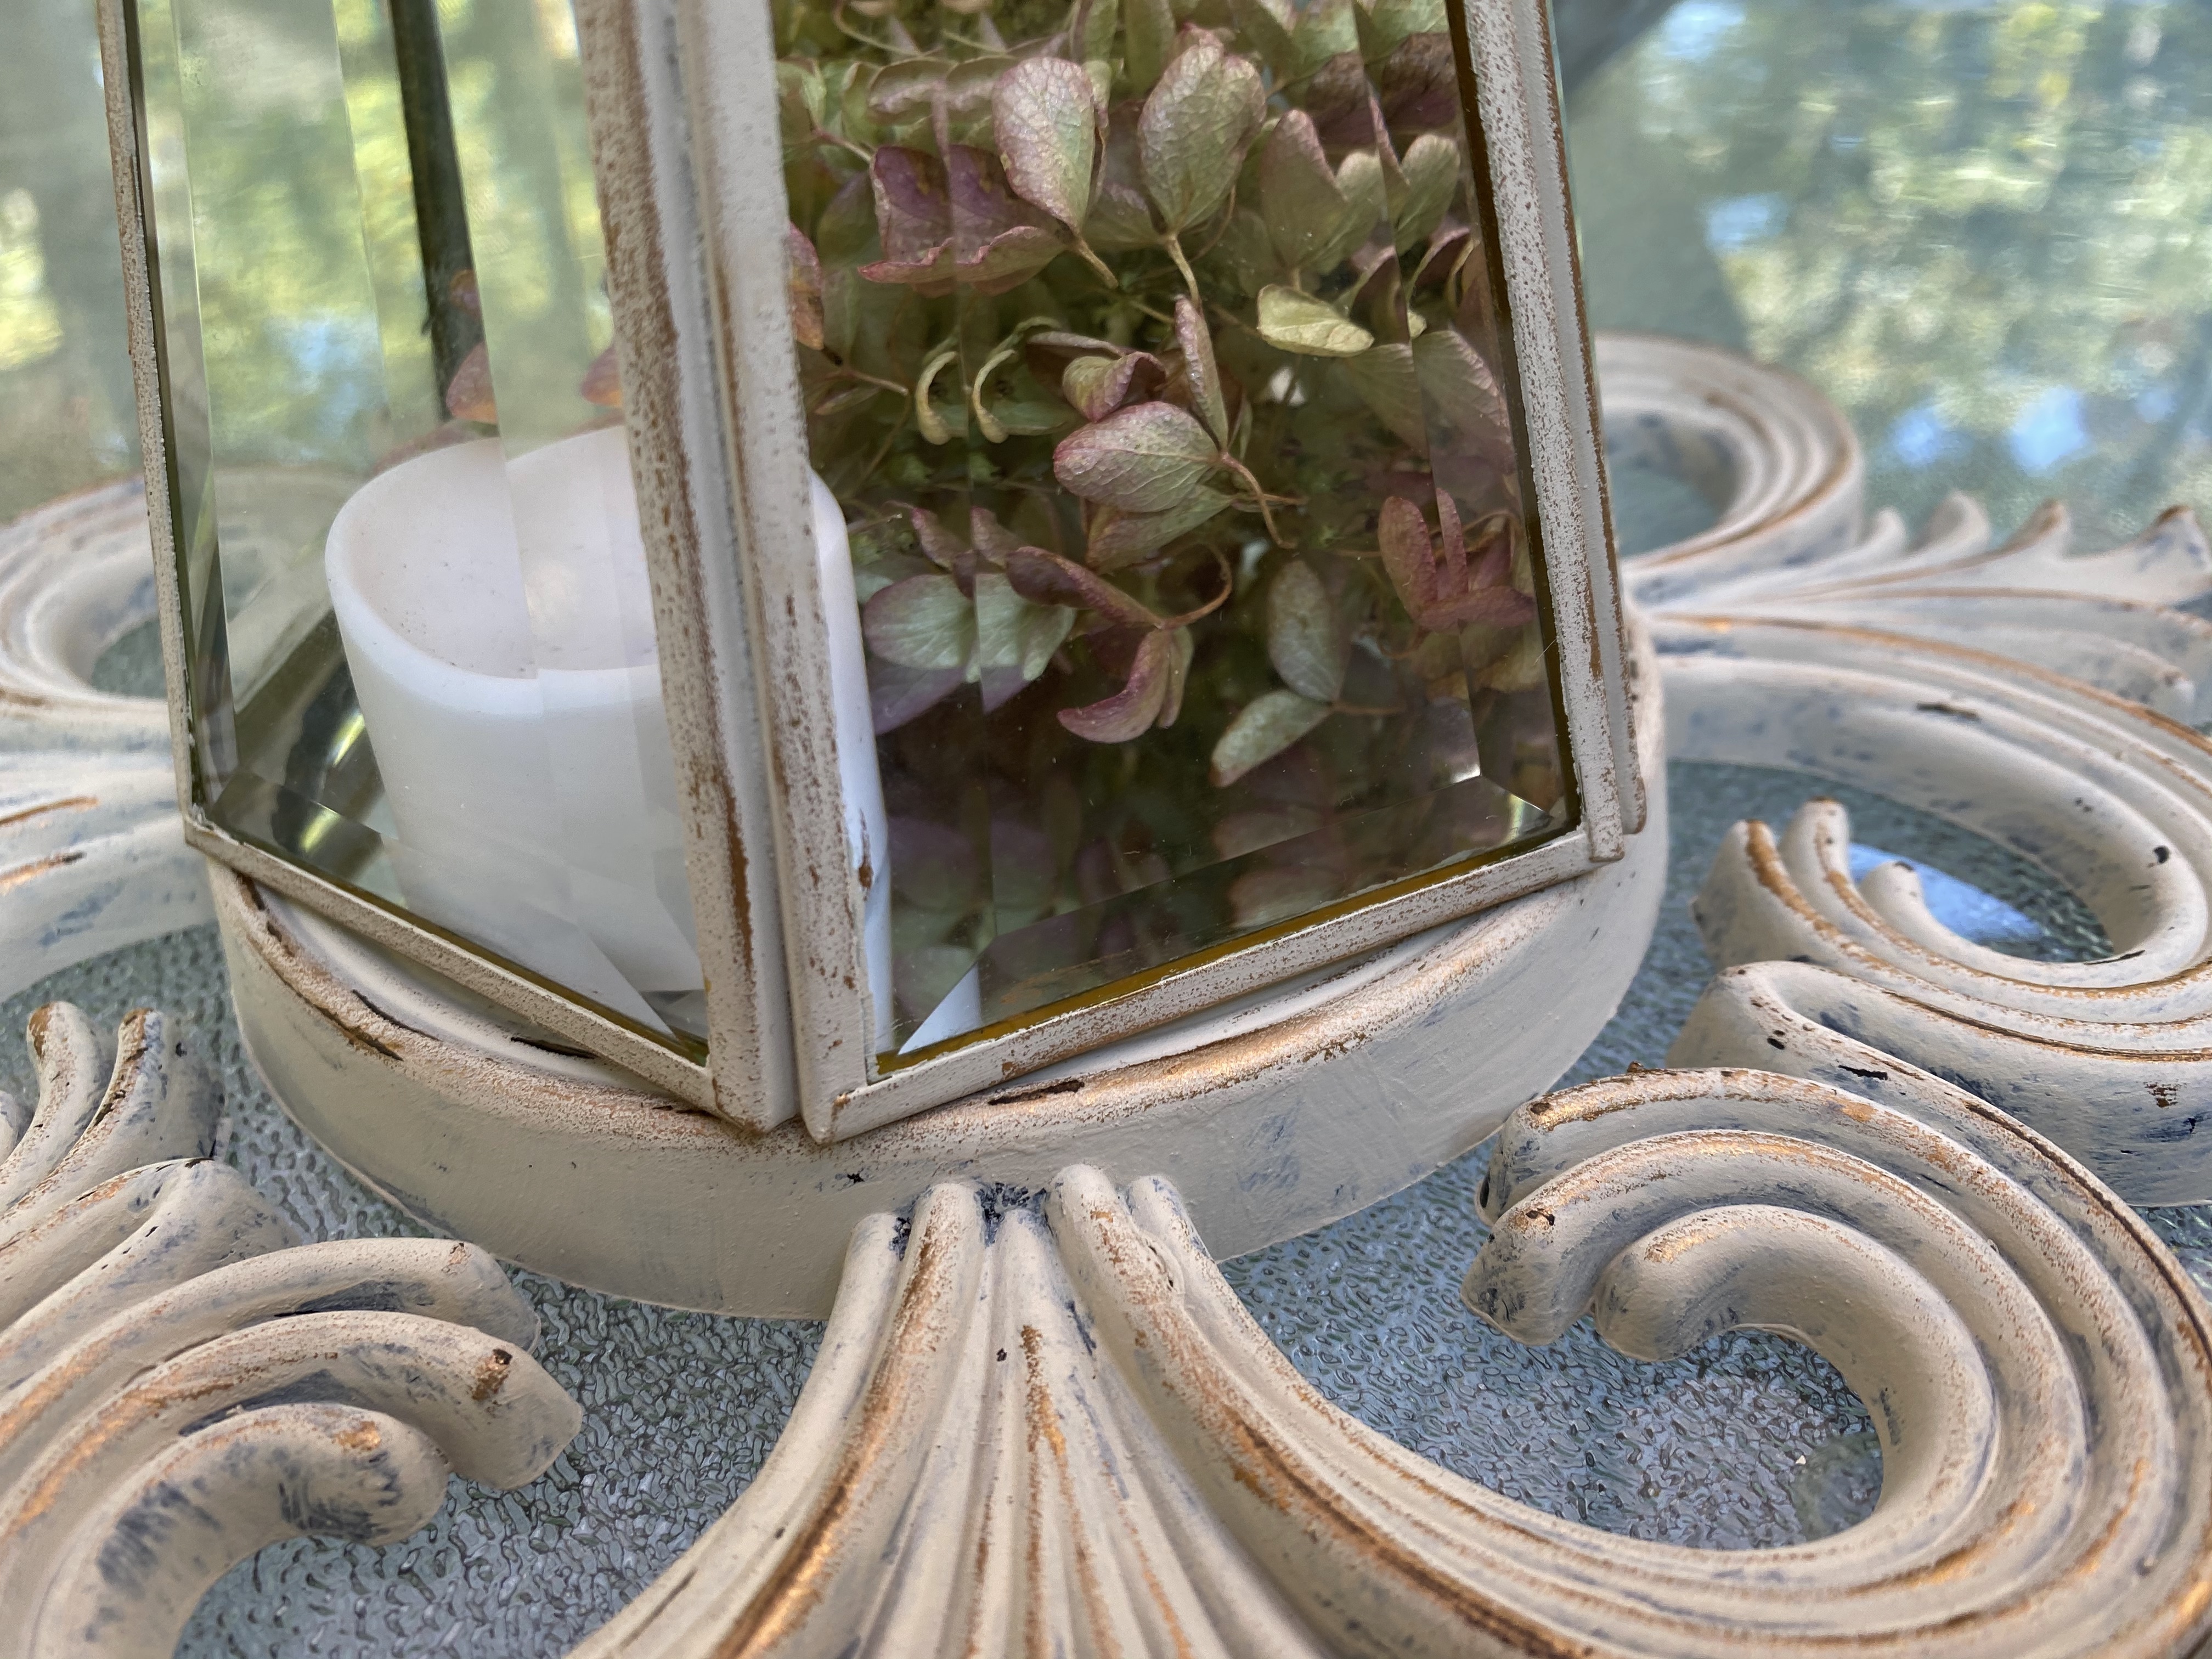
I went Shabby Chic with the second one. I was stumped on how to make a lid for this one. But then I noticed one of my cans of spray sealer would work if I cut it down. I did that and painted it inside and out with our brand of chalk-style paint Missouri Limestone Paint Company in Vintage Linen and added a prism cut drawer pull.
I glued the lid to the top of the cover with hot glue and E6000 and used metallic aged brass wax to distress.
I also painted a small mirror, distressed it with sandpaper and added a touch of the metallic aged brass wax.
The lantern sits over a hydrangea bloom I dried and a tea light with a 6 hour timer.
Very elegant!
Now, to think up another lantern or two or three to make. 😁
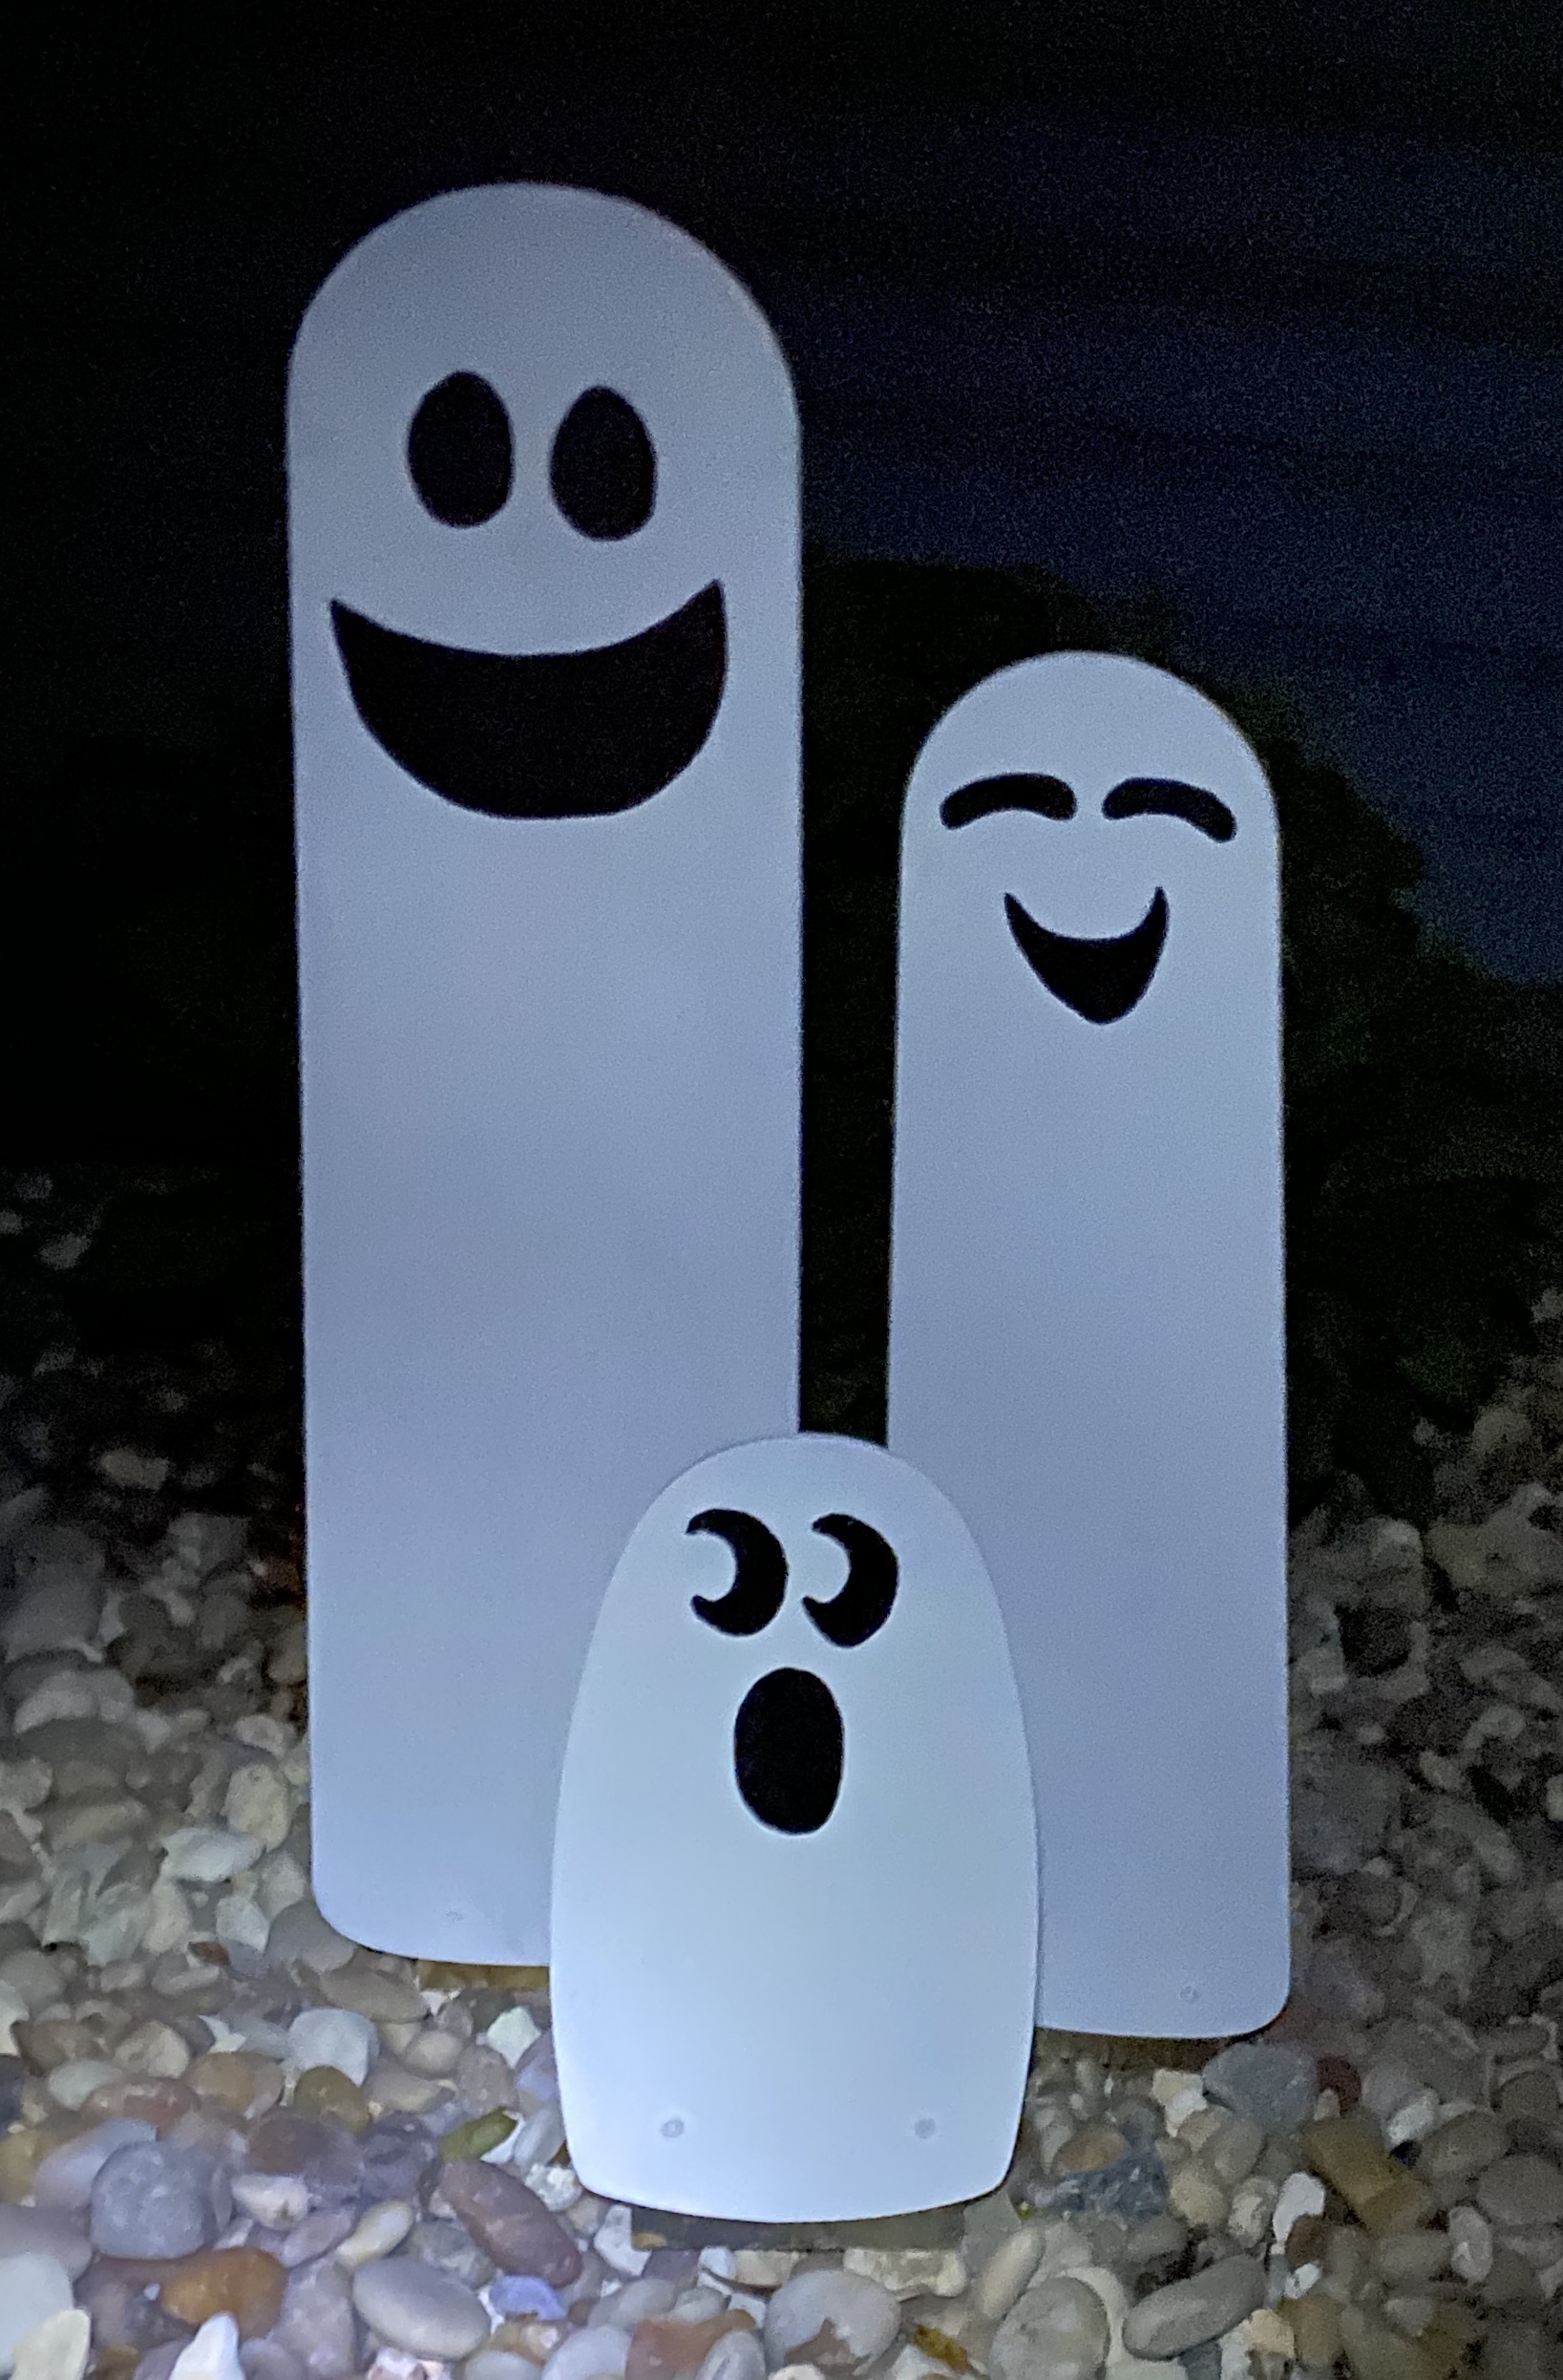
Meet Gus, Gertie, and Georgie, my latest project. They are a happy garden ghost family….not scary at all!
Boooo!!!
Who knew when I bought a small ceiling fan with short blades at a yard sale several years ago, one of the blades would become Georgie. My original intent was to paint the blades for my grandson’s bedroom with a bunk bed, but never got around to doing that. So Georgie and his three friends have been patiently waiting for some action.
Then, along comes our neighbors doing some remodeling, and gifts us with a ceiling fan and a ceiling fan with lights. I’ve already started making lanterns with the light covers, and am now the proud owner of two different sizes of fan blades from this gift. 🤗
So what’s a crafter to do? And then it hit me….. make some spooky? families for the yard. I put them up against a door and Yes! I could see a dad, mom, and kid. Can’t you?
1. Prep – I cleaned them thoroughly with Windex, my go to cleaner.
2. I filled in the holes with KwikWood, my favorite wood repair putty, just so I’d have more of a finished look when finished. After all, who wants a ghost with holes in his head?
3. Once the filler was dry, I sanded it and scuffed up the blades front and back with 220 sandpaper.
5. Next, I free hand drew their faces on a piece of card stock and cut them out to use as stencils. I traced the faces onto the blades with a pencil, then used a black oil-based Sharpie paint pen to color them in.
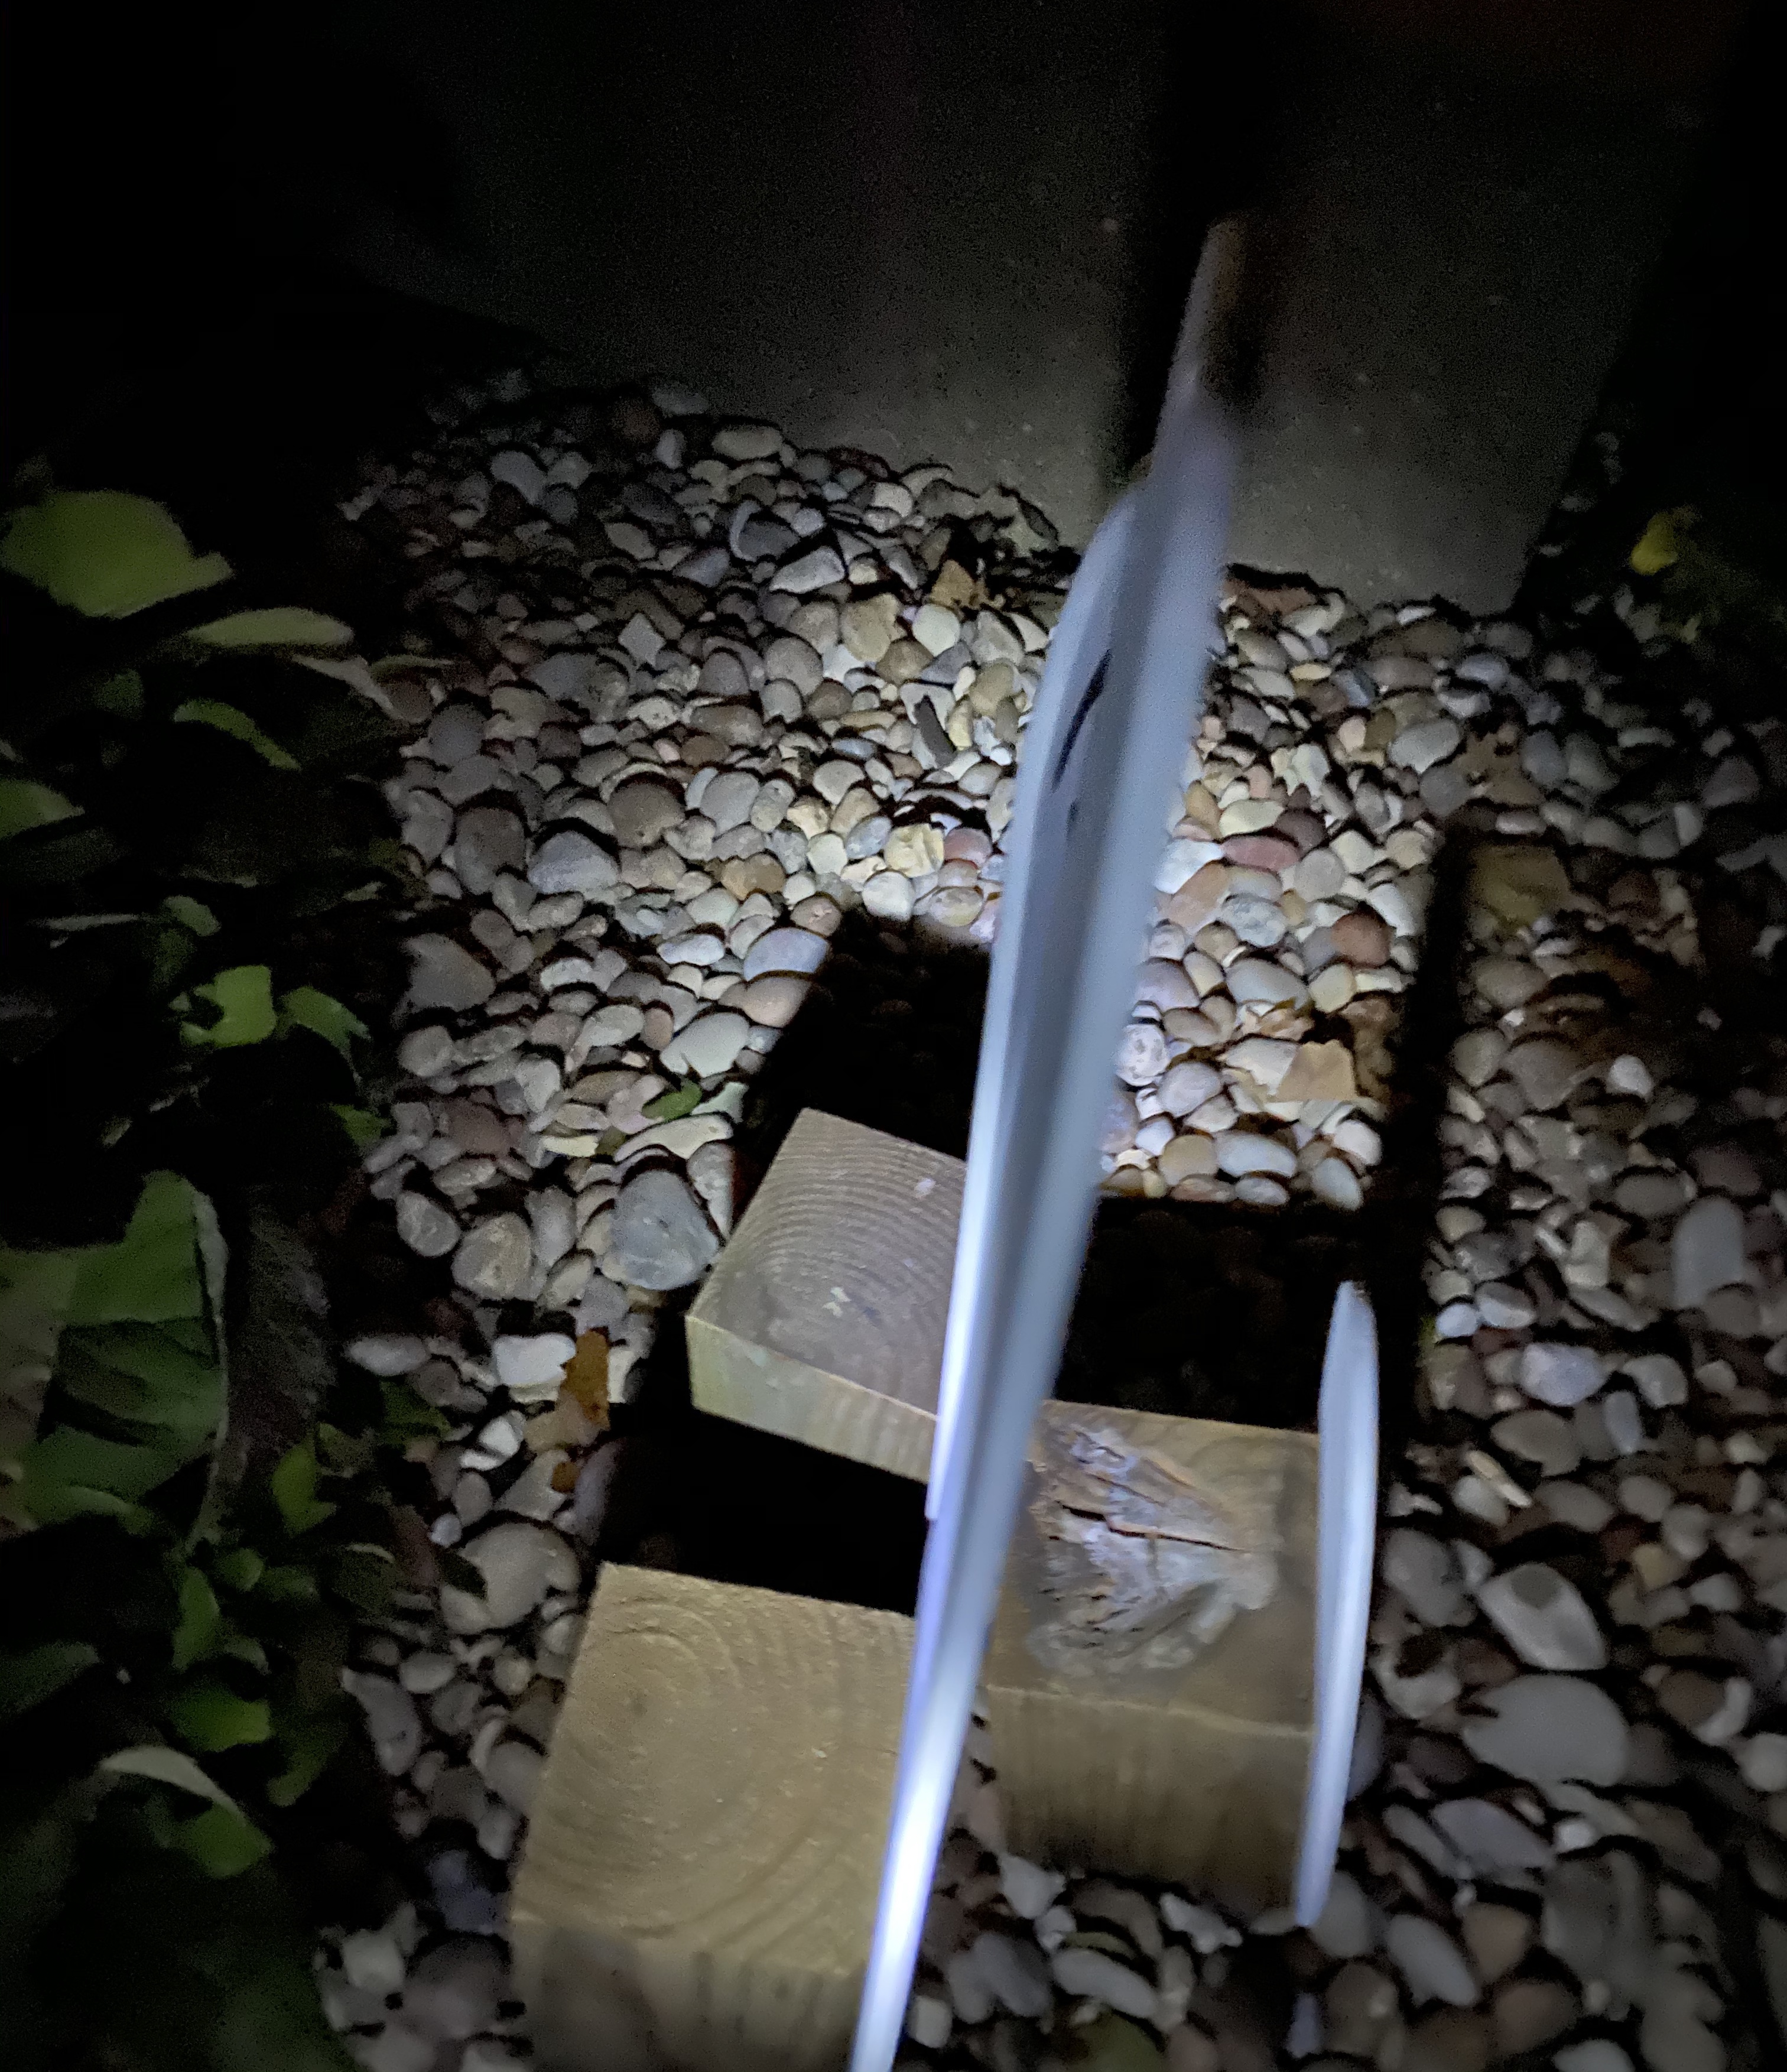
6. I didn’t want them falling over in the garden and getting hurt so Danny found 3 4×4” blocks about 4” tall and screwed them to the wood blocks. These happened to be left over pieces of treated lumber he had stored away in the shed. He left a bit of the treated lumber showing just so the fan blade would be resting on the ground.
7. My final step is spraying them with Varathane SPAR Urethane to protect them from the weather. Fan blades are a manufactured wood product (MDF). Even though they won’t be out in the weather for a long period, this will help keep them nice for many Halloweens to come.
And here they are again! They seem so happy to be in the garden. I’m a fan! How about you? 🥰
Happy Halloween!
I’m now making two more families. These are for my kids. The first set is complete and has been delivered. We have Dad, Mom, sister, brother, and can’t forget the family dog.
Getting started!
Our granddaughter helped screw each one to a block of wood so they would stand up without falling over. A girl is never too young to learn to use a power tool.
We put mom and dad on a bit of a slant toward the kids. And here they are!
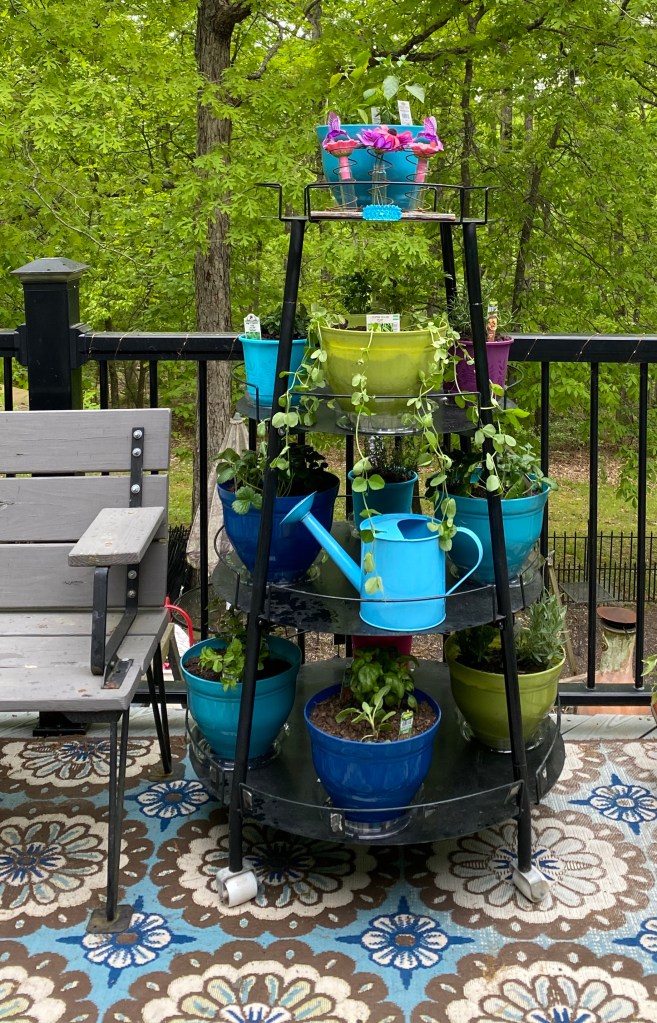
Today is September 30th and it is a beautiful Fall day in Missouri ….. the perfect day to make a Halloween decoration for my Halloween Deck Display “Tree”. See my summer garden and fall displays below.
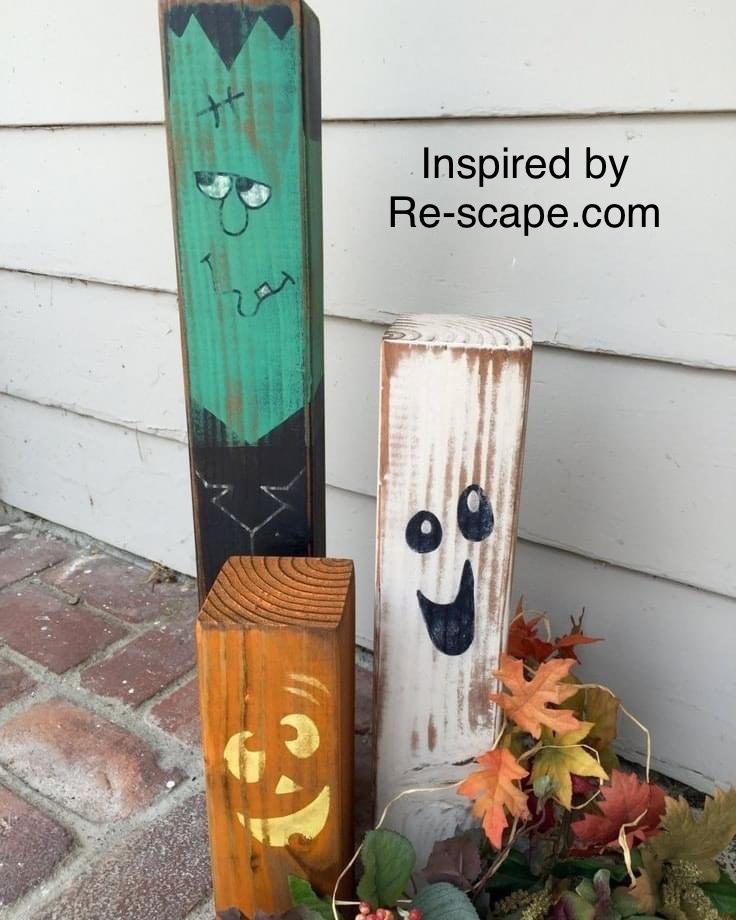
I used our Missouri Limestone Paint Company chalk-style paint (colors: Crisp Kale, Coal Shovel, January, and Harvest Pumpkin) and Sharpie oil paint pens. I had to have an inspiration piece to look at or I wouldn’t have been able to draw the faces. This is the inspiration photo I saw that was posted by https://www.facebook.com/ReScapedotcom/ I found the artist and they are for sale on Etsy for $74.95. https://pin.it/7DjaZfV
I used the photo above to help guide me when drawing the faces on mine below. FYI – if I can do this anyone can. We sell our paint in 2 oz ($3.99) containers that are perfect for projects like this as well as other sizes. Message me if interested in a porch pickup of paint. We can also ship.
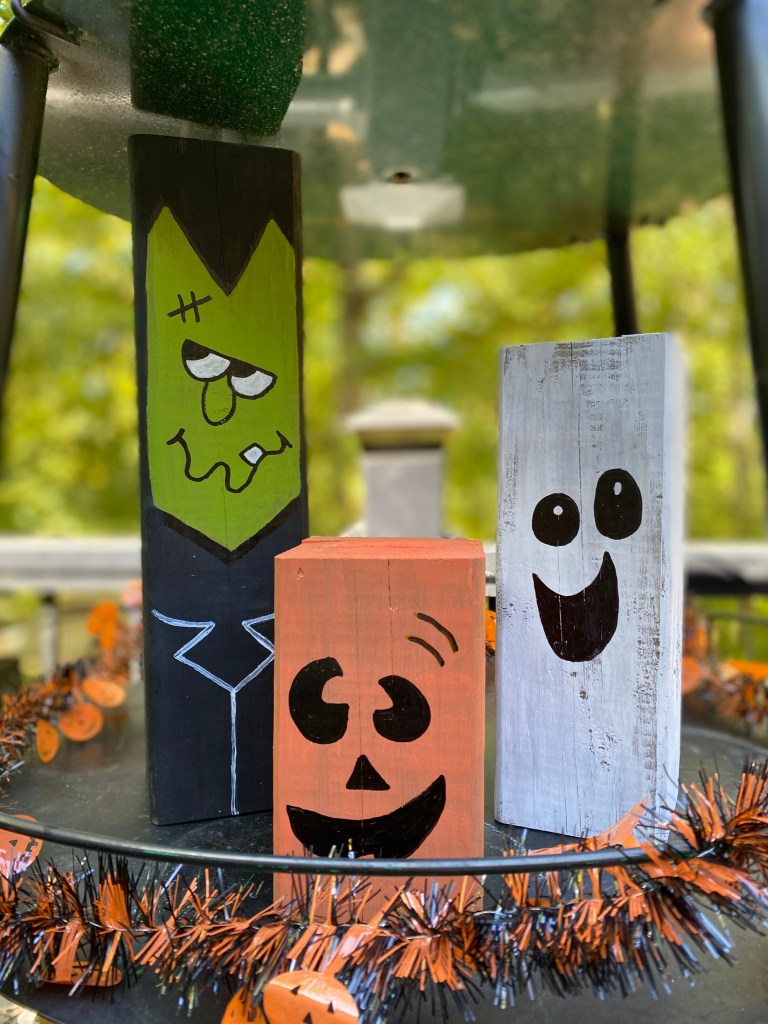
Here’s my version of these cute and easy to make blocks.
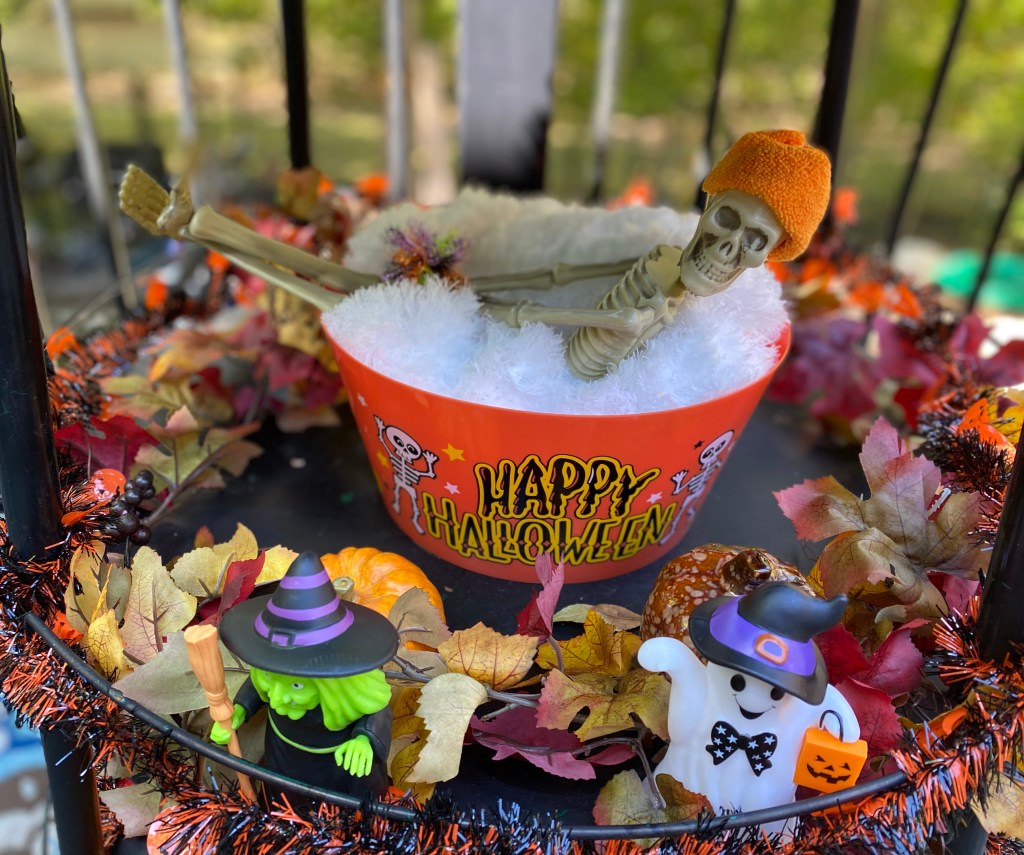
And now here is my Halloween Deck Display “Tree”.
I used a silver tray and glued to a base. The painted and distressed it and the candelabra. The skeleton head are from Dollar Tree.4×4 blocks are 15”, 10”x and 6” tall.Dollar Tree idea I saw.This pumpkin’s face is a vinyl cut out.It didn’t take long to turn off the motion detector sounds on these Dollar Tree finds.Fall DisplaySummer Deck Garden
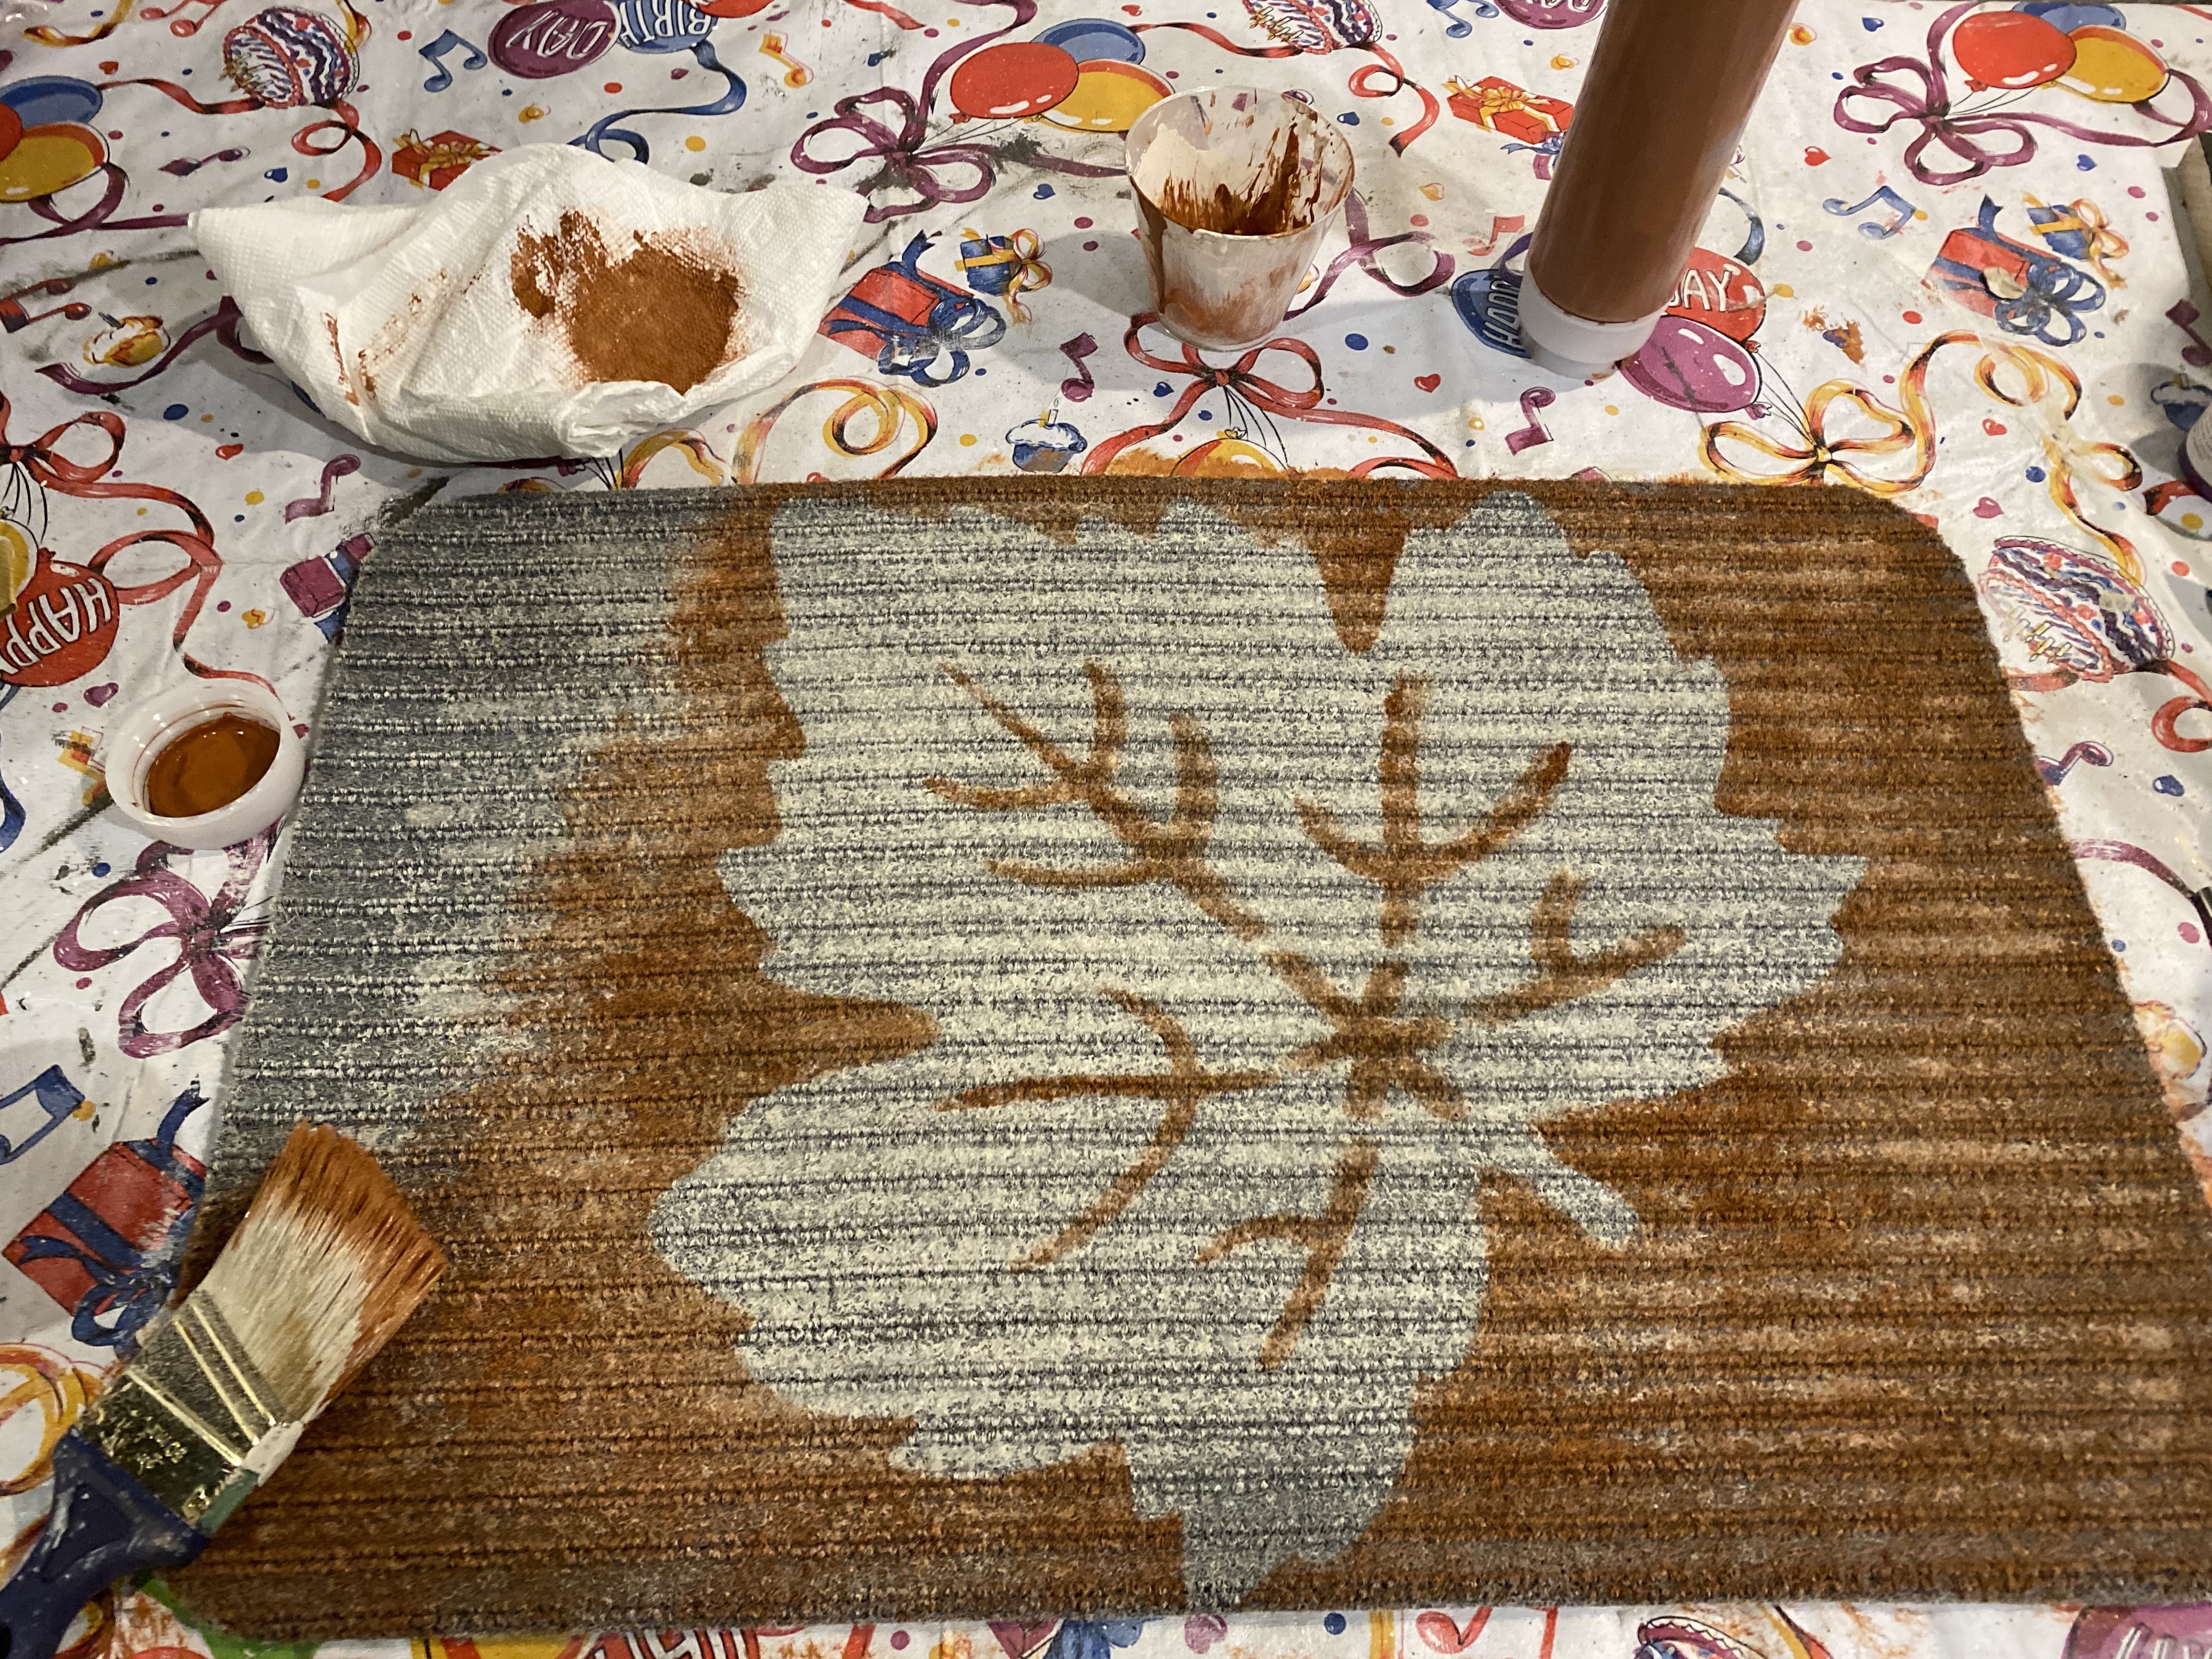
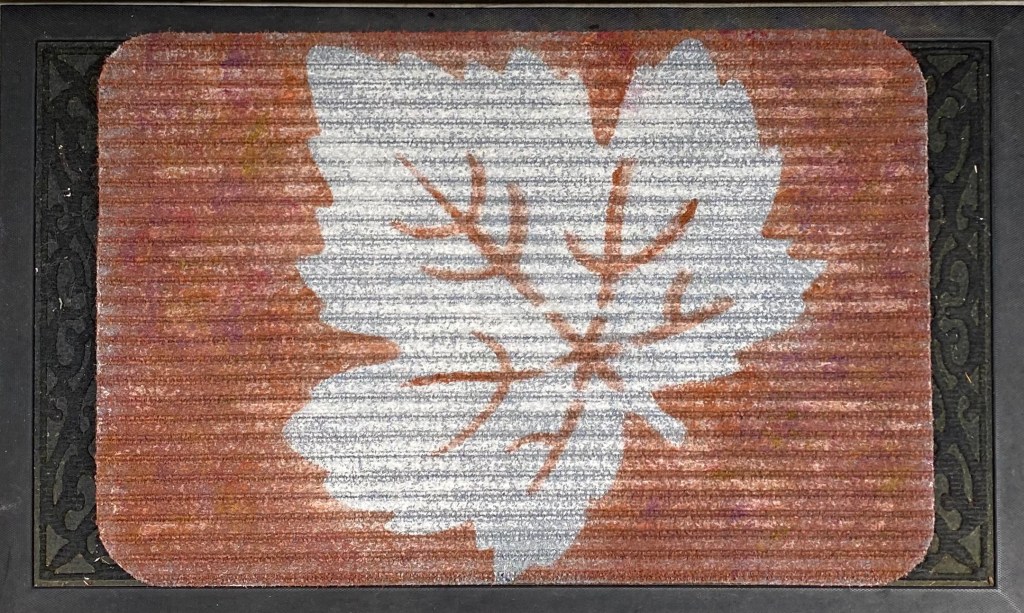
I’ve been seeing the Dollar Tree Felt Pumpkins, Leaves, and Acorns used as stencils on the Dollar Tree gray door mats. This morning, I used the leaf one to create this beautiful door mat. You can do it, too!
Yes, I made that cute little fall gnome door hanger, too.
These are the materials I used. I used our paint brand we own and produce, Missouri Limestone Paint Company chalk-style paint: Grannies Lace, Old Tin Barn, Bordeaux, English Ivy, and Possum Grape Jam. However, any brand and type of paint should do fine.
I used the side that was more ribbed. On my next one I will use the flatter side. This mat really soaks up the paint. This is the first coat. I eventually did two coats and then a little more to cover well the area that will be under the leaf stencil. The rest can have a more dry brush look.
I then placed the stencil on the mat and just started pounding the Old Tin Barn color on the spines and all around the leaf. You don’t have to do the whole thing at this point. I just did around the leaf area then removed the leaf stencil.
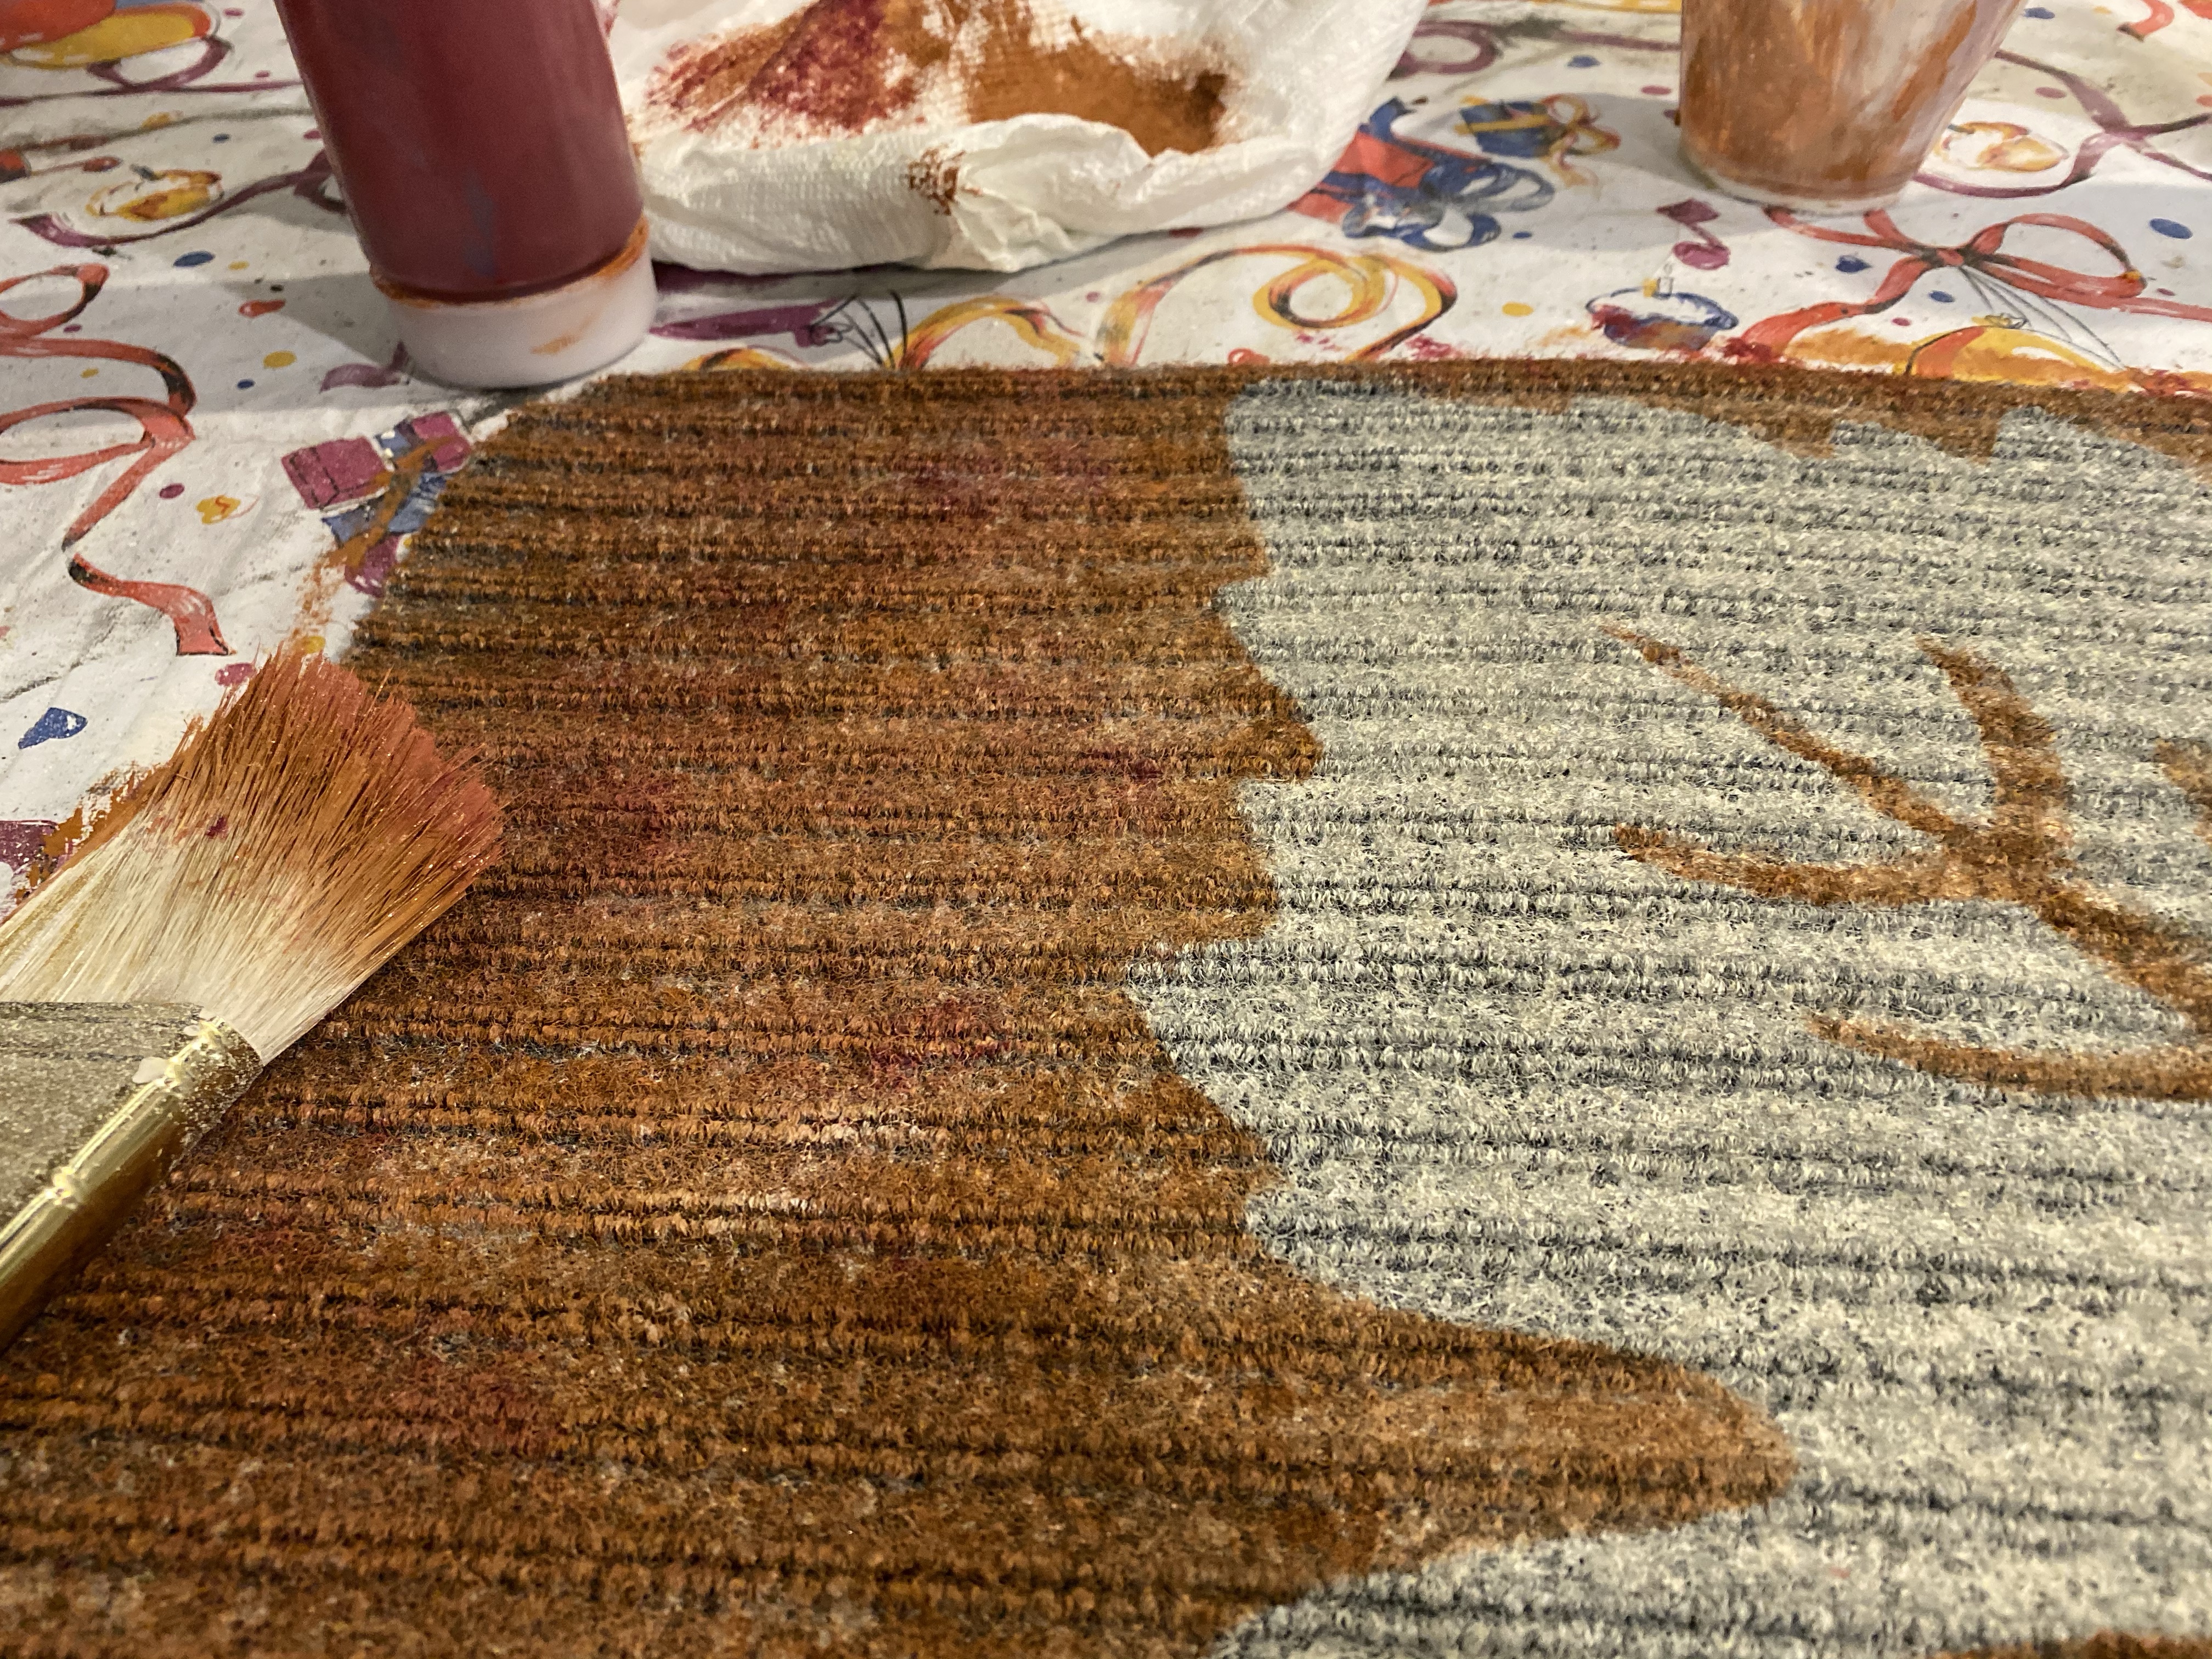
I then continued pouncing the Old Tin Barn color all around.
Using the same brush, without washing it out, I pounced the Bordeaux color on randomly over the Old Tin Barn, trying to blend it a bit.
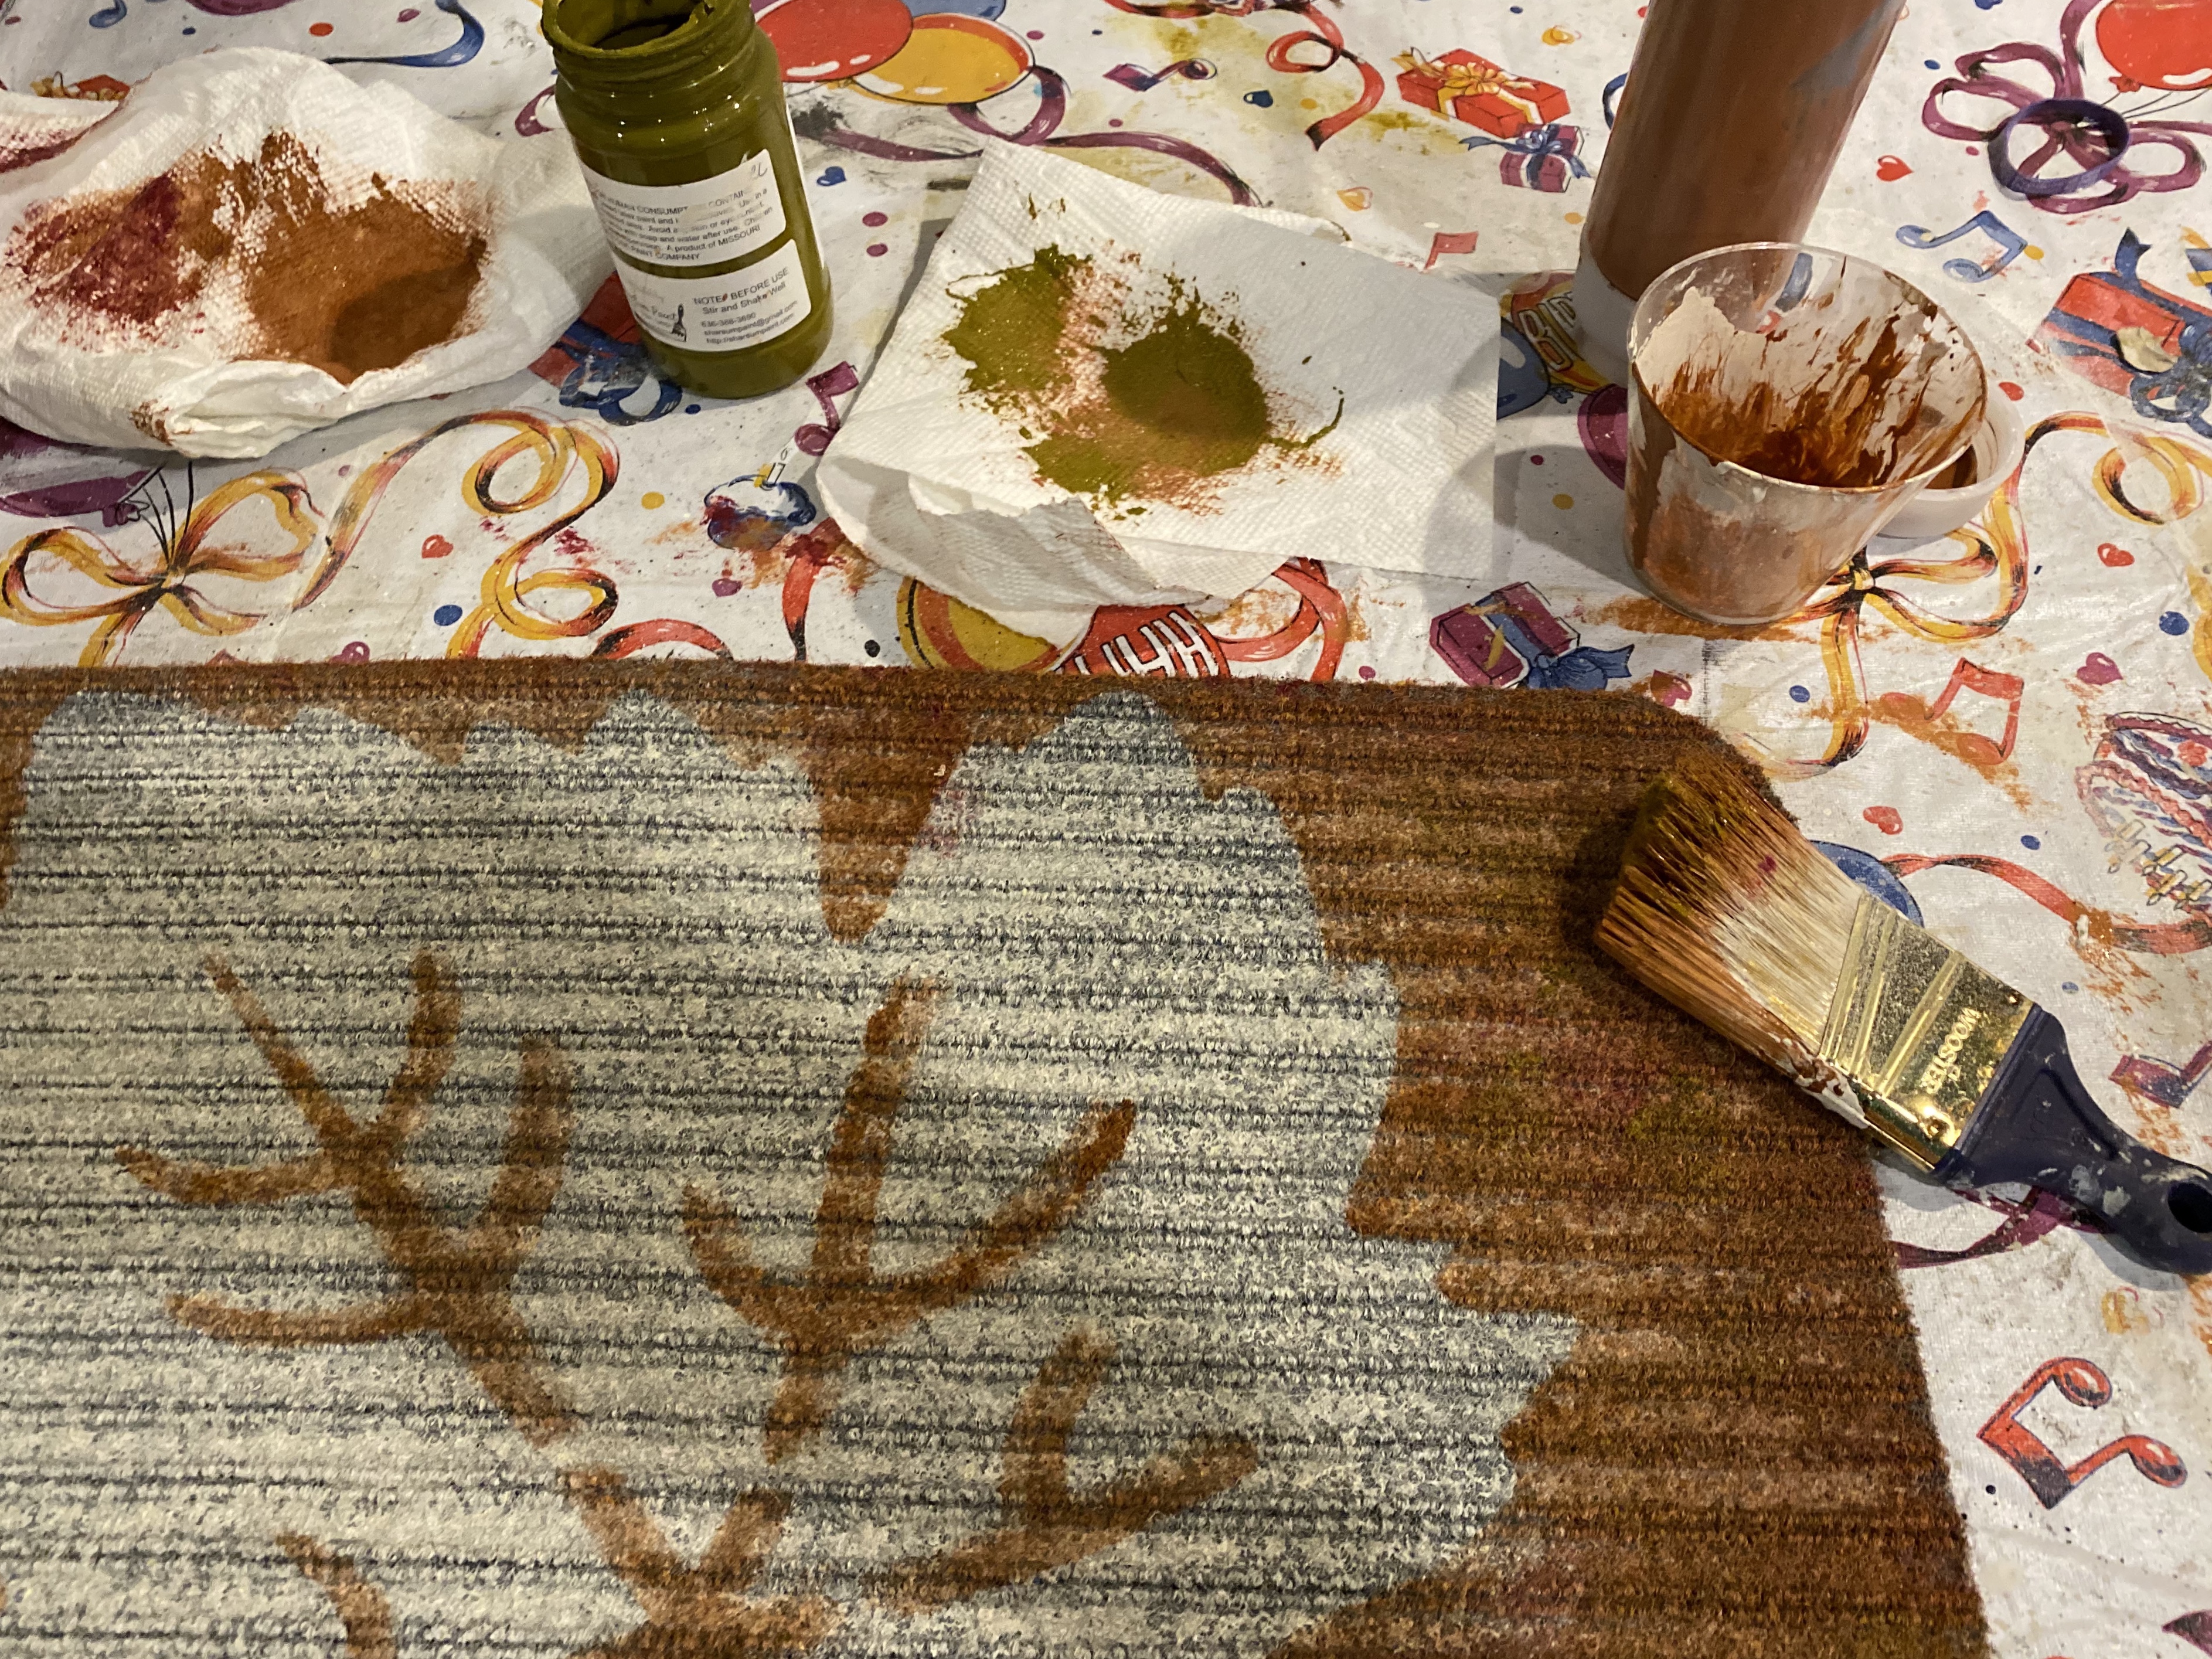
Using the same brush again, I pounced on randomly the English Ivy color.
Using the same process, I added a bit of Possum Grape Jam color.
This photo shows all the different colors, much like you would see in nature in the fall.
The last step is to take the mat outside and give it a couple coats of the SPAR Urethane waterbased exterior sealer. It says it is gloss, but doesn’t show up gloss on the mat. I don’t think, once chalk-style paint cures for 30 days, a sealer is really needed, but in the meantime I think it just helps protect it a little.
And there it is! A beautiful Fall door mat. The pumpkin and acorn would also look nice.
And here’s my acorn one. I’m keeping this one. It’s pretty appropriate since we have a ton of oak trees (not to mention leaves) in our yard.
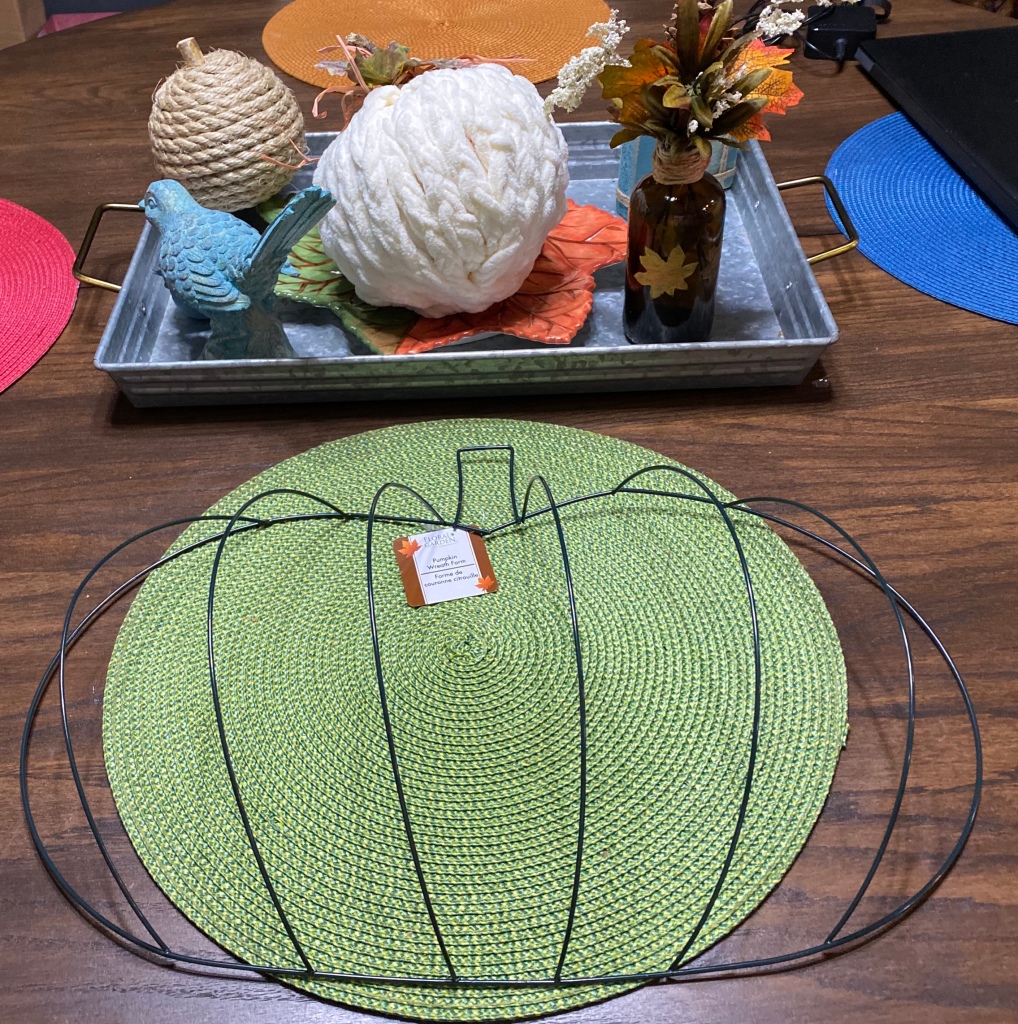
I ordered 24 of the pumpkin wire forms from Dollar Tree. They were shipped free within a couple of weeks to my store and the notification and pick up were very easy. Just go to https://dollartree.com
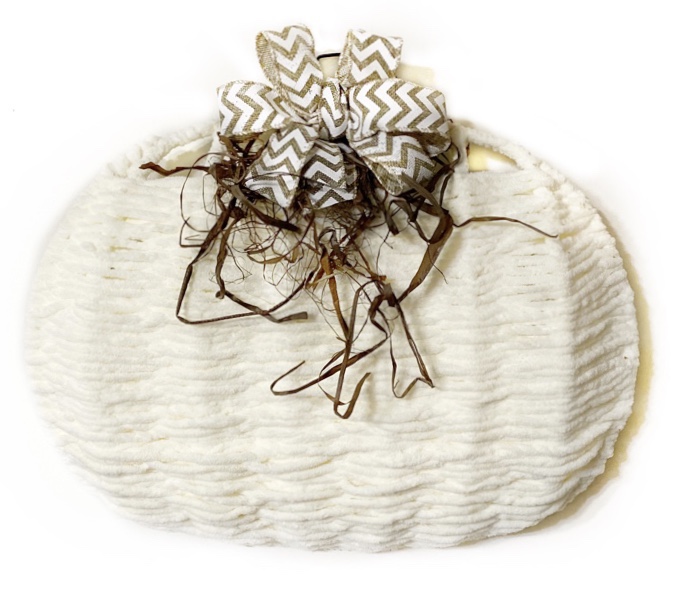
In addition, the manager of my local store told me if I didn’t want them all, they would buy any back for store credit as they were so popular. My plan is to make up some and decide what might be easiest to do. I want to then try a Zoom craft meet with about 8 friends. I will make up a kit for them, let them know the date and time, and they can porch pickup the kit. This should prove to be pretty hilarious. I did decide on weaving yarn through one, similar to the cream colored one pictured. Hopefully they will remember their elementary school lantern weaving projects. 🤪
Right now, I have completed 8 wreaths. Several take two of the forms. I have a few more to make, including a snowman made from one. Most of my ideas came from or were inspired by those I saw on Pinterest or in my crafting groups. Most of these wreaths can hang on a door, but should be kept out of the weather.
I hope these will inspire someone else. So keep coming back to this post as I add more. 😁
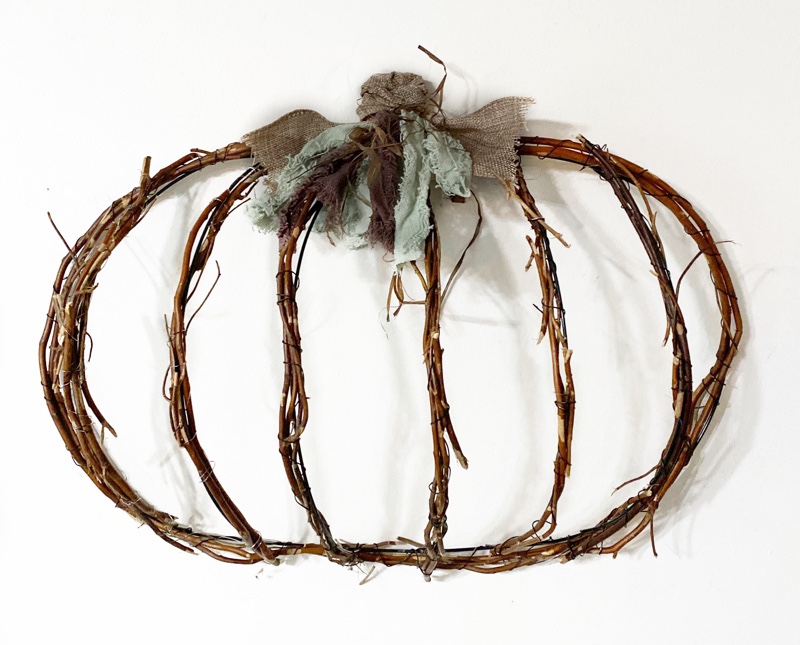
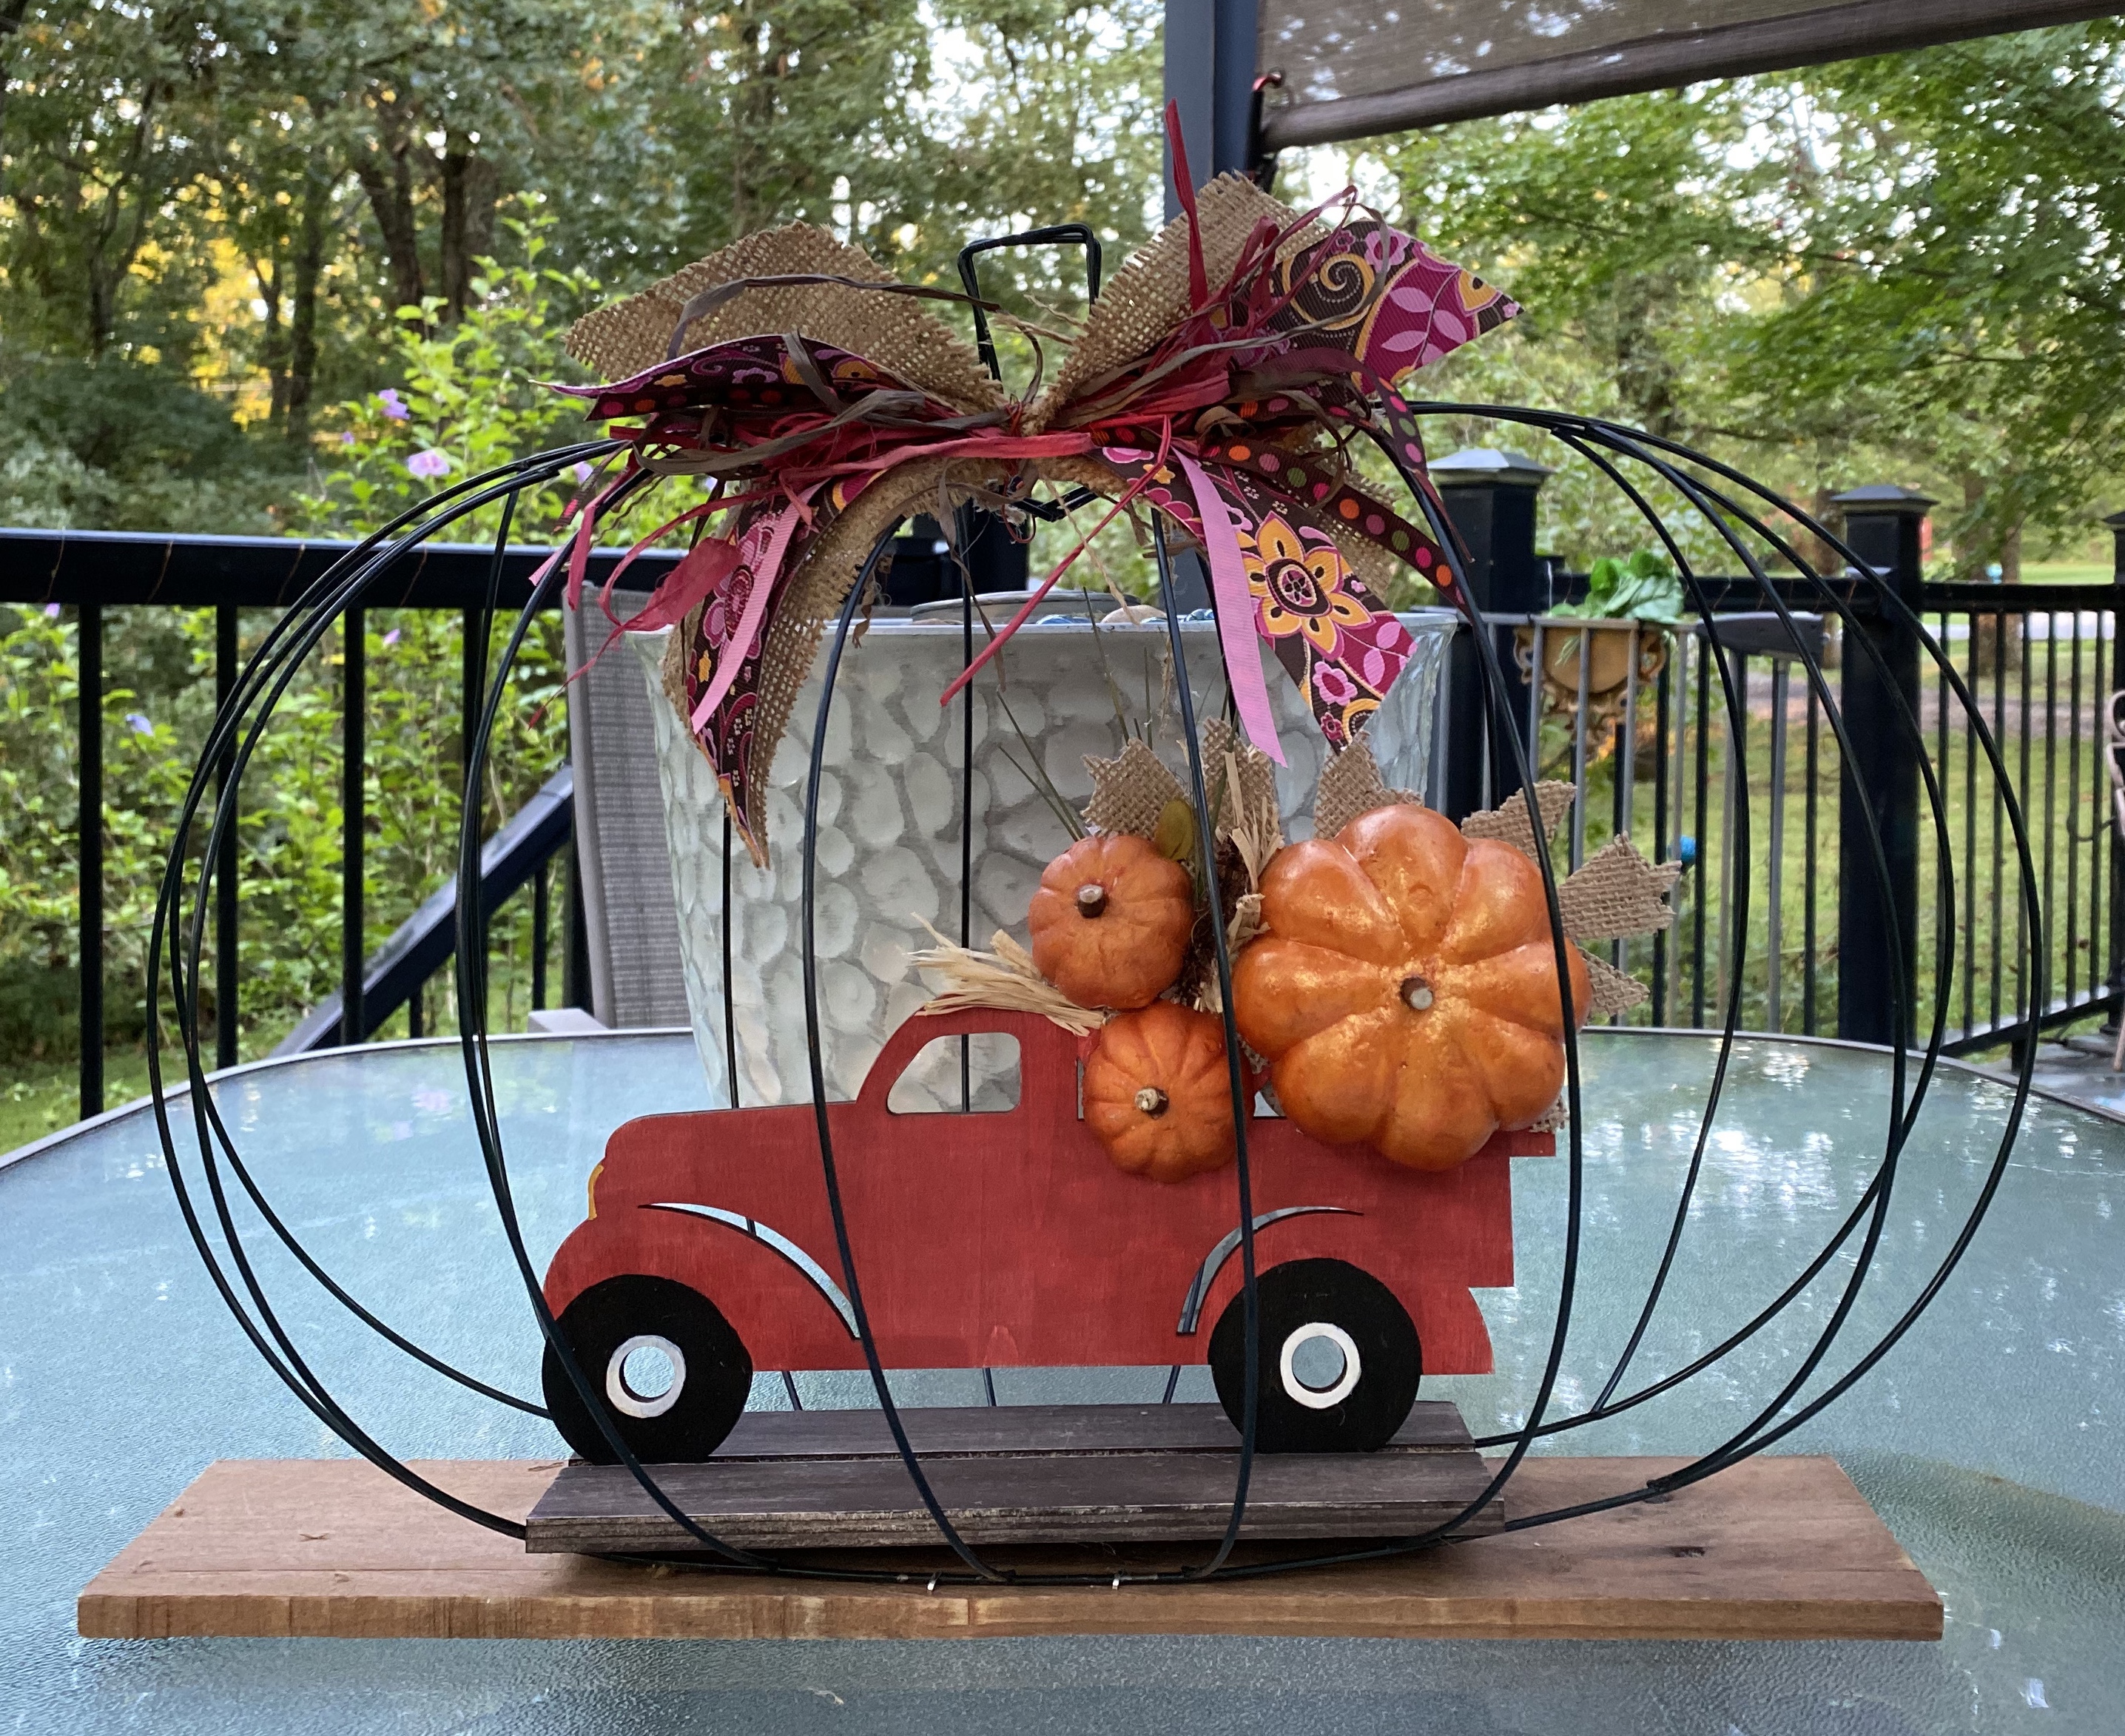
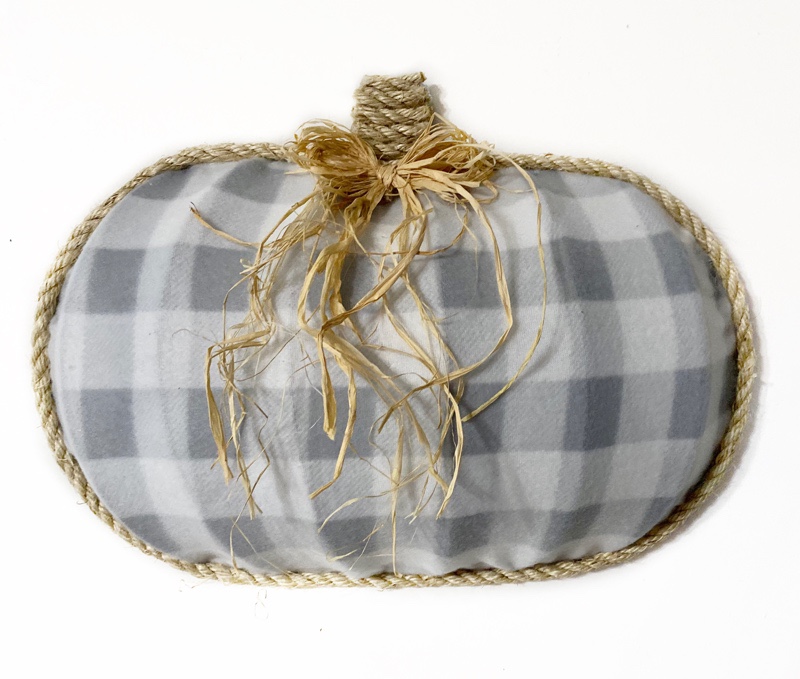
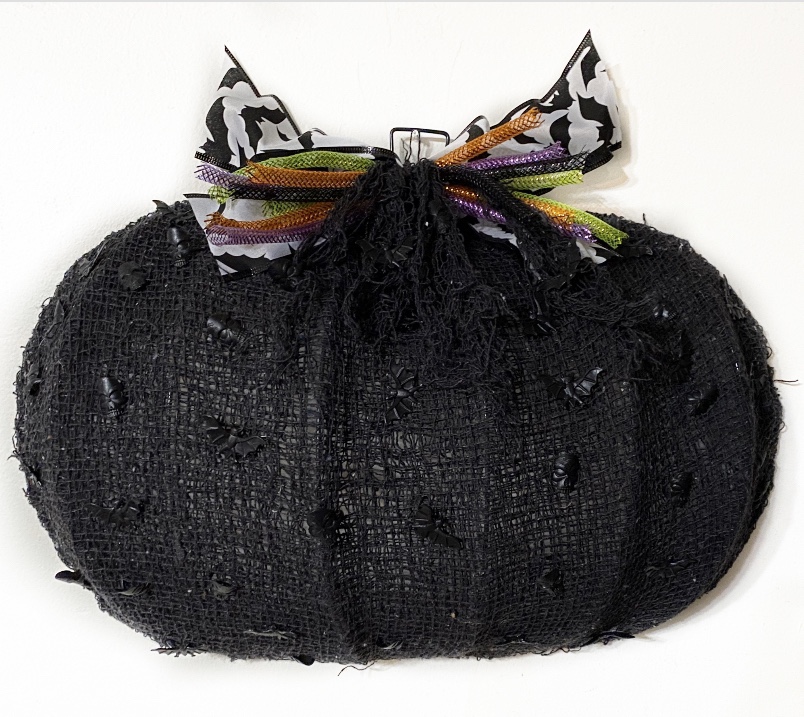
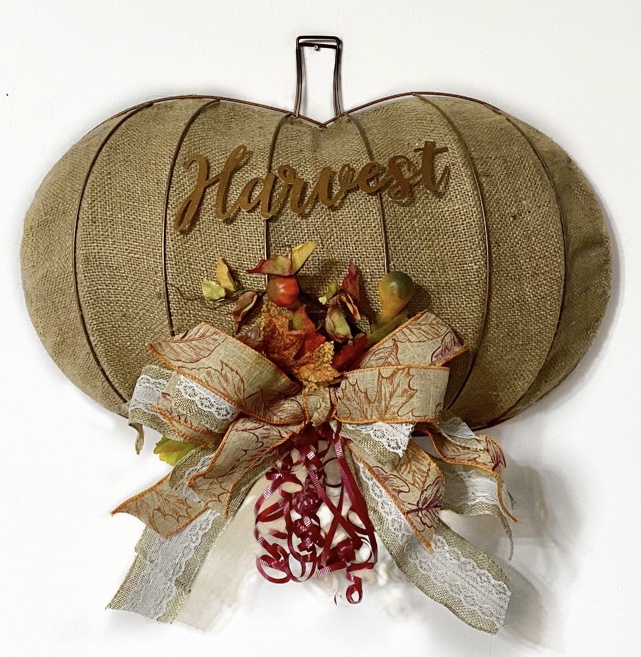
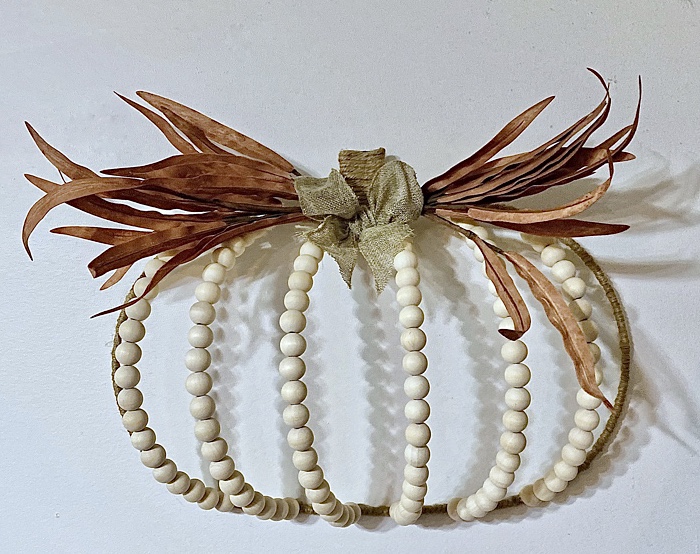
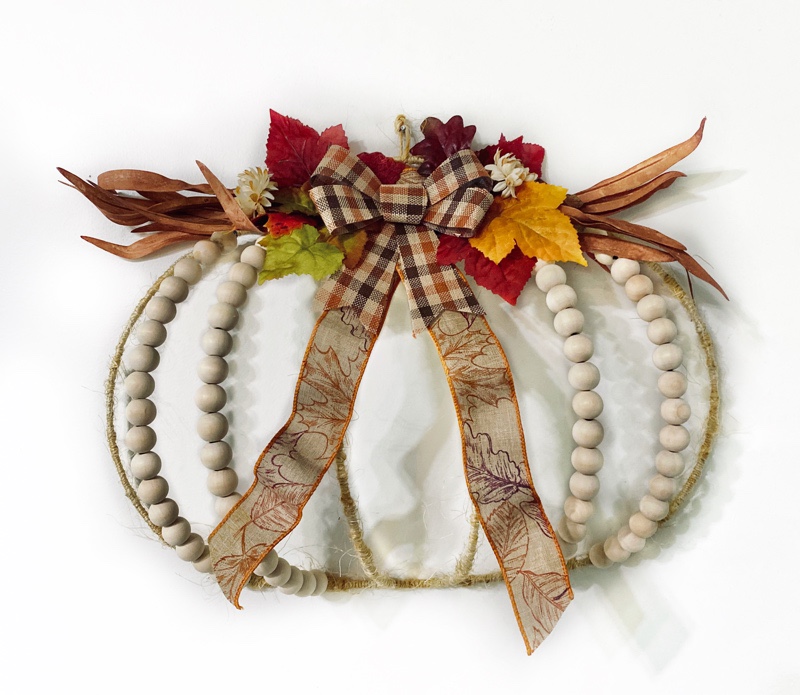
I used a grapevine wreath from Dollar Tree and took it apart. I wired it to the form, wrapping the wire as I went.Woven with chenille blanket yarn. I first wrapped the whole pumpkin. The bow is removable and I left an opening at the top in case someone wanted to add decoration there, plus, I liked the look of that.This one took two. The bottoms were stapled to a board and tied across the top with jute. I pulled the wire apart just a bit to get the big pumpkin in the truck to fit. The wires went right back in place. The truck is decorated on both sides and a bow added to that side so this makes an awesome centerpiece.This one has two forms. The first one, I wove with chunky chenille yarn. Then placed the second over it. I tied them together with pieces of the yarn on the top, sides, and bottom.This gray buffalo check wreath started out as a flannel baby receiving blanket. I added jute all around and on the stem for a finished look. Bow is just long strands of raffia tied in a bow.I had to do a Halloween one. All materials for this one came from Dollar Tree, including the gauze like fabric. The tiny black bats and skulls are actually plastic rings for your fingers. I tried to make the ribbon look like bat wings.This one took two. I sprayed them with metallic copper paint first. It is made with a burlap feed bag glued over the first form, then the second one place over that. I use mall wire to secure them together in places. The Harvest word was sprayed copper also. The curly ribbon is old school curled with the edge of a scissors blade.I wrapped jute around the outside wire and the stem. Then cut the spine wires at the top leaving a bit of wire to glue the first natural wooden bead to. Then added beads to each spine wire and glued the first bead to the last one on each. Foliage from JoAnn’s and a small wired ribbon bow seemed perfect for this neutral wreath.
That’s all for now. Remember to check back. I still have a few more forms left and will add photos here. 😁