Nightstands & Storage Bench

The problem (not really a problem) with selling chalk-based paint is that with everything you paint, you really want to keep it all. Take my bedroom….we bought nightstands about a year ago. We’d never had nightstands before much less matching ones and I was going to paint them. We bought themnightstands_somethingblue at Mary Ann’s Home Decor and Consignment in Rolla, Missouri, about a year ago and they were in such good shape I really didn’t want to paint them. So, I compromised and painted just the drawer fronts, then gave them a coat of wax. I’ve really enjoyed the size and the drawers and the drawer fronts I painted with Missouri Limestone Chalk-based paint in the color “Something Blue”, which is similar to a light teal color.

Then about a storagebench_pier1month ago, our son Trevor found at an estate sale in Cape Girardeau,  a really neat rattan storage bench for me to paint and sell. It was from Pier 1 Imports originally.

Hmmmm…that would look so nice painted with the same color as my drawer fronts and sitting at the foot of my bed storing clean sheet sets. I gave this a couple of coats  of polyurethane for protection.bedroom_somethingblue1


Sold! To me!  See, I told you it was a problem. I had to keep this one.

bedroom_somethingblue

Update: Painted Kitchen Cabinets and Countertops

We’ve had so many people lately wondering about painting their kitchen cabinets and what to do about outdated counter tops.

https://sharsumpaint.com/2017/03/18/update-painted-kitchen-cabinets-and-countertops/

I thought I would share the post documenting what we did with ours around 2014.  Both the cabinets and counter top are holding up well and I still love them.  Click here to see the blog on our kitchen makeover. The information about our kitchen is toward the bottom of that post. Sorry you will have to scroll.

I used Annie Sloan chalk paint on my cabinets….Annie Sloan was my introduction to chalk-based paint and I was in love.  I still like the Annie Sloan line. At the time, I didn’t even mind the price as it does go a long way.  It was hard to find in my area, though, and there weren’t a lot of color choices. Then, we stumbled across Missouri Limestone Paint Company’s chalk-based paint, founded in the Missouri Ozarks, and the rest is history.  We are now established distributors of this line, selling paint and painting to sell, and I am more in love with chalk-style paint than ever!

Update on the paint line: As of March 2019 we became the owners of Missouri Limestone Paint Company and continue using and selling this quality paint!

The counter top product we used is truly amazing:  Daich Coatings Spreadstone Countertop Finishing Kit.  It was a long process but well worth it in the end.  To this day, it looks pretty much the same as the day we finished it.  It is wearing very well and I am very happy with it.  Our counter top was the 1980’s white “leather-look” laminate.  I thought we would be able to sand it down, but that was wishful thinking. That laminate is tough stuff.  So, underneath my lovely counter tops with flecks of colored stone, is an interesting “leather-look”, but it really doesn’t detract from the looks of the counter top at all.  Read more about our counter tops on my Pinterest Board.

The Daich Company advertises they give you a generous supply.  That is true.  We had a lot left over in our kit.  I ended up a couple of years later doing the top of a laminated kitchen table to match the counter tops.  This company now has a new finish called Mineral Select, that looks amazingly like (from the photos on their website) a granite or quartz counter top!

Update: I had great luck using chalk paint on my cabinets as they are holding up very well, but I do have to say using wax was probably not the best choice. It was a lot of buffing! Also, these days, there are so many new products available especially made for cabinets, I would use if doing it again.

For countertops I recommend the Daich Coatings products. I have no affiliation with this company.  I just know I used it, loved it in 2014 and still love it now.  I just checked out their prices and the Spreadstone product we used is even cheaper than when we purchased it.

If you have any questions, I’d be happy to answer them.  Just fill out the form below and I will get back to you within 24 hours.

← Back

Thank you for your response. ✨

Chalk-based Painted Bunny Decor w/ Clear Glaze Technique

Chalk-based paint and clear glaze – who knew?  And just in time for Easter!  My inspiration piece came from Pinterest, naturally.  As soon as I saw the cute bunny decoration on this site, I thought……I can do this!  So, I did.  http://divaofdiy.com/easter-decorations-rustic-bunny-sign/

First off, my husband and I are distributors for an awesome (we think) chalk-based paint manufactured in the Missouri Ozarks by a company called Missouri Limestone Paint Company.  As of this writing, they have over 30 beautiful colors and we stock most of them in several stores in our area.  Of course, we practice what we preach, so we paint with it, too.  Be sure to visit our website to learn more about us and the paint.  http://sharsumpaint.com  You can follow us on facebook, too.  https://www.facebook.com/sharsumpaint

This is what we did….did I take step by step pics?  No…..so you’ll just have to read carefully on this one.

  1.  We already had the paint and clear glaze.  You know where we get our paint now and the clear glaze we use is Dutch Boy, purchased at Menards a few months ago.
  2. The boards we used to make the sign came from Lowes.  They are 1/4″  x by 2 1/2″ poplar boards.  The ones we used came 24″ long.  We bought 6 of them to make 2 signs.  We just cut them in half.  Then we bought 2 – 1/4″ x 1 1/2″ boards that came 48″ long.  We cut four of them ( about 14 1/2″ long) to use as braces for stapling to the back of the sign.  The finished sign is approximately 12″ wide by 15″ long.
  3. Before we stapled the boards together we painted them (front, back, and sides) with the paint/glaze combination.  I love, love, love how the glaze transformed the paint into soft pastel colors.  I just experimented with the combinations.  I didn’t need much of any of the colors as I only had 2 12″ boards to paint with each color. I’m guessing I used maybe 2 Tablespoons of glaze and about a 1/2 teaspoon of paint….but you just have to figure out your own color preference on that.  I love how the paint/glaze combination produces almost a color stain….so that the wood grain of the boards shows through.
    1. Possum Grape Jam – this is usually a deep purple but just a bit added to the glaze made the darker pink color.
    2. English Bluebells – this, mixed with the glaze, created the lighter blue color.
    3. Trading Post – this color and the glaze produced the light turquoise.
    4. Dandelion and Field Corn – I used a little combination of both of these colors to produce the light yellow when mixed with the glaze.
    5. Effie’s Lilac – Usually a light blush pinkish/lilac – I love the light pink produced with the glaze.
    6. Evening Shade – this is a new color I hadn’t even tried yet.  It is usually a beautiful dark green but the glaze lightened it up and reminded me of Spring grass.  I’m now trying to think of something else to paint with this mixture.
  4.  It was now time to staple the boards together.  We just decided on which side we wanted for the face of the sign and turned them over.  I used the light blue to represent sky and the the green to represent grass and the other colors were just random, trying not to have the pinks together.  Then we made sure they fit tight next to each other and stapled the smaller boards to each one.  We probably could have used glue, too, but we didn’t.
  5. Time to make the bunny.  I’m not an artist, so I usually use a stencil. I have a Silhouette machine and usually use contact paper as stencils.  It usually works great.  Sticks down nice and even and I seldom ever get bleed through.  However, contact paper wasn’t liking the slightly rough, raw boards and wasn’t sticking well enough to stencil.  So, I just used the bunny outline and traced around it with white chalk.  Then filled it in with our white paint called January.  That worked like a charm as I found I can paint with the lines.  This is the template I used to make my bunny.  But I just saw this one.  It looks more like the one used on Pinterest.  It has the little feet on it.
  6. The final touch is the cute little bunny tail.  I used white Bernat blanket yarn to make a pom pom and just kept trimming it until I got the size I wanted and hot glued it on.  This tutorial using a piece of cardboard is basically what I did when I made mine.

That’s it!  If you make one, it is fun to experiment with the different colors you get when mixing them with glaze.  Of course, we love our Missouri Limestone Paint, but any chalk-based paint should work.

If you do make one, be sure to mention it in the comments and send me a pic of yours.  I’ll be sure to post it.


A Winthrop Style Secretary – Should it Stay or Should it Go?

I just can’t keep myself from picking up a paintbrush before Christmas. Last week, my childhood friend came to visit for a week (I’m fond of saying my best friend since 4th grade).  She was the one who introduced me to chalk paint in the first place. Now, she wanted to see me paint the Winthrop Style Secretary (Lammert’s Furniture in St. Louis – possibly around 1940’s) that had been sitting in my hallway for months.  I had purchased it at a resale shop and just hadn’t been able to decide how I wanted to paint it.  It did need painting on the outside and some work done on the drawers and pull down.  But the inside was really in pretty good shape and I wanted to leave it original if I could. So, what color would go with the wood and would be a neutral color that would fit in with just about any decor?

With my friend Cindy’s help, we decided on a new color I had asked Missouri Limestone Paint Company to mix.  I wanted a linen color and they came up with exactly what I had in mind…and named it “Vintage Linen”.  It is a gorgeous color and looks beautiful next to the wood on the Secretary.  I also made a glaze with French Roast and lightly glazed the feet and the finial and area around it.

We decided to paint it right in the hallway, so we put down some plastic and got started.  Since the lighting there wasn’t the greatest and it was a small space to work in, she was my assistant and held a flashlight and was quick to let me know if I missed a spot.  : )

I really become attached to pieces once I’ve painted them, and this piece was one that really makes me want to keep it, especially since it does fit in my living room nicely and blends in with my decor.  Once I decorated it with my snowman collection, I really fell in love.  I do have it for sale for $250.00, however, I’m perfectly happy if it doesn’t sell.  : )

Now for some pics!

originalsecretary secretary_snowman1


originalsecretaryinside secretaryinsidefinished


Even though the inside was in good condition, there were several spots and scratches.  My magic stain/sealer by Varathane (water-based) took care of that and restored the beautiful wood finish. It also refreshed the wood on the doors and the fretwork.

I think this one might be one that stays!

Update:  I didn’t have time to get too attached as it sold quickly.  : )

secretary_snowman

TIP OF THE WEEK: THANKSGIVING HOLIDAYS – Creating a Barn Wood Look With Paint on a Farm Table Top

You can create a barn wood like look on a table top using Missouri Limestone Company chalk-based paint and a stain_sealer. I have a step-by-step tutorial here to show you how!

For previous TIP OF THE WEEK click here.

The tip of the week is a little late thanks to Thanksgiving holidays. One of my sons and his two sons ages 4 and 17 months came to visit the week before Thanksgiving so need I say more.

My tip of the week for the Thanksgiving holidays shows you how I created a barn wood look on a table top. Plus I get to share the final results of the farm table set.  This is one of those projects I sure wished I had #1 – a garage to work in and #2 – that my dining room was big enough for me to keep it.  I posted pics of the progress and that generated so much interest, I sold it the day I finished it, so others liked it, too.


I did manage to get some time in to finish the huge farm table set I started (hoping to finish before Thanksgiving) the day after so that wasn’t too bad.  It took a couple of mornings getting up at 4:30 am to work on it before the little ones were up.  I really needed to get it out of the basement before everyone got here so we could get to the bed.  I was thinking we might have to sleep on it.  It sure was big enough. LOL

TIP OF THE WEEK

How to create a barn wood look with paint and Varathane’swater-based stain and sealer (I call this my magic stain).  I love it!  I debated about keeping this as my secret weapon, but I can’t do that.  I’m an educator and I just have to share what I have learned myself.  Hence the name of our paint company….SharSum Paint, a play of words based on my name Sharon Sumner (Share Some – get it?)

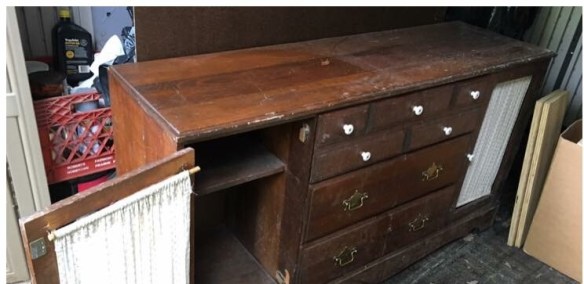
But first, some before pics of the table and chairs.

original-top originalbase originalchairs

farmtablebenchchairsbefore

The table and chairs were basically in pretty good shape.  We had to do some repair on some of the veneer under the table top and on the leaves and had to put the sliding mechanism back together, but this was a good sturdy set.

TIP #1:  Creating a barnwood type look on a table top.  I really didn’t know how this was going to turn out, so I did a practice piece and then decided to just go with it.  I really do love how it turned out and it is all due to my magic stain/sealer technique.

First, I gathered my supplies.  I used Missouri Limestone Paint Company’s chalk-based paint.  I needed Grannie’s Lace (an off white) Sunday Silver (a medium gray), French Roast (a dark brown) and Varathane water-based stain and sealer in Dark Walnut.

I painted the leaves and table first with the French Roast.  The pic shows a finished sample.

barnwoodlooksupplies

Next, I used Grannie’s Lace and dry-brushed over the French Roast.  Then, just a little of the Sunday Silver dry-brushed, and even less of French Roast again.  I then did a light wash of Grannie’s Lace.  I took dry paper towel and just started rubbing that wash in.  Sometimes I rubbed down to the French Roast and sometimes even harder down to the original finish.  The picture below shows the dry brushing.  UPDATE:  I did another table top after this (see pics at bottom of post).  I didn’t bother using the paper towel and rubbing it in.  Instead, I did a dry brush technique on the other colors (adding just a bit of water – not much) and tried to keep the brushing as straight as possible.)  It turned out as nice, if not better, with much less work.

2016-11-14_225107555_480a1_ios-1

The magic comes when I add the Varathane water-based stain and sealer.  I used Dark Walnut.  It somehow just blends everything all together and seals it at the same time.  You can see the white wash on the picture below.

2016-11-20_170958642_3595a_ios

The more coats you put on, the darker it becomes.  I used 3 coats on this table and leaves.  I very lightly sanded in between coats.  The result was a very smooth finish.  The sealer has a little shinier finish than I like, though, plus I always want to have a really durable surface on a table, so I added two coats of Varathane water-based satin polyurethane, which toned down the shine.  Every single time I would walk past the table top, I just had to admire it and feel the smoothness.  : )

So, there’s your tip of the week.  And now for the finished farm set.  By the way, we made a bench for this table out of 3 complimentary chairs.  Check it out on a previous tip of the week.The lady buying the set loved the bench.  She has two little ones and one on the way and she said she was worried about the benches with no backs and afraid the kids would turn them over too easily.  She loved how heavy and sturdy the chair bench was.

finishedbench finished-table farmtableset10 farmtableset9 farmtableset8 farmtableset7 farmtableset6 farmtableset5 farmtableset4 farmtableset3 farmtableset1

The 2nd table top I did is pictured below.
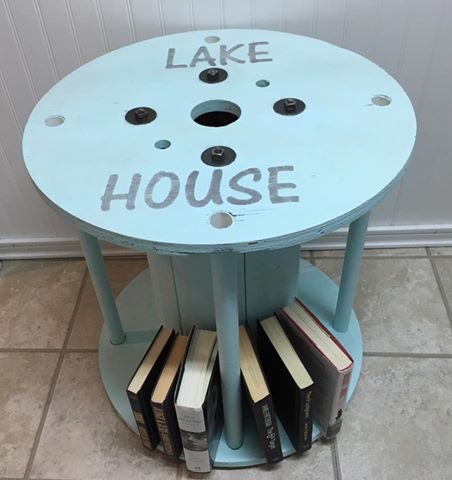


A Coffee Bar from a Dresser

Yes, please.  I wasn’t going to pick up my paint brush until after Christmas but….I just had to.  I felt the need to de-clutter after Thanksgiving and it came to me that I should make myself a coffee bar.  The piece could be used to store coffee cups, coffee, coffee pot, crock pot, toaster, and whatever else would fit and clear up some space in my small kitchen.

I just happened to have a long, narrow dresser that I hadn’t been able to decide how to finish.  I knew I wanted to paint the drawers different colors due to the way the top drawer was made.  So, Danny dug it out of our shed and we went to work.  He cleaned it up and I started painting.

coffeebar-original

The piece (I call it a dresser, but not sure what it actually was) is made of pine.  The top was in pretty good shape except for a couple of gouges and scratches.  Danny sanded the top a little and smoothed it out and then I used my secret weapon:  Varathane Water-based stain and sealer in Dark Walnut.  I love this stuff.  It goes on so smooth, really brings out the wood grain, and dries quickly.  I used 3 coats, sanding lightly in between.  It dries pretty shiny, though, and I wanted to use the semi-gloss water-based poly on the rest of the cabinet so I put two coats of it on after.  The top is so smooth, with just a little sheen.  I love the distressed look of the scratches and gouges.

coffeebartopwithstainsealer

After 3 coats of stain/sealer – pretty shiny

coffeebartopwithpoly

After 2 coats of poly – really toned it down. Now has a nice soft, sheen.

Then, I wanted to paint the base gray to match my kitchen cabinets, which were Annie Sloan Paris Gray.  So, I took some Missouri Limestone Paint Company “Winter Gloves” and mixed in a little dark “Gray Goose” and it came out pretty darn close.  You’d never know they weren’t exactly the same.  I painted the drawers the same colors I painted my chairs in the dining room. (“Sour Green Apple”, “Old Tin Barn”, “Trading Post”, and “African Violet”) I also bought some gray printed burlap at Jo-Ann’s for the doors and my daughter-in-law, Daphney, suggested adding chicken wire.  I found that at Hobby Lobby.  The chicken wire was the perfect final touch!

I’m very happy with the results.  It’s probably one of my favorite things I’ve done….possibly because I get to keep it.  That didn’t stop me from thinking, “Hmmm…I wonder if people would be interested in buying this coffee bar?”  After all, I have a dining room set to match and I can always paint another table and chairs.  : )  Nah…..I’m keeping this.  For awhile, anyway.  However, you never know that else will come up that I may want to paint just for me. But best of all, it has given me some counter top and  cabinet space in the kitchen.  Yay.

Meet my new coffee bar:


TIP OF THE WEEK: November 12, 2016 – DIY ANTIQUING WAX

For previous TIP OF THE WEEK click here.

Those who know us, know we recommend using toulene-free Briwax with Missouri Limestone Paint Company’s chalk-based paint.  It is so nice and buttery and goes on smoothly.  It rubs in well.  Then, with just a bit of buffing, you get a nice soft sheen.  Briwax does not take a lot of elbow grease and that’s always good.

Briwax does sell dark wax and we can and do get it.  It is great for a uniform color and if you have a very large project or do a lot of distressing with dark wax to get an antique look.  The consistency is a little different than the clear.  It goes into a liquid phase much quicker than the clear.  However, a few minutes in the refrigerator and you are back to a solid again.  This is normal, so don’t worry if your dark wax turns liquid.  Briwax also sells a liming wax.  I talked about liming wax in a previous Tip of the Week, when I did a tutorial on getting the restoration hardware look. Liming wax looks great over colors when you want to get that white washed beachy look.  I would not use it in bathrooms or kitchens, however.  For those areas, I would just thin down some white paint with water and do a wash.  Brush it on and wipe it off, then poly.

A good rule to follow when using any kind of antiquing wax – USE CLEAR WAX FIRST!  The reason is the clear wax base allows you to move the antiquing wax around more to get the look you want.  If you get too much just use a little more clear wax to wipe it off.  Without the clear wax, you won’t be able to work it as much and may not be happy with the final results.

Update:  It is very important to use Clear wax first on light colors.  On dark colors, however, I recently came across a tutorial in which clear wax isn’t applied first but in conjunction with the dark wax.  This produced beautiful results.  Keep in mind, you are still applying the clear wax before the dark wax has a chance to dry. https://sharsumpaint.com/2017/08/13/the-best-blackdark-wax-over-chalk-paint-tutorial-ever-by-jan-brown-kissick/

You also may not want to purchase a large can of dark wax or liming wax for just a small project or if you are experimenting with distressing techniques.  This is where this DIY tip comes in.  You can make your own antiquing wax with clear, toulene-free Briwax and any color of Missouri Limestone Painting Company (MLPC) paint you choose.  For liming wax I use “January” but I’ve made  antiquing wax with “French Roast” and “Grey Goose”, too. Can you use other waxes or paint?  I suppose, but I don’t sell those.  I stick to only what I like and use myself.

There is no scientific mix thing you need to know.  This is pretty simple.  I take about 2 Tablespoons of Briwax and mix in about 1 Tablespoon of MLPC.  Stir it well.  That’s it!  That’s all there is to it.  You can apply with a rag or brush. REMEMBER:  A clear coat of Briwax goes on first.  A tip I learned is to take one of the cheap chip brushes and cut about an inch off it.  You’ll then have a pretty sturdy, stumpy brush.  Applying your wax with this stumpy brush will let you dab it into all the nooks and crannies and move it around really well.  Make sure you don’t use too much and that you rub it in well.  You don’t want to have too much wax.  Let it dry for a bit and then buff.  Then apply your antiquing wax in the same way.  Work it around to get the look you are going for.  Then let it dry and buff.

That’s it!  This DIY tip is a great way for you to practice.  Go on….try it. It’s fun to distress with antiquing wax.

NOTE:  When using wax, you cannot seal it with poly after.  The poly does not work well on top of wax.  Remember the alphabet.  W is after P.  If you choose, you can apply a coat of wax over the poly.  Some people like to do that as wax helps repel dust.  But that is just a personal preference.  Poly is fine all by itself.

Electrical Spool Redefined as a Coffee Table/Bookcase

We’ve all seen these…..those spools in the hardware store that hold electrical wiring, etc.  You may not realize that at stores like Lowe’s (at least in my town) you can put your name on a list to get one of these for next to nothing.

Then, once you have one…..what to do with it?  I recently, thanks to my son’s father-in-law, received one.  It was a smaller one, the perfect size!  I forgot to take a picture of mine before the redefine, but it looked similar to this one…especially the top.  The bottom had 4 holes around the perimeter that matched the 4 top holes.

electrical-spool2

A quick search on the internet “electrical spool DIY” produce quite a few results.  One of the ideas I ran across was to make a coffee table/bookcase.  I loved that idea.  I also knew I wanted to keep all the imperfections in the spool so I chose not to sand mine.  My project was going to be to redefine my spool into a shabby/chic coffeetable/bookcase perfect for a lake house.  Why not beach house?  We live closer to a lake rather than an ocean and I think one that says lake house would sell much better….more market for a lake house table.  LOL

It’s a little difficult to see from the photo above but there are 4 washers and screws on the top.  I also decided to leave them as is and not paint them.  I did clean them good as they were kind of oily.  Now, onto creating my table.  Here’s the inspiration piece I found.

spoolbookcase_inspiration

Off to Lowe’s we went to purchase dowel rods….oops…stumbling block.  They had the perfect size dowel rod, but at over $6 a rod and we need 4 of them, that meant over $24 just for the rods to create the bookcase part.  Nope….that wasn’t going to happen.  So, we put on our thinking caps and decided pvc pipe was the way to go and off to the plumbing department we went.  They had a long piece that would make 4 the size we needed for a little over $3 for the piece.  Yes…..pvc pipe it is.  However, there was printing in black up one side.  We knew from experience that wouldn’t wash off.  So, off to the paint department we went.  We found a can of spray paint for plastic for about $6.  I knew I would use this again, so we purchased it and were on our way home.

The first thing Danny (my handyman husband) did was cut the pvc into 4 pieces just about the right length and then sanded out the existing 4 holes around the edge so the pvc pipe would fit.  It was just a bit too snug.  It didn’t take long and soon our bookcase supports were in place.  He then sawed them off even with the top of the spool.  We took them out again and gave them one coat of the spray paint for plastic.  (I wanted to have that base coat so that the chalk-based paint I would be applying later would have a good bond).

While that paint was drying, Danny turned the table over and added some wood on the bottom to create a stable base.  There were washers and nuts on the bottom, too, so without that (or casters – which were more expensive than I wanted) this worked out fine.  He made kind of an X pattern with the wood that fit around the nuts and washers.  He made one long piece and then two shorter pieces that formed the X and screwed them in place.  He also added on each edge, those little things you put on the bottom of furniture to keep it from scratching floors.  The ones he used were round and had what looks like carpet pieces on them that you tap into place.

I was now ready to paint the spool and bookcase supports with Missouri LImestone Paint Company’s (MLPC) chalk-based paint – “Front Porch”.  We put the supports back in and for good measure, Danny added a small screw on the inside of each one to make sure they stayed in place.  But they were a good type fit as he pounded them in with a rubber hammer so I don’t think they were going to go anywhere. I gave the whole thing one coat, allowing a little of the wood to peek through if it wanted to.  On the supports I also only used one coat.  A lot of the white showed through, but I liked that.  It looked like the front page color was just a wash over them and it created a nice effect.

Note:  All the other hole in the top of the table we left open, including the pvc pipe holes.  In interesting thing to note is at the bottom of the spool column there is a little hoe shaped like an upside down U.  I saw one idea that someone draped white Christmas lights down the big middle hole.  The plug would easily come through that little upside down U hole and you could plug them in.  That would make a nice effect at night.

After the paint dried, I cut a stencil from my Silhouette machine and stenciled “Lake House” on the top using MLPC “Sunday Silver” color.

The final step was mixing up some liming wax by adding some MLPC “January” to some Briwax and giving the whole thing a coat of wax….let it dry for a bit and buffed it.  I loved the effect of the liming wax.  The redefine was complete.  We are taking it to our storage unit “PopUp Shop” this morning.  Fingers crossed that it sells!  If not, I’ve posted it on Facebook’s marketplace and several local facebook swap shops, so hopefully it will sell on one of those if not today.

spooltable

A Custom Painted Wardrobe & Dresser

We purchased a Waterfall type wardrobe and dresser, but didn’t have a clue how we wanted to paint them.  I posted them on a couple of selling sites as is and offered to custom paint them.  Someone who had a vision loved them and knew exactly what she wanted them to look like.  And so the process to transform these pieces with good bones but needing a lot of work was begun.

wardrobeanddresseroriginal

She had seen a chest I had painted gray and with drawers left original.  The dresser drawers were in good enough shape that this would be possible to do.  So, we had a plan and started with that piece.

All the original pulls were there but they needed some restoration. I had found a product I loved called Rub n Buff.  I chose to use Antique Copper on the hardware and the result was amazing! This is a good video tutorial on Rub n Buff.  After  I buffed the dresser hardware, I sealed it with a couple of coats of water-based polyurethane to keep them looking good.rubnbuffhardware

Then came the transformation of the dresser.  I used Missouri Limestone Paint Company’s chalk-based paint “Gray Goose” on the base.  Due to the dark color and the old wood, I chose to then use a couple of coats of Minwax’s Sanding Sealer, sanding in between coats to even out the finish.  I applied 3 coats of Varanthane’s water-based satin polyurethane to seal and the finish dresseroriginalwas smooth as glass.

For the mirror and drawers I was able to keep the original wood.  I brought out the beauty of the wood with a couple of coats of Varathane’s water-based stain and sealer.  They turned out beautiful.

dresserfinished

Next up was the wardrobe.  My customer found an awesome inspiration piece on Pinterest.  I painted the outside of the wardrobe and the drawer fronts with Missouri Limestone Paint’s chalk-based paint with “Trading Post”, a beautiful turquoise.  The drawers and the inside of the wardrobe were painted with “Field Corn”, a bright yellow.

The inside of the inspiration piece had a dandelion decal.  We were able to find the same exact decal on Amazon.  I researched and found it was best to seal the decal with Modpodge.  I used two coats of Modpodge on the decals then sealed everything with 3 coats of Varathane’s water-based satin polyurethane.  I did not use the sanding sealer on the lighter color paint.  I also used Rub n Buff on the hardware.

This before awardrobeoriginalnd after restoration project is absolutely stunning.  This one is going to its new home today and now I can’t wait to start a new project.
wardrobefinished


wardrobefinished1

TIP OF THE WEEK: November 3, 2016 – Steampunk Decor – Who Knew?

For previous TIP OF THE WEEK click here.

I have to admit, before I started painting furniture I had never heard of Steampunk or Steampunk Decor.

steam·punk
ˈstēmˌpəNGk/
noun
a genre of science fiction that typically features steam-powered machinery rather than advanced technology.

Steampunk incorporates technology and aesthetic designs inspired by 19th-century industrial steam-powered machinery. Steampunk decor will then have elements of machinery and the elegance of 19th century design.

I found this article does a great job of explaining Steampunk and Steampunk Decor.

http://www.impressiveinteriordesign.com/steampunk-interior-design-style-decorating-ideas/

Here’s what came up with a Google Search on Steampunk Decor.  Browse through some of these links to get an idea of the look.

https://www.google.com/webhp?sourceid=chrome-instant&ion=1&espv=2&ie=UTF-8#q=steampunk%20decor 

For previous TIP OF THE WEEK, click here.

Why am I so interested in learning more about this unusual interior design? I have a customer who really likes this and looks for pieces that will fit. So, I made it my business to find out…and you know what? It’s pretty fascinating stuff.

I’ve done a couple of pieces now for him. I call it a Steampunk type look. Not exactly the real deal, but reminiscent of true Steampunk.

The first piece was a marble top coffee table. The middle piece of marble was missing and had been replaced with glass. I painted the table black and bought a piece of fabric from Jo-Ann’s which featured some of the colors of Steampunk and included images of a map, post office stamps, etc. I covered a thin board and stapled it on the back. I put it under the glass (it fit fine as with the board and the glass, the width was just about the same as the original marble and ended up with a cool, Steampunk look coffee table.

steampunktablesteampunktable11

Then, this cool clock came to me through a friend and I thought it would really be a statement piece. I painted it black and an out of date nautical clock has now been elevated to a Steampunk look. My customer loved it and purchased it on the spot.
nautical-clock

I’m kind of liking this Steampunk Decor.