A One of a Kind Floral Cow Skull Tray/Wall Hanging Decor

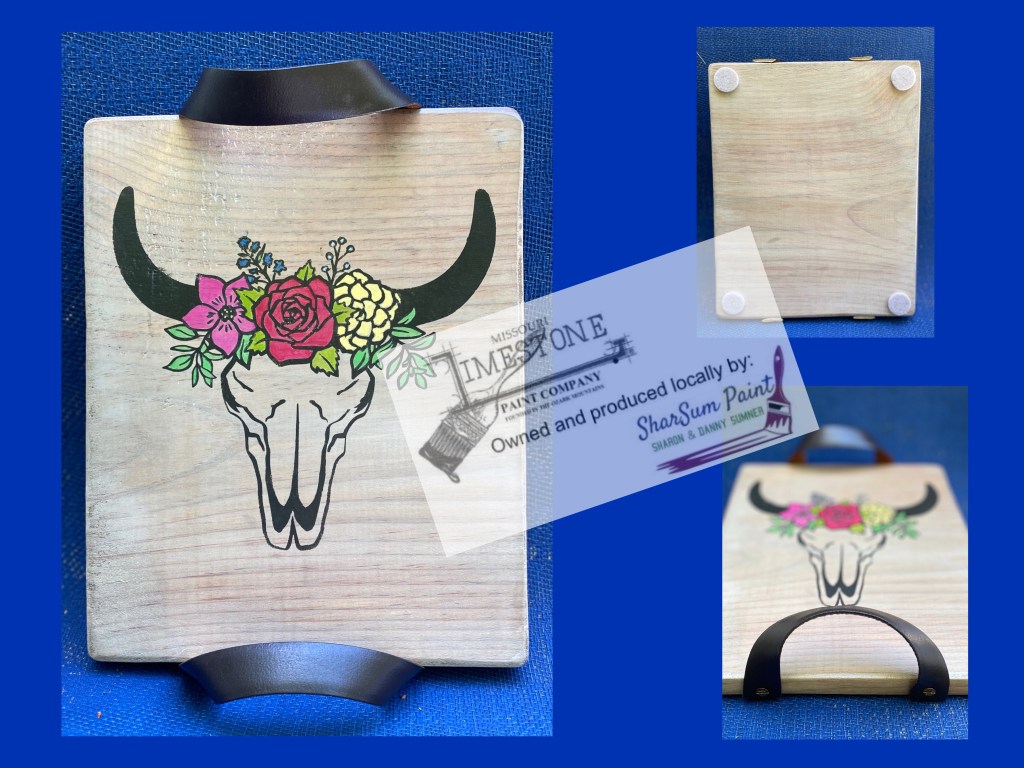
I’ve been on a kick creating stencils lately of farm animals on my Silhouette machine. My latest project has become my favorite! 🙂 I also tried a new staining technique on this one. I will definitely be using this technique again.

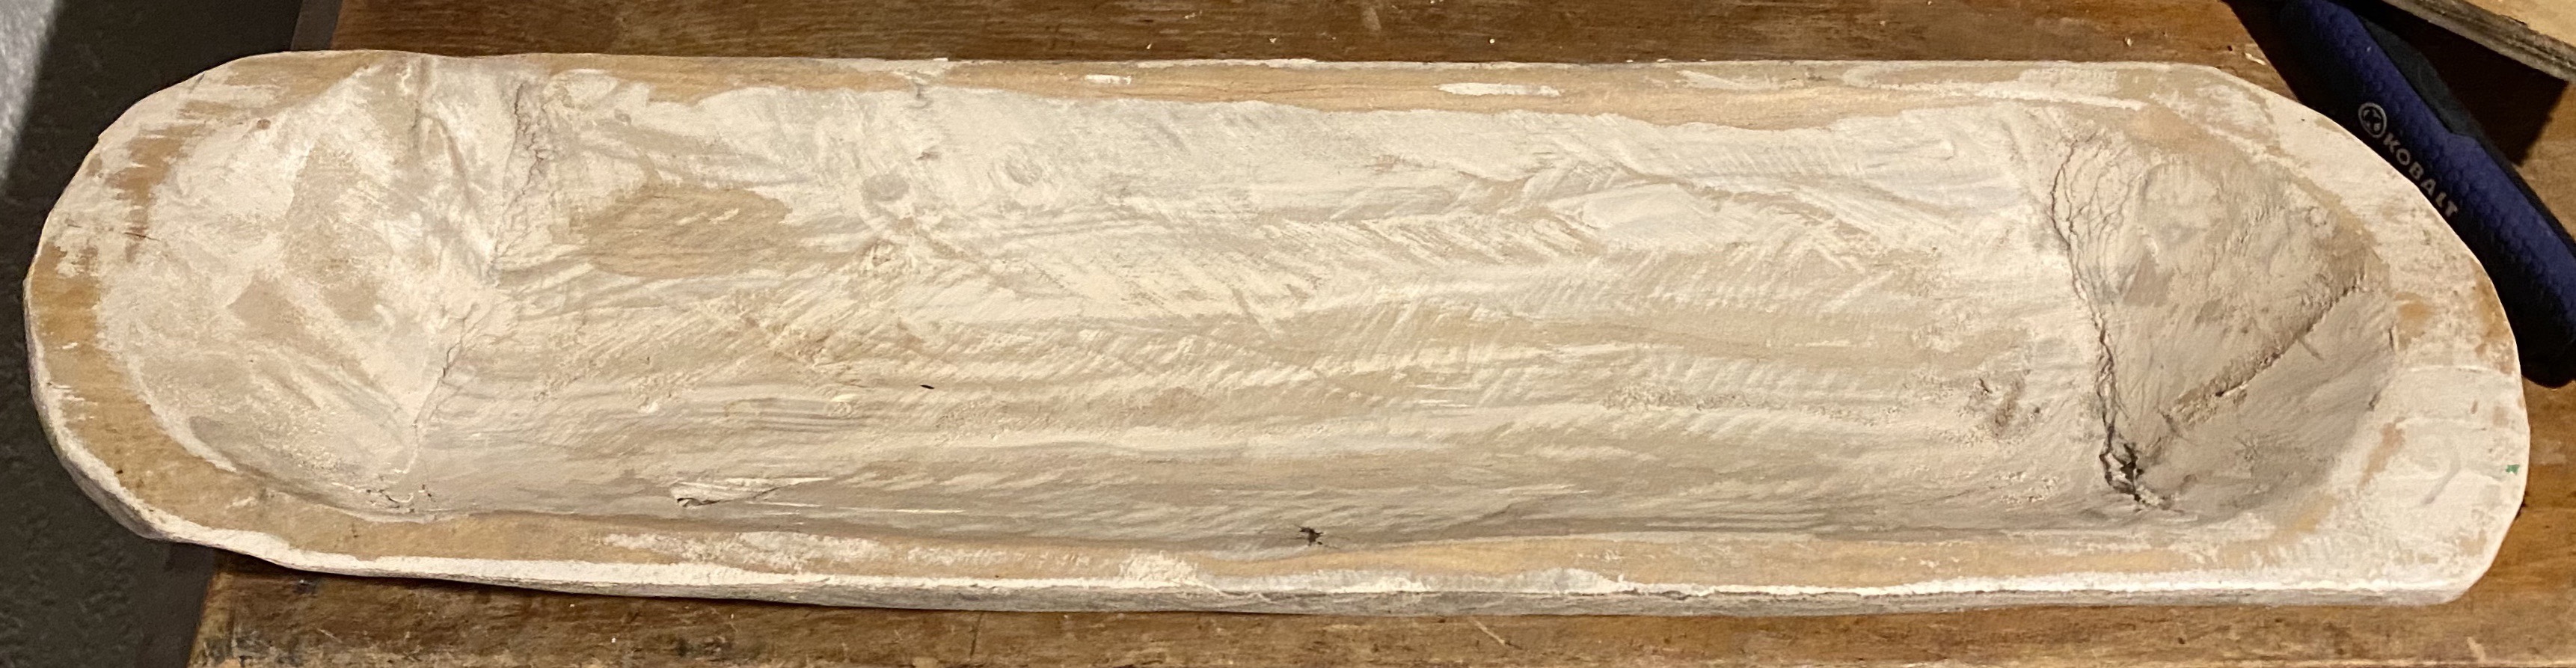
I started with a plain new pine board. Danny, my husband and partner in our world of painting and creating, had previously cut a long pine board into 9 x 11 1/2” boards, sanding and rounding the edges. Some we will make into cutting boards, but this one I wanted to make a tray that could also hang up and be used as a wall decoration.

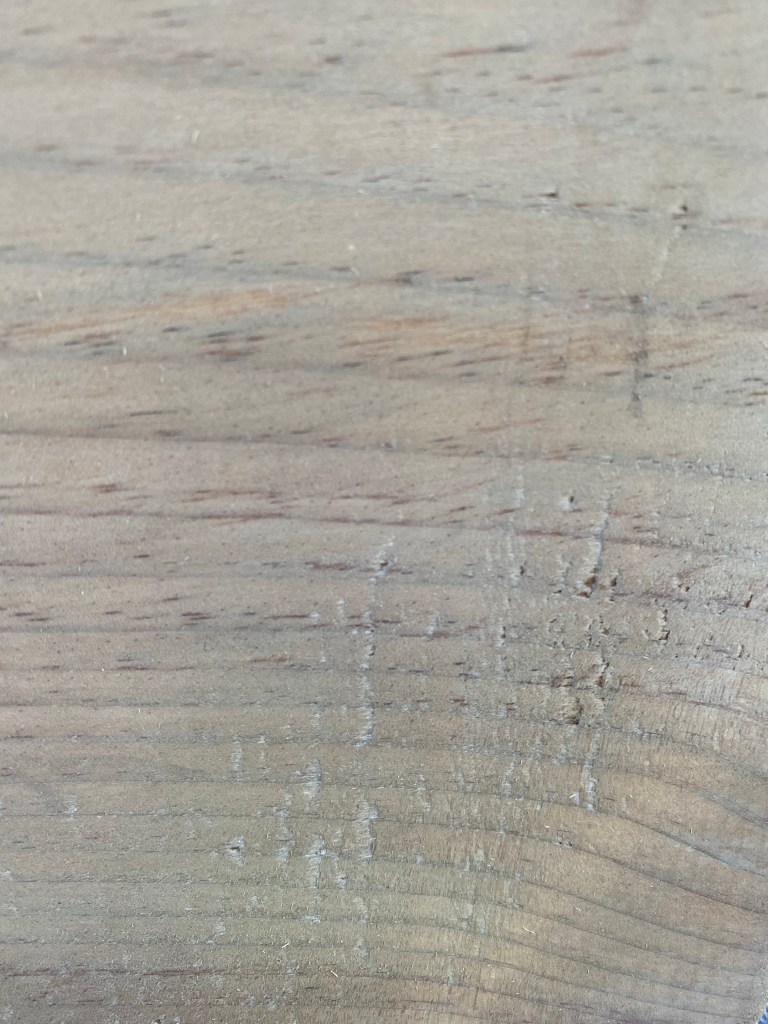
My idea was to give the board a natural, white washed look. I created a coffee stain with used coffee grounds, vinegar, and a steel wool pad. Here’s the tutorial I used: https://www.familyhandyman.com/woodworking/staining-wood/how-to-stain-unfinished-wood-with-used-coffee-grounds/?_cmp=stf

This worked well to darken the wood and bring out the grain. I would have liked for the wood to have been a little darker. When this dried, and after 3 coats, I still thought it would be a little darker but it was fine. I let the solution sit for 24 hours after I mixed it. The next time, I think I would let it sit several days.

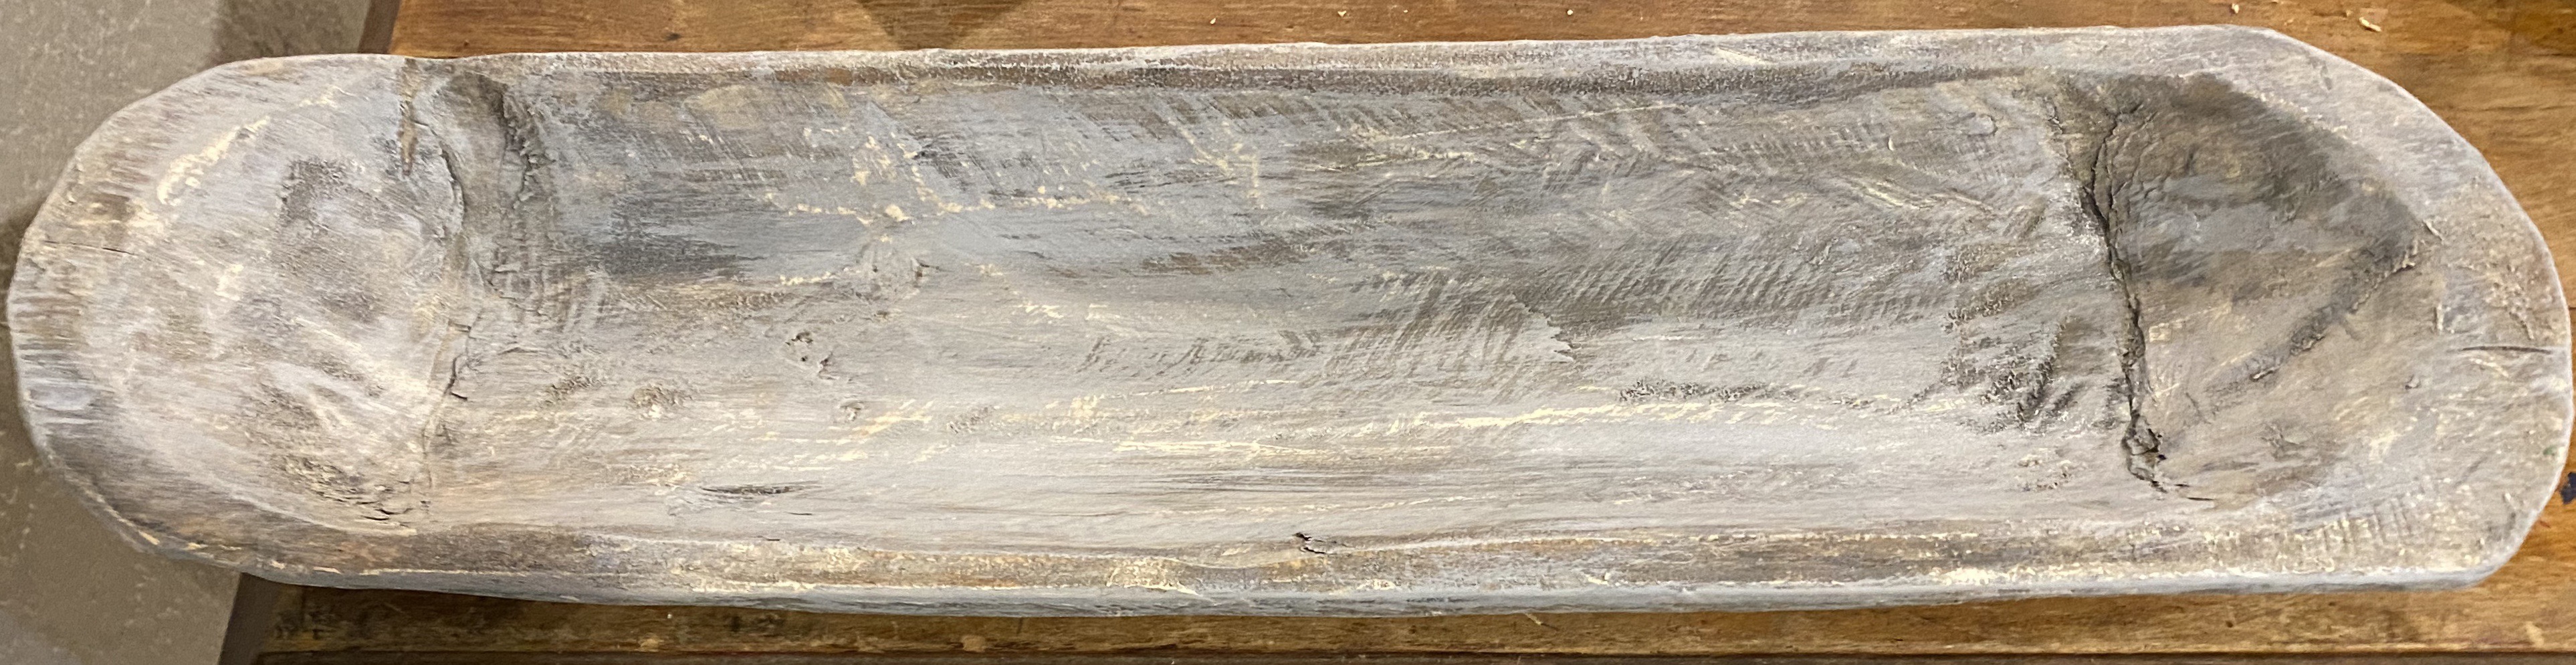
After drying, the board was ready for the white wash, I mixed our brand of chalk-style paint Missouri Limestone Paint Company (MLPC) “January” with a little water, painted it on, then used a damp rag to rub it in and wipe it off. I let that dry well and it was ready to stencil.

I really liked the look of the end result – I will be using this technique on a small table top next.

It was now time to stencil. I found an SVG image I loved on Etsy from HeyLena Arts and purchased it. https://www.etsy.com/listing/744390593/cow-skull-svg-floral-wreath-svg-boho-svg?ga_order=most_relevant&ga_search_type=all&ga_view_type=gallery&ga_search_query=floral+cow+skull+svg&ref=sr_gallery-1-3&organic_search_click=1&pro=1

I uploaded the SVG file to my Silhouette machine, traced it and cut it out, using Contact paper. I find this is a cheap and easy way to cut stencils. The Contact paper adheres nicely and is easy to remove. I also use clear Contact paper to transfer the stencil to my project. Press n Seal will also work as a transfer.

Then I did all the “weeding” (picking out the areas of vinyl) for the dark area of the skull. I stenciled those areas with MLPC “French Roast”, a dark brown.

For the flower area, I decided the best way to finish that would be to hand paint it, so that’s what I did. I am no artist, but I did learn to pretty much stay in the lines when coloring in elementary school. ☺️

The MLPC colors used: Crepe Myrtle, Farmhouse Green, Cornflower, Radio Flyer, Sour Green Apples, English Bluebells, and MO Buttercup.

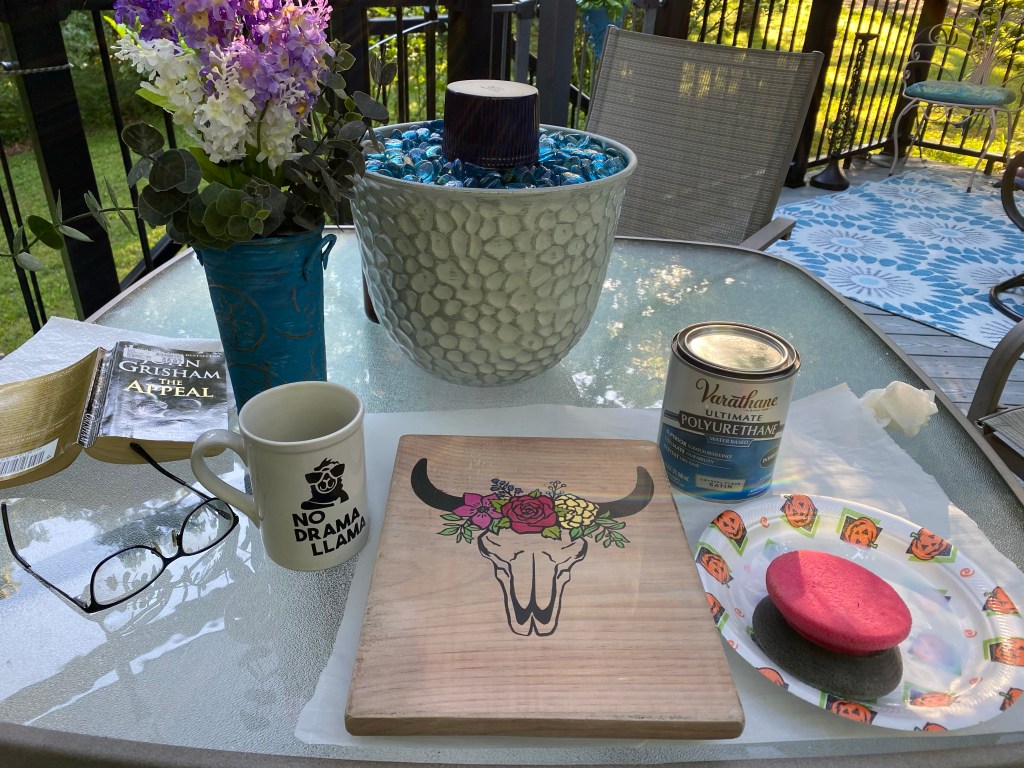
Once all the flower area was dry I sealed front, back, and sides with Varathane water-based Crystal Clear Polyurethane in Satin Finish. I used 5 thin coats for durability. This piece may be used as a tray so I wanted it to stand up to hard use. (It was so pretty out I did the sealing on my deck. I had my book and coffee handy and read while my sealer dries. It only took about 10 minutes for each on this day.)

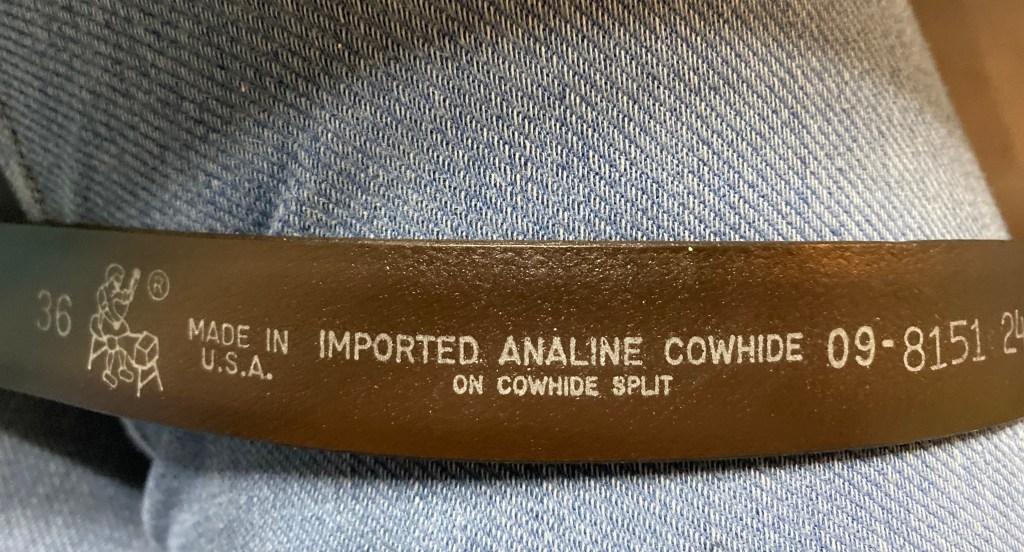
Now it was time for the handles. I remembered seeing a DIY on Pinterest for creating handles out of strips of leather. I happened to have the perfect belt made of genuine cowhide that I thought would be perfect! I had purchased it at Goodwill some time ago to create handles for a suitcase dresser, so used it for this project instead. I cut two strip of 8” each and we attached them to the edges of the top and bottom of the board using vintage wood screws.

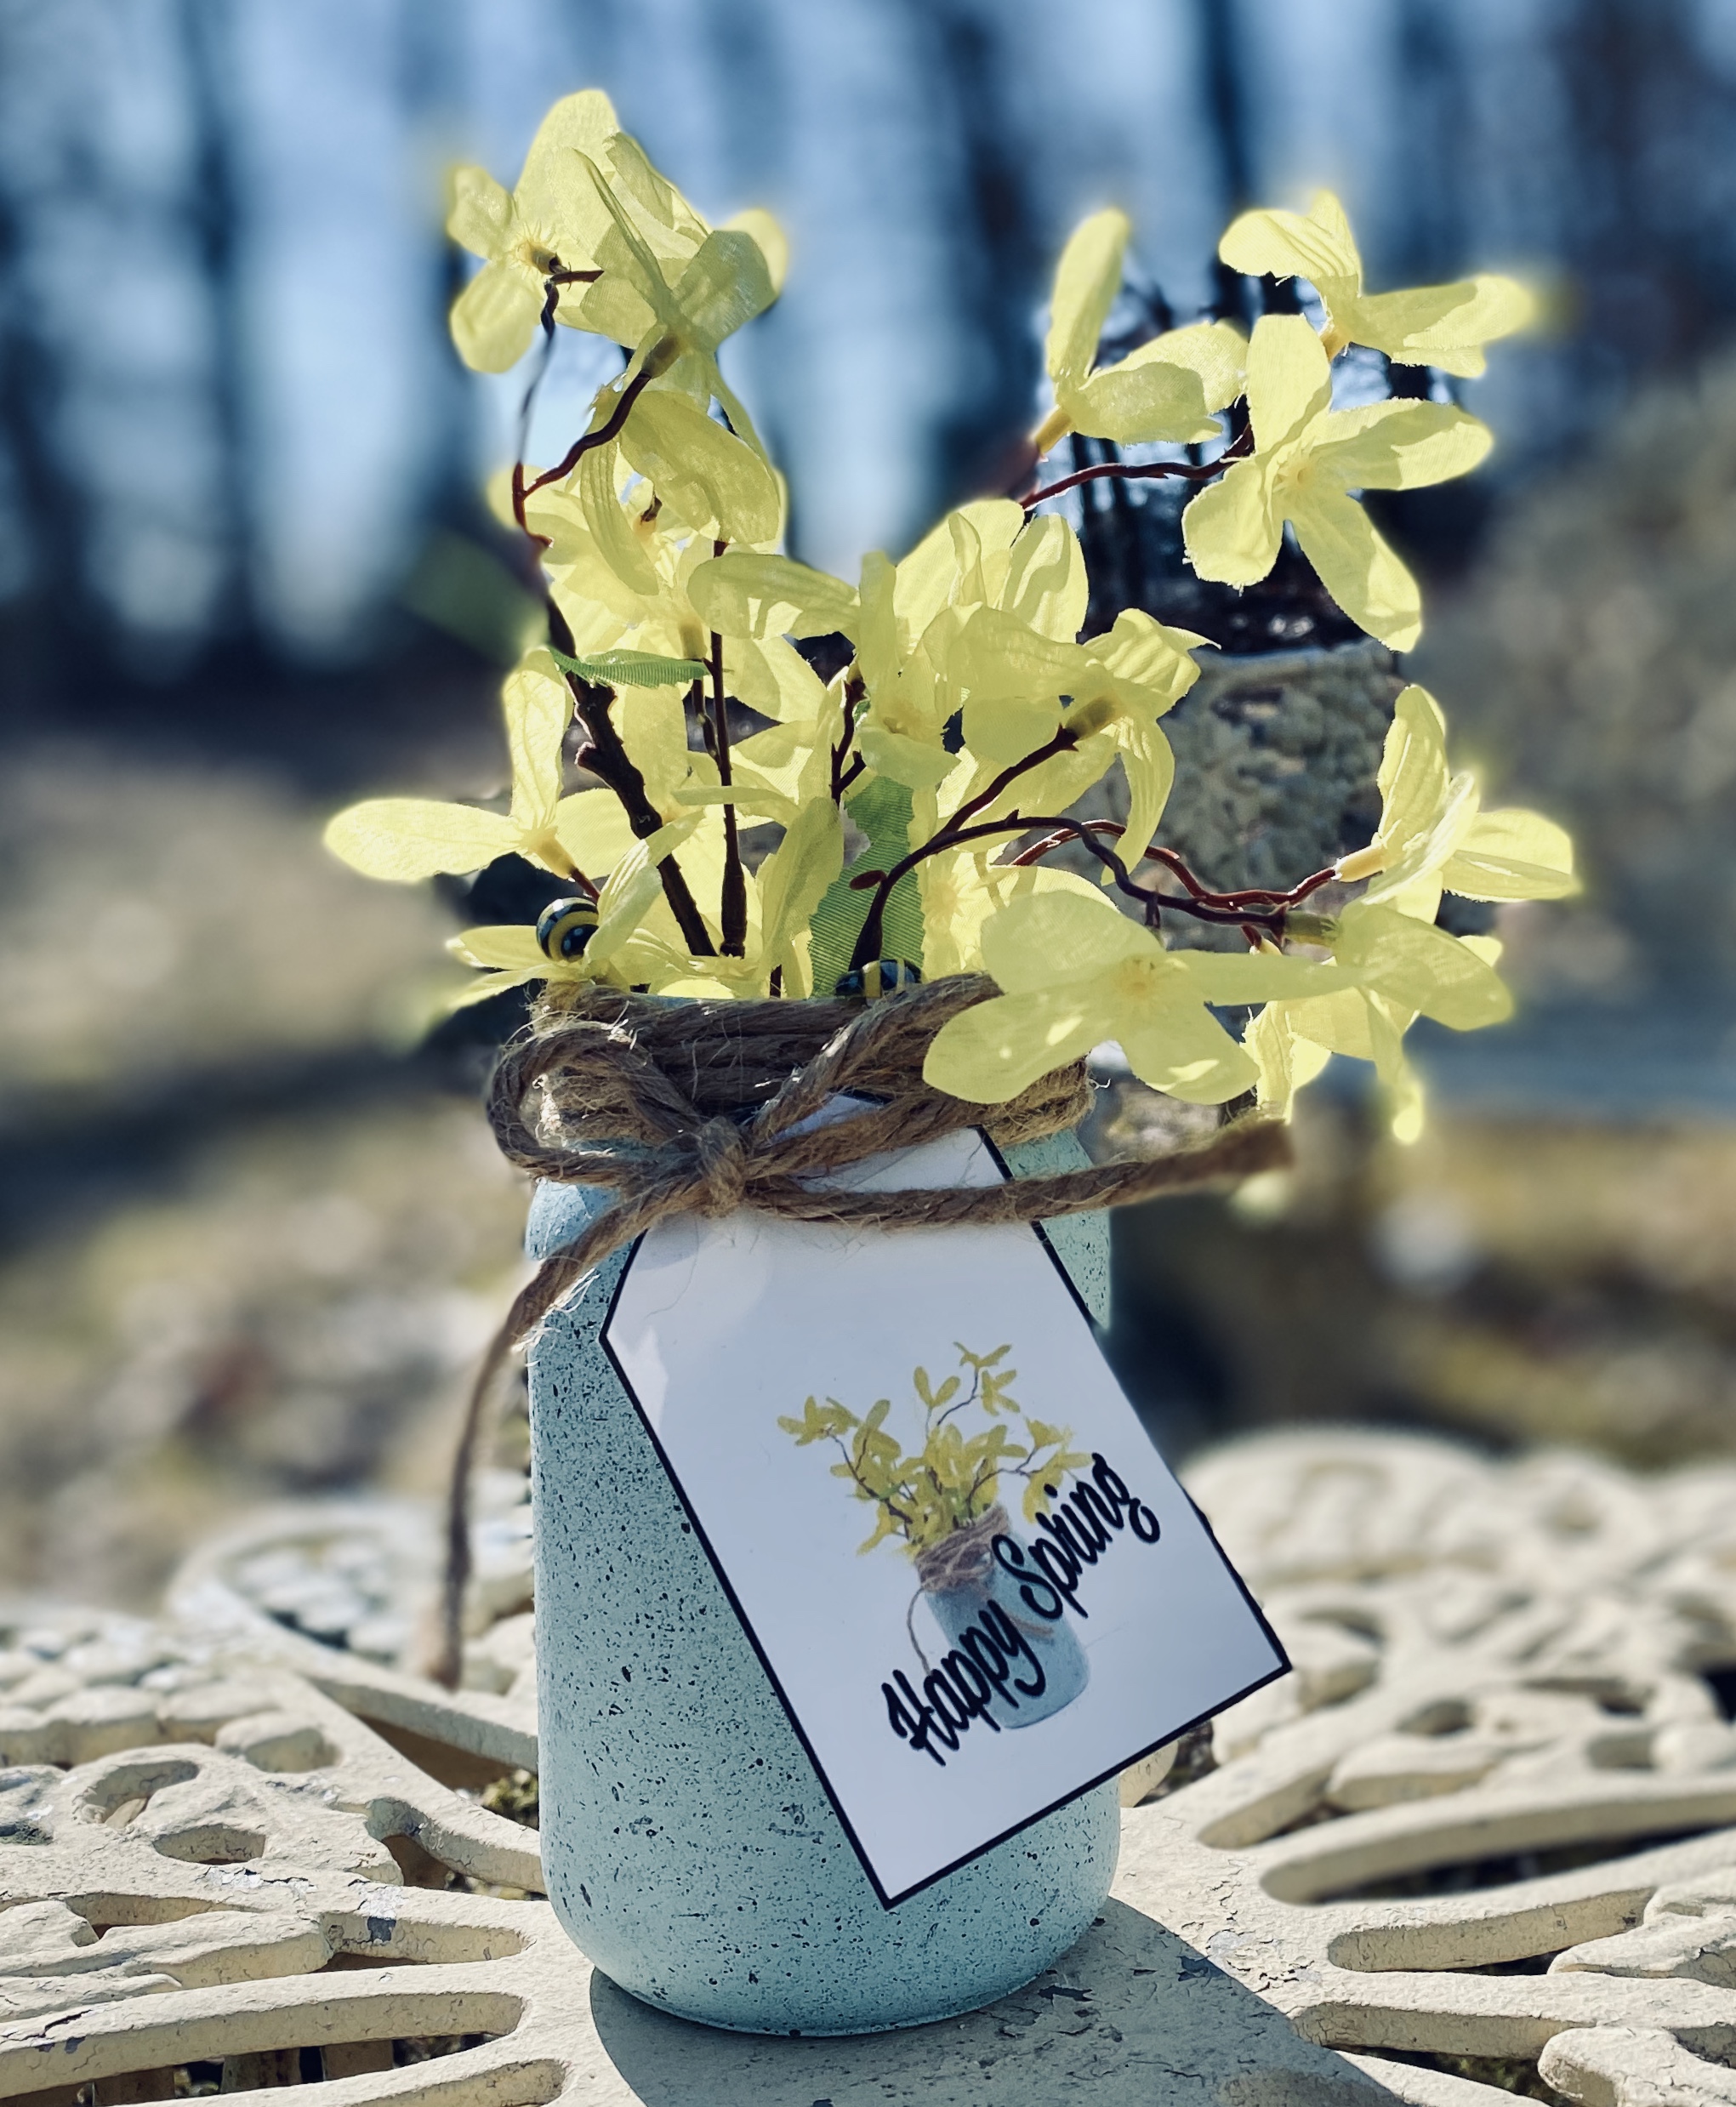
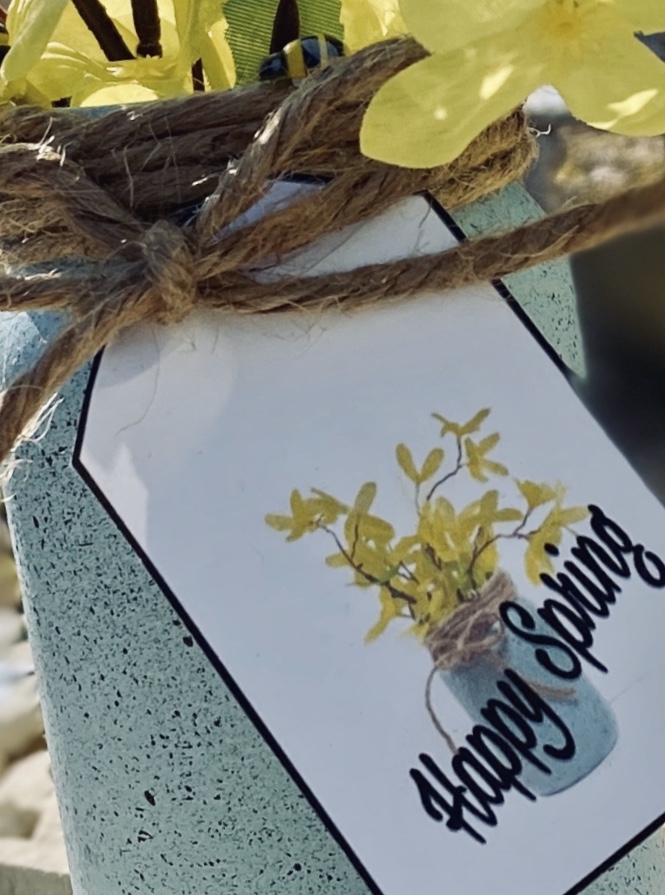
This beautiful, floral cow skull tray/ wall hanging decoration is now complete! I absolutely love how it turned out!

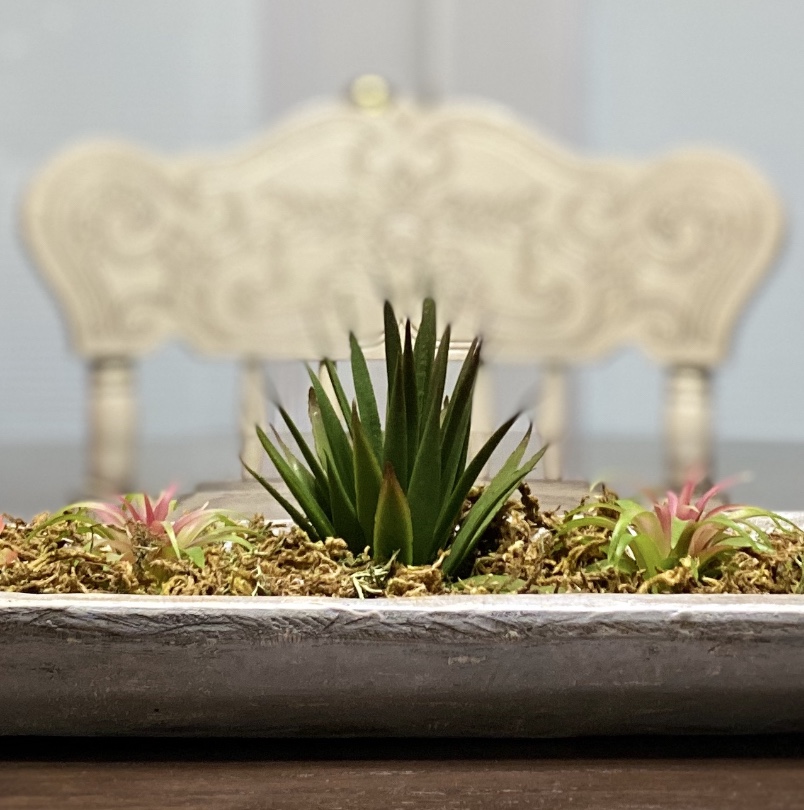
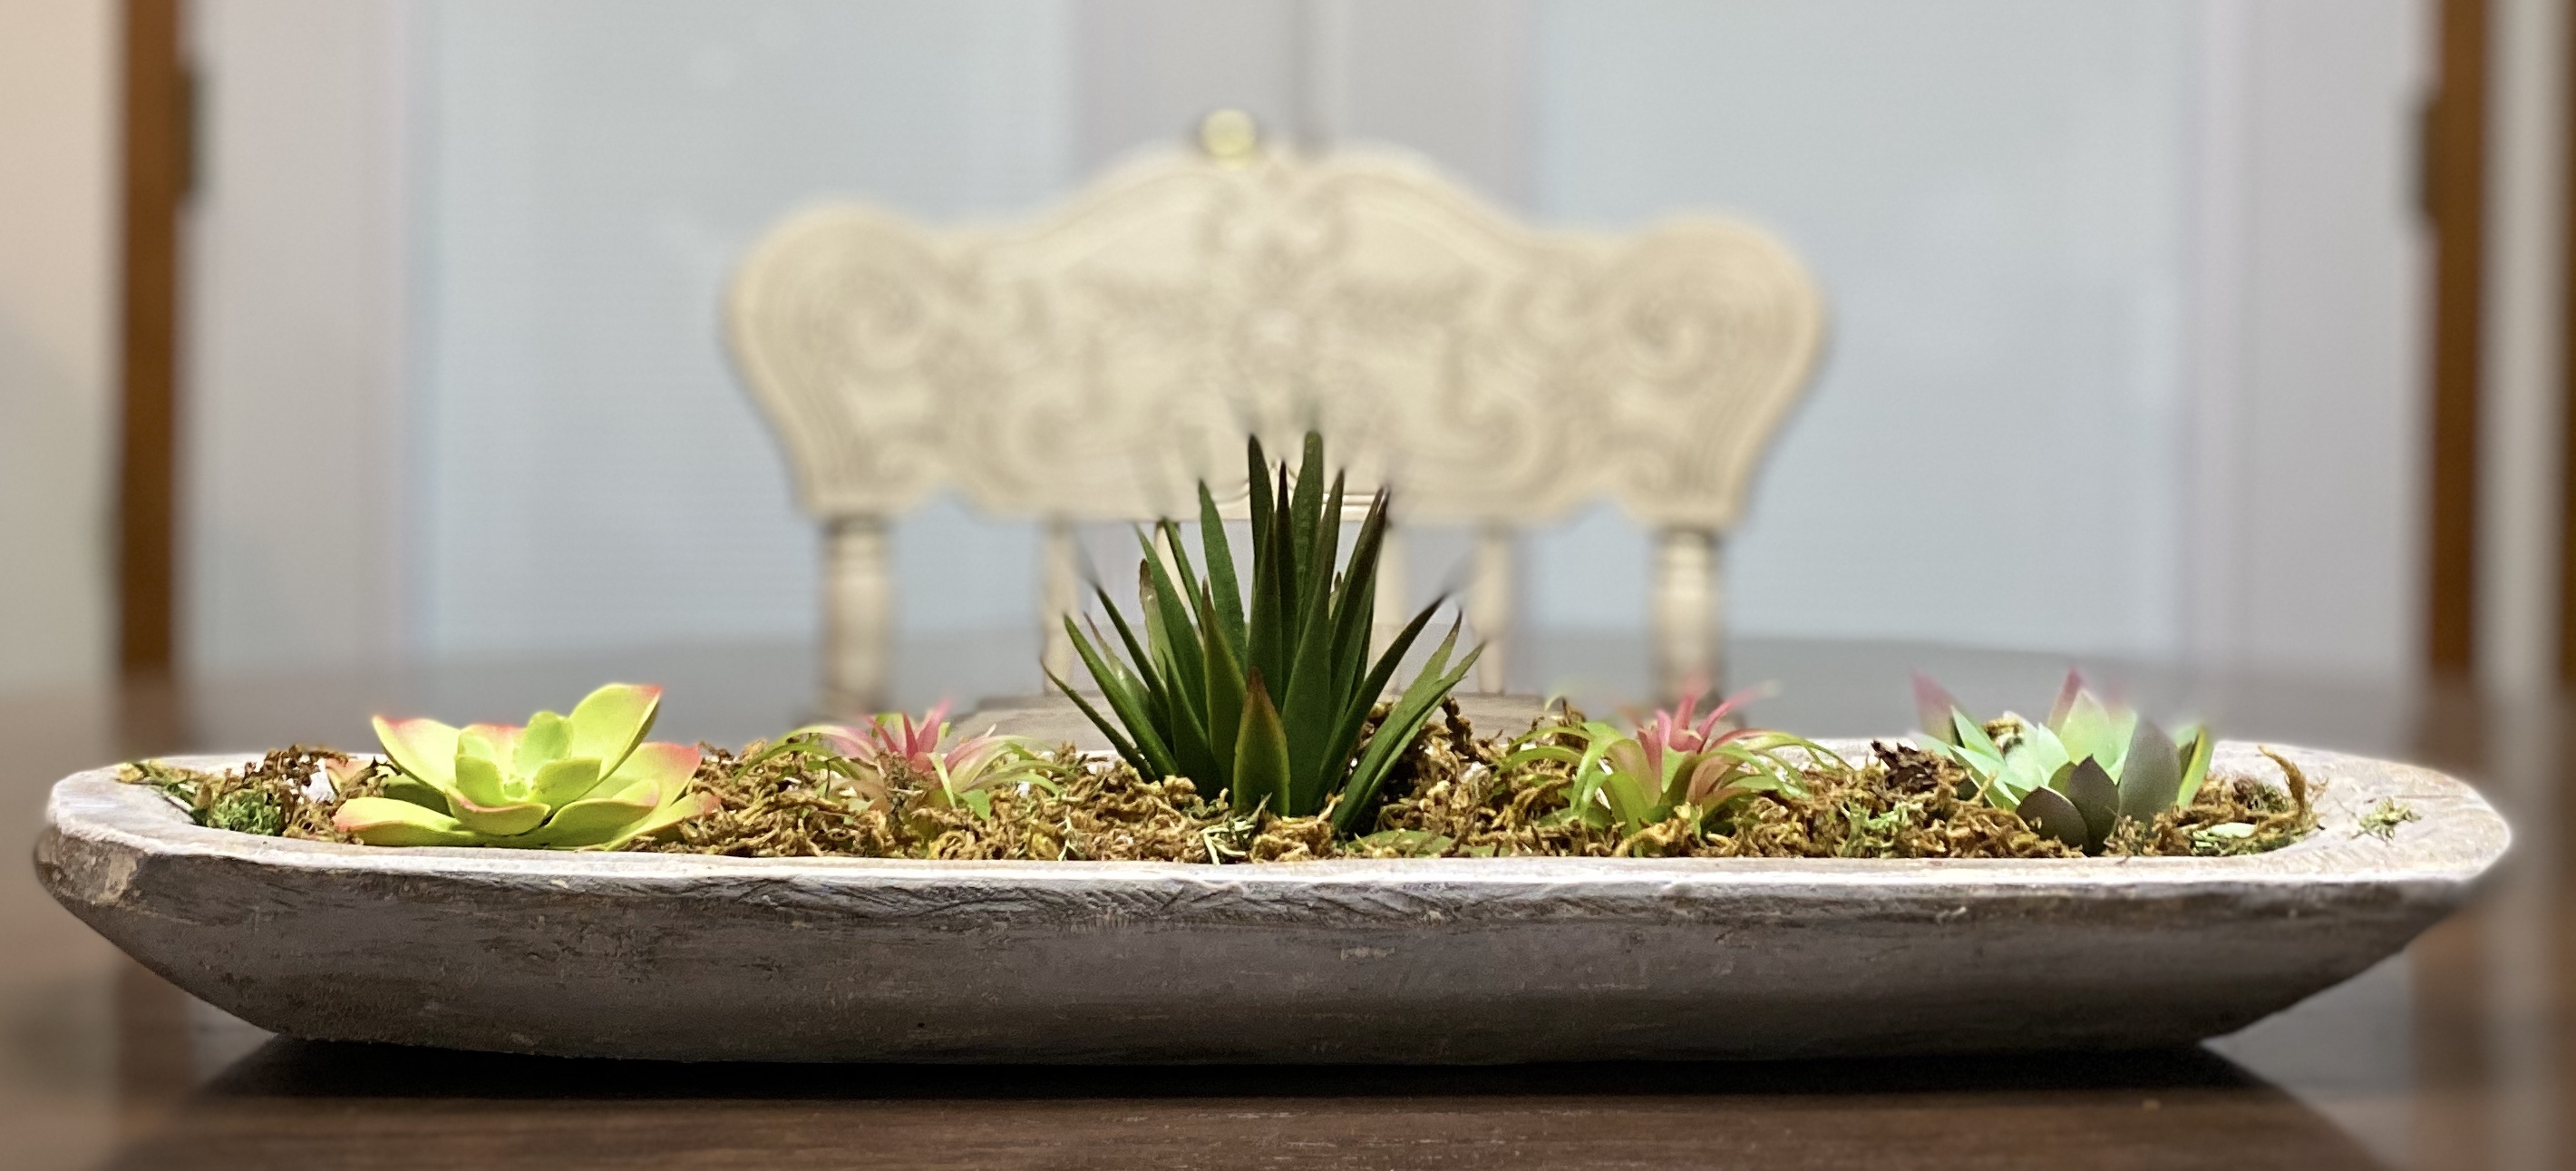
Here are the other projects I have recently completed.

This is a charcuterie/cheese board
Wall decoration

A Fairy Garden Makeover

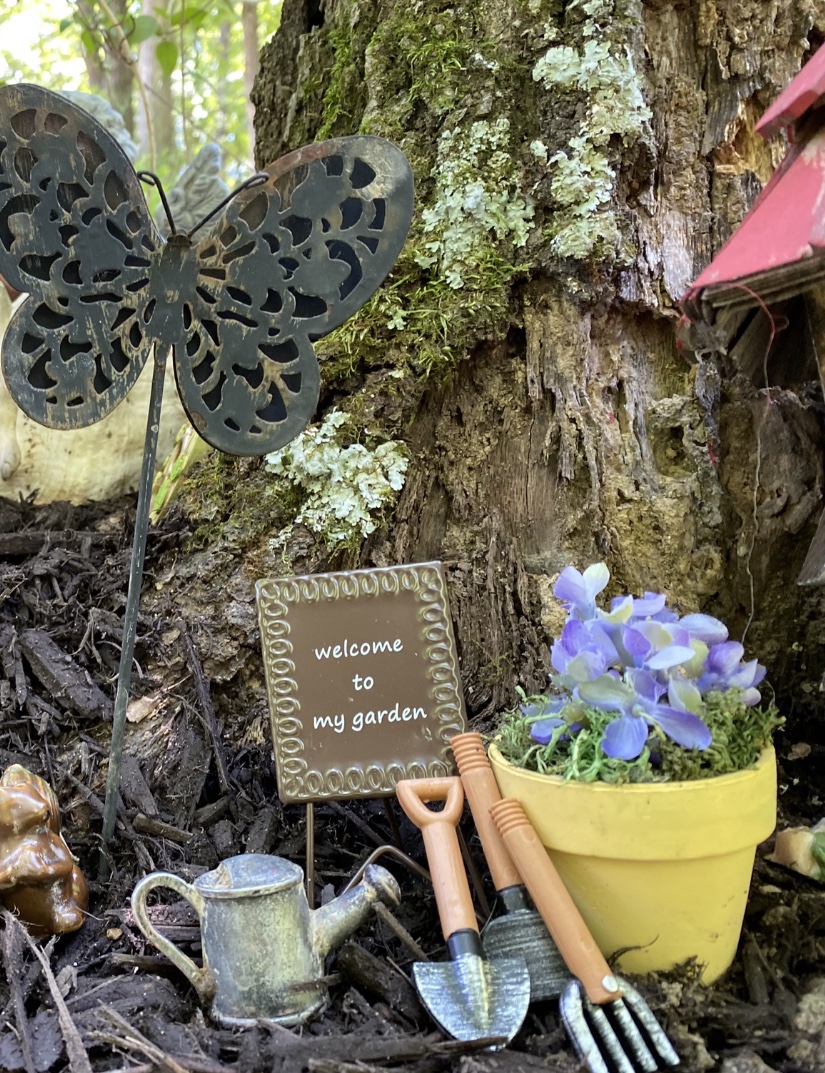
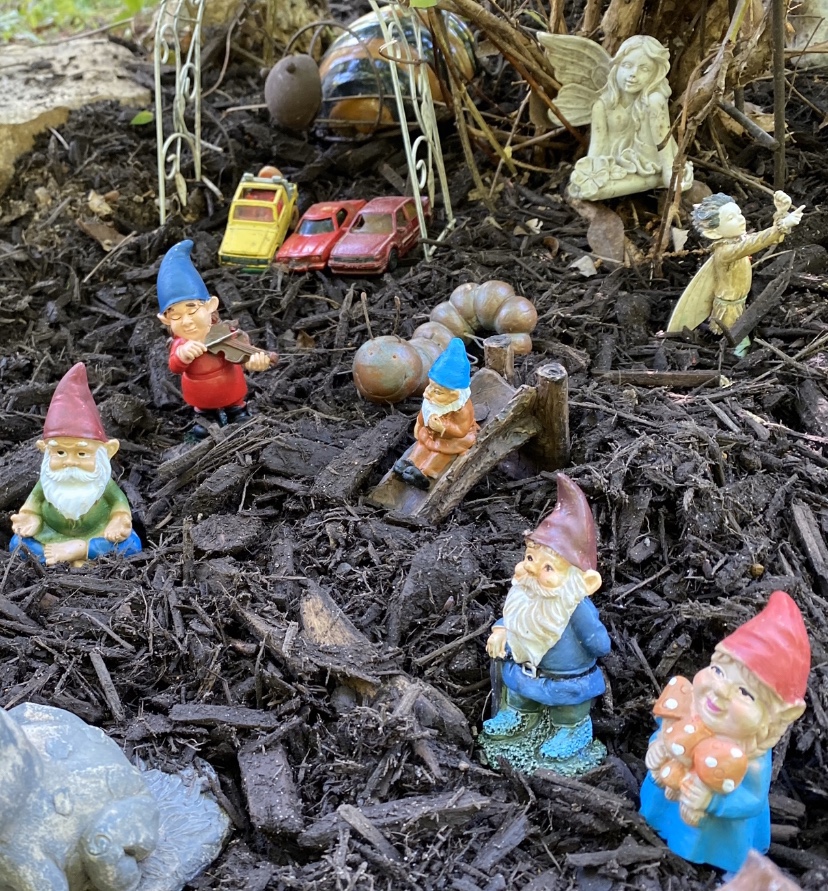
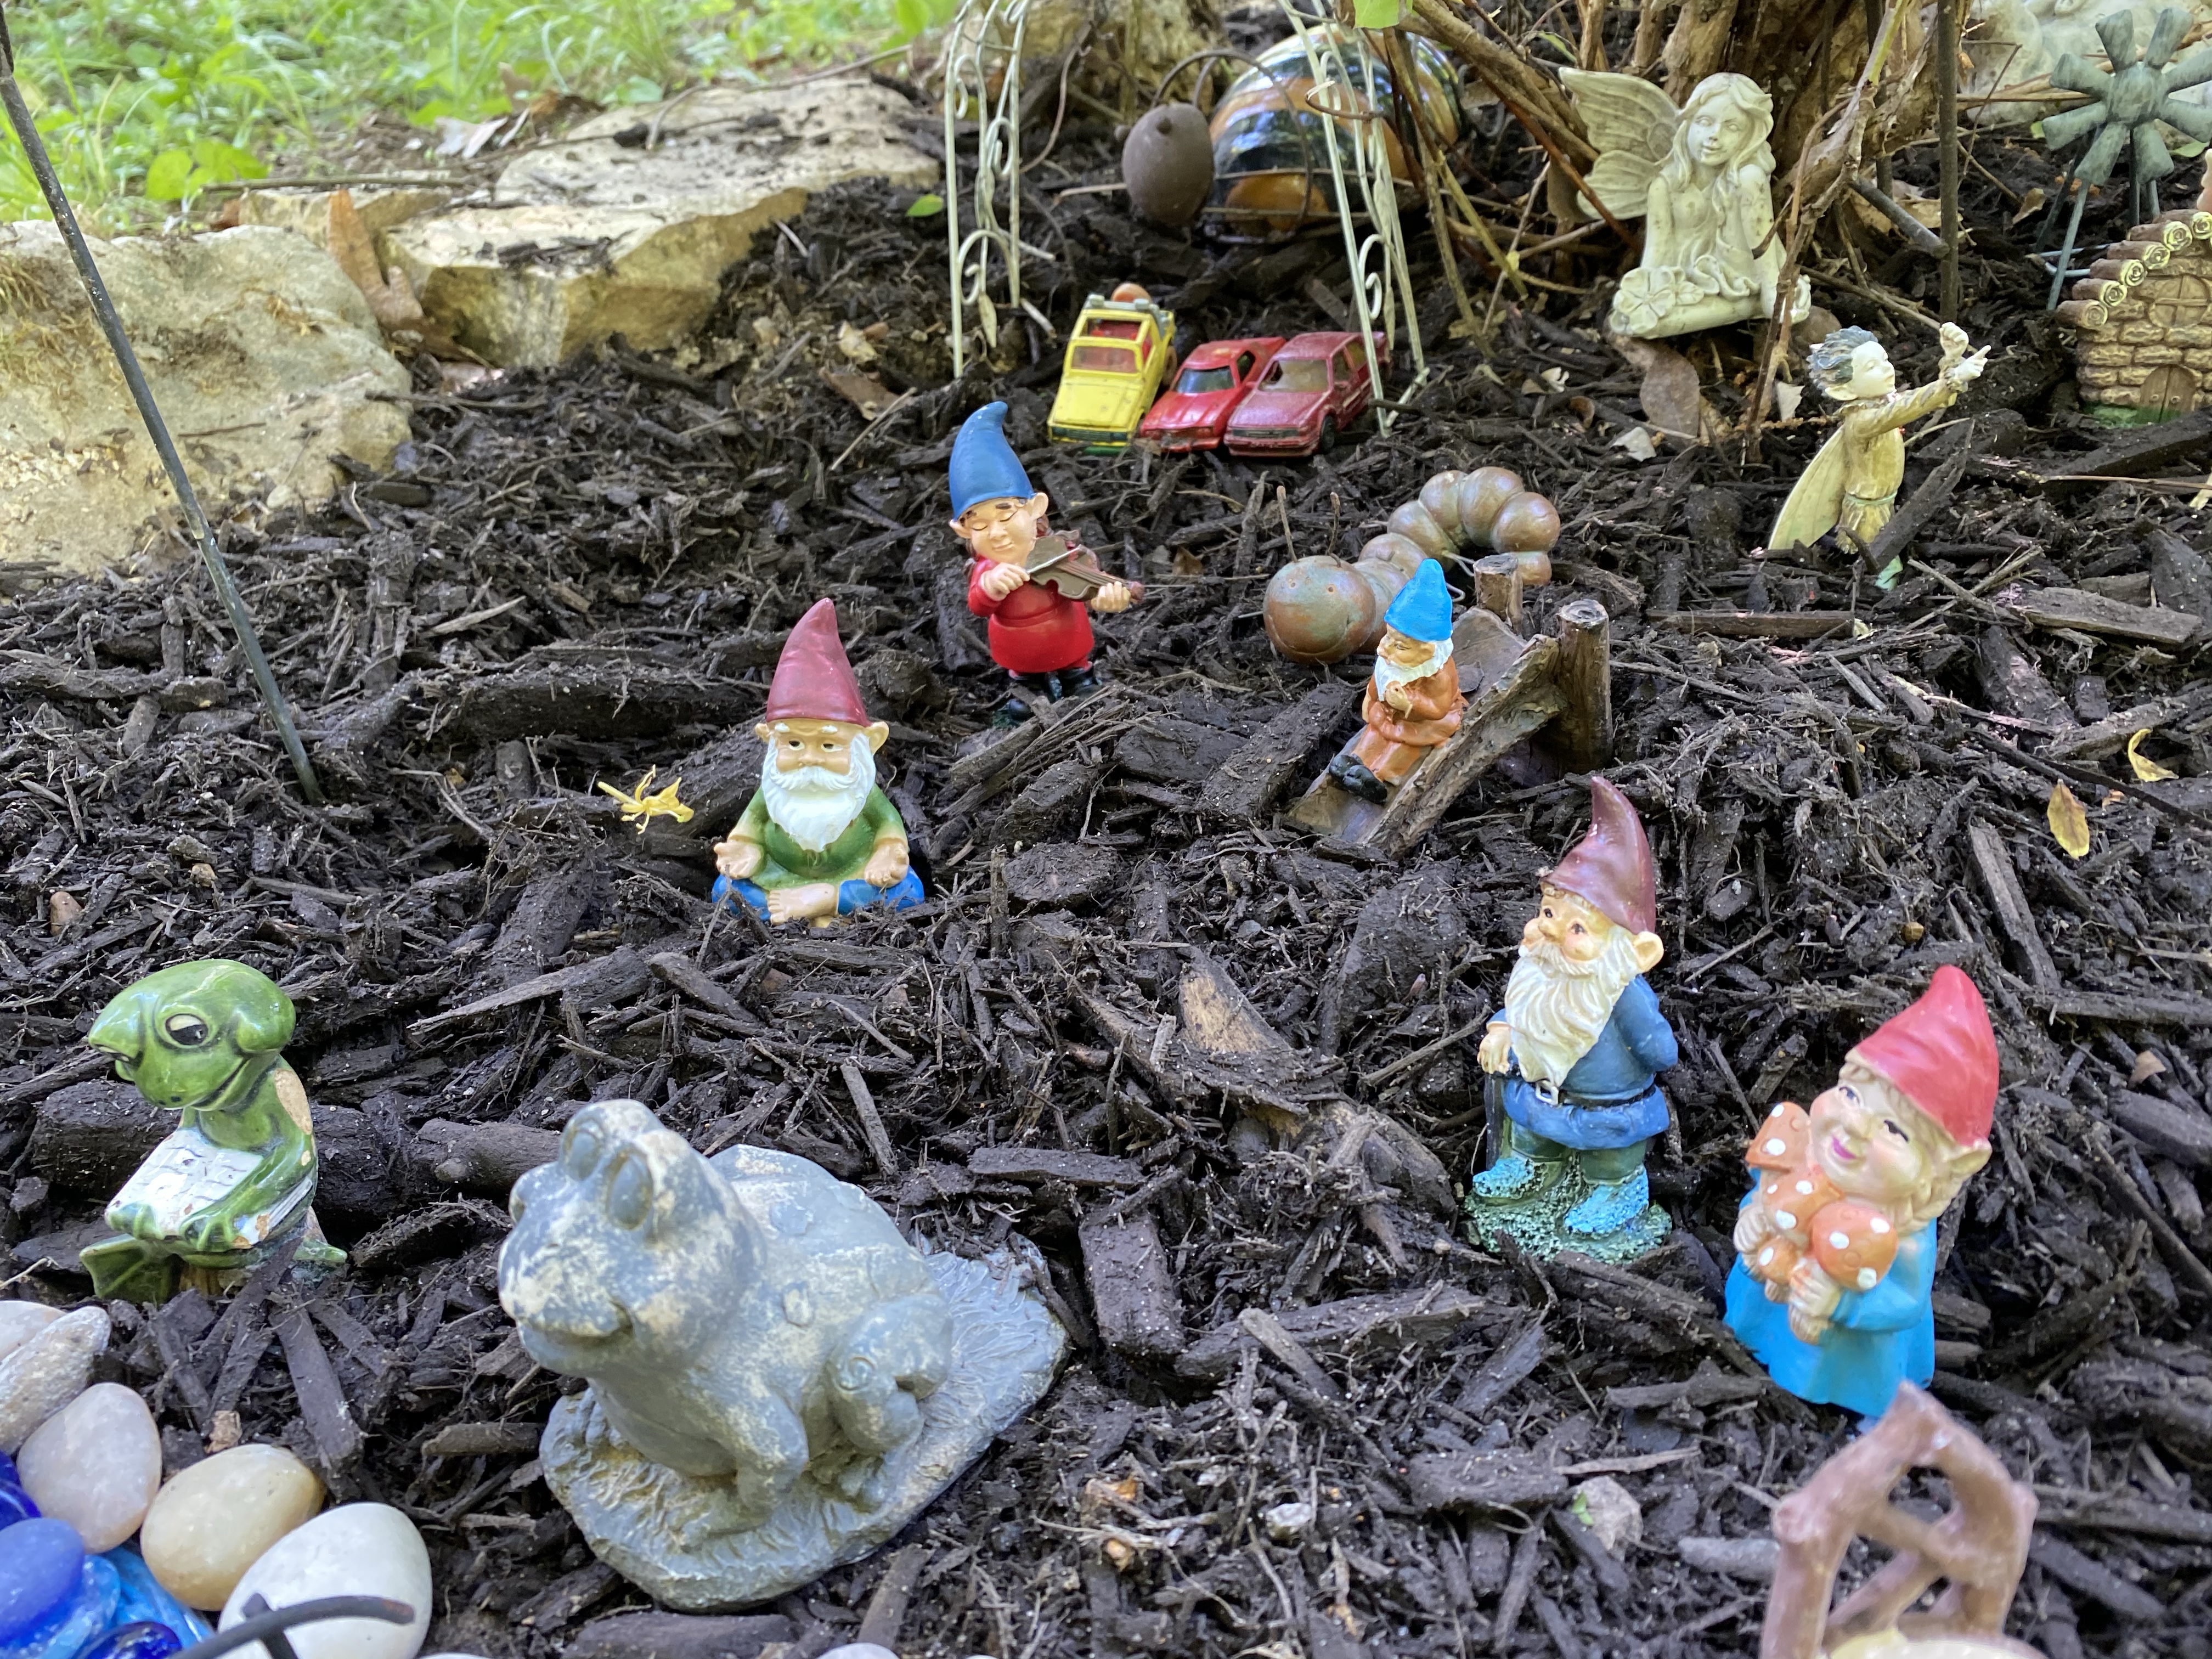
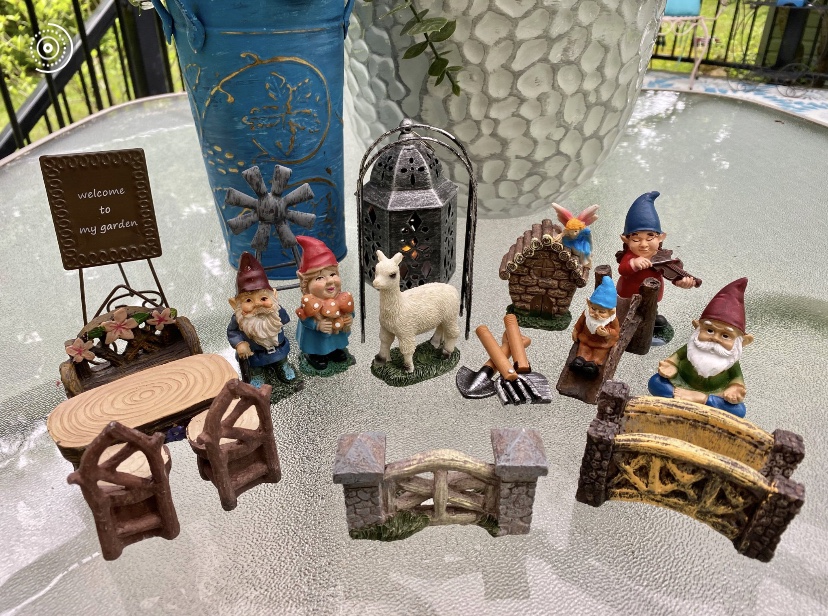
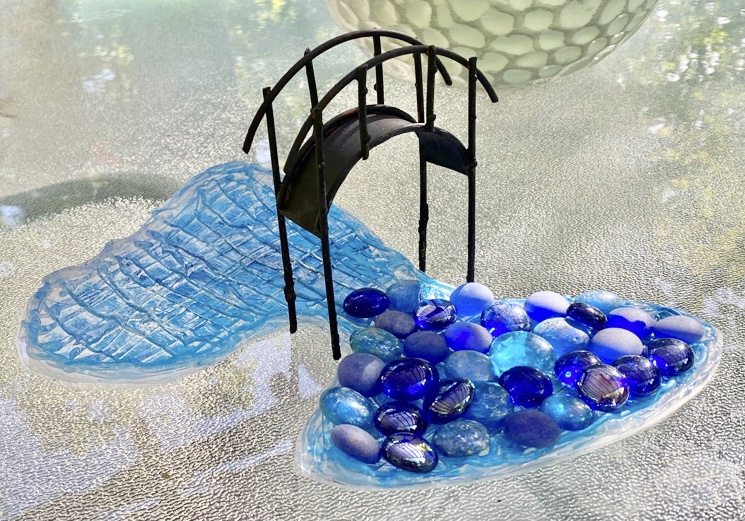
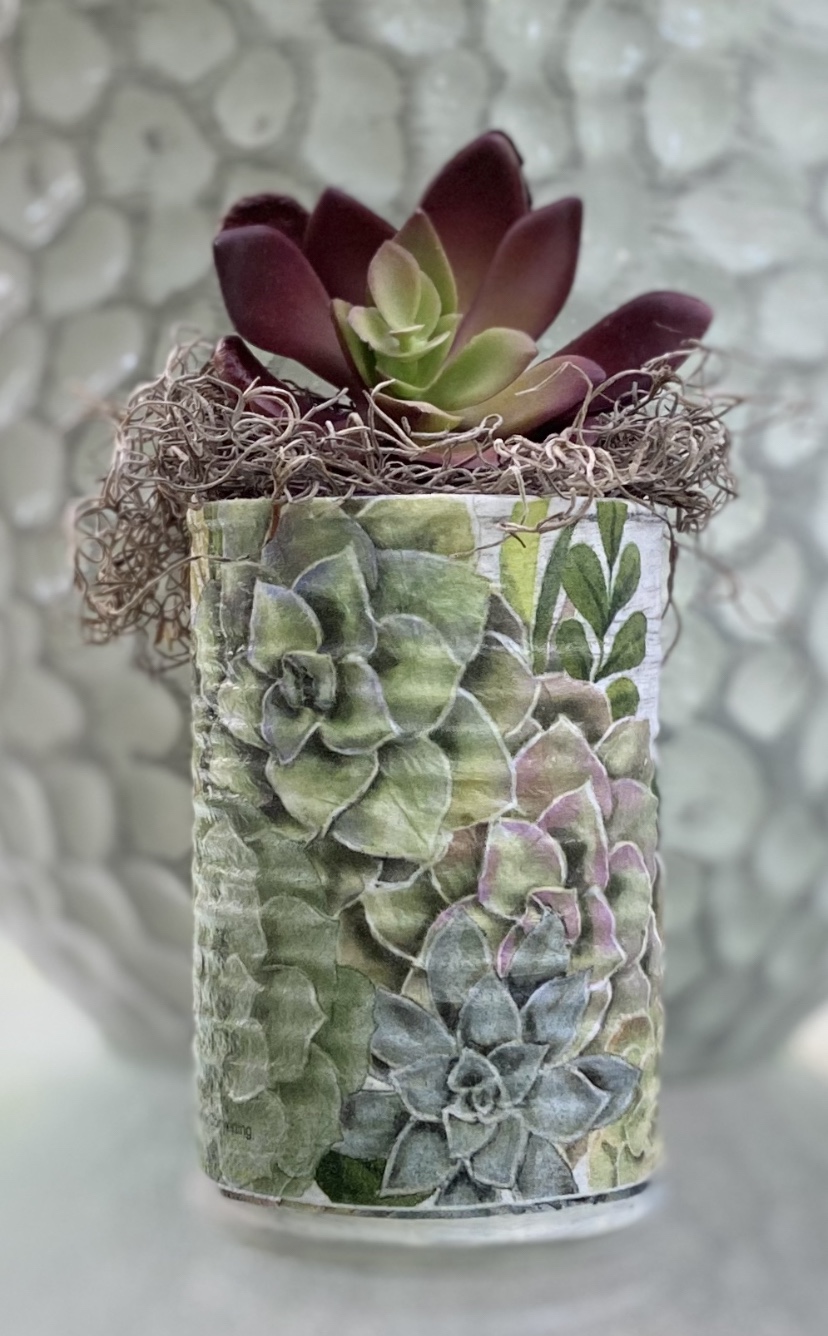
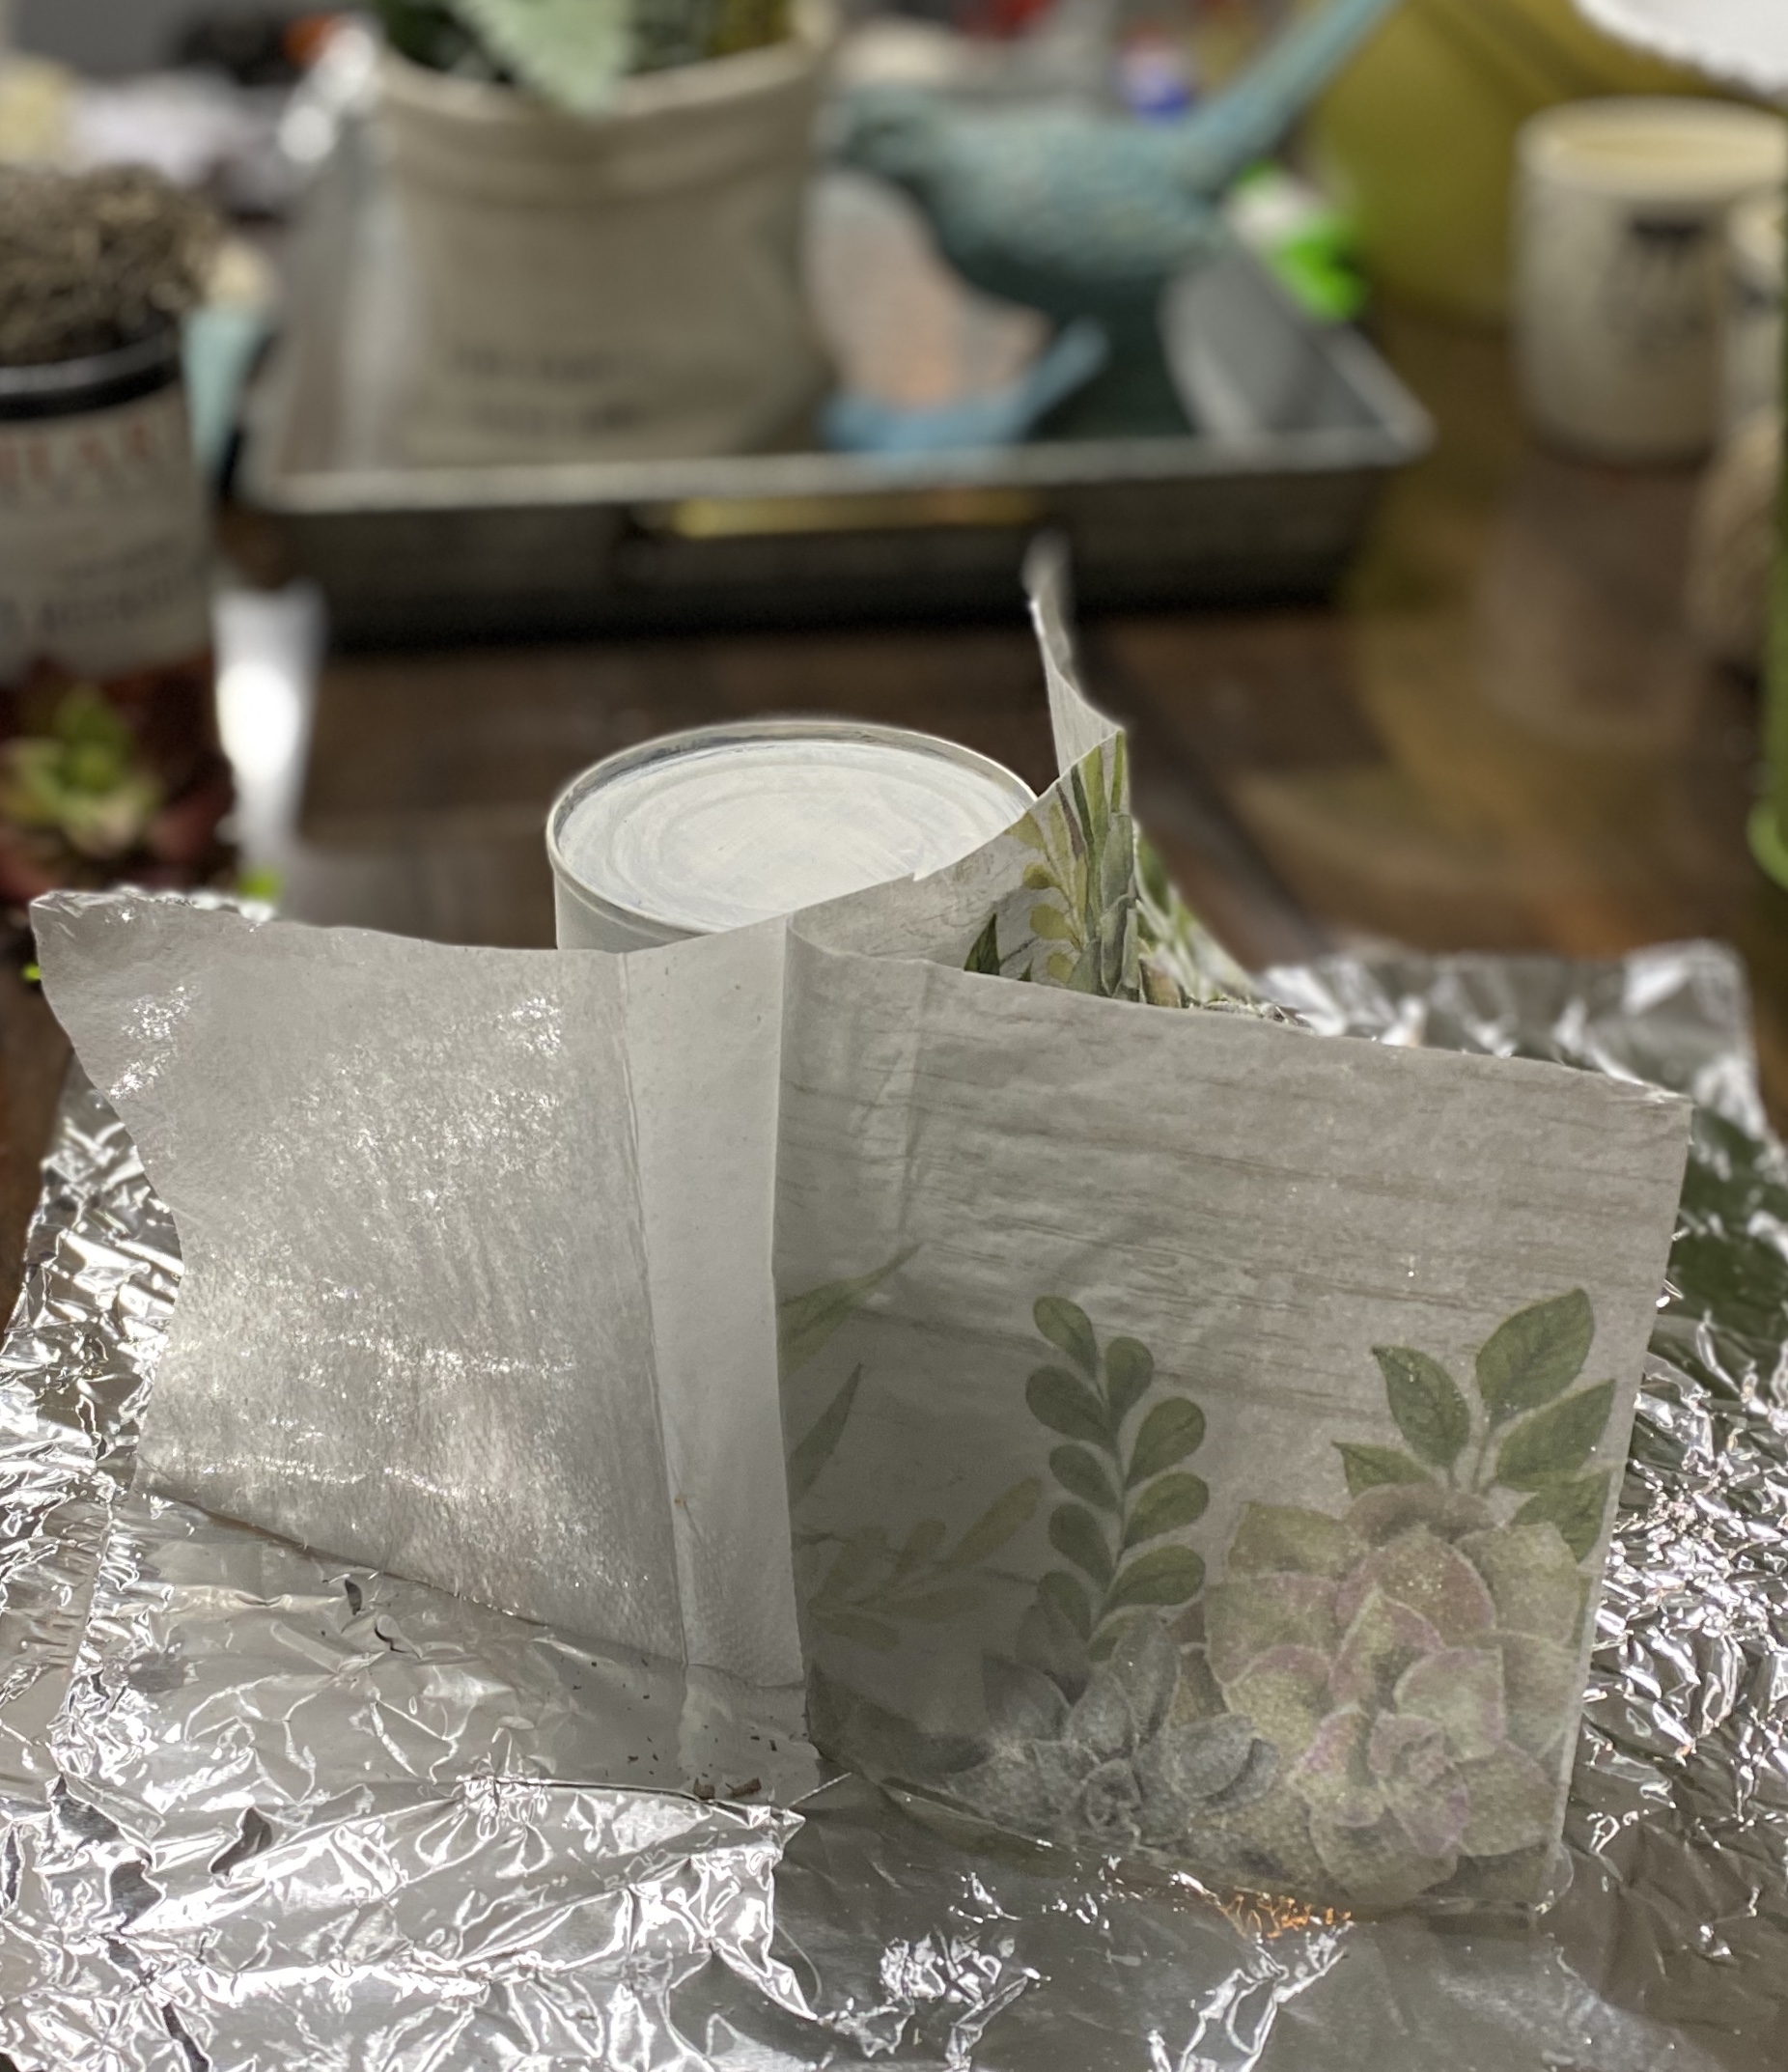
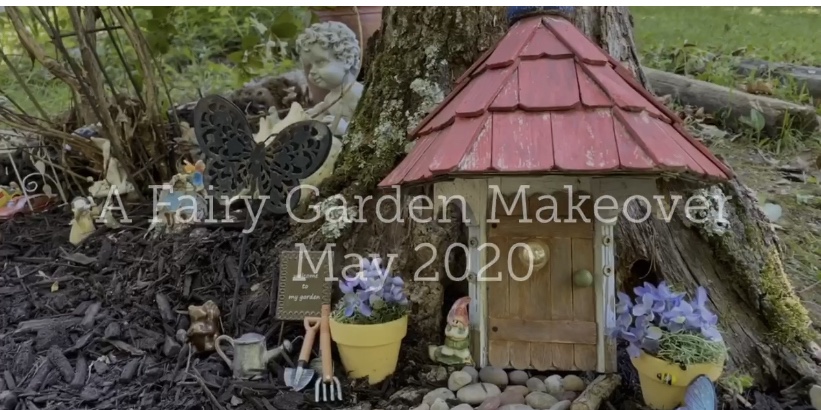
We started a fairy garden for our granddaughter about eight years ago. We’ve enjoyed adding items to it through the years. When we added grandsons it seemed only fitting the fairy garden had a carport and cars. It was time for a major makeover!

And did I mention our fairy garden is right under a trellis of honeysuckle vines I trained to grow there. It is blooming right now and smelled heavenly as I toiled in my garden. ☺️

My before photo does not clearly show how bad of shape our fairy garden was in, but will give you an idea.

Here’s a video I made and below I will add individual photos and some hints on how I made my pond this year so you can get a better look and maybe some ideas to create a fairy garden of your own. Whether you have kids, grandkids, or none of the above, if you have never had a fairy garden, you should. They are a lot of fun to create.

I have painted two rocks to look like gnomes and will paint two more for each grand and have them add to the garden. I painted them with Our Missouri Limestone Paint Company colors and then sealed them with spray lacquer.

I also plan on adding a miniature toy train as a couple of the boys love trains.

Through the years, some things broke beyond repair and some were just getting old. Last year seemed to be the roughest winter on the garden yet, so in 2020 with plenty of time on our hands, we made over the fairy garden.

It was kind of a treasure hunt digging down into the dirt to retrieve buried fairy items. And then the scrubbing of those items had to take place. But some, even with their rusty and worn look, are still treasures to keep.

We did find a few new ones for $1.00 each at our local Dollar Tree. They had little gnomes so we added gnomes to our garden this year. But forget the llama… I already gave it to my granddaughter who loves llamas. I crocheted a few, painted a couple and even made some coffee cup quotes this winter using llamas, so I will have to find another to add to my fairy garden.

I made the door with jumbo craft sticks from Dollar Tree (another Pinterest idea). I used a bit of hot glue (to hold in place) along with E6000 for durability outside to glue the sticks to the braces which were 4 glue sticks cut to size (2 for the front and 2 for the back). The window is a glob of hot glue with a clear half gem from Dollar Tree presses into it.

The roof was what was left from the bird feeder we had sitting on top of the stump the last several years. Danny reworked it and we were amazed the door fit perfectly inside the part it did. He attached the door and then screwed the whole unit to the stump. I gave it just a little paint so it still looked weathered.

The mushroom top on the stump was a resin base of some kind we had sitting around for years I painted it and added white polka dots with a foam stencil dauber. It is very heavy so it is just sitting on top of the stump.

I also dug out all the gems from Dollar Tree we had used earlier for a pond so I wanted something to contain them.

Now for the pond I created this year:

I saw an idea on Pinterest and thought it would work, and it did. I used a plastic sheet like a report cover and then drew out an outline and then just made a thick border of hot glue and then just created a grid like inside so my gems wouldn’t fall out and get buried again. I painted it with some colors of water with our MLPC paint and even added a little glitter paint I had. You were supposed to be able to peel the glue formation off the plastic when dry and you can, but I chose to cut around my form and keep it so I would have another layer for my gems.

We will continue to add more items, I’m sure. And the grands will rearrange what we have many different times. 🥰

But what fun memories we will continue to make in our magical fairy garden.

A Faux Succulent on a Can of Vegetables Decoupaged With a Napkin

How pretty, right? You would never know that’s a can of garbanzo beans under there. 😁

I woke up this morning thinking I wanted to napkin decoupage a tin can and add a succulent to it. I had all the supplies except for the tin can. I did have a can of garbanzo beans, though. I didn’t want to waste food, so I decided to just decoupage the full can. I could always just open up the can later. I did realize, too late, that I shouldn’t paint the lid in case I do want to eat the beans. So I would not paint the lid the next time.

I gathered my supplies and got started.

I didn’t use the refried beans. That is there just to show you what a can of vegetables looks like with its clothes on compared to when it is naked. ☺️

Step 1:

I then painted the can, but next time I won’t, just in case I want to open the can later. I used two light coats of “Grannie’s Lace” from our brand of chalk-style paint Missouri Limestone Paint Company. It really doesn’t matter what paint you use. The can also doesn’t need full coverage. The napkin details will show better just by it being white.

Step 2:

The expiration date was already on the bottom of this can. I just added the name in case I forgot what was in there.

Step 3:

I trimmed the napkin to fit the can, leaving a little overlap on the top and sides. Also with napkins you need to pull apart and remove extra layers as you can see in the above photo.

Step 4:

I was now ready to decoupage. I spread a thick layer of Mod Podge onto the can. I cut down a small baggie and tape it small enough to slip my fingers into it like a mitten. I use the plastic to press the napkin into the Mod Podge. This keeps the napkin from tearing as it will stick to your fingers otherwise. Any little bit of plastic will work. You still must press carefully.

Step 5:

After decoupage dried, I sanded the rim of the top. The part sticking up will sand right off, leaving a clean edge. I then added another coat of Mod Podge all over to seal it.

Step 6: Final Step. I just added a little Spanish Moss and a Faux Succulent to the top. You could use a spot of hot glue to hold it in place, but I didn’t. After all, I may just want to open up that can of garbanzo beans. The moss and succulent will be easy to remove. ☺️

Turning a Funky Yellow Tray into a Rustic Faux Succulent Garden

I bought this tray about a year ago and never really did anything with it.

It’s not really wood and it was a funky yellow color. But yesterday, I decided. I would create a rustic, driftwood finish on it ….

…. and plant a faux succulent garden. Those seem really popular right now.

I already had the two pinkish succulents and I found a few more at Dollar Tree at some point in time. I removed the clips attached to those and saved the clips. You never know when they could be used. 🙂

Using our Missouri Limestone Paint Company chalk-style paint, I paint washed the tray with “French Roast”, wiping it down before it dried. When dry, I dry brushed with “Sunday Silver”, let that dry, then dry brushed with “Winter Gloves”. When that dried, I sanded the whole thing with 320 sandpaper, applied a wax salve, and buffed it. I love the color now! It now has a rustic, driftwood look.

This morning, I added some mosses from Dollar Tree and now have a beautiful succulent garden. I just need to figure out where I will display it.

Creating a Lamp with a Globe Lampshade

Covid 19 Creations:

What do you do when you’ve got to do something? You go shopping in your own storage unit, create a project, then make a movie! All in one afternoon!

And it’s not raining so you work outside! Another silver lining and a great day!

Now get your popcorn ready. The feature film is about to begin.

A Stool Cover Update – Confessions of a Hoarder Part 1

People wonder why Furniture Artists and Crafters hoard. There is a reason. The perfect scenario would be that the hoard was organized. But that is for another day and another post. But the reason is the unbelievable beauty that can come from not selling, giving, or throwing everything away is priceless.

This post came about through hoarding. Lol. This is the first in a series of posts that chronicles a complete deck makeover that all started with a deck rug. Yep! My son didn’t want it, although all it needed was a good cleaning so we said, “Sure, we’ll take it!” Just like Mikey in the old commercial who would eat anything, we will take anything, especially when it is free. After all, we have a basement, a shed, and two storage units. 🤪 But, this post is all about a stool cover makeover, Part 1 of the series.

Follow my blog and you will be notified when I post Part 2 (The Free Deck Rug) where you will learn more about the big picture of our whole deck makeover.

One corner of our deck gets a good amount of shade. It’s a nice place to sit and read a book and watch the world go by. We had bought a couple of cool chairs last year and painted them a neutral blush color, thinking they would sell in a heartbeat. They didn’t. So….we kept them…stored in one of our units. We then decided why not use them ourselves? After all, I really liked them. Lol And that’s why we have a beautiful little reading nook on our deck. We moved the deck rug we’ve had a couple of years there because we were given another one to use (stay tuned for Part 2 of this series of hoarding confessions).

As I was reading there one day, I thought it would be nice if I had a stool to prop my feet on while I read. I just happened to have one in my basement I’ve had for years but wasn’t using. But it needed a new cover. No problem!

One day, when staging a piece of furniture I was painting, I needed a throw pillow. I took a piece of painters drop cloth (washed and dried it to make it a soft fabric) then used a French postcard stamper and Missouri Limestone Paint Company chalk-style Paint (the brand we own and produce) and stamped all over the piece. I then used a stencil and stenciled a bird on a branch on it. I wrapped it around a pillow and pinned it in place, took my photo, then took the cover off and stored it with my other fabric. (Hoarders do organize sometimes.)

I retrieved that piece and my stool and quickly made a new cover. The back is not pretty but won’t show and I will probably cover it with a piece of contact paper because it will be somewhat waterproof.

And then … I just used more of our chalk-style paint and free hand painted over the stencil. Soooo easy! I just followed the lines of the stencil and filled it in.

I plan on leaving this stool outside. It is old and way too much trouble to carry it in every day, so I ordered this waterproofing spray I found on Amazon. Not sure if it works, but it is worth a try!

And now, my reading nook has a foot stool for one of the chairs. 🙂 And I just noticed, with the tea cart and the mini fire pit ball (looking like a coach and pumpkin) the blue bird and the chair, it almost looks like a nod to Cinderella! It’s a magical space now for sure! 💕

Remember, follow my blog to be notified when I post Part 2 of the series “Confessions of a Hoarder.”

Self-Distancing Crafting with SharSum Paint – Day 5

March 21, 2020

/ Day 1 / Day 2 / Day 3 / Day 4 / Day 5 / Day 6 / Day 7 / Day 8 / Day 9 / Day 10 /

100 Things to Do While Stuck Inside Due to a Pandemic

Today’s post is pretty easy. Thanks to USA Today, they have compiled a list for you. Stay safe and stay healthy.

https://www.usatoday.com/story/life/health-wellness/2020/03/16/coronavirus-quarantine-100-things-do-while-trapped-inside/5054632002/

Self-Distancing Crafting with SharSum Paint – Day 2

March 18, 2020

/ Day 1 / Day 2 / Day 3 / Day 4 / Day 5 / Day 6 / Day 7 / Day 8 / Day 9 / Day 10 /

Make a DIY Stress Ball (a Squishy)

We all have a lot of stress in our life right now. This fun and happy project is not only a quick and easy one, but if you are home with your kids, this is perfect to do with them. Just look how much fun I had playing with the one I made! And trust me, squishing it does relieve some stress. 🤣

Why not make some for the kids in your life, sanitize them and mail them!

My example shows a yellow balloon and orange and yellow play dough. But use any color you’d like. Don’t “stress” over the color. Lol

I found this type of play dough at Dollar Tree, but any will work. I share a link to some homemade stuff below. I can’t guarantee it works, but you can make DIY play dough. There are all kinds of recipes online. You don’t even need to add color. Or maybe you have some old “multicolor” play dough around that is still pliable. That will work, too.

For kids, another fun idea besides happy faces, is to use different colored balloons for all their emotions (joy, disgust, anger, sadness, and fear.) The Pixlar movie “Inside Out” would be the perfect movie to watch with kids at this time. The link to make faces to make with the emotion stress balls includes the directions for DIY play dough. The Dollar Tree play dough, though, is so much easier.

Supplies Needed:

* Latex Balloons – I used 12″. This is a good size. 9″ would be too small, I think. I got this package at Dollar Tree. If you want to do the Emotion ones, they also have solid color balloons. Walmart may also have them or any of the other big stores or party supply stores.

* Play dough of some kind – mine came from Dollar Tree.

Directions:

* Pick your colors

* Start filling your balloon with play dough. The best way is to take a small amount and roll it thin. The shorter and thinner the better. (Thinner and shorter than the picture shows – see more photos below for size reference). I blew into the balloon just to open it up enough so I could hold onto the neck and then dropped the pellets in.

As the balloon starts filling ups, keep pushing the play dough away from the neck and toward the bottom.

* Keep adding play dough (the picture below shows the perfect size pellet) until you get almost to the neck. I used the whole little jar of orange and some of the yellow. You want to save a little room to blow a small amount of air before tying it off.

And that’s it! Be sure to blow just a small amount of air into the balloon and tie it off. You are ready to relieve some stress. Enjoy! See links below for DIY play dough and making the Emotion type stress balls (squishies). ☺️

Here is the link showing how to make the Emotions stress balls. It includes instructions for making your own DIY play dough. Click on the photo below or the link.

http://pre-schoolplay.blogspot.com/2011/07/stress-ball-balloons.html?m=1

Books and Music – A Perfect Match

Update: These SOLD overnight! 🙂

This poor set of vintage bookends was destined for the trash.

When I spotted them, I knew I could save them and give them new life. I didn’t know for sure what that life would look like at the time, so they sat and waited patiently for me to decide.

Today was the day.

* First, I cleaned them well.

* Next, I lightly sanded in case there was chipped paint. There really wasn’t, it had just worn off through the years. Then I cleaned again.

* I gave them one coat of our Missouri Limestone Paint Company chalk-style paint in “Vintage Linen” and let that dry.

* Once that dried, I applied an antique crackling glaze. I let it dry for over an hour.

* I then applied a coat of “January” over that. The antiquing magic started right away, crackling right before my eyes.

* Once that dried, I waxed it all with clear wax and buffed and then highlighted them with dark wax and buffed to give them an aged look. I then applied a bit of copper metallic wax in several areas to bring out more detail. Just look how the music notes seem to jump off the page now!!!

And now, someone’s soon to be trash has become a music and book lover’s soon to be treasure.

This set of bookends is available for purchase. We take PayPal, Square, and cash. Message us for details.

A Robin’s Egg Glass Vase

Here’s a fun project using Missouri Limestone Paint Company’s chalk-style paint – MO Duck Egg and French Roast.
We have it locally at Gift Emporium and Half-Crocked Antiques, and we do ship.
Maybe, just maybe, painting a pint jar like a robin’s egg and filling it with faux forsythia or another spring bouquet will bring on the sun and Spring.  I was getting desperate here so made this one yesterday. 😳  ☀️ 🐦 💐 🐝
Do you remember flicking paint with a toothbrush?  Or is that something only weird people who paint do?  I remember “antiquing” an old vanity for our cabin and doing this when I was about 10 or 12. ☺️ 👩🏼‍🎨 🎨
Directions:
1.  Pint jar or canning jar or any glass jar will work.  Dollar Tree has pint canning jars with no embossed wording.  I like using those.
2.  Important step…. glass is such a smooth shiny, surface it is hard to keep paint from getting scratched off.  Not with this trick.  Clean the jar well.  Then paint a coat of water based sealer.  Any brand will work, but I use Varathane water based polyurethane.  Let dry. This is the secret technique that really works!
3.  I painted the jar with two coats of MO Duck Egg.  A trick I like to use on glass is to use a stencil dauber and pounce the paint on.  It looks very textured going on but dries smooth.  Let dry.
4.  You might want to take your jar outside to flick on the French Roast with a toothbrush.  It’s kind of messy.  You might want to wear a plastic glove, too. Don’t get too close or you will get globs and lines.  Trust me.🙄  I had to repaint and reflick in a couple of areas.  Let dry.
5.  You will want to seal your beautiful vase with a top coat.  I could have used the Varathane again, but I used my favorite magic trick.  It is a spray Pearlized Glaze by Mod Podge.  I love this stuff.  It gives a kind of Pearl shimmer and is a great sealer.  This seals the paint as hard as concrete. You can’t scratch the paint off! I found it on Amazon.  Mod Podge Pearlized Spray Sealer… https://www.amazon.com/dp/B007QNI3AI?ref=ppx_pop_mob_ap_share
6.  I glued sisal rope around the top and filled it with my faux forsythia.  Now, come on Spring!!!! Today the sun is shining so I think it worked. I have also now made two more!
Awww!!! There’s the sun!