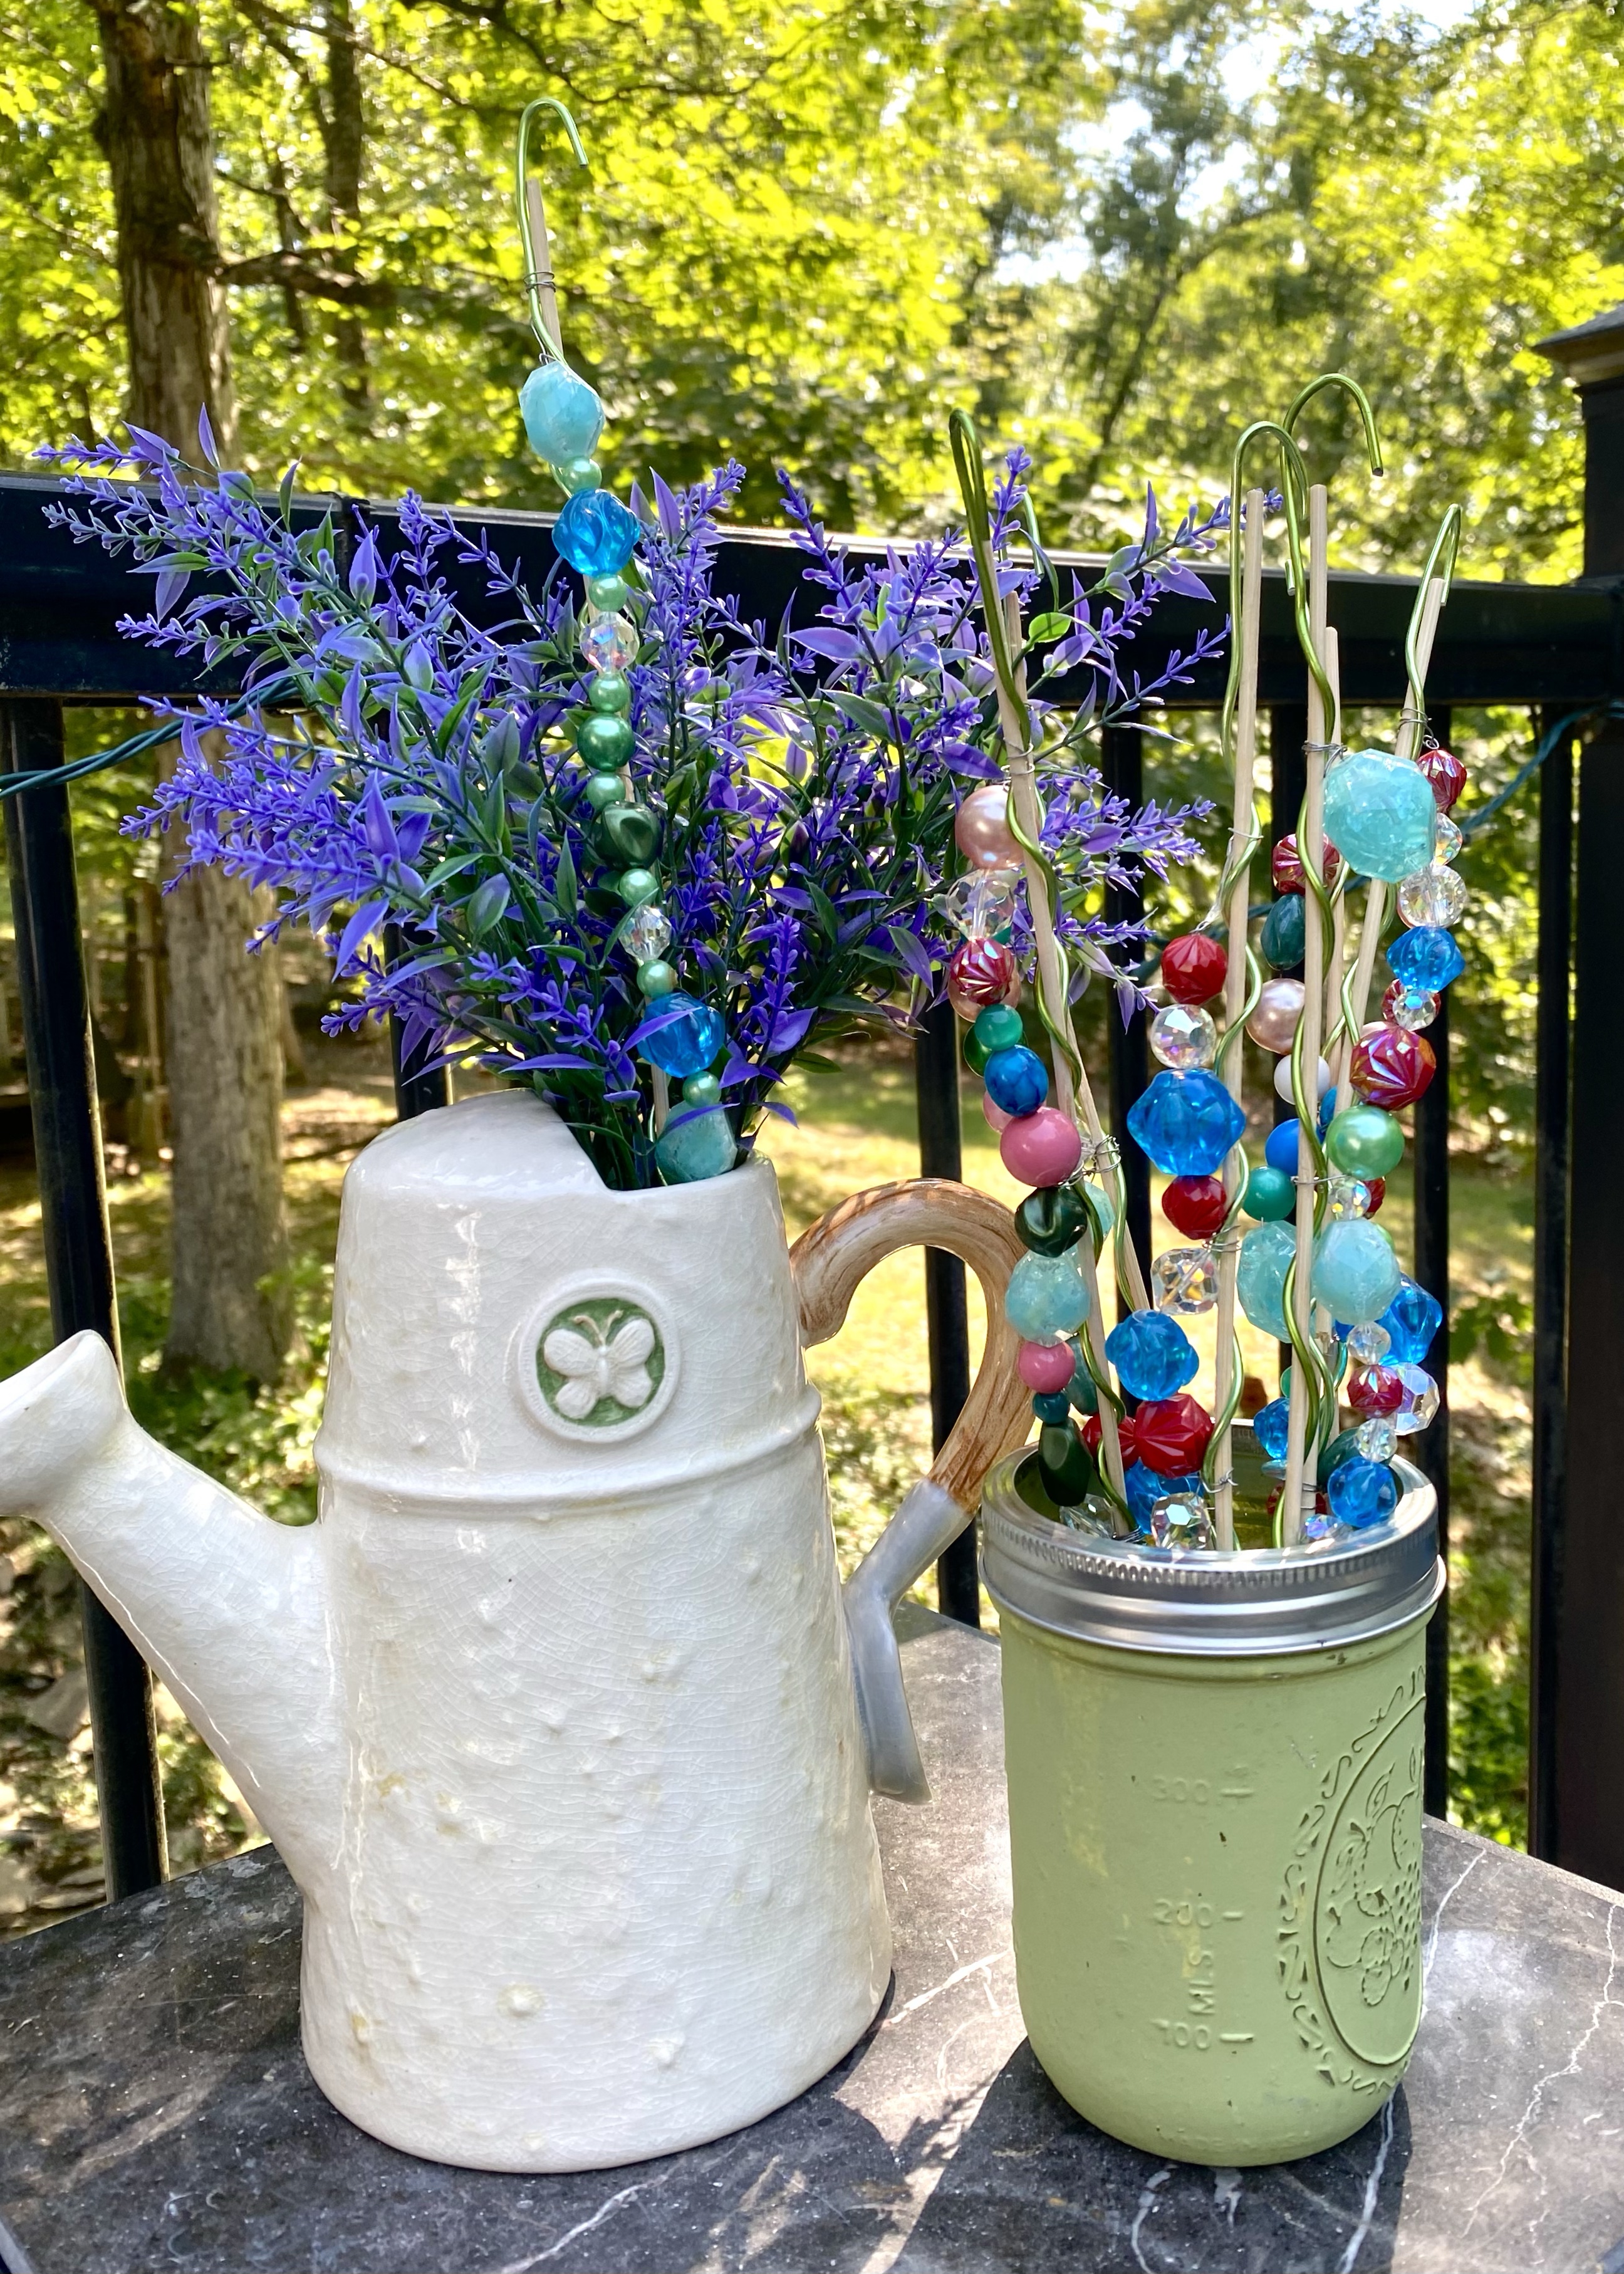
These “bling sticks” dress up potted plants or flower arrangements. I used green wire I think I got from Dollar Tree (it was very bendable and soft to work with). I threaded all kinds of beads from old necklaces, etc. to the green wire and then wired the bling to a skewer from Dollar Tree with thin wire for support.
One of them looks so pretty in the ceramic watering can full of faux purple flowers on my deck.
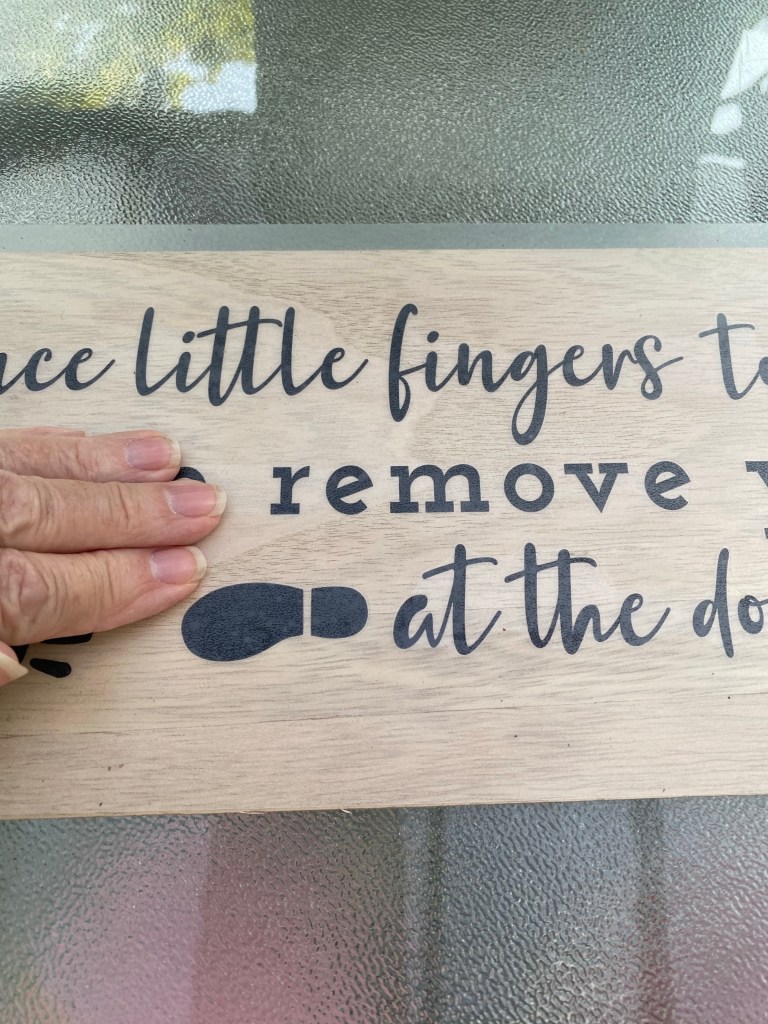
Many people take their shoes off at the door. It seems as though Dollar Tree has noticed this and has started stocking Wall Art politely asking visitors to do the same.
If this is something you practice, I have taken their Wall Art and applied it to a piece of one of their MDF thin boards with a natural wood look.
This board had a pumpkin cut out on it. I measured how long it needed to be and removed the pumpkin area. I scored it with a box cutter and broke it off, then sanded the edges.
I removed the extra vinyl on the wall art and then used transfer paper to pick up the words and images.
I notched the edges of the board using a pair of scissors for a more decorative look and added a decorative string to hang it.
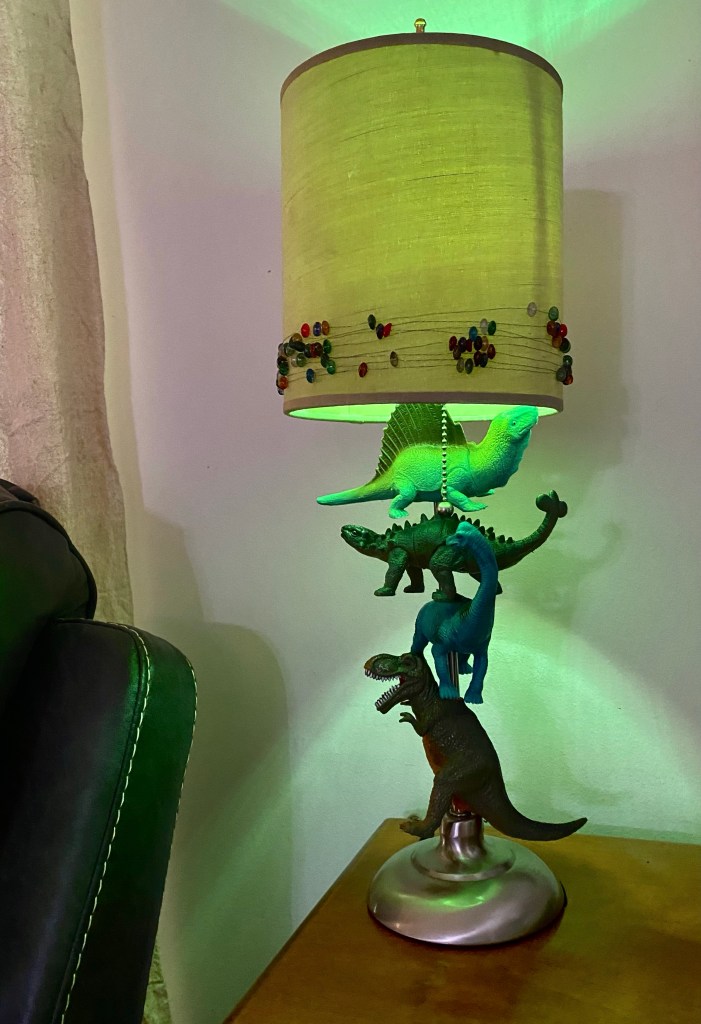
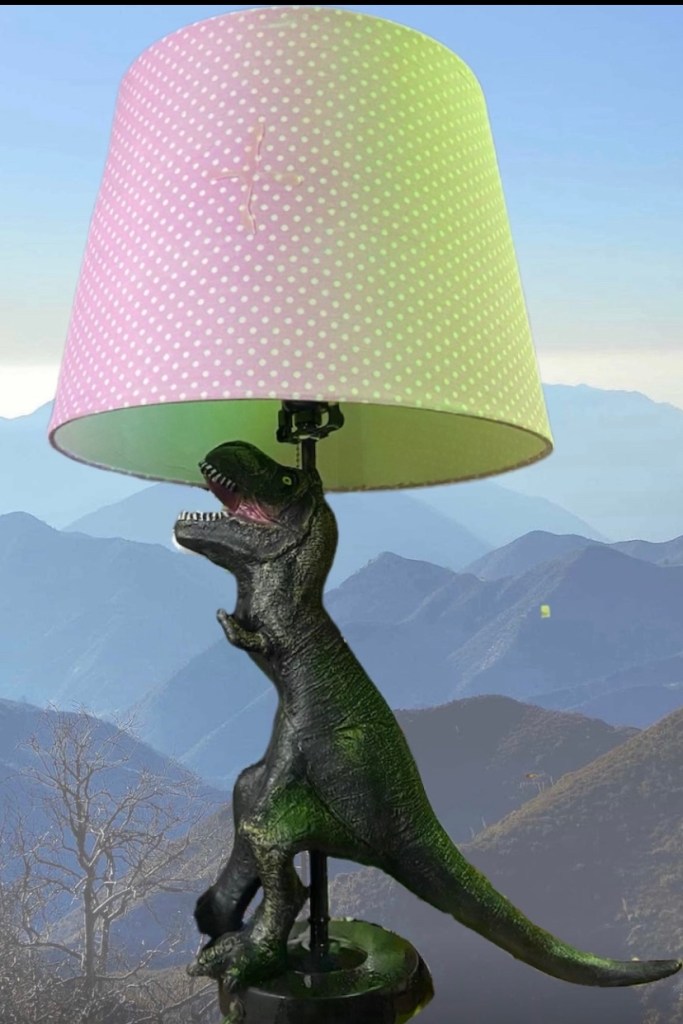
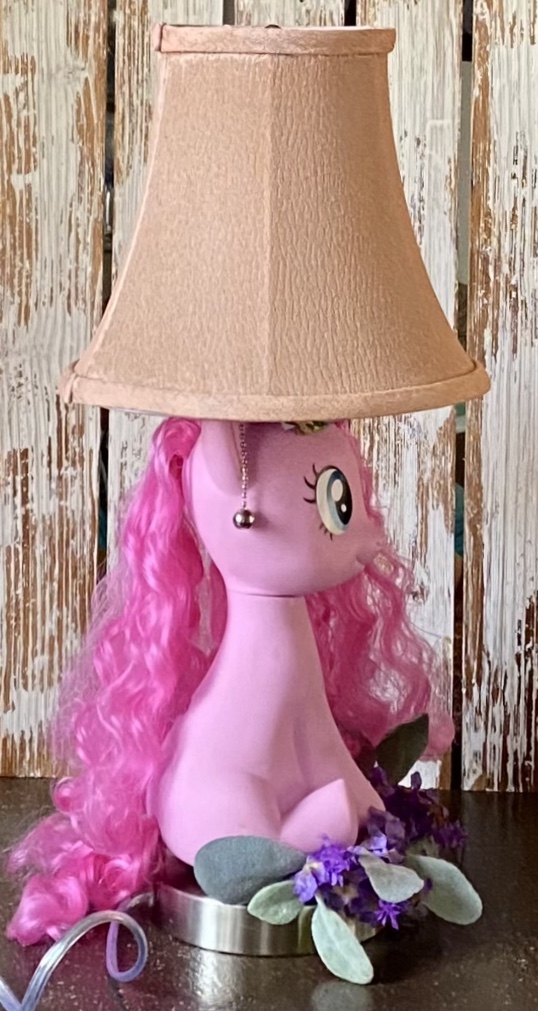
My husband has a background in working with electricity and has been loving scouring Goodwill, thrift stores, estate and garage sales looking for the perfect lamps, and lampshades, dinosaurs and My Little Ponies to create these character lamps.
He’s been having so much fun I’m starting to wonder if he will ever run out.
But here’s what he has created so far. Im starting with the last one because if you press the button on the belly of the green dinosaur, he roars. 😂
The purple chalk style paint we created to paint a vintage wooden chair is such a pretty color, we decided to name it MO Eureka Purple.
I decided after seeing a similar chair painted purple by Junk Chick, I knew I had to paint one, too. I sold it even before it was finished to a customer whose favorite color is purple!
This is your Missouri History lesson for today. George Hearst was born in Franklin County, Missouri … some say near what was to become Sullivan, Missouri. His wife, Phoebe, was born in Anaconda, near St. Clair. George named his copper mine, Anaconda. I’m not sure but would like to think he yelled “Eureka” when his mines would produce. I haven’t found out if this is true or not but since that is the city where one of our sons lived in and still is close by and our grandson still goes to elementary school there, and the school color is purple…. MO Eureka Purple is the perfect name. I wonder if that is why the city is named Eureka.
Painting this chair reminds me that the second thing I ever painted with chalk paint was in January 2014. My best friend had been painting some furniture and gave me some left over Annie Sloan gray paint in 2013. It took me a year to try it. After that, I was hooked.
You can click on this link: Annie Sloan and Me to see my first experiences with chalk paint.
I liked Annie Sloan paint but after trying Missouri Limestone Paint Company’s chalk-style paint in 2015, produced in Ozark, Missouri, I was hooked and SharSum Paint company was born. I love how smoothly it goes on with no brush strokes at all as long as you apply a very thin coat for the first coat. This is the gripping coat. The second coat usually does full coverage. It dries so fast (usually 15-20 minutes), by the time you have finished the first coat, it is ready for the second.
Introducing MO Eureka Purple – a vintage chair painted purple and displaying my favorite faux purple flowers!
Everyone is always using high end stores as inspiration and creating projects that sometimes turn out better than the original. I did that this evening, and even I was blown away by the results.
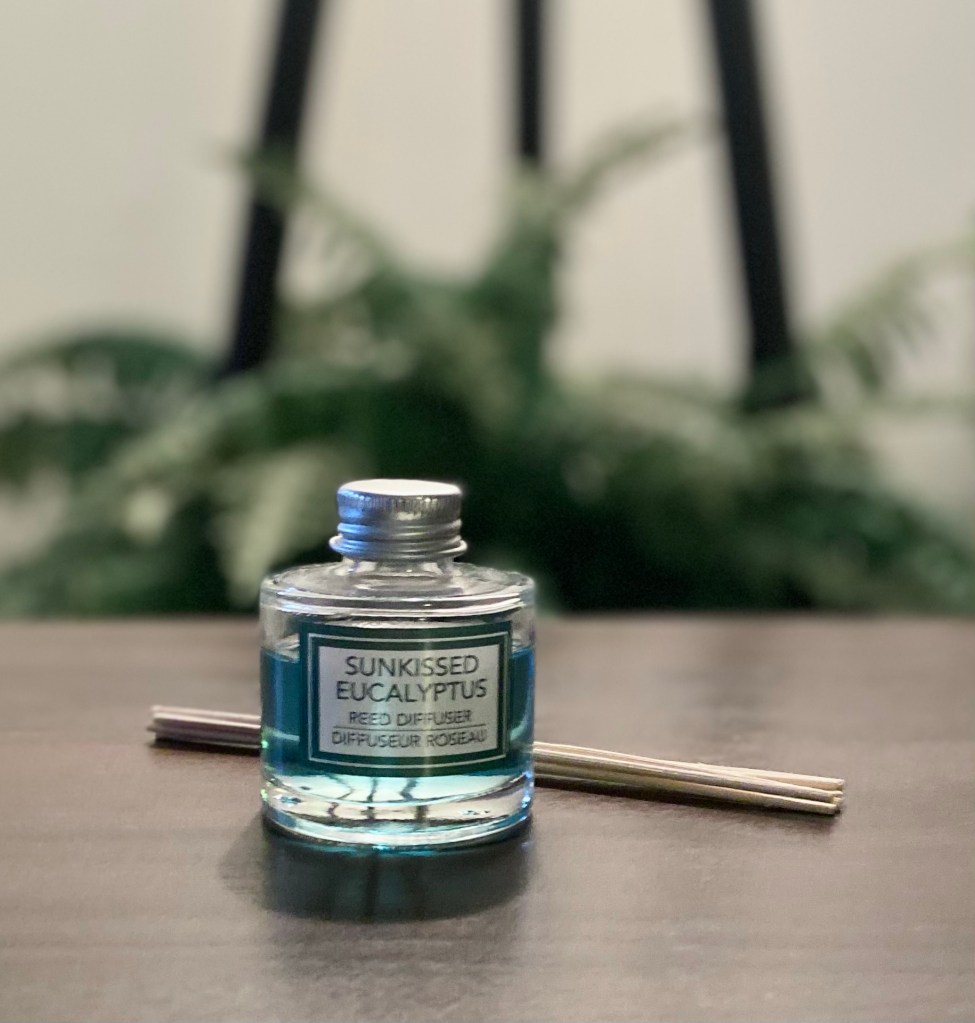
It all started with this little Reed diffuser from Dollar Tree.
I was putting away some bags with Dollar Tree purchases and got distracted. Lol
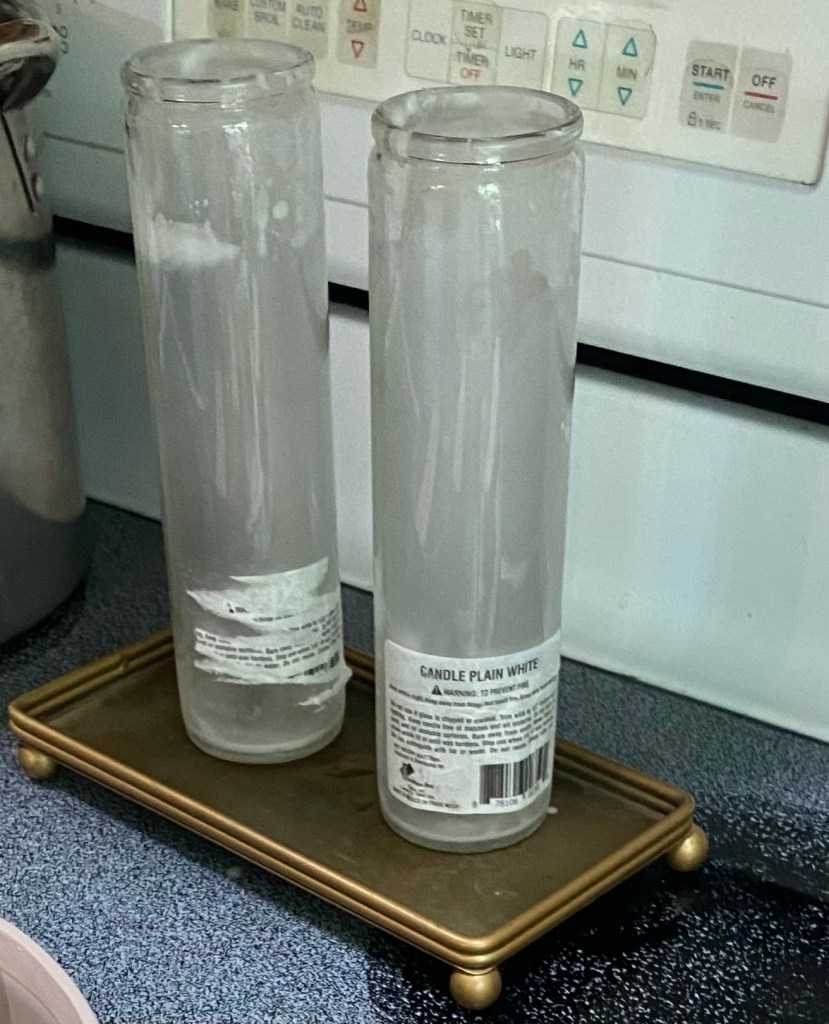
First of all, I’ve had a little gold metal riser for a year or two. I never knew what I would do with it. Today, I used it to put my hot melted candle wax jars on, so it was handy (I hadn’t put it away yet, either. 🙄)
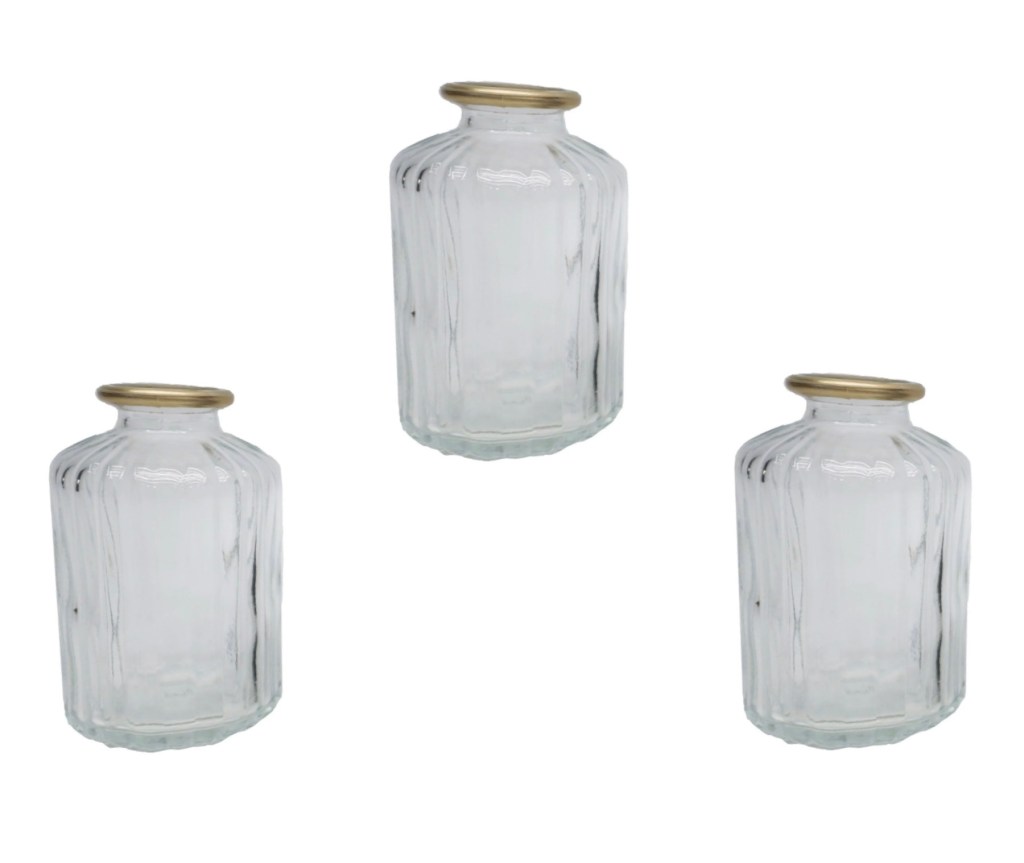
I took three little glass vases out of one of the bags. They were the only three I saw at Dollar Tree one day so I got them, not knowing what I’d use them for, either. I really liked the bit of gold around the top of them.
I also found two packages of reed decor. I have found these before and have them in my upstairs bathroom in a vase. I really like the neutral look of them.
Then I remembered I bought a Reed Diffuser at Dollar Tree awhile ago and hadn’t used it yet. It had the Eucalyptus scent.
So, of course, I had to act on an idea that came to me.
I added some RubnBuff on the rims of the vases to enhance the gold a little more and also added it to the edges and feet of the riser.
I poured the liquid from the diffuser evenly into the three jars and divided up all the reeds into the jars, making sure I saturated the ends well. Then I arranged the jars on the riser. They fit perfectly!
I’m so glad I stopped what I was doing and put all these things together. I really like how this turned out! It’s so much prettier than just the little Reed Diffuser all by itself. It looks and smells perfect in my downstairs bathroom.
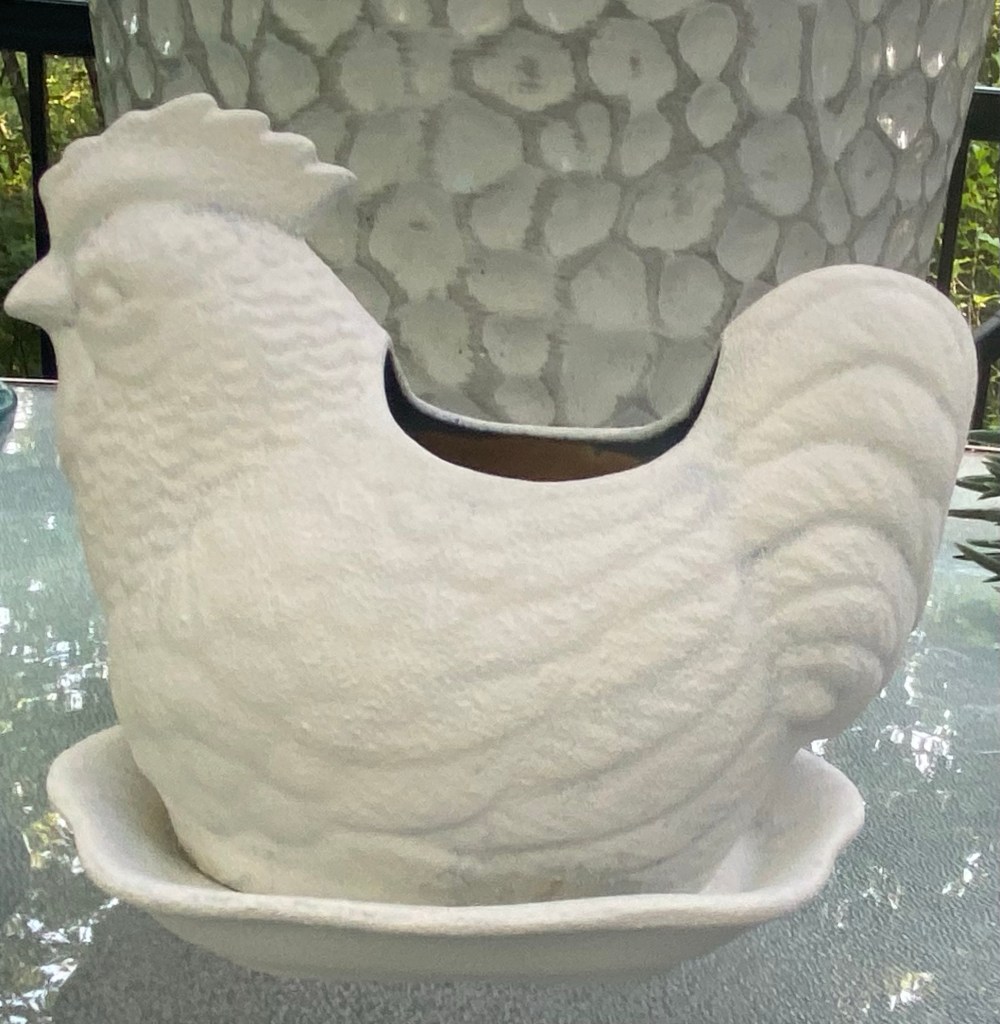
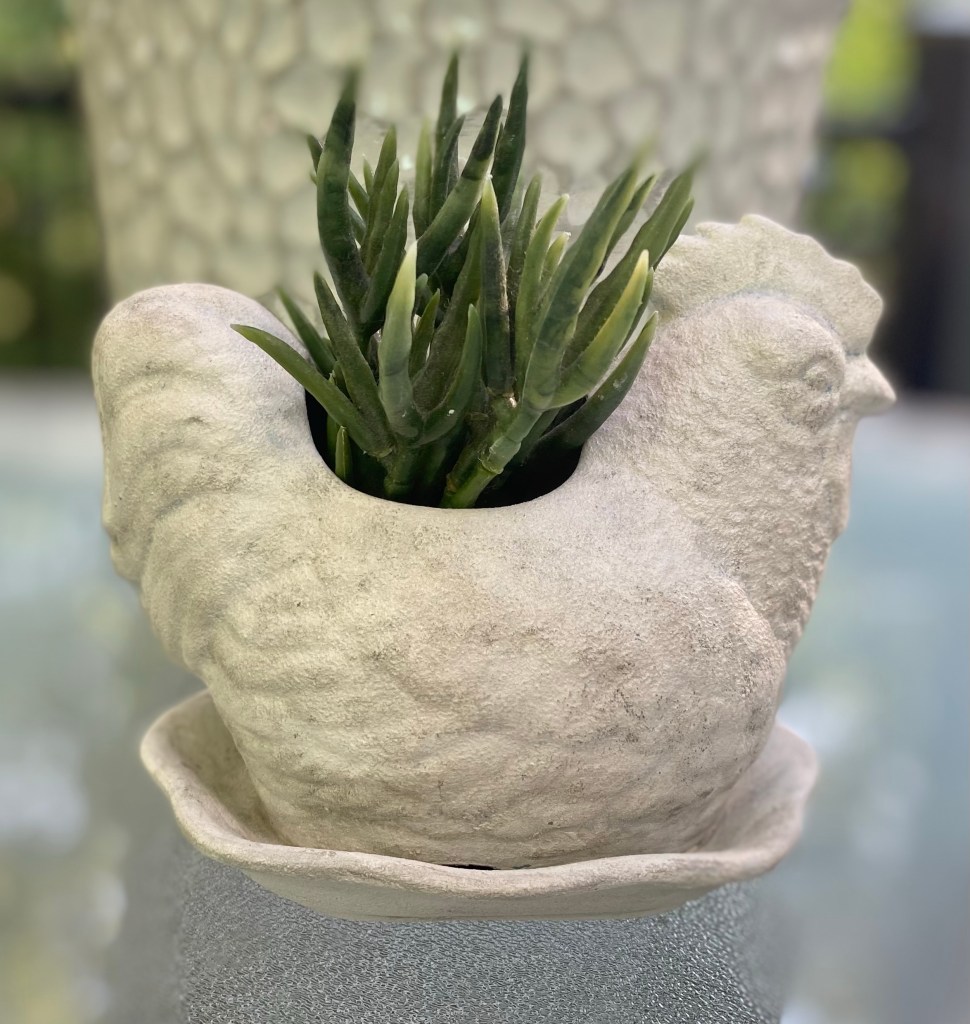
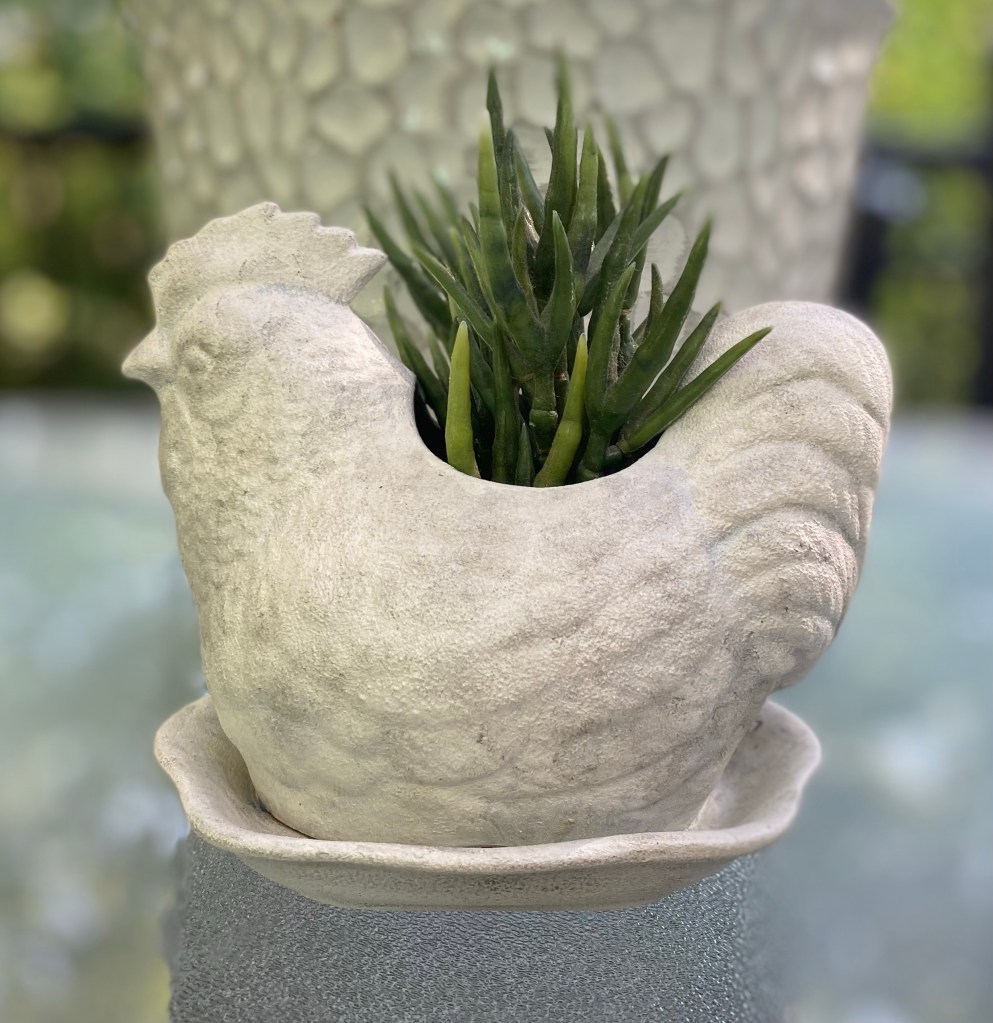
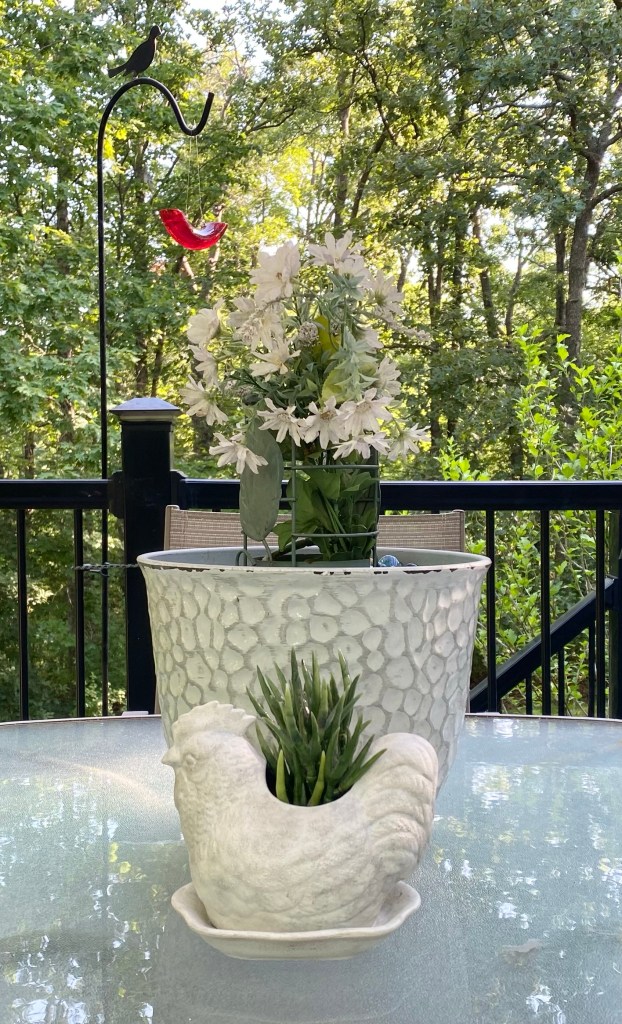
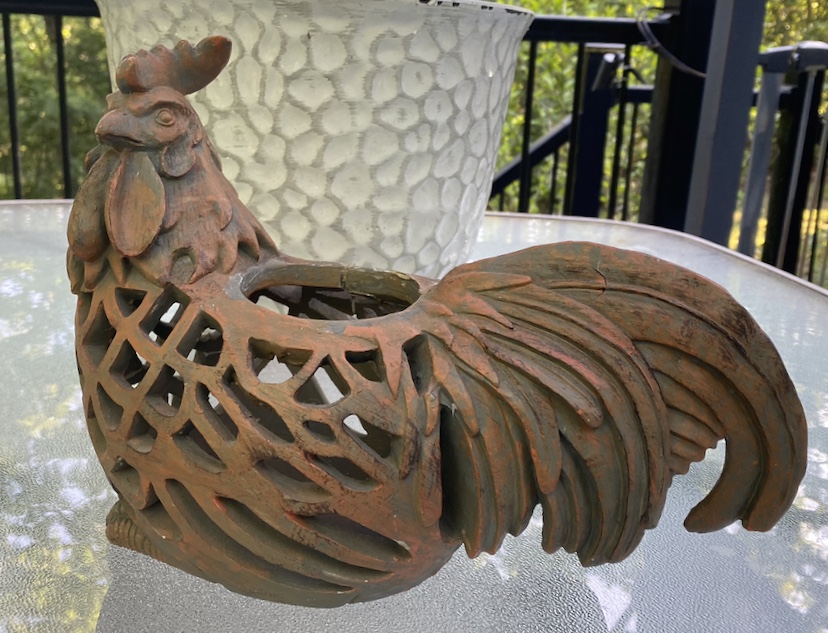
I found a chicken planter and a rooster that would hold a vase at two different thrift stores in the last few weeks. I decided they both needed updating using a concrete look technique.
The first thing I did with the chicken was spray him with Mod Podge pearlized glaze. Any sealer would work or even spray paint. I sprayed it to help the paint adhere well since the pottery was a bit shiny.
Next, I mixed chalk-style paint with baking soda and began daubing it on all over. This gives it a nice texture and no brush strokes. I gave it two coats, letting it dry in between.
After two coats of the baking soda and chalk paint mixture. I don’t have a photo, but I sprayed it with a coat of Mod Podge. This will help keep the antique look I’m giving it from soaking in which would make it hard to remove if needed.
Next, I did a little dry brushing with the gray paint. I would daub it on and use a baby wipe to blend where needed.
That’s it. I now have a chicken planter with a concrete look.
Now, for the rooster – I finished him much in the same way using the baking soda and white chalk- style paint mixture with a little different type of antiquing.
I learned the rooster was made of resin. I knew it wasn’t metal or wood. I had someone tell me to scratch off a bit of the bottom and if it was white underneath, it was resin…it was white!
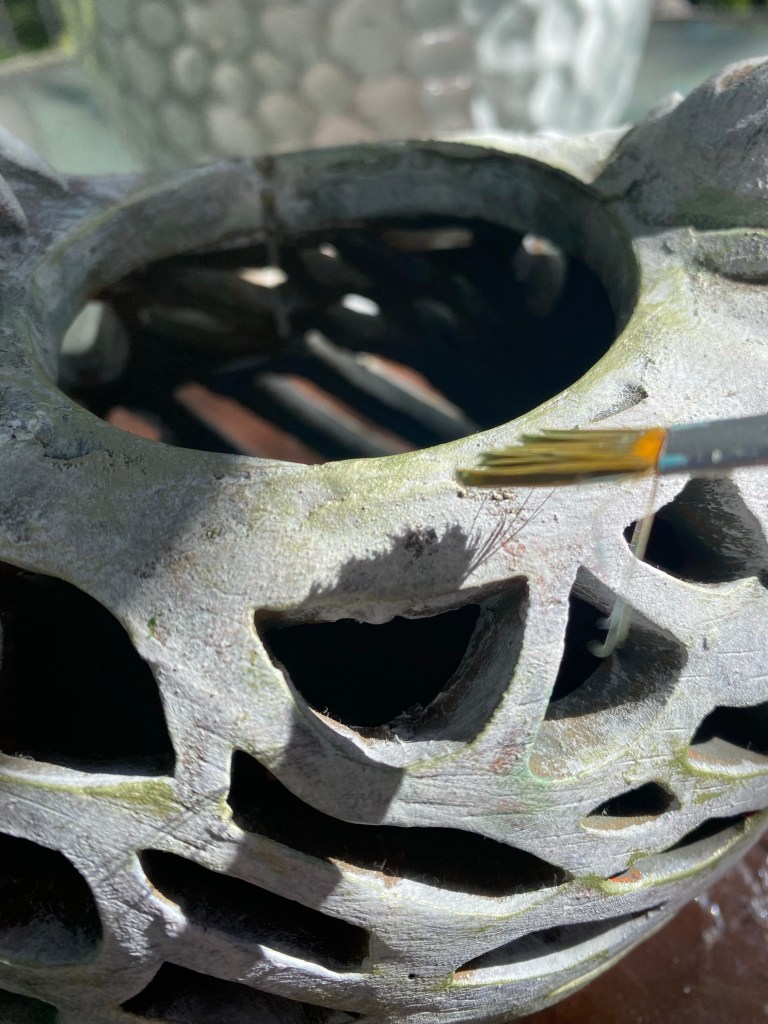
I daubed the white chalk paint all over him. I only used one coat and wasn’t worried about full coverage because I liked the colors underneath and didn’t mind them coming through a bit.
Once dry, I used sprayed the rooster with this clear chalky spray. This will help me when I apply the glaze and will let me remove excess.
I applied the metallic green glaze to make it look like the rooster had been outside in the weather for years and had moss growing on it at one point.
I also applied a bit of turquoise paint for some patina.
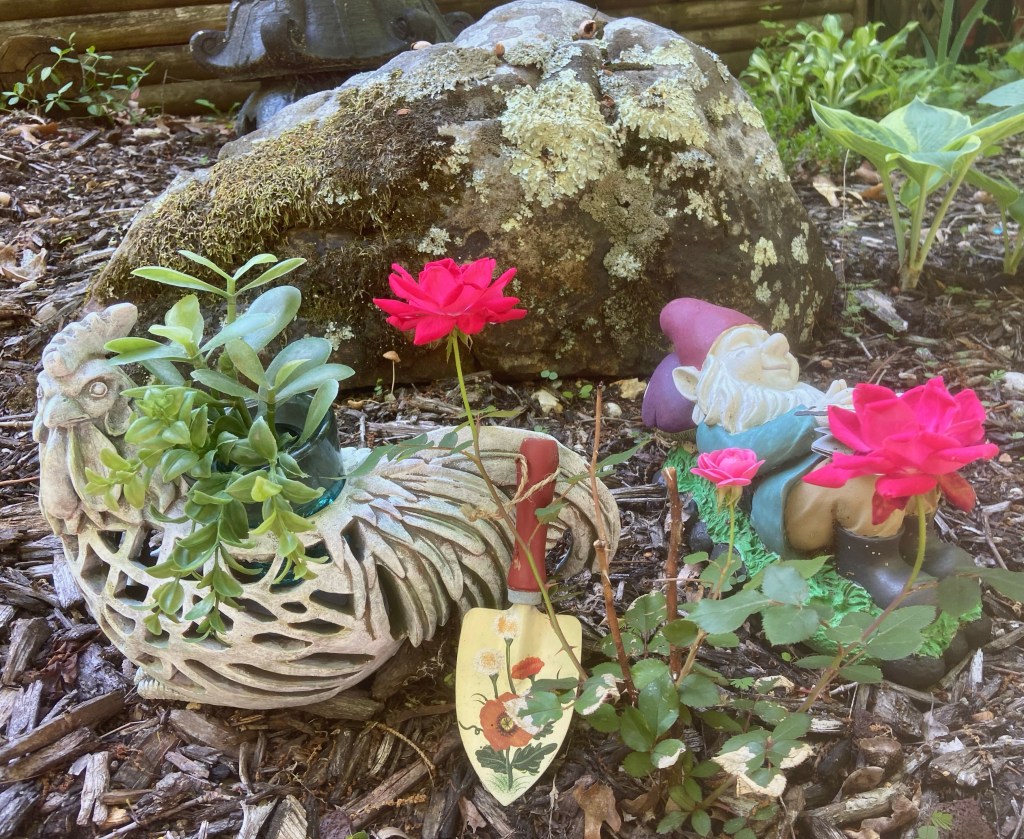
The rooster was now ready to be added to a garden display.
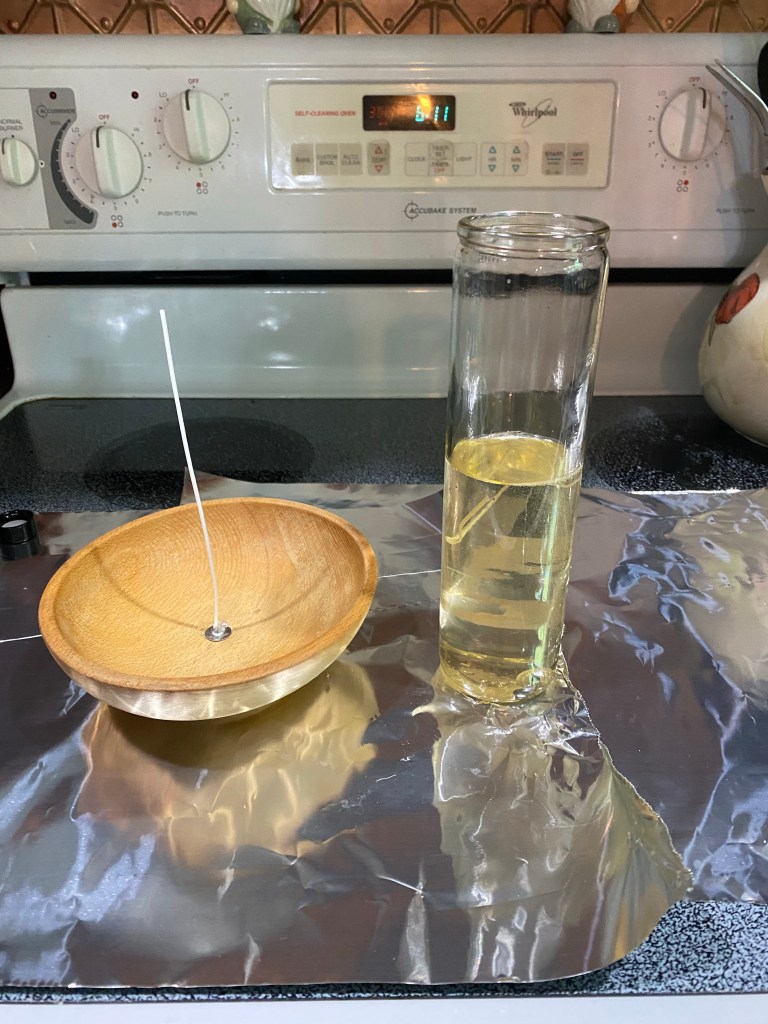
I’ve been seeing crafters use the tall Dollar Tree candles and melt them to create new candles in pretty containers. I had everything I needed to try this out. I am thrilled with the results. In fact, I shared the one I made for myself on my Facebook page and already have a request to make another.
The candle in the glass holder is from Dollar Tree. I ordered wicks from Temu and I had this wooden bowl. I love thrifting wooden bowls so I had several to choose from. The fragrance oil is “Egyptian Musk”. I love the fresh clean smell. I found it on Amazon.
I had seen many crafters stand the candle in a pan of water and put it on the stove on low until it melted. Today, though, I saw a technique of placing the candle on a cookie tray in the oven at 300°. It took about 18 minutes to melt mine.
I hot glued the wick to the bottom of the bowl while the candle was melting and got it ready for the wax.
It is ready to pour.
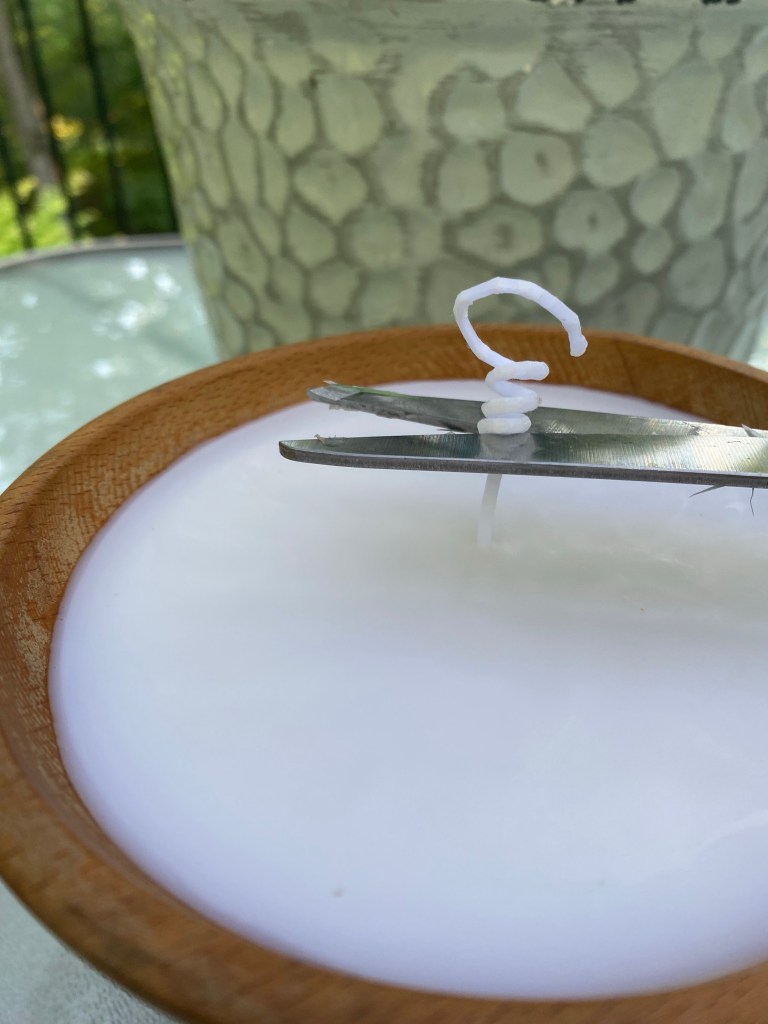
After I poured the wax into the bowl, I added two capfuls of my fragrance oil and stirred it around a bit with another skewer.
I should have curled the extra wick around a skewer and laid it on top of the bowl to keep the wick upright, but didn’t remember to do that until after I poured the wax. Next time I will do that before pouring.
I then let it cool and trimmed the wick.
I love how my candle turned out! I can’t wait to make more!
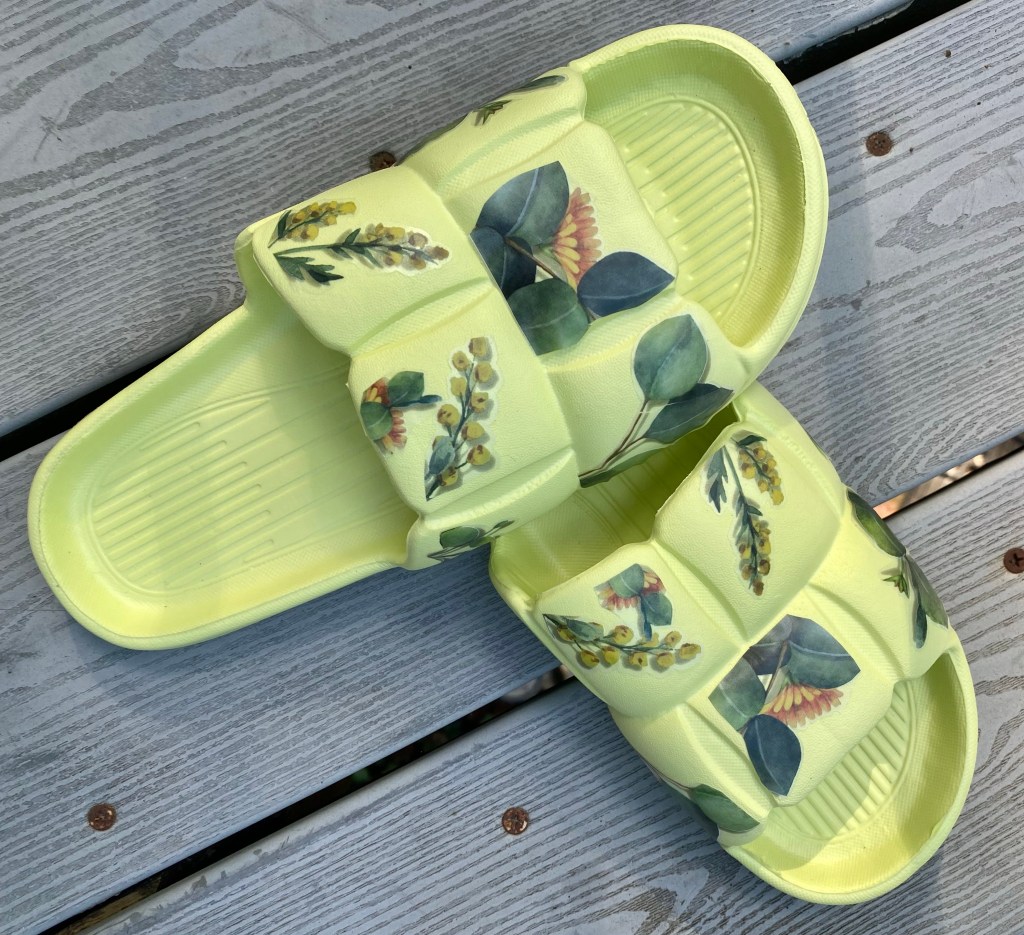
I have been experimenting with adding designs on some rubber bath slippers I bought on the Temu app. These were a great buy, but I am also seeing these at Dollar Tree, Walmart, Hobby Lobby, etc. Today’s experiment is applying rub on transfers to them. This has become my favorite way to give bath slippers a unique look.
Today, I’m highlighting the rub on transfer technique because I love how they turned out and I believe this to be the most durable method. I did seven pairs this way, once I did the first pair using the rub on transfers. I used Dollar Tree rub on transfers and a set from Temu, but any brand should work just as well.
I know they are super durable because I applied one of the transfers where I didn’t want it on one pair and I couldn’t remove it. I tried scraping and picking it off with my fingernail and tried using soap and water. I couldn’t budge it. So, I ended up applying another transfer over it. I actually like the shadowed look it made. 🙂
These are really easy to apply, especially if you have used rub on transfers before. If you haven’t, they remind me of the type of stickers when I was young that you would lay down on a piece of paper and they rub over the top plastic piece with a pencil and the image would transfer to the paper. That’s it!
I like to keep all the bits and pieces of the rub on transfers I don’t use on a project and use them another time. Today was that time. I picked out the ones I wanted to use and a pair of pink slippers and then started applying them to the different sections on these slippers.
I cut the first piece I wanted away from the sheet. It has a white backing on it to protect the transfer. You don’t want to remove that white backing yet as you don’t want the transfer sticking to anything until you are ready to use it or you will ruin it.
Then I removed the white backing, placed the transfer where I wanted it and used a flat stick I had that came with another type of transfer and rubbed on the plastic until the image released. A popsicle stick or even your fingernail would work, After it releases, I then used the plastic sheet to “burnish” it into the rubber, meaning rubbing it in to make sure it adhered well.
That’s all there is to it! I continued adding transfers to each section. I applied a little Wise Owl Salve (or any clear wax would work) to protect the transfer, but I really don’t think it is needed.
Examples are below of my other experiments…. decoupaging napkins (I did another blog post on that technique) and using Dollar Tree Wall Art.
The first experiment was with decoupaging napkins. They were pretty and turned out nice and I wear the pairs I made myself around the house all the time. They were fun to make and fun to wear. They do not slip off your feet at all. Here’s a link to my blog post on them.
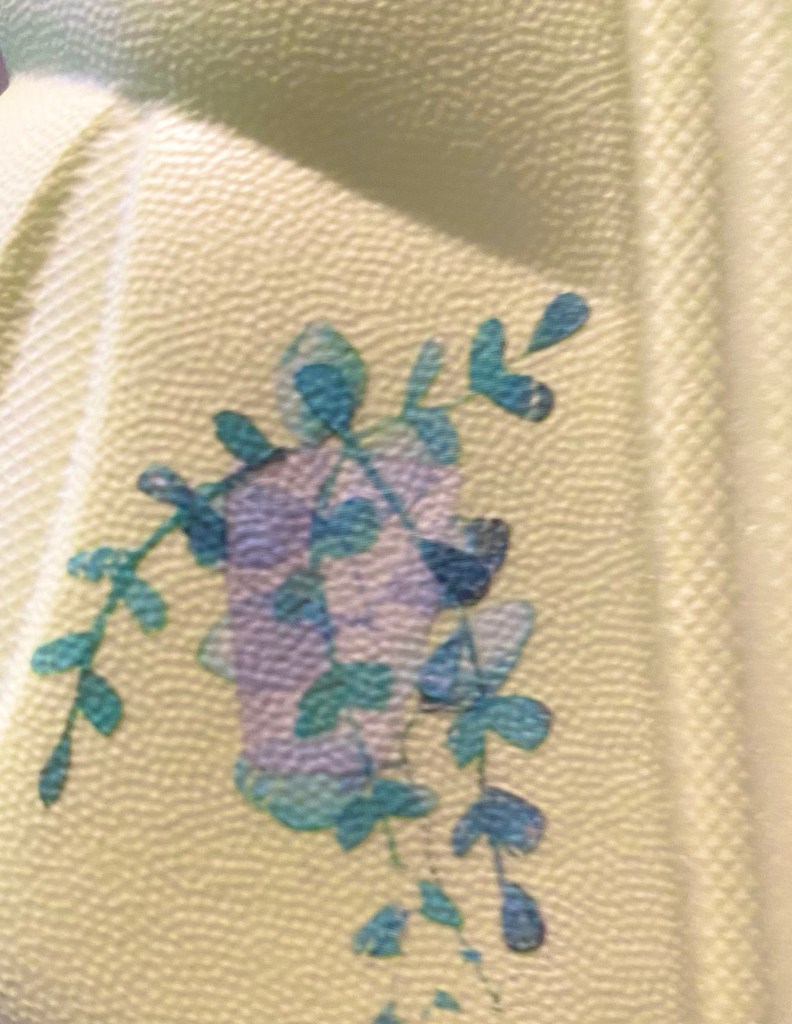
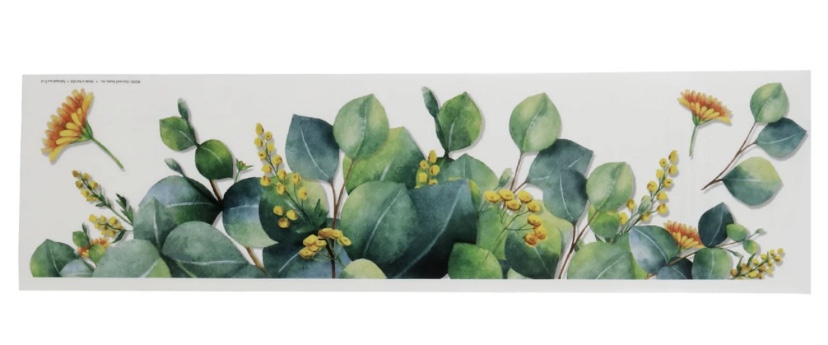
The other experiment was using Dollar Tree Wall Art. I found a beautiful flower and foliage design and cut it to fit a different type of slipper. I love how it looked on this blue slipper. This Wall art is removable, so…. If it starts coming off after a bit, simple remove it and you’ll still have a neat pair of slippers or go to Dollar Tree and get another Wall Art for $1.25 and make another unique look. 🙂 I then used bits and pieces left over and made another Wall Art pair. I did not apply wax to these as they are removable anyway. Both turned out very cute.
But, as I mentioned earlier, the rub on transfers are my favorite!!!! Which te unique do you like best?