Shabby Chic Desk/Hutch Set

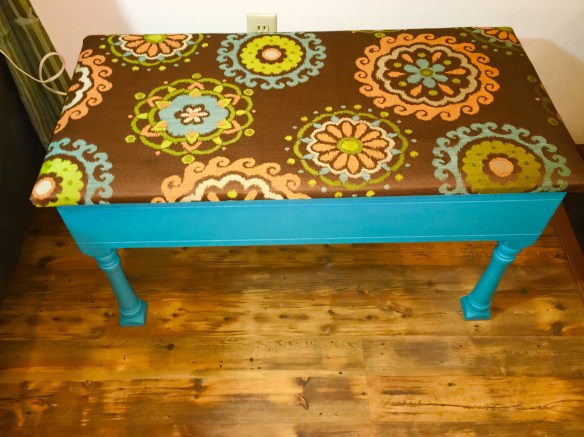
My Shabby Chic Desk/Hutch has been one of my favorite projects so far using our Missouri Limestone Company’s Chalk-based paint.  I personally paint furniture to sell with this paint we distribute through our SharSum Paint company and really fall in love with some of the things I paint.

You can read through the transformation below, or if you are in a hurry and want to come back to this wonderful piece of writing later, just scroll to the bottom to see this Shabby Chic Desk/Hutch Set in all its glory!

I really, really would love to keep this one but just don’t have the room in my house.  As of now, it is for sale.  Like it?  Pay my too low asking price of $215 and the shipping charges (which would probably be astronomical) and it’s yours!  : )  I’ve often wondered how individuals on sites like ebay and etsy ship huge pieces of furniture.  I can just see me wrapping this up in brown paper and taking it to our local hardware store for UPS pickup.

Seriously, I do have it for sale on Facebook’s Marketplace.  If you are looking for projects to paint or have something to sell, this is a great place to do it.  Marketplace somehow finds all the swap sites on Facebook (according to your desired location setting) and puts them in one place .  You don’t even have to a member of those sites.  I have bought and sold several things through Marketplace.  I love this service!  P.S.  I just noticed this set has been viewed by 509 people in the last two days.  Wow!

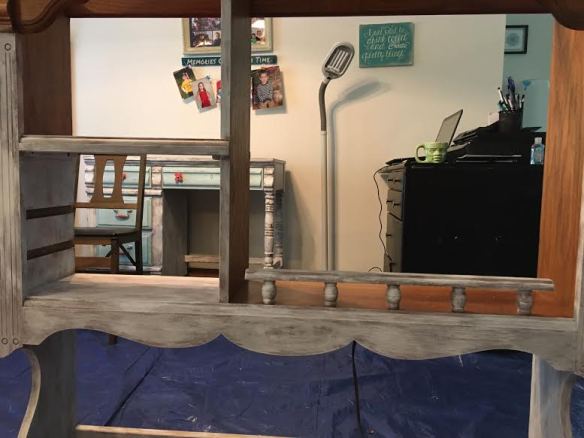
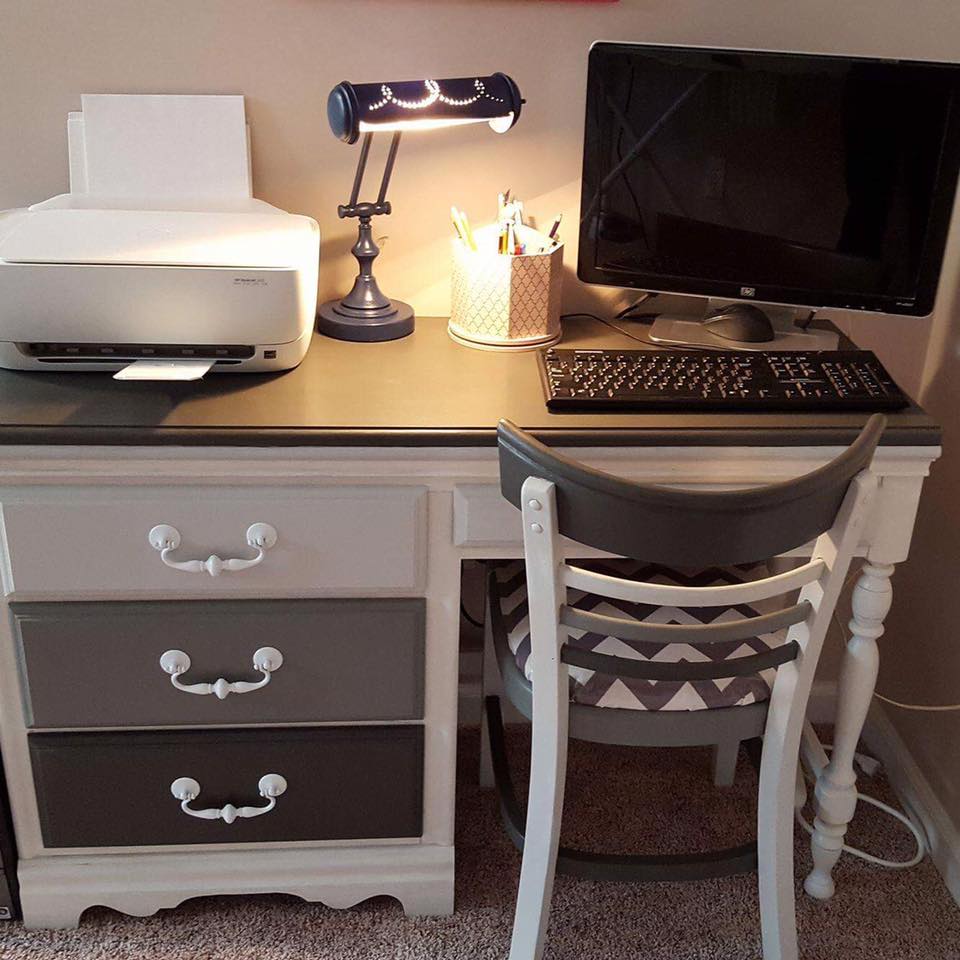
But first, the history of the desk/hutch.  I found this set on one of the swap sites.  It sat smack dab in my living room for months!  As you can see a floor lamp is on the desk at this point.  I would look at that huge hutch and think, “How am I ever going to paint those little letter cubby areas” and then get overwhelmed with how huge a project like this would be.

I couldn’t think what I wanted to do with it, so I finally sold it to my friend, Michelle, who carries our paint in her store and paints projects right along with me.  We call ourselves Lucy and Ethel.  Funny thing, that’s not the first time a friend and I have had those nicknames and I always seem to be Lucy.  Hmmmm.

But then…..a previous customer who had bought a desk from me earlier for one of her daughters contacted me and wanted me to find and paint another for another daughter.  Sure!  No problem.  I knew just the desk. It even looked somewhat like the one she bought earlier. She probably wouldn’t want the hutch, but I sent a quick text to Michelle to see if she still had it in her stash and back it came. Only catch was, I had to take the hutch back, too!  I sometimes feel we spend more time shuffling furniture around than actually painting.  🙂  So then it was back in the living room again.

Now, to find inspiration for the desk.  I started searching and came upon this awesome blog.  Would you believe this lady had the same exact desk I had?  Not only was it painted with an absolutely beautiful shabby chic look, she even had a tutorial on how she did it!! Her blog is called “How to Nest for Less” and her desk tutorial can be found here.  Thank you, thank you, Erin!

Erin’s painting idea was genius!  Dry brush distress right over the desk as it is.  I painted the desk first and realized that it just had to have the hutch.  However, both pieces would be way too big for this little girl’s room.  I happened to have just finished another smaller desk/hutch in a blush pink and suggested this one instead to the customer.  She loved it for her daughter!  SOLD!  I’m going to paint a chair to match and….she is also buying a dresser to match the desk set she bought earlier.  It was a good week for furniture selling.

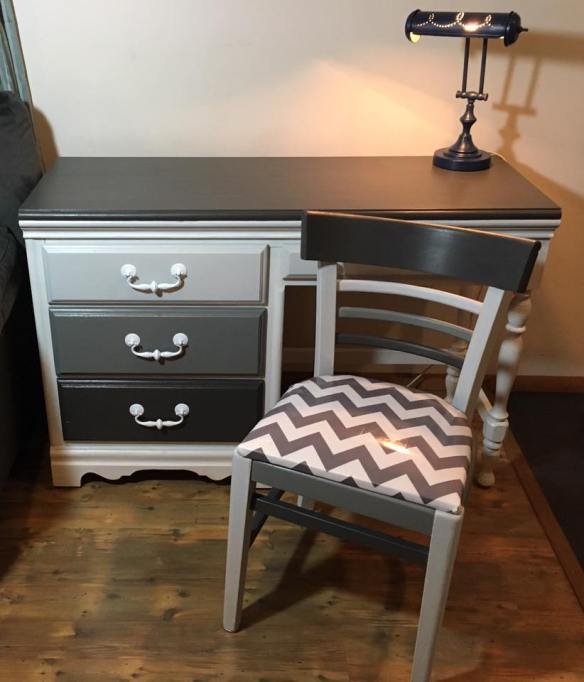
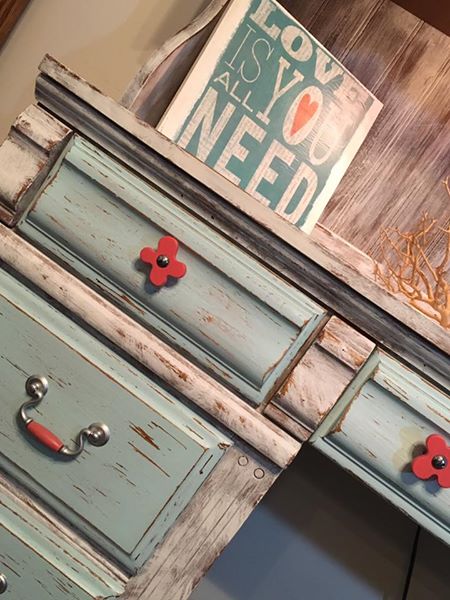
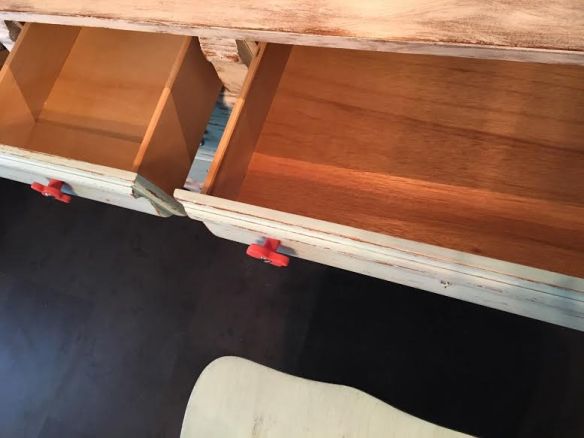
Back to the Shabby/Chic desk set.  I now had the desk completed, with new knobs (actually clear resin knobs I found at a yard sale and painted “Vintage Coral” and pulls spray painted silver with the wood part painted “Vintage Coral”.

finisheddesk

I was ready to tackle the hutch. As I was painting it, I decided to take the cork board off and paint it.  I had researched and found it was best to shellac it before painting, so Danny (my husband and partner in all of this) used our handy dandy Zinsser Bulls-Eye Shellac on it. That worked like a charm and the paint just glided on.  Then I figured it would be easier to paint the back if it was off.  When it came off, we discovered the shelves and letter cubby things all slid out and I was able to paint each piece separately!!!  Yahoo!  And I’d been so stuck on what trouble that was going to be.

corkboard

Corkboard – shellac first

openhutch

hutch without back

paintedcubbies

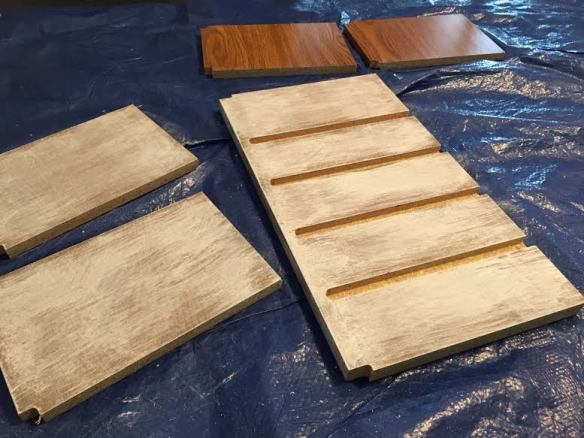
letter cubbies came apart

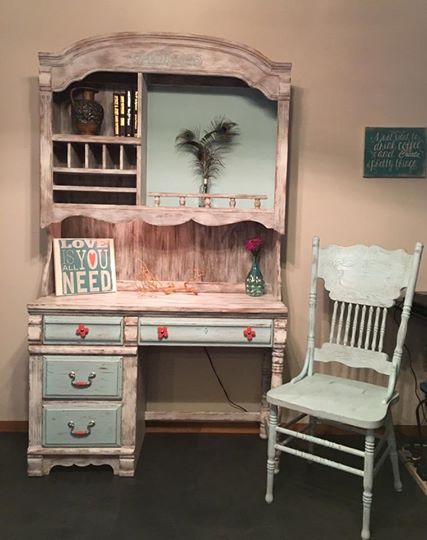
I finished up the hutch and if the desk looked pretty before, once we put the hutch on top the transformation was amazing.  This set is officially GORGEOUS! I added a shabby/chic chair to match and it was ready to sell!  Oh and did I mention, the hutch has a light?  Right now, there are two people interested in it, so it is going to sell quickly, I think.  But maybe not too quickly.  I like looking at it as it sits in my crowded dining room and going over every once in awhile and sitting at it and running my hand across the top.

I do believe I’m a little obsessed over this project.

Are you ready for the reveal?

deskhutchfinalpicatnightdeskhutch1deskhutch3detaildrawers


Projects are Endless, Using Chalk-based Paint

My chalk-based paint of choice is Missouri Limestone Company because, as you know by now if you’ve been reading my blog, I love it so much I’m now selling it locally!  So, when I see an idea using chalk-based paint, I just substitute with my MLP!

As I’ve said before, the projects are endless when using chalk-based paint! I was just checking facebook before leaving to get my plant at Lowe’s for my newly painted plant stand and saw this idea. Well, yes! Missouri Limestone chalk-based paint would be perfect on concrete pavers.http://www.countryliving.com/…/g10…/decorative-paint-ideas/…

My project for last night was to paint my wrought iron plant stand. There was no rust flaking off, so I cleaned this old thing up then gave it one coat of Missouri Limestone Paint’s “Homemade Ice Cream”. It now matches my newly painted front door. I know exactly what plant I’m going to buy for it in the morning at Lowe’s. 😍 I have plans now for my wrought iron set.

Update:  Here’s a photo of my new look for the front of my house.  The wrought iron furniture is painted and the set turned out great!

doorandfurniture

For even more projects using chalk-based paint, be sure to follow my board Chalk Paint Projects for inspiration as I’m always adding new project ideas there. https://www.pinterest.com/sharsum/chalk-paint-project-ideas/

Essential Oil Tip for Refinishing Drawers

As I was finishing up my “Ombre” desk set re-do, I thought about my collection of essential oils.The drawers of the desk were in very good shape and had no odor whatsover. However, I’m into essential oils and I have an oil from Young Living called Cedarwood. I decided I would wipe down the drawers with a mixture of water and about 10 drops of Cedarwood. I thought that might be a perfect scent for a wooden drawer, right? It smelled so good, I put a little oil on q-tips and put one in each drawer for awhile. I love opening the drawers and getting a faint whiff of Cedarwood. You might try a favorite scent in the drawers of something you are working on or purchased.  Another tip…..if your drawers do have an odor, paint or spray a coat or two of Zinsser water-based shellac to seal in odors such as smoke or a musty smell.  These odors won’t penetrate through the shellac.  This works on stains, too.

Q-tip dipped in essential oil and placed in drawer for a short time.

Q-tip dipped in essential oil and placed in drawer for a short time.


A Desk Gets a New Life and a New Home

One of the things I absolutely love about our Missouri Limestone Company’s chalk-based paint (besides how easy it is to use) is the look of the final project.  I recently found an older solid wood desk from a company called American Drew.  I had never heard of this company, but looked it up and they make quality furniture.

I decided I wanted to make an “Ombre'” desk, using different shaded of gray.  So I painted the base of the desk with Missouri Limestone Paint’s “January” (white) then gave it a wash of “Winter Gloves” (light gray).  I painted the top and the bottom drawer “Gray Goose” (dark gray), the little band around the top and the two top drawers with “Winter Gloves”, and the middle drawer “Sunday Silver” (medium gray).  I love the color names!  Click here for a neat trick using essential oils in drawers!

This slideshow requires JavaScript.

I also had a nice solid yard sale chair that had been painted black so I painted right over the black using the same “Ombre'” color scheme.  I recovered the chair seat with a piece of laminated fabric I bought at Hobby Lobby.

The final touch was an old brass-plated desk lamp I bought at another yard sale and painted it with “Indigo” (navy blue).

I sealed the whole set with 3 coats of my favorite topcoat Varathane Crystal Clear Water-based Polyurethane after my research found this recommendation.  I purchased it on Amazon and at Menards. because I could not find it locally.

The “Ombré” desk, chair, and lamp are in their new home. The 9 year old owner is said to be very excited. I love making people happy with our paint and projects.

Ombre Desk in it's new home - 9 year old owner is said to be very excited. : )

Ombre Desk in its new home – 9 year old owner is said to be very excited. : )

Projects Painted and Sold Using Missouri Limestone Chalk-based Paint

It’s been awhile since I added sold projects, so thought I’d update and add a few.

This has to be my favorite piece I’ve sold. It was shipped all the way to Virginia. This was a watercolor technique I came up with, staining the wood with a paint wash. Read all about the Rags to Riches story of Sir Albert on my blog!

The unassembled parts of a hutch we recently finished for a client. Too big to put back together in my house. Don’t you just love the decoupaged knobs and drawer sides?

This dining room set is one of my favorite ones we’ve painted and sold.

Another favorite set.

We even paint and sell jewelry boxes.

Yes, this pink one is really a jewelry box.

This one was actually a gift. It is a memory box I made for my sister with a vintage photo of my mom and her sisters decoupaged on the top. Have a photo of your own? We have more jewelry boxes. We can copy your photo and make one for you!

This client owned set was just what she was envisioning. We even painted books to go in the basket we painted for one of the nightstands.

We paint and sell smalls, too. Like these vintage sewing machine drawers.

We have turned several Queen Ann captain chairs into colorful, whimsical works of art. This one we donated to my grandson’s kindergarten classroom.

Love how this one turned out!

We had fun with this set. Client purchased it to donate to a heart charity auction.

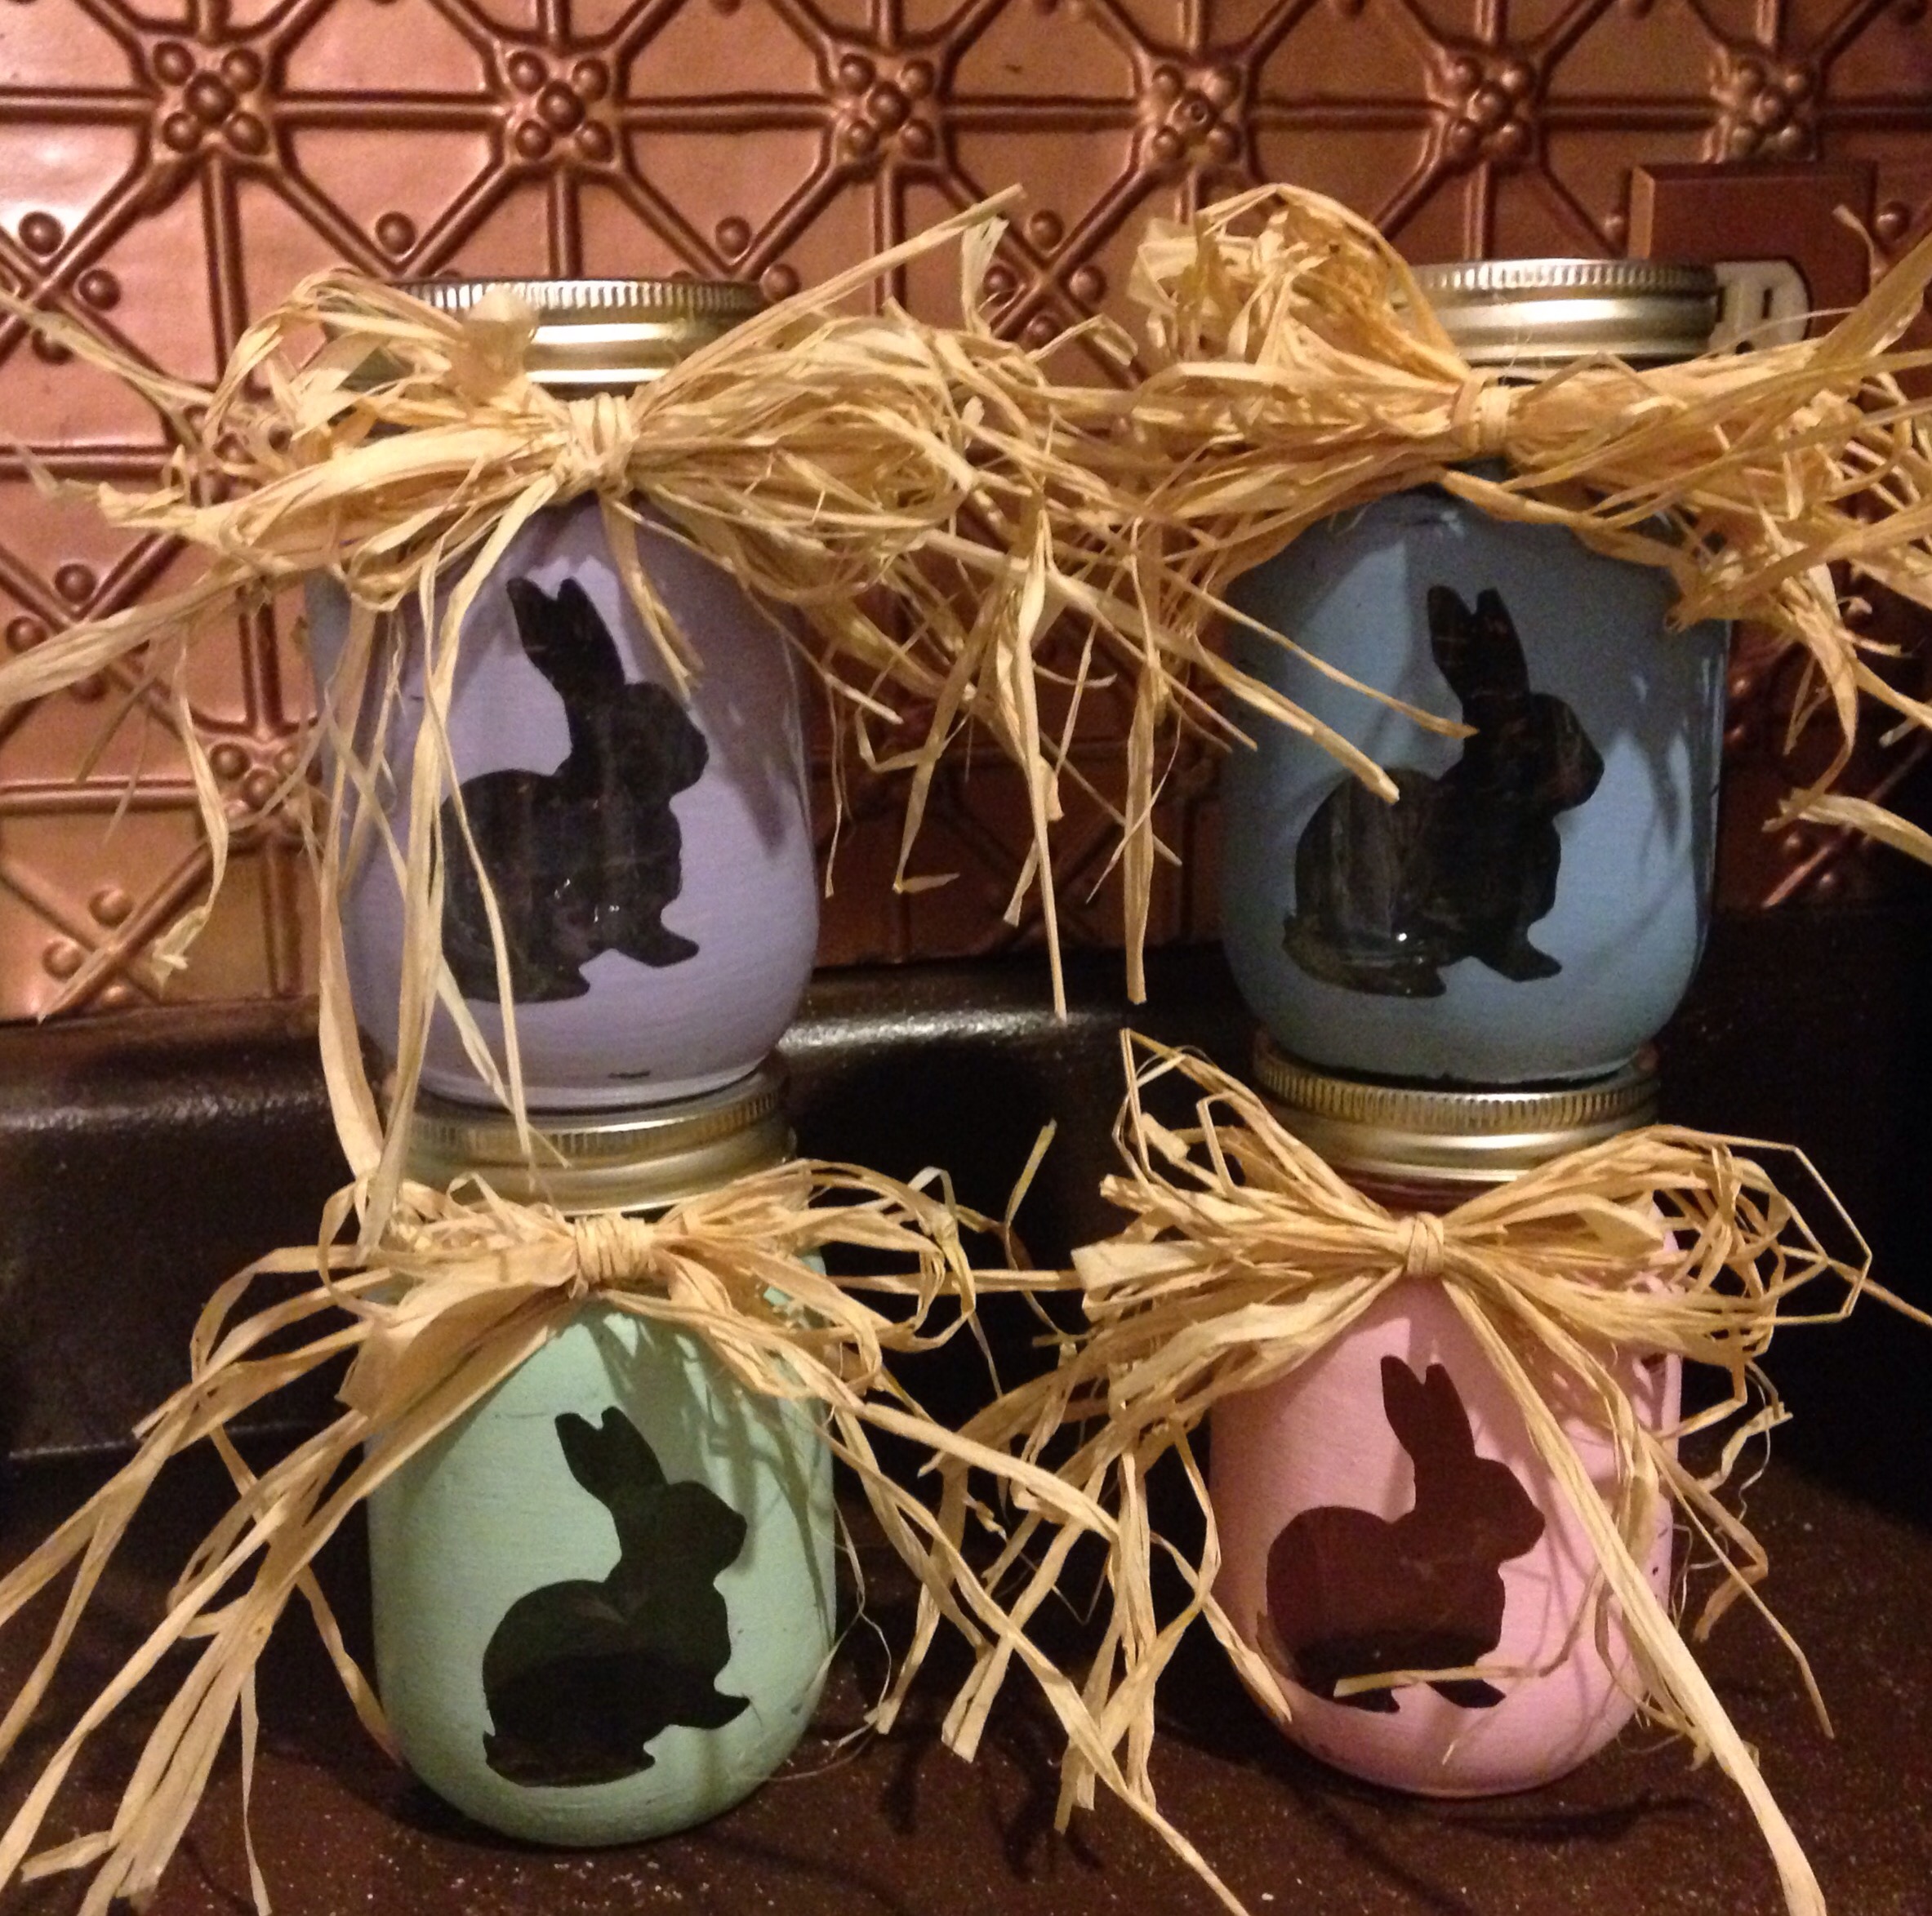
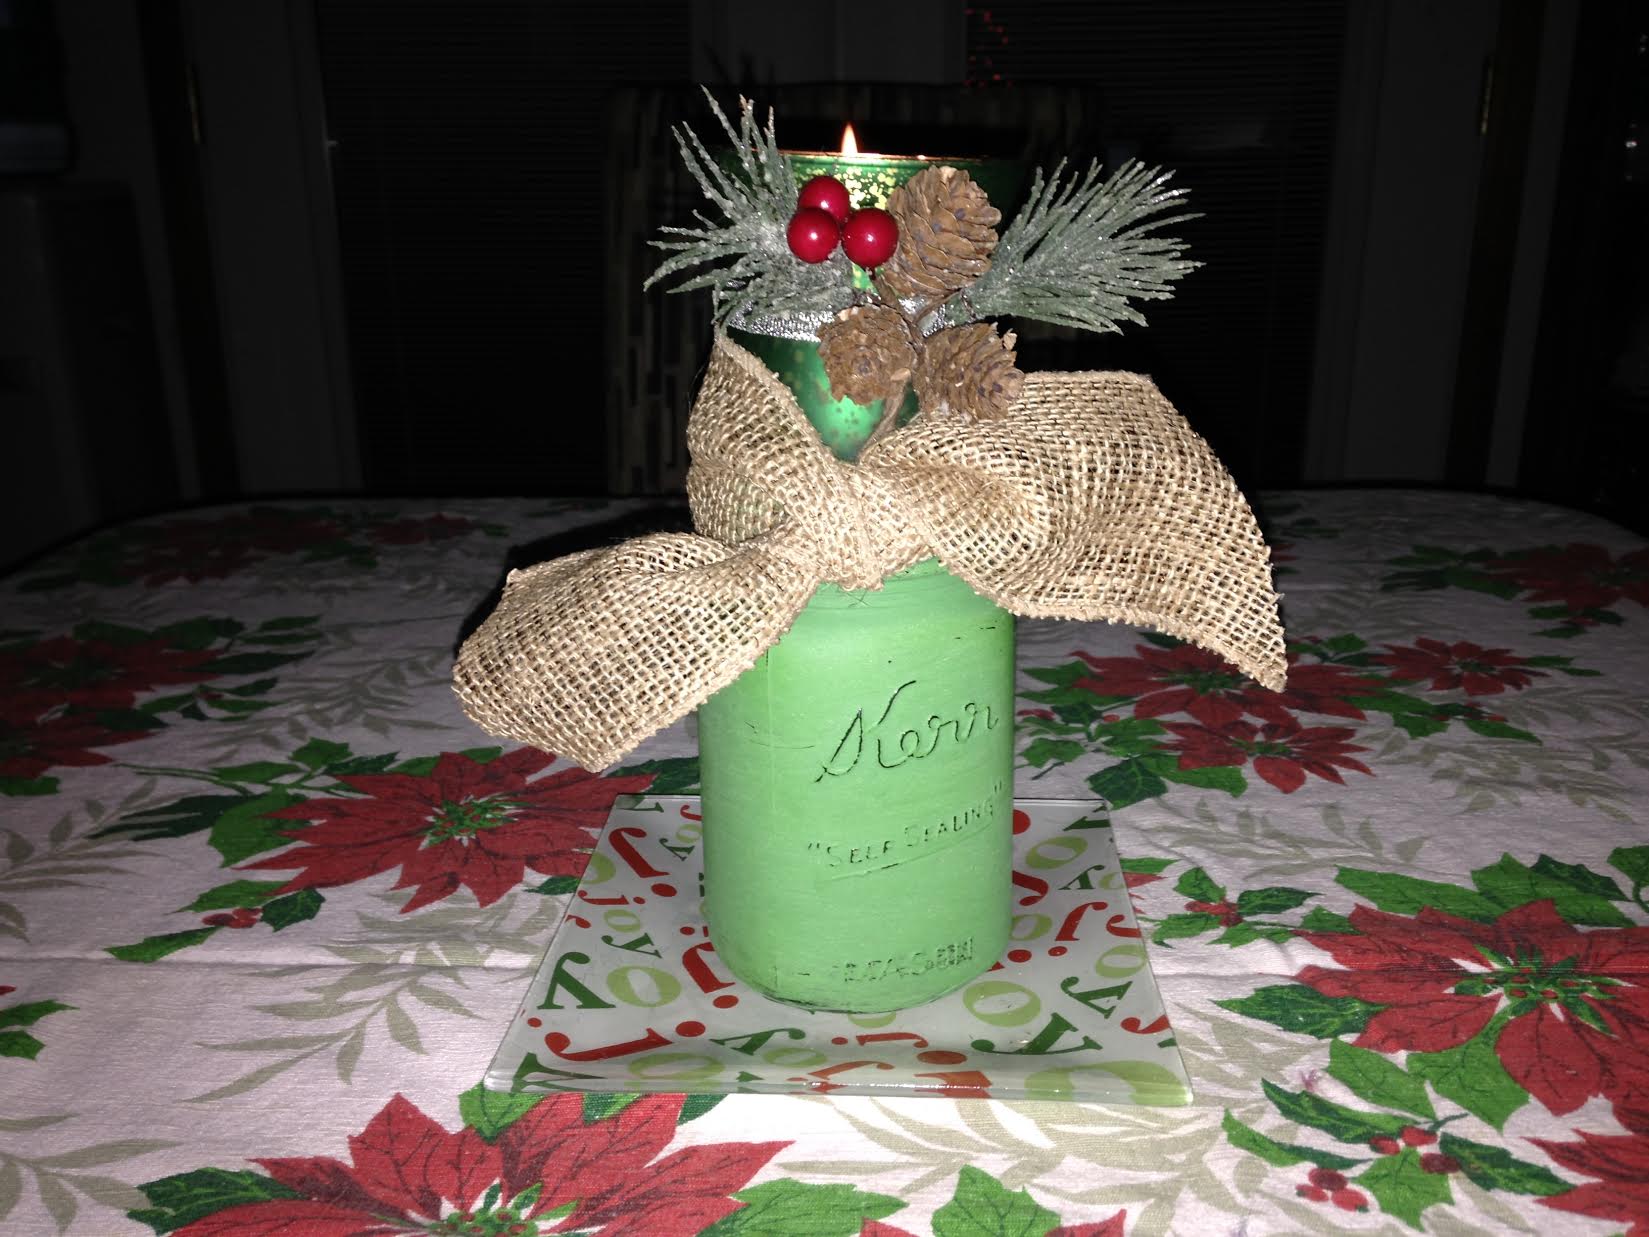
We painted a bunch of these cute little vases. Can paint these with your color choices. I love filling mine with fresh blooms from my yard.

This is a cute little cabinet we reinvented with a farmhouse look, custom painted with client color choice. We can do that. Just ask!!

This was a little bench I painted with Missouri Limestone Psint Company’s January and Crepe Myrtle. Stencils were cut using my Silhouette Portrait machine and contact paper.

This is another piece I really hated selling.  I was so wishing I had a 4 season room.  I would have kept this little table set in a heartbeat.

a4tablechairs

This 1880’s sofa table is very long.  It really needed a paint job so we gave it one.  I distressed this piece with vaseline.  : )

1880sofatable

The original use for this spool was for electrical wiring a Lowe’s.  We transformed this into a little table, just perfect for a beach house.  I called a friend who had just purchased a beach house as a second home.  She thought so, too.  It is now happily content in its new home.  : )

spooltable

I had this waterfall set and custom painted it for a customer.  She wanted the dresser to be gray with some of the wood still showing.  The wardrobe’s inspiration was from a piece she saw on Pinterest.  We even found the same exact vinyl design on Amazon.

dresserfinishedwardrobefinishedwardrobefinished1

Another Steam Punk look for a customer that loves the look.  The middle piece of marble was broken on this coffee table and had been replace by a piece of glass.  We covered a thin board with this map fabric from Jo-Ann’s and it fit perfectly under the glass.  Gave it a black paint job and sealed it with poly.

steampunktable

This was such a fun project!  This dated wooden nautical clock was blah, until I turned it into a Steam Punk look with a little black paint and wax.

nautical-clock

Love Pinterest.  That’s where we got the idea to take chairs and turn them into a bench.  The bench is 3 chairs put together.  We used the back legs of the 4th chair to create the sides.  This bench sold with a table and chair set my friend was selling. Love how it all turned out.

bench-12

bench-1

This is one of my first “restoration hardware” looks I did.  I really enjoy trying out different painting techniques.

restorationhardwaretablerestorationhardwaretable1

I loved painting the gray ombre desk so much, I painted the dresser that matched it the same way. The lady that bought the desk snatched up the dresser right away.ombredresser

I didn’t sell this one.  This is my front door, and my wrought iron furniture I have in my front yard.  The door is metal.  I did this about 3 months ago and still haven’t sealed it.  I’m not sure I will.  It is holding up well.

frontdoorplantstanddoorandfurniture

This hutch and desk was a drab, yellowish color and had seen better days.  Painting it with varying shades of pink made all the difference in the world.

pinkblushdeskhutch

This is one of my all time favorite pieces.  I would have kept this one if I had the room in my house.  finalpicfinalpicatnightdeskhutch3

We had another client who had 6 chairs that needed painting.  We took that project on and delivered them back home this past week.  They look gorgeous with the dining room table that was handcrafted by the husband.  A beautiful set at the fraction of what a new one would cost.

chairspaintedforclient

Painted chairs – Missouri Limestone Paint – January


This little vanity table was a family heirloom.  It had been “antiqued” by the client’s grandmother back in the 1960’s.  Read more about that here.  The client had admired the Ombre desk I had completed and so the vanity has the same type of look, with the addition of a stencil to give it a french-style look.


desk set

Ombre Desk Set – painted in varying shades of gray – Missouri Limestone’s Chalk-based Paint – Winter Gloves, Sunday Silver and Gray Goose. Lamp is painted with Indigo.

desklamp_indigo

Desk Lamp – Painted with Indigo


ombredesk_finalhome

Ombre Desk in it’s new home – 9 year old owner is said to be very excited. : )

bench

Piano/Storage Bench – painted with Trading Post

pet bed

Pet Bed – upcycled from a drawer – Painted with Coal Shovel

Lamp painted with Vintage Coral.

Lamp painted with Vintage Coral.

Spigot Planter

Spigot Planter – painted with “Clothesline”

Easter Candy Jars

Easter Candy Jars

fliptoptable

Small Tilt Table – Painted with Grannie’s Lace

cupboard green_memories

Memories Photo holder – painted with Coal Shovelv

sharsum_spigot1

Spigot towel rack painted with “Clothesline”

sharsum_smtable

Small Detailed Cabinet – painted with Dark Roast on top (with poly sealer)  and Zinc on bottom (with clear wax and dark wax in detail area)

smalltable_finalhome

The small table is sitting happily in its new home. Looks like the colors go perfectly with the decor in the home.

A Cinder Block Bench

Great idea for making a cinder block bench, but I would paint it with Missouri Limestone Chalk-based paint. It is perfect for outdoor projects like this.

http://diycozyhome.com/diy-cinder-block-project-for-your-back-patio/

Paint a Patio Chair Cushion with Chalk-type Paint? Yes, Please!

I was with a friend at dinner the other night and she was mentioning how faded and blah her patio chair cushions were.  She wondered if she could paint them with Missouri Limestone Chalk-type paint.  I said, “Sure you can!”  But then we both wondered if you would need to seal them and if so, what you should use.  I told her I’d check it all out and let her know.  I’m so glad I did, and you will be, too.

paintedcushion1

First, I did some research and here are my findings:

Painting Tips:

  1.  Give your cushions a good cleaning before you begin. My practice cushion, sad to say, had some of that green gunk on it.  I took a Mr. Clean sponge and wiped that stuff off and was good to go.
  2. The best tip I read when getting started: Before painting, take a spritzer bottle of water to dampen the cushion.  The paint goes on better and gets into the fabric better when the cushion is slightly damp.  I didn’t need to do that.  I just went outside and found an old cushion that had been left out and it had rained some earlier.  Perfect dampness!  Sometimes it pays to be lazy!
  3. Some people took their cushion covers off (if able to remove) and used cardboard between the covers so paint wouldn’t bleed through.  My thought on this:  If your cushions were so bad you were thinking of throwing them out before you decided to paint them, then just leave those covers on.  Who cares if the pillow underneath gets paint on it?  Save yourself some time and energy.
  4. I noticed when I painted my striped cushion, you were able to see the faint stripe underneath.  I also needed to spread it out a little while painting to get into the nooks and crannies. I also noticed my brush bristles went right up to the cording on the sides.  On this pillow, the cording seemed to be a plastic type material and looked ok, so I just left it like it was.  I painted a second coat in one area, but still saw the faint stripe.  So, my conclusion on that was:  That stripe was kind of cool.  It gave the pillow a look I liked.  Why waste paint and time and cover it all up.  Patterns are good under a coat of paint.  In fact, they are very, very good.
  5. I saw some people added stencil designs to their pillows and some used painters tape and painted their own stripes in coordinating colors.

Finishing Tips:

  1. You don’t want to wax….my friend’s cushions are on a screened-in porch, but it does get hot out there.  We wouldn’t want to sit on those cushions on a hot summer day and have wax come off on our clothes….so no waxing outside….on any project.  The sun and the heat will cure your chalk-type paint projects.
  2. Some suggested sealing with a poly of some kind, some did not.  I would guess it would all depend how much they are left out in the elements.
  3. My finishing tip?  Don’t bother.  I’ll explain why below.

What a difference a little chalk-type paint makes, right?  It literally took me just seconds to paint the area I painted as the paint covered so well.  But then came the question of sealing.

I let the cushion dry for several hours and then tried an experiment.  I put a poly sealer on half of the cushion and let the other half stay as it was. My thought was the poly would not only give it more protection, it would make the cushion easy to wipe off.

After the poly dried well, I took a wet cloth and scrubbed it really hard.  No paint came off on the rag, and it was easy to scrub, so I thought that was very nice.  Then, I took a wet rag and scrubbed the area that just had paint. I scrubbed and scrubbed.  Guess what?  No paint came off that area, either.  It was easy to scrub and actually, except for the slight sheen of the poly area, you really couldn’t tell any difference.

Bottom line…..don’t bother sealing.  Bring your cushions in to protect them like you did when they were new (as you can tell from the beginning of this post – I tend to leave mine out in the elements at times) and your newly painted cushions should last the summer, at least.  I personally believe the heat of the summer will make the paint cure even more and they will last a good long while.  If they don’t, just paint them again next year.

I’m so glad I did my research and experiments.  I, too, have a set of patio chair cushions that I’m going to paint……now my biggest problem is choosing a color!


SharSum Paint’s Guest Program at Sullivan’s January Rotary Meeting

Karen Largent invited SharSum Paint to present at today’s January Rotary meeting to introduce our new company and the paint we are selling, explain chalk-based paint and share ideas for painting with it.  We thoroughly enjoyed the experience and hope everyone left with a little more knowledge of chalk-based paint and maybe left thinking of projects they could paint.  You can view our Google presentation here.

rotary_01_2015rotary2_01-2015

metalflowerpotWe explained how you could paint and distress a metal flower pot and pointed out the right half of the pot is waxed and has a slight sheen to it.  The other half shows the chalk-like matte finish without wax. Passing this piece around the group gave them a hands-on look at the finish once waxed and they could see how the wax deepens the color and enhances texture.

metalflowerpot_clothesline

We also discussed repurposing thrift store finds.  We created a hanging photo holder (Capture Memories in Time) and brought this piece to show.

capturememories_border


A Re-purposed Table Decoration

I’ve been on a painting frenzy lately it seems.  Today, when I put a Christmas tablecloth on my dining room table, I decided it needed a Christmas table decoration. I had painted a pint size Kerr jar with “Farmhouse Green” earlier.  As I was rooting around in a box of Christmas decorations, I came across a small glass plate and a small votive candle holder.  I’m pretty sure both of these items came from the dollar store at one point.  What do you know, the votive holder fit right into the top of the Kerr jar.  I tied a burlap ribbon around the neck, and “Voila!”  My re-purposed table decoration was complete. I lit the candle tonight and it looks so pretty!  I LOVE being able to just go to my basement and pick and choose from my stash of paint jars and make new things from old – quick and easy.  Danny thinks I’m my own best customer.  LOL  It is just as much fun as having a stash of yarn.  : )

repurposedtabledecoration


November Class Projects

The projects below are from November’s Make & Take It class.  They are now in place in the participants’ homes.  Very nice.  I will add more as I get them.  See photos from the class.

This slideshow requires JavaScript.

Paint display at Gift Emporium & CAFE’, Sullivan, MO.  A variety of colors are available there for purchase.

display_GiftEmporium_Sullivan