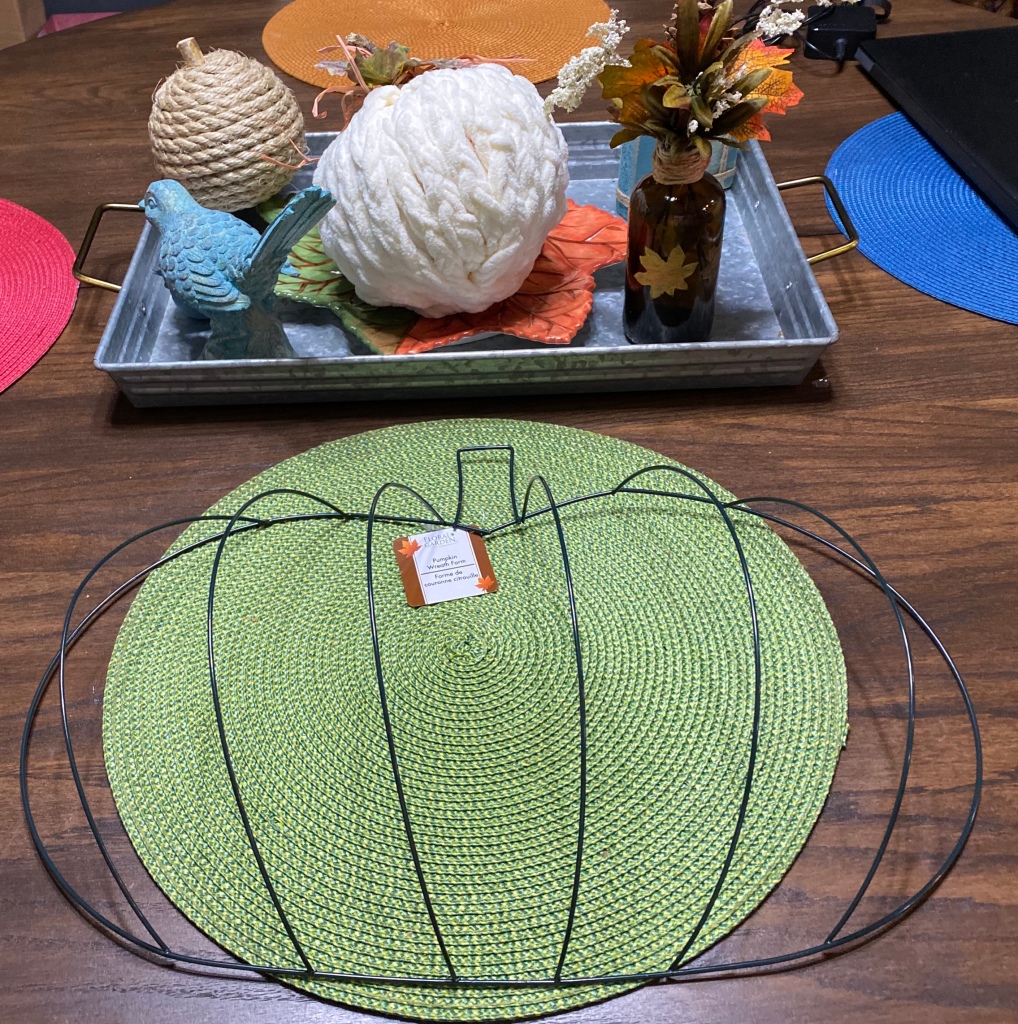
I ordered 24 of the pumpkin wire forms from Dollar Tree. They were shipped free within a couple of weeks to my store and the notification and pick up were very easy. Just go to https://dollartree.com
In addition, the manager of my local store told me if I didn’t want them all, they would buy any back for store credit as they were so popular. My plan is to make up some and decide what might be easiest to do. I want to then try a Zoom craft meet with about 8 friends. I will make up a kit for them, let them know the date and time, and they can porch pickup the kit. This should prove to be pretty hilarious. I did decide on weaving yarn through one, similar to the cream colored one pictured. Hopefully they will remember their elementary school lantern weaving projects. 🤪
Right now, I have completed 8 wreaths. Several take two of the forms. I have a few more to make, including a snowman made from one. Most of my ideas came from or were inspired by those I saw on Pinterest or in my crafting groups. Most of these wreaths can hang on a door, but should be kept out of the weather.
I hope these will inspire someone else. So keep coming back to this post as I add more. 😁
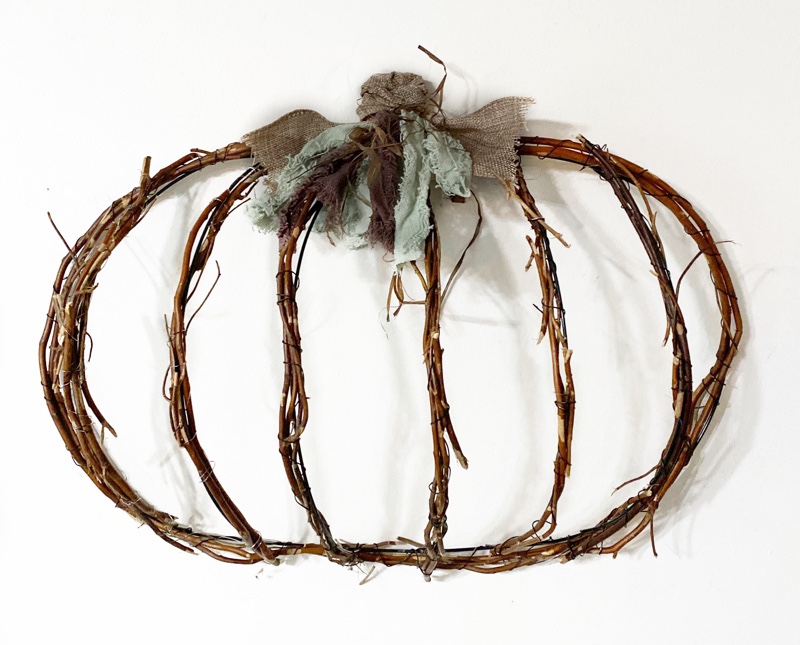
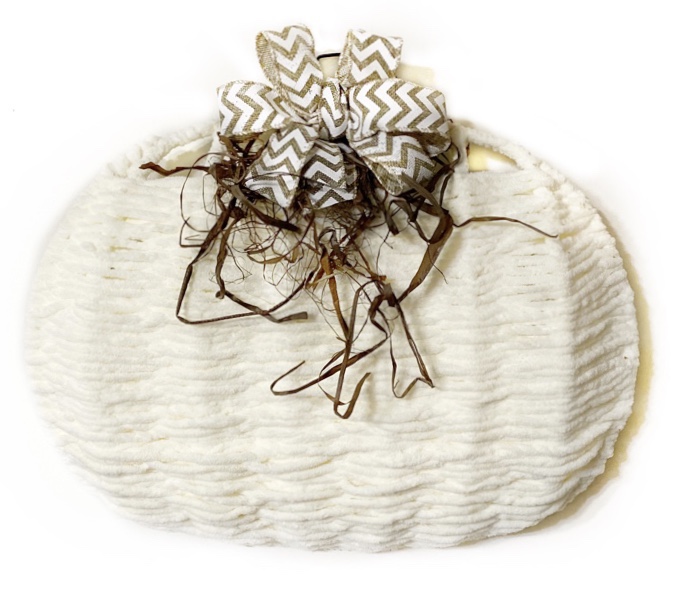
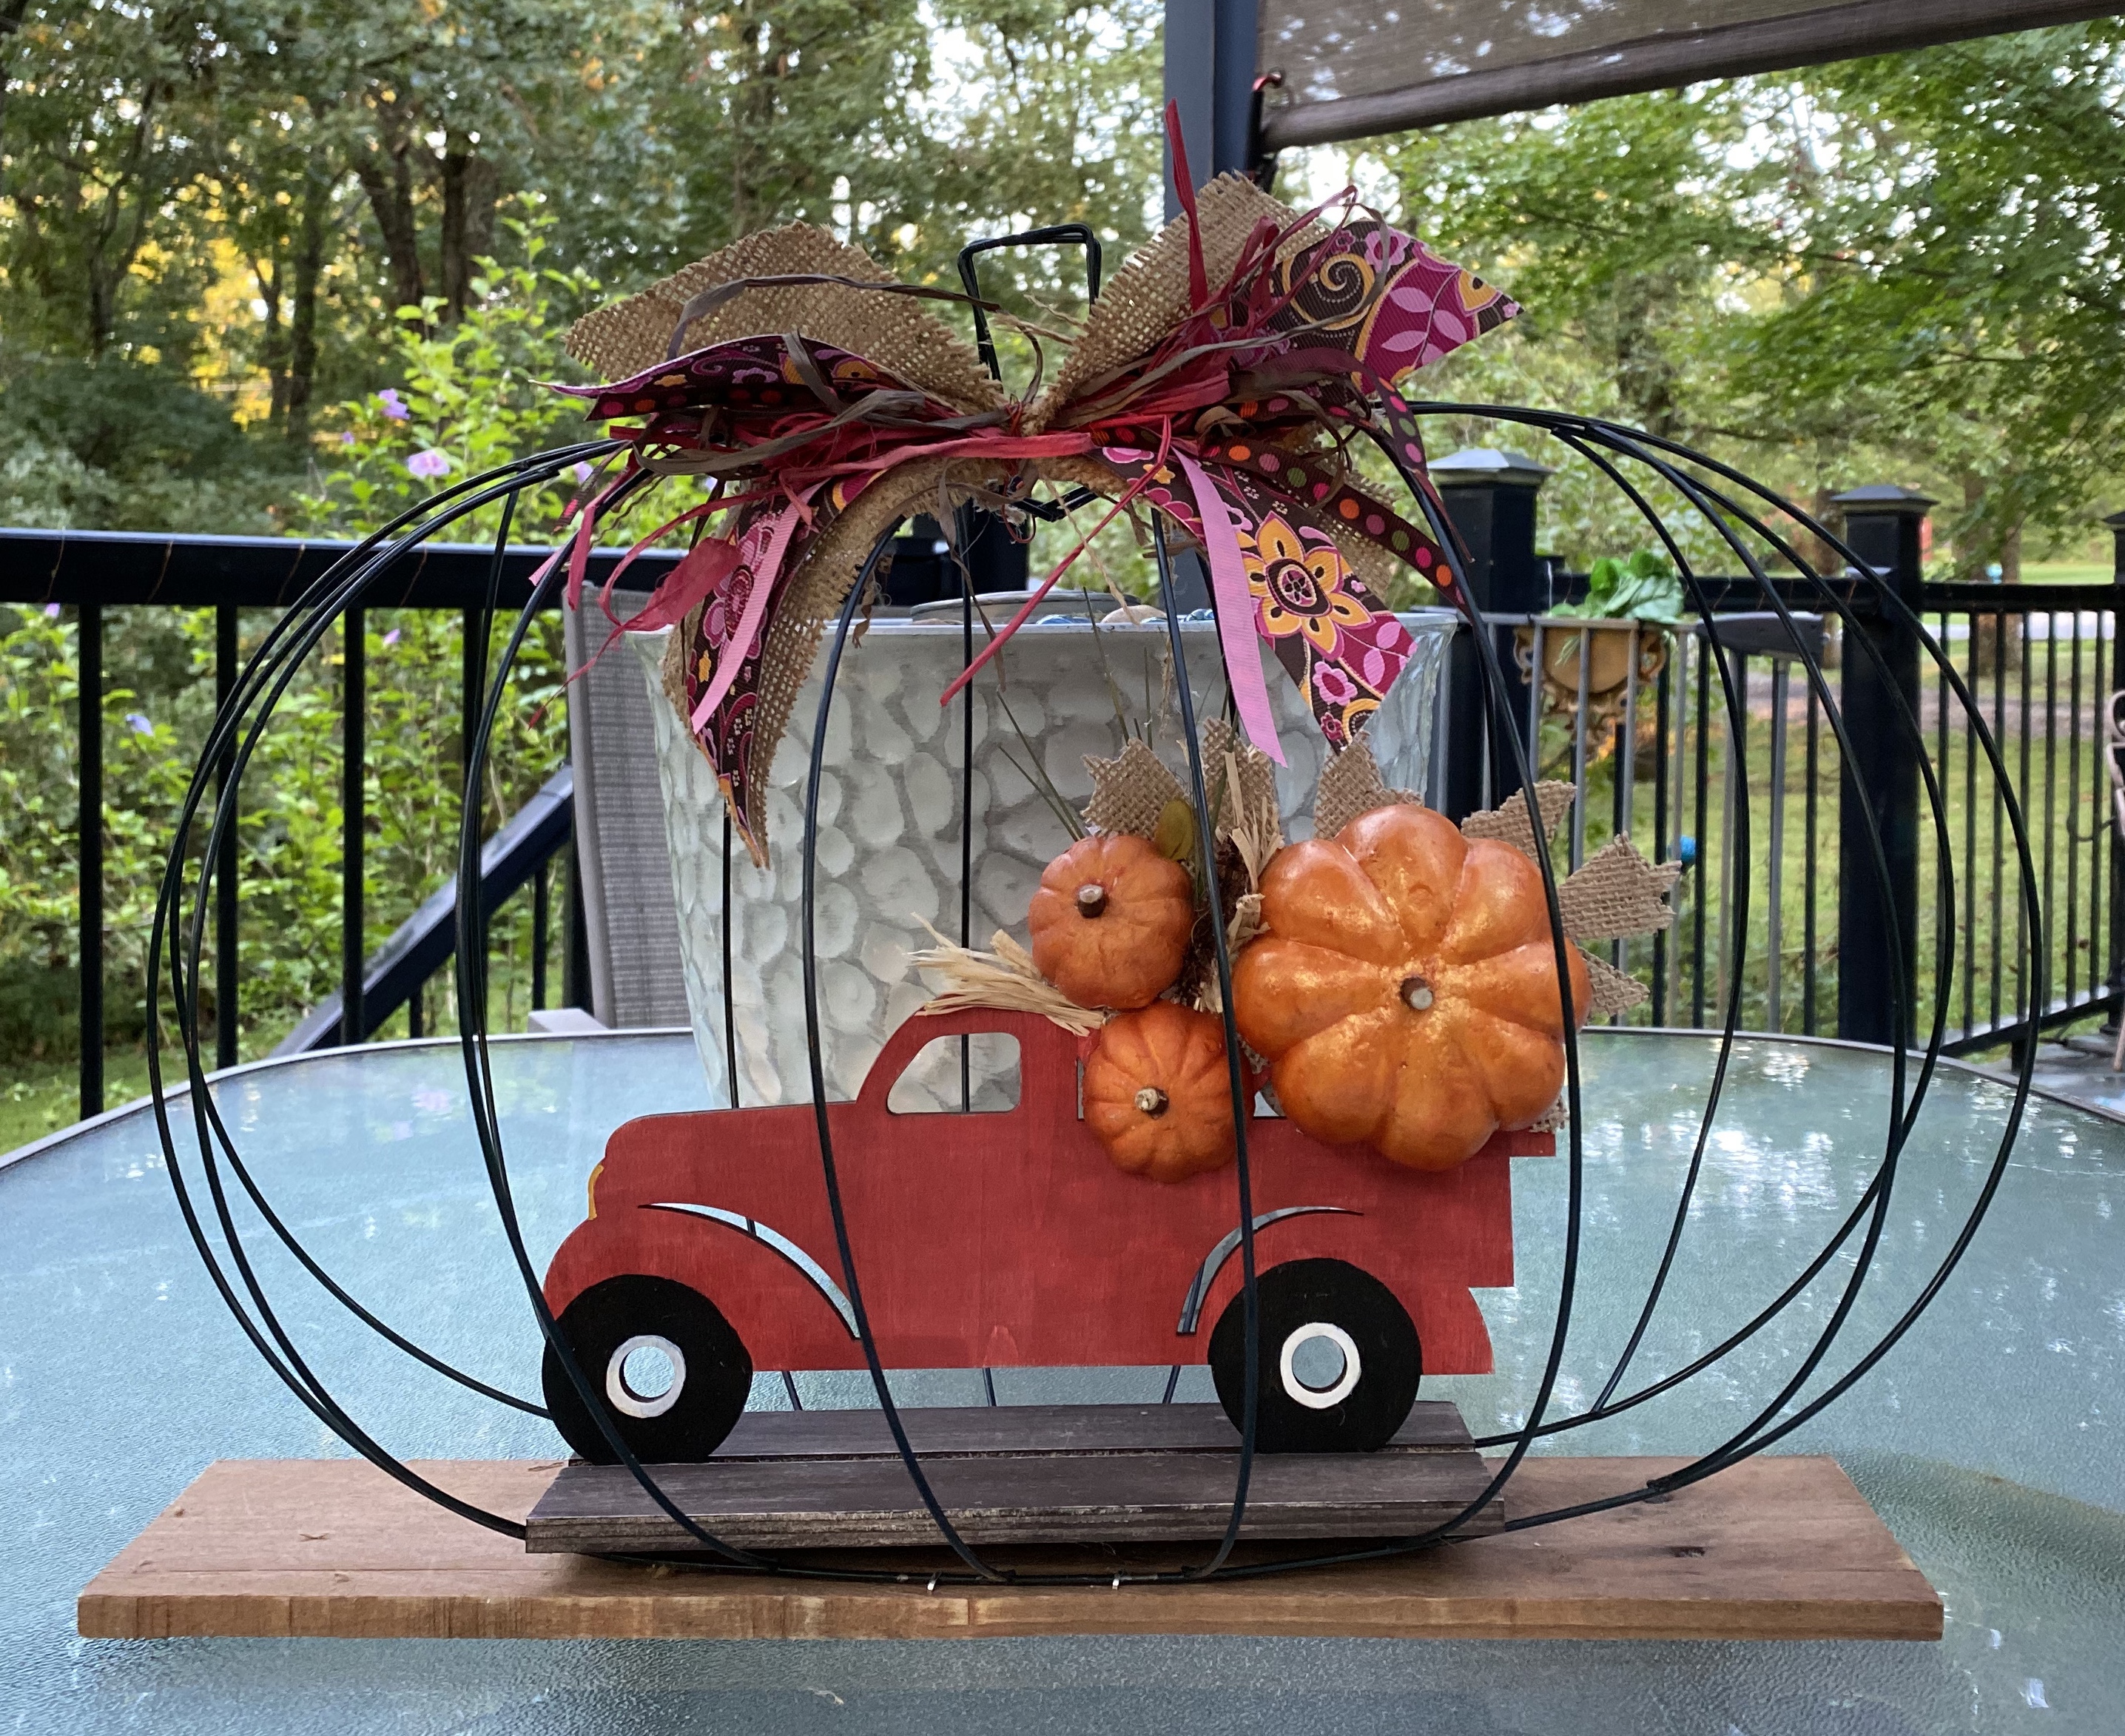
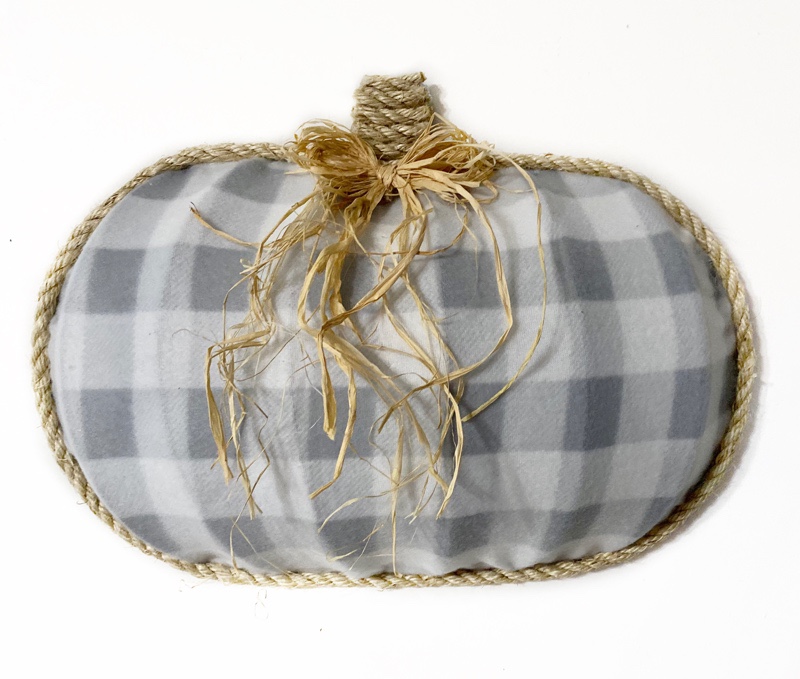
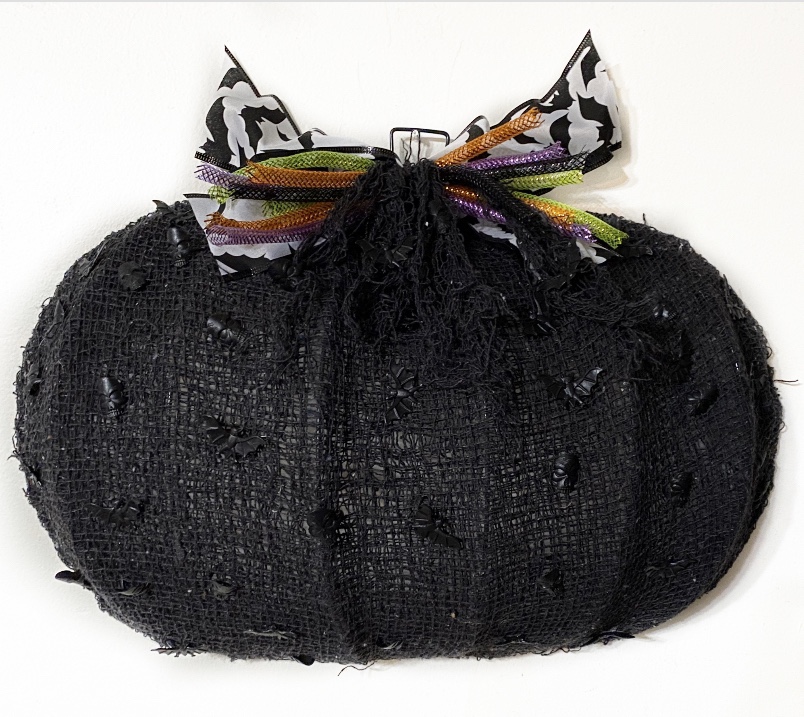
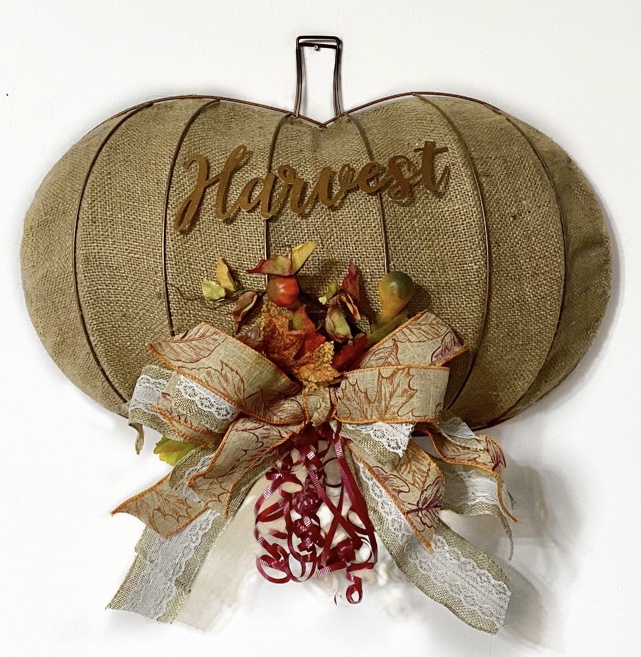
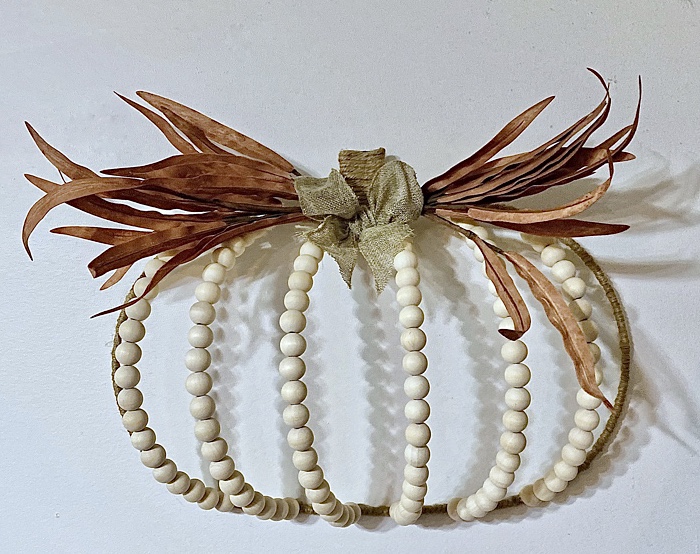
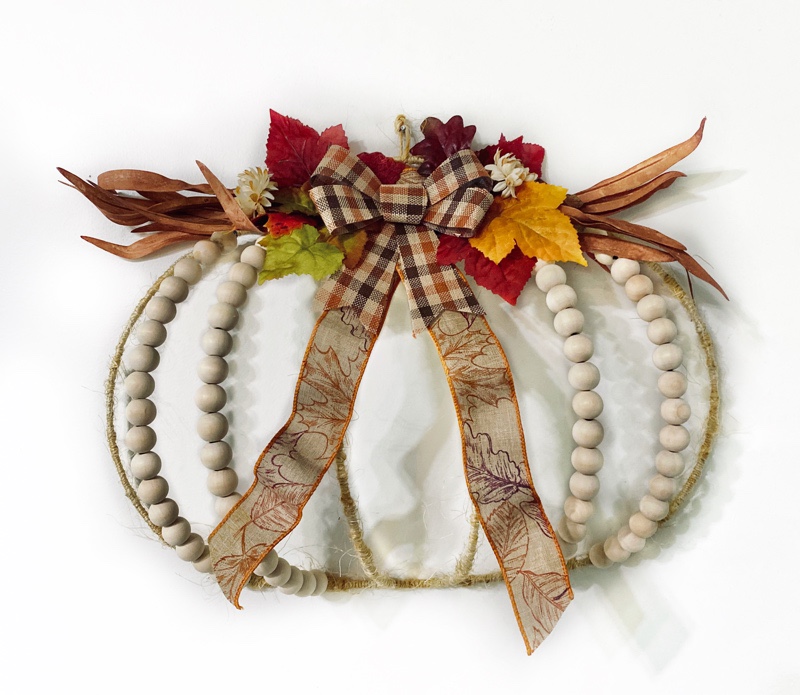
I used a grapevine wreath from Dollar Tree and took it apart. I wired it to the form, wrapping the wire as I went.Woven with chenille blanket yarn. I first wrapped the whole pumpkin. The bow is removable and I left an opening at the top in case someone wanted to add decoration there, plus, I liked the look of that.This one took two. The bottoms were stapled to a board and tied across the top with jute. I pulled the wire apart just a bit to get the big pumpkin in the truck to fit. The wires went right back in place. The truck is decorated on both sides and a bow added to that side so this makes an awesome centerpiece.This one has two forms. The first one, I wove with chunky chenille yarn. Then placed the second over it. I tied them together with pieces of the yarn on the top, sides, and bottom.This gray buffalo check wreath started out as a flannel baby receiving blanket. I added jute all around and on the stem for a finished look. Bow is just long strands of raffia tied in a bow.I had to do a Halloween one. All materials for this one came from Dollar Tree, including the gauze like fabric. The tiny black bats and skulls are actually plastic rings for your fingers. I tried to make the ribbon look like bat wings.This one took two. I sprayed them with metallic copper paint first. It is made with a burlap feed bag glued over the first form, then the second one place over that. I use mall wire to secure them together in places. The Harvest word was sprayed copper also. The curly ribbon is old school curled with the edge of a scissors blade.I wrapped jute around the outside wire and the stem. Then cut the spine wires at the top leaving a bit of wire to glue the first natural wooden bead to. Then added beads to each spine wire and glued the first bead to the last one on each. Foliage from JoAnn’s and a small wired ribbon bow seemed perfect for this neutral wreath.
That’s all for now. Remember to check back. I still have a few more forms left and will add photos here. 😁
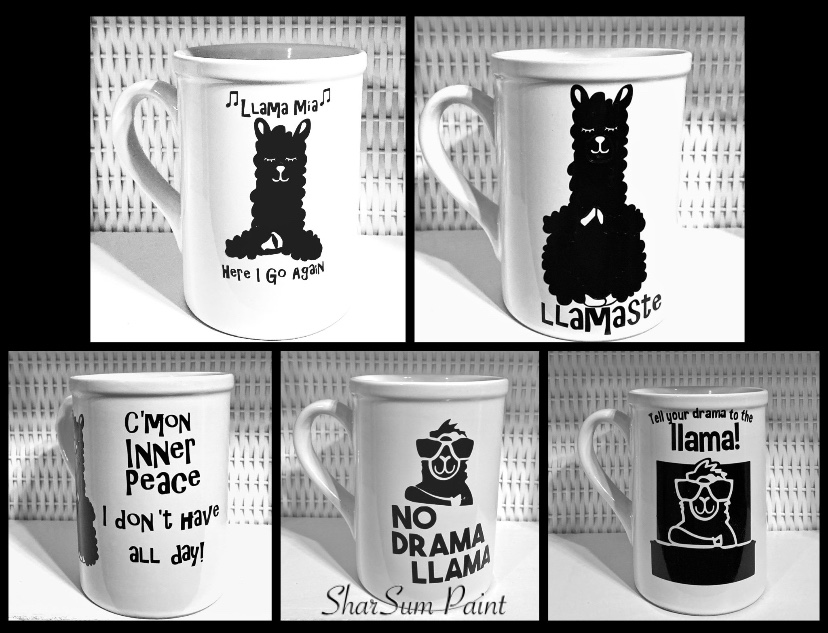
This has been an experiment on how to decorate Dollar Tree mugs.
I’ve decorated mugs in a couple of ways. For example, I used Dollar Tree mugs and permanent adhesive vinyl. That works great. I have washed these By Hand numerous times and they are still going strong.
But…..put them in the dishwasher and they become a mangled mess. Washing by hand is fine, but one of these days someone is going to forget and put them in the dishwasher and all will be lost.
So, I went back to researching. This time I read and watched videos on what others had done. I finally chose to follow this method on my Dollar Tree mugs.
1. Of course, the first thing to do is always clean well and then wipe down with rubbing alcohol to get rid of any oils.
2. I make stencils from contact paper, which does well as it fits so tightly to the mug and is easy to remove. For this leaf pattern (purchased from the Silhouette store) I made my stencil, put it on the mug and colored it in with a brown Sharpie paint pen. It has to be the oil-based paint pen. The regular Sharpie permanent ink one won’t work.
3. Then I let it dry for 72 hours. Once dry I put it on parchment paper on a cookie sheet in a cold oven. Set the temp. For 250 degrees F turned it on and baked the cup for 20minutes. I then turned the oven off and left it in there untouched for an hour or so, until it was cool to the touch.
My mug turned out great. I experimented with it and washed it with hot soap and water by hand several times. It came out perfect every time! Yay! A success for creating painted mugs to hand wash!
But! What if I forgot or if someone buys a mug from me and they forget I said to hand wash?
So, now it was time to possibly say goodbye to my cute fall coffee mug as it might get ruined in the dishwasher.
I did make sure I put it in the top rack. When it came out, it was still in one piece and looked great. However, a change has taken place.
The leaf was now lighter, the yellow tones looked gray and the mug itself took on a creamier color.
It still looks great! I’m happy it is not ruined…but…I was a little disappointed in the color change.
I did learn that if I do want to sell these, I will need to run them through the dishwasher before I take a photo due to the color change.
Here’s a before and after. It is a noticeable difference.
Now, I’m going to be trying something else. I learned, in my research, that Mod Podge makes a dishwasher safe sealer. I’m going to try that next and will let you know what happens.
Be watching this space. Also, be sure to follow my blog to be notified when I post something new!