I wanted an area rug for my living room, but rugs act like a magnet for my cat’s shedding fur. I have a bare laminate floor that just needed something, though. My friend, Cindy, has used painted canvas floor cloths and I’ve always liked them, so I started searching for ways to make them, but found it too messy and time consuming to make my own and already bound and primed ones were way too expensive. Then I started thinking, maybe I could paint a bamboo slat rug with Annie Sloan…..yep! I could. I decided to get creative and make a Subway Art type rug about….you guessed it! Grandchildren – and use my Silhouette Portrait Machine to cut describing word stencils out of contact paper. I was thrilled to find out they worked perfectly! I estimate it was about 16 hours total. Most time consuming was deciding what words to use and making the stencils and transferring them. I estimate the cost of the final rug to be around $80.00. I bought the rug at World Market for $50.00. I also estimated the amount of Annie Sloan paint and Annie Sloan Lacquer to be around $30.00. Note I did not include the price of a good massage, but I feel I need one after a marathon session of working on this over that last two days.
So now I will take you on the journey of how I made my rug. Click on each picture for a larger view.
Bamboo Rug – It is cheaper online but you have to pay shipping. My rug is 4′ x 6′.
Words describing grandchildren – when I was stumped for a word, I just did a google search for “describing words that start with __”.
Update: 2017 – the rug is holding up extremely well as it gets hard use every day. I have noticed some of the knot holes in the bamboo have bled through, though, so I would suggest scuffing it up a little by hand with some sandpaper, then painting a coat of Zinsser BIN primer (the one that has shellac in it) first. This will stop any bleed through.
Update: 2019 – the rug is still getting every day traffic and holding up just fine!
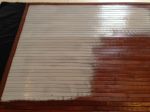
I painted the rug with Annie Sloan Paris Grey. This is the base coat and will be the color of the lettering.
 I didn’t want to paint the brown cloth border, and wasn’t sure how I was going to paint up to it until I got started. Then, amazingly, I found my brush just slid under the trim without even getting any paint on it. I was pretty thrilled with that.
 I cut stencils out of contact paper….loosely arranging them on the rug to get an idea of how they would fit. I cut the roll of contact paper in half and turned it so I could print out long words. The settings I used were: Custom Media – Speed 8 – Thickness 3 – Blade 1 and no cutting mat. Note: you can sometimes find contact paper at the dollar store or dollar general. For projects like this, it really doesn’t matter what color or print it is.
This is a reverse stencil process, meaning I used the words themselves, rather than the outline of the words. I used clear contact paper to transfer the words to the rug. They adhered just fine.
 I then painted over the lettering and the rug with another coat of the Paris Grey. The reason for painting over the letters with the base color again is to help keep any bleeding from happening when painting the final color.
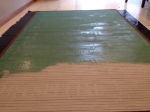
The rug then got 2 coats of the final color. To get the turquoise look I wanted, I bought 3 sample pots of Annie Sloan Paint to mix from NettieSuze Home Decor in Pacific, Missouri. They are always so helpful when I have questions and they suggested the colors for this project. They even had a sample piece in the store so I could see what color I would be making when I mixed them. I used equal parts of Provence, Napoleonic Blue, and Antibes Green.

 This was my favorite part of the whole project. It was time to pick off the painted stencils. I used a travel sized dentist pick you can find anywhere. I think I got this one at Walmart. I couldn’t wait to see the lettering appear. It was amazing how easily the stencils came off with the pick and so satisfying to see the beautiful letter appear. There were just a few little places I had to touch up, but probably didn’t even need to do that as the lettering was so crisp and clean. If you enlarge the photo, you’ll see it is not exactly bleed through, you just see a little of the turquoise sometimes where the slats come together. You have to be down close and personal with the rug to actually notice it. Note: if the stenciling was done on a completely flat surface (rather than a slatted wood surface) I don’t think there would have been any bleeding through at all.
I finished the project by rolling on 2 coats of Annie Sloan Lacquer. This is a water based lacquer and after the first coat dried to the touch (thanks for that tip, NettieSuze!) I was able to add the second coat. The lacquer needs to cure overnight before walking on it, and then I’ll finally have an area rug for my living room…..and a great conversation piece. I can already see Lucy trying to read the words and Ben looking and saying the letters he knows. It won’t be long before Liam joins them.
Note: The rug does slide around on the laminate floor. It is hard to find rug pads that work with laminate and vinyl floors without staining them, but I found the perfect pad at Bed Bath and Beyond. The pads used should not be latex or rubber. This one is 100% PVC and will not stain. I ordered it and am waiting for it to arrive.
And there you have it! How to paint a bamboo rug with Annie Sloan paint and seal it with her lacquer!


