
 I love finding great tutorials to help me with techniques I want to learn while painting with chalk-based paints. Sometimes you find that perfect one and think…..where was that tutorial when I needed it?? Like that time when I didn’t know what I was doing applying dark wax to a green cabinet and it turned out looking like camouflage. Raise your hand if you know what I mean.
Well, wonder no more on how to apply dark wax. This tutorial by Jan will provide you with clear step-by-step instructions that you will want to save. Trust me…..it is good!
First of all I want to make it very clear this was not written by me. I make camouflage pieces, remember? This excellent tutorial was written by Jan Brown Kissick who has kindly given me permission to use her photos and her words to share this with all of you.
Jan wrote this tutorial in a post for a chalk painting Facebook group I belong to called Chalk Paint, Distress and Decoupage. Good info here. If you’d like to join, here’s the link: https://www.facebook.com/groups/Chalkpaint101/
I will stop rambling now and share Jan’s tutorial in her own words.
********
Steps I Do for a Black/Dark Wax Tutorial by Jan Brown Kissick
Ok someone has asked me to show the steps I do for black/dark wax. {EDITED: following Steps are for when using a darker color of paint and only based off of my experience with Annie Sloan products! Use clear wax first on lighter paint colors–immediately–do not let sit before starting your dark/black wax!} I’ll state that I’m definitely not a pro but I’m not brand new either. I’ve learned a lot of lessons the hard way and I’m sure there’s still more to learn! Hope this helps you all! There are captions with each picture.

1. Set up old movie on your tablet for entertainment I get tired of music so like listening to (love Audrey H!) Photo by Jan Brown Kissick

2. 1 paper plate for clear wax, 1 for black/dark Photo by Jan Brown Kissick
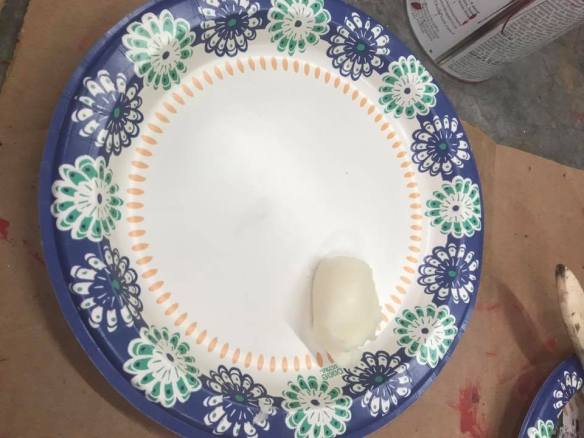
3. spoonful of clear wax Photo by Jan Brown Kissick

4. Spoonful of black wax Photo by Jan Brown Kissick

5. Cut down cheap chip brush –load with black wax Photo by Jan Brown Kissick

6. Scott shop towels Photo by Jan Brown Kissick

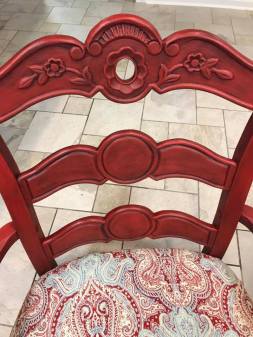
7. 2 coats of paint fully dried AS Emperors Silk. Anyone else hearing clown 🤡 music? I don’t like this red without black wax. If you do great! It’s just not me. So let’s add black wax. Photo by Jan Brown Kissick

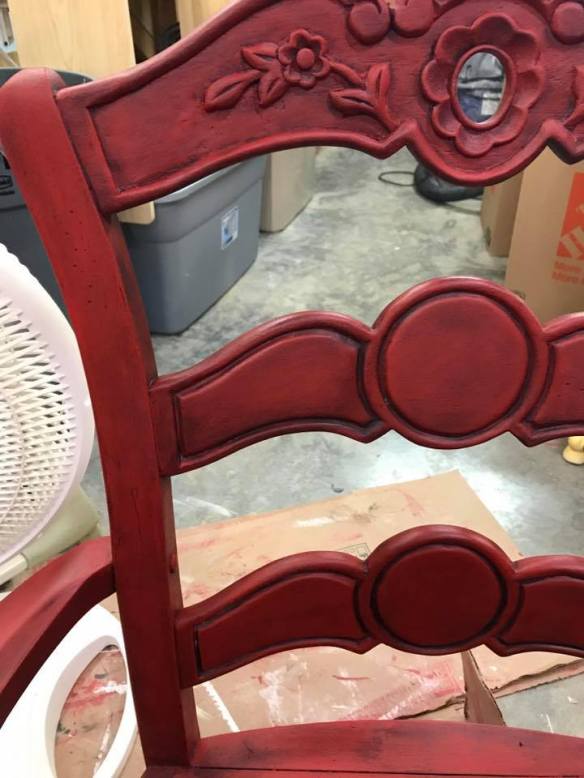
8. Brushing on black wax in small sections-(only doing black first bc it’s a darker pigment paint color. If yours is light, then start with clear. Recommend trying small spot to see how black wax first works for you and follow remaining steps) Photos by Jan Brown Kissick

9. Looks like crap right? 💩🤣 Photo by Jan Brown Kissick

10. Tear off towel and fold into fourths ( or whatever’s comfortable for you) Photo by Jan Brown Kissick

11. Wipe off wax as much as possible turn over cloth often,otherwise you will just put wax back on. Photo by Jan Brown Kissick

12. Now get clear wax on new section of towel or get new towel. Photo by Jan Brown Kissick

13. Not a whole lot but make sure you get some! Photo by Jan Brown Kissick

14. I “dab” the clear wax on Photo by Jan Brown Kissick

15. Then wipe it off. Remember to turn cloth over often!! Or will create “bare spots” Photo by Jan Brown Kissick

16. Keep wiping, adding more clear wax until blended well. Photo by Jan Brown Kissick

17. Blended! (Top of arm) Photo by Jan Brown Kissick

18. Applied the black wax… Photo by Jan Brown Kissick

19. Blended! Photo by Jan Brown Kissick

20. 😳😳are you scared??? This is when you panic right???😳😳😳 Photo by Jan Brown Kissick

21. It will be okay! Keep adding clear, keep blending, remember to turn that cloth over and get new cloth! Photo by Jan Brown Kissick
22. Blending… Photo by Jan Brown Kissick

23. Okay…maybe there’s hope… Photo by Jan Brown Kissick

24. Not worrying about that bottom too much. Will have a cushion over it. Photo by Jan Brown Kissick

25. Look at that leg! 😎😎 Photo by Jan Brown Kissick
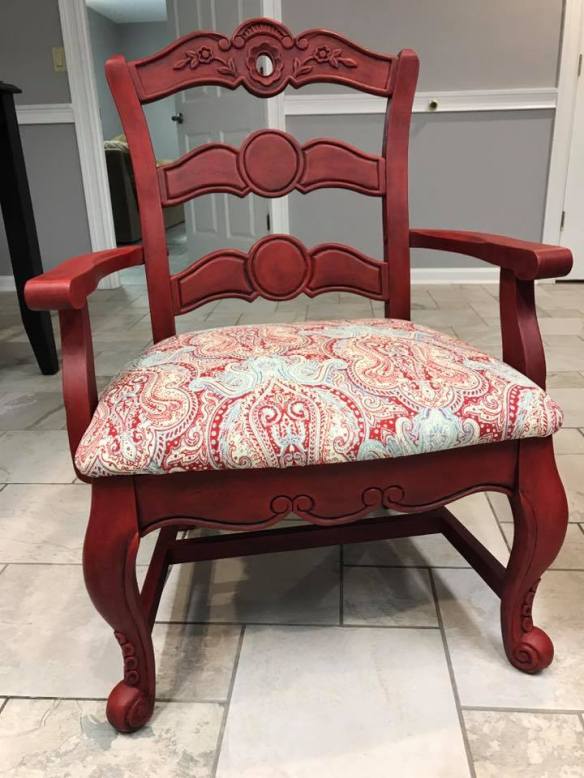
26. Ta-da!!! Done!!!! Photo by Jan Brown Kissick

27. Happy!! 😍😍😍 Photo by Jan Brown Kissick
Some addtional comments from Jan after questions on group post:
- If using a light color do clear wax first. If using a large surface like a table, buffet, dresser I use a wax brush for the clear to apply but always blend with cloth. Don’t want to get dark wax on your clear wax brush.
- clear wax–if only using clear–the technique is different. Just making sure I clarify that.
- On lighter colors…yes do clear first. Colors with more pigment should be fine with black first. Try it first as I suppose it will depend on your piece. Hope it works for you as It will save you wax!
- want to make sure not misleading people into thinking you don’t need to do clear wax first–you will on lighter colors! Also this is only for Annie Sloan’s products. I’ve used other products in the past and I never had much luck with them. Not sure they will work the same. Thanks everyone for the great feedback. My first tutorial so I’m learning how to do this too! Next time I make up a glaze with dark wax I’ll do one for that.
- And do small sections. Don’t let the first layer of clear dry! Right after clear, then add black, do it immediately, then add the clear.
- wanted to add that you can break after a section, just don’t stop in the middle of the section. Hope that makes sense. In other words I did half the chair last night and half today.
- if you’re going to do dark/black wax too then do all at once in sections. You can stop and pause between sections but don’t pause within a section. You don’t want the black/clear to dry too much. I do sometimes come back the next day and still wipe it down again with more clear if I find streaks–it’s possible–I just say don’t stop mid-section as a rule.
- And I do always buff pieces next day regardless if just clear or a mixture. Gets off the residue and makes them shine!
- the wax will harden and no longer be tacky when it’s sealed. I have pieces I’ve spilled coffee with no damage and my dog threw up on a table
 🤢 and it cleaned right up. No signs of any of it.
 - I’ll do a tutorial for my next dark wax that is more of a glaze technique.
I don’t know about you, but I’m looking forward to Jan’s next tutorial! Fingers crossed she will let me share it here, too!

Love this – thank you. The timing could not have been better.
LikeLike
That’s great! And finding one just when you need it makes it even better!
LikeLike
Pingback: TIP OF THE WEEK: November 12, 2016 – DIY ANTIQUING WAX | SharSum Paint